
Search results for "Consequences" in Home Design Ideas
 Kitchen Design Concepts
The moment we stepped in, we analyzed the space, listened to our client’s needs, and consequently gave this space the love and care it needed. As a result, this room did a complete 180 from a space that no one wanted to be in, to a space that is now bright and inviting! Since the remodel was completed, the transitional design still stands as one of our favorite remodels. Before we spill all the details, check out the BEFORE photos below:
Cabinetry
The vanity cabinets in this bathroom space are from Kitchen Craft with a Salem door-style in an Alabaster finish. The cabinets from Kitchen Craft are frameless, which gives great access and storage within. The addition of the counter-sitting cabinet also gives great storage space with its drawers for smaller items. Disclaimer: In most cases, we either refinish or reface existing cabinetry; however, in this particular case the clients needed new cabinet boxes.
Countertops
The countertops are a great contrast from the white cabinets and also adds a contemporary element. The quartz countertops are a 3cm Caesarstone in a Pebble Honed finish. We love the balance between the white and grey finishes! Also, quartz is a great low-maintenance material, it’s a win-win!
Tile
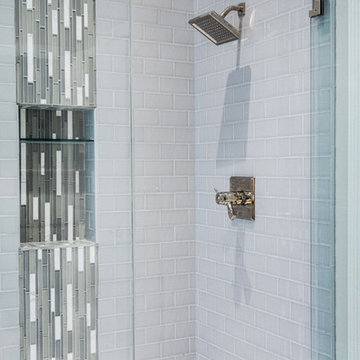
Now, while the cabinets and countertops play a huge role in this design, the tile is the one that really stands out. Let’s break it down, from Arizona Tile: the shower walls and tub face are a 3×6 H-Line ceramic tile in Denim, the accent on the shower wall and above the tub are a Soho glass and stone stack in Cloud, and the shower floor is a Bianco Carrera 1×1 penny round. Lastly, from Daltile: the flooring in a 12×24 Cotto Contempo with a finish in Pennsylvania Avenue.
Plumbing Fixtures
Without plumbing fixtures, we wouldn’t have a bathroom now would we? The plumbing finishes and style all complement the design on the bathroom and gives the overall space a designer look. From Toto: Two Rendezvous® lavatories in a Cotton finish. From Delta in the Dryden collection: one robe hook, two towel rings, one toilet paper holder and one double towel bar all in a Polished Nickel finish.
 GOODESIGN, Inc.
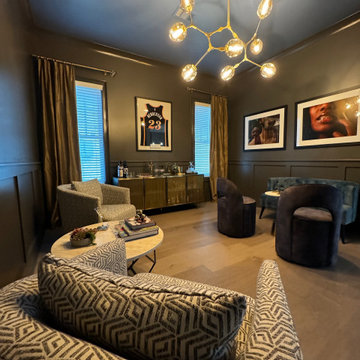
This client wanted to take their unused dining room and turn it into a useable and functional space. Consequently, GOODESIGN turned the space in to a moody lounge area.
 Kitchen Design Concepts
The moment we stepped in, we analyzed the space, listened to our client’s needs, and consequently gave this space the love and care it needed. As a result, this room did a complete 180 from a space that no one wanted to be in, to a space that is now bright and inviting! Since the remodel was completed, the transitional design still stands as one of our favorite remodels. Before we spill all the details, check out the BEFORE photos below:
Cabinetry
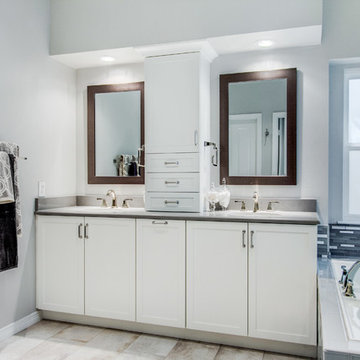
The vanity cabinets in this bathroom space are from Kitchen Craft with a Salem door-style in an Alabaster finish. The cabinets from Kitchen Craft are frameless, which gives great access and storage within. The addition of the counter-sitting cabinet also gives great storage space with its drawers for smaller items. Disclaimer: In most cases, we either refinish or reface existing cabinetry; however, in this particular case the clients needed new cabinet boxes.
Countertops
The countertops are a great contrast from the white cabinets and also adds a contemporary element. The quartz countertops are a 3cm Caesarstone in a Pebble Honed finish. We love the balance between the white and grey finishes! Also, quartz is a great low-maintenance material, it’s a win-win!
Tile
Now, while the cabinets and countertops play a huge role in this design, the tile is the one that really stands out. Let’s break it down, from Arizona Tile: the shower walls and tub face are a 3×6 H-Line ceramic tile in Denim, the accent on the shower wall and above the tub are a Soho glass and stone stack in Cloud, and the shower floor is a Bianco Carrera 1×1 penny round. Lastly, from Daltile: the flooring in a 12×24 Cotto Contempo with a finish in Pennsylvania Avenue.
Plumbing Fixtures
Without plumbing fixtures, we wouldn’t have a bathroom now would we? The plumbing finishes and style all complement the design on the bathroom and gives the overall space a designer look. From Toto: Two Rendezvous® lavatories in a Cotton finish. From Delta in the Dryden collection: one robe hook, two towel rings, one toilet paper holder and one double towel bar all in a Polished Nickel finish.
Find the right local pro for your project
 Wild by Design
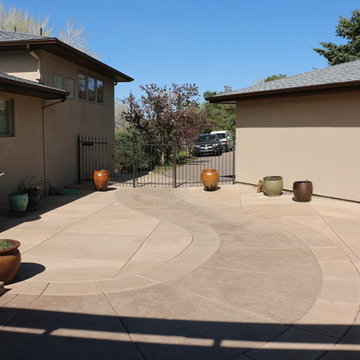
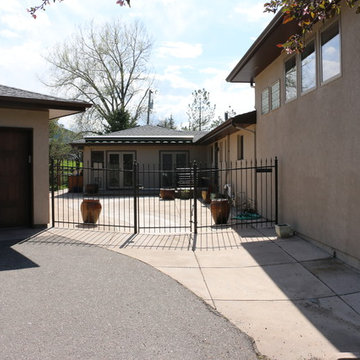
Pre-existing concrete courtyard entrance. The concrete entrance was originally designed to provide a low maintenance wheel chair friendly entrance. The unintended consequence of positioning the pathway in the lowest part of the courtyard caused water to pool and freeze during the winter creating a very dangerous entrance. Given the entire concrete hardscape surface, snow and water has to be completely removed from the courtyard to alleviate the problem. - Larry Elmore
 NanaWall
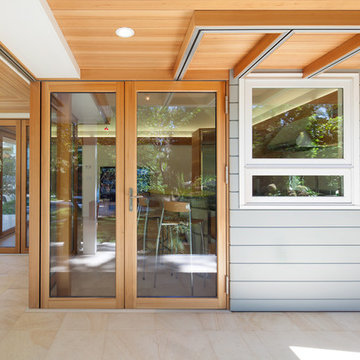
Massive boulders broker the marriage between the modern and the natural that NanaWall symbolizes. For example, one rock is unnaturally anchored on the concrete patio, grass and traditional Zen gravel. The remarkable effect pays homage to disparate cultural aesthetics, and consequently embraces the modern.
This refined garden can be enjoyed by the homeowners while making dinner, lounging in the pool house, or swimming in the pool. There’s no separation between outdoor/indoor space, thanks to NanaWalls.
 SDM Design, Inc.
This house was designed for a couple and their son. One of the design program requirements was to have two master suites on the main level. They enjoy cooking and entertaining so the public and food prep. areas are functional, attractive and conducive to people gathering around. Consequently, the square footage of the main level is large.
The house is also on a very steep slope which didn't help with the required footprint. In order to minimize the related costs of building with this site condition, the footprint of the house is long and not deep as it reaches down the slope.
The scale of the existing homes in the neighborhood are unimposing. In order to play down the size as viewed from the street, the facade is broken up into several different masses with low sloping roofs.
Once you're inside, the house opens up with 14 foot ceilings in the entry and living areas. The ceiling height of other spaces on the main level are 10 feet. Universal design was implemented on the main level to provide inherent accessibility for everyone.
The lower level accommodates several guest rooms and baths, an exercise room, a guest den with wet bar and a man cave.
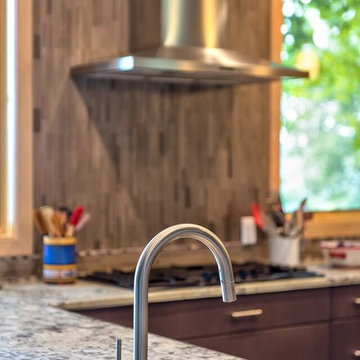
Another design program requirement was to make the house as maintenance-free as possible. Exterior materials include stucco, Pennsylvania Blue Stone and a new aluminum siding product called Longboard. The siding comes in many wood grain finishes and to everyone that has seen it, they think it's real wood. It's also made from heavy gauge aluminum so it doesn't ding like traditional aluminum siding. The roofs are metal standing seam.
The house is energy efficient. It's fully insulated with spray foam insulation-lots of it. The exterior walls were designed with 2x6 studs and roof rafters are 2x12 to provide plenty of space for the insulation, exceeding the required R-values. Windows and doors of course are energy efficient as well. All lighting is LED.
The decking around the exterior is locust, a very hard native wood which is naturally insect and rot resistant.
The best part of the whole project are the owners who love their new home. They initially had plans to live in this house during the summer months and Florida during the winter. They are now seriously considering living here full-time.
 Kitchen Design Concepts
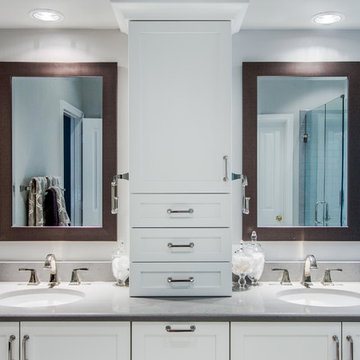
The moment we stepped in, we analyzed the space, listened to our client’s needs, and consequently gave this space the love and care it needed. As a result, this room did a complete 180 from a space that no one wanted to be in, to a space that is now bright and inviting! Since the remodel was completed, the transitional design still stands as one of our favorite remodels. Before we spill all the details, check out the BEFORE photos below:
Cabinetry
The vanity cabinets in this bathroom space are from Kitchen Craft with a Salem door-style in an Alabaster finish. The cabinets from Kitchen Craft are frameless, which gives great access and storage within. The addition of the counter-sitting cabinet also gives great storage space with its drawers for smaller items. Disclaimer: In most cases, we either refinish or reface existing cabinetry; however, in this particular case the clients needed new cabinet boxes.
Countertops
The countertops are a great contrast from the white cabinets and also adds a contemporary element. The quartz countertops are a 3cm Caesarstone in a Pebble Honed finish. We love the balance between the white and grey finishes! Also, quartz is a great low-maintenance material, it’s a win-win!
Tile
Now, while the cabinets and countertops play a huge role in this design, the tile is the one that really stands out. Let’s break it down, from Arizona Tile: the shower walls and tub face are a 3×6 H-Line ceramic tile in Denim, the accent on the shower wall and above the tub are a Soho glass and stone stack in Cloud, and the shower floor is a Bianco Carrera 1×1 penny round. Lastly, from Daltile: the flooring in a 12×24 Cotto Contempo with a finish in Pennsylvania Avenue.
Plumbing Fixtures
Without plumbing fixtures, we wouldn’t have a bathroom now would we? The plumbing finishes and style all complement the design on the bathroom and gives the overall space a designer look. From Toto: Two Rendezvous® lavatories in a Cotton finish. From Delta in the Dryden collection: one robe hook, two towel rings, one toilet paper holder and one double towel bar all in a Polished Nickel finish.
 Next Stage Design + Build
Designer: Charlotte Tully LEED Green Assoc., UDCP
Photographer: CasaMokio (Nate Lewis)
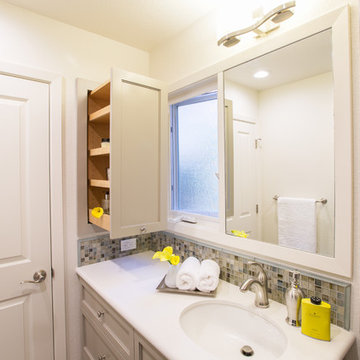
the client did not need as much clothing storage as originally thought. Consequently the hanging quantity was decreased while the custom pull-out integrated a creative solution to optimize “dead space”.
2014 NARI META Platinum Award: Sunnyvale Bathroom Remodel
 Progressive Design Build
Challenge
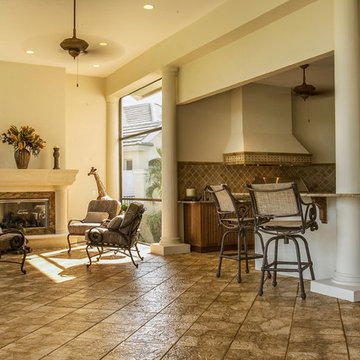
As part-time residents of this Bonita Springs home, our clients were looking to update their outdoor entertainment area. They also planned to be away for the summer during the remodel and needed their renovation project to be finished prior to their return for the winter.
Their needs included:
Changing the color pallet to a monochromatic scheme, removing the yellow brick pavers, adding an outdoor kitchen area, adding an outdoor fireplace, resurfacing the pool and updating the tile, installing a new screen enclosure, and creating privacy from the neighbors, particularly the main sitting areas, pool and outdoor kitchen.
Although there was already a 1,221 sq. ft. lanai under the roof, it lacked functionality needed by the homeowners. Most of its amenities were located at one end of the lanai, and lacked privacy that the homeowners valued.
Solution
The final project design required two additions to the lanai area adding an accumulative 265 sq. ft. to the existing space expanding their sitting area and accommodating a much-needed outdoor kitchen. The new additions also needed to blend with the home’s existing style.
Addition #1—Sitting Area:
The first addition added approximately 145 sq. ft. to the end of the lanai. This allowed Progressive Design Build to tie into the existing gable room for the new space and create privacy from the neighbors.
Addition #2—Outdoor Kitchen:
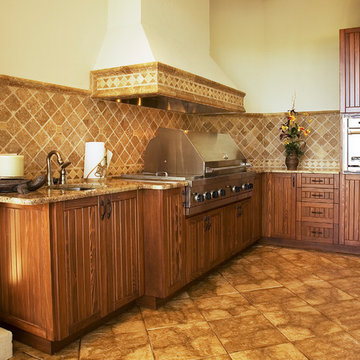
The second addition was a bump out that added approximately 120 sq. ft. to the end of the house close to the interior kitchen. This allowed the client to add an outdoor over and 52” Viking grill (with a side burner) to their outdoor living space. Other amenities included a new sink and under counter fridge, granite countertops, tumbled stone stile and Cypress cabinetry, custom-fabricated with marine grade plywood boxes and marine grade finishes to withstand moisture, common in the Bonita Bay community.
Special attention was given to the preparation area on either side of the stove, the landing area next to the oven and the serving counter behind the bar. Bar seating was added to the outdoor kitchen, allowing guests to visit with the cook comfortably and easily.
Brick Pavers
During the design phase, we discovered that the original brick pavers were set in sand, with no concrete pad below. Consequently, the retaining wall and several pavers were starting to fail, caused by the shifting sands. To remedy the problem, we installed a new concrete deck and laid new nonslip pavers on top of the deck—ideal for wet area applications.
Pool Renovations
To dramatically improve the enjoyment and ambiance of their pool, Progressive Design Build completely re-plumbed it, putting in additional lighting and new water features. New decorative pool tile, coping, and a paver deck were also installed around the pool. The pool finish chosen by our clients was a nice tropical blue color.
Screen Enclosure
A new screen enclosure was installed in compliance with new local building codes, making it more stable and solid than the existing one. The color change from white to bronze coordinated well with the homeowners’ new color scheme; and the location of the service door and stairs provided convenient access to the new pool equipment.
Results
This project was completed on time and within budget before these homeowners returned for their winter holiday. They were thrilled with the weekly communication, which included two-way phone calls and email photo sharing. They always knew where their project was in the construction process and what was happening at all times—providing security and peace of mind.
 G. Christianson Construction, Inc.
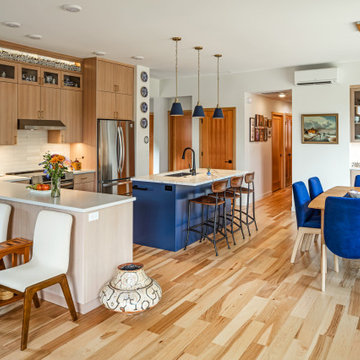
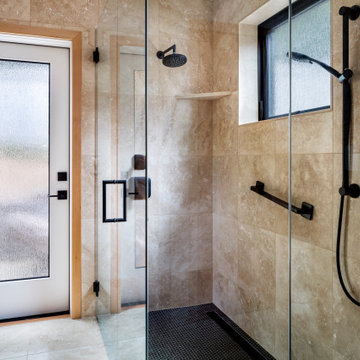
Rich and Janet approached us looking to downsize their home and move to Corvallis to live closer to family. They were drawn to our passion for passive solar and energy-efficient building, as they shared this same passion. They were fortunate to purchase a 1050 sf house with three bedrooms and 1 bathroom right next door to their daughter and her family. While the original 55-year-old residence was characterized by an outdated floor plan, low ceilings, limited daylight, and a barely insulated outdated envelope, the existing foundations and floor framing system were in good condition. Consequently, the owners, working in tandem with us and their architect, decided to preserve and integrate these components into a fully transformed modern new house that embodies the perfect symbiosis of energy efficiency, functionality, comfort and beauty. With the expert participation of our designer Sarah, homeowners Rich and Janet selected the interior finishes of the home, blending lush materials, textures, and colors together to create a stunning home next door to their daughter’s family. The successful completion of this wonderful project resulted in a vibrant blended-family compound where the two families and three generations can now mingle and share the joy of life with each other.
 HAUS | Architecture For Modern Lifestyles
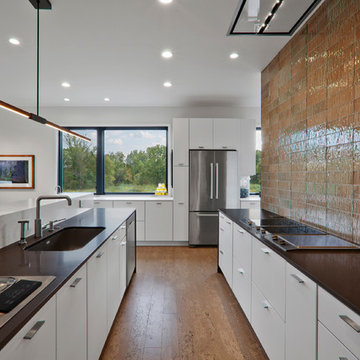
Modern open concept kitchen overlooks living space and outdoors - Architecture/Interiors: HAUS | Architecture For Modern Lifestyles - Construction Management: WERK | Building Modern - Photography: HAUS
 The Buckingham Group
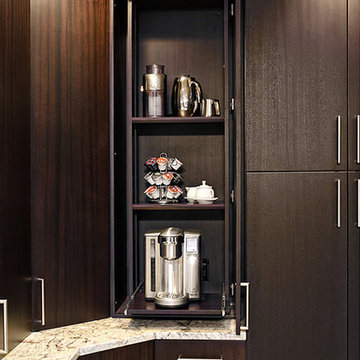
A hidden coffee bar and large pantry anchor this end of the kitchen. Pocket doors and pullout shelves add convenience while hiding some of the less attractive staples and equipment that are used on a daily basis. The beauty of the Sapele (Brazilian Mahogany) is accented by the LED lighting. Brushed nickel hardware provides an interesting contrast that helps highlight the beauty of the cabinets surface.
Photography by: Hawks Photography
 Progressive Design Build
Challenge
As part-time residents of this Bonita Springs home, our clients were looking to update their outdoor entertainment area. They also planned to be away for the summer during the remodel and needed their renovation project to be finished prior to their return for the winter.
Their needs included:
Changing the color pallet to a monochromatic scheme, removing the yellow brick pavers, adding an outdoor kitchen area, adding an outdoor fireplace, resurfacing the pool and updating the tile, installing a new screen enclosure, and creating privacy from the neighbors, particularly the main sitting areas, pool and outdoor kitchen.
Although there was already a 1,221 sq. ft. lanai under the roof, it lacked functionality needed by the homeowners. Most of its amenities were located at one end of the lanai, and lacked privacy that the homeowners valued.
Solution
The final project design required two additions to the lanai area adding an accumulative 265 sq. ft. to the existing space expanding their sitting area and accommodating a much-needed outdoor kitchen. The new additions also needed to blend with the home’s existing style.
Addition #1—Sitting Area:
The first addition added approximately 145 sq. ft. to the end of the lanai. This allowed Progressive Design Build to tie into the existing gable room for the new space and create privacy from the neighbors.
Addition #2—Outdoor Kitchen:
The second addition was a bump out that added approximately 120 sq. ft. to the end of the house close to the interior kitchen. This allowed the client to add an outdoor over and 52” Viking grill (with a side burner) to their outdoor living space. Other amenities included a new sink and under counter fridge, granite countertops, tumbled stone stile and Cypress cabinetry, custom-fabricated with marine grade plywood boxes and marine grade finishes to withstand moisture, common in the Bonita Bay community.
Special attention was given to the preparation area on either side of the stove, the landing area next to the oven and the serving counter behind the bar. Bar seating was added to the outdoor kitchen, allowing guests to visit with the cook comfortably and easily.
Brick Pavers
During the design phase, we discovered that the original brick pavers were set in sand, with no concrete pad below. Consequently, the retaining wall and several pavers were starting to fail, caused by the shifting sands. To remedy the problem, we installed a new concrete deck and laid new nonslip pavers on top of the deck—ideal for wet area applications.
Pool Renovations
To dramatically improve the enjoyment and ambiance of their pool, Progressive Design Build completely re-plumbed it, putting in additional lighting and new water features. New decorative pool tile, coping, and a paver deck were also installed around the pool. The pool finish chosen by our clients was a nice tropical blue color.
Screen Enclosure
A new screen enclosure was installed in compliance with new local building codes, making it more stable and solid than the existing one. The color change from white to bronze coordinated well with the homeowners’ new color scheme; and the location of the service door and stairs provided convenient access to the new pool equipment.
Results
This project was completed on time and within budget before these homeowners returned for their winter holiday. They were thrilled with the weekly communication, which included two-way phone calls and email photo sharing. They always knew where their project was in the construction process and what was happening at all times—providing security and peace of mind.
 G. Christianson Construction, Inc.
Rich and Janet approached us looking to downsize their home and move to Corvallis to live closer to family. They were drawn to our passion for passive solar and energy-efficient building, as they shared this same passion. They were fortunate to purchase a 1050 sf house with three bedrooms and 1 bathroom right next door to their daughter and her family. While the original 55-year-old residence was characterized by an outdated floor plan, low ceilings, limited daylight, and a barely insulated outdated envelope, the existing foundations and floor framing system were in good condition. Consequently, the owners, working in tandem with us and their architect, decided to preserve and integrate these components into a fully transformed modern new house that embodies the perfect symbiosis of energy efficiency, functionality, comfort and beauty. With the expert participation of our designer Sarah, homeowners Rich and Janet selected the interior finishes of the home, blending lush materials, textures, and colors together to create a stunning home next door to their daughter’s family. The successful completion of this wonderful project resulted in a vibrant blended-family compound where the two families and three generations can now mingle and share the joy of life with each other.
 SHEEX
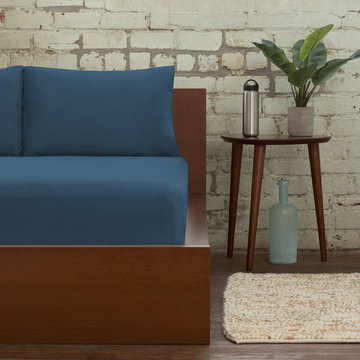
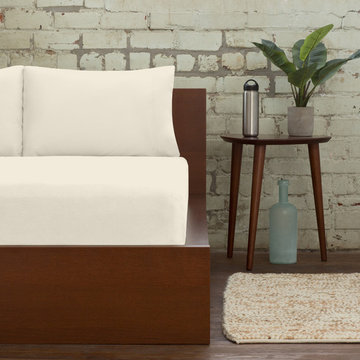
SHEEXSHEEX® PRO • COTTON Performance Sheets amp up the performance of traditional bedding through innovative, technical SLEEP•TECHTM fabric advancements in temperature regulation, breathability, and moisture wicking. Traditional sheets trap excess heat against your body, which makes you hot and sweaty and, consequently, causes you to wake up in soaking wet sheets. SHEEX® PRO•COTTON offers the familiar comfort of cotton that you love with the added benefit of patented TransDRY® technology to release excess heat and wick moisture away from your body. You stay cooler, drier and more comfortable throughout the night, and you will sleep better and stay asleep longer.
 Absolute Design Build
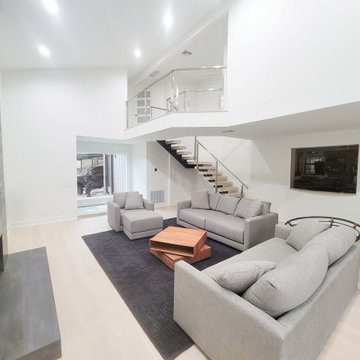
This remodel project transformed a family’s dated, impractical living room space into an inviting and open family “hub” with contemporary materials and a refreshing color palette. Additionally, we were able to fulfill the client's wish for a dedicated office space.
The home’s cramped, poorly-lit staircase was not within code and connected to a boxy, narrow catwalk. Our team creatively designed a spacious welded steel and solid oak free-floating staircase, along with an expanded catwalk that improved the overall flow and consequently increased upstairs closet space.
 Wild by Design
Pre-existing concrete courtyard entrance. The concrete entrance was originally designed to provide a low maintenance wheel chair friendly entrance. The unintended consequence of positioning the pathway in the lowest part of the courtyard caused water to pool and freeze during the winter creating a very dangerous entrance. Given the entire concrete hardscape surface, snow and water has to be completely removed from the courtyard to alleviate the problem. - Larry Elmore
 SHEEX
SHEEXSHEEX® PRO • COTTON Performance Sheets amp up the performance of traditional bedding through innovative, technical SLEEP•TECHTM fabric advancements in temperature regulation, breathability, and moisture wicking. Traditional sheets trap excess heat against your body, which makes you hot and sweaty and, consequently, causes you to wake up in soaking wet sheets. SHEEX® PRO•COTTON offers the familiar comfort of cotton that you love with the added benefit of patented TransDRY® technology to release excess heat and wick moisture away from your body. You stay cooler, drier and more comfortable throughout the night, and you will sleep better and stay asleep longer.
 Windy City Painters
PREPARATION AND PLANNING
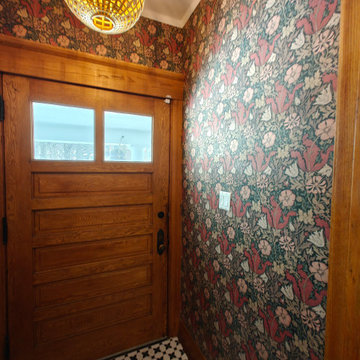
First, we assessed existing wall conditions and repaired minor imperfections. Next, surfaces were thoroughly cleaned and primed for maximum adhesion. Then, precise measurements ensured perfect pattern alignment throughout the space.
INSTALLATION PROCESS
Subsequently, we carefully cut each strip accounting for pattern matching. Moreover, professional installation techniques eliminated bubbles and ensured seamless seams. Finally, detailed finishing work created flawless edges and corners.
CHICAGO-SPECIFIC CHALLENGES
Furthermore, older Chicago buildings present unique challenges including settling walls, vintage plaster surfaces, and lead paint considerations. Therefore, proper preparation becomes crucial for long-lasting results that withstand seasonal temperature fluctuations.
RESULTS AND QUALITY
Consequently, the finished installation showcases perfect pattern alignment and professional craftsmanship. The wallpaper enhances the entry hall's architectural character while providing durability for high-traffic use.
PROFESSION AL TIPS
Homeowners should always hire experienced installers for complex patterns. Additionally, investing in quality primer saves money long-term by ensuring proper adhesion and easier future removal.
See more work and request free estimate at windypainters.com.
Q: How long does wallpaper installation take? / A: Most entry halls require one to two days depending on pattern complexity, surface preparation needs, and room size for professional wallpaper installation.
Q: Can you install over existing wallpaper? / A: We recommend removing old wallpaper first for best adhesion, though some situations allow installation over existing wallpaper after proper preparation and assessment.
Q: What wallpaper works best in Chicago? / A: Vinyl and fabric-backed wallpapers handle Chicago's climate changes best, providing durability against humidity fluctuations and temperature variations throughout seasons.
Q: Do you guarantee installation work? / A: Yes, Windy City Painters provides comprehensive warranties covering wallpaper installation craftsmanship and adhesion for specified warranty periods on all projects.
Q: How do you handle pattern matching? / A: We carefully measure walls, calculate pattern repeats, and plan installation sequence to ensure perfect wallpaper installation pattern alignment throughout the space.
Q: Can wallpaper work in vintage buildings? / A: Absolutely, we specialize in wallpaper installation for older Chicago homes, understanding unique challenges like settling walls and vintage plaster surfaces.
Q: What preparation is required? / A: Proper wallpaper installation requires surface assessment, repairs, thorough cleaning, appropriate priming, and climate control for optimal adhesion and lasting results.
Q: Do you remove old wallpaper? / A: Yes, we provide professional wallpaper removal services using safe techniques that protect underlying wall surfaces during the wallpaper installation preparation process.
Q: How much does installation cost? / A: Wallpaper installation costs vary based on room size, pattern complexity, surface preparation needs, and wallpaper selection - contact for detailed estimates.
Q: What tools do professionals use? / A: Professional wallpaper installation requires specialized smoothing tools, precision cutting equipment, quality brushes, and professional-grade adhesives for optimal results and longevity.
 Bentham Plank
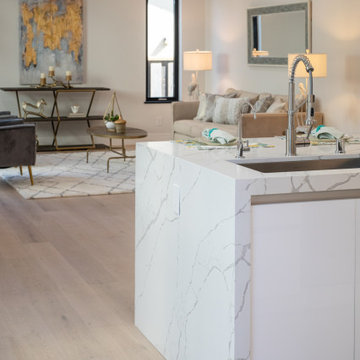
For those who prefer light-colored floors but do not wish for the consequent atmospheric coolness, Margot is the perfect solution: a light-colored floor that radiates an aura of warmth. In contrast to Sanzio and Burano, smooth and sophisticated Margot pursues a sense of unity, blurring the lines between floor planksboards. With its mellow texture and pleasantly bright ambience, Margot emanates an intoxicating impression of serene bliss.
5