
Search results for "Cost based" in Home Design Ideas
 Sabrina Alfin Interiors
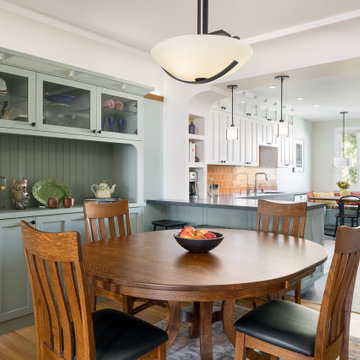
View of kitchen from the dining room. Wall was removed between the two spaces to create better flow. Craftsman style custom cabinetry in both the dining and kitchen areas, including a built-in banquette with storage underneath.
 Modifica Interiors LLC
Robert Benson Photography
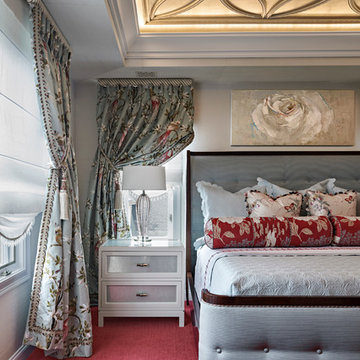
Mid-sized elegant master carpeted and red floor bedroom photo in Bridgeport with beige walls and no fireplace
Mid-sized elegant master carpeted and red floor bedroom photo in Bridgeport with beige walls and no fireplace
 Nar Design Group
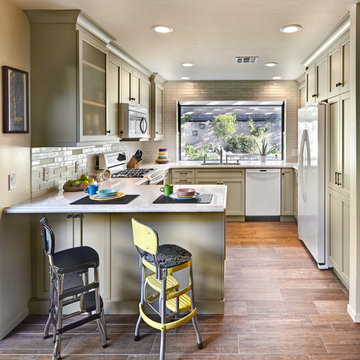
This fun classic kitchen in Gold River features Columbia frameless cabinets in Sandy Hook grey. A green glass backsplash in a random matte and polished pattern complements the cabinets which are faced with both painted wood and frosted glass. The Silestone countertops in the Lyra finish have an ogee bullnose edge. The floors are finished in a rich brown porcelain tile of varying sizes that are made to resemble distressed wood.
Photo Credit: PhotographerLink
Find the right local pro for your project
 Continental Ponds
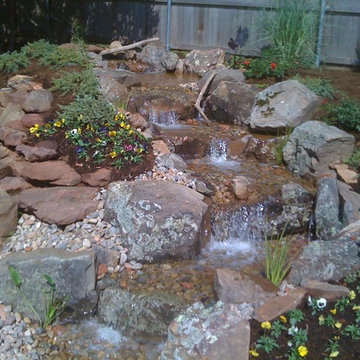
Pondless Waterfall
Pondless Waterfalls are simply a re-circulating waterfall and/or stream without the presence of a pond. You can enjoy the sight and sound of running water without the maintenance of a pond.
The waterfall is undoubtedly the most beautiful and favored feature in a water garden. If space is lacking in your yard or you have safety concerns with a pond, go Pondless! The name basically explains it all. It’s a waterfall and stream, without the pond. So why would you want a waterfall without a pond? The truth is that a Pondless Waterfall isn’t for everyone, but it can be a great alternative for someone who isn’t quite sure if a pond is right for their family.
Safety
Because there is no pool of water, a Pondless Waterfall is a great option if you are concerned about safety issues associated with a traditional pond.
Cost
Cost can be a big factor when considering the type of pond you want to build. In most cases, the price of a Pondless waterfall will be less than a pond, because there is less labor involved, as well as less rock and materials. Operating costs are also less. Because you’re not dealing with an established ecosystem, it’s not necessary to run the pump 24/7.
Space
The small size of the Pondless Waterfall means you can build and enjoy a beautiful waterfall anywhere in you yard.
Maintenance - Taking care of your Pondless Waterfall is easy. Filling the reservoir every few weeks to compensate for water loss because of evaporation is all that’s required.
Flexibility
Perhaps the best part of the Pondless Waterfall is the possibility for the future. If you change your mind later, wishing you’d build a pond, that’s ok! If you leave enough room around the base of the waterfall, it’s easy to add a pond onto a Pondless Waterfall.
Complete System
It might be difficult to imagine a waterfall and stream without a pond. Where does the water go? A Pondless Waterfall works much like a regular pond. The hole, deeper than a normal pond, is dug then lined with rock and gravel, and filled with water. The water is then circulated from beneath the rocks and gravel by a pump that sits on the bottom, inside a Snorkel Vault and Centipede Module. A pipe runs from there up to a BioFalls Filter and into an overflowing waterfall, where it falls back into the reservoir. Since the water level never pools above the level of the rock and gravel fill, it give the appearance of a waterfall without a pond, when in fact, the “pond” is there but not visible.
The Pondless Waterfall has made many water-lovers who were previously unable to indulge in the sweet sounds of falling water, very happy. It’s a great alternative for those who are trying to get their feet wet, or looking to fit a little bit of paradise into their own backyard. In other words, when all else fails … go Pondless!
 John Toole Interiors + Concierge Services
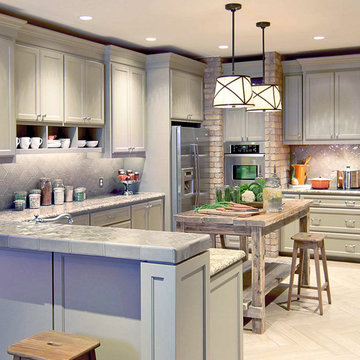
This cozy kitchen was created with a modest budget and several design constraints. The brink walls and recently installed granite countertops were to be spared to save cost. The base cabinets were reconfigured with wider drawers and new cabinet doors. New upper cabinets with open accent spaces were added. The island was scrapped and a new larger (and rotated) counter was added which also serves as a gathering place for family and friends. The new lighting scheme accents new flooring, backsplash tile and relaxing colors.
 Horn & Co. (Previously JHLA)
Allen Russ Photography
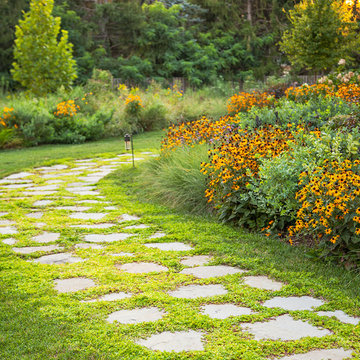
Design ideas for a traditional drought-tolerant and full sun front yard stone garden path in DC Metro.
Design ideas for a traditional drought-tolerant and full sun front yard stone garden path in DC Metro.
 Refined Elements LLC
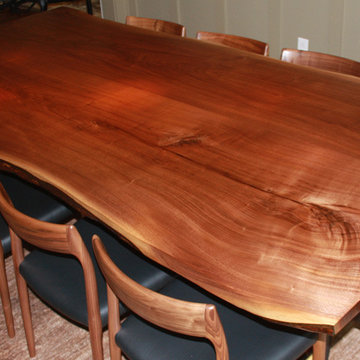
Elegant live edge black walnut table with solid brass legs. The chairs are black walnut with black leather. Table is 55" wide x 109" long and custom designed for our client's space. This is the largest residential live edge black walnut dining table in Texas. It is finished with our proprietary hand rubbed finish which offers superb durability, moisture resistance, and easy care. We use only organic based citrus solvents. This particular walnut log was purchased from Michigan. We either stock or can get any species desired. The attention to detail is unmatched and this table was created to be passed down for generations.

Sponsored
Sunbury, OH

J.Holderby - Renovations
Franklin County's Leading General Contractors - 2X Best of Houzz!
 AAA Distributor, LLC
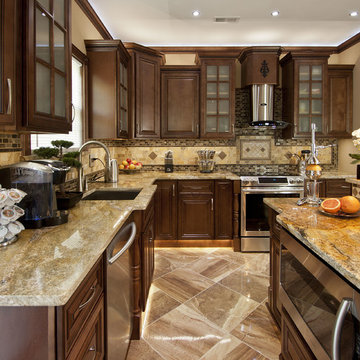
One of our favorite collections, the Geneva Cabinetry Collection, will easily catch the eye of visitors with its traditional and skillfully crafted custom appearance. Emerging with an unprecedented hand applied rich chocolate glaze and charming contour boundaries, our Geneva kitchen and bath cabinetry collection was formulated for universal application to any room - bathroom, bedroom, office, laundry, or kitchen.
As with all of our products, our natural wood interior finish is smoothly illusive throughout and can be contrasted by of some of the lighter color palettes. To further our suggestions, we recommend selecting pure chrome and elite, silver accents. Any of the indirect tones such as playful pearl or even sophisticated mosaic backdrop will joyfully consent to the newly installed Geneva kitchen and bath cabinetry collection.
Specifications:
- Full overlay
- All wood construction
- Hand applied rich dark chocolate glaze
- Natural wood interior finish
- Solid wood frame
- 1/2" plywood box
- 3/4" 5-piece drawer front raised solid wood panel
- 3/4" plywood half-depth adjustable base cabinet shelve
- Dead-lock shelve clip technology
- Quiet smooth-close door hinges on all doors
- Full extension dovetailed drawer with soft-close glides
Click the link below to build and order your kitchen with our convenient online ordering system.
 Allreno
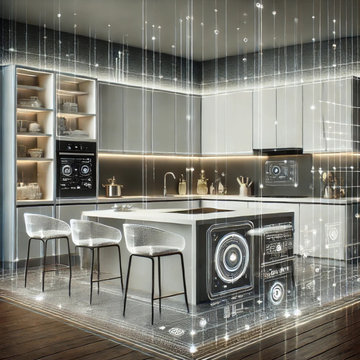
In What Order Should You Renovate a Kitchen? Revolutionizing Kitchen and Bath Renovation with Allreno's Design AI
Renovating a kitchen can be one of the most exciting and rewarding home improvement projects. However, with so many decisions to make, it can also be overwhelming. From selecting kitchen cabinets to choosing countertops and appliances, the process often involves careful planning and organization. So, how do you ensure the renovation goes smoothly? One important factor is knowing the right order in which to tackle the project.
The Right Order for Kitchen Renovation
Renovating a kitchen involves multiple steps, and knowing the proper order of operations is crucial for both time efficiency and cost savings. Here’s a general guideline for how to approach your kitchen renovation:
1. Planning and Design: The first step in any renovation is planning. This includes deciding on the layout, design, and features you want in your kitchen. At this stage, you’ll also need to think about your budget and timeline. It’s essential to finalize these details before moving forward with the actual work.
2. Demolition: Once the design is set, it’s time to remove old fixtures, cabinets, appliances, and flooring. Demolition can be a messy process, but it’s necessary for starting fresh. Having a professional handle this phase is often a smart move to ensure everything is safely removed.
3. Structural Work: If you plan on altering the layout of the kitchen by knocking down walls or adding new plumbing or electrical work, now is the time to do it. Structural changes can be complicated and costly, so it’s important to ensure these are completed before installing any new elements.
4. Plumbing and Electrical Work: With the structure in place, you can begin installing plumbing and electrical systems. This might include adding new water lines, sinks, or electrical outlets for appliances. It’s best to bring in licensed professionals for this stage, as electrical and plumbing work requires expert knowledge.
5. Cabinet Installation: Once the plumbing and electrical work are in place, you can install the kitchen cabinets. Cabinets are one of the most important elements of the kitchen, and the Allreno design AI can make this process easier. Allreno's AI-driven platform allows you to visualize how different kitchen cabinets will fit into your space, ensuring you make the best choice based on your preferences and layout.
6. Countertops: After the cabinets are installed, it’s time to add countertops. Whether you choose granite, quartz, or a more budget-friendly option, countertops are a focal point of the kitchen, and they should complement the cabinets and other design elements.
7. Flooring: Now that the major structural elements are in place, it’s time to install your flooring. Whether you opt for tile, hardwood, or vinyl, flooring should be installed after the cabinets and countertops to prevent any damage during the installation process.
8. Appliances and Fixtures: With the foundation in place, you can now add your appliances (oven, refrigerator, dishwasher, etc.) and fixtures (sink, faucets, lighting). Allreno’s AI can also help here by offering kitchen design recommendations based on available appliances and space dimensions.
9. Final Touches: The last step is adding the finishing touches to your kitchen. This includes painting the walls, adding backsplash tiles, and installing accessories like handles and knobs on your cabinets. This is also the stage where you can implement any stylistic choices to make the space uniquely yours.
How Allreno's AI Transforms the Renovation Process
One of the biggest challenges of a kitchen renovation is visualizing how everything will come together. Allreno’s design AI changes that by offering an intuitive platform that brings your ideas to life. Here’s how:
• Personalized Design Recommendations: Allreno’s AI suggests design elements based on your preferences, style, and space dimensions. Whether it’s selecting the perfect kitchen cabinets or countertop finishes, the AI ensures everything works together cohesively.
• 3D Visualization: With Allreno’s AI-driven design tools, you can visualize your kitchen layout in 3D before any work begins. This allows you to see how different elements will fit into your space and make adjustments as needed.
• Efficient Project Management: Allreno helps you streamline the entire renovation process by generating accurate material lists, estimates, and timelines. This means you can avoid costly errors and keep your renovation on track.
Conclusion
Renovating a kitchen is an exciting project, but it requires careful planning and organization to ensure it’s done right. By following a strategic order of operations and leveraging cutting-edge technology like Allreno’s design AI, homeowners can streamline the process, save time and money, and bring their dream kitchen to life with ease. Allreno not only simplifies the design process but also provides innovative solutions that make kitchen and bath renovations faster and more efficient than ever before.
Ready to get started with your kitchen renovation? Allreno's AI-powered design platform is here to help you every step of the way.
 Windy City Painters
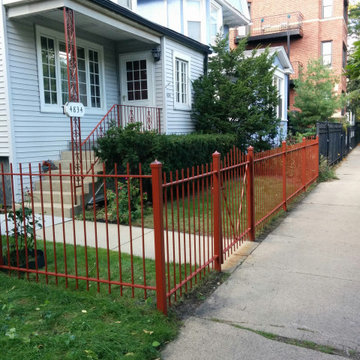
ver look at your iron fence and wonder how rust crept up so fast? For homeowners across Chicago's North Side and Near West Side, that moment of recognition often comes too late. Windy City Painters built this project guide to help you understand exactly what a professional iron fence restoration involves, what products matter, and what Chicago's climate demands from every coat of paint applied to exposed metal.
PROJECT OVERVIEW
This iron fence restoration involved a multi-unit property featuring an ornamental iron perimeter fence typical of Chicago's greystone and courtyard building streetscape. The fence presented moderate-to-severe surface rust, multiple areas of paint delamination, and two sections with deep pitting requiring needle gun descaling before any coating could be applied. The goal was full rust remediation and a durable topcoat finish built for Chicago's demanding climate. Windy City Painters completed the project in two days with zero damage to surrounding hardscape.
MATERIALS AND PRODUCTS
Ospho Rust Converter - A phosphoric acid-based treatment that chemically transforms iron oxide into iron phosphate, halting active corrosion before primer is applied. Essential on Chicago iron exposed to decades of salt air and freeze-thaw cycling.
Corroseal Rust-Inhibitive Primer - A water-based latex primer with built-in rust inhibitors, applied over converted surfaces to seal and prepare metal for topcoating.
Sherwin-Williams DTM Acrylic Coating - Direct-to-Metal formulation delivering exceptional adhesion, flexibility, and corrosion resistance. Available in satin and semi-gloss, ideal for ornamental iron fence painting across Chicago properties.
THE PROCESS
Step 1 - Mechanical Surface Preparation: Wire wheel grinding with angle grinder attachments removed all loose rust scale, failing paint, and surface contamination. Heavily pitted sections received needle gun descaling to expose clean stable metal beneath. This step determines everything. No primer or topcoat performs correctly over compromised metal, regardless of product quality. Windy City Painters treats prep as the primary investment on every iron fence project.
Step 2 - Rust Conversion: Ospho was applied liberally to all areas showing active rust. The phosphoric acid reaction was allowed to complete fully before any priming began. On severely oxidized sections, a second Ospho application ensured complete conversion. This step is non-negotiable in Chicago where freeze-thaw cycles push moisture into every surface irregularity.
Step 3 - Priming with Corroseal: Full coverage Corroseal primer coat sealed the converted surface and established adhesion for the finish coats. Corroseal's rust-inhibitive chemistry adds a secondary barrier against moisture penetration, extending the effective life of the topcoat by years in Chicago's humid lakefront environment.
Step 4 - DTM Topcoat Application: Two coats of Sherwin-Williams DTM acrylic in satin black were applied by brush to ensure full penetration into ornamental detail. DTM's flexibility accommodates the metal expansion and contraction Chicago temperatures demand, from minus-15 winters to 95-degree July afternoons. Final coverage was uniform and true to color.
CHICAGO-SPECIFIC CHALLENGES
Chicago iron faces challenges most other markets do not. Lake Michigan humidity accelerates surface oxidation year-round. Road salt from winter de-icing migrates to fence bases and lower rails. Freeze-thaw cycling cracks poorly adhered coatings within a single winter. Greystones, two-flats, and Victorian brownstones often feature original ornamental ironwork with decades of layered paint that must be assessed before any new coating is added. Windy City Painters factors all of these conditions into every iron fence estimate and material selection.
WHAT TO EXPECT LONG-TERM
A properly prepared and coated iron fence using the Ospho, Corroseal, and Sherwin-Williams DTM system should deliver 5-8 years of performance in Chicago conditions. Annual visual inspection for chips or scratches, followed by prompt spot priming, extends that timeline significantly. Full refinishing cycles become less frequent when the initial prep work is done correctly.
PRO TIPS
Tip 1 - Never skip the rust converter. Painting over active rust with even the best topcoat guarantees early failure. Ospho or a comparable phosphoric acid treatment must precede any primer on iron showing orange or brown oxidation.
Tip 2 - Assess for weld repairs before scheduling painting. If rust has eaten through the metal creating structural voids or broken sections, a welder must address those areas before painting begins. Windy City Painters identifies weld repair needs during the free estimate.
Tip 3 - Choose satin or semi-gloss finish on iron. Flat finishes on metal hold moisture and show wear faster. Satin DTM provides enough sheen to shed water while maintaining the traditional look Chicago ornamental iron demands.
Ready to restore your iron fence the right way? Visit windypainters.com to schedule your free estimate with Windy City Painters.
FAQ
Q: What does iron fence painting cost in Chicago?
A: Most residential iron fence projects range from $500 to $1,800 depending on linear footage, rust severity, and prep requirements. Windy City Painters provides free detailed on-site estimates for accurate iron fence painting cost in Chicago.
Q: How do I know if my fence needs rust conversion or just repainting?
A: Any visible orange or brown rust requires chemical conversion before priming. Windy City Painters evaluates every fence during the estimate to determine whether Ospho, mechanical prep, or weld repair is needed before coating begins.
Q: Can you paint iron in cold Chicago weather?
A: DTM coatings have lower application temperature thresholds than standard exterior paint, but we avoid application below 35 degrees Fahrenheit. Windy City Painters schedules iron fence projects for appropriate weather windows throughout the season.
Q: How long does iron fence paint last in Chicago?
A: With complete rust conversion, Corroseal priming, and Sherwin-Williams DTM topcoat, iron fence painting in Chicago lasts 5-8 years. Annual inspections and prompt touch-ups of chips extend that timeline further.
Q: Do I need a welder before an iron fence can be painted?
A: Only if rust has created structural voids or breaks in the metal. Windy City Painters assesses this during the free estimate and can coordinate with welders when needed before our painting crew begins.
Q: What is the difference between Ospho and Corroseal?
A: Ospho is a rust converter applied directly to active rust to chemically neutralize it. Corroseal is a rust-inhibitive primer applied over converted or clean metal. Windy City Painters often uses both in sequence for maximum protection on Chicago iron.
Q: How often should Chicago iron fences be inspected?
A: Annual inspection is recommended, ideally in early spring after winter salt and freeze-thaw exposure. Catching small chips and bare spots early allows simple touch-up rather than full iron fence repainting, saving significant cost.


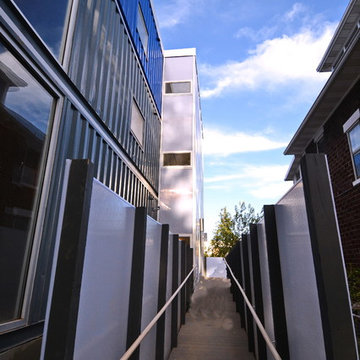
 Travis Price Architects
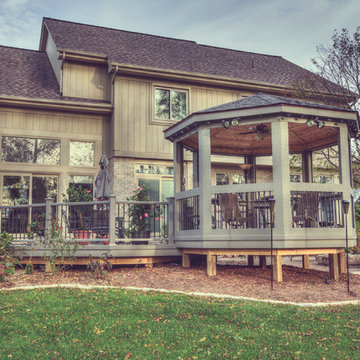
Four Apartments, one per floor, six containers each, including six bedrooms per apartment with one shared common kitchen, living, and dining room. Perfect for urban living!
Photo Credit:Travis Price

 Jo Rabaut
Chris Little Photography
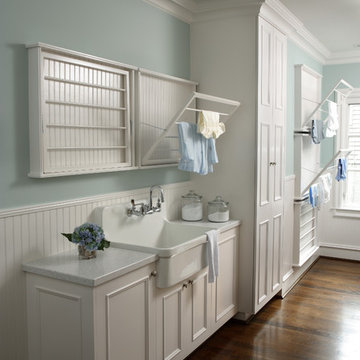
Laundry room - traditional laundry room idea in Atlanta with white cabinets, white countertops and a drop-in sink
Laundry room - traditional laundry room idea in Atlanta with white cabinets, white countertops and a drop-in sink
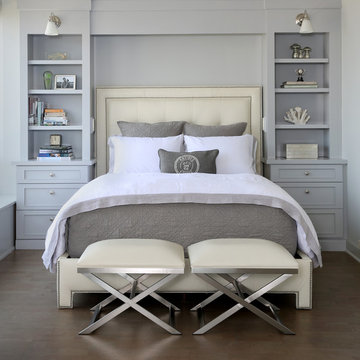
 Normandy Remodeling
These floor to ceiling book shelves double as a storage and an eye- capturing focal point that surrounds the head board, making the bed in this master bedroom, the center of attention.
Learn more about Chris Ebert, the Normandy Remodeling Designer who created this space, and other projects that Chris has created: https://www.normandyremodeling.com/team/christopher-ebert
Photo Credit: Normandy Remodeling
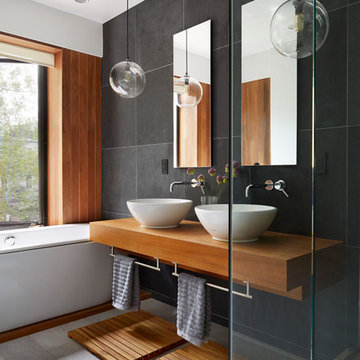
 Etelamaki Architecture
Photos: MIkiko Kikuyama
Pendants: Solitaire by Niche Modern
Medicine Cabinet: Kohler
Wall Tile: Graphite Cleft Slate by Stone Source
Floor Tile: Spa White Velvet by Stone Source
Floor Mats: Teak Floor Mat by CB2
Basin: Larissa by Toto
Faucet: Zuchetti
Vanity: Custom Teak veneer ~5'0" x 22"
Tub: Nexus by Toto
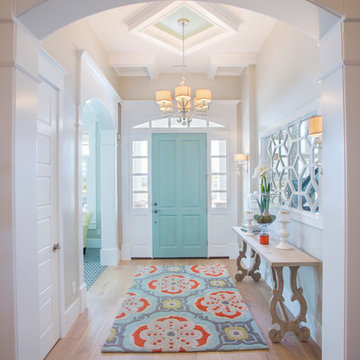
 Carrick Custom Home Design
Built by Highland Custom Homes
Entryway - mid-sized transitional medium tone wood floor and beige floor entryway idea in Salt Lake City with beige walls and a blue front door
Entryway - mid-sized transitional medium tone wood floor and beige floor entryway idea in Salt Lake City with beige walls and a blue front door
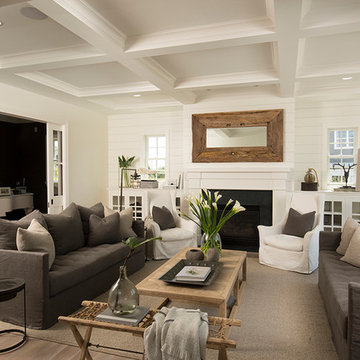
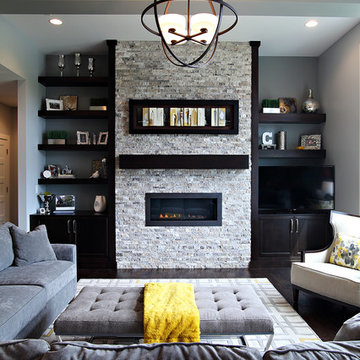
 State Street Interiors
****Please click on image for additional details****
Living room - transitional formal dark wood floor living room idea in Cedar Rapids with gray walls, a ribbon fireplace, a stone fireplace and a tv stand
Living room - transitional formal dark wood floor living room idea in Cedar Rapids with gray walls, a ribbon fireplace, a stone fireplace and a tv stand
 Christine Sheldon Design
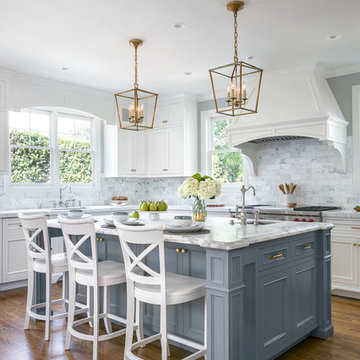
Example of a classic l-shaped dark wood floor and brown floor kitchen design in San Francisco with an undermount sink, recessed-panel cabinets, gray cabinets, white backsplash, marble backsplash, stainless steel appliances and an island
 AR Homes - Cincinnati, OH
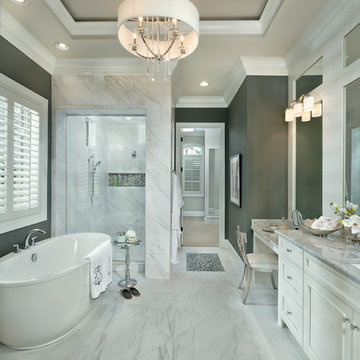
Asheville 1296 luxurious Owner's Bath with freestanding tub and Carerra marble.
Bathroom - large transitional master white tile and porcelain tile porcelain tile and white floor bathroom idea in Cincinnati with an undermount sink, recessed-panel cabinets, white cabinets, marble countertops and gray walls
Bathroom - large transitional master white tile and porcelain tile porcelain tile and white floor bathroom idea in Cincinnati with an undermount sink, recessed-panel cabinets, white cabinets, marble countertops and gray walls
19