
Search results for "Couple additional" in Home Design Ideas
 Michael Nash Design, Build & Homes
2011 NARI CAPITAL COTY GRAND AWARD WINNER
A single family home in Oakton, VA built in late 80’ was occupied by family of four for 10 years. The owner wishes to expand the living space, finish the basement, add a sunroom/breakfast area addition, eliminate the deck and put in a screen porch. Also convert the laundry room to office/mudroom area.
It took months of planning to get into the final design.
We have implemented a plan that had a two story back addition (both basement level and first level).
This required removing the cinder block wall of basement to add the seamless addition, and removing the entire first level back wall of kitchen to open up kitchen into sunroom.
The major challenge was to re-route all duct work going to second level, add ducts for basement and first level to existing system. Then add a second HVAC system in attic for entire second level. Then change all load structure for tow story addition to side wall and new walls to have entire width opened up.
The basement has gained a new bar area, a total new bathroom with shower and large vanities and all amenities, media area with gas fireplace and mantel surrounded with matching cherry bookcases and granite tops, recess lights, surround sound system, wood floor and steps, new sewer ejection system due to their difficult septic tank. The new French doors lead into back bricked patio
The first floor gained this new 16’x20’ cathedral ceiling sunroom/breakfast addition surrounded with large arched windows and French slider leading into new screen porch.
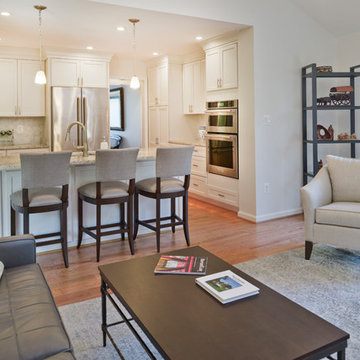
The kitchen lay-out gained three more feet in width. Also by removing partition wall between kitchen and existing family room. The first floor now has total open floor plan. The fireplace in existing family room was converted to gas and got marble surround and new mantel.
All bulkhead and part of partition walls contained massive plumbing and electrical that needed to be relocated in order to implement the new kitchen layout. This design has much more appliances and a beautiful large furniture style island that is the focal point of this kitchen done in espresso color cherry cabinetry and contrasting light color exotic stove top lighted by two crystal chandeliers.
The wrap around of cherry cabinetry in the kitchen with expended cabinetry into butler area and bookcases and bench in sunroom has given this couple lots to fill in.
The entire first floor and leading stairs to second floor and part of the second floor was all covered with new 5” wide exotic Santos Mahogany wood floors and new railings.
The powder room has been reconfigured to allow larger hallway and with new furniture style vanity this powder room even small than before but has better layout and space.
The old Laundry room and has been converted to a 10’x15’ area of multipurpose space. On the left wall there are locker style cabinetry and bench. One the left wall built in and desk area with tones of storage space. The washer and dryer are install into a closet, away from site. A set of French doors were installed into the new back deck and screen porch.
The large porcelain floors made the space look even larger and more utilitarian. Use of cherry cabinetry on deck and bookcase with recess lighting scaled up look of the space.
The new kitchen, family room and sun room with the rich cherry cabinetry and darker granite top, tumbled marble backsplash and wide board mahogany floors, upper scale stainless steel appliances and furniture style distressed look darker wood Island and light granite have made this project a breathtaking one.
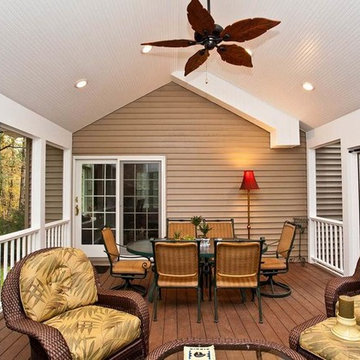
The added side screen porch done with Trex decking and cathedral ceiling covered in beaded panel and corner gas fireplace all around covered with Ledgestone has given this family a place to retire in for all those autumn afternoons and much more.
The major overhaul of this home from replacement of all existing doors and windows, flooring, crown molding and trim, stairs, entire first floor reface, new siding , new roofing, new electrical, new HVAC, entire new basement, bathroom, mud room, screen porch and lots more makes these owner proud to stay in this home for years to come.


Find the right local pro for your project
 Michael Nash Design, Build & Homes
For this couple, planning to move back to their rambler home in Arlington after living overseas for few years, they were ready to get rid of clutter, clean up their grown-up kids’ boxes, and transform their home into their dream home for their golden years.
The old home included a box-like 8 feet x 10 feet kitchen, no family room, three small bedrooms and two back to back small bathrooms. The laundry room was located in a small dark space of the unfinished basement.
This home is located in a cul-de-sac, on an uphill lot, of a very secluded neighborhood with lots of new homes just being built around them.
The couple consulted an architectural firm in past but never were satisfied with the final plans. They approached Michael Nash Custom Kitchens hoping for fresh ideas.
The backyard and side yard are wooded and the existing structure was too close to building restriction lines. We developed design plans and applied for special permits to achieve our client’s goals.
The remodel includes a family room, sunroom, breakfast area, home office, large master bedroom suite, large walk-in closet, main level laundry room, lots of windows, front porch, back deck, and most important than all an elevator from lower to upper level given them and their close relative a necessary easier access.
The new plan added extra dimensions to this rambler on all four sides. Starting from the front, we excavated to allow a first level entrance, storage, and elevator room. Building just above it, is a 12 feet x 30 feet covered porch with a leading brick staircase. A contemporary cedar rail with horizontal stainless steel cable rail system on both the front porch and the back deck sets off this project from any others in area. A new foyer with double frosted stainless-steel door was added which contains the elevator.
The garage door was widened and a solid cedar door was installed to compliment the cedar siding.
The left side of this rambler was excavated to allow a storage off the garage and extension of one of the old bedrooms to be converted to a large master bedroom suite, master bathroom suite and walk-in closet.
We installed matching brick for a seam-less exterior look.
The entire house was furnished with new Italian imported highly custom stainless-steel windows and doors. We removed several brick and block structure walls to put doors and floor to ceiling windows.
A full walk in shower with barn style frameless glass doors, double vanities covered with selective stone, floor to ceiling porcelain tile make the master bathroom highly accessible.
The other two bedrooms were reconfigured with new closets, wider doorways, new wood floors and wider windows. Just outside of the bedroom, a new laundry room closet was a major upgrade.
A second HVAC system was added in the attic for all new areas.
The back side of the master bedroom was covered with floor to ceiling windows and a door to step into a new deck covered in trex and cable railing. This addition provides a view to wooded area of the home.
By excavating and leveling the backyard, we constructed a two story 15’x 40’ addition that provided the tall ceiling for the family room just adjacent to new deck, a breakfast area a few steps away from the remodeled kitchen. Upscale stainless-steel appliances, floor to ceiling white custom cabinetry and quartz counter top, and fun lighting improved this back section of the house with its increased lighting and available work space. Just below this addition, there is extra space for exercise and storage room. This room has a pair of sliding doors allowing more light inside.
The right elevation has a trapezoid shape addition with floor to ceiling windows and space used as a sunroom/in-home office. Wide plank wood floors were installed throughout the main level for continuity.
The hall bathroom was gutted and expanded to allow a new soaking tub and large vanity. The basement half bathroom was converted to a full bathroom, new flooring and lighting in the entire basement changed the purpose of the basement for entertainment and spending time with grandkids.
Off white and soft tone were used inside and out as the color schemes to make this rambler spacious and illuminated.
Final grade and landscaping, by adding a few trees, trimming the old cherry and walnut trees in backyard, saddling the yard, and a new concrete driveway and walkway made this home a unique and charming gem in the neighborhood.
 Progressive Design Build
Challenge
After living in their home for ten years, these Bonita Bay homeowners were ready to embark on a complete home makeover. They were not only ready to update the look and feel, but also the flow of the house.
Having lived in their house for an extended period of time, this couple had a clear idea of how they use their space, the shortcomings of their current layout and how they would like to improve it.
After interviewing four different contractors, they chose to retain Progressive Design Build’s design services. Already familiar with the design/build process having finished a renovation on a lakefront home in Canada, the couple chose Progressive Design Build wisely.
Progressive Design Build invested a lot of time during the design process to ensure the design concept was thorough and reflected the couple’s vision. Options were presented, giving these homeowners several alternatives and good ideas on how to realize their vision, while working within their budget. Progressive Design Build guided the couple all the way—through selections and finishes, saving valuable time and money.
Solution
The interior remodel included a beautiful contemporary master bathroom with a stunning barrel-ceiling accent. The freestanding bathtub overlooks a private courtyard and a separate stone shower is visible through a beautiful frameless shower enclosure. Interior walls and ceilings in the common areas were designed to expose as much of the Southwest Florida view as possible, allowing natural light to spill through the house from front to back.
Progressive created a separate area for their Baby Grand Piano overlooking the front garden area. The kitchen was also remodeled as part of the project, complete with cherry cabinets and granite countertops. Both guest bathrooms and the pool bathroom were also renovated. A light limestone tile floor was installed throughout the house. All of the interior doors, crown mouldings and base mouldings were changed out to create a fresh, new look. Every surface of the interior of the house was repainted.
This whole house remodel also included a small addition and a stunning outdoor living area, which features a dining area, outdoor fireplace with a floor-to-ceiling slate finish, exterior grade cabinetry finished in a natural cypress wood stain, a stainless steel appliance package, and a black leather finish granite countertop. The grilling area includes a 54" multi-burner DCS and rotisserie grill surrounded by natural stone mosaic tile and stainless steel inserts.
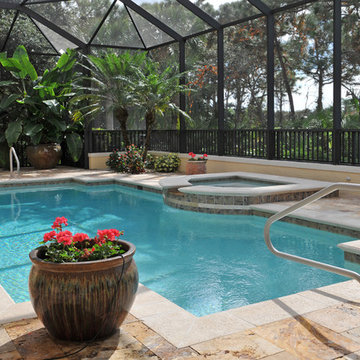
This whole house renovation also included the pool and pool deck. In addition to procuring all new pool equipment, Progressive Design Build built the pool deck using natural gold travertine. The ceiling was designed with a select grade cypress in a dark rich finish and termination mouldings with wood accents on the fireplace wall to match.
During construction, Progressive Design Build identified areas of water intrusion and a failing roof system. The homeowners decided to install a new concrete tile roof under the management of Progressive Design Build. The entire exterior was also repainted as part of the project.
Results
Due to some permitting complications, the project took thirty days longer than expected. However, in the end, the project finished in eight months instead of seven, but still on budget.
This homeowner was so pleased with the work performed on this initial project that he hired Progressive Design Build four more times – to complete four additional remodeling projects in 4 years.
 The Brooks & Studio
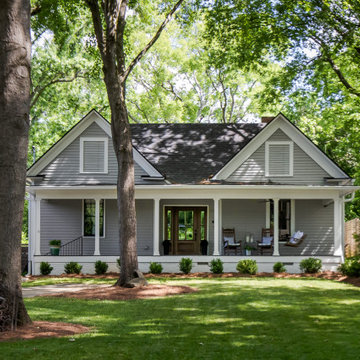
1910 Historic Farmhouse renovation
Mid-sized country gray one-story mixed siding and clapboard house exterior photo in Atlanta with a shingle roof and a black roof
Mid-sized country gray one-story mixed siding and clapboard house exterior photo in Atlanta with a shingle roof and a black roof
 Twelve Stones Designs, LLC
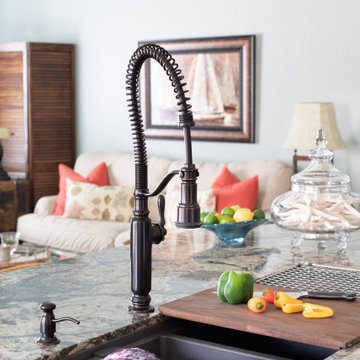
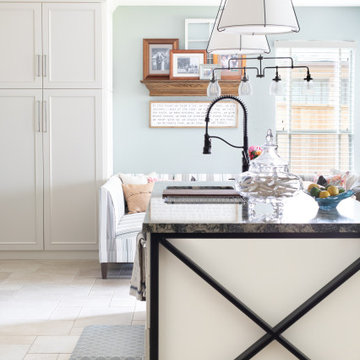
The owners of this kitchen had spent the money to upgrade the finishes in their kitchen upon building the home 12 years ago, but after living in the space for several years they realized how nonfunctional the layout really was. The (then) two preschool aged children had grown into busy, hungry teenagers with many friends who also liked to hang out at the house. So the family needed a more functional kitchen with better traffic flow, space for daily activities revolving around the kitchen at different times of day, and a kitchen that could accommodate cooking for and serving large groups. Furthermore, the dark, traditional finishes no longer reflected the homeowners’ style. They requested a brighter, more relaxed, coastal style that reflected their love of the seaside cities they like to visit.
Originally, the kitchen was U-shaped with a narrow island in the middle. The island created narrow aisles that bottle-necked at the dishwasher, refrigerator, and cooktop areas. There was a pass-through from the foyer into the kitchen, but the owners never liked that the pass-through was also located so close to the powder room. The awkward proximity was unappealing and made guests feel uncomfortable.
The kitchen’s storage was made up of lots of narrow cabinets, apothecary drawers, clipped corner units, and very few drawers. It lacked useful storage for the larger items the family used on a daily basis. And the kitchen’s only pantry was small closet that had only builder-grade, narrow shelving with no illumination to be able to see the contents inside.
Overall, the kitchen’s lighting plan was poorly executed. Only six recessed cans illuminated the entire kitchen and nook areas. The under cabinet lighting was not evenly distributed either. In fact, the builder had mis-placed the under cabinet lighting around the decorative pilasters which made for choppy, dark cubbies. Further, the builder didn’t include any lighting over the sink or the bar area, which meant whoever was doing the dishes was always in their own shadow. That, coupled with the steep overhang of the game room above made the bar area feel like a dim, cavernous space that wasn’t inviting or task oriented. The kitchen looked out into the main living space, but the raised bar and a narrow wall (which held the only large cabinet in the kitchen) created more of a barrier than a relationship to the living room or breakfast nook. In fact, one couldn’t even see the breakfast nook from the cooktop or sink areas due to its orientation. The raised bar top was too narrow to comfortably sit to either dine at or chat from due to the lack of knee space. The the homeowners confided that the kitchen felt more like a dark, dirty prison than place where the family, or their guests, wanted to gather and commune.
The clients' needs and desires were:
➢ to create a kitchen that would be a space the family loved to be in; to relate to the adjacent spaces all around, and to have better flow for entertaining large groups
➢ to remove the walls between the breakfast nook and living area and to be able to utilize the natural light from the windows in both those areas
➢ to incorporate a functional chopping block for prepping fresh food for home cooked meals, an island with a large sink and drain board, 2 pull out trash cans, and seating for at least the 2 teens to eat or do homework
➢ to design a kitchen and breakfast nook with an airy, coastal, relaxed vibe that blended with the rest of the house's coastal theme
➢ to integrate a layered lighting plan which would include ample general illumination, specific task lighting, decorative lighting, and lots of illuminated storage
➢ to design a kitchen with not only more storage for all the husband’s kitchen gadgets and collection of oils and spices, but smart storage, including a coffee/breakfast bar and a place to store and conceal the toaster oven and microwave
➢ to find a way to utilize the large open space between the kitchen, pantry area, and breakfast nook
Twelve Stones Designs achieved the owner's goals by:
➢ removing the walls between the kitchen and living room to allow the natural light to filter in from the adjacent rooms and to create a connection between the kitchen, nook, and living spaces for a sense of unity and communion
➢ removing the existing pantry and designing 3 large pantry style cabinets with LED tape lights and rollout drawers to house lots of kitchen appliances, gadgets, and tons of groceries. We also took the cabinets all the way up to the 9’ ceiling for additional storage for seasonal items and bulk storage.
➢ designing 2 islands - 1 with a gorgeous black walnut chopping block that houses a drawer for chopping and carving knives and a custom double pull out trash unit for point of use utilization - and 1 that houses the dishwasher, a large Blanco Gourmet sink with integrated drain board, woven baskets for fresh root vegetables and kitchen towels, plenty of drawer storage for kitchen items, and bar seating for up to 4 diners.
➢ closing off the space between the kitchen and the powder room to create a beautiful new private alcove for the powder room as well as adding some decorative storage. This also gave us space to include more tall storage near the new range for precision placement of the husband’s extensive oil and spice collection as well as a location for a combo-steam oven the wife wanted for baking and cooking healthy meals.
The project is enhanced functionally by:
➢ incorporated USB and standard receptacles for the kids’ laptops and phone charging in the large island
➢ designing the small island to include additional open shelving for items used on a daily basis such as a variety of bowls, plates, and colanders. This set up also works well for the husband who prefers to “plate” his dinners in restaurant-style fashion before presenting them to the table.
➢ the integration of specific storage units, such as double stacked cutlery drawers, a custom spice pull-out, a Kuerig coffee and tea pod drawer, and custom double stacked utensil drawers
➢ moving the refrigerator to the old oven location - this eliminated the bottle neck as well as created a better relationship to the eating table. It also utilizes the floor space between the pantry, nook, and kitchen
➢ creating a banquet style breakfast nook - this banquette seating not only doubles the amount of seating for large gatherings but it better utilizes the odd space between the kitchen and the previous nook area. It also helps to create a distinct pathway from the mudroom room through the pantry area, kitchen, nook, and living room.
➢ the coffee/breakfast bar area which includes the perfect location for the concealed microwave and toaster oven, convenient storage for the coffee pods and tea accoutrements. Roll-out drawers below also house the smoothie maker, hot water kettle, and a plethora of smoothie-making ingredients such as protein powders, smoothie additives, etc. Furthermore, the drawers below the Keurig house measuring utensil, cutlery, baking supplies and tupperware storage.
➢ incorporating lots of wide drawers and pullouts to accommodate large cookware.
➢ utilizing as much vertical space as possible by building storage to the ceiling which accommodates the family’s abundant amount of serving platters, baking sheets, bakeware, casserole dishes, and additional cutting boards.
The project is enhanced aesthetically by:
➢ new 5-piece Versailles pattern porcelain tile that now seamlessly joins the entire down stairs area together creating a bright, cohesiveness feeling instead of choppy separated spaces - it also adds a coastal feeling
➢ designing a cabinet to conceal the microwave and toaster oven
➢ the coastal influenced light fixtures over the nook table and island
➢ the sandy colors of the Langdon Cambria countertops. The swirling pattern and sparkling quartz pieces remind the homeowner of black-and-tan sandy beaches
➢ the striped banquet seating whose creamy white background and blue-green stripes were the inspiration for the cabinet and wall colors.
➢ All the interior doors were painted black to coordinate with the blacks and grays in the backsplash tile and countertop. This also adds a hint of tailored formality to an otherwise casual space.
➢ the use of WAC's Oculux small aperture LED units for the overhead lighting complimented with Diode LED strips for task lighting under the cabinets and inside the pantry and glass wall cabinets. All of the lighting applications are on separate dimmer switches.
Innovative uses of materials or construction methods by Realty Restoration LLC:
➢ Each 1-1/2” x 3” block of reclaimed end-grain black walnut that makes up the center island chopping block was hand milled and built in the shop. It was designed to look substantial and proportional to the surrounding elements, executed by creating the 4 inch tall top with a solid wood chamfered edge band.
➢ The metal doors on either side of the vent hood were also custom designed for this project and built in the Realty Restoration LLC shop. They are made 1x2, 11-gauge mild steel with ribbed glass. Weighing 60 lbs a piece, heavy duty cabinet hinges were added to support the weight of the door and keep them from sagging.
➢ Under-cabinet receptacles were added along the range wall in order to have a clean, uninterrupted backsplash.
Design obstacles to overcome:
➢ Because we were removing the demising walls between the kitchen and living room, we had to find a way to plumb and vent the new island. We did this by tunneling through the slab (the slab had post tension cables which prevented us from just trenching) to run a new wet vent through a nearby structural wall. We pulled the existing hot and cold lines between upper floor joists and ran them down the structural wall as well and up through a conduit in the tunnel.
➢ Since we were converting from wall overs to a gas range it allowed us to utilize the 220 feed for the wall ovens to provide a new sub panel for all the new kitchen circuits
➢ Due to framing deficiencies inherited from the original build there was a 1-1/2” differential in the floor-to-ceiling height over a 20 foot span; by utilizing the process of cutting and furring coupled with the crown moulding details on the cabinet elevations we were able to mask the problem and provide seamless transitions between the cabinet components.
Evidence of superior craftsmanship:
➢ uniquely designed, one-of-a-kind metal “X” end panels on the large island. The end panels were custom made in the Realty Restoration LLC shop and fitted to the exact dimensions of the island. The welding seams are completely indistinguishable - the posts look like they are cut from a single sheet of metal
➢ square metal posts on the small island were also custom made and designed to compliment and carry through the metal element s throughout the kitchen
➢ the beautiful, oversized end panels on the pantry cabinets which give the breakfast nook a tailored look
➢ integrating a large format 5 piece Versailles tile pattern to seamlessly flow from the existing spaces into the new kitchen space
➢ By constructing a custom cabinet that jogged around a corner we could not remodel (housing the entry way coat closet) we were able to camouflage the adjacent wall offset within the upper and lower cabinets. By designing around the existing jog in the structural walls we accomplished a few things: we were able to find the space to house, and hide, the microwave and toaster oven yet still have a clean cohesive appearance from the kitchen side. Additionally, the owners were able to keep their much needed coat closet and we didn’t have to increase the budget with unnecessary structural work.

Sponsored
Columbus, OH

Hope Restoration & General Contracting
Columbus Design-Build, Kitchen & Bath Remodeling, Historic Renovations
 The Tiny Project
Alek Lisefski / tiny-project.com
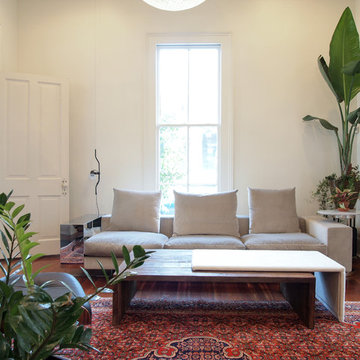
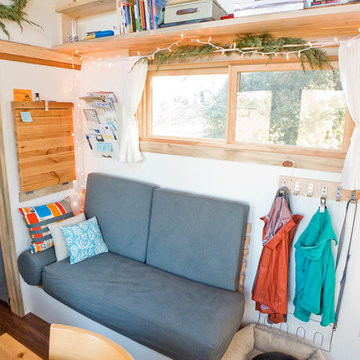
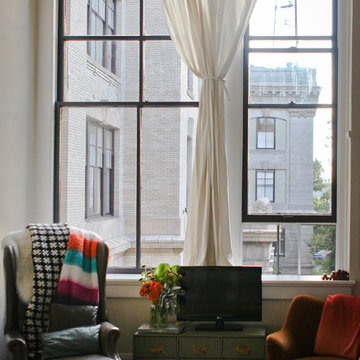
Inspiration for a contemporary living room remodel in San Francisco
Inspiration for a contemporary living room remodel in San Francisco
 Twelve Stones Designs, LLC
The owners of this kitchen had spent the money to upgrade the finishes in their kitchen upon building the home 12 years ago, but after living in the space for several years they realized how nonfunctional the layout really was. The (then) two preschool aged children had grown into busy, hungry teenagers with many friends who also liked to hang out at the house. So the family needed a more functional kitchen with better traffic flow, space for daily activities revolving around the kitchen at different times of day, and a kitchen that could accommodate cooking for and serving large groups. Furthermore, the dark, traditional finishes no longer reflected the homeowners’ style. They requested a brighter, more relaxed, coastal style that reflected their love of the seaside cities they like to visit.
Originally, the kitchen was U-shaped with a narrow island in the middle. The island created narrow aisles that bottle-necked at the dishwasher, refrigerator, and cooktop areas. There was a pass-through from the foyer into the kitchen, but the owners never liked that the pass-through was also located so close to the powder room. The awkward proximity was unappealing and made guests feel uncomfortable.
The kitchen’s storage was made up of lots of narrow cabinets, apothecary drawers, clipped corner units, and very few drawers. It lacked useful storage for the larger items the family used on a daily basis. And the kitchen’s only pantry was small closet that had only builder-grade, narrow shelving with no illumination to be able to see the contents inside.
Overall, the kitchen’s lighting plan was poorly executed. Only six recessed cans illuminated the entire kitchen and nook areas. The under cabinet lighting was not evenly distributed either. In fact, the builder had mis-placed the under cabinet lighting around the decorative pilasters which made for choppy, dark cubbies. Further, the builder didn’t include any lighting over the sink or the bar area, which meant whoever was doing the dishes was always in their own shadow. That, coupled with the steep overhang of the game room above made the bar area feel like a dim, cavernous space that wasn’t inviting or task oriented. The kitchen looked out into the main living space, but the raised bar and a narrow wall (which held the only large cabinet in the kitchen) created more of a barrier than a relationship to the living room or breakfast nook. In fact, one couldn’t even see the breakfast nook from the cooktop or sink areas due to its orientation. The raised bar top was too narrow to comfortably sit to either dine at or chat from due to the lack of knee space. The the homeowners confided that the kitchen felt more like a dark, dirty prison than place where the family, or their guests, wanted to gather and commune.
The clients' needs and desires were:
➢ to create a kitchen that would be a space the family loved to be in; to relate to the adjacent spaces all around, and to have better flow for entertaining large groups
➢ to remove the walls between the breakfast nook and living area and to be able to utilize the natural light from the windows in both those areas
➢ to incorporate a functional chopping block for prepping fresh food for home cooked meals, an island with a large sink and drain board, 2 pull out trash cans, and seating for at least the 2 teens to eat or do homework
➢ to design a kitchen and breakfast nook with an airy, coastal, relaxed vibe that blended with the rest of the house's coastal theme
➢ to integrate a layered lighting plan which would include ample general illumination, specific task lighting, decorative lighting, and lots of illuminated storage
➢ to design a kitchen with not only more storage for all the husband’s kitchen gadgets and collection of oils and spices, but smart storage, including a coffee/breakfast bar and a place to store and conceal the toaster oven and microwave
➢ to find a way to utilize the large open space between the kitchen, pantry area, and breakfast nook
Twelve Stones Designs achieved the owner's goals by:
➢ removing the walls between the kitchen and living room to allow the natural light to filter in from the adjacent rooms and to create a connection between the kitchen, nook, and living spaces for a sense of unity and communion
➢ removing the existing pantry and designing 3 large pantry style cabinets with LED tape lights and rollout drawers to house lots of kitchen appliances, gadgets, and tons of groceries. We also took the cabinets all the way up to the 9’ ceiling for additional storage for seasonal items and bulk storage.
➢ designing 2 islands - 1 with a gorgeous black walnut chopping block that houses a drawer for chopping and carving knives and a custom double pull out trash unit for point of use utilization - and 1 that houses the dishwasher, a large Blanco Gourmet sink with integrated drain board, woven baskets for fresh root vegetables and kitchen towels, plenty of drawer storage for kitchen items, and bar seating for up to 4 diners.
➢ closing off the space between the kitchen and the powder room to create a beautiful new private alcove for the powder room as well as adding some decorative storage. This also gave us space to include more tall storage near the new range for precision placement of the husband’s extensive oil and spice collection as well as a location for a combo-steam oven the wife wanted for baking and cooking healthy meals.
The project is enhanced functionally by:
➢ incorporated USB and standard receptacles for the kids’ laptops and phone charging in the large island
➢ designing the small island to include additional open shelving for items used on a daily basis such as a variety of bowls, plates, and colanders. This set up also works well for the husband who prefers to “plate” his dinners in restaurant-style fashion before presenting them to the table.
➢ the integration of specific storage units, such as double stacked cutlery drawers, a custom spice pull-out, a Kuerig coffee and tea pod drawer, and custom double stacked utensil drawers
➢ moving the refrigerator to the old oven location - this eliminated the bottle neck as well as created a better relationship to the eating table. It also utilizes the floor space between the pantry, nook, and kitchen
➢ creating a banquet style breakfast nook - this banquette seating not only doubles the amount of seating for large gatherings but it better utilizes the odd space between the kitchen and the previous nook area. It also helps to create a distinct pathway from the mudroom room through the pantry area, kitchen, nook, and living room.
➢ the coffee/breakfast bar area which includes the perfect location for the concealed microwave and toaster oven, convenient storage for the coffee pods and tea accoutrements. Roll-out drawers below also house the smoothie maker, hot water kettle, and a plethora of smoothie-making ingredients such as protein powders, smoothie additives, etc. Furthermore, the drawers below the Keurig house measuring utensil, cutlery, baking supplies and tupperware storage.
➢ incorporating lots of wide drawers and pullouts to accommodate large cookware.
➢ utilizing as much vertical space as possible by building storage to the ceiling which accommodates the family’s abundant amount of serving platters, baking sheets, bakeware, casserole dishes, and additional cutting boards.
The project is enhanced aesthetically by:
➢ new 5-piece Versailles pattern porcelain tile that now seamlessly joins the entire down stairs area together creating a bright, cohesiveness feeling instead of choppy separated spaces - it also adds a coastal feeling
➢ designing a cabinet to conceal the microwave and toaster oven
➢ the coastal influenced light fixtures over the nook table and island
➢ the sandy colors of the Langdon Cambria countertops. The swirling pattern and sparkling quartz pieces remind the homeowner of black-and-tan sandy beaches
➢ the striped banquet seating whose creamy white background and blue-green stripes were the inspiration for the cabinet and wall colors.
➢ All the interior doors were painted black to coordinate with the blacks and grays in the backsplash tile and countertop. This also adds a hint of tailored formality to an otherwise casual space.
➢ the use of WAC's Oculux small aperture LED units for the overhead lighting complimented with Diode LED strips for task lighting under the cabinets and inside the pantry and glass wall cabinets. All of the lighting applications are on separate dimmer switches.
Innovative uses of materials or construction methods by Realty Restoration LLC:
➢ Each 1-1/2” x 3” block of reclaimed end-grain black walnut that makes up the center island chopping block was hand milled and built in the shop. It was designed to look substantial and proportional to the surrounding elements, executed by creating the 4 inch tall top with a solid wood chamfered edge band.
➢ The metal doors on either side of the vent hood were also custom designed for this project and built in the Realty Restoration LLC shop. They are made 1x2, 11-gauge mild steel with ribbed glass. Weighing 60 lbs a piece, heavy duty cabinet hinges were added to support the weight of the door and keep them from sagging.
➢ Under-cabinet receptacles were added along the range wall in order to have a clean, uninterrupted backsplash.
Design obstacles to overcome:
➢ Because we were removing the demising walls between the kitchen and living room, we had to find a way to plumb and vent the new island. We did this by tunneling through the slab (the slab had post tension cables which prevented us from just trenching) to run a new wet vent through a nearby structural wall. We pulled the existing hot and cold lines between upper floor joists and ran them down the structural wall as well and up through a conduit in the tunnel.
➢ Since we were converting from wall overs to a gas range it allowed us to utilize the 220 feed for the wall ovens to provide a new sub panel for all the new kitchen circuits
➢ Due to framing deficiencies inherited from the original build there was a 1-1/2” differential in the floor-to-ceiling height over a 20 foot span; by utilizing the process of cutting and furring coupled with the crown moulding details on the cabinet elevations we were able to mask the problem and provide seamless transitions between the cabinet components.
Evidence of superior craftsmanship:
➢ uniquely designed, one-of-a-kind metal “X” end panels on the large island. The end panels were custom made in the Realty Restoration LLC shop and fitted to the exact dimensions of the island. The welding seams are completely indistinguishable - the posts look like they are cut from a single sheet of metal
➢ square metal posts on the small island were also custom made and designed to compliment and carry through the metal element s throughout the kitchen
➢ the beautiful, oversized end panels on the pantry cabinets which give the breakfast nook a tailored look
➢ integrating a large format 5 piece Versailles tile pattern to seamlessly flow from the existing spaces into the new kitchen space
➢ By constructing a custom cabinet that jogged around a corner we could not remodel (housing the entry way coat closet) we were able to camouflage the adjacent wall offset within the upper and lower cabinets. By designing around the existing jog in the structural walls we accomplished a few things: we were able to find the space to house, and hide, the microwave and toaster oven yet still have a clean cohesive appearance from the kitchen side. Additionally, the owners were able to keep their much needed coat closet and we didn’t have to increase the budget with unnecessary structural work.




Sponsored
Columbus, OH

Structural Remodeling
Franklin County's Heavy Timber Specialists | Best of Houzz 2020!
 Gayler Design Build
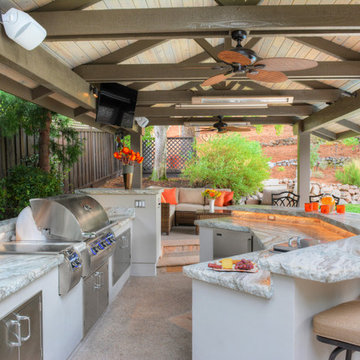
With a sizeable backyard and a love for entertaining, these clients wanted to build a covered outdoor kitchen/bar and seating area. They had one specific area by the side of their pool, with limited space, to build the outdoor kitchen.
There were immediate concerns about how to incorporate the two steps in the middle of the patio area; and they really wanted a bar that could seat at least eight people (to include an additional seating area with couches and chairs). This couple also wanted to use their outdoor living space year round. The kitchen needed ample storage and had to be easy to maintain. And last, but not least, they wanted it to look beautiful!
This 16 x 26 ft clear span pavilion was a great fit for the area we had to work with. By using wrapped steel columns in the corners in 6-foot piers, carpenter-built trusses, and no ridge beams, we created good space usage underneath the pavilion. The steps were incorporated into the space to make the transition between the kitchen area and seating area, which looked like they were meant to be there. With a little additional flagstone work, we brought the curve of the step to meet the back island, which also created more floor space in the seating area.
Two separate islands were created for the outdoor kitchen/bar area, built with galvanized metal studs to allow for more room inside the islands (for appliances and cabinets). We also used backer board and covered the islands with smooth finish stucco.
The back island housed the BBQ, a 2-burner cooktop and sink, along with four cabinets, one of which was a pantry style cabinet with pull out shelves (air tight, dust proof and spider proof—also very important to the client).
The front island housed the refrigerator, ice maker, and counter top cooler, with another set of pantry style, air tight cabinets. By curving the outside edge of the countertop we maximized the bar area and created seating for eight. In addition, we filled in the curve on the inside of the island with counter top and created two additional seats. In total, there was seating for ten people.
Infrared heaters, ceiling fans and shades were added for climate control, so the outdoor living space could be used year round. A TV for sporting events and SONOS for music, were added for entertaining enjoyment. Track lighting, as well as LED tape lights under the backsplash, provided ideal lighting for after dark usage.
The clients selected honed, Fantasy Brown Satin Quartzite, with a chipped edge detail for their countertop. This beautiful, linear design marble is very easy to maintain. The base of the islands were completed in stucco and painted satin gray to complement their house color. The posts were painted with Monterey Cliffs, which matched the color of the house shutter trim. The pavilion ceiling consisted of 2 x 6-T & G pine and was stained platinum gray.
In the few months since the outdoor living space was built, the clients said they have used it for more than eight parties and can’t wait to use it for the holidays! They also made sure to tell us that the look, feel and maintenance of the area all are perfect!
 Innovative Design Build
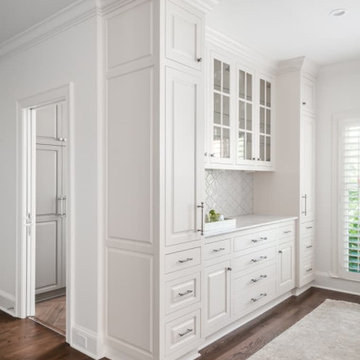
Our clients wanted to utilize this particular area of their home and really give it a function. It has been many things over the years: bonus room, dining area, etc. The kitchen is the natural gathering spot. They wanted to create a space that was an extension of the kitchen for entertaining and serving family and friends.
Architect, Cynthia Karegeannes was hired to draw up plans for a mudroom to corral the couple’s two dogs and stash the pet’s leashes, treats, etc. A large butler pantry was imagined with a full size refrigerator, prep sink, dishwasher and custom cabinetry to have items handy for entertaining. Innovative Construction, helped finalize the details and implemented the plans for the new addition. Interior Designer, Beth Weltlich with The House Dressing worked with homeowners, to select materials and finishes to unify the areas of the existing kitchen and the new spaces. A custom banquette was created with room under the staircase so that all of the space could be utilized. Furniture and accessories are still in the works as the homeowners let the area evolve to see exactly what their needs are. A collaborative effort-for sure!
The challenges included creating three separate areas (mudroom, banquette and butler pantry) with storage and versatility in one existing space. Having this additional space that was not always utilized, the homeowners feel the new addition will become an integral part of the families' living area.
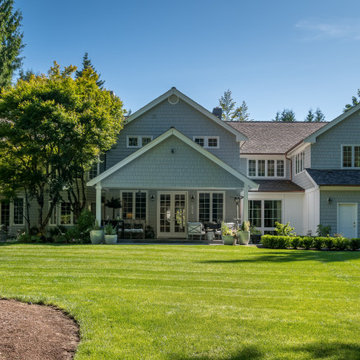
 McAdams Remodeling & Design
Roughly 500 square feet was added to the home which gave the couple an additional bay to their garage. Above the garage addition, they added a room dedicated to Jonathan’s whiskey collection, and a new game room
and a "secret" room.
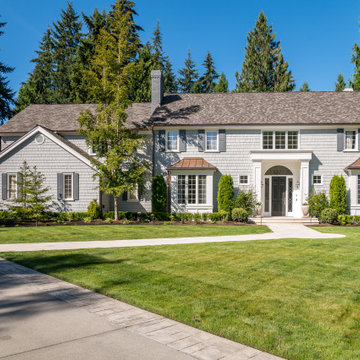 McAdams Remodeling & Design
Roughly 500 square feet was added to the home which gave the couple an additional bay to their garage. Above the garage addition, they added a room dedicated to Jonathan’s whiskey collection, and a new game room
and a "secret" room.
Sponsored
Columbus, OH
Structural Remodeling
Franklin County's Heavy Timber Specialists | Best of Houzz 2020!
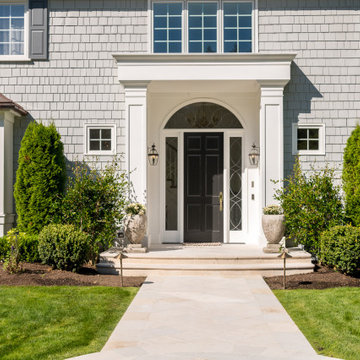 McAdams Remodeling & Design
Roughly 500 square feet was added to the home which gave the couple an additional bay to their garage. Above the garage addition, they added a room dedicated to Jonathan’s whiskey collection, and a new game room
and a "secret" room.
 3north
Do you move to the suburbs, make do, or add on? For a couple who wanted more kitchen and room to spread out and entertain, the decision was made to stay and grow. An addition was made behind their home that created an entirely new kitchen and family room, complete with vaulted ceilings and custom light fixtures. The addition itself is also not highly visible from the road, cutting down on the “hunchback” look of so many older city homes with massive additions. Windows give the space abundant natural light, with doors that inconspicuously blend indoor and outdoor living – an all in the home and neighborhood the couple loves best.
14