
Search results for "Crucial material" in Home Design Ideas
 River Valley Landscapes
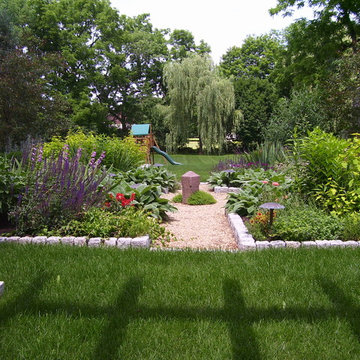
The property is one of the original farm houses located on the main street of a small town. It has been in the family for many years and our client just inherited the property. They were trying to have balance of preserving the old while realizing modern day living has its benefits too. The house had a large addition added using mostly old style materials, but designed with function and modern day luxuries. Our goal was to carry that theme to the outside.
Our first problem we had to address was how to transition between the first floor elevation changes. The lower room was the husband’s office. He stated in the future he may have clients over and it would be nice to have an area to sit outside. The wife’s main concern was to renew the four corner garden. She also felt it was very important to be able to see it from the kitchen area. Finally there was an old wishing well stuck right outside the kitchen. They both felt it would be neat to be able to incorporate this in some how. They wanted a patio area with a built in grill to accommodate there family and friends. They also wanted to keep a large play area for the kids.
We were able to pull this off successfully. We addressed the first issue by having a small lower level flagstone area. This area is large enough for 1 to 2 people to sit comfortably. It also provides a transition from his office to the larger patio area. We installed a simple small gravel sitting area opposite of the main patio. This provides our client a secluded place to relax or do business. Mrs.... told me she is amazed how much her and her husband enjoys this area. It is so peaceful looking at the small creek over a glass of wine.
We built a natural limestone retaining wall to create the patio terrace. The stone was chosen to extend the houses architectural elements into the landscape. Irregular broken flagstone was used to give it a more casual feel. We installed three Serviceberries into the patio terrace to replace some trees that were taken down during the remodeling. She was very concern that they would block the view of the four corner garden. We new they were crucial to nestle in the terrace, so we placed them for a couple days for her to decide. Fortunately she agreed they not only kept the view open, but helped frame the garden.
The four corner garden was designed to be viewed from afar and experienced up close. We wanted the space to have some formal structure while keeping with the casual farm house feel. Another natural limestone retaining wall was created. This leveled the garden terrace and helped associate it with the rest of the property. The four corner garden is nestled into the existing woods edge. This provides three distinct experiences to entering the garden; a more formal from the driveway, an open feel from the lower lawn, and a more natural / casual experience from the wooded area. The Plymouth brown gravel was used for the center of the garden. This helped highlight the stone post that was found during construction. The gravel also brings the sense of sound into the garden space. Lamb’s ear was chosen as a fun way to get kids interest in horticulture.
The balance of using the new to create the old feel is what makes this project a success. The property has already hosted a local historical society event and won an award for its preservation efforts. When Mrs.... can’t find her husband, she knows he is either reading the newspaper by the grill or resting in the hammock along the wood’s path.
 River Valley Landscapes
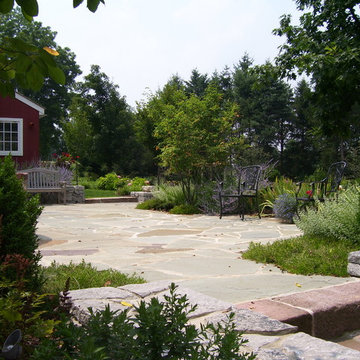
The property is one of the original farm houses located on the main street of a small town. It has been in the family for many years and our client just inherited the property. They were trying to have balance of preserving the old while realizing modern day living has its benefits too. The house had a large addition added using mostly old style materials, but designed with function and modern day luxuries. Our goal was to carry that theme to the outside.
Our first problem we had to address was how to transition between the first floor elevation changes. The lower room was the husband’s office. He stated in the future he may have clients over and it would be nice to have an area to sit outside. The wife’s main concern was to renew the four corner garden. She also felt it was very important to be able to see it from the kitchen area. Finally there was an old wishing well stuck right outside the kitchen. They both felt it would be neat to be able to incorporate this in some how. They wanted a patio area with a built in grill to accommodate there family and friends. They also wanted to keep a large play area for the kids.
We were able to pull this off successfully. We addressed the first issue by having a small lower level flagstone area. This area is large enough for 1 to 2 people to sit comfortably. It also provides a transition from his office to the larger patio area. We installed a simple small gravel sitting area opposite of the main patio. This provides our client a secluded place to relax or do business. Mrs.... told me she is amazed how much her and her husband enjoys this area. It is so peaceful looking at the small creek over a glass of wine.
We built a natural limestone retaining wall to create the patio terrace. The stone was chosen to extend the houses architectural elements into the landscape. Irregular broken flagstone was used to give it a more casual feel. We installed three Serviceberries into the patio terrace to replace some trees that were taken down during the remodeling. She was very concern that they would block the view of the four corner garden. We new they were crucial to nestle in the terrace, so we placed them for a couple days for her to decide. Fortunately she agreed they not only kept the view open, but helped frame the garden.
The four corner garden was designed to be viewed from afar and experienced up close. We wanted the space to have some formal structure while keeping with the casual farm house feel. Another natural limestone retaining wall was created. This leveled the garden terrace and helped associate it with the rest of the property. The four corner garden is nestled into the existing woods edge. This provides three distinct experiences to entering the garden; a more formal from the driveway, an open feel from the lower lawn, and a more natural / casual experience from the wooded area. The Plymouth brown gravel was used for the center of the garden. This helped highlight the stone post that was found during construction. The gravel also brings the sense of sound into the garden space. Lamb’s ear was chosen as a fun way to get kids interest in horticulture.
The balance of using the new to create the old feel is what makes this project a success. The property has already hosted a local historical society event and won an award for its preservation efforts. When Mrs.... can’t find her husband, she knows he is either reading the newspaper by the grill or resting in the hammock along the wood’s path.

 Talon Construction Inc.
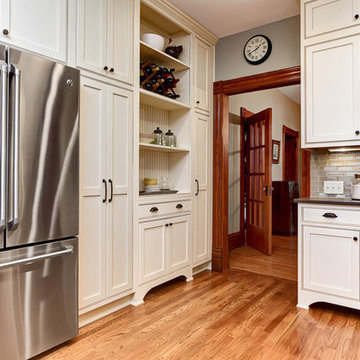
Designing and building a kitchen addition is a complex process that involves multiple steps and considerations. Here is a general outline to help you get started on your kitchen addition project:
Define Your Goals and Budget:
• Determine the purpose of the kitchen addition. Is it for more cooking space, a dining area, or a combination of both?
• Establish a realistic budget for your project. Consider all costs, including construction, permits, materials, and furnishings.
Hire a Design Professional:
• Seek the services of a design build company who specializes in kitchen additions.
• Discuss your vision, needs, and budget with the design professional to create a design concept.
Site Evaluation:
• Assess the existing space and structural condition of your home to ensure it can support the addition.
• Consider factors like zoning regulations, setbacks, and building codes.
Design Development:
• Collaborate with your design professional to refine the concept, including the layout, size, and architectural style.
• Choose materials, finishes, and fixtures that fit your design and budget.
Obtain Permits:
• Consult with your local design build contractor to determine the necessary permits and approvals.
• Prepare and submit all required documents, including architectural drawings and engineering plans.
Create Construction Documents:
• Work with your design build professional to develop detailed construction drawings and specifications.
• These documents will serve as a guide for contractors during construction.
Hire a design build contractor:
• Check references, credentials, and licenses before selecting a contractor.
• Sign a detailed contract that outlines the scope of work, timeline, and payment schedule.
Construction Phase:
• Demolition: If needed, remove any existing structures or walls.
• Foundation: Construct the foundation for the addition.
• Framing: Build the structural framework of the addition.
• Plumbing, Electrical, and HVAC: Install or update utilities as required.
• Insulation: Ensure proper insulation for energy efficiency.
• Drywall and Finish Work: Complete the walls and ceilings.
• Flooring and Cabinetry: Install flooring and kitchen cabinets.
• Appliances and Fixtures: Add appliances, plumbing fixtures, and lighting.
• Paint and Finish: Apply paint and finishes to achieve the desired look.
• Final Inspection: Schedule inspections to ensure compliance with building codes.
Final Inspections and Approvals:
• Arrange for final inspections to ensure the addition meets all safety and code requirements.
• Obtain any necessary certificates of occupancy or compliance.
Move In and Enjoy:
• Once all inspections and approvals are received, you can move into your new kitchen addition and start enjoying it.
Remember that every kitchen addition project is unique, so adapt this outline to your specific needs and circumstances. Consulting with professionals and obtaining the required permits and inspections is crucial to a successful and safe project.
Find the right local pro for your project
 Talon Construction Inc.
Designing and building a kitchen addition is a complex process that involves multiple steps and considerations. Here is a general outline to help you get started on your kitchen addition project:
Define Your Goals and Budget:
• Determine the purpose of the kitchen addition. Is it for more cooking space, a dining area, or a combination of both?
• Establish a realistic budget for your project. Consider all costs, including construction, permits, materials, and furnishings.
Hire a Design Professional:
• Seek the services of a design build company who specializes in kitchen additions.
• Discuss your vision, needs, and budget with the design professional to create a design concept.
Site Evaluation:
• Assess the existing space and structural condition of your home to ensure it can support the addition.
• Consider factors like zoning regulations, setbacks, and building codes.
Design Development:
• Collaborate with your design professional to refine the concept, including the layout, size, and architectural style.
• Choose materials, finishes, and fixtures that fit your design and budget.
Obtain Permits:
• Consult with your local design build contractor to determine the necessary permits and approvals.
• Prepare and submit all required documents, including architectural drawings and engineering plans.
Create Construction Documents:
• Work with your design build professional to develop detailed construction drawings and specifications.
• These documents will serve as a guide for contractors during construction.
Hire a design build contractor:
• Check references, credentials, and licenses before selecting a contractor.
• Sign a detailed contract that outlines the scope of work, timeline, and payment schedule.
Construction Phase:
• Demolition: If needed, remove any existing structures or walls.
• Foundation: Construct the foundation for the addition.
• Framing: Build the structural framework of the addition.
• Plumbing, Electrical, and HVAC: Install or update utilities as required.
• Insulation: Ensure proper insulation for energy efficiency.
• Drywall and Finish Work: Complete the walls and ceilings.
• Flooring and Cabinetry: Install flooring and kitchen cabinets.
• Appliances and Fixtures: Add appliances, plumbing fixtures, and lighting.
• Paint and Finish: Apply paint and finishes to achieve the desired look.
• Final Inspection: Schedule inspections to ensure compliance with building codes.
Final Inspections and Approvals:
• Arrange for final inspections to ensure the addition meets all safety and code requirements.
• Obtain any necessary certificates of occupancy or compliance.
Move In and Enjoy:
• Once all inspections and approvals are received, you can move into your new kitchen addition and start enjoying it.
Remember that every kitchen addition project is unique, so adapt this outline to your specific needs and circumstances. Consulting with professionals and obtaining the required permits and inspections is crucial to a successful and safe project.
 Talon Construction Inc.
Designing and building a kitchen addition is a complex process that involves multiple steps and considerations. Here is a general outline to help you get started on your kitchen addition project:
Define Your Goals and Budget:
• Determine the purpose of the kitchen addition. Is it for more cooking space, a dining area, or a combination of both?
• Establish a realistic budget for your project. Consider all costs, including construction, permits, materials, and furnishings.
Hire a Design Professional:
• Seek the services of a design build company who specializes in kitchen additions.
• Discuss your vision, needs, and budget with the design professional to create a design concept.
Site Evaluation:
• Assess the existing space and structural condition of your home to ensure it can support the addition.
• Consider factors like zoning regulations, setbacks, and building codes.
Design Development:
• Collaborate with your design professional to refine the concept, including the layout, size, and architectural style.
• Choose materials, finishes, and fixtures that fit your design and budget.
Obtain Permits:
• Consult with your local design build contractor to determine the necessary permits and approvals.
• Prepare and submit all required documents, including architectural drawings and engineering plans.
Create Construction Documents:
• Work with your design build professional to develop detailed construction drawings and specifications.
• These documents will serve as a guide for contractors during construction.
Hire a design build contractor:
• Check references, credentials, and licenses before selecting a contractor.
• Sign a detailed contract that outlines the scope of work, timeline, and payment schedule.
Construction Phase:
• Demolition: If needed, remove any existing structures or walls.
• Foundation: Construct the foundation for the addition.
• Framing: Build the structural framework of the addition.
• Plumbing, Electrical, and HVAC: Install or update utilities as required.
• Insulation: Ensure proper insulation for energy efficiency.
• Drywall and Finish Work: Complete the walls and ceilings.
• Flooring and Cabinetry: Install flooring and kitchen cabinets.
• Appliances and Fixtures: Add appliances, plumbing fixtures, and lighting.
• Paint and Finish: Apply paint and finishes to achieve the desired look.
• Final Inspection: Schedule inspections to ensure compliance with building codes.
Final Inspections and Approvals:
• Arrange for final inspections to ensure the addition meets all safety and code requirements.
• Obtain any necessary certificates of occupancy or compliance.
Move In and Enjoy:
• Once all inspections and approvals are received, you can move into your new kitchen addition and start enjoying it.
Remember that every kitchen addition project is unique, so adapt this outline to your specific needs and circumstances. Consulting with professionals and obtaining the required permits and inspections is crucial to a successful and safe project.
 Talon Construction Inc.
Designing and building a kitchen addition is a complex process that involves multiple steps and considerations. Here is a general outline to help you get started on your kitchen addition project:
Define Your Goals and Budget:
• Determine the purpose of the kitchen addition. Is it for more cooking space, a dining area, or a combination of both?
• Establish a realistic budget for your project. Consider all costs, including construction, permits, materials, and furnishings.
Hire a Design Professional:
• Seek the services of a design build company who specializes in kitchen additions.
• Discuss your vision, needs, and budget with the design professional to create a design concept.
Site Evaluation:
• Assess the existing space and structural condition of your home to ensure it can support the addition.
• Consider factors like zoning regulations, setbacks, and building codes.
Design Development:
• Collaborate with your design professional to refine the concept, including the layout, size, and architectural style.
• Choose materials, finishes, and fixtures that fit your design and budget.
Obtain Permits:
• Consult with your local design build contractor to determine the necessary permits and approvals.
• Prepare and submit all required documents, including architectural drawings and engineering plans.
Create Construction Documents:
• Work with your design build professional to develop detailed construction drawings and specifications.
• These documents will serve as a guide for contractors during construction.
Hire a design build contractor:
• Check references, credentials, and licenses before selecting a contractor.
• Sign a detailed contract that outlines the scope of work, timeline, and payment schedule.
Construction Phase:
• Demolition: If needed, remove any existing structures or walls.
• Foundation: Construct the foundation for the addition.
• Framing: Build the structural framework of the addition.
• Plumbing, Electrical, and HVAC: Install or update utilities as required.
• Insulation: Ensure proper insulation for energy efficiency.
• Drywall and Finish Work: Complete the walls and ceilings.
• Flooring and Cabinetry: Install flooring and kitchen cabinets.
• Appliances and Fixtures: Add appliances, plumbing fixtures, and lighting.
• Paint and Finish: Apply paint and finishes to achieve the desired look.
• Final Inspection: Schedule inspections to ensure compliance with building codes.
Final Inspections and Approvals:
• Arrange for final inspections to ensure the addition meets all safety and code requirements.
• Obtain any necessary certificates of occupancy or compliance.
Move In and Enjoy:
• Once all inspections and approvals are received, you can move into your new kitchen addition and start enjoying it.
Remember that every kitchen addition project is unique, so adapt this outline to your specific needs and circumstances. Consulting with professionals and obtaining the required permits and inspections is crucial to a successful and safe project.
 Talon Construction Inc.
Designing and building a kitchen addition is a complex process that involves multiple steps and considerations. Here is a general outline to help you get started on your kitchen addition project:
Define Your Goals and Budget:
• Determine the purpose of the kitchen addition. Is it for more cooking space, a dining area, or a combination of both?
• Establish a realistic budget for your project. Consider all costs, including construction, permits, materials, and furnishings.
Hire a Design Professional:
• Seek the services of a design build company who specializes in kitchen additions.
• Discuss your vision, needs, and budget with the design professional to create a design concept.
Site Evaluation:
• Assess the existing space and structural condition of your home to ensure it can support the addition.
• Consider factors like zoning regulations, setbacks, and building codes.
Design Development:
• Collaborate with your design professional to refine the concept, including the layout, size, and architectural style.
• Choose materials, finishes, and fixtures that fit your design and budget.
Obtain Permits:
• Consult with your local design build contractor to determine the necessary permits and approvals.
• Prepare and submit all required documents, including architectural drawings and engineering plans.
Create Construction Documents:
• Work with your design build professional to develop detailed construction drawings and specifications.
• These documents will serve as a guide for contractors during construction.
Hire a design build contractor:
• Check references, credentials, and licenses before selecting a contractor.
• Sign a detailed contract that outlines the scope of work, timeline, and payment schedule.
Construction Phase:
• Demolition: If needed, remove any existing structures or walls.
• Foundation: Construct the foundation for the addition.
• Framing: Build the structural framework of the addition.
• Plumbing, Electrical, and HVAC: Install or update utilities as required.
• Insulation: Ensure proper insulation for energy efficiency.
• Drywall and Finish Work: Complete the walls and ceilings.
• Flooring and Cabinetry: Install flooring and kitchen cabinets.
• Appliances and Fixtures: Add appliances, plumbing fixtures, and lighting.
• Paint and Finish: Apply paint and finishes to achieve the desired look.
• Final Inspection: Schedule inspections to ensure compliance with building codes.
Final Inspections and Approvals:
• Arrange for final inspections to ensure the addition meets all safety and code requirements.
• Obtain any necessary certificates of occupancy or compliance.
Move In and Enjoy:
• Once all inspections and approvals are received, you can move into your new kitchen addition and start enjoying it.
Remember that every kitchen addition project is unique, so adapt this outline to your specific needs and circumstances. Consulting with professionals and obtaining the required permits and inspections is crucial to a successful and safe project.
Sponsored
Plain City, OH

Kuhns Contracting, Inc.
Central Ohio's Trusted Home Remodeler Specializing in Kitchens & Baths
 Rhodes Architecture + Light
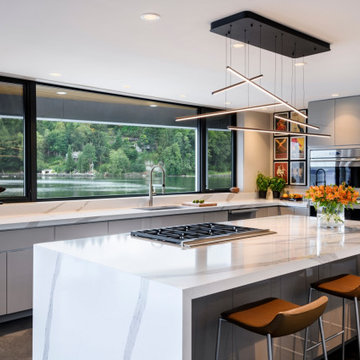
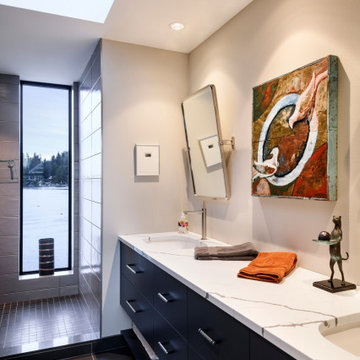
A transformation inspired by the owner’s love of modern architecture, art and color (and the adjacent sand, rock, water, and the northwest landscape), the Indianola House sought to bring the soul of a home to a colorless muted box. The original house was a drab 1990’s-era box with no personality or presence sited on a beautiful secluded bay, facing water and island views, northwest of the City of Seattle. The existing mono-colored stucco-clad exterior and pyramidal glass-block openings had led the neighborhood to dub the structure, unflatteringly, “The Miami Vice House”.
Rhodes Architecture’s Residential Architects careful use of natural light, rich, collaged finishes and ability to open the house to gardens, beach, and outdoor gathering was critical to the design. The house soon became “The Gallery”.
The original home’s grey stucco exterior made the house seem both large and featureless; the introduction of no-maintenance exterior materials that collage and complement each other was a goal of the homeowner and the Seattle Architects who teamed up for this residential design. The bloated scale of the house cried out for the establishment and definition of the parts of the structure, a breaking down of the home’s form and its apparent bland size.
Living, sleeping, and bathing areas that started as staid spaces were in need of opening to the natural environment with additions of large doors, folding glass walls and useable balconies were crucial to each space having a dialogue with the outdoors.
The owner’s extensive art collection was highlighted and became the focus of interior places, well-lit naturally and through a new lighting system. Energy use and sustainable systems were a key component of the design which used high-efficacy lighting, better cladding on a rain-screen system, high-efficiency doors and windows, new insulation and weather barriers, and which added a photovoltaic-generated electrical system. The contemporary design sought to integrate all of these systems, materials, and finishes into a seamless whole that lent interest and drama to a residence which was previously lusterless.
How radically this house was transformed is evident in the exteriors, gardens and the natural spaces the house now opens to, as well as the gallery-like interiors. This home is a stunning testament to what is possible “before-and-after” when remade by Rhodes Architecture + Light.
The clients are an older couple with long professional and political careers, a love of art and a clear desire to connect with the Northwest environment and enliven their daily lives with spaces full of color and natural light.
Rhodes Architecture + Light was hired in 2019 to add new exteriors and interiors, natural light, larger openings to beach and bay, seismic and foundation upgrades to the home, and to infuse life into the house through the re-use of existing space and varied materials, color, textures, and lighting. The only actual change to the exterior “shell” of the house was the introduction of a low “gull-wing” roof with wood soffits above the central atrium space, to add drama and bring natural light into the entry gallery space. Interior spaces, including bedrooms and bathrooms, were re-planned and opened to each other, to greater natural light, to roof decks, and to the incredible views and sea-side environment.
The Builder, Fairbank Construction Company of Bainbridge Island, Washington, met the challenge of the design, first completely deconstructing the finishes inside and out, then precisely interlocking new claddings, windows and doors, cabinetry, finishes and a new gull-wing central roof in a beautiful transformation. The construction was total, thorough, and very detailed, resulting a house that, far from seeming a “remodeling”, is far more present and fitting to the owner’s lives and the natural environment than the house we started with.
 Rhodes Architecture + Light
A transformation inspired by the owner’s love of modern architecture, art and color (and the adjacent sand, rock, water, and the northwest landscape), the Indianola House sought to bring the soul of a home to a colorless muted box. The original house was a drab 1990’s-era box with no personality or presence sited on a beautiful secluded bay, facing water and island views, northwest of the City of Seattle. The existing mono-colored stucco-clad exterior and pyramidal glass-block openings had led the neighborhood to dub the structure, unflatteringly, “The Miami Vice House”.
Rhodes Architecture’s Residential Architects careful use of natural light, rich, collaged finishes and ability to open the house to gardens, beach, and outdoor gathering was critical to the design. The house soon became “The Gallery”.
The original home’s grey stucco exterior made the house seem both large and featureless; the introduction of no-maintenance exterior materials that collage and complement each other was a goal of the homeowner and the Seattle Architects who teamed up for this residential design. The bloated scale of the house cried out for the establishment and definition of the parts of the structure, a breaking down of the home’s form and its apparent bland size.
Living, sleeping, and bathing areas that started as staid spaces were in need of opening to the natural environment with additions of large doors, folding glass walls and useable balconies were crucial to each space having a dialogue with the outdoors.
The owner’s extensive art collection was highlighted and became the focus of interior places, well-lit naturally and through a new lighting system. Energy use and sustainable systems were a key component of the design which used high-efficacy lighting, better cladding on a rain-screen system, high-efficiency doors and windows, new insulation and weather barriers, and which added a photovoltaic-generated electrical system. The contemporary design sought to integrate all of these systems, materials, and finishes into a seamless whole that lent interest and drama to a residence which was previously lusterless.
How radically this house was transformed is evident in the exteriors, gardens and the natural spaces the house now opens to, as well as the gallery-like interiors. This home is a stunning testament to what is possible “before-and-after” when remade by Rhodes Architecture + Light.
The clients are an older couple with long professional and political careers, a love of art and a clear desire to connect with the Northwest environment and enliven their daily lives with spaces full of color and natural light.
Rhodes Architecture + Light was hired in 2019 to add new exteriors and interiors, natural light, larger openings to beach and bay, seismic and foundation upgrades to the home, and to infuse life into the house through the re-use of existing space and varied materials, color, textures, and lighting. The only actual change to the exterior “shell” of the house was the introduction of a low “gull-wing” roof with wood soffits above the central atrium space, to add drama and bring natural light into the entry gallery space. Interior spaces, including bedrooms and bathrooms, were re-planned and opened to each other, to greater natural light, to roof decks, and to the incredible views and sea-side environment.
The Builder, Fairbank Construction Company of Bainbridge Island, Washington, met the challenge of the design, first completely deconstructing the finishes inside and out, then precisely interlocking new claddings, windows and doors, cabinetry, finishes and a new gull-wing central roof in a beautiful transformation. The construction was total, thorough, and very detailed, resulting a house that, far from seeming a “remodeling”, is far more present and fitting to the owner’s lives and the natural environment than the house we started with.
 Timely Designs
 In California's Central Coast, custom homes require interior design that evolves with occupants, especially retired families aiming to age gracefully. At Timely Designs, we craft functional, high-end modern living spaces through a collaborative process, ensuring every detail reflects a unique vision for a enduring haven.
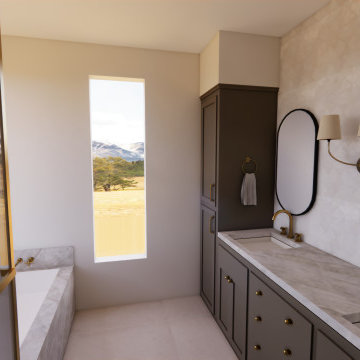
Our journey begins by understanding clients' current desires and future comfort. For this master bathroom, retired clients wanted a space that would serve them beautifully as they aged. The "organic, embracive, earthy" palette created a tranquil atmosphere, while a meticulous space plan optimized flow and accessibility. Elements like the walk-in shower, freestanding tub, and double vanity were strategically placed for ease of movement, anticipating future mobility needs without sacrificing luxury or charm. This foresight is a hallmark of professional expertise, ensuring long-term usability.
Material selection focused on premium elements for a serene, spa-like experience. Light-toned, veined stone tile in the shower and around the tub offered luxurious calm, integrating with the home's elegance. The vanity provided ample storage, maintaining an airy feel. Every surface was chosen for aesthetics, longevity, and ease of maintenance, crucial for aging-in-place. Stone slab surround, rich accents, and elegant brass fixtures exemplified our commitment to timeless beauty and practical durability. Strategic lighting and thoughtful furnishings ensured functionality and invitation. A layered lighting scheme incorporated ambient, task, and accent lighting. Large windows maximized natural light, connecting the bathroom to the Central Coast landscape. Selections were chosen for comfort and safety, including non-slip elements and accessible features. Each selection harmonized with the overall design, balancing modern aesthetics with classic details.
This project highlights the essential role of an experienced interior designer in custom home builds, especially for long-term living. We offer a holistic perspective, anticipating future needs, and possess expertise in accessible design and material longevity. We act as a critical partner, proactively solving challenges and saving clients time, stress, and resources. Ultimately, we integrate practicality with unparalleled style, transforming a house into a dream home for every chapter of life.
At Timely Designs, we believe homes should evolve with occupants, offering comfort, beauty, and unwavering functionality. This master bathroom transformation proves how thoughtful design creates a stunning, lifelong space. We craft personalized havens where Central Coast families can thrive and create lasting memories. Ready to transform your home into a personalized sanctuary? Contact Timely Designs today for a consultation on your custom residential design project. Let’s design for your life, beautifully.
 Talon Construction Inc.
Designing and building a kitchen addition is a complex process that involves multiple steps and considerations. Here is a general outline to help you get started on your kitchen addition project:
Define Your Goals and Budget:
• Determine the purpose of the kitchen addition. Is it for more cooking space, a dining area, or a combination of both?
• Establish a realistic budget for your project. Consider all costs, including construction, permits, materials, and furnishings.
Hire a Design Professional:
• Seek the services of a design build company who specializes in kitchen additions.
• Discuss your vision, needs, and budget with the design professional to create a design concept.
Site Evaluation:
• Assess the existing space and structural condition of your home to ensure it can support the addition.
• Consider factors like zoning regulations, setbacks, and building codes.
Design Development:
• Collaborate with your design professional to refine the concept, including the layout, size, and architectural style.
• Choose materials, finishes, and fixtures that fit your design and budget.
Obtain Permits:
• Consult with your local design build contractor to determine the necessary permits and approvals.
• Prepare and submit all required documents, including architectural drawings and engineering plans.
Create Construction Documents:
• Work with your design build professional to develop detailed construction drawings and specifications.
• These documents will serve as a guide for contractors during construction.
Hire a design build contractor:
• Check references, credentials, and licenses before selecting a contractor.
• Sign a detailed contract that outlines the scope of work, timeline, and payment schedule.
Construction Phase:
• Demolition: If needed, remove any existing structures or walls.
• Foundation: Construct the foundation for the addition.
• Framing: Build the structural framework of the addition.
• Plumbing, Electrical, and HVAC: Install or update utilities as required.
• Insulation: Ensure proper insulation for energy efficiency.
• Drywall and Finish Work: Complete the walls and ceilings.
• Flooring and Cabinetry: Install flooring and kitchen cabinets.
• Appliances and Fixtures: Add appliances, plumbing fixtures, and lighting.
• Paint and Finish: Apply paint and finishes to achieve the desired look.
• Final Inspection: Schedule inspections to ensure compliance with building codes.
Final Inspections and Approvals:
• Arrange for final inspections to ensure the addition meets all safety and code requirements.
• Obtain any necessary certificates of occupancy or compliance.
Move In and Enjoy:
• Once all inspections and approvals are received, you can move into your new kitchen addition and start enjoying it.
Remember that every kitchen addition project is unique, so adapt this outline to your specific needs and circumstances. Consulting with professionals and obtaining the required permits and inspections is crucial to a successful and safe project.
 Talon Construction Inc.
Designing and building a kitchen addition is a complex process that involves multiple steps and considerations. Here is a general outline to help you get started on your kitchen addition project:
Define Your Goals and Budget:
• Determine the purpose of the kitchen addition. Is it for more cooking space, a dining area, or a combination of both?
• Establish a realistic budget for your project. Consider all costs, including construction, permits, materials, and furnishings.
Hire a Design Professional:
• Seek the services of a design build company who specializes in kitchen additions.
• Discuss your vision, needs, and budget with the design professional to create a design concept.
Site Evaluation:
• Assess the existing space and structural condition of your home to ensure it can support the addition.
• Consider factors like zoning regulations, setbacks, and building codes.
Design Development:
• Collaborate with your design professional to refine the concept, including the layout, size, and architectural style.
• Choose materials, finishes, and fixtures that fit your design and budget.
Obtain Permits:
• Consult with your local design build contractor to determine the necessary permits and approvals.
• Prepare and submit all required documents, including architectural drawings and engineering plans.
Create Construction Documents:
• Work with your design build professional to develop detailed construction drawings and specifications.
• These documents will serve as a guide for contractors during construction.
Hire a design build contractor:
• Check references, credentials, and licenses before selecting a contractor.
• Sign a detailed contract that outlines the scope of work, timeline, and payment schedule.
Construction Phase:
• Demolition: If needed, remove any existing structures or walls.
• Foundation: Construct the foundation for the addition.
• Framing: Build the structural framework of the addition.
• Plumbing, Electrical, and HVAC: Install or update utilities as required.
• Insulation: Ensure proper insulation for energy efficiency.
• Drywall and Finish Work: Complete the walls and ceilings.
• Flooring and Cabinetry: Install flooring and kitchen cabinets.
• Appliances and Fixtures: Add appliances, plumbing fixtures, and lighting.
• Paint and Finish: Apply paint and finishes to achieve the desired look.
• Final Inspection: Schedule inspections to ensure compliance with building codes.
Final Inspections and Approvals:
• Arrange for final inspections to ensure the addition meets all safety and code requirements.
• Obtain any necessary certificates of occupancy or compliance.
Move In and Enjoy:
• Once all inspections and approvals are received, you can move into your new kitchen addition and start enjoying it.
Remember that every kitchen addition project is unique, so adapt this outline to your specific needs and circumstances. Consulting with professionals and obtaining the required permits and inspections is crucial to a successful and safe project.
 Get My Rugs LLC
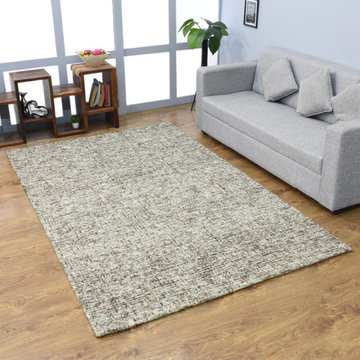
Decorate your bedroom with the best area rug, a crucial element that enhances both style and comfort. An area rug does more than cover your floor; it adds warmth, texture, and personality to your space, making it an essential part of your bedroom decor. With a wide variety of options available, you can find the perfect rug by focusing on design, material, and functionality.
Design and Style: Select a rug that complements your bedroom’s theme, whether it’s contemporary, modern, traditional, mid-century modern, or transitional. Hand-tufted and hand-knotted rugs bring luxury and intricate craftsmanship, perfect for adding elegance. For a sleek, modern look, machine-woven rugs offer vibrant patterns and durability, often featuring heat-set fibers for long-lasting use. Flat-woven rugs, such as kilims, are versatile and reversible, fitting seamlessly into various decor styles.
Materials and Comfort: The material of your rug plays a key role in its appearance and comfort. Shag and flokati rugs provide a plush, cozy feel with their long, soft fibers, ideal for creating a welcoming bedroom retreat. Hand-loomed rugs add unique textures and an artisanal touch, while braided and hand-hooked rugs introduce charming, handcrafted elements. Option for machine washable rugs for easy upkeep, ensuring your rug stays fresh and clean with minimal effort.
Practical Features: Choose rugs with practical features to enhance functionality. Stain-resistant and water-resistant rugs help maintain a clean appearance and withstand spills. Non-slip and adhesive backings are essential for safety on hardwood floors, preventing slips and ensuring the rug stays in place. Cushioned rugs offer added comfort, making your bedroom even more luxurious and inviting.
Customization and Personalization: Add a personal touch with custom or personalized rug sets. An 8x10 area rug provides ample coverage and can be tailored to fit your bedroom’s dimensions perfectly. Features like fringe details or organic textures allow you to customize the rug to reflect your unique style and match your decor.
Versatility and Maintenance: The 15 best area rugs offer a broad range of styles and features to suit any bedroom decor. From distressed designs that add character to contemporary patterns that bring a modern edge, there’s a rug to fit every aesthetic. Look for options that combine style with practicality to ensure your rug enhances your bedroom while standing up to daily use.
In summary, selecting the right area rug involves finding a balance between aesthetic appeal and practical benefits. Whether you choose a luxurious hand-tufted rug, a practical machine-woven design, or a versatile flat-woven option, the perfect rug will elevate your bedroom decor and create a stylish, comfortable space. Explore various options to find the ideal rug that meets your design preferences and functional needs.

 Natural Stone Institute
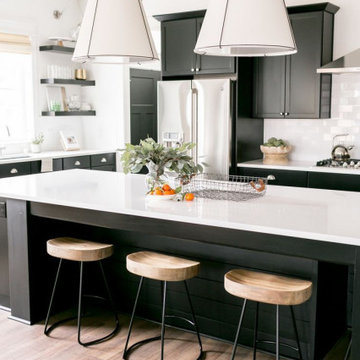
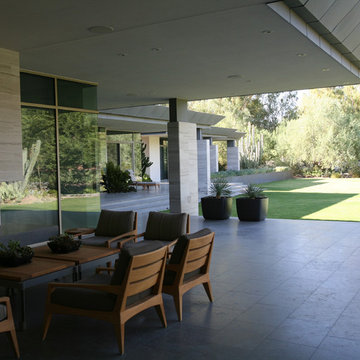
This contemporary 18,000 sq. ft. home in Paradise Valley, Arizona is a perfect mix of Gray limestone used on all horizontal surfaces and Cream, vein cut limestone on all vertical surfaces. The Gray limestone flooring was mud packed to meet 1.5 in. wood flooring areas using uncoupling membrane throughout. Numerous hours went into the layout to insure architectural detail lines were met. Oversized tiles were planned to ensure all layouts met crucial lines per the design. Blue limestone was used setting the path to the front entry. All pieces at the edges were mitered to appear to be thick, block stone. The veneer walls were alternated in size to reach the exact width at the top band of the walls. The edge detailing created interesting shadow play, both day and night, at interior and exterior locations. This detail is also noted on the fireplaces. Blue limestone hearths, which floated at all locations, used the same quirk mitered edges.
Five showers throughout the main house share the same veneer and flooring materials. Blue limestone slab benches were fabricated to rest on a stainless steel frame. The shower floors were mapped out to the exact dimensions so there were no cuts, but rather the same size pieces continually framing the space to the center drain.
 Colorworks Landscape Design
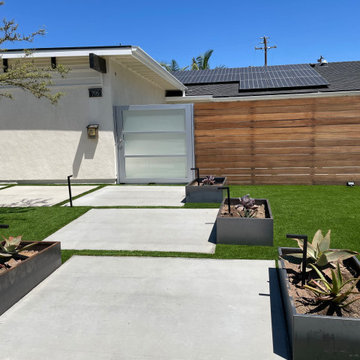
We are thrilled to present our recently completed landscape remodel project in the vibrant city of Orange, California. This modern and stunning transformation perfectly marries contemporary aesthetics with functional outdoor living. With a price range of $35,000 - $40,000, our team has orchestrated an impressive array of features that have revitalized the entire space.
Project Highlights:
1. Comprehensive Demolition and Site Preparation:
The project began with the meticulous removal of existing concrete and decomposed granite, setting the stage for a fresh canvas. Clearing the site was a crucial step to lay the foundation for the envisioned modern oasis.
2. Thoughtful Irrigation System:
We designed and installed a state-of-the-art irrigation system that not only ensures the lushness of the landscape but also conserves water through efficient distribution methods. This sustainable approach aligns with the modern ethos of the project.
3. Contemporary Concrete Walkways and Driveway:
The landscape now boasts brand-new poured concrete walkways and a driveway, exuding modern elegance. The sleek lines and minimalistic design of the concrete elements harmonize seamlessly with the overall aesthetic.
4. Luxurious Synthetic Turf:
To introduce a touch of verdant luxury without the maintenance requirements, we installed high-quality synthetic turf. Its evergreen allure adds a refreshing contrast against the hardscape elements.
5. Bountiful Flora and Fauna:
Carefully curated plants and trees have been strategically placed to add depth, color, and texture to the landscape. This selection of vegetation creates a dynamic environment that evolves with the changing seasons.
6. Reimagined Decomposed Granite Areas:
The introduction of new decomposed granite areas not only complements the modern design but also adds a natural element to the landscape. This material harmonizes beautifully with the surroundings, enhancing the overall aesthetic appeal.
7. Subtle Landscape Lighting:
Landscape lighting has been thoughtfully incorporated to illuminate the space during the evening hours. This subtle and strategic lighting transforms the landscape into a captivating visual delight after sunset.
8. Refreshed Wood Fence:
To frame the space with a touch of warmth, the wood fence has been sanded and re-stained. This careful restoration preserves the natural charm of the fence while seamlessly aligning it with the contemporary redesign.
In conclusion, our recently completed landscape remodel in Orange, CA stands as a testament to the harmonious fusion of modern design, functionality, and natural beauty. With a budget of $35,000 - $40,000, we've transformed an ordinary outdoor area into an extraordinary modern sanctuary. This project showcases our commitment to crafting outdoor spaces that not only reflect our clients' vision but also elevate their quality of life.
 Rardon Design
Rachel Rardon
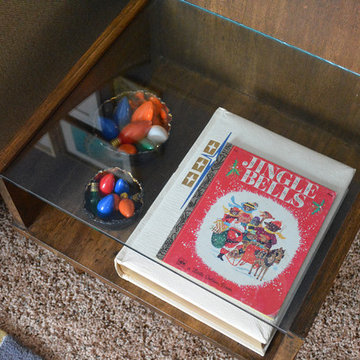
Example of a small eclectic open concept carpeted living room design with blue walls, a standard fireplace, a tile fireplace and no tv
Example of a small eclectic open concept carpeted living room design with blue walls, a standard fireplace, a tile fireplace and no tv
 Get My Rugs LLC
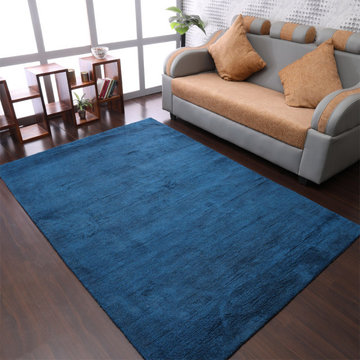
Modern Style your living room or bedroom into an exquisite retreat with the perfect area rug, an essential element that combines both style and practicality. A thoughtfully selected rug not only anchors the space but also infuses it with warmth, texture, and personality. Whether you're enhancing a cozy bedroom or designing a spacious living area, choosing the right rug is crucial to creating a harmonious and inviting environment.
The design of your area rug can profoundly influence the overall ambiance of your room. For a touch of opulence, consider hand-tufted or hand-knotted rugs, which are renowned for their intricate patterns and luxurious textures. These rugs, crafted with meticulous attention to detail, make a sophisticated statement in any setting. If a contemporary aesthetic appeals to you, machine-woven rugs are an excellent choice. They are available in an array of vibrant patterns and hues and are engineered to endure high foot traffic with their durable heat-set fibers. For a versatile and classic option, flat-woven rugs, such as kilims, offer a reversible design that seamlessly integrates with both modern and traditional decor.
When selecting a rug, the choice of material significantly impacts both its look and feel. Shag and flokati rugs are ideal for creating a sumptuous, inviting atmosphere. Their long, soft fibers provide unparalleled comfort underfoot, enhancing the coziness of your living room or bedroom. Hand-loomed rugs deliver unique textures and artisanal craftsmanship, while braided and hand-hooked rugs bring a delightful, handcrafted charm. For ease of maintenance, machine washable rugs are highly practical. They allow for effortless cleaning and help maintain a pristine appearance with minimal effort.
In addition to aesthetics, the functionality of your rug is paramount. Stain-resistant and water-resistant rugs are perfect for managing spills and everyday wear, ensuring your rug remains pristine over time. Non-slip and adhesive backings are crucial for safety, particularly on hardwood floors, preventing any risk of slipping and ensuring the rug stays securely in place. Furthermore, cushioned rugs enhance comfort, making your space not only stylish but also extraordinarily comfortable.
Personalize your space with bespoke or custom rug options. An 8x10 area rug is ideal for covering substantial areas and can be customized to fit specific dimensions or design preferences. Custom features, such as elegant fringe details or organic textures, allow you to craft a rug that reflects your unique style and complements your existing decor.
The selection of the top 15 area rugs available today encompasses a wide range of styles and features to meet diverse needs. From distressed designs that impart character to sleek contemporary patterns that offer a modern touch, there is a rug to suit every taste. Large rugs for living rooms and bedrooms can define and unify the space, while oversized carpets can create a dramatic focal point. Consider the practical aspects of each rug to ensure it not only enhances your decor but also withstands the rigors of daily use.
Ultimately, selecting the ideal area rug involves a delicate balance between aesthetic appeal and functional utility. Whether you opt for a luxurious hand-tufted piece, a resilient machine-woven design, or a versatile flat-woven style, the right rug will elevate your living space into a stylish and comfortable haven. By exploring a variety of options and carefully considering both design and practicality, you can find the perfect rug to transform your room into a beautifully appointed retreat.
Sponsored
Columbus, OH

Hope Restoration & General Contracting
Columbus Design-Build, Kitchen & Bath Remodeling, Historic Renovations
 Colorworks Landscape Design
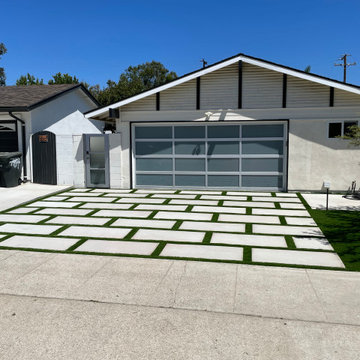
We are thrilled to present our recently completed landscape remodel project in the vibrant city of Orange, California. This modern and stunning transformation perfectly marries contemporary aesthetics with functional outdoor living. With a price range of $35,000 - $40,000, our team has orchestrated an impressive array of features that have revitalized the entire space.
Project Highlights:
1. Comprehensive Demolition and Site Preparation:
The project began with the meticulous removal of existing concrete and decomposed granite, setting the stage for a fresh canvas. Clearing the site was a crucial step to lay the foundation for the envisioned modern oasis.
2. Thoughtful Irrigation System:
We designed and installed a state-of-the-art irrigation system that not only ensures the lushness of the landscape but also conserves water through efficient distribution methods. This sustainable approach aligns with the modern ethos of the project.
3. Contemporary Concrete Walkways and Driveway:
The landscape now boasts brand-new poured concrete walkways and a driveway, exuding modern elegance. The sleek lines and minimalistic design of the concrete elements harmonize seamlessly with the overall aesthetic.
4. Luxurious Synthetic Turf:
To introduce a touch of verdant luxury without the maintenance requirements, we installed high-quality synthetic turf. Its evergreen allure adds a refreshing contrast against the hardscape elements.
5. Bountiful Flora and Fauna:
Carefully curated plants and trees have been strategically placed to add depth, color, and texture to the landscape. This selection of vegetation creates a dynamic environment that evolves with the changing seasons.
6. Reimagined Decomposed Granite Areas:
The introduction of new decomposed granite areas not only complements the modern design but also adds a natural element to the landscape. This material harmonizes beautifully with the surroundings, enhancing the overall aesthetic appeal.
7. Subtle Landscape Lighting:
Landscape lighting has been thoughtfully incorporated to illuminate the space during the evening hours. This subtle and strategic lighting transforms the landscape into a captivating visual delight after sunset.
8. Refreshed Wood Fence:
To frame the space with a touch of warmth, the wood fence has been sanded and re-stained. This careful restoration preserves the natural charm of the fence while seamlessly aligning it with the contemporary redesign.
In conclusion, our recently completed landscape remodel in Orange, CA stands as a testament to the harmonious fusion of modern design, functionality, and natural beauty. With a budget of $35,000 - $40,000, we've transformed an ordinary outdoor area into an extraordinary modern sanctuary. This project showcases our commitment to crafting outdoor spaces that not only reflect our clients' vision but also elevate their quality of life.
 Thinkterior LLC
For a family who believes fitness is not only an essential part of life but also a fun opportunity for the whole family to connect, build and achieve greatness together there is nothing better than a custom designed obstacle course right in your back yard.
THEME
The theme of this half mile trail through the woods is evident in the fun, creative and all-inclusive obstacles hidden in the natural flow of the land around this amazing family home. The course was created with adults and children, advanced and beginner athletes, competitive and entertaining events all accounted for. Each of the 13 obstacles was designed to be challenging no matter the size, skill or ability of the athlete lucky enough to run the course.
FOCUS
The focus for this family was to create an outdoor adventure that could be an athletic, social and personal outlet for their entire family while maintaining the natural beauty of the landscape and without altering the sweeping views from the home. The large scale of the challenging obstacles is camouflaged within the landscape using the rolling hills and mature trees as a natural curtain in every season. The beauty of the course does not diminish the functional and demanding nature of the obstacles which are designed to focus on multiple strength, agility, and cardio fitness abilities and intensities.
STORAGE
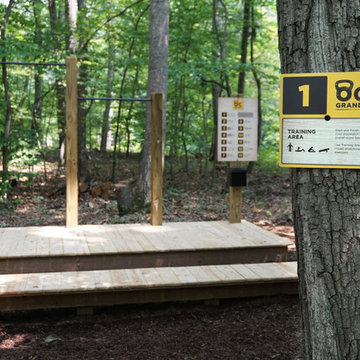
The start of the trail includes a raised training area offering a dedicated space clear from the ground to place bags, mats and other equipment used during the run. A small all-terrain storage cart was provided for use with 6 yoga mats, 3 medicine balls of various weights, rings, sprinting cones, and a large digital timer to record laps.
GROWTH
The course was designed to provide an athletic and fun challenge for children, teens and adults no matter their experience or athletic prowess. This course offers competitive athletes a challenge and budding athletes an opportunity to experience and ignite their passion for physical activity. Initially the concept for the course was focused on the youngest of the family however as the design grew so did the obstacles and now it is a true family experience that will meet their adapting needs for years. Each obstacle is paired with an instructional sign directing the runners in proper use of the obstacle, adaptations for skill levels and tips on form. These signs are all customized for this course and are printed on metal to ensure they last for many years.
SAFETY
Safety is crucial for all physical activity and an obstacle course of this scale presents unique safety concerns. Children should always be supervised when participating in an adventure on the course however additional care was paid to details on the course to ensure everyone has a great time. All of the course obstacles have been created with pressure treated lumber that will withstand the seasonal poundings. All footer pilings that support obstacles have been placed into the ground between 3 to 4 feet (.9 to 1.2 meters) and each piling has 2 to 3 bags of concrete (totaling over 90 bags used throughout the course) ensuring stability of the structure and safety of the participants. Additionally, all obstacle lumber has been given rounded corners and sanded down offering less splintering and more time for everyone to enjoy the course.
This athletic and charismatic family strives to incorporate a healthy active lifestyle into their daily life and this obstacle course offers their family an opportunity to strengthen themselves and host some memorable and active events at their amazing home.
 Get My Rugs LLC
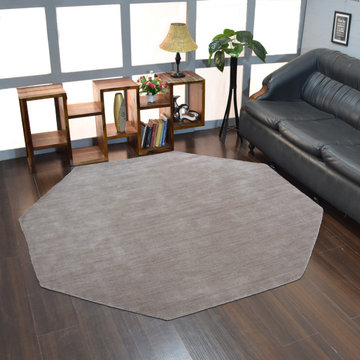
Modern Style your living room or bedroom into an exquisite retreat with the perfect area rug, an essential element that combines both style and practicality. A thoughtfully selected rug not only anchors the space but also infuses it with warmth, texture, and personality. Whether you're enhancing a cozy bedroom or designing a spacious living area, choosing the right rug is crucial to creating a harmonious and inviting environment.
The design of your area rug can profoundly influence the overall ambiance of your room. For a touch of opulence, consider hand-tufted or hand-knotted rugs, which are renowned for their intricate patterns and luxurious textures. These rugs, crafted with meticulous attention to detail, make a sophisticated statement in any setting. If a contemporary aesthetic appeals to you, machine-woven rugs are an excellent choice. They are available in an array of vibrant patterns and hues and are engineered to endure high foot traffic with their durable heat-set fibers. For a versatile and classic option, flat-woven rugs, such as kilims, offer a reversible design that seamlessly integrates with both modern and traditional decor.
When selecting a rug, the choice of material significantly impacts both its look and feel. Shag and flokati rugs are ideal for creating a sumptuous, inviting atmosphere. Their long, soft fibers provide unparalleled comfort underfoot, enhancing the coziness of your living room or bedroom. Hand-loomed rugs deliver unique textures and artisanal craftsmanship, while braided and hand-hooked rugs bring a delightful, handcrafted charm. For ease of maintenance, machine washable rugs are highly practical. They allow for effortless cleaning and help maintain a pristine appearance with minimal effort.
In addition to aesthetics, the functionality of your rug is paramount. Stain-resistant and water-resistant rugs are perfect for managing spills and everyday wear, ensuring your rug remains pristine over time. Non-slip and adhesive backings are crucial for safety, particularly on hardwood floors, preventing any risk of slipping and ensuring the rug stays securely in place. Furthermore, cushioned rugs enhance comfort, making your space not only stylish but also extraordinarily comfortable.
Personalize your space with bespoke or custom rug options. An 8x10 area rug is ideal for covering substantial areas and can be customized to fit specific dimensions or design preferences. Custom features, such as elegant fringe details or organic textures, allow you to craft a rug that reflects your unique style and complements your existing decor.
The selection of the top 15 area rugs available today encompasses a wide range of styles and features to meet diverse needs. From distressed designs that impart character to sleek contemporary patterns that offer a modern touch, there is a rug to suit every taste. Large rugs for living rooms and bedrooms can define and unify the space, while oversized carpets can create a dramatic focal point. Consider the practical aspects of each rug to ensure it not only enhances your decor but also withstands the rigors of daily use.
Ultimately, selecting the ideal area rug involves a delicate balance between aesthetic appeal and functional utility. Whether you opt for a luxurious hand-tufted piece, a resilient machine-woven design, or a versatile flat-woven style, the right rug will elevate your living space into a stylish and comfortable haven. By exploring a variety of options and carefully considering both design and practicality, you can find the perfect rug to transform your room into a beautifully appointed retreat.
15