
Search results for "Deep cleaning" in Home Design Ideas
 Tile Doctor Ltd
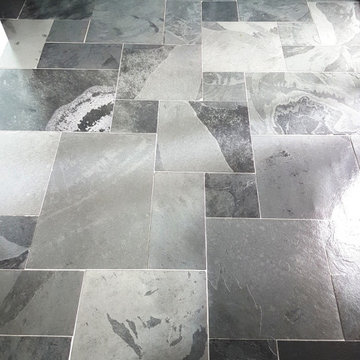
The pictures below are of a Riven Slate floor at a house in in the Leeds suburb of Horsforth which had been laid ten years prior. It’s probably difficult to appreciate from the images but the sealer on this floor was well worn through in the high traffic areas making it patchy in places. Without the protection of the sealer dirt was now ingrained in the pores of the stone leaving it looking dull. Riven slate is always tricky to clean thoroughly due to the rough surface and that combined with the ingrained dirt was making it very difficult to keep clean.
The floor now needed to be stripped of old sealer and then resealed and although I can provide a price for this over the phone my preference is to visit the property and survey the floor. In the case the owner had sent me some photographs via email however they were not too clear and so I felt it would be best if I paid the customer a visit to ensure I could give them an accurate price.
The floor was indeed overdue a clean and seal, as suspected dirt was ingrained into the areas where the seal had worn off. The house was home to a very busy family, so the area was subject to the significant traffic. I carried out a test clean on a small area and they were surprised by the results, when you live with a floor for so long you don’t notice the very slow decline in its appearance. They agreed to my quote and we arranged a time to return and carry the deep clean out.
When I arrived, I started off by protecting the skirting and surrounding woodwork. Given the rough surface of the floor I first applied Tile Doctor Wax Away which is a very effective coatings remover that is designed for removing wax but works very well in these situations. The product was left to dwell for a round ten minutes so it could get to work breaking down the old sealer and then scrubbed in using a black scrubbing pad fitted to a rotary machine.
This process removed most of the dirt and old sealer, but some stubborn patches remained. To treat these, I replaced the black pad with a coarse 200-grit burnishing pad and finally some handheld diamond burnishing blocks for the edges and corners where more intricate work was required, and the circular pads struggle to reach.
I gave the floor a rinse, and extracted the soil with a wet vacuum, the floor was then left to dry off overnight.
The next day I returned, first the slate floor was checked for moisture using the moisture meter. Once I was happy it was within the correct parameters, I then sealed with four coats of Tile Doctor Seal and Go. This is a modern water-based blend of acrylic polymers that provides both a stain resistant surface seal and a durable low-sheen finish also being water based there’s no smell as it dries.
The sealer really brought the stone to back to life and the lovely colours in the natural stones were now evident. The patchy appearance of the floor was gone, and the customer was happy.
I discussed with them how they should maintain the floor and advised them to use Tile Doctor Neutral Tile Cleaner. This is pH neutral cleaner that won’t prematurely erode the new sealer like the stronger products you find in Supermarkets which are only for use on Vinyl and Ceramic floors.
Nigel Stoker
North West Yorkshire Tile Doctor

 Connecticut Stone
Photo Credit: Neil Landino,
Counter Top: Connecticut Stone Calacatta Gold Honed Marble,
Kitchen Sink: 39" Wide Risinger Double Bowl Fireclay,
Paint Color: Benjamin Moore Arctic Gray 1577,
Trim Color: Benjamin Moore White Dove,
Kitchen Faucet: Perrin and Rowe Bridge Kitchen Faucet
VIDEO BLOG, EPISODE 2 – FINDING THE PERFECT STONE
Watch this happy client’s testimonial on how Connecticut Stone transformed her existing kitchen into a bright, beautiful and functional space.Featuring Calacatta Gold Marble and Carrara Marble.
Video Link: https://youtu.be/hwbWNMFrAV0
 TruDesign Co. Inc.
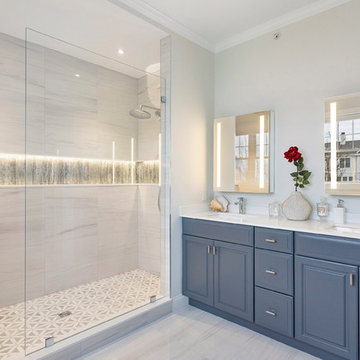
Mid-sized transitional master gray tile and porcelain tile porcelain tile and gray floor bathroom photo in Boston with raised-panel cabinets, gray cabinets, gray walls, an undermount sink, quartz countertops and white countertops
Find the right local pro for your project

 CG&S Design-Build
Design by Joanna Hartman
Photography by Ryann Ford
Styling by Adam Fortner
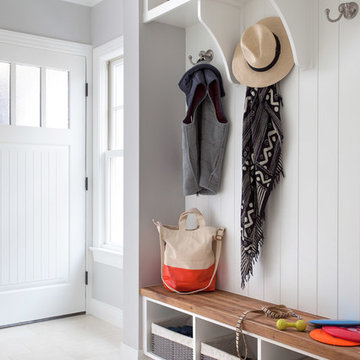
This space features Crema Marfil Honed 12x12 floor tile and Restoration Hardware "Vintage Hooks".
 AquaTerra Outdoors
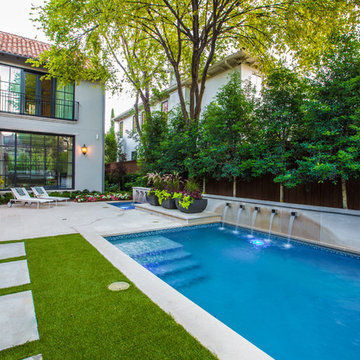
This pool and spa is built in an affluent neighborhood with many new homes that are traditional in design but have modern, clean details. Similar to the homes, this pool takes a traditional pool and gives it a clean, modern twist. The site proved to be perfect for a long lap pool that the client desired with plenty of room for a separate spa. The two bodies of water, though separate, are visually linked together by a custom limestone raised water feature wall with 10 custom Bobe water scuppers.
Quality workmanship as required throughout the entire build to ensure the automatic pool cover would remain square the entire 50 foot length of the pool.
Features of this pool and environment that enhance the aesthetic appeal of this project include:
-Glass waterline tile
-Glass seat and bench tile
-Glass tile swim lane marking on pool floor
-Custom limestone coping and deck
-PebbleTec pool finish
-Synthetic Turf Lawn
This outdoor environment cohesively brings the clean & modern finishes of the home seamlessly to the outdoors to a pool and spa for play, exercise and relaxation.
Photography: Daniel Driensky
 Addhouse
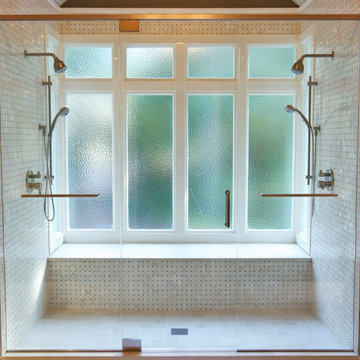
Double shower in bay window. The bench is cantilevered out over the exterior wall below.
Design, color scheme, lighting, and installation by Addhouse.
Photo by Monkeyboy Productions


 Clean Design
Donna Dotan Photography Inc.
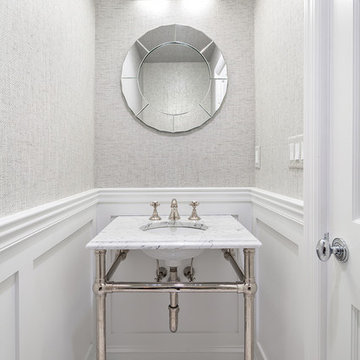
Inspiration for a small transitional bathroom remodel in New York with gray walls and a console sink
Inspiration for a small transitional bathroom remodel in New York with gray walls and a console sink
 JTWdesign LLC
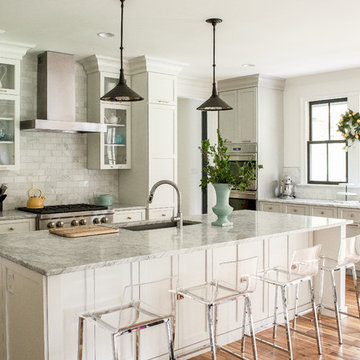
Example of a transitional u-shaped light wood floor kitchen design in Richmond with an undermount sink, shaker cabinets, white cabinets, subway tile backsplash, stainless steel appliances and an island
 ZeroEnergy Design
This renovated brick rowhome in Boston’s South End offers a modern aesthetic within a historic structure, creative use of space, exceptional thermal comfort, a reduced carbon footprint, and a passive stream of income.
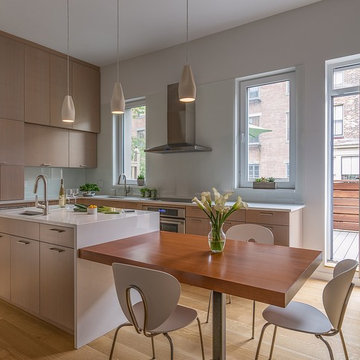
DESIGN PRIORITIES. The goals for the project were clear - design the primary unit to accommodate the family’s modern lifestyle, rework the layout to create a desirable rental unit, improve thermal comfort and introduce a modern aesthetic. We designed the street-level entry as a shared entrance for both the primary and rental unit. The family uses it as their everyday entrance - we planned for bike storage and an open mudroom with bench and shoe storage to facilitate the change from shoes to slippers or bare feet as they enter their home. On the main level, we expanded the kitchen into the dining room to create an eat-in space with generous counter space and storage, as well as a comfortable connection to the living space. The second floor serves as master suite for the couple - a bedroom with a walk-in-closet and ensuite bathroom, and an adjacent study, with refinished original pumpkin pine floors. The upper floor, aside from a guest bedroom, is the child's domain with interconnected spaces for sleeping, work and play. In the play space, which can be separated from the work space with new translucent sliding doors, we incorporated recreational features inspired by adventurous and competitive television shows, at their son’s request.
MODERN MEETS TRADITIONAL. We left the historic front facade of the building largely unchanged - the security bars were removed from the windows and the single pane windows were replaced with higher performing historic replicas. We designed the interior and rear facade with a vision of warm modernism, weaving in the notable period features. Each element was either restored or reinterpreted to blend with the modern aesthetic. The detailed ceiling in the living space, for example, has a new matte monochromatic finish, and the wood stairs are covered in a dark grey floor paint, whereas the mahogany doors were simply refinished. New wide plank wood flooring with a neutral finish, floor-to-ceiling casework, and bold splashes of color in wall paint and tile, and oversized high-performance windows (on the rear facade) round out the modern aesthetic.
RENTAL INCOME. The existing rowhome was zoned for a 2-family dwelling but included an undesirable, single-floor studio apartment at the garden level with low ceiling heights and questionable emergency egress. In order to increase the quality and quantity of space in the rental unit, we reimagined it as a two-floor, 1 or 2 bedroom, 2 bathroom apartment with a modern aesthetic, increased ceiling height on the lowest level and provided an in-unit washer/dryer. The apartment was listed with Jackie O'Connor Real Estate and rented immediately, providing the owners with a source of passive income.
ENCLOSURE WITH BENEFITS. The homeowners sought a minimal carbon footprint, enabled by their urban location and lifestyle decisions, paired with the benefits of a high-performance home. The extent of the renovation allowed us to implement a deep energy retrofit (DER) to address air tightness, insulation, and high-performance windows. The historic front facade is insulated from the interior, while the rear facade is insulated on the exterior. Together with these building enclosure improvements, we designed an HVAC system comprised of continuous fresh air ventilation, and an efficient, all-electric heating and cooling system to decouple the house from natural gas. This strategy provides optimal thermal comfort and indoor air quality, improved acoustic isolation from street noise and neighbors, as well as a further reduced carbon footprint. We also took measures to prepare the roof for future solar panels, for when the South End neighborhood’s aging electrical infrastructure is upgraded to allow them.
URBAN LIVING. The desirable neighborhood location allows the both the homeowners and tenant to walk, bike, and use public transportation to access the city, while each charging their respective plug-in electric cars behind the building to travel greater distances.
OVERALL. The understated rowhouse is now ready for another century of urban living, offering the owners comfort and convenience as they live life as an expression of their values.
Photography: Eric Roth Photo
 AT6 Architecture + Design Build
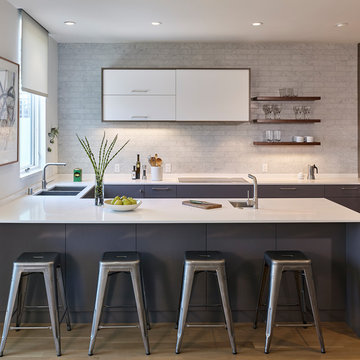
Mid-sized minimalist u-shaped medium tone wood floor and brown floor kitchen photo in San Francisco with an undermount sink, flat-panel cabinets, gray cabinets, gray backsplash, a peninsula, quartz countertops, marble backsplash and white countertops
 aARts William Dale Brantley Architects
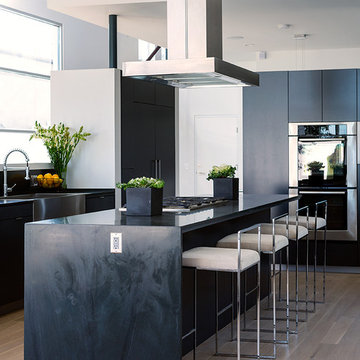
Renovation of a 1950's tract home into a stunning masterpiece. Matte lacquer finished cabinets with deep charcoal which coordinates with the dark waterfall stone on the living room end of the duplex.
 Osborne Construction
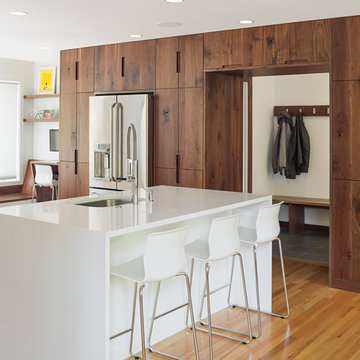
GC: Osborne Construction
Architect: C2 Architecture
Design: Kole Made.
Custom Woodwork + Cabinetry: Loubier Design.
http://www.kolemade.com/ http://www.c2-architecture.com/ http://kirk-loubier.squarespace.com/
Photo Credit: http://www.samoberter.com/

Sponsored
Columbus, OH

Hope Restoration & General Contracting
Columbus Design-Build, Kitchen & Bath Remodeling, Historic Renovations
 Robert Kaner Interior Design
Tom Powel Imaging
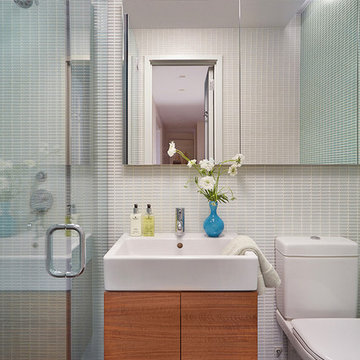
Alcove shower - mid-sized contemporary 3/4 ceramic tile and black floor alcove shower idea in New York with flat-panel cabinets, medium tone wood cabinets, a two-piece toilet, a wall-mount sink and a hinged shower door
Alcove shower - mid-sized contemporary 3/4 ceramic tile and black floor alcove shower idea in New York with flat-panel cabinets, medium tone wood cabinets, a two-piece toilet, a wall-mount sink and a hinged shower door
 Alexandra Crafton
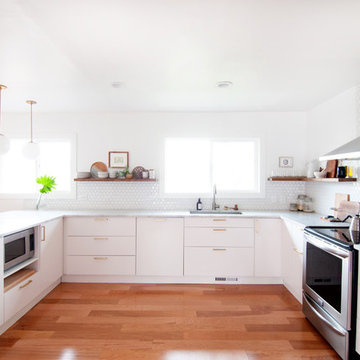
Wall paint: Simply White, Benjamin Moore; hardwood floor: Southern Pecan Natural, Home Depot; cabinets: Veddinge, Ikea; sink: Undermount Deep Single Bowl, Zuhne; faucet: Ringskär, Ikea; range hood: Luftig, Ikea; shelves: Reclaimed Wood Shelving + Brackets, West Elm; backsplash: Retro 2" x 2" Hex Porcelain Mosaic Tile in Glossy White, EliteTile; hardware: Edgecliff Pull - Natural Brass, Schoolhouse Electric; dinnerware: Coupe Line in Opaque White, Heath Ceramics; countertop: Carrara Marble, The Stone Collection; pendant lights: Luna Pendant, Schoolhouse Electric
Photo: Allie Crafton © 2016 Houzz
Design: Annabode + Co
 Tile Doctor Ltd
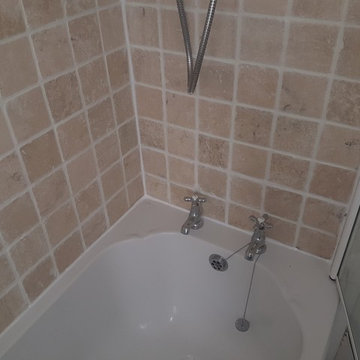
Here’s a quick example of an interesting tiled shower cubicle at a property in Edinburgh that was well overdue for a refresh, including deep cleaning and recolouring do the grout lines that had become stained and mouldy. This is a problem that the majority of property owners experience due to the simple fact that shower cubicles come into contact with damaging acid-based shampoos and soaps on a daily basis.
The short-term solution for this is to wash the shower cubicle down with water after each use, however busy people do not always remember to do so! The prognosis is bad discolouration, mould growth and staining if the problem if proper care isn’t taken. In this case, the problem had worsened to the point that the property owner decided to contact Tile a Doctor to provide a thorough refresh of the tiles.
Our process for refreshing shower cubicles in a similar state to this one is simple, but highly effective. I started by mixing a strong solution of our high alkaline cleaner, known as Tile Doctor Pro Clean (diluted to an appropriate level with water), before applying it directly to the tile and grout.
Next, I worked it in using specialised handheld grout brushes , with the alkaline in the Pro Clean neutralising the acidic staining and mould growth had leaving the area clean and fresh. Pro Clean is suitable for use on all kinds of natural stone, and on both verticals and horizontal surfaces. Once satisfied the grout had been cleaned to the best of my abilities, I quickly dried the entire area using a heat gun.
To restore the appearance of the installation back to it’s optimal appearance I chose to recolour the grout lines with our Light Grey grout colourant, which matched in very nicely. This is just one of ten different colours of grout colourant we offer. The colourant was left to dry for a short period before I cleaned off any excess. The final stage of the refresh involved stripping off the old discoloured silicone from around the bath and replacing it with fresh silicone.
The customer was very impressed by the speed and efficiency of the refresh. With the work completed to a high standard in just a few hours, she now has one less problem to worry about – and a very smart looking shower cubicle! Another satisfied customer.
Thomas Wilson
Edinburgh Tile Doctor
 Tile Doctor Ltd
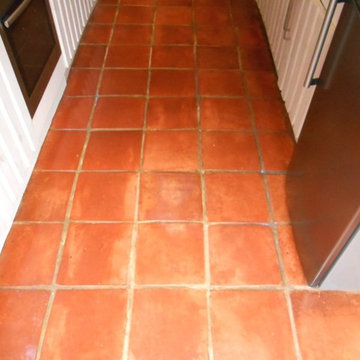
Not too long ago, I visited a house in the town of Fulwood in Preston, Lancashire. My client had a Terracotta tiled floor which had been neglected for many years and in their attempt to improve it had unfortunately been given some very poor advice by tile retailers, all of whom sold him different products, and each of which was unsuitable. Using these different products in succession had resulted in the depreciation of the floor’s texture and smoothness, in turn making the clay difficult to clean and maintain.
As per my usual process I ran a small test clean to demonstrate what could be done to improve the floor and I was commissioned to restore the floor back to its former glory.
I started by mixing a strong cleaning solution consisting of one part Tile Doctor Pro-Clean to three parts water. The solution was applied to the floor and left it to dwell for a short period. The high alkaline cleaner seeps into the pores of the tile getting underneath and lifting out the ingrained dirt and breaking down the old sealers. Then, I agitated the floor using a scrubbing pad fitted to a rotary floor machine before using a wet vacuum to suck up the resulting soiled solution.
There were a few paint marks dotted across the floor, but these were not noticeable until after I had given the Terracotta a deep clean. To remove the paint marks I used Tile Doctor Remove & Go, which is specially formulated to break down paint stains, adhesives and coatings. This product was used in combination with a steamer which, when applied directly to the tiles, helped to lift the paint out. Following this, I rinsed the entire floor a couple of times to remove any trace of cleaning product, and vacuumed up the excess moisture.
It’s always best to let the floor dry completely prior to sealing as applying sealer to a damp floor will affect the sealer. I left the house to allow this to take place overnight returning the next day. To get the best out of the Terracotta I sealed the floor using one coat of Tile Doctor Colour Grow, which is an impregnating sealer that soaks into the pores of the tile and acts as both as a bonding sealer enhancing the natural colours and darkening the clay (as requested by my client).
After the coat of Colour Grow had dried, I applied a further seven coats of Tile Doctor Seal & Go, which achieves a nice, low sheen Satin finish. Before leaving my happy client to enjoy his newly restored Terracotta floor, I made sure to provide some professional cleaning and long-term maintenance advice.
Russell Taylor
Lancashire Tile Doctor
Sponsored
Columbus, OH
Hope Restoration & General Contracting
Columbus Design-Build, Kitchen & Bath Remodeling, Historic Renovations
 Tile Doctor Ltd
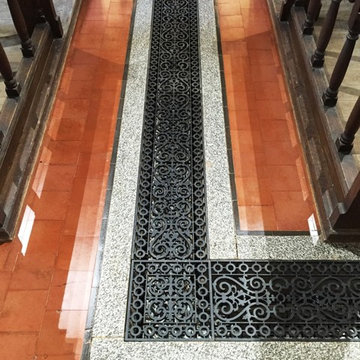
Did you know that Wantage, the town in Oxfordshire where I completed this job, is the birthplace of Alfred the Great? The town is certainly a historic area – in fact, I was contacted by the warden of a church dating back to the 12th century, who asked Tile Doctor Oxfordshire to help restore the building’s flooring, consisting of Quarry and Marble tiles.
This is an interesting mix of hard wearing and high end tiles, and while the floor was in
dire need of a deep clean, it could be restored back to looking fantastic once again.
The church has recently undergone a complete refurbishment with the help of a grant from lottery money. We were called after the builders had finished their work, to restore the floor to the finish required by the church warden.
His specification was to provide the Marble with a Matt finish and the Quarry tiles with a sheen finish. The floor was, at one point in its history, covered in carpet which had been taken up, no doubt exposing many years’ worth of muck.
My first task was to clean the floor with a diluted solution of Tile Doctor Pro-Clean, a high alkaline cleaner safe to use on tile and stone. This was left to dwell for a short period to seep into the tile, before being scrubbed in to remove the initial layers of muck. The resulting residue was promptly vacuumed away.
To tackle the tougher areas of soil buildup, I opted to use Tile Doctor Nanotech HBU which was spread over the floor and left to dwell for about 30 minutes. This product differs from most cleaners in that it uses nano-sized cleaning particles to deal with difficult to reach dirt ingrained in the stone. I then rinsed the area with water and vacuumed this up.
Due to the substantial size of the church floor I had to work in multiple sections, and so the cleaning process took three days to complete. After finishing, I left the church for a few days to allow the floor time to dry.
When I returned to the church I checked the floor with a damp meter and was satisfied that it was dry enough to seal.
First, I sealed the Marble tiles with Tile Doctor Colour Grow, which is a colour enhancing impregnating sealer suitable for use on high end stone such as Marble and Limestone. I applied two coats, leaving a few hours between coats; this brought the colour back without a high shine, as per the church warden’s request.
The next day I returned to seal the Quarry tiles, this time using Tile Doctor Seal & Go Extra which is a topical sealer specially formulated to lea e a nice sheen as requested. I applied several thin coats of the sealer to build up solid protection on the floor.
The warden was extremely pleased with the finished floor, leaving the following feedback:
“We found the Tile Doctor online and watched some of the very helpful slideshows on YouTube. The Victorian Quarry tiles in our 12th century church had been covered with carpet for many years and needed a thorough clean and polish at the end of our major restoration project. Barry was very quick to respond to our enquiry and over the course of a week he did a brilliant job on our tiles. We’re delighted with the results, just in time for our reopening service with our bishop and MP.”
Barry Woodward
Oxfordshire Tile Doctor
 Tile Doctor Ltd
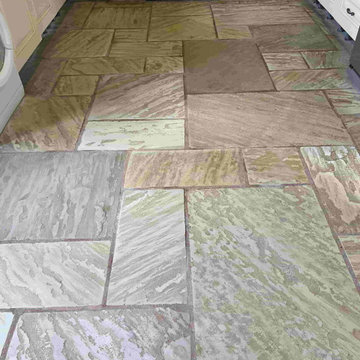
This client at a property in Bamber Bridge was really fed up with his Indian sandstone kitchen floor. The sandstone suited the age of the property but due to its course rough texture he was having issues keeping the stone clean and maintaining it to a decent standard. Ideally, he wanted something long lasting that was easier to keep clean.
Sealers can only help so much on a rough stone like this, in my opinion really rough stone is best sold for use outside in patio’s etc. My client didn’t want to rip it up as it ran underneath the kitchen units and it cost them a lot of money to have it laid, so having been on our website and checked out our previous work they realised we could mill the stone and smooth down the rough texture to a much smoother finish and yet still leave enough texture in the stone for it to look very natural.
We have developed a system at Tile Doctor called “Milling” which is very similar to sanding rough wood to reveal the inner patina. Once done we then we give it one more clean before adding a fresh sealer to add protection. Milling does change the look of the stone as you will see on the before and after pictures on this page, so it is not for everyone. It is however a one-off process so once done it will never need to be milled again. Like all stone floors it will still benefit from a deep clean and re-seal every five years (depending on use) just to keep it looking its best but after milling you will be able to walk on the stone in bare feet or socks and slippers as it really does make a big difference to the finish.
By milling we mainly use coarse-grit burnishing pads that contain segments made from hard industrial diamonds. Working our way up the different grits the pads are applied using a weighted floor buffer which is run over each tile several times to cut the stone back. The process is so effective we often find that the pads are all you need to clean the stone so hardly ever use any chemicals with this process, apart from the sealer which is applied once fully dry.
I should mention that Milling is not something a customer should consider doing themselves as you need invest in a heavy-duty weighted buffing machine which are rarely available for hire.
To seal internal Sandstone floors, I usually use Tile Doctor Colour Grow which brings out the natural colours in the stone. On this occasion however two coats of Tile Doctor Ultra Seal were applied to the stone and grout which results in an invisible natural finish and better matched the clients’ requirements.
My client was really pleased with the new floor and left the following feedback:
“Only finished today but looks so good now. Russell did a great job milling the flags to a much smoother finish. Two coats of sealant applied by Heidi on last day which hopefully will keep it looking that way. Mark F. Bamber Bridge”
For aftercare cleaning I left them with a bottle of Tile Doctor Neutral Cleaner which is specially designed for cleaning sealed floors. You need to be very careful when using supermarket cleaners as many are tool strong and will slowly strip the sealer off the floor, always read the label.
Russell Taylor
Lancashire Tile Doctor

 transFORM Home
This breathtaking project by transFORM is just part of a larger renovation led by Becky Shea Design that transformed the maisonette of a historical building into a home as stylish and elegant as its owners.
Attention to detail was key in the configuration of the master closets and dressing rooms. The women’s master closet greatly elevated the aesthetic of the space with the inclusion of posh items like ostrich drawer faces, jewelry-like hardware, a dedicated shoe section, and glass doors. The boutique-inspired LED lighting system notably added a luxe look that’s both polished and functional.
Custom Closet by transFORM
Interior Design by Becky Shea Design
Photography by Sean Litchfield Photography
43