
Search results for "Deep cleaning" in Home Design Ideas

 Tile Doctor Ltd
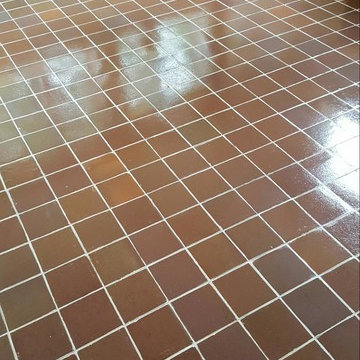
It’s always a good idea to double-check any tile cleaning advice you receive with a professional. Sometimes advice can be inaccurate and cause more problems than good. Such was the case with this customer, who lives in the small town of Appleton near Warrington. He had been advised by his builder to use brick acid to remove carpet glue from a newly discovered Quarry tiled floor. Taking the advice, he had washed the floor several times with a solution of brick acid diluted with water. But while this seemed to successfully remove the carpet glue, it also severely discoloured the grout lines, leaving the entire floor looking grubby and unappealing.
The customer was just about to go on holiday, and asked me to see what could be done to restore the floor’s appearance while he was gone. With the house to myself, I got to work.
My first job was to strip the floor property to remove old sealers present on the tile using a strong dilution of our high alkaline cleaner, Tile Doctor Pro Clean. We use this cleaner on all types of tile and natural stone due to its versatility and consistency.
I spread the solution onto the floor and left to dwell for twenty minutes before scrubbing with a black pad fitted to a floor rotary machine. This process also removed the years of dirt and dust that had penetrated through the recently removed carpet. I also paid attention to the grout lines giving them a good scrub with a stiff grout brush, but the acid staining proved to be impossible to remove completely.
While I’m not sure exactly how long the floor had been covered by carpet, it’s safe to say a deep clean had been long, long overdue. Once I had cleaned the floor to a high standard, I used a wet-vac to remove the now dirty cleaning solution from the floor, before leaving it to dry off completely overnight.
Upon my return to the property the next day, I tested to make sure the floor was dry enough to seal, which is important as excess moisture can cloud the sealer and damage its performance.
Once satisfied, I applied one coat of Tile Doctor Colour Grow, which is our impregnating sealer designed to really bring out the natural colours in the tile, followed by two coats of Tile Doctor Seal and Go to give the tiles a stain resistant, low-sheen finish.
After this was dry I coloured the grout lines with a matching Tile Doctor Grout Colourant to cover and hide the damage the acid had caused to the grout lines. Finally, I gave the floor three more coats of Seal and Go to add the finishing touches.
My customer returned from holiday to find a completely transformed floor. Looking at the before and after photos, it is easy to see why he was more than happy with the result! Another satisfied customer.
Alastair Robb
West Cheshire Tile Doctor
Find the right local pro for your project
 Tile Doctor Ltd
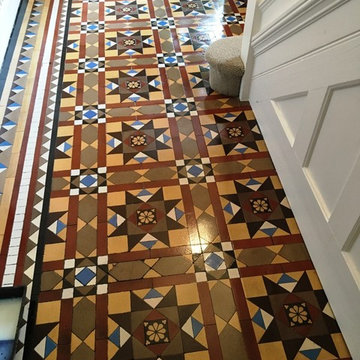
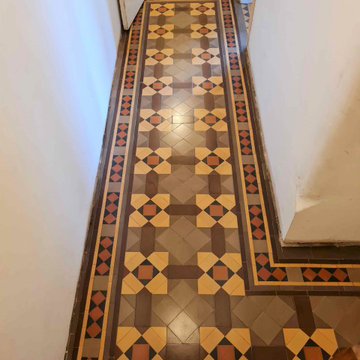
Apologies in advance but I forgot to take the usual before photograph of this Victorian tiled hallway in Twickenham that I worked on recently. It’s a shame really as it was certainly in need of a good clean and re-seal after years of inadequate maintenance and I’m sure a photo would have helped.
Victorian tiles are porous and do need a sealer to stop dirt becoming ingrained, as once that happens they can be difficult to clean and a Hallway is an especially high traffic area that will see a lot of dirt being tramped in. That activity also wears down the sealer over time so it’s important to keep it topped up.
On these tiles, we used a 50:50 combination of Tile Doctor Pro-Clean mixed with Tile Doctor Remove and Go. This combination of products works very well to break down old sealers and also to clean the general soil away from the tile. As usual it was left to soak into the tiles for ten minutes before using a heavy duty scrubbing machine to scrub the floor clean. This achieved a good result and the soil and products were then flushed away using our special flushing tool which fires a jet of water onto the tile whilst vacuuming at the same time (no mess!) to an external tank.
After allowing the tiles to dry off overnight with some heating on, the floor was ready to accept a new seal the next day. Our customer decided to have a sheen finish so we opted to apply Tile Doctor Seal and Go. These tiles are very porous and so need seven coats to be applied to the floor before it was completely sealed.
Apologies again for not taking a before photo so you can compare the difference however hopefully you can see how health the floor looks following the deep cleaning and application of a fresh sealer which will ensure future maintenance is a lot easier for the customer.
Jonathan Oldham
South Middlesex Tile Doctor
 Tile Doctor Ltd
We were contacted by a customer in West Kirby who needed help renovating a Victorian tiled hallway in a house they had just purchased. Kirby is a desirable seaside location North of Heswall that expanded with the arrival of the railway in 1848. The railway brought a demand for property and so it’s not unusual to find housing stock in this area dating back to the Victorian era.
The Victorian tiles at this property appear to have been neglected by the previous owner and were now looking very dull and marked by paint from decorating; all the colours looked washed out and the floor was now looking very unappealing.
The good news however is that this problem is not uncommon and with a deep clean and a fresh sealer applied it can be transformed. I gave the owner a quote which was accepted a date agreed for my return to do the work.
On the first day the floor was sprayed with a neat solution of Tile Doctor Remove and Go which is a powerful alkaline cleaning and stripping agent used to remove old seals and paint. The solution was left to dwell for about twenty minutes so it could soak in and get to work. It was then scrubbed into the tiles using a coarse 200-grit pad fitted to a heavy buffing machine. Water was then added to the floor for lubrication and the soils released from the pores of the tile during scrubbing was removed by with a wet vacuum.
To treat the stubborn paint stains and remains of what I suspect was carpet adhesive a hand scraper and wire brush was used, this was made easier by the Remove and Go which had softened the paint etc.
The next stage was to give the Victorian tiles a mild acid wash using Acid Gel which is applied to the floor, scrubbed in, and rinsed off with a little water then extracted using the wet vacuum. We always recommend an acid wash for old floors like these as it will counter any efflorescent salts resident in the tiles and helps to remove other mineral contaminates and old grout that can mask the true beauty of the tiles.
I left the tiles to dry out for two days before returning to apply the sealer, first checking it was dry by testing for moisture in various places with an electronic damp tester. It’s not a good idea to apply a sealer to a damp floor so we always check first.
Satisfied the floor was dry, I started applying a coat of Tile Doctor Colour Grow which is a colour enhancing impregnating sealer that helps to bring out the true colours in the tile. This was allowed to dry for thirty minutes and then followed up five coats of Tile Doctor Seal and Go Extra which is a breathable sealer that leaves a lovely satin finish and builds on the protection.
Once done the Victorian hallway tiles looked so much cleaner and healthier. It was quite a transformation and the new sealer had given the floor a nice low sheen shine which the customer was very happy with.
For aftercare cleaning I left them with a bottle of Tile Doctor Neutral Cleaner which is specially formulated for cleaning sealed tiles. We don’t recommend tile cleaning products you find on supermarket shelves as the are usually too strong and can strip a sealer off the floor prematurely. If your choosing another product to clean your floor always read the label to make sure its compatible.
Andrew Robb
Merseyside Tile Doctor
 Haus Of Tre Li
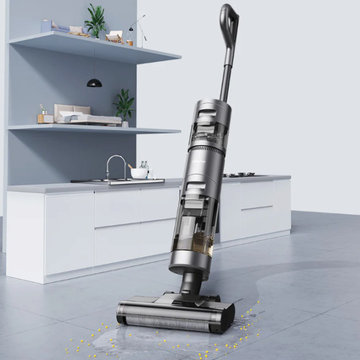
One pass. All clean.
Cleans up wet and dry messes at the same time.
Self-cleaning on the roller brush as long as it is on.
Automatic mess detection for deep cleaning.
Long runtime for cleaning large homes.
Auto ModeMess
Detection
36min
Runtime
0.23gal
Clean Water Tank
0.13gal
Used Water Tank
Erases household messes, both wet and dry.
Vacuums and mops at the same time when brushing the floor 560 times per minute. Especially useful for the bathroom, kitchen, and balcony. With the Dreame detergent* in the package, your floor is cleaner than it looks.
 Tile Doctor Ltd
When you discover an old Victorian tiled floor underneath carpet, the first question that will probably pop into your mind is: can it be restored?
The answer, in the majority of cases, is yes. In fact, Tile Doctor has completed hundreds of Victorian tiled floor restorations. Victorian tiles have a timeless quality about them and are still popular for residential use even in the twenty first century.
What you can usually expect upon lifting your carpet is for the tiles to be covered in carpet adhesives and grippers, as was the case with this particular example of a Victorian Tiles hallway floor at a property in Bedford. Sometimes you might also find paint splashes or other staining left over from decoration work. And, of course, the tiles will be dirty and in much need of a deep clean. These issues spoil the original appearance of the tiles, but with the right methods and products, a complete restoration can be achieved quickly and cost-effectively.
My first task upon arriving at the proper was to carry out a site survey to address the condition of the tiles, before running a quick test clean on a small area of the floor. The result was good and so I was confident that I could achieve a high-quality restoration for the client.
A quote was issued and accepted, and the work was booked in at a date that was convenient for the customer.
Returning to the property, my first course of action was to mix a strong dilution of Tile Doctor Pro Clean, which is a powerful alkaline cleaner safe to use on natural stone, with hot water. This cleaning solution was sprayed along all edges of the floor loosen the glue securing the carpet grippers. I then successfully removed the adhesive carefully using handheld tools to avoid damaging any tiles.
Once this was done, I applied Tile Doctor Remove and Go, scrubbing it into the tiles with a rotary machine. This product is designed to remove heavy soiling, paint splashes and old waxes and sealers. The soiled solution was then extracted using a wet vacuum and stubborn areas re-treated until I was satisfied the floor was clean.
The entire floor was then given a thorough rinse with water to remove any trace of cleaning products and extracted using a wet vax machine.
The floor was allowed to dry for several days before I was able to return to seal the tiles. It’s always important to leave significant time for the floor to dry because any moisture left over can impact the performance of the sealer.
The choice of sealer was Tile Doctor Seal and Go Extra, which provides robust protection against dirt and stains, with a light sheen finish. I chose this sealer not only because the customer wanted a light sheen finish, but also because this particular sealer is fully breathable. Dampness can sometimes be an issue with old Victorian and Quarry tiles which were installed before damp proof membranes became standard.
The transformation achieved within the space of a week was quite incredible and the colours in the tile have really come through.
Another satisfied customer!
David Vissian
Bedfordshire Tile Doctor


 Tile Doctor Ltd
For this job, I had the pleasure of visiting the historic Salts Mill, a former textile mill turned art gallery, shopping centre, and restaurant complex near Bingley, West Yorkshire. It was built in 1853 by the famous manufacturer and philanthropist, Sir Titus Salt, and was at one point the largest industrial building in the world by total floor area.
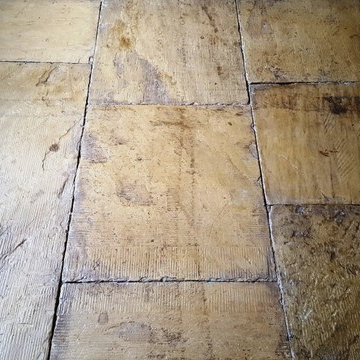
As you can imagine, a lot of the rooms at Salts Mill are over a century and a half old. Most of them also contained stone flooring made from Yorkstone – a type of Sandstone unique to Yorkshire, and easily distinguishable due to its rich, natural yellow colouring. Unfortunately, one such floor in the Salts Mill was in quite a bad state. It has completely lost its vibrance – appearing more grey than yellow – and was evidentially in need of a very deep clean and fresh seal.
I started the Yorkstone tile restoration by soaking the floor in a strong dilution of our reliable alkaline-based tile cleaner, Tile Doctor Pro Clean, and scrubbing it in using a rotary machine fitted with a scrubbing pad. This quickly removed the initial layers of muck and, in the process, revealed oil-based paint and glue stains all over the floor.
To break down the oil and paint I applied Tile Doctor Remove & Go, which is our heavy duty stripper, remover and degreaser. This quickly ate through the paint and glue, and I followed by giving the floor another thorough clean with Pro Clean. Finally, I rinsed the floor with clean water before leaving it to dry for a full two days due to the amount of chemical cleaning product and water applied.
Upon my return to the Salts Mill two days later, I ran some quick damp tests to check for any excess moisture which could’ve prevented me from sealing the floor. Thankfully, the floor was dry and ready to be sealed, but it is always recommended, especially with older floors, to be aware of damp issues as these can be very troublesome.
My choice of sealer was Tile Doctor Seal and Go, a topical sealer which provides a robust, stain resistant seal and a durable low sheen finish all in one product. Multiple coats of Seal and Go were applied, bringing the life and character back to these classic tiles.
Nigel Stoker
North West Yorkshire Tile Doctor
 Tile Doctor Ltd
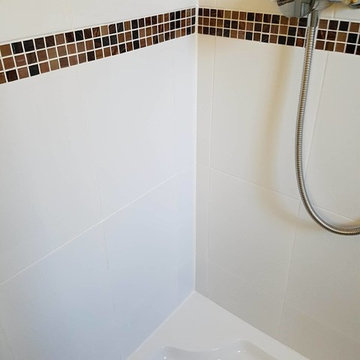
The photographs below are from the bathroom of a house in the Moston area of Manchester which is primarily residential and only 3 miles away from the city centre. My customer had been primarily concerned with the removal of unsightly mould but was also keen to have the grout in the ceramic tiled shower cubicle given a good deep clean.
To clean the Shower Cubicle, I used a strong dilution of Tile Doctor Pro Clean which is a strong alkaline cleaner that works really well on grout. The Pro-Clean solution was decanted into a spray bottle and then sprayed onto the grout lines and left it to dwell. The air in the solution makes it lighter and easier for it to stick to vertical surfaces.
After a few minutes the Pro-Clean was scrubbed in using a stiff grout brush. The tiles were then rinsed with water to remove the soiled solution from the tiles and the process repeated where required.
Although cleaning process was a success there were still a few mould marks left so to tackle these I used Tile Doctor Mould Away spray using the same process of scrubbing and rinsing. The Mould Away spray did the trick for me and I moved on to remove the silicone around the shower cubicle. When removing silicone, you must make sure you get all mouldy silicone out otherwise it can spread from the old to the new.
After I had finished removing the silicone I tidied the shower cubicle and used a bit of gentle heat from my heat gun to dry the grout lines and edges where silicone used to be.
I used my damp tester to make ensure there was no dampness anywhere around the working area and then moved on to colouring the grout which would give the whole shower a fresh and consistent appearance. On this occasion, I used a White colour from the Tile Doctor range of Grout Colourant’s, it’s an epoxy based colourant that protects and rejuvenate the grout lines.
I had to use 2 coats of colourant to get the best result and then moved on to putting new silicone around the shower base with a high-quality mould resistant silicone. When finished adding fresh silicone I tidied up again and the job was complete.
I think you can’t argue the shower cubicle was transformed and customer even said it looks better then when it was new; we also fixed few chips for her whilst there and stripped and replaced the silicone around the sink as a bonus.
Tony Olmet
Greater Manchester Tile Doctor
 Tile Doctor Ltd
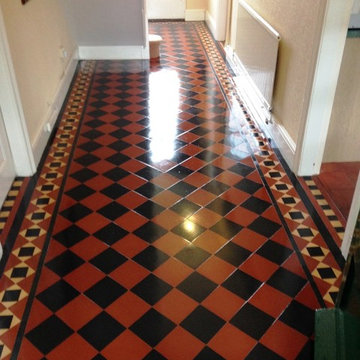
This black and red Victorian tiled hallway at a property in Newport, the third largest city in Wales, had a timeless charm about it, and a classic diamond pattern. Unfortunately, the tiles had lost their colour, leaving them looking dull and lifeless. It was clear to me, upon further inspection, that the existing sealer had failed, allowing dirt to become trapped in the pores of tile.
This can be a very difficult problem to rectify without the right professional assistance; everyday household cleaners are rarely suitable for sealed floors and acidic cleaners can actually male the problem worse. The tiles needed a deep clean with strong products, followed by a fresh, robust surface seal to prevent dirt from becoming trapped again in the future.
I started cleaning the tiles with a strong dilution of Tile Doctor Pro Clean, worked in to the stone as per usual by using a rotary machine fitted with a black scrubbing pad. Pro Clean is a reliable alkaline cleaner that works well on most kinds of natural stone, and while I could see it made a difference here, it was clear something stronger was required to remove what was left of the old sealer.
To remove this, I applied a dilution of Tile Doctor Remove and Go, which is a dedicated stripper that is safe to use on tile and stone for the purposes of breaking down old sealers, waxes, paints, and adhesives, and this proved effective in getting rid of all the old sealer.
Once the cleaning was complete, I rinsed the floor thoroughly to remove any trace of chemicals left over from the cleaning products, before leaving it to dry overnight.
I came back to the property the next day and, after checking the floor was completely dry, I proceeded to seal the floor using eight coats of Tile Doctor Seal and Go. This types of sealer is known as ‘topical’, which means that it builds up a solid layer of protection on the surface of the tile. Topical sealers tend to be more suitable to Victorian and Quarry tiles as they typically require a lot of sealer due to their porosity and these types of sealer are less costly. Seal and Go also adds a nice aesthetically pleasing low sheen finish.
As you can see from the second photo, this did wonders to the tiles and really brought this classic Victorian pattern back to life. Another satisfied client for the Monmouthshire Tile Doctor.
Paul Wales
Monmouthshire Tile Doctor
 Haus Of Tre Li
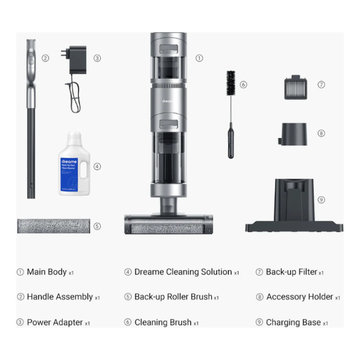
One pass. All clean.
Cleans up wet and dry messes at the same time.
Self-cleaning on the roller brush as long as it is on.
Automatic mess detection for deep cleaning.
Long runtime for cleaning large homes.
Auto ModeMess
Detection
36min
Runtime
0.23gal
Clean Water Tank
0.13gal
Used Water Tank
Erases household messes, both wet and dry.
Vacuums and mops at the same time when brushing the floor 560 times per minute. Especially useful for the bathroom, kitchen, and balcony. With the Dreame detergent* in the package, your floor is cleaner than it looks.
 Tile Doctor Ltd
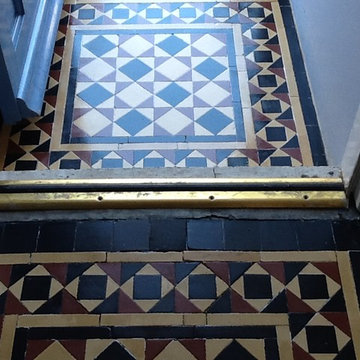
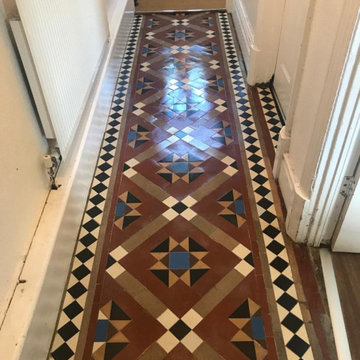
I recently worked on the restoration of a Victorian tiled hallway in Cwmbran Wales which is six miles North of Newport. As you can see from the photographs the floor was in quite a neglected dirty state and many of the the black and white border tiles needed removing and replacing. The worst part was the area by the front door where most of the tiles had been removed and then backfilled with concrete. I can only assume at some point in the past it was deemed to difficult or expensive to restore the floor, so they simply covered it up.
After visiting to survey the floor I did offer to source replacements for the concreted section and restore that as part of the work however my client’s budget would not stretch to that at the time. My quote was therefore focused on the main section of flooring and included replacing border tiles, deep cleaning the whole floor and then sealing the tiles to add protection. Although I did need to check that I could indeed source the replacement tiles before being able to provide the quote which as it turned out would not be an issue.
They were happy to go ahead and we arranged a suitable time to carry out the work which would enable me to work in the property whilst minimising contact with the owners due to the Covid-19 situation.
I spend the first day sorting out the black and white border tiles which needed to be gently prised out of position without upsetting the main part of the floor. The exposed subfloor was then cleaned up to remove old adhesive and replacements were fitted where required and secured into place. The floor would need to be solid before cleaning so that was left for day two so the new adhesive could go off overnight.
On day two I gave the floor an initial clean using a combination of Tile Doctor Pro-Clean and Remove and Go diluted with water. This produces a strong cleaner/stripper that will tackle dirt and remove coatings such as previous sealers. The old tiles had accumulated years of ingrained dirt, so I needed this extra power to remove the years of dirt and contaminates from the tile. It was sprayed onto the tiles and then left to soak in for ten minutes before being actively scrubbed into the tile using a rotary machine fitted with a black scrubbing pad. The soil was then rinsed off with water and extracted with a wet vacuum. The floor was inspected, and the process repeated on the tough stains until I was satisfied all the dirt had been removed.
Next the floor was treated to an acid wash using Tile Doctor Acid Gel using a similar method as before. This is an important treatment for these old Victorian floors that have no damp proof course as it neutralises efflorescent salts trapped in the tile which can appear as white salt deposits later. Once I was happy with the condition of the floor it was given a final rinse and left to dry off. I use a wet vacuum to remove liquids from the floor and on this last extraction I spent extra time to remove as much moisture from the tiles as possible.
I came back a few days later and after checking the tiles were dry using a damp meter, I started the application of the sealer. For this floor I applied seven coats of Tile Doctor Seal and Go for a satin finish. Tile Doctor Seal and Go is a specially formulated water-based sealer that provides both stain resistance and a durable low-sheen finish. It is perfect on a floor of this age where it leaves a lovely finish and will remain durable in what is a essentially a high traffic area.
Although we didn’t manage to sort out the area by the front door the client managed to fit a made to measure coir door mat along with carpet bar which was quite practical and looked fine so they were able to resolve that problem without blowing their budget.
The client was over the moon with results, the floor had a lovely pattern and the colours now shone through. I suggested the use of Tile Doctor Neutral Tile Cleaner to keep the floor clean and in good condition. It is neutral in pH so will ensure that the newly applied sealer stays in place and will ensure maintenance is nice and easy for them.
Paul Wales
Monmouthshire Tile Doctor
 Tile Doctor Ltd
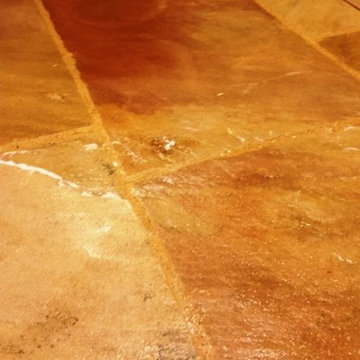
Sandstone is a particularly popular choice for kitchen and hallway floors amongst home owners in the UK. It not only possesses beautiful natural shades and features, but it is also typically hard wearing, making it an ideal stone for tiled flooring in high traffic areas of a house and can often be found laid as large riven flagstones in pubs and other commercial premises.
Naturally, just like any other type of tiled floor, Sandstone needs to be maintained using appropriate products and methods. A lack of adequate surface sealer in particular leaves Sandstone susceptible to ingrained dirt, and can leave distinct, unsightly patches such as those in the photograph below.
In this instance, I visited a client in the old Essex town of Thaxted, who believed that her four square meter Sandstone tiled floor might be suffering from damp issues after lifting up the mats covering the area.
However, when I arrived at the property and ran damp tests, I found the issue to be superficial. The Sandstone floor however did require attention in the form of a deep clean and a fresh seal to tackle the white patches and prevent further discolouration.
To begin the cleaning process I spread Tile Doctor Remove & Go evenly across the floor. It was left to dwell for approximately 15 minutes, during which time it worked to break down the old sealer remaining on the tiles. I then agitated the area twice over with both a black scrubbing pad fitted to a rotation machine lift away any dirt.
The resultant slurry was removed using a wet vacuum and the floor was then rinsed with water and then mixed a strong solution of one part Tile Doctor Pro Clean to three parts water which was used to give the floor a final clean and scrub the grout clean before using the wet vacuum again and giving the floor a final rinse with water.
After completing the cleaning process I left the floor to dry over the weekend. Upon my return to the house I proceeded to seal the tiles with three coats of Tile Doctor Colour Grow which is an impregnating sealer that soaks into the pores of the stone and provide durable surface protection going forward. Colour Grow is also specially designed to let the floor breathe and enhance the natural colours in the stone and, in this case, really helped to intensify the natural sand-coloured shades in the tiles.
The difference made to these Sandstone tiles was really noticeable, with the white patches completely removed and the surface more generally back to looking like new, needless to say, my client was very happy with the results.
Nick Murphy
South Essex Tile Doctor
Sponsored
Columbus, OH

Hope Restoration & General Contracting
Columbus Design-Build, Kitchen & Bath Remodeling, Historic Renovations
 Haus Of Tre Li
One pass. All clean.
Cleans up wet and dry messes at the same time.
Self-cleaning on the roller brush as long as it is on.
Automatic mess detection for deep cleaning.
Long runtime for cleaning large homes.
Auto ModeMess
Detection
36min
Runtime
0.23gal
Clean Water Tank
0.13gal
Used Water Tank
Erases household messes, both wet and dry.
Vacuums and mops at the same time when brushing the floor 560 times per minute. Especially useful for the bathroom, kitchen, and balcony. With the Dreame detergent* in the package, your floor is cleaner than it looks.
 Tile Doctor Ltd
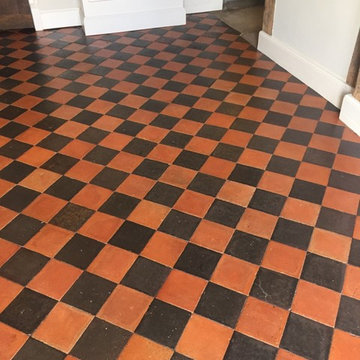
Sometimes it isn’t until you’ve deep cleaned your tiles that you realise just how dirty they were to begin with. This was the case with my customer in Thame, in the south of Oxfordshire where I worked on a classic red and black Quarry tiled floor which was far from being in its best condition.
My starting point in the cleaning process was to mix a strong solution of Tile Doctor Pro Clean, which is the reliable, multi-purpose alkaline cleaner that is safe to use on tile, stone and grout. The solution was left to soak into the tiles for ten minutes before being scrubbed into the floor with a rotary floor machine fitted with a stiff brush.
Following this, I rinsed the floor with clean water and then proceeded to wash it with Tile Doctor Grout Clean Up. This is a concentrated phosphoric acid cleaner designed to remove efflorescence and other mineral deposits such as grout smears.
Finally, I rinsed the tiles again with water and Tile Doctor Neutral Tile Cleaner, which is a pH neutral solution, to neutralise the chemicals and leave the floor fresh and clean, ready to be sealed. The floor was left to dry overnight.
The next day I returned to seal the floor after checking the tiles were dry. I opted to use two different sealers. The first was Tile Doctor Colour Grow, which is an impregnating sealer with the added effect of enhancing the natural colour in the stone. The second was Tile Doctor Seal & Go, a topical sealer that adds the high quality, durable sheen finish to the floor that the customer had requested.
I took the photograph below after sealing half the floor, it really shows the difference a sealer can make to a tiled floor.
Here’s the photo of theQuarry tiled floorafter sealing the whole floor. As you can see, they now have a new lease of life, and they’ll be much easier for the customer to keep looking great in the future.
Barry Woodward
Oxfordshire Tile Doctor
 Tile Doctor Ltd
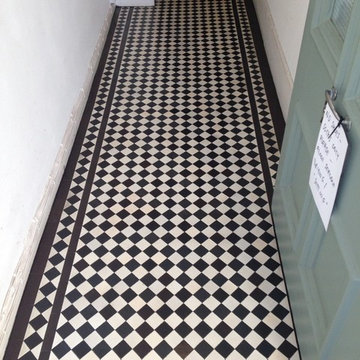
This Victorian floor was discovered at a house in Swiss Cottage in the London borough of Camden when the current owner took the old carpet up. It was in need of substantial restoration to bring it back to its former glory however we have had really good results from restoring similar floors so we were confident it could be done.
The carpet had literally just been taken away so we had to remove the gripper rods, underlay and deal with the adhesive which we managed to tackle using a strong solution of Tile Doctor Remove and Go which was left to dwell and penetrate the glue for ten minutes before being scrubbed in.
Once the glue was removed the tiles were given a thorough clean using Tile Doctor Pro-Clean using the same process of leaving it to soak in and then actively scrubbing it into the floor to get the tile and grout as clean as possible. The floor was then rinsed and stubborn areas re-treated until we were satisfied with the result.
The last cleaning step was to use a steam cleaner to pull as much dirt out of the pores of the tiles as possible and a wet vacuum to extract the liquids and get the floor as dry as possible and we also re-grouted where necessary due to the damage caused by the gripper rods.
We also gave the Victorian tiles in the entrance lobby a thorough clean using the same process, although they had not been covered in carpet they were still in need of a deep clean.
The floor was left to dry and when we returned the whole floor was ready to be sealed and for this we used five coats of Tile Doctor Seal and Go which adds a nice shine to the floor as well as providing a surface seal that will help protect the tiles from stains going forward. For the entrance lobby we used two coats of Colour Grow which doesn’t add the shine but as an impregnating sealer we felt it would perform better with the wear at the front of the house.
The owner of the house was very pleased with the outcome and left the following testimonial:
Prompt, courteous, hard working and great results !.
Nigel Voyce
North London Tile Doctor
 Haus Of Tre Li
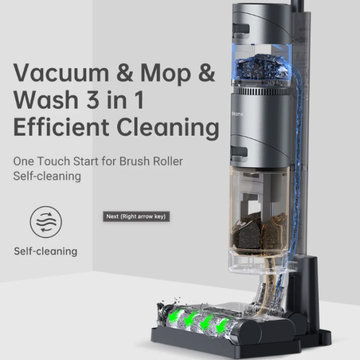
One pass. All clean.
Cleans up wet and dry messes at the same time.
Self-cleaning on the roller brush as long as it is on.
Automatic mess detection for deep cleaning.
Long runtime for cleaning large homes.
Auto ModeMess
Detection
36min
Runtime
0.23gal
Clean Water Tank
0.13gal
Used Water Tank
Erases household messes, both wet and dry.
Vacuums and mops at the same time when brushing the floor 560 times per minute. Especially useful for the bathroom, kitchen, and balcony. With the Dreame detergent* in the package, your floor is cleaner than it looks.
Sponsored
Columbus, OH
Hope Restoration & General Contracting
Columbus Design-Build, Kitchen & Bath Remodeling, Historic Renovations
 41 West
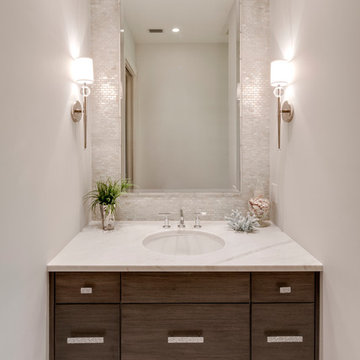
41 West Coastal Retreat Series reveals creative, fresh ideas, for a new look to define the casual beach lifestyle of Naples.
More than a dozen custom variations and sizes are available to be built on your lot. From this spacious 3,000 square foot, 3 bedroom model, to larger 4 and 5 bedroom versions ranging from 3,500 - 10,000 square feet, including guest house options.
 Alan Clark Architects, LLC
Jeff Herr Photography
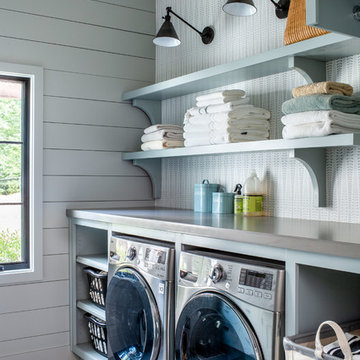
Example of a farmhouse gray floor laundry room design in Atlanta with open cabinets, blue cabinets, gray walls, a side-by-side washer/dryer and gray countertops
Example of a farmhouse gray floor laundry room design in Atlanta with open cabinets, blue cabinets, gray walls, a side-by-side washer/dryer and gray countertops

 Lisa Gabrielson Design
Suburban kitchen remodel for a crisp urban farmhouse look. Photo: Lauren Rubinstein
Example of a transitional u-shaped eat-in kitchen design in Atlanta with a farmhouse sink, shaker cabinets, white cabinets, white backsplash, subway tile backsplash, stainless steel appliances and granite countertops
Example of a transitional u-shaped eat-in kitchen design in Atlanta with a farmhouse sink, shaker cabinets, white cabinets, white backsplash, subway tile backsplash, stainless steel appliances and granite countertops
45