
Search results for "Determine" in Home Design Ideas
 Elite Construction and Remodel Corp
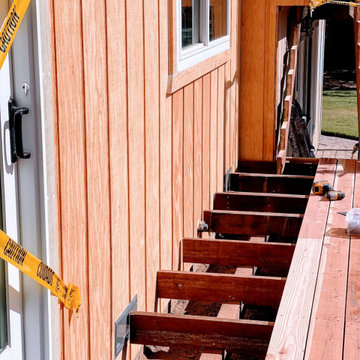
Building a deck takes time, and there are specific steps you need to follow to get the job done right. When building on a sloped site, take extra care to ensure each step is complete after moving on to the next. In this case, once you’ve determined to rise and run and install a landing pad, you’re ready to start building the stairs.

 Urbanology Designs
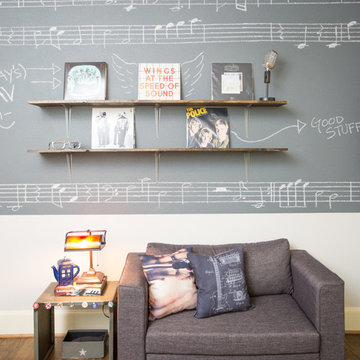
Sitting area in teenage bedroom. Custom chalkboard wall with music and simple shelving.
Bedroom - bedroom idea in Dallas
Bedroom - bedroom idea in Dallas
Find the right local pro for your project
 Coastal Signature Homes
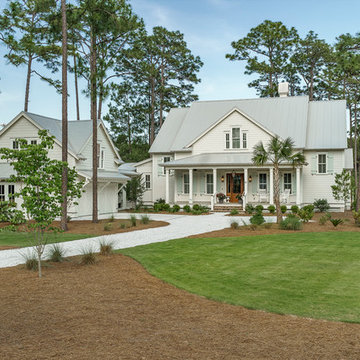
Front view of this lovely home in the heart of the Low Country of South Carolina. Thoroughly Southern, this home has a wide, open front porch, shell drive and walkway, beautifully landscaped and low maintenance lawn, a separate guest suite over the garage - absolutely beautiful.
 Orren Pickell Building Group
**Project Overview**
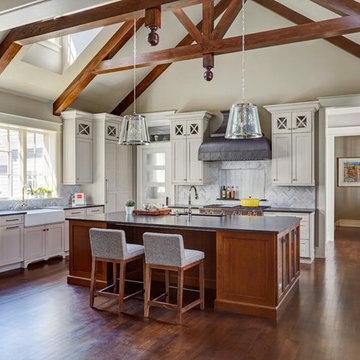
This new construction home built next to a serene lake features a gorgeous, large-scale kitchen that also connects to a bar, home office, breakfast room and great room. The homeowners sought the warmth of traditional styling, updated for today. In addition, they wanted to incorporate unexpected touches that would add personality. Strategic use of furniture details combined with clean lines brings the traditional style forward, making the kitchen feel fresh, new and timeless.
**What Makes This Project Unique?*
Three finishes, including vintage white paint, stained cherry and textured painted gray oak cabinetry, work together beautifully to create a varied, unique space. Above the wall cabinets, glass cabinets with X mullions add interest and decorative storage. Single ovens are tucked in cabinets under a window, and a warming drawer under one perfectly matches the cabinet drawer under the other. Matching furniture-style armoires flank the wall ovens, housing the freezer and a pantry in one and custom designed large scale appliance garage with retractable doors in the other. Other furniture touches can be found on the sink cabinet and range top cabinet that help complete the look. The variety of colors and textures of the stained and painted cabinetry, custom dark finish copper hood, wood ceiling beams, glass cabinets, wood floors and sleek backsplash bring the whole look together.
**Design Challenges*
Even though the space is large, we were challenged by having to work around the two doorways, two windows and many traffic patterns that run through the kitchen. Wall space for large appliances was quickly in short supply. Because we were involved early in the project, we were able to work with the architect to expanded the kitchen footprint in order to make the layout work and get appliance placement just right. We had other architectural elements to work with that we wanted to compliment the kitchen design but also dictated what we could do with the cabinetry. The wall cabinet height was determined based on the beams in the space. The oven wall with furniture armoires was designed around the window with the lake view. The height of the oven cabinets was determined by the window. We were able to use these obstacles and challenges to design creatively and make this kitchen one of a kind.
Photo by MIke Kaskel
 Kasper Custom Home Remodeling
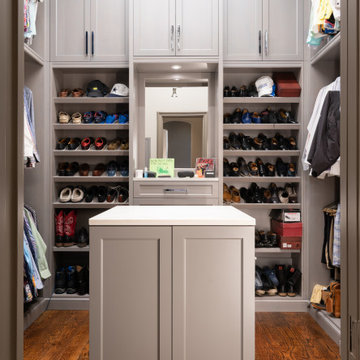
His closet was tailored to his every need. We work with our clients to determine their "inventory" before we even begin design, so there will literally be a place for everything. Whether everything is in it's place, on the other hand, is another story...
 EC Trethewey Building Contractors, Inc.
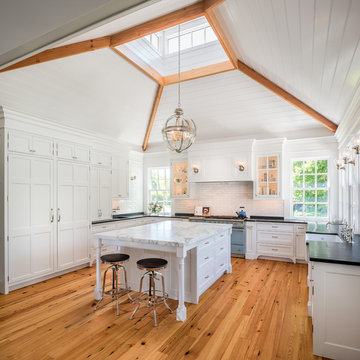
Kitchen - traditional u-shaped medium tone wood floor kitchen idea in Philadelphia with a farmhouse sink, white cabinets, white backsplash, colored appliances, an island and shaker cabinets
 123 Remodeling Inc.
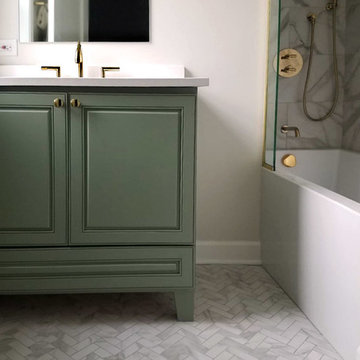
Chicago isn’t known for spacious bathrooms, especially in older areas like Ravenswood. But we’re experts in using every inch of a condo’s limited footprint. With that determination, this mini master bath now has a full vanity, shower, and soaking tub with room to spare.
You can find more information about 123 Remodeling and schedule a free onsite estimate on our website: https://123remodeling.com/
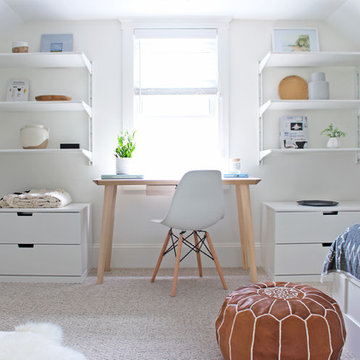
 COSWICK LTD
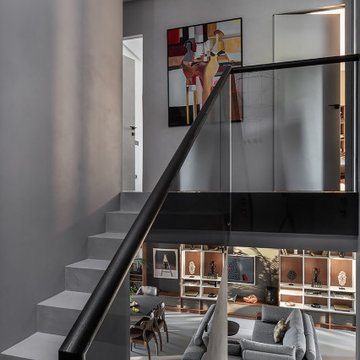
Modern minimalism as a basis for unusual, expressive art objects and author’s painting. This is what determined the main style of the living space. The concept was based on such materials as concrete and plaster, natural wood and stone. The interior had to be as natural as possible, reflecting the architectural image of the residential complex and the beauty of the surrounding nature. “The most important thing for me in this project is the result. Customers say that the interior has become their place of power! They want to return home, invite guests, spend a lot of time in their house and enjoy life here! It is very valuable and important that the project was realized almost 100%, while the customers themselves were interested not to deviate even a millimeter from the project, but to do everything exactly as the Author intended,” emphasized project designer Ksenia Mitskevich.
Coswick oak Cinnamon hardwood flooring was used in the project.
Designer: Ksenia Mitskevich.
Photo by Sergey Pilipovich.
Coswick’s partner: Domani.
 Annette Jaffe Interiors
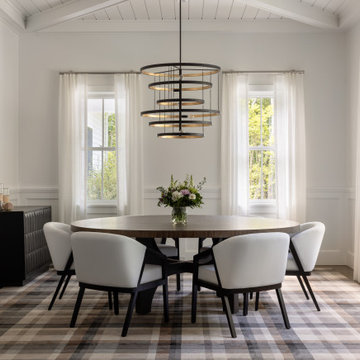
This Sag Harbor home is designed for year-round gatherings, offering a welcoming atmosphere for family and friends with stylish, cozy spaces perfect for entertaining and relaxation.
This dining room features a round table perfect for intimate holiday set-ups, complemented by a gorgeous rug, sleek furniture, and statement lighting for a stylish and inviting atmosphere.
 Allan Block Retaining Wall and Patio Wall Systems
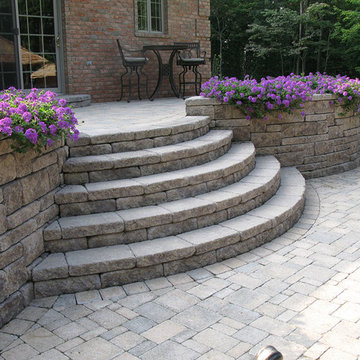
Allan Block products can be used to create many types of applications including stairs. These projects were built in Pennsylvania and Maryland using products from Nitterhouse Concrete. They offer great colors and textures to compliment any outdoor landscaping the customer has requested. Large backyard makeover that included sunken pool, retaining walls and pool house.
Photos provided by Allan Block Corporation
 TKS Design Group
Free ebook, Creating the Ideal Kitchen. DOWNLOAD NOW
Our clients came to us looking to do some updates to their new condo unit primarily in the kitchen and living room. The couple has a lifelong love of Arts and Crafts and Modernism, and are the co-founders of PrairieMod, an online retailer that offers timeless modern lifestyle through American made, handcrafted, and exclusively designed products. So, having such a design savvy client was super exciting for us, especially since the couple had many unique pieces of pottery and furniture to provide inspiration for the design.
The condo is a large, sunny top floor unit, with a large open feel. The existing kitchen was a peninsula which housed the sink, and they wanted to change that out to an island, relocating the new sink there as well. This can sometimes be tricky with all the plumbing for the building potentially running up through one stack. After consulting with our contractor team, it was determined that our plan would likely work and after confirmation at demo, we pushed on.
The new kitchen is a simple L-shaped space, featuring several storage devices for trash, trays dividers and roll out shelving. To keep the budget in check, we used semi-custom cabinetry, but added custom details including a shiplap hood with white oak detail that plays off the oak “X” endcaps at the island, as well as some of the couple’s existing white oak furniture. We also mixed metals with gold hardware and plumbing and matte black lighting that plays well with the unique black herringbone backsplash and metal barstools. New weathered oak flooring throughout the unit provides a nice soft backdrop for all the updates. We wanted to take the cabinets to the ceiling to obtain as much storage as possible, but an angled soffit on two of the walls provided a bit of a challenge. We asked our carpenter to field modify a few of the wall cabinets where necessary and now the space is truly custom.
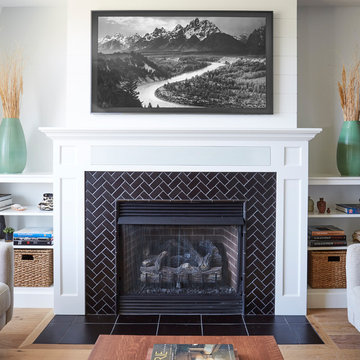
Part of the project also included a new fireplace design including a custom mantle that houses a built-in sound bar and a Panasonic Frame TV, that doubles as hanging artwork when not in use. The TV is mounted flush to the wall, and there are different finishes for the frame available. The TV can display works of art or family photos while not in use. We repeated the black herringbone tile for the fireplace surround here and installed bookshelves on either side for storage and media components.
Designed by: Susan Klimala, CKD, CBD
Photography by: Michael Alan Kaskel
For more information on kitchen and bath design ideas go to: www.kitchenstudio-ge.com
 Bay Area Cabinetry
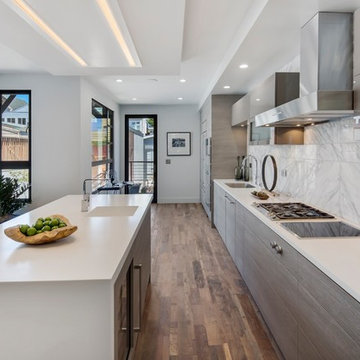
Inspiration for a contemporary galley medium tone wood floor and brown floor kitchen remodel in San Francisco with an integrated sink, flat-panel cabinets, gray cabinets, white backsplash, an island and white countertops
 Cuisines Nuenza
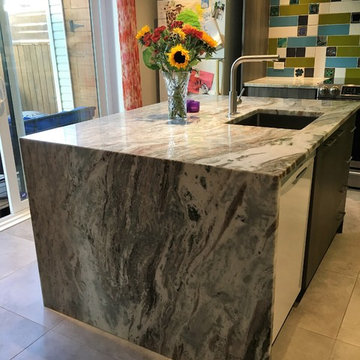
The inspiration for this space comes from beautiful tiles that were collected from around Europe. The were the driving factor which determined the colors of the cabinets, counters and floors. These colorful tiles of greens, blues and whites were matched and dispersed among other simple tiles, and a custom back splash was created. We brought in green cabinets and grounded the whole space with a neutral concrete tile. The counter top, a natural stone called Fantasy Brown brought a whimsical yet subdued feel to the space.
 Kathleen Jennison
An Arts & Crafts Bungalow is one of my favorite styles of homes. We have quite a few of them in our Stockton Mid-Town area. And when C&L called us to help them remodel their 1923 American Bungalow, I was beyond thrilled.
As per usual, when we get a new inquiry, we quickly Google the project location while we are talking to you on the phone. My excitement escalated when I saw the Google Earth Image of the sweet Sage Green bungalow in Mid-Town Stockton. "Yes, we would be interested in working with you," I said trying to keep my cool.
But what made it even better was meeting C&L and touring their home, because they are the nicest young couple, eager to make their home period perfect. Unfortunately, it had been slightly molested by some bad house-flippers, and we needed to bring the bathroom back to it "roots."
We knew we had to banish the hideous brown tile and cheap vanity quickly. But C&L complained about the condensation problems and the constant fight with mold. This immediately told me that improper remodeling had occurred and we needed to remedy that right away.
The Before: Frustrations with a Botched Remodel
The bathroom needed to be brought back to period appropriate design with all the functionality of a modern bathroom. We thought of things like marble countertop, white mosaic floor tiles, white subway tile, board and batten molding, and of course a fabulous wallpaper.
This small (and only) bathroom on a tight budget required a little bit of design sleuthing to figure out how we could get the proper look and feel. Our goal was to determine where to splurge and where to economize and how to complete the remodel as quickly as possible because C&L would have to move out while construction was going on.
The Process: Hard Work to Remedy Design and Function
During our initial design study, (which included 2 hours in the owners’ home), we noticed framed images of William Morris Arts and Crafts textile patterns and knew this would be our design inspiration. We presented C&L with three options and they quickly selected the Pimpernel Design Concept.
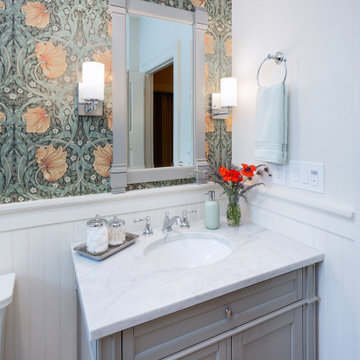
We had originally selected the Black and Olive colors with a black vanity, mirror, and black and white floor tile. C&L liked it but weren’t quite sure about the black, We went back to the drawing board and decided the William & Co Pimpernel Wallpaper in Bayleaf and Manilla color with a softer gray painted vanity and mirror and white floor tile was more to their liking.
After the Design Concept was approved, we went to work securing the building permit, procuring all the elements, and scheduling our trusted tradesmen to perform the work.
We did uncover some shoddy work by the flippers such as live electrical wires hidden behind the wall, plumbing venting cut-off and buried in the walls (hence the constant dampness), the tub barely balancing on two fence boards across the floor joist, and no insulation on the exterior wall.
All of the previous blunders were fixed and the bathroom put back to its previous glory. We could feel the house thanking us for making it pretty again.
The After Reveal: Cohesive Design Decisions
We selected a simple white subway tile for the tub/shower. This is always classic and in keeping with the style of the house.
We selected a pre-fab vanity and mirror, but they look rich with the quartz countertop. There is much more storage in this small vanity than you would think.
The Transformation: A Period Perfect Refresh
We began the remodel just as the pandemic reared and stay-in-place orders went into effect. As C&L were already moved out and living with relatives, we got the go-ahead from city officials to get the work done (after all, how can you shelter in place without a bathroom?).
All our tradesmen were scheduled to work so that only one crew was on the job site at a time. We stayed on the original schedule with only a one week delay.
The end result is the sweetest little bathroom I've ever seen (and I can't wait to start work on C&L's kitchen next).
Thank you for joining me in this project transformation. I hope this inspired you to think about being creative with your design projects, determining what works best in keeping with the architecture of your space, and carefully assessing how you can have the best life in your home.
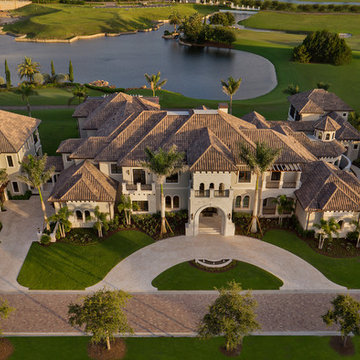
 JMDG Architecture | Planning + Interiors
 Photographed by Giovanni Photography
Transitional two-story stucco exterior home idea in Miami
Transitional two-story stucco exterior home idea in Miami
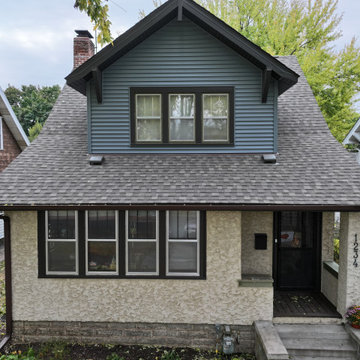
 St. Paul Siding
When we were contacted by the homeowners, they were looking to improve the exterior of their home but wanted to save the stucco. After exploring different options, we determined the best way to do this was to replace the existing siding, install an aluminum soffit and aluminum window wraps, and wrap the fascia in aluminum. The homeowners wanted an entirely maintenance-free exterior, and it will be many years before there is any upkeep required.
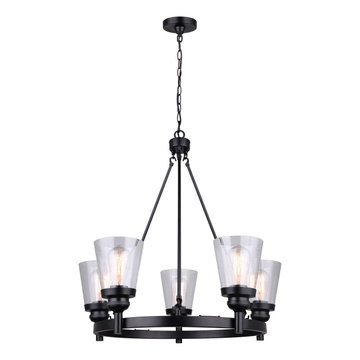
 Harmonized Home by CANARM
Your home lighting determines how a room looks and feels, so make sure your time at home shines by including DECLAN in your plans. DECLAN is the ideal transitional wagon wheel chandelier as it suits many home decor styles such as traditional, farmhouse or industrial. Its ever-trending matte black finish complements its beautiful seeded glass shades to perfection, leaving an eye-catching style and lasting impression.
36