Search results for "Determine" in Home Design Ideas

After meeting with Kenny & Laura, we determined that they wanted a clean and effortless design that had elements of nature and healing. We started by determining that they wanted a neutral and natural materials.
The centerpiece of the space was the tub, this stone tub was purchased, and all other elements were carefully selected to enhance the healing and spa experience.
The large format flooring selected is called Lagos Concrete from Arizona Tile. The tile is 24X48 which makes for less grout lines and the minimal chance for the pattern to be broken up with lines.
The shower wall tile is also a 24X48 tile called Cosmic White and laid in a horizontal pattern for ease of maintenance and care. By using this large format, it almost appears to be a slab material.
The pebble chosen is a warm blend which stimulates a healing capability during the showering experience.
The shower fixtures, tub filler and faucets are from Delta Faucet. They are the Trinsic collection.
The shower head is called the Hydro Rain shower head, which diverts to an everyday shower head, but has the option of a rain shower.
Just look at that vanity! The natural veined grained wood from Room & Board completes that natural element and promotes healing.
Haku White quartz countertop and rectangular sinks give a modern element paired with electric mirrors for even light when in use.
Beautiful remodel!

ARTR152M4: adorne® Tamper-Resistant Outlet - 15A - 125V - Magnesium
ADPD703HM4: adorne® Paddle Dimmer - 700W - Incandescent/Halogen - Magnesium
ADTP703TUM4: - 700W - True-Universal - Magnesium
adorne® Tamper-Resistant Outlet -
All adorne outlets include a tamper-resistant design featuring a patented shutter system, keeping children safe by preventing them from pushing small objects into the outlet. The shutters are molded a dark color that they fade into the backgorund while keeping users safe.
Patented shutter system helps prevent improper insertion of foreign objects.
Configuration easily supports two plugs and offers the capacity of a standard outlet.
Easy "1-for-1" installation lets you simply replace your existing outlet in just minutes.
Fits in your existing electrical box and does not require new wires for typical installation. Innovative assembly and snap-in system make it fast and simple to install.
adorne® Paddle Dimmer -
Dual-engineered with a rocking motion for seamless on/off lighting control, as well as a slider for dimming in one beautifully inventive package.
To determine what option is right for you, make sure the wattage of your bulbs matches the wattage of the dimmer switch by multiplying the number of bulbs by their respective wattage. For example, if you have a chandelier with 11 bulbs at 100 watts each, you would need the 1100 watt dimmer switch.
Supports incandescent and halogen bulbs and single-pole/3-way operation.
Easy "1-for-1" installation lets you simply replace your existing switch in just minutes.
Fits in your existing electrical box and does not require new wires for typical installation. Innovative assembly and snap-in system make it fast and simple to install.
adorne® sofTap Dimmer -
The sofTap design features an innovative micro-movement that turns lights on an doff with just a soft "tap" of the finger.
2015 Light for Tomorrow Winner.
To determine what option is right for you, make sure the wattage of your bulbs matches the wattage of the dimmer switch by multiplying the number of bulbs by their respective wattage. For example, if you have a chandelier with 11 bulbs at 100 watts each, you would need the 1100 watt dimmer switch.
Switch supports single-pole and three-way operation.
Easy "1-for-1" installation lets you simply replace your existing switch in just minutes.
Fits in your existing electrical box and does not require new wires for typical installation. Innovative assembly and snap-in system make it fast and simple to install.
Tru-Universal technology enables the dimmer to support all load types, including incandescent/halogen, Magnetic Low Voltage (MLV), Electronic Low Voltage (ELV) in forward or reverse Phase, CFL/LED, etc.

4 Steps to Achieving a Rewarding Cost Effective Home Renovation
1 Home Renovation an Introduction
A home renovation due to changes in family needs and space requirements can be a challenging, but also a rewarding experience. As a homeowner, gathering and coordinating resources and possibly help from professional consultants are required. Once the construction phase has started, patience, endurance and commitment to follow through are necessary. Despite the challenges, the rewards of a well-planned and successfully completed project are meaningful, adding aesthetic and economic value, also providing the opportunity to personalize a home, encompassing the function, comfort and aesthetics to accommodate individual taste and lifestyle.
A renovation of an existing home is a viable alternative to moving or building a new home, assuming that a home is structurally sound, the expenditure to enlarge or improve can be a cost effective alternative. A home possessing charm, style, historical significance, established landscaping or an exceptional location could be a significant motivation to consider purchasing another home with the intent to renovate.
The complexity of a project could be relatively simple, changing the use of a room, consolidating two rooms into one, or opening up a room to the outdoors. It could also be a more involved task requiring planning, design and construction documents to build a second floor addition, the addition of a new wing or completely gutting the interior. Some projects could be completed in a weekend’s work or more complex projects, using a “Master Plan”, a plan which provides overall guidance; a renovation can be accomplished all at once or divided into manageable projects over a period of time. With the home evolving gradually allowing the renovation to be planned, timed and tailored to meet individual needs and circumstances.
The due diligence phase should precede the decision to renovate whether it’s an existing home or a home that is purchased with the intent to renovate. The due diligence phase will reveal the factors affecting the nature and scope of the project or if a renovation makes sense.
Every renovation project is unique relative to personal requirements, architectural style & construction type. This guide will be helpful in developing an understanding of the preliminary groundwork required to realize a successful project. If properly planned, a home renovation project can be a positive and rewarding experience resulting in a comfortable, practical and an attractive living environment.
The first step of the planning process is documenting the goals and long-range plans referred to as the “Project Program”. This will dictate the nature, scope and feasibility of the project. Providing a guide to achieving defined goals, the timing or phasing of the project and budget required to achieve the desired end result.
2 Documenting Existing Conditions
Once the “Project Program”, has been established, the next step is to determine what there is to work with. This requires documenting the home’s floor plan and site elements which includes drawing an “as built” floor & site plan consisting of the existing exterior walls, interior rooms, doors, windows, etc. and surrounding site elements, landscape and other significant exterior features. Additionally understanding and noting on the “as built” plan, the structural, mechanical and electrical systems as necessary. Gathering the “existing condition” information defines what there is to work with, creating the framework from which to facilitate and organize the decision making process and develop effective “project program” solutions.
3 Evaluating Existing Conditions
The goals and long-range plans have been established, and the existing floor plan and site elements have been documented. Before developing design solutions, the next step is to evaluate existing conditions. The evaluation includes: a detailed analysis of the structural, mechanical and electrical systems, determining the condition of the house, noting functional and aesthetic deficiencies. At the same time recognizing the home’s strengths, assets and evaluating its relationship to its site. The remaining parameters will be defined by the local jurisdiction’s zoning regulations, these regulations will define the “envelope”, within which the proposed project will be required to fit:
•required front, side & rear yard setbacks
•maximum allowable lot coverage & height
The previous three steps have provided the necessary foundation to start the design phase. The goals and long range plans have been established, existing conditions have been documented and the evaluation of what there is to work with are now in place. This will provide the framework from which to facilitate and organize design solutions. The consolidation of this information is manifested in the development of the “Master Plan” which will become the road map by which sound decision-making can be made as a home renovation evolves. Keeping the project, on a linear path, avoiding redundancies and back tracking, on time, within budget, concluding with a well crafted finished product. After all the “up front” research and documentation has been completed, the design phase of the project can now precede, with the creation of diagrammatic design drawings. Organizing interior spaces, taking into account the external elements, prevailing breezes, solar orientation, view, existing outdoor features, etc. Through the development of schematic sketches themes will emerge followed by design development drawings. Wise planning and renovation decisions can save money and time at the same time provide a well crafted finished project. The “Master Plan” provides a strategic path in the planning and decision making process leading to a successful and rewarding home renovation, which will add value and considerable enjoyment, for many years, living in a newly renovated home.
By virtue of having gone through these steps, frustrations sometimes encountered during a home renovation will be minimized, allowing the renovation to be a gratifying and rewarding experience. Being aware of the process allows one to become an “Educated Client,” which is worth quite a bit more than one might realize. The uneducated client may not realize the benefit of going through the planning, evaluation and documentation groundwork. He will only realize its benefits after having completed a prior renovation project. This rational approach keeps the design process on a direct path to achieving prescribed goals.
4 Exploring Design Solutions & Developing a Master Plan
The previous three steps have provided the necessary foundation to start the design phase. The goals and long range plans have been established, existing conditions have been documented and the evaluation of what there is to work with are now in place. This will provide the framework from which to facilitate and organize design solutions. The consolidation of this information is manifested in the development of the “Master Plan” which will become the road map by which sound decision-making can be made as a home renovation evolves. Keeping the project, on a linear path, avoiding redundancies and back tracking, on time, within budget, concluding with a well crafted finished product.
By virtue of having gone through these steps, frustrations sometimes encountered during a home renovation will be minimized, allowing the renovation to be a gratifying and rewarding experience. Being aware of the process allows one to become an “Educated Client,” which is worth quite a bit more than one might realize. The uneducated client may not realize the benefit of going through the planning, evaluation and documentation groundwork. He will only realize its benefits after having completed a prior renovation project. This rational approach keeps the design process on a direct path to achieving prescribed goals.
After all the “up front” research and documentation has been completed, the design phase of the project can now precede, with the creation of diagrammatic design drawings. Organizing interior spaces, taking into account the external elements, prevailing breezes, solar orientation, view, existing outdoor features, etc. Through the development of schematic sketches themes will emerge followed by design development drawings. Wise planning and renovation decisions can save money and time at the same time provide a well crafted finished project. The “Master Plan” provides a strategic path in the planning and decision making process leading to a successful and rewarding home renovation, which will add value and considerable enjoyment, for many years, living in a newly renovated home.
Find the right local pro for your project

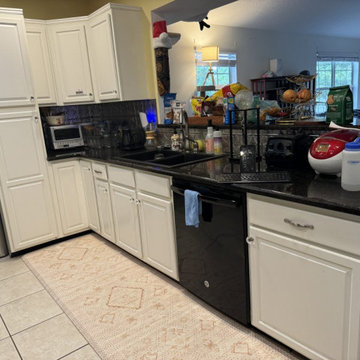
Determine the lighting layout. Before installing the fixtures, it is necessary to determine the layout of the lighting. Generally, installing fixtures above, below, and on the sides of cabinets can achieve better illumination. If the kitchen space is small, consider installing lights above the walls. Additionally, consider the lighting coverage and quantity to ensure optimal illumination for the entire kitchen.

After meeting with Mark, we determined that the goal of his remodel was that he wanted to convert his typical 2000s master bath into a transitional and functional area and get more storage. The standard cultured marble walls and soaking tub wasn’t exactly what he wanted any longer.
After learning about his style, we determined a large format tile and larger base cabinets would do the trick. From the white cabinetry, and striking vein large format tile and deep soaking tub.
The white shaker cabinets are for Sollid Cabinetry. We minimized the sink bases so that Mark could control what is under those cabinets, however do you see those drawer bases? They are large enough to hold anything you desire.
The two-toned shower and tub deck tile feature a striking vein that appears to go on for days. The wall tiles size is a large format tile measuring at 24X48.
This size allows for two great design elements. The first, allowing the vein to be continuous. Second, less wall grout. A total of 9 tiles used on the walls. To accentuate this vein we installed an oversized niche allows for a spotlight for the pebble mosaic to be a feature on the wall and the shower pan.
The tub deck and curb tiles are from Arizona Tile as well. It is the Cemento Rasato – Bianco 12X24. By pairing these tiles together, it supports the wall tile and allows that to be the star of the show.
The bathroom floor is Frassino, from the collection of Porta Nouva from Arizona Tile. Laid in a horizontal random offset. This selection pops the whites and grounds the elements.
This bathroom features a Calcatta quartz countertops that showcase a slight vein that supports the wall tile. The bathroom accessories, lighting fixtures and faucets are all brushed nickel.

Joseph Eichler developed his moderately priced houses for the mass-market starting in 1949. His homes were designed using affordable materials and simple construction techniques. Nearly 70 years later these homes are in need of updating and remodeling an Eichler home today can become an imposing and costly project if you’re not careful. For this project the clients, who had undergone several previous house renovations, were determined to stick with an established budget from the beginning. Klopf Architecture helped them modernize their Eichler with a premium appearance on a reasonable budget.
The clients challenged the Klopf team to create a design that had a high-end feel and nicely done while adhering to their budget. That meant not all of the initial project scope could be built. Like many other Eichler homes, the original floor plan did not meet the family’s needs leaving them feeling disconnected from one room to another. While an early goal was to expand the house into a carport and create a larger garage, it did not survive the contractor pricing phase of the project.
The goals that did survive through to the end of the project included blurring some of the boundaries and opening up some of the spaces, making them more functional and creating a smoother flow in the house. The Klopf team joined the former separate kitchen and formal living room into one large space and shift the dining room where it is now connected to the kitchen. Klopf swapped the family room to the front alongside the living room, so the spaces feel more cohesive and are now better suited for family activities. The functional layout of the master bathroom was changed to include a large, curbless shower.
Installing a complete IKEA kitchen including cabinets, countertops, appliances, light fixtures, and furnishings was key to staying within budget. Bath fixtures in this house are also exclusively IKEA. Klopf Architecture has designed many homes using IKEA products, which are quite compatible offering an affordable, contemporary take on Eichler homes. The clients saved additional money from the simplicity and availability of IKEA products and by orchestrating the orders and purchases themselves. Following each construction meeting, the clients would make a run to IKEA and purchase items, pick up needed spare parts, and bring them back right away to stay ahead of the contractor’s schedule and minimize the chance of delays and bottlenecks.
Klopf balanced material selections by retaining some of the original woodwork and simply refinishing the mahogany paneling. They were able to retain the original windows and sliding doors which were still in good shape, avoiding some of the most costly replacement expenses. Additionally interior doors were simply refinished and the exterior siding cleaned up and repainted. Formerly dark interiors are now illuminated with new slimmer semi-recessed lighting eliminating the need for costly roof work.
Attention to design details allowed the Klopf team to ensure the house ended up with a high quality feel. Key visual elements were strictly aligned and Klopf worked with the clients to select a unified materials palette throughout the spaces so the house flows seamlessly together. Aligning the tile layout with the trusses and keeping it level with the concrete slab outside allowed them to achieve a level of quality that may otherwise be missed.
The clients were able to keep their budget on track by determining clear goals and making critical decisions upfront, choosing materials and furnishings wisely, working with the right design and construction teams in place and to a large part, their willingness to participate throughout the process. In the end the clients were much happier with their reconfigured Eichler home and Klopf Architecture managed to keep their remodeling costs to about $325/sf – a good amount below the average Bay Area Eichler remodel.
Project Team: John Klopf, Angela Todorova, Sherry Tan
Contractor: Keycon Construction
Structural Engineer: Sezen & Moon
Photography: Sabrina Huang
Year Completed: 2020

After meeting with Mark, we determined that the goal of his remodel was that he wanted to convert his typical 2000s master bath into a transitional and functional area and get more storage. The standard cultured marble walls and soaking tub wasn’t exactly what he wanted any longer.
After learning about his style, we determined a large format tile and larger base cabinets would do the trick. From the white cabinetry, and striking vein large format tile and deep soaking tub.
The white shaker cabinets are for Sollid Cabinetry. We minimized the sink bases so that Mark could control what is under those cabinets, however do you see those drawer bases? They are large enough to hold anything you desire.
The two-toned shower and tub deck tile feature a striking vein that appears to go on for days. The wall tiles size is a large format tile measuring at 24X48.
This size allows for two great design elements. The first, allowing the vein to be continuous. Second, less wall grout. A total of 9 tiles used on the walls. To accentuate this vein we installed an oversized niche allows for a spotlight for the pebble mosaic to be a feature on the wall and the shower pan.
The tub deck and curb tiles are from Arizona Tile as well. It is the Cemento Rasato – Bianco 12X24. By pairing these tiles together, it supports the wall tile and allows that to be the star of the show.
The bathroom floor is Frassino, from the collection of Porta Nouva from Arizona Tile. Laid in a horizontal random offset. This selection pops the whites and grounds the elements.
This bathroom features a Calcatta quartz countertops that showcase a slight vein that supports the wall tile. The bathroom accessories, lighting fixtures and faucets are all brushed nickel.

An Arts & Crafts Bungalow is one of my favorite styles of homes. We have quite a few of them in our Stockton Mid-Town area. And when C&L called us to help them remodel their 1923 American Bungalow, I was beyond thrilled.
As per usual, when we get a new inquiry, we quickly Google the project location while we are talking to you on the phone. My excitement escalated when I saw the Google Earth Image of the sweet Sage Green bungalow in Mid-Town Stockton. "Yes, we would be interested in working with you," I said trying to keep my cool.
But what made it even better was meeting C&L and touring their home, because they are the nicest young couple, eager to make their home period perfect. Unfortunately, it had been slightly molested by some bad house-flippers, and we needed to bring the bathroom back to it "roots."
We knew we had to banish the hideous brown tile and cheap vanity quickly. But C&L complained about the condensation problems and the constant fight with mold. This immediately told me that improper remodeling had occurred and we needed to remedy that right away.
The Before: Frustrations with a Botched Remodel
The bathroom needed to be brought back to period appropriate design with all the functionality of a modern bathroom. We thought of things like marble countertop, white mosaic floor tiles, white subway tile, board and batten molding, and of course a fabulous wallpaper.
This small (and only) bathroom on a tight budget required a little bit of design sleuthing to figure out how we could get the proper look and feel. Our goal was to determine where to splurge and where to economize and how to complete the remodel as quickly as possible because C&L would have to move out while construction was going on.
The Process: Hard Work to Remedy Design and Function
During our initial design study, (which included 2 hours in the owners’ home), we noticed framed images of William Morris Arts and Crafts textile patterns and knew this would be our design inspiration. We presented C&L with three options and they quickly selected the Pimpernel Design Concept.
We had originally selected the Black and Olive colors with a black vanity, mirror, and black and white floor tile. C&L liked it but weren’t quite sure about the black, We went back to the drawing board and decided the William & Co Pimpernel Wallpaper in Bayleaf and Manilla color with a softer gray painted vanity and mirror and white floor tile was more to their liking.
After the Design Concept was approved, we went to work securing the building permit, procuring all the elements, and scheduling our trusted tradesmen to perform the work.
We did uncover some shoddy work by the flippers such as live electrical wires hidden behind the wall, plumbing venting cut-off and buried in the walls (hence the constant dampness), the tub barely balancing on two fence boards across the floor joist, and no insulation on the exterior wall.
All of the previous blunders were fixed and the bathroom put back to its previous glory. We could feel the house thanking us for making it pretty again.
The After Reveal: Cohesive Design Decisions
We selected a simple white subway tile for the tub/shower. This is always classic and in keeping with the style of the house.
We selected a pre-fab vanity and mirror, but they look rich with the quartz countertop. There is much more storage in this small vanity than you would think.
The Transformation: A Period Perfect Refresh
We began the remodel just as the pandemic reared and stay-in-place orders went into effect. As C&L were already moved out and living with relatives, we got the go-ahead from city officials to get the work done (after all, how can you shelter in place without a bathroom?).
All our tradesmen were scheduled to work so that only one crew was on the job site at a time. We stayed on the original schedule with only a one week delay.
The end result is the sweetest little bathroom I've ever seen (and I can't wait to start work on C&L's kitchen next).
Thank you for joining me in this project transformation. I hope this inspired you to think about being creative with your design projects, determining what works best in keeping with the architecture of your space, and carefully assessing how you can have the best life in your home.

We had renovated others areas of this home and enjoyed designing and renovating this fun black and white "kids" bath. With a whimsical aesthetic we wanted to do something fun and creative with black and white tile and laid out this zig zag pattern that our tile setters followed well. We used black tile to finish the look for base around the room and a black pencil mold to finish the top. By determining the height of the vanity and the size of the mirror, we were able to determine the best height to lay the tile up the walls. A black toilet anchors the toilet niche and the floating black vanity is gorgeous with the pop of white quartz top and sink and a black faucet make for a gorgeous aesthetic. Black and Gold sconces mounted on the side walls finish this fun room for the "kid" in all of us.

A little over a year ago my retaining wall collapsed by the entrance to my house bringing down several tons of soil on to my property. Not exactly my finest hour but I was determined to see as an opportunity to redesign the entry way that I have been less than happy with since I got the house.
I wanted to build a structure together with a new wall I quickly learned it required foundation with cement caissons drilled all the way down to the bedrock. It also required 16 ft setbacks from the hillside. Neither was an option for me.
After much head scratching I found the shed building ordinance that is the same for the hills that it is for the flatlands. The basics of it is that everything less than 120 ft, has no plumbing and with electrical you can unplug is considered a 'Shed' in the City of Los Angeles.
A shed it is then.
This is lead me the excellent high-end prefab shed builders called Studio Shed. I combined their structure with luxury vinyl flooring from Amtico and the 606 Universal Shelving System from Vitsoe. All the interior I did myself with my power army called mom and dad.
I'm rather pleased with the result which has been dubbed the 'SheShed'

Drew Rice, Red Pants Studio
Transitional l-shaped medium tone wood floor and brown floor open concept kitchen photo in Seattle with an undermount sink, shaker cabinets, beige cabinets, quartzite countertops, stainless steel appliances and an island

Modern minimalism as a basis for unusual, expressive art objects and author’s painting. This is what determined the main style of the living space. The concept was based on such materials as concrete and plaster, natural wood and stone. The interior had to be as natural as possible, reflecting the architectural image of the residential complex and the beauty of the surrounding nature. “The most important thing for me in this project is the result. Customers say that the interior has become their place of power! They want to return home, invite guests, spend a lot of time in their house and enjoy life here! It is very valuable and important that the project was realized almost 100%, while the customers themselves were interested not to deviate even a millimeter from the project, but to do everything exactly as the Author intended,” emphasized project designer Ksenia Mitskevich.
Coswick oak Cinnamon hardwood flooring was used in the project.
Designer: Ksenia Mitskevich.
Photo by Sergey Pilipovich.
Coswick’s partner: Domani.

Inspiration for a contemporary 3/4 beige tile multicolored floor and single-sink bathroom remodel in San Francisco with flat-panel cabinets, medium tone wood cabinets, white walls, an integrated sink, quartz countertops, white countertops and a floating vanity

Design work started with a modest design focused on improving the kitchen, living, dining and outdoor living areas. However, a feasibility study determined that a better option was to fully remodel the existing dwelling, resulting in reclaiming some of the front veranda to increase the size of the living and dining areas. The remaining section created an alcove to the main bedroom, increasing privacy and creating a dedicated outdoor area.
A large awning, cantilevered so as not to impose on the existing septic, created a separate outdoor living area. A teak facade, that will weather to grey in the salty sea air over time, was added to extend high above the box gutter, conceal the solar panels and cap the ends of the separation walls. The roof was repitched and the internal ceilings raked upwards from the teak facade, thereby increasing the internal volume and allowing for the addition of high-light windows in rooms on the ridge side of the dwelling to capture the vista, increase natural light, ventilation and sense of space.
A skillion roof outside the back kitchen area was strategically positioned out of sight from the inside of the home and created a second outdoor area in the rear courtyard, serving as the main entry point. A gate house was incorporated in the rear fence to enhance the entry. The rear courtyard reclaimed an existing parking bay to create space for the cellar/music room.
41