
Search results for "Difficult experience" in Home Design Ideas
 Kowalske Kitchen & Bath
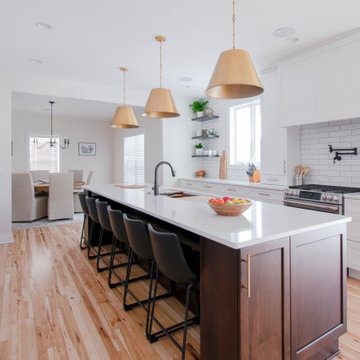
A Sussex family hired us as the design build remodel company to makeover this kitchen. This remodeling project had three main goals: improve storage, update the layout/style and enhance the functionality.
IMPROVE STORAGE
The original home builder put in very narrow cabinets. The small, narrow cabinets made it difficult for the homeowners to store items. They also said it was important to have a kitchen that works for their children. The new design incorporates an appliance cabinet and wide drawers for storing items. The kids have easy access to snack drawers and lower dish storage for plastic cups and plates. Also, we added two built-in cabinets in the dining room for more storage.
UPDATE THE LAYOUT & STYLE
While the area was large, it didn’t maximize the space or fit their contemporary style. They wanted plenty of counter prep space and enough room for friends and family to gather. We added a large wood island with seating – perfect for hosting parties and family dinners. The space is bright with white shaker cabinetry and subway tile backsplash. Warm touches include satin bronze light fixtures and hardware.
ENHANCE THE FUNCTIONALITY
This Sussex kitchen features a Galley Sink Workstation. Having a sink workstation facing the center of the room allows the homeowners to stay part of the conversation while preparing a meal or cleaning up. Sink workstations are one of the hottest kitchen trends.
HOMEOWNER REVIEW
“We recently completed our kitchen remodel with Kowalske and we can’t say enough good things about our experience. Not only was every member of the team amazing, the work that was done in our kitchen was very high quality. We have recommended Kowalske to all of our friends and plan to use them for our master bath remodel in the future!” – Nicole, homeowner (Houzz Review)
 Barron Designs
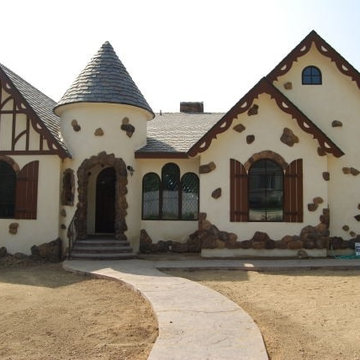
Faux wood planks mean that this Tudor owner won't have to replace the wood trim every few years like those using real wood on their exterior have to do.
Our client said, "I am pretty proud of this since I did most of it myself. I am a 58-year old woman and I never had any experience with carpentry but I have been a hobby seamstress. For this house project I made up some paper patterns and put the patterns on the wood so I would know where to cut and how to put it together. The lace cut fascia board you see, I cut out myself with a jigsaw and router, after my husband showed me how to hold the tools. Never touched them before in my life.
I also designed and cut the Tudor trim you see on the left side of the house. I also cut and put together the shutters you see flanking the windows. All a very fun project and not that difficult. My husband helped me put up the fascia board and the Tudor trim but I managed the shutters myself. I think it turned out pretty cute. No one can tell it isn't wood."
 RAJ Kitchen and Bath, LLC
 “Full apartment design”.
IF you have not yet seen this apartment conversion before, we strongly urge you to go to the bottom left of this page and click on the short 2-minutes video. It would put a lot of things into perspective when you come back and continue reading this.
It is true we were literally handed the keys and told a list of things that they wanted to have happen and we were to go into the apartment, look at the space and come up with a design that would satisfy all of that need. UNTIL we showed up! The unit had really seen some better days but we knew we had to look past that and come up with a concept that would work for them.
The immediate challenges were centered around 3 big ideas:
1. Adding a second bedroom to the already small footprint
2. Figuring out a way to make the kitchen bigger, better and brighter
3. Creating a master room walk in closet
It’s always difficult to add new rooms into existing footprint without expanding out or up and not incurring any opportunity cost. In this case, that was exactly what we had to do. Item one and two above had to be tackled as one. We went ahead and switched out the location of the dining room and eliminating an area where there was a “nook” type eat-in area. By doing so, we were able to cut right into that footprint and change the layout of the kitchen.
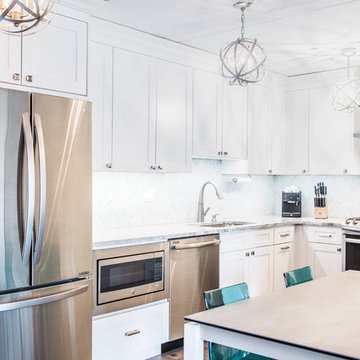
That one move allowed us to dig into the kitchen design because it was now the main focal point in the apartment. It was no longer an option to keep it in that tiny hole where it was, so we had to ensure that this design was functional and aesthetically pleasing at the same time. By adding the table into the space where an Island typically would go, we were able to both cut cost and still provide a dining experience. The Table serves as an Island as well when cooking.
We then proceeded to block in the existing doorway to the dining room. By doing this, we were able to create a full room which allowed us to put a door on the other side and called that room Bedroom #2. This was easier to do because all of the mechanicals were already in that space (light, heater and windows). By shifting things around, we also achieved a huge wall to wall closet from inside. PERFECT!
Then we moved into the Single bedroom. We thought it was a big room with a small closet, so by creatively adding an L shaped wall and steal some footprint into the bedroom side, we were able to put a door on that new room and design it for the walk-in closet. Even after this, the bedroom still holds a queen size bed with 2 night stands, a TV on the wall, a sitting chair and plenty of room to walk around. This was done by rethinking the location for the bed and night stands.
The bathroom was gutted to make sure there was no leaks and rebuild from the ground up. We kept all of the plumbing where it was, added a new vanity, medicine cabinet, tiles and lighting and it was done.
From there, the rest of the unit had new flooring all throughout, paint, and lighting. After completion and walk through, this project was handed over back to the clients.
Execution and collaboration between all the trades were: Reggie and his team from Premier Interiors and Rohan from RD Mechanical Services.
p.s. Please see our website to see the video.
Find the right local pro for your project
 Main Line Kitchen Design
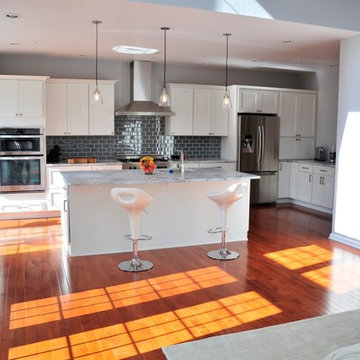
Main Line Kitchen Design is a group of skilled Kitchen Designers each with many years of experience planning kitchens around the Delaware Valley. Using doorstyle and finish kitchen cabinetry samples, photo design books, and laptops to display your kitchen as it is designed, we eliminate the need for and the cost associated with a showroom business model. This makes the design process more convenient for our customers, and we pass the significant savings on to them as well.
Our design process also allows us to spend more time with our customers working on their designs. This is what we enjoy most about our business – it’s what brought us together in the first place. The kitchen cabinet lines we design with and sell are Jim Bishop, Durasupreme, 6 Square, Oracle, Village, Collier, and Bremtowm Fine Custom Cabinetry. This is one of our recently completed kitchens.
Photo by Michael B
 Kowalske Kitchen & Bath
A Sussex family hired us as the design build remodel company to makeover this kitchen. This remodeling project had three main goals: improve storage, update the layout/style and enhance the functionality.
IMPROVE STORAGE
The original home builder put in very narrow cabinets. The small, narrow cabinets made it difficult for the homeowners to store items. They also said it was important to have a kitchen that works for their children. The new design incorporates an appliance cabinet and wide drawers for storing items. The kids have easy access to snack drawers and lower dish storage for plastic cups and plates. Also, we added two built-in cabinets in the dining room for more storage.
UPDATE THE LAYOUT & STYLE
While the area was large, it didn’t maximize the space or fit their contemporary style. They wanted plenty of counter prep space and enough room for friends and family to gather. We added a large wood island with seating – perfect for hosting parties and family dinners. The space is bright with white shaker cabinetry and subway tile backsplash. Warm touches include satin bronze light fixtures and hardware.
ENHANCE THE FUNCTIONALITY
This Sussex kitchen features a Galley Sink Workstation. Having a sink workstation facing the center of the room allows the homeowners to stay part of the conversation while preparing a meal or cleaning up. Sink workstations are one of the hottest kitchen trends.
HOMEOWNER REVIEW
“We recently completed our kitchen remodel with Kowalske and we can’t say enough good things about our experience. Not only was every member of the team amazing, the work that was done in our kitchen was very high quality. We have recommended Kowalske to all of our friends and plan to use them for our master bath remodel in the future!” – Nicole, homeowner (Houzz Review)

 safe ZOnea
Every year, the same thing happens. The first real snowfall arrives, demand for de-icing materials spikes overnight, and the businesses that waited too long find themselves scrambling for supply at the worst possible moment. Facility managers, property owners, contractors, and municipalities all depend on a steady supply of salt and ice melt to keep their properties safe and operational through winter. The ones who plan ahead sail through. The ones who don't pay more, wait longer, and take on real risk.
Sourcing de-icing materials well is not complicated, but it does require thinking ahead and understanding the options. The choices you make about what to buy, how to buy it, and who to buy it from have a direct effect on your costs, your reliability, and your ability to keep people safe when conditions turn dangerous. This article lays out what matters.
Why Your Choice of Supplier Matters More Than You Think
It is easy to treat de-icing material as a commodity, something you grab whenever you need it without much thought about where it comes from. That works fine until the moment it doesn't, usually in the middle of a storm when everyone needs supply at once and the casual sources have run dry. At that point, the relationships you built before the season become the difference between staying stocked and being stuck.
Reliable supply is the whole game in winter operations. A property that runs out of ice melt during a storm faces safety hazards, liability exposure, and disruption, none of which can wait for a back-ordered shipment. This is why establishing relationships with dependable rock salt suppliers before the season starts is one of the smartest moves a facility manager or contractor can make. It locks in supply, often locks in better pricing, and removes a major source of mid-winter stress.
The lesson here is to treat sourcing as a planning decision rather than a last-minute errand. The businesses that come through winter smoothly are almost always the ones that secured their supply chain early, chose suppliers who could actually deliver when it counted, and never had to gamble on finding material during a shortage. Reliability bought in advance is far cheaper than scarcity paid for in a crisis.
Bagged or Bulk: Matching the Material to the Job
One of the first practical decisions is whether to buy de-icing material in bags or in bulk, and the right answer depends entirely on the operation. Each format has clear advantages, and many operations end up using both for different purposes.
Bagged material offers convenience, control, and easy storage. It is simple to handle, easy to distribute to different locations or crews, straightforward to store without special equipment, and convenient for spot application by hand. It suits smaller properties, businesses without bulk storage, and situations where portion control and tidiness matter. Bulk material, on the other hand, tends to make sense for large operations that go through high volumes, where buying in quantity lowers the per-unit cost and the operation has the equipment and space to store and handle it. The tradeoff is between the convenience and flexibility of bags and the volume economics of bulk.
For many operations, the right approach is a mix: bulk for the high-volume core of the work and bags for flexibility, spot treatment, and locations where bulk handling is impractical. The key is to match the format to how the material will actually be stored, moved, and applied, rather than defaulting to one or the other out of habit. Thinking this through in advance avoids both the waste of over-buying bulk you can't handle and the expense of relying entirely on bags for a large operation.
Rock Salt Is Not Your Only Option
Rock salt, or sodium chloride, is the workhorse of winter de-icing for good reason. It is effective, widely available, and cost-efficient, which makes it the default choice for most operations most of the time. But it has limits, and understanding the alternatives helps you choose the right material for the conditions you actually face.
The most important limitation is temperature. Rock salt becomes less effective as temperatures drop, and in genuinely cold conditions it can struggle to do the job at all. This is where alternatives come in. Calcium chloride, for instance, works at much lower temperatures than rock salt and acts quickly, which makes it valuable when conditions are severe or when fast melting matters. Operations that face hard freezes or need dependable performance in extreme cold often keep calcium chloride for sale on hand for exactly those situations, using it alongside rock salt rather than instead of it.
The practical approach is to understand the conditions your property faces and stock accordingly. For many operations, rock salt handles the bulk of the work while a faster, colder-rated material like calcium chloride covers the extreme days when ordinary salt falls short. Matching the material to the temperature and the urgency of the situation is what separates an operation that stays ahead of winter from one that is constantly reacting to it.
Securing Your Supply Before the Season
Knowing what to buy is only half the equation. The other half is making sure you can actually get it when you need it, which means securing your supply before winter arrives rather than after it has already started. Timing is one of the most underrated factors in winter operations.
The logic is simple. Demand for de-icing materials is highly seasonal and spikes sharply during storms, when everyone needs supply simultaneously. Prices and availability both move against the buyer at exactly those moments. By contrast, planning ahead, estimating your needs and arranging supply before the season, puts you in a far stronger position. Working with established rock salt suppliers ahead of time means your material is accounted for before the rush, often at better pricing and with the confidence that it will be there when the first storm hits.
This kind of planning also lets you think clearly rather than react under pressure. You can estimate your seasonal needs based on your property and past winters, decide on the right mix of materials and formats, and arrange storage in advance. Operations that do this consistently spend less, worry less, and never find themselves making frantic calls during a storm. The effort of planning ahead is modest, and the payoff in reliability and cost savings is substantial.
Storing and Handling What You Buy
Securing supply is not much use if the material degrades before you can use it, which makes proper storage and handling an important and often overlooked part of the equation. De-icing materials are sensitive to moisture, and poor storage can turn a good supply into a clumped, hardened mess that is difficult to apply.
The fundamentals are straightforward. Keep material dry and protected from moisture, since salt and ice melt readily absorb water and can harden if exposed. Store it in a way that suits the format, whether that means a proper bulk storage area or a dry space for stacked bags. Keep it accessible, so crews can get to it quickly when a storm hits and time is short. And handle it with the right equipment for the format and volume, which protects both the material and the people working with it. None of this is complicated, but neglecting it can undermine even a well-planned supply.
Good storage practices protect the investment you made in securing supply early. There is little point in arranging your materials ahead of the season only to have them degrade before use. Treating storage and handling as part of the overall plan, rather than an afterthought, ensures that the material you secured is actually usable when the moment comes. It is the final link in a supply chain built to perform under winter conditions.
Estimating How Much You Actually Need
One question trips up operations of every size: how much de-icing material to buy. Order too little and you risk running short during a storm. Order too much and you tie up money and storage space in material you may not use. Getting the estimate reasonably right is a meaningful part of sourcing well.
Several factors shape the answer. The size and type of the areas you treat, sidewalks, lots, entrances, and drive lanes, set the baseline for how much material each application consumes. The local climate matters too, since colder regions and those with frequent snowfall go through far more material than milder ones. Application frequency depends on how often storms hit and how quickly surfaces need to be cleared, which varies with the kind of property and the expectations of the people who use it. And the type of material plays a role, since different products are applied at different rates.
Past experience is often the best guide. Operations that track what they used in previous winters, adjusted for the size of the property and the severity of the season, can estimate their needs with reasonable confidence. For newer operations without that history, it helps to plan conservatively and to work with a supplier who can replenish stock reliably, so that a low estimate does not turn into a mid-storm shortage.
The goal is not perfect precision but a sound, slightly cautious estimate paired with a dependable supply relationship. That combination lets an operation keep enough material on hand to handle the season without over-committing to volume it cannot store or use. Thinking this through before winter, rather than guessing during it, is one more way that planning ahead pays off when the snow starts to fall.
The Bottom Line
Sourcing de-icing materials well comes down to a few straightforward principles: plan ahead, choose reliable suppliers before the season, match your materials and formats to your actual needs and conditions, and store what you buy properly. The operations that follow these principles move through winter with confidence, while those that improvise pay more and take on needless risk.
Winter is predictable in one respect: it arrives every year, and demand for de-icing material spikes the moment it does. The businesses that prepare for that reality, rather than being surprised by it, are the ones that keep their properties safe, their costs controlled, and their operations running no matter what the season throws at them. A little foresight before the first snowfall pays off through every storm that follows.
 INSPIRED KITCHEN DESIGN
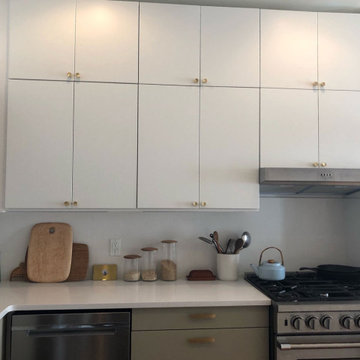
Another design need for her IKEA kitchen was an easier-to-clean countertop, Shoko says.
“Our original counter was brown, making it very difficult to spot messes, spills, and crumbs. That’s why we opted for a white counter with matching backsplash (which is all one piece),” she says.
In fact, the Caesarstone in Blizzard runs from the sink to the stove area, giving ample space for food prep and is complemented by the matching backsplash and the custom butcher block seating area on the other side of the stove.
“Clean up is so much quicker and easier with the new countertops,” she says.
The counter area is further brightened by under cabinet lighting strips from IKEA.
For new IKEA renovators, Shoko wants to share some useful tips from her IKEA experience.
“The first thing I would say to others is do not be intimidated by the renovation process! There are so many resources available that can help simplify an IKEA renovation project. I’d also suggest asking a lot of questions, including asking how you plan on using the space,” she says.
She also says that working with design professionals was the best decision for her IKEA kitchen.
“The kitchen specialists at IKEA were very knowledgeable, and, of course the staff at IKD explained all the options, materials, and demystified the IKEA ordering process,” she adds.
She concludes: “Ultimately, we chose IKEA cabinetry for the ease and the price. Since our apartment isn’t a forever home, we didn’t think it made sense to go for custom cabinets. We were looking for something simple, clean, and affordable, and for a project (and a space) of this size, IKEA’s options were a great fit for us!”
 RAJ Kitchen and Bath, LLC
 “Full apartment design”.
IF you have not yet seen this apartment conversion before, we strongly urge you to go to the bottom left of this page and click on the short 2-minutes video. It would put a lot of things into perspective when you come back and continue reading this.
It is true we were literally handed the keys and told a list of things that they wanted to have happen and we were to go into the apartment, look at the space and come up with a design that would satisfy all of that need. UNTIL we showed up! The unit had really seen some better days but we knew we had to look past that and come up with a concept that would work for them.
The immediate challenges were centered around 3 big ideas:
1. Adding a second bedroom to the already small footprint
2. Figuring out a way to make the kitchen bigger, better and brighter
3. Creating a master room walk in closet
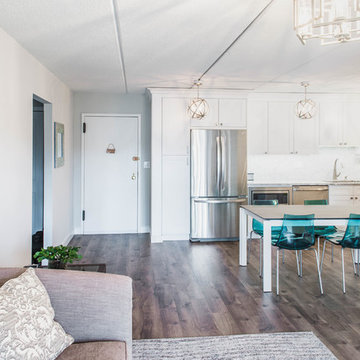
It’s always difficult to add new rooms into existing footprint without expanding out or up and not incurring any opportunity cost. In this case, that was exactly what we had to do. Item one and two above had to be tackled as one. We went ahead and switched out the location of the dining room and eliminating an area where there was a “nook” type eat-in area. By doing so, we were able to cut right into that footprint and change the layout of the kitchen.
That one move allowed us to dig into the kitchen design because it was now the main focal point in the apartment. It was no longer an option to keep it in that tiny hole where it was, so we had to ensure that this design was functional and aesthetically pleasing at the same time. By adding the table into the space where an Island typically would go, we were able to both cut cost and still provide a dining experience. The Table serves as an Island as well when cooking.
We then proceeded to block in the existing doorway to the dining room. By doing this, we were able to create a full room which allowed us to put a door on the other side and called that room Bedroom #2. This was easier to do because all of the mechanicals were already in that space (light, heater and windows). By shifting things around, we also achieved a huge wall to wall closet from inside. PERFECT!
Then we moved into the Single bedroom. We thought it was a big room with a small closet, so by creatively adding an L shaped wall and steal some footprint into the bedroom side, we were able to put a door on that new room and design it for the walk-in closet. Even after this, the bedroom still holds a queen size bed with 2 night stands, a TV on the wall, a sitting chair and plenty of room to walk around. This was done by rethinking the location for the bed and night stands.
The bathroom was gutted to make sure there was no leaks and rebuild from the ground up. We kept all of the plumbing where it was, added a new vanity, medicine cabinet, tiles and lighting and it was done.
From there, the rest of the unit had new flooring all throughout, paint, and lighting. After completion and walk through, this project was handed over back to the clients.
Execution and collaboration between all the trades were: Reggie and his team from Premier Interiors and Rohan from RD Mechanical Services.
p.s. Please see our website to see the video.

 KOZAK Hauling and Junk Removal
#1 JUNK REMOVAL KOZAK Hauling and Junk Removal is The Best New Port Richey Junk Removal Service! KOZAK Hauling and Junk Removal Is your local junk removal expert! Operating in the New Port Richey area, we are ready to help you reclaim your space! KOZAK Hauling and Junk Removal is a full-service junk removal company helping residential & commercial clients remove whatever type of junk you may have. Whether its junk removal, scrap metal recycling, mattress disposal, trash removal, electronics recycling, furniture disposal or a full office cleanout, whatever you call it, if you don't need it, we can take it! We do our very best to recycle and donate to local charities, keeping as much junk out of our landfills as possible. 727-455-5144

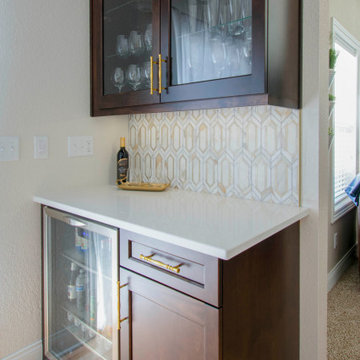 Kowalske Kitchen & Bath
A Sussex family hired us as the design build remodel company to makeover this kitchen. This remodeling project had three main goals: improve storage, update the layout/style and enhance the functionality.
IMPROVE STORAGE
The original home builder put in very narrow cabinets. The small, narrow cabinets made it difficult for the homeowners to store items. They also said it was important to have a kitchen that works for their children. The new design incorporates an appliance cabinet and wide drawers for storing items. The kids have easy access to snack drawers and lower dish storage for plastic cups and plates. Also, we added two built-in cabinets in the dining room for more storage.
UPDATE THE LAYOUT & STYLE
While the area was large, it didn’t maximize the space or fit their contemporary style. They wanted plenty of counter prep space and enough room for friends and family to gather. We added a large wood island with seating – perfect for hosting parties and family dinners. The space is bright with white shaker cabinetry and subway tile backsplash. Warm touches include satin bronze light fixtures and hardware.
ENHANCE THE FUNCTIONALITY
This Sussex kitchen features a Galley Sink Workstation. Having a sink workstation facing the center of the room allows the homeowners to stay part of the conversation while preparing a meal or cleaning up. Sink workstations are one of the hottest kitchen trends.
HOMEOWNER REVIEW
“We recently completed our kitchen remodel with Kowalske and we can’t say enough good things about our experience. Not only was every member of the team amazing, the work that was done in our kitchen was very high quality. We have recommended Kowalske to all of our friends and plan to use them for our master bath remodel in the future!” – Nicole, homeowner (Houzz Review)
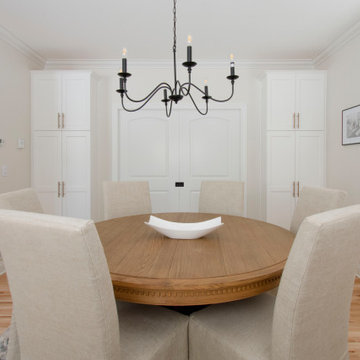 Kowalske Kitchen & Bath
A Sussex family hired us as the design build remodel company to makeover this kitchen. This remodeling project had three main goals: improve storage, update the layout/style and enhance the functionality.
IMPROVE STORAGE
The original home builder put in very narrow cabinets. The small, narrow cabinets made it difficult for the homeowners to store items. They also said it was important to have a kitchen that works for their children. The new design incorporates an appliance cabinet and wide drawers for storing items. The kids have easy access to snack drawers and lower dish storage for plastic cups and plates. Also, we added two built-in cabinets in the dining room for more storage.
UPDATE THE LAYOUT & STYLE
While the area was large, it didn’t maximize the space or fit their contemporary style. They wanted plenty of counter prep space and enough room for friends and family to gather. We added a large wood island with seating – perfect for hosting parties and family dinners. The space is bright with white shaker cabinetry and subway tile backsplash. Warm touches include satin bronze light fixtures and hardware.
ENHANCE THE FUNCTIONALITY
This Sussex kitchen features a Galley Sink Workstation. Having a sink workstation facing the center of the room allows the homeowners to stay part of the conversation while preparing a meal or cleaning up. Sink workstations are one of the hottest kitchen trends.
HOMEOWNER REVIEW
“We recently completed our kitchen remodel with Kowalske and we can’t say enough good things about our experience. Not only was every member of the team amazing, the work that was done in our kitchen was very high quality. We have recommended Kowalske to all of our friends and plan to use them for our master bath remodel in the future!” – Nicole, homeowner (Houzz Review)

 highland
Ever been out in a park, forest, or even just in your backyard and wanted to see just a small side of the picture? Beauty is in the midst of us, but we are not doing enough to see it—we see only at a superficial level. The reality is that there is an entire universe on a scale that is so miniscule yet all around us, waiting to be discovered.
Put the digital microscope camera on the scope, and that little quantum universe you never knew was there awaits your gaze. Makes everyday outdoor activities exciting adventures and learning experiences with leaves, rocks, and bugs that are all interesting. It used to look just the same, and now it's vibrant with patterns, textures, and stories you didn't know before!
What is a Digital Microscope Camera?
A digital microscope camera is a compact device that magnifies very small objects and can display its real-time image on the screen. This new type of microscope can be taken outside and is much easier to transport than a conventional microscope. It is based on three important technologies: the magnification lenses, digital imaging, and As the name implies, snapping up shots of the objects when you bring them close and displaying them clearly on your smartphone, tablet, or its built-in display. This gives you the power to see details of a microworld anywhere you go, with no special equipment.
How a Digital Microscope Camera Works in Real Life
It is easy and yet powerful to operate a digital microscope camera. It brings very small objects closer by employing a system of lenses, and through a digital sensor, it turns the image into a compelling display. After focusing, the image becomes so big that it displays details that the human eye isn't able to see. Whereas, in an actual setting, an individual can simply place the gadget over an object, such as a leaf, insect, or soil surface. This is then performed to get a focus on the details, clear and sharp. In the blink of an eye, you will be exploring a hidden reality with patterns and structures.
Why Nature Looks Completely Different at the Micro Level
If you watch nature with an unbiased eye, it's all straightforward. Leaves are green; insects are tiny and land on a mere brown earth. However, things look so different through the microscope camera's zoom-in. A leaf is more than a leaf: it is a complex system of veins and cells! However, the insect is not merely a tiny insect anymore, but it gradually turns into an object with wings, eyes, and patterns, all of which seem almost like art. From soils a combination of small particles of rock, organic material, and unseen creatures.
Gaining appreciation for the details in leaves and plants.
Plant life is one of the most interesting objects to be examined under the microscope. The details on the leaves, stems, and petals are amazing and would get lost in the details otherwise. By using a digital microscope camera, the vein network that transports water and nutrients can be readily observed. These veins are naturally occurring and run in patterns that resemble roads and/or rivers in the landscape. Every leaf grows differently and is as individual as a fingerprint.
Discovering the Hidden World of Insects
There is no better thing to see under the microscope than one of the many interesting insects. They may appear at first glance to be quite unassuming and tiny, but magnified, they let one in on the whole other universe. They feature fine patterns in their wings – like those found on glass artworks – that are often difficult to see. They have eyes comprised of multiple repeating units. Even their legs and segments of their bodies have special textures.
The Secret Life Inside Soil and Sand
A microscope camera reveals a soil in which activity is taking place in a lively world in the seemingly lifeless soil. The very small particles of rock, decayed plant material, and micro-living organisms are interacting. Sand grains look similar to miniature crystals; all of them are distinctively shaped and structured. As organic matter decomposes, it forms patterns that illustrate how nature continually recycles itself.
Tree Bark: A Natural Storybook
Another interesting area of interest for micro-focusing is the bark of trees. Apparently, this appears to be rough and simple, but under magnification, it is seen as a highly detailed landscape of cracks, lines, and textures. The bark patterns that can be observed on each branch offer a glimpse of the branch's years of growth, weather, and environmental stresses. It's as if someone wrote the history of a tree on its trunk!
Tips for Getting the Best Microscopic Results Outdoors
A few simple techniques can make a big difference in the variety of images you get before getting clear and detailed images. Always make sure that the hands are stable or have a resting surface so that there is no shaking. Moving, even slightly, can cause the picture to become blurry. Lighting is one of the other important ones. This is because natural soft lighting is best suited, as it doesn't create strong reflections and it does show detail. Minimize exposure to strong sunlight/deep shade when possible.
Conclusion:
The digital microscope camera isn't just a camera; it's a new way of viewing life. Makes routine walks outdoors into thrilling explorations of the scientific world and how minute details make a difference. It can teach us something about living by the rules of nature! It is something that we can contemplate, clarify, and enjoy more.
What is a Digital Microscope Camera?
A digital microscope camera is a compact device that magnifies very small objects and can display its real-time image on the screen. This new type of microscope can be taken outside and is much easier to transport than a conventional microscope. It is based on three important technologies: the magnification lenses, digital imaging, and As the name implies, snapping up shots of the objects when you bring them close and displaying them clearly on your smartphone, tablet, or its built-in display. This gives you the power to see details of a microworld anywhere you go, with no special equipment.
How a Digital Microscope Camera Works in Real Life
It is easy and yet powerful to operate a digital microscope camera. It brings very small objects closer by employing a system of lenses, and through a digital sensor, it turns the image into a compelling display. After focusing, the image becomes so big that it displays details that the human eye isn't able to see. Whereas, in an actual setting, an individual can simply place the gadget over an object, such as a leaf, insect, or soil surface. This is then performed to get a focus on the details, clear and sharp. In the blink of an eye, you will be exploring a hidden reality with patterns and structures.
Why Nature Looks Completely Different at the Micro Level
If you watch nature with an unbiased eye, it's all straightforward. Leaves are green; insects are tiny and land on a mere brown earth. However, things look so different through the microscope camera's zoom-in. A leaf is more than a leaf: it is a complex system of veins and cells! However, the insect is not merely a tiny insect anymore, but it gradually turns into an object with wings, eyes, and patterns, all of which seem almost like art. From soils a combination of small particles of rock, organic material, and unseen creatures.
Gaining appreciation for the details in leaves and plants.
Plant life is one of the most interesting objects to be examined under the microscope. The details on the leaves, stems, and petals are amazing and would get lost in the details otherwise. By using a digital microscope camera, the vein network that transports water and nutrients can be readily observed. These veins are naturally occurring and run in patterns that resemble roads and/or rivers in the landscape. Every leaf grows differently and is as individual as a fingerprint.
Discovering the Hidden World of Insects
There is no better thing to see under the microscope than one of the many interesting insects. They may appear at first glance to be quite unassuming and tiny, but magnified, they let one in on the whole other universe. They feature fine patterns in their wings – like those found on glass artworks – that are often difficult to see. They have eyes comprised of multiple repeating units. Even their legs and segments of their bodies have special textures.
The Secret Life Inside Soil and Sand
A microscope camera reveals a soil in which activity is taking place in a lively world in the seemingly lifeless soil. The very small particles of rock, decayed plant material, and micro-living organisms are interacting. Sand grains look similar to miniature crystals; all of them are distinctively shaped and structured. As organic matter decomposes, it forms patterns that illustrate how nature continually recycles itself.
Tree Bark: A Natural Storybook
Another interesting area of interest for micro-focusing is the bark of trees. Apparently, this appears to be rough and simple, but under magnification, it is seen as a highly detailed landscape of cracks, lines, and textures. The bark patterns that can be observed on each branch offer a glimpse of the branch's years of growth, weather, and environmental stresses. It's as if someone wrote the history of a tree on its trunk!
Tips for Getting the Best Microscopic Results Outdoors
A few simple techniques can make a big difference in the variety of images you get before getting clear and detailed images. Always make sure that the hands are stable or have a resting surface so that there is no shaking. Moving, even slightly, can cause the picture to become blurry. Lighting is one of the other important ones. This is because natural soft lighting is best suited, as it doesn't create strong reflections and it does show detail. Minimize exposure to strong sunlight/deep shade when possible.
Conclusion:
The digital microscope camera isn't just a camera; it's a new way of viewing life. Makes routine walks outdoors into thrilling explorations of the scientific world and how minute details make a difference. It can teach us something about living by the rules of nature! It is something that we can contemplate, clarify, and enjoy more.
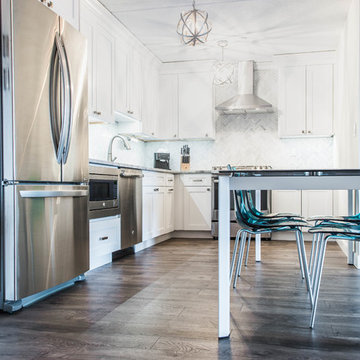 RAJ Kitchen and Bath, LLC
 “Full apartment design”.
IF you have not yet seen this apartment conversion before, we strongly urge you to go to the bottom left of this page and click on the short 2-minutes video. It would put a lot of things into perspective when you come back and continue reading this.
It is true we were literally handed the keys and told a list of things that they wanted to have happen and we were to go into the apartment, look at the space and come up with a design that would satisfy all of that need. UNTIL we showed up! The unit had really seen some better days but we knew we had to look past that and come up with a concept that would work for them.
The immediate challenges were centered around 3 big ideas:
1. Adding a second bedroom to the already small footprint
2. Figuring out a way to make the kitchen bigger, better and brighter
3. Creating a master room walk in closet
It’s always difficult to add new rooms into existing footprint without expanding out or up and not incurring any opportunity cost. In this case, that was exactly what we had to do. Item one and two above had to be tackled as one. We went ahead and switched out the location of the dining room and eliminating an area where there was a “nook” type eat-in area. By doing so, we were able to cut right into that footprint and change the layout of the kitchen.
That one move allowed us to dig into the kitchen design because it was now the main focal point in the apartment. It was no longer an option to keep it in that tiny hole where it was, so we had to ensure that this design was functional and aesthetically pleasing at the same time. By adding the table into the space where an Island typically would go, we were able to both cut cost and still provide a dining experience. The Table serves as an Island as well when cooking.
We then proceeded to block in the existing doorway to the dining room. By doing this, we were able to create a full room which allowed us to put a door on the other side and called that room Bedroom #2. This was easier to do because all of the mechanicals were already in that space (light, heater and windows). By shifting things around, we also achieved a huge wall to wall closet from inside. PERFECT!
Then we moved into the Single bedroom. We thought it was a big room with a small closet, so by creatively adding an L shaped wall and steal some footprint into the bedroom side, we were able to put a door on that new room and design it for the walk-in closet. Even after this, the bedroom still holds a queen size bed with 2 night stands, a TV on the wall, a sitting chair and plenty of room to walk around. This was done by rethinking the location for the bed and night stands.
The bathroom was gutted to make sure there was no leaks and rebuild from the ground up. We kept all of the plumbing where it was, added a new vanity, medicine cabinet, tiles and lighting and it was done.
From there, the rest of the unit had new flooring all throughout, paint, and lighting. After completion and walk through, this project was handed over back to the clients.
Execution and collaboration between all the trades were: Reggie and his team from Premier Interiors and Rohan from RD Mechanical Services.
p.s. Please see our website to see the video.
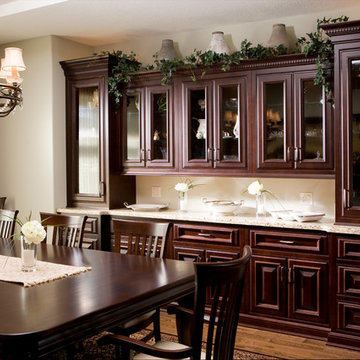
 Chervin Kitchen & Bath Inc.
This bold and stately kitchen can’t help being the centre of attention. It’s an elegant design, with rich dark chocolate cabinetry, cream touches and dual-level counters and seating. Sharing the spotlight, a less formal dining experience awaits through glass doors. There, an enclosed patio – complete with barbeque, sink and counter – wraps you in warm earthy ceramics. Choosing your ambiance has never been so difficult!
 Schwartz and Architecture
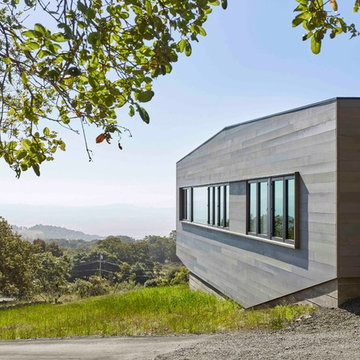
The tightly constrained footprint of the affectionately named “Box on the Rock” is a response to a limited budget and difficult site. Shallow underground hillside waterways run across the site often daylighting in unexpected and unwanted locations. These necessitated relatively expensive pier footings thus motivating an extremely efficient 2,000 sq ft footprint. With no initial resources to develop the wild scrub and rock landscape of the 3-acre property, the home becomes a lone outpost settling the higher ground of the larger natural site --a literal box on a rock.
Given these limitations, the architecture of this outpost needs to provide for all indoor and outdoor functions within its area. With the extremes of the wine country microclimate on the exposed site, this becomes an even more critical requirement for year-round comfort. The central courtyard and the cantilevered deck are strategically carved out of the diagrammatic box to ensure that over the course of the day, temperate options for both sun and shade are always available. In particular, the geometry of the overhang at the front cantilevered deck and the inward angle of its exterior glass walls are carefully calibrated to capture morning sun and winter warming while shielding the internal space from the harshest summer glare. Later in the day the central courtyard comes alive as the sunniest developed outdoor space, yet one that is naturally cooled by capturing the valley cross breezes.
With an economy of means, this simple form morphs to amplify the experience of the dramatic site and create an expansive feeling home that belies its small footprint. Each adjustment to the diagrammatic box negotiates the functional and environmental needs to foster self-contained and site-specific living with a minimal environmental impact.
Photo by Bruce Damonte

 Studio Wills + Architects
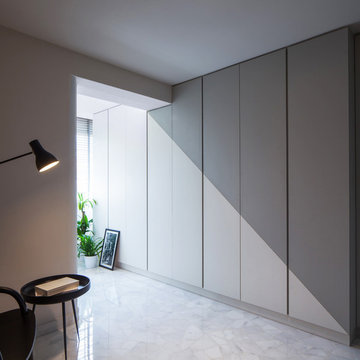
Leaving behind the Master Bedroom is an illusionary ray of light. (Photography by Beton Brut).
Trendy bedroom photo in Singapore
Trendy bedroom photo in Singapore
 Kowalske Kitchen & Bath
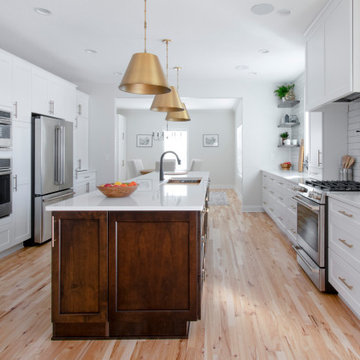
A Sussex family hired us as the design build remodel company to makeover this kitchen. This remodeling project had three main goals: improve storage, update the layout/style and enhance the functionality.
IMPROVE STORAGE
The original home builder put in very narrow cabinets. The small, narrow cabinets made it difficult for the homeowners to store items. They also said it was important to have a kitchen that works for their children. The new design incorporates an appliance cabinet and wide drawers for storing items. The kids have easy access to snack drawers and lower dish storage for plastic cups and plates. Also, we added two built-in cabinets in the dining room for more storage.
UPDATE THE LAYOUT & STYLE
While the area was large, it didn’t maximize the space or fit their contemporary style. They wanted plenty of counter prep space and enough room for friends and family to gather. We added a large wood island with seating – perfect for hosting parties and family dinners. The space is bright with white shaker cabinetry and subway tile backsplash. Warm touches include satin bronze light fixtures and hardware.
ENHANCE THE FUNCTIONALITY
This Sussex kitchen features a Galley Sink Workstation. Having a sink workstation facing the center of the room allows the homeowners to stay part of the conversation while preparing a meal or cleaning up. Sink workstations are one of the hottest kitchen trends.
HOMEOWNER REVIEW
“We recently completed our kitchen remodel with Kowalske and we can’t say enough good things about our experience. Not only was every member of the team amazing, the work that was done in our kitchen was very high quality. We have recommended Kowalske to all of our friends and plan to use them for our master bath remodel in the future!” – Nicole, homeowner (Houzz Review)
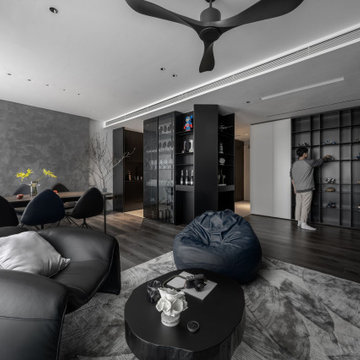
 D2 Architects
"We often rush to divide everything as white and black and store them separately in a separate place. But seemingly opposing things that are inseparable - that is the world - are a mixture of different things." _Matisyahu_
The contrast between black and white is not only a choice but also a way to make it special. When stepping into an all-white or all-black living space, it is easy to feel purity or luxury, but it can also suggest a little skepticism about the monotony or oppressiveness it brings. So using black and white is therefore not difficult but definitely not easy.
In the apartment project at Vinhomes Symphony apartment that we implemented this time, white and black are no longer just two opposing colors, but they are combined and mixed, intertwined creatively to create a unity. As an expression of day and night, brilliance and mystery, white and black have adopted tricks and materials, arrays of blocks and light, blending together with the goal of creating living spaces with comfort, convenience and luxury.
"This is probably a very special and interesting project for me and my colleagues, right from the first approach, the investor is also a sister, a person with a young, dynamic way of thinking with a very special and very own taste. After each actual project, we keep a diary of the conceptualization, design and execution process. Join us to look back on the process of project formation as well as better understand the philosophy, ideas and functions that have been sent in the project" - Kts. Dang Duong - Founder of D2Architects.
The current status of the project is 2 apartments located at location A-20 and A-21 in S6A building of Vinhomes Symphony apartment. With an east-facing façade, the apartment is endowed with the advantage of natural light as well as excellent panoramic views. The highlight of this apartment is the view opening to the Phuc Loi lotus lagoon with a large area, more than 10 hectares and airy landscape by the Duong River.
These are not merely apartments, but they are also places to express creativity and make harmonious use of natural light and surrounding nature. Every view from these apartments not only opens up amazing scenery but also a lifestyle full of relaxation and tranquility amidst the noisy city.
With the special importance of location and unique views, making perfect use of space and light here is not only an advantage but also a great potential to create a sophisticated and classy living space. The sophistication in design and handling of space has been put on top by us, in order to make the most of these extremely special advantages.
In order for a living space to truly become a place called "Home" – a place where we want to return and feel peaceful while there, we have carefully researched the preferences and desires of the owner. Sharing with me about her hobby, Ms. Yen expressed that she loves a modern space with minimalist style and cool tones, creating a sense of tranquility and elegance. This is clearly reflected in the original idea for the apartment.
What's even more interesting is his teenage son's hobby of playing Lego. This is not only a personal preference but also a special source of inspiration for the design process. From these data, we built a preliminary idea for the comprehensive living space of the apartment.
The combination of the requirement of modern, minimalist space and cool tones along with creative elements from his son's personal hobby of playing Lego has created a unique living space, both reflecting the owner's own personality and meeting the needs of living and personal preferences. This is the foundation for creating a real home, where each member of the family feels content and peaceful every time they return.
The project uses the main tone of industrial wood painted in dark gray, white and dark veneer. Versatile combination with other modern materials such as smoke glass and artificial stone,... Create a work of architectural art where everything intersects harmoniously with natural light like a great symphony.
The contrast between the bass of the cool tone and the warm, gentle touch of the light creates an impressive picture of a delicate blend of opposing elements. The soft, beautiful touch of this space is hidden in the strength and modernity of the materials used. This is not only a house, but also a mirror that clearly reflects the personality and philosophy of life of the owner.
The modern, youthful spirit is clearly shown from the moment you cross the threshold to enter the house. Flexibility, creativity and the harmonious intersection of materials and light have created a colorful and sophisticated living space, while celebrating the beauty of modernity and youthful vitality.
LIVING ROOM:
The living room is not merely a living area or common living space of the family, but according to feng shui concept, this is the place where the best energy of the house is concentrated. Therefore, creating a special living room space is extremely important.
Neutral gray-white tones are made in the background, creating the foundation for sophistication and elegance. Color accents are subtly applied, creating a unique touch for the house, increasing the creativity and style of the owner.
Maintaining the spirit of LEGO - unlimited creativity - through every corner, every architectural line has created an interesting space experience right in the living room. It stimulates the imagination of all ages, opening up space for each person to freely create, build and connect with each other through the common language of LEGO.
KITCHEN & DINNING ROOM:
The kitchen is an indispensable piece in every family, this place is likened to the heart of the whole house. All one needs to create great taste is love and creativity in the kitchen. Because the kitchen with family meals is the emotional bond between members. Therefore, designing a beautiful and functional kitchen requires a delicate combination of colors, shapes and meticulousness in choosing the right materials.
Today's kitchen is invested by many people in both form and quality, so a beautiful, luxurious, modern, comfortable kitchen that fully meets the needs of each family is the design criterion D2 Architects aims for.
The Lego House project is not just a project anymore but it is really the result of sending all our core values and creative spirit to create a living space that symbolizes the interconnectedness of design, art and soul.
D2Architects
A : Khuat Duy Tien -Thanh Xuan Bac - Ha Noi – Viet Nam
M: d2architects.vn@gmail.com
W: d2architects.vn
P: 0965551101 - 0965554792
11