
Search results for "Discussions generated" in Home Design Ideas

 Dianne Davant and Associates
Master Bedroom with Red Bed Frame and custom drapery and bedding.
Bedroom - traditional master light wood floor bedroom idea in Charlotte
Bedroom - traditional master light wood floor bedroom idea in Charlotte



 Liebherr Appliances North America
MONOLITH INCEPTION KITCHEN
designed by Richard T. Anuszkiewicz
Featured brands include
Premier Custom-Built Cabinetry
SUPERIORE ranges
KALLISTA Plumbing
Dekton by Cosentino countertops
Burchette & Burchette Hardwood Floors,
Bradley USA Bridget Beari Designs wallpaper
Grothouse Lumber Custom Wood Surfaces.
Find the right local pro for your project
 Zelaya Properties LLC
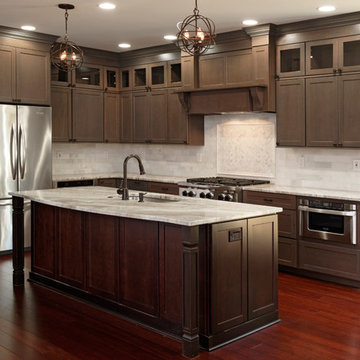
We used: Custom cherry cabinetry in Arts & Crafts Shaker style by Kabinart in Boulder and Espresso stains. Liberty Hardware Venetian bronze 1-1/2" cabinet knobs. KitchenAid Architect II Series 22 CF counter-depth French door refrigerator. KitchenAid Architect Series II 27" convection single wall oven. KitchenAid 36" 6-burner dual fuel freestanding commercial-style range. KitchenAid Architect II Series 24" dishwasher. Sharp Insight Pro Series 24" built-in microwave drawer (Model #KB6524PS). Crystorama Solaris 12" wide pendant lights in English bronze. Granite countertops in Brown Fantasy. 3"x6" polished marble backsplash.
Paint colors:
Walls: Glidden Silver Cloud 30YY 63/024
Ceilings/Trims/Doors: Glidden Swan White GLC23
Robert B. Narod Photography
 Moss Yaw Design studio
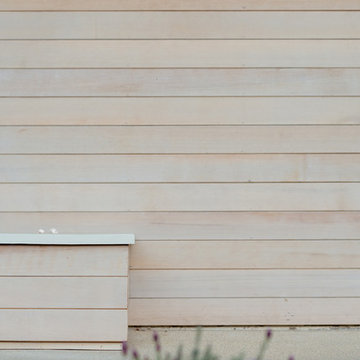
Engineered cedar siding creates beautiful gray-blue tones at the exterior of the home, while adding a textural element to activate the simple exterior design.
 Warm Timber Saunas & Wine Cellars
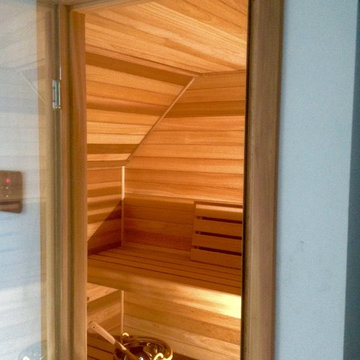
This previously unused attic space is now a sauna/yoga room. The left sauna wall follows the attic rafters down diagonally to allow a wider space for leg room on the twin sauna benches.
 Tile Doctor Ltd
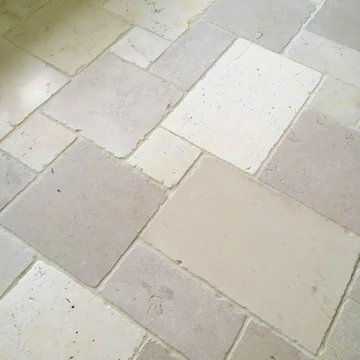
This Limestone tiled floor had been installed in the kitchen of a property in Teddington three years before and due to the use of the wrong cleaning product was now stripped of its protective sealer. Limestone like any natural stone is porous and without a sealer in place dirt becomes trapped in the stone making it very difficult to keep clean. The property was close to Bushy Park situated in South West London on the North bank of the Thames which is only about seven miles from my base in Shepperton.
I discovered all of this after visiting the property to quote for deep cleaning and resealing the floor. It turns out they have been using Flash multi-surface & floor cleaner which has an acidic pH of 10.3, compare this to Tile Doctor Remove and Go which we use to strip sealers off floors and has a pH of 12. Needless to say, this was not the right product to use and the old sealer had been completely stripped off the floor and probably within the first few months.
On top of this our customer had 3 children and a dog running in and out of the garden and was therefore transferring quite a lot of dirt into the stone. After surveying the floor, I discussed the renovation process with the customer which would take two days and include a deep clean of the Limestone followed by the application of a sealer to ensure it did not hold onto the dirt. They were after a sheen finish for the floor and were keen to have natural brown and cream variations in the stone highlighted. We agreed a price for the work and booked a date for the work to start.
To start with, we machine scrubbed the floor with Tile Doctor Pro-Clean to break down the dirt and release it from the stone. We find the best process is to spray the Pro-Clean onto the floor first and then leave to dwell for ten minutes before scrubbing. It’s not long before the cleaning solution turns dark with the dirt released from the pores of the stone and this soil is then rinsed with water and vacuumed off the floor with a low-pressure hard floor cleaning machine.
Following the cleaning, we honed the Limestone using a sequence of 800, 1500 and finally 3000-grit Tile Doctor Burnishing Pads. The pads are applied with water to lubricate and the slurry generated is rinsed off the floor as before. This burnishing process brings up the natural sheen of the stone and tightens up its pores prior to sealing. I left the floor overnight to allow it to dry out.
The next day I returned to the property and checked the floor for moisture using a damp meter. The readings were fine, so I proceeded with the application of the sealer for which I used two coats of Tile Doctor Colour Grow. This is an impregnating sealer that enhances the colours and contrast on the stone while protecting it against future soiling and spillages. It gave a lovely sheen finish to the floor as requested by the customer.
As you can see from the pictures the process made a huge difference to the floor which now looks lighter and brighter, certainly the customer was more than happy. Before leaving I recommended, they should clean the floor using Tile Doctor Stone Soap, this is a pH neutral product that will ensure the seal does not get broken down like it previously had using the household cleaners. It is gentle enough to use every day if you wish is designed to help maintain the patina of the burnished stone.
Jonathan Oldham
South Middlesex Tile Doctor
Sponsored
Fredericksburg, OH

High Point Cabinets
Columbus' Experienced Custom Cabinet Builder | 4x Best of Houzz Winner


 KINGDOM WOODWORKS
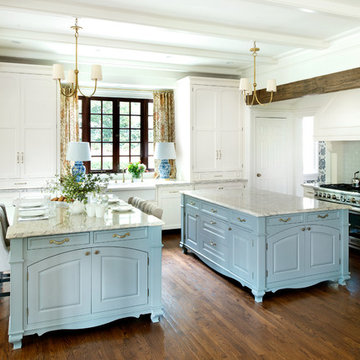
Collaboration with Canonbury Homes and Frank Neely Design Associates.
Inspiration for a timeless open concept kitchen remodel in Atlanta with beaded inset cabinets and two islands
Inspiration for a timeless open concept kitchen remodel in Atlanta with beaded inset cabinets and two islands
 McCullough's Flooring
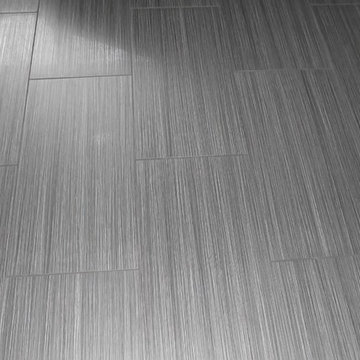
Gorgeous master bath finished with Dal-Tile's Fabrique porcelain tile in the color Noir Linen polished. Tile size is 12"x24" installed in a brick joint pattern. The floor boasts underfloor heating on a timed thermostat.
 Tile Doctor Ltd
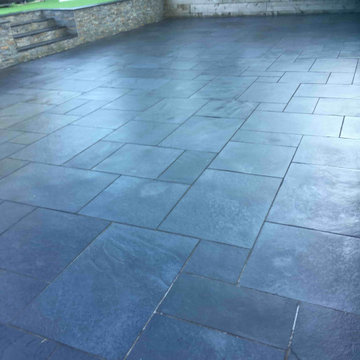
The photographs below are of an 80m2 Black Limestone Patio that was laid in rear garden of a property in Sandbach. All was going well until the installer decided to clean up the stone and remove the excess grout (aka grout haze) using brick acid. This is common practice in the trade after laying a patio however what they failed to realise is that Limestone can be marked by acids and in fact can be dissolved over time. This left the patio looking drained and in quite a state as you can imagine.
In an attempt to restore the black colour of the stone, the tiler painted on a restoration product however with the grout haze still present on the stone all this did was to add to the problems. Frustrated the customer decided to call Tile Doctor and so I went over to see what could be done.
I quickly deducted that the brick acid will have damaged the surface of the stone so to restore it I ran some tests on a small part of the patio that I been badly affected using a series of diamond encrusted burnishing pads of different grits. The pads successfully demonstrated that the appearance could be restored and impressed with the difference I was given the job of renovating all 80m2.
Being outside weather was an issue and I had to reschedule until a dry weather window appeared. Cleaning during damp weather isn’t a problem, it’s the sealer which needs to be applied when the sone is dry to get the right result.
Made with industrial diamonds and available in different sizes and grits, burnishing pads are ideal for restoring the appearance of polished stone floors. The first step was to work on the most badly damaged tiles with a coarse 100 and then 200-grit diamond milling pad fitted to a weighted rotary machine and lubricated with water. This took off the ruined top layer of the limestone bringing up the virgin stone underneath.
Next the patio was worked on with a 400-grit diamond burnishing pad, followed by 800-grit, and then 1500-grit pad. Each pad further renovates the appearance of the stone (Honing) and had to be rinsed after each pad to remove the slurry that is generated.
With 80m2 of Limestone paving to cover it took four days to completely restore all the stone using this method. It was tough work, but it made an incredible difference and naturally was far more cost effective than replacing the patio.
With the stone cleaned up the last step was to restore the natural black colour in the Limestone with an application of Tile Doctor Stone-Oil which restores the deep black colour and adds texture to the stone, it’s also an impregnating sealer in its own right that adds protection and improves mechanical strength once cured.
I allowed this to dry overnight then returned the next day to finish the patio restoration with a further coat of Tile Doctor Ultra-Seal, a no-sheen natural-looking sealer formulated to provide maximum stain protection without altering the colour of the stone.
The customer was delighted with the transformation, what was one an uninviting ugly area now looks fantastic and welcoming. Impressed with the result they left the following glowing feedback:
“Kamila is A M A Z I N G! From discussing our issue over the phone to meeting her in person, her advice and professionalism was second to none. She worked hard to repair our outdoor patio and we are thrilled with her results! We would happily recommend Kamila and wish her every success with her business in the future! Thank you Kamila! X
Kamila Logonzy
East Cheshire Tile Doctor
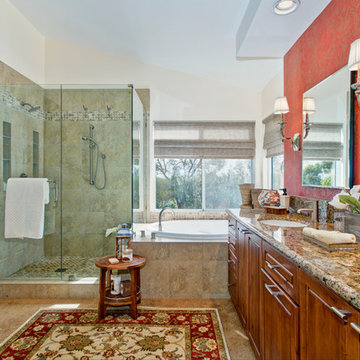
 CairnsCraft Design & Remodel
Great spacious bathroom with lot of amenities.
Photographer: Jon Upson
Large elegant master beige tile and porcelain tile drop-in bathtub photo in San Diego with an undermount sink, raised-panel cabinets, medium tone wood cabinets, granite countertops, beige walls and a two-piece toilet
Large elegant master beige tile and porcelain tile drop-in bathtub photo in San Diego with an undermount sink, raised-panel cabinets, medium tone wood cabinets, granite countertops, beige walls and a two-piece toilet
 Interior Pros - Design Studio
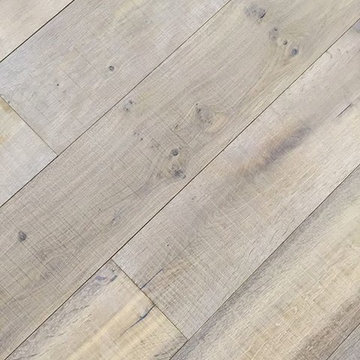
The grey trend has evolved in the last twelve months. Nowadays browns, beige and a touch of grey are in demand. Greige is the new buzzword.
Heavier hand scraped or contoured products, the rage that started around 2005 has taken a back seat in most areas, while a softer wire brushed "ceruse effect" seen mostly on White Oak has been remarkably strong showing no effects of becoming “dated” like the others mentioned.
Ceruse Color Possibilities
There are numerous color combinations to the "cerused" process with the most popular being white or off white. This design trend in hardwood flooring can have darker gray white oak with a mild ceruse off white effect.
There are limitless possibilities in either a prefinished hardwood floor or with what we can create for you in a custom on-site finished hardwood floor.
If something suits your fancy, contact us and we can work on creating just the look and sense of style you are looking for.

Sponsored
Delaware, OH

Buckeye Basements, Inc.
Central Ohio's Basement Finishing ExpertsBest Of Houzz '13-'21
 Spire North
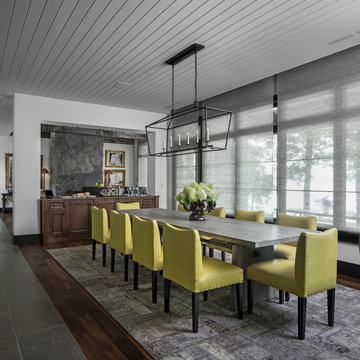
Tucked away in the backwoods of Torch Lake, this home marries “rustic” with the sleek elegance of modern. The combination of wood, stone and metal textures embrace the charm of a classic farmhouse. Although this is not your average farmhouse. The home is outfitted with a high performing system that seamlessly works with the design and architecture.
The tall ceilings and windows allow ample natural light into the main room. Spire Integrated Systems installed Lutron QS Wireless motorized shades paired with Hartmann & Forbes windowcovers to offer privacy and block harsh light. The custom 18′ windowcover’s woven natural fabric complements the organic esthetics of the room. The shades are artfully concealed in the millwork when not in use.
Spire installed B&W in-ceiling speakers and Sonance invisible in-wall speakers to deliver ambient music that emanates throughout the space with no visual footprint. Spire also installed a Sonance Landscape Audio System so the homeowner can enjoy music outside.
Each system is easily controlled using Savant. Spire personalized the settings to the homeowner’s preference making controlling the home efficient and convenient.

 Architect
Not all architectural imagery is created equal. Some renderings look obviously computer-generated, with flat lighting and plastic-looking materials that fail to convince viewers. Others are so precise that they are indistinguishable from photographs. That second category, realistic architectural visualization rendering, has become the standard expectation for architects, developers, and marketers who need imagery capable of withstanding close scrutiny from investors, buyers, and planning authorities. As audiences grow more visually literate, the tolerance for obviously artificial, video-game-like imagery in professional presentations continues to shrink.
What Sets Realistic Visualization Apart
Realistic architectural visualization goes beyond simply modeling a building in three dimensions. It requires physically accurate lighting simulation, true-to-life material properties, and careful attention to the small imperfections that make real-world photography convincing, such as subtle reflections, ambient occlusion in corners, and natural depth of field. The goal is an image that a viewer would believe was captured by a camera on-site rather than generated by software. Achieving that level of believability typically means dozens of small adjustments layered on top of one another rather than any single dramatic setting.
Realistic Versus Stylized Rendering Approaches
Stylized or conceptual renderings still have their place, particularly in early design phases when a looser, more artistic representation helps convey mood without locking in every detail. But once a project moves toward marketing, investment, or permitting, stakeholders need to see exactly what they are getting. Realistic visualization removes ambiguity, showing true material colors, accurate proportions, and honest lighting conditions rather than idealized abstractions. Understanding which approach a project actually needs at each stage helps clients avoid paying for a level of polish that a given milestone does not yet require.
Why Realism Builds Client and Buyer Confidence
Buyers and investors are understandably skeptical of overly polished or unrealistic marketing images. When a rendering looks convincingly real, it builds trust rather than raising doubts about what the finished project will actually look like. This is especially important in real estate presales, where buyers are committing significant sums based largely on visual material rather than a finished physical space. A rendering that later turns out to have misrepresented the finished product can also create legal and reputational exposure for developers, making accuracy a genuine business risk rather than just an aesthetic preference.
The Technical Pillars Behind Every Realistic Scene
Achieving true realism depends on several technical disciplines working together: physically based rendering engines that simulate how light actually behaves, high-resolution texture libraries that replicate real materials like stone, wood, and glass, and careful camera work that mimics real photographic lenses and exposure. Post-production adds a final layer of color grading and atmospheric effects that ties everything together into a cohesive, believable image. Each of these pillars depends on the others; even flawless material work can be undermined by lighting that behaves in a physically implausible way.
Applications Across Residential, Commercial, and Institutional Projects
Realistic visualization serves a wide range of building types, from single-family homes and luxury condominiums to office towers, hotels, schools, and healthcare facilities. Each typology has its own material palette and lighting expectations, and an experienced studio adjusts its approach accordingly, whether that means warm, inviting tones for a residential lobby or crisp, professional lighting for a corporate headquarters. Institutional clients such as universities and hospitals often have additional requirements around accessibility signage and wayfinding, which need to be represented accurately alongside the architecture itself.
How AIMIR CG Delivers Photorealistic Accuracy
Our studio specializes in realistic architectural visualization rendering that holds up under close inspection. Every project moves through a disciplined pipeline of modeling, texturing, lighting, and post-production review, with artists cross-checking material references and lighting studies against real-world photography. This attention to detail is why clients consistently describe our end product as impressive and our process as easy to work with. A dedicated quality review stage before delivery catches inconsistencies that might otherwise slip through a faster, less structured pipeline.
Common Challenges in Achieving True Realism
Realistic rendering is technically demanding. Common obstacles include accurately simulating how light bounces between surfaces, matching material reflectivity to real product specifications, and avoiding the uncanny, slightly artificial look that comes from over-processed images. Overcoming these challenges requires experienced artists who understand both the science of light and the craft of photography, not just software proficiency. Rushed production schedules are often the real culprit behind unconvincing renderings, since realism typically requires several iterative passes rather than a single render.
What to Look for in a Realism-Focused Rendering Studio
When evaluating a rendering partner, review their portfolio critically. Do the images include convincing shadow detail and material variation, or do surfaces look uniformly smooth and artificial? Ask about their revision process and how closely they work with architects to source accurate material and lighting references, since realism is ultimately the product of disciplined collaboration, not a single software setting. It also helps to ask for examples of past projects in a similar building type, since a studio's strengths can vary across typologies.
Ready for Renderings That Look Real
If your project deserves imagery that can stand up to the scrutiny of investors, buyers, and planning boards, AIMIR CG is ready to help. Our team combines technical precision with artistic judgment to deliver visualization that looks and feels genuinely real. Contact us to discuss how photorealistic rendering can strengthen your next presentation or marketing campaign, and let us show you examples from projects similar to your own.
 a.d.d. concept + design
Large cottage black two-story mixed siding exterior home photo in San Francisco
 Estero Builders, Inc.
Sandprints Photography
Inspiration for a mid-sized contemporary backyard deck remodel in San Luis Obispo with a fire pit and no cover
Inspiration for a mid-sized contemporary backyard deck remodel in San Luis Obispo with a fire pit and no cover

 BAUFORMAT
Wavy mother of pearl porcelain tile, wavy white tile for bathroom shower or backsplash. Perfect for fireplace or accent wall
Example of a trendy bathroom design in Los Angeles
Example of a trendy bathroom design in Los Angeles
 Heritage Construction Companies, LLC.
Example of a huge trendy metal floating open staircase design in Minneapolis
 Tile Doctor Ltd
I was contacted about a Georgian property in the Kent village of Leeds , to see if I could do anything to improve a Travertine tiled floor. The use of Travertine was extensive and had been installed throughout the ground floor including the kitchen, dining room, utility and bathroom WC. Travertine is probably my favourite stone, but it is acid sensitive and attracts dirt easily, due to its ‘holey’ composition.
Initially we discussed the floor over the phone where I got to know about the issues they were experiencing, and I detailed the renovation process I normally use to restore it including the products and timelines. Naturally they wanted to me to provide a quote for the work however its tricky to do that accurately without seeing the floor, so I arranged a date to pop over.
Upon arriving I could see the tiles and the wide grout joints had extensive, ingrained dirt indicating the previous sealer had long since worn away. This is a common issue with stone floors, and to re-assure myself and the client it could be resolved I cleaned a small area in the utility room with pleasing results!
This test clean helped me to understand which products and methods would work best on the floor and later that day I emailed over a detailed quote for the renovation. Happy with the quote I received a reply the same day asking when I could start.
My colleague and I arrived on the agreed date and work started with adding protection to all areas that required it. We use a lot of water during the cleaning process and some materials such as MDF can become damaged with water ingress, so it makes sense to do this.
To get the floor clean, a coarse Carbide Brush fitted to a rotary machine was run over the Travertine tiles to scrub in a strong solution of Tile Doctor Pro-Clean. This process generates a lot of slurry as the dirt was washed out of the stone and grout which is extracted with a wet vacuum as we progressed.
Next it was on hands and knees with more Tile Doctor Pro-Clean and handheld brushes run over stubborn areas and along the grout lines to take them from 80% up to 100%.
Happy with the results, the next step was to renovate the stone using a series of diamond encrusted burnishing pads. Using only water for lubrication this process starts with the application of a coarse 400-grit burnishing pad attached to the floor buffer. This produces a lot of slurry which again was removed with a wet vacuum.
This left the Travertine clean, but the pores of the stone had been opened giving the floor a matt finish and more absorbent than it was originally. To further refine the appearance of the stone the next two burnishing pads were applied which are 800 and 1500-grit. These pads polish the stone and close the pores, restoring the natural sheen in the process. After each pad was applied the slurry was rinsed off the floor with water and extracted with the wet vacuum. Once complete the floor was left to dry off fully overnight.
I arrived the next day and took several moisture readings from the floor to check that it had dried off sufficiently overnight. The results were good, so work moved onto sealing the Travertine with two coats of Tile Doctor Ultra Seal which is a natural look impregnating sealer. It works by soaking into the stone, occupying the pores and thereby preventing dirt from becoming ingrained there. This ensures dirt remains on the surface where it is easily cleaned away.
The final step in the floor’s renovation was to apply the last of the diamond polishing pads which is a very fine 3000-grit. This pad further improves the polished appearance of the stone resulting in a satisfying sheen.
The work made a massive difference to the floor, and I received an email the next day from one of the owners who was really pleased with the transformation:
”Floors look brilliant. Very pleased.”
For the care and maintenance of polished sealed floors I recommend the use of Tile Doctor’s Stone Soap which is a gentle but effective cleaning product that won’t impact the sealer and contains a patina enhancer. When it comes to sealed floors my mantra is:
“If you look after the sealer, the sealer will look after the floor!”
Graham Davis
North Kent Tile Doctor
6