
Search results for "Doctorate" in Home Design Ideas

 Woodheat Specialists DBA: The Chimney Doctors
Bedroom - mid-sized traditional medium tone wood floor and brown floor bedroom idea in Other with beige walls, a standard fireplace and a stone fireplace

 The Closet Doctor
Two twin murphy beds designed for when our customers grand kids come to visit. We used a white melamine with raised panel shaker doors and bead board inserts. The upper cabinets have glass doors, glass shelves, and LED lighting to showcase the customers car collection. Additional LED was installed to showcase their family photos.
 Tile Doctor Ltd
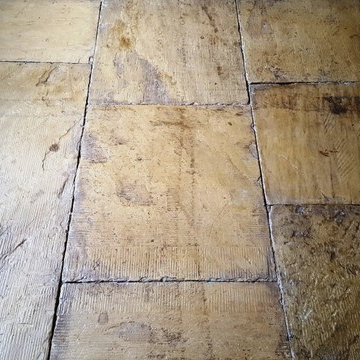
For this job, I had the pleasure of visiting the historic Salts Mill, a former textile mill turned art gallery, shopping centre, and restaurant complex near Bingley, West Yorkshire. It was built in 1853 by the famous manufacturer and philanthropist, Sir Titus Salt, and was at one point the largest industrial building in the world by total floor area.
As you can imagine, a lot of the rooms at Salts Mill are over a century and a half old. Most of them also contained stone flooring made from Yorkstone – a type of Sandstone unique to Yorkshire, and easily distinguishable due to its rich, natural yellow colouring. Unfortunately, one such floor in the Salts Mill was in quite a bad state. It has completely lost its vibrance – appearing more grey than yellow – and was evidentially in need of a very deep clean and fresh seal.
I started the Yorkstone tile restoration by soaking the floor in a strong dilution of our reliable alkaline-based tile cleaner, Tile Doctor Pro Clean, and scrubbing it in using a rotary machine fitted with a scrubbing pad. This quickly removed the initial layers of muck and, in the process, revealed oil-based paint and glue stains all over the floor.
To break down the oil and paint I applied Tile Doctor Remove & Go, which is our heavy duty stripper, remover and degreaser. This quickly ate through the paint and glue, and I followed by giving the floor another thorough clean with Pro Clean. Finally, I rinsed the floor with clean water before leaving it to dry for a full two days due to the amount of chemical cleaning product and water applied.
Upon my return to the Salts Mill two days later, I ran some quick damp tests to check for any excess moisture which could’ve prevented me from sealing the floor. Thankfully, the floor was dry and ready to be sealed, but it is always recommended, especially with older floors, to be aware of damp issues as these can be very troublesome.
My choice of sealer was Tile Doctor Seal and Go, a topical sealer which provides a robust, stain resistant seal and a durable low sheen finish all in one product. Multiple coats of Seal and Go were applied, bringing the life and character back to these classic tiles.
Nigel Stoker
North West Yorkshire Tile Doctor
Find the right local pro for your project
 Tile Doctor Ltd
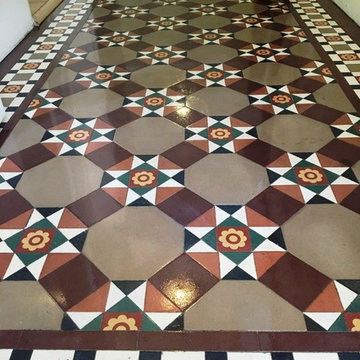
Esher is a small suburb in Surrey, situated just outside London. It was a fashionable area to live in amongst royalty and the aristocracy in the Victorian period, and during this time many buildings were built.
One such building has since been turned into a block of separate flats, and some of the flats still contain the original Victorian tiles in the hallway. I was contacted by one of these flat owners about restoring their tiles back to the best possible condition. Interestingly this customer’s tiles were part of a larger floor that had been divided between two flats.
I began the restoration by spreading Tile Doctor Remove and Go across the entire set of tiles. Remove and Go is a heavy-duty stripper that helped to loosen and remove old glue deposits where carpet had been laid over the tile, it will also strip off old sealers and release ingrained muck.
The Remove and Go was worked into the tile and grout with a stiff brush and then the soiled solution rinsed off and extracted using a wet vacuum. I followed by this applying a coarse 200-grit diamond encrusted burnishing pad, fitted to a handheld buffer, to grind away the particularly stubborn dirt and stains to restore the appearance of the stone. Afterwards, I rinsed the tiles again with water and soaked up the resultant slurry with a wet vacuum.
I noticed that there remained several ingrained stains dotted across the floor, so to remove these I aggressively burnished the affected areas with a very coarse 50-grit handheld diamond block. This essentially removed the very top layer of the stone, taking with it the ingrained marks.
Next, I dried the area with a large blower and heat gun. Under normal circumstances, 48 hours needs to pass before the tiles can be sealed, but as this was a small area I was able to dry it very quickly. After carrying out a damp test, I determined the tiles were ready to be sealed.
To seal the Victorian Tiles, I applied six coats of Tile Doctor Seal and Go sealer, which provides a high-quality sheen finish, as well as plenty of protection for the future. Tile Doctor have a range of suitable sealers available including Colour Grow which provides a matte finish – it’s just a matter of personal choice for the customer.
The outcome of the restoration was fantastic and the customer was very pleased, leaving the following testimonial.
“Promptly organised, delivered when promised. Good looking job when complete. Well done.”
Rupert Mcleod
West Surrey Tile Doctor
 Woodheat Specialists DBA: The Chimney Doctors
Living room - mid-sized traditional formal and enclosed medium tone wood floor and brown floor living room idea in Other with beige walls, a standard fireplace, a tile fireplace and no tv

 Cindy McCarley Designs
Beach style medium tone wood floor, brown floor, exposed beam and vaulted ceiling living room photo in Miami with white walls
 Woodheat Specialists DBA: The Chimney Doctors
Example of a mid-sized classic formal and enclosed medium tone wood floor and brown floor living room design in Other with beige walls, a standard fireplace, a tile fireplace and no tv
 Woodheat Specialists DBA: The Chimney Doctors
Example of a mid-sized transitional formal and enclosed medium tone wood floor and brown floor living room design in Other with beige walls, a standard fireplace, a tile fireplace and no tv
 Mako Renovation
by Tile Doctor
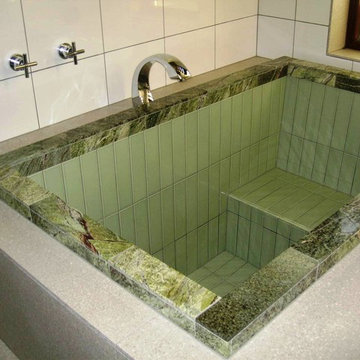
Large elegant master multicolored tile and ceramic tile ceramic tile bathroom photo in Chicago with green walls
Large elegant master multicolored tile and ceramic tile ceramic tile bathroom photo in Chicago with green walls
 Mako Renovation
by Tile Doctor
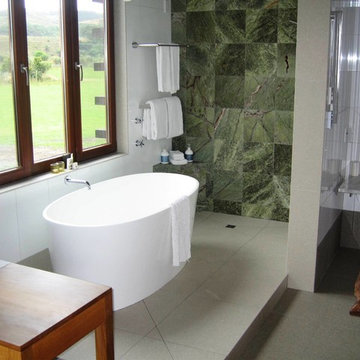
Bathroom - large traditional master multicolored tile and ceramic tile ceramic tile bathroom idea in Chicago with green walls
Bathroom - large traditional master multicolored tile and ceramic tile ceramic tile bathroom idea in Chicago with green walls
 Mako Renovation
by Tile Doctor
Bathroom - large traditional master multicolored tile and ceramic tile ceramic tile bathroom idea in Chicago with green walls
Bathroom - large traditional master multicolored tile and ceramic tile ceramic tile bathroom idea in Chicago with green walls
 Tile Doctor Ltd
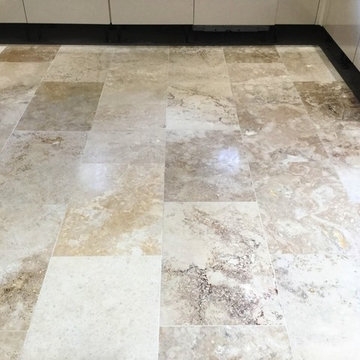
Travertine floor tiles are very appealing and very hardwearing, but without the protection of a sealer to stop dirt becoming ingrained in the pores of the stone their appearance will degrade. Fortunately, this can be remedied as demonstrated in these pictures of a Travertine floor I recently polished at a house in Weston Favell, Northampton.
This owner of the property had called me out as their kitchen floor was looking very sorry for itself and he was concerned that a lot of holes were appearing which was making cleaning the floor difficult as dirt was getting trapped in the holes. I went over and carried out a test clean on two separate tiles in the kitchen and the customer was amazed at how clean they came up and especially the grout.
The kitchen was stunning, but unfortunately the state of the Travertine tiled floor was bringing down its overall appearance. Impressed with the test clean they were keen to get the whole floor renovated so we agreed a price and I scheduled the work in for the following month.
I returned on the agreed data and made a start by protecting the kitchen units by removing the plinths and covering base units and the appliances with a protective film. We then commenced the cleaning process to remove surface dirt by cleaning with Tile Doctor Pro-Clean paying special attention to the grout lines. The holes in the Travertine were filled with a stone resin, mixing it to closely match the colours of the stone.
The resin was allowed to dry before starting to re-polish the Travertine using a set of Tile Doctor Diamond encrusted burnishing pads. These pads are applied individually to each tile in sequence starting with a coarse 400-grit pad before moving onto the 800-grit and finishing with the fine 1500 grit pad. A little water is used to lubricate the process along the way and the floor is rinsed in between each pad with the resulting residue extracted from the floor using a wet vacuum. The process takes some time, but it really brings up the polished appearance of the stone and the results are well worth the effort. After a final rinse the floor was inspected and then left to dry off fully overnight.
When we returned the next day, the floor had dried, and we were able to give the floor a final polish with a very fine 3000-grit burnishing pad applied with a little water sprayed onto the tile. Finally, the floor was then sealed with two coats of Tile Doctor Ultra-Seal which provides excellent protection without changing the colour of the stone to provide a natural look.
The client was over the moon with the outcome and surprised at the improvement. They were left with a floor that would be easy to clean and maintain.
Phil Vissian
Northamptonshire Tile Doctor
 Tile Doctor Ltd
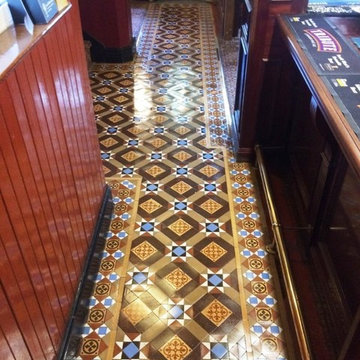
Here’s a really interesting commercial job for you, which I recently completed in the town of Hinckley, Leicestershire. I was asked to take a look at a Victorian Geometric and Encaustic tiled floor in the historic Queen’s Head pub.
This floor is over a century old and although in good condition for its age had suffered significant wear over the years, along with some cracked tiles and slight inherent moisture issues. What the pub landlord requested was a restorative clean to alleviate the aesthetically damaging effect of the wear, and to enhance the natural colours of the stone. I was also asked to seal the floor following the clean to achieve a semi-gloss finish.
The first step in the cleaning process was to mix a strong solution of one part Tile Doctor Pro-Clean to four parts clean water. Pro-Clean is a high alkaline cleaner which also contains stripping properties, allowing it to break down old sealer and tackle heavy soil build-up. The solution was applied to the floor and left to dwell for 15 minutes, giving it times to seep into the stone, get underneath the dirt and lift it to the surface.
I addressed several paint spots and areas suffering from glue contamination by using Tile Doctor Remove & Go, which is specially formulated to break down paint and adhesives on unpolished natural stone floors, amongst others. The entire floor was then scrubbed using a special floor cleaning pad, and the resulting slurry was vacuumed away using a wet-vac machine.
The final issue to deal with was the inherent efflorescence staining. This was treated using Tile Doctor Grout Clean-Up, an acid-based product which removes not just efflorescence but also grout haze, mineral deposits, and rust stains. The solution here was one part Grout Clean-Up diluted with four parts water.
After completing the clean, I thoroughly rinsed the floor with clean water to remove any trace of cleaning product and dried the floor as much as possible with a wet vacuum, then before leaving for the day i installed a couple of air movers to assist with drying overnight.
Upon my return the following day, I checked the floor for any excess moisture before sealing it with our topical, semi-gloss finish sealer, known as Seal & Go Extra which due to its formula is ideal for external or old internal floors where there is unlikely to be damp from membrane.
This unique product provides excellent protection, and allows the tiles to breath where floors are suffering from inherent moisture issues. It is suitable for both internal and external use, on Victorian floor tiles, Sandstone, Flagstones, Terracotta, and rough Slate.
As you can see from the photo, I was able to fulfil my client’s request to a high standard, bringing the pub’s old yet characterful Victorian tiled floor back to life again.
Kay Sylvester
Leicestershire Tile Doctor
 Tile Doctor Ltd
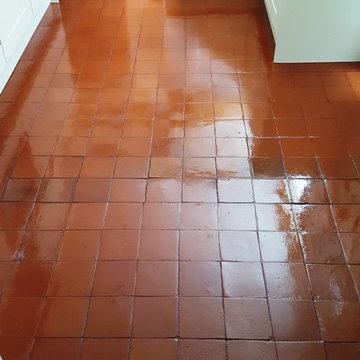
If you’re a first time buyer in the process of renovating or redecorating your new property, you may well discover some fantastic tiled floors hidden under your carpets. Certainly in my experience this happens quite often, so it came as no surprise when I got a call from a couple who had pulled up the carpet in the kitchen of their new house in Chester to find Quarry tiles, along with some fantastic Victorian tiles in the hallway.
While the Quarry tiles were in relatively good condition – having been shielded by carpet for many years – the couple were still understandably keen to get them back to looking their very best. I was more than happy to help them do just that.
Before beginning the restoration, I removed the kick boards from the kitchen cupboards so as not to damage them. I then applied a solution of our versatile, high alkaline cleaner, Tile Doctor Pro Clean, and let it soak into the tiles for a short period before scrubbing it in using a rotary machine fitted with a black scrubbing pad. Pro Clean is suitable for use on most natural stone tiles, including Quarry, Victorian and Slate, doing the trick to break down medium to heavy soil buildup.
The floor was then rinsed off with clean water, and the resulting slurry was promptly removed using a wet vac. I then left the floor dry out overnight.
I returned to the property the next morning, and started out by taking a couple of damp meter readings to make sure the floor was dry enough to seal. This is an essential task before sealing any tiled floor as even the smallest amount of excess moisture can cloud the sealer and damage its performance.
To seal the floor, I firstly applied one coat of Tile Doctor Colour Grow, which really brought out the natural reddish shades in the Quarry. As an impregnating sealer, Colour Colour fills the pores in the stone and prevents dirt from becoming ingrained. I followed the application of Colour Grow by applying three coats of Tile Doctor Seal and Go Extra. As a topical sealer, Seal and Go Extra forms an additional stain resistant seal on the surface of the tiles to protect against dirt and stains. It also gave the tiles a quality sheen finish as requested by the customer.
The customers were very happy with their newly restored Quarry tiled floor. They left the following feedback:
“We were both thrilled to bits with how nice the Quarry tiled kitchen floor looked, after being cleaned and sealed. Alastair was a pleasure to deal with and we would highly recommend him to anyone considering having their floor done.”
Alastair Robb
West Cheshire Tile Doctor
 Tile Doctor Ltd
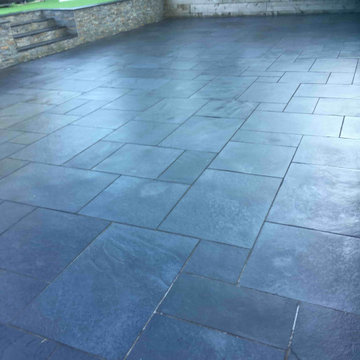
The photographs below are of an 80m2 Black Limestone Patio that was laid in rear garden of a property in Sandbach. All was going well until the installer decided to clean up the stone and remove the excess grout (aka grout haze) using brick acid. This is common practice in the trade after laying a patio however what they failed to realise is that Limestone can be marked by acids and in fact can be dissolved over time. This left the patio looking drained and in quite a state as you can imagine.
In an attempt to restore the black colour of the stone, the tiler painted on a restoration product however with the grout haze still present on the stone all this did was to add to the problems. Frustrated the customer decided to call Tile Doctor and so I went over to see what could be done.
I quickly deducted that the brick acid will have damaged the surface of the stone so to restore it I ran some tests on a small part of the patio that I been badly affected using a series of diamond encrusted burnishing pads of different grits. The pads successfully demonstrated that the appearance could be restored and impressed with the difference I was given the job of renovating all 80m2.
Being outside weather was an issue and I had to reschedule until a dry weather window appeared. Cleaning during damp weather isn’t a problem, it’s the sealer which needs to be applied when the sone is dry to get the right result.
Made with industrial diamonds and available in different sizes and grits, burnishing pads are ideal for restoring the appearance of polished stone floors. The first step was to work on the most badly damaged tiles with a coarse 100 and then 200-grit diamond milling pad fitted to a weighted rotary machine and lubricated with water. This took off the ruined top layer of the limestone bringing up the virgin stone underneath.
Next the patio was worked on with a 400-grit diamond burnishing pad, followed by 800-grit, and then 1500-grit pad. Each pad further renovates the appearance of the stone (Honing) and had to be rinsed after each pad to remove the slurry that is generated.
With 80m2 of Limestone paving to cover it took four days to completely restore all the stone using this method. It was tough work, but it made an incredible difference and naturally was far more cost effective than replacing the patio.
With the stone cleaned up the last step was to restore the natural black colour in the Limestone with an application of Tile Doctor Stone-Oil which restores the deep black colour and adds texture to the stone, it’s also an impregnating sealer in its own right that adds protection and improves mechanical strength once cured.
I allowed this to dry overnight then returned the next day to finish the patio restoration with a further coat of Tile Doctor Ultra-Seal, a no-sheen natural-looking sealer formulated to provide maximum stain protection without altering the colour of the stone.
The customer was delighted with the transformation, what was one an uninviting ugly area now looks fantastic and welcoming. Impressed with the result they left the following glowing feedback:
“Kamila is A M A Z I N G! From discussing our issue over the phone to meeting her in person, her advice and professionalism was second to none. She worked hard to repair our outdoor patio and we are thrilled with her results! We would happily recommend Kamila and wish her every success with her business in the future! Thank you Kamila! X
Kamila Logonzy
East Cheshire Tile Doctor
 Tile Doctor Ltd
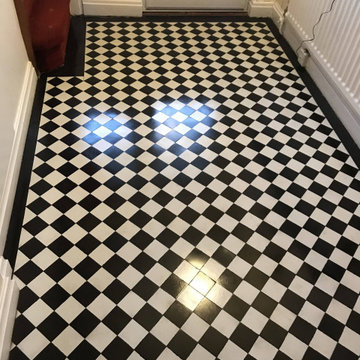
This is a great example of a Victorian Tiled floor refurbishment which I recently completed at a property in Stoke-on-Trent. If you look closely at the photographs below you will see the white tiles are looking grubby and paint splash staining from decorating. The owner was unhappy with how the floor now looked and wanted it refurbished.
Black and White Victorian tiles laid in a chequered diamond pattern is a classic style and a very popular choice for hallways at the turn of the 20th century. Over the years many have been replaced or covered up with carpet and those that survived are now a sought-after period feature that adds value to your property.
I initially cleaned the floor by applying a strong dilution of Tile Doctor Pro-Clean which was sprayed onto the floor and then left to soak in for ten minutes. Pro-Clean is our goto tile and grout cleaning product that is designed to break down dirt and remove old sealers. After ten minutes the solution was scrubbed in with a rotary machine fitted with a coarse 200-grit pad. The soil generated was rinsed off the tiles and extracted with a wet vacuum and the floor inspected.
I would see more work was needed to get the floor clean and free of staining, so I spot treated the problem areas with Tile Doctor Remove and Go which is a coatings remover. I worked in small sections leaving the product to dwell as before for 10 minutes, I then used a wallpaper steamer with handheld diamond blocks to get the ingrained dirt out of the floor. After a final rinse and extraction, the floor looked clean so, so much better than when I started.
I then left the floor to dry off overnight and came back the second day to seal the tiles first checking the moisture levels with a damp meter. Applying sealer to a damp floor will result in the floor looking patchy when it dries so I always check first. The readings were good, so I started to apply the first of five coats of sealer which for this floor I chose Tile Doctor Seal and Go Extra.
Old Victorian floors do not have a damp-proof membrane installed under the floor so its important to select a sealer that will allow moisture to rise through the tiles and evaporate on the surface, Seal and Go Extra allows for this. Choosing a non-breathable sealer can result in moisture being trapped under the floor where it can reach out to the walls leading to rising damp.
Once the floor dried it looked fantastic. In fact, my customer was so happy with the transformation she was taking pictures and sending them to her daughters as I worked; she couldn’t believe how well it was turning out.
Trevor Preece
Staffordshire Tile Doctor
 Tile Doctor Ltd
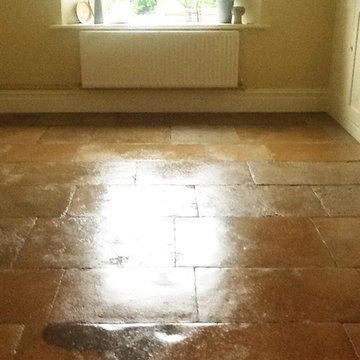
This property was situated in the tiny, yet picturesque village of Grafton Underwood in Kettering, Northamptonshire. The village has only a population numbering a few hundred and, interestingly enough, is the childhood home of the famous ‘Bridget Jones’ character. I have previously worked on a number of floors in Grafton Underwood, and on this particular occasion I was called to complete the job through a recommendation – which is always welcome!
This particular customer had two floors that needed re-finishing; the first was a polished Limestone tiled conservatory (which I will cover in a separate post as the process was different) and the second a Flagstone tiled living room; so on a rather dull day in November, I began my work.
The sealer on the Flagstone tiled living room had failed in certain places, resulting in the floor becoming difficult to clean due to dirt becoming ingrained in the stone. The decline in the sealer is not uncommon, as they do wear down over time – especially in an area of high traffic like a living room. To resolve this issue, the old surface seal needed to be stripped back and re-sealed.
To remove what was left of the old sealer, I applied a dilution of Tile Doctor Remove and Go and scrubbed it into the floor using a rotary machine fitted with black stripping pads. I then gave the floor an initial rinse, before paying special attention to scrubbing the stubborn spots, making sure all of the sealer was removed.
I then gave the floor an acid wash using Tile Doctor Grout Clean-Up in order to remove grout haze and other mineral deposits which were evident. Due to its acidic properties, you have to be very careful with this product on any type of stone, so I didn’t let it dwell for too long and made sure the floor was thoroughly rinsed down afterwards, with all solutions extracted using a wet-vac machine.
The floor was left to dry for more than 24 hours, before I returned to re-seal it using Tile Doctor Seal & Go. This product provides both a stain resistant surface seal and the durable low-sheen finish requested by my client. Seal & Go is suitable for use on internal unsealed, porous surfaces.
I guess the photographs don’t really do the transformation justice however the freshly re-sealed Flagstone living room certainly brightened up what was a very dreary autumn day!
Phil Vissian
Northamptonshire Tile Doctor
 Tile Doctor Ltd
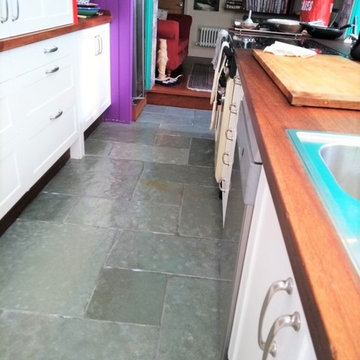
I recently helped a homeowner from my home town of Dursley who got in touch about her kitchen Flagstone floor. The problem revolved around an accident she had with raspberries which had stained the flagstones and the problem became compounded when a house hold clearing product was applied neat to clean up the mess. If you follow any of our Tile Doctor blogs, you will know that using strong household cleaning products can damage the sealer and, in this case, it had left white marks on the floor.
I called round to the property to survey the floor as was surprised to find out that the floor had been cleaned and sealed only four months prior by another company. I don’t like to comment on other people’s work, but I found the grout lines and flagstones were still badly ingrained with dirt, so it wasn’t a through job.
I completed by survey and demonstrated the process I would follow to resolve the issues on one of the flagstone tiles. She could not believe the difference I was able to make and booked me in straight away to restore the entire floor.
My first task was to protect the wooden kitchen units from splashing that can happen when cleaning the floor. Once that was done, I set about stripping the sealer from the floor and deep cleaning the tile and grout with a strong dilution of Tile Doctor Pro-Clean. Pro-Clean is a concentrated, multi-purpose high-alkaline cleaner, stripper and degreaser which is safe to use on all types of tile, stone and grout including natural stone.
Working in sections across the Kitchen and adjacent dining room I diluted one part Pro-Clean to two parts water and mopped it onto the flagstones and grout where I left it to soak in for roughly fifteen minutes. Then using a rotary floor buffer fitted with a black scrubbing pad I scrubbed the solution into the floor into the old sealer and trapped dirt came away turning the cleaning fluid black in the process. The soil was then rinsed off with water and then extracted with a powerful 3,000 watt wet and dry vacuum. This process was repeated until I was satisfied the floor was clean and I ran a stiff grout brush along the grout lines to ensure they also received a good scrub. After I was satisfied the section was clean it was rinsed thoroughly with water to neutralise the floor and remove any trace of product and then dried with the wet and dry vacuum.
The cleaning process took up the whole day, but the flagstones would need to be dry before sealing so after giving the owner an update I left the floor for two days, so it could dry out thoroughly.
On my return I tested the floor was dry in multiple places with a damp meter to ensure it was ready to be sealed. The readings showed that the wet and dry vacuum had done a good job in removing the moisture, so all was well. To seal I applied several coats of Tile Doctor Seal and Go allowing each coat to dry before applying the next however with such a large area to cover I was able to work in sections around the floor.
Seal and Go works really well on Flagstones and leaves a very appealing sheen finish, also being water based it doesn’t leave a smell as it dries.
The results were amazing, and the customer thanked me for making such a massive improvement on her floor. Before leaving I made sure to discuss after-care and to avoid the use of hash cleaning products.
Malcolm Crowther
Gloucester Tile Doctor
 Tile Doctor Ltd
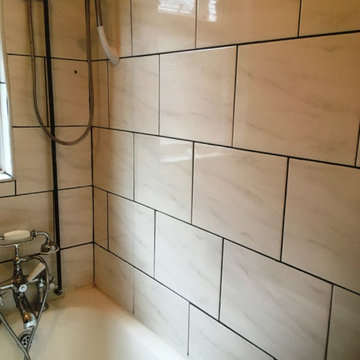
We were contacted by a client from the Levenshulme area of Greater Manchester who had just purchased a property there and hated the state of the grout which despite cleaning did not improve. The owner said she could not use the bathroom in this state as it looked disgusting and unclean and was keen to have it renovated. The rest of the house was being redecorated so whilst that was going on, I was called over to have a proper look at the grout and quote for sorting it out.
It didn’t take long to understand the issue, is seems the previous owner in an attempt to improve the appearance of the grout had touched it up by applying another thin layer of grout on top of the original. Now both the new and old was starting to flake off making a real mess.
I explained to the client we would need to scrape out the new layer, clean the original and then apply a grout colourant to improve the overall appearance. I gave her a price for the work, and she was happy for me to go ahead with the job.
My first task was to scrape off the new layer of grout, so I had a stable grout line to work from. I then started cleaning the grout up using a Tile Doctor Grout Colourant Pre-Treater cleaner, this cleans up the grout and being acidic it etches the surface to provide a better base for the grout colourant to adhere to. The dirt was rinsed off and then the area was dried using a heat gun.
Once dry I used a Tile Doctor Grout Colourant in Charcoal Grey (one bottle was sufficient). This product is equally effective for interior or exterior applications including bathrooms and kitchens and it is available in ten different colours. The client had requested to darken the grout and give it a completely new modern look. The colourant is painted onto the grout with a small brush and any excess which gets onto the tile is removed with a cloth before it dries.
The best thing about the grout colourant is it forms an easy to clean seal over the grout which ensures the grout is protected. Given Ceramic tiles are glazed and therefore don’t need sealing the new combination should ensure the tiles keep their appearance for a very long time with minimal cleaning. The silicone sealant between the bath and the wall tiles looked in good condition and had not discoloured so there was no need for this to be replaced.
The bathroom now looked clean and inviting and I’m pleased to report my client was very happy with the completed renovation and was finally happy to use the bathroom!
I recommended that for on-going cleaning that they use Tile Doctor Aqua-Pro, this is a pH neutral cleaner with a trigger action for easy application. It can be used in the bathroom every day. It helps to keep soap scum and limescale at bay and has a pleasant lemon smell so cleaning should not be too much of a chore.
Alex Logonzy
Greater Manchester Tile Doctor
 Tile Doctor Ltd
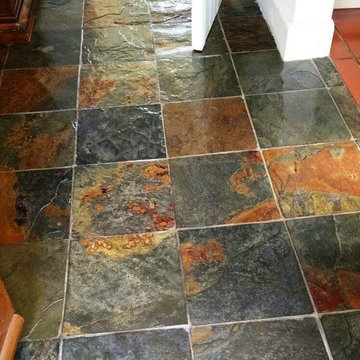
The photographs below are of rough Chinese Slate floor tiles installed at a house in Dorchester; they had not been deep cleaned in a long time and the combination of pets and grandchildren had taken its toll on the floor. Rough Slate from China is a relatively inexpensive product and although long lasting and value for money the texture of the Slate is difficult to maintain and thus difficult to keep clean even if fully sealed
To clean the tiles I used a strong dilution of Tile Doctor Pro-Clean which was left to soak into the Slate for a good ten minutes before working it in with a buffing machine fitted with a black scrubbing pad. This action removed the ground in dirt and any old sealer and a stiff brush was then run along the grout lines with more Pro-Clean to get them as clean as possible. The floor was then rinsed thoroughly and any stubborn areas retreated; a wet vacuum was used to extract the soiled water from the surface of the stone in order to get it as dry as possible.
The floor was left to dry overnight and I returned the next day to seal using three coats of Tile Doctor Seal and Go sealer which is a water based sealer (so no smell) that leaves a nice subtle shine to floor.
The slate and the grout looked really dull and dirty before we started and now the floor looks like it was recently laid.
For aftercare we don’t recommend the use of a Floor Steamer as they work on a 100 degrees and this damages the sealer; for regular cleaning use Tile Doctor Ph Neutral Cleaner using a two bucket system, whereby you apply the cleaning solution with a jug, wipe the floor and then squeeze off the excess into the second bucket, this stops you reapplying dirty water onto a clean floor.
Stuart Tibu
Dorset Tile Doctor
11