
Search results for "Doctors specializing" in Home Design Ideas
 Tile Doctor Ltd
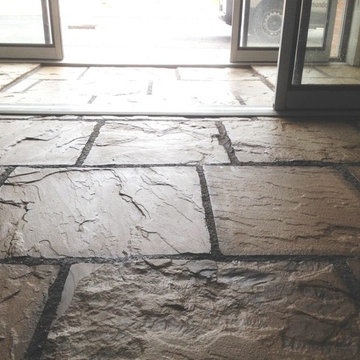
We work on a lot of residential tile installations but also cover commercial properties too, such as this new farm office which was in the process of being built in the market town of Driffield, East Yorkshire where a Flagstone tiled floor had been laid at the entrance. Driffield is known as the ‘Capital of the Yorkshire Wolds’ and lies near the source of the River Hull.
The farm office project was very big and, with the pressure on to complete it in time, the floor had been laid without being sealed first. As a result, the floor was getting dirty very easily, and was proving difficult to keep clean. It was clear that the Flagstone tiles would need to be cleaned and sealed, and I was called upon to get the job done.
To clean the floor I first mixed a 50:50 solution of clean water and Tile Doctor Pro Clean. Pro Clean is a high-alkaline cleaner which is safe to use on a wide range of natural stone floors. The cleaning solution was worked in using a rotary machine fitted with a black buffing pad which proved an effective method, lifting off the dust and residue that had been left on the surface of the Flagstone tiles during the course of construction work.
The excess residue was extracted using a wet-vac machine. I then repeated the whole process over again several times in order to get the floor as clean as possible.
To seal the floor I used a combination of two different Tile Doctor sealers. Firstly, I applied a layer of Tile Doctor Colour Grow to the floor. This colour intensifying sealer is specially formulated to enhance the fantastic natural colours in the stone, while at the same time providing durable surface protection.
The floor was then finished off with a couple of coats of Tile Doctor Seal & Go. This added to the stain resistance of the floor, while also delivering a very nice subtle shine on the surface.
All signs of building work have been removed from the stone floor and it is now looking presentable ready for the opening of the new office, the combination sealer applied to the floor will also make sure it stays that way for some time to come.
Ronnie Phipps
East Yorkshire Tile Doctor

 Marble Doctors LLC
Before Photos shows etched and scratched surface:
Installing,Refinishing, Repairing and Maintaining of Natural Stone and Other Man Made Solid Surfaces in Both Commercial & Residential Settings
Company Overview
Marble Doctors are a specialized company that has been perfecting the stone trade for many years and has developed a reputation for true craftsmanship. As an individually owned company since 2008, the Marble Doctors will give you the personalized service you need and the expertise you desire. We understand that stone is an investment and a luxury, so we want to help you protect your investment and keep your stone looking its best for the longest time possible
Description
Dull Spots - Marble, Travertine, Granite, Terrazzo and other solid surfaces. Polished out to return a mirrored finish
White Spots - Stubborn spots removed once and for all via marble, limestone and travertine polishing and restoration
Scratches - Honed out to restore a smooth mirrored appearance.
Chips & Cracks - Repaired and blended to virtually disappear.
Grout - Repaired and cleaned.
 Tile Doctor Ltd
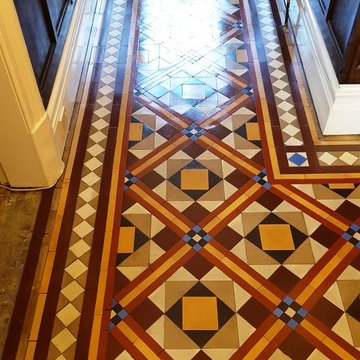
The colourful and diverse geometric patterns of a Victorian tiled floor can give a property a regal, elegant and timeless feel, making it a popular choice even in the 21st century. However, as time passes without regular care and maintenance, Victorian tiles can quickly lose their colour and appear deadened by the buildup of dirt and dust over several months (and sometimes years).
This property owner in Hebden a very small village in North Yorkshire of less than 300 people, had this common problem. Her Victorian tiled hallway had not been adequately maintained and was now more difficult to keep clean than ever. To add to the problem, most of the tiles along the edges were either broken, cracked, or filled with holes, probably I suspect from the installation of carpet grippers at some point in the past.
At this point, the property owner turned to Tile Doctor to see what could be done.
Before beginning a deep clean of the entire length of the hallway, it was first necessary to source and install replacement tiles for those that had been broken and damaged. I also relaid any that were loose.
When finished, I left the tiles to set and returned the next day to start the clean. My choice of cleaner in this situation was Tile Doctor Pro Clean, which was scrubbed into the floor with a special pad fitted to a rotary machine to break down ingrained dirt and stains. Pro Clean does this very effectively on all types of tile, including natural stone and of course Victorian tiles.
The floor was then rinsed with water and the soiled cleaning solution extracted from the floor using a vet vacuum. Stubborn areas were re-treated with more Pro Clean, and when I was satisfied with the condition of the tiles the floor was given a final but thorough rinse to remove any trace of cleaning product.
The floor was then left to dry completely overnight to ensure all excess moisture had disappeared, leaving it fresh to be sealed. I returned in the morning for a third day of work to seal the Victorian tiles with four coats of Tile Doctor Seal and Go, a topical sealer which provides a rich satin finish to really add depth to the colours in the tile while protecting it against dirt and stains.
The customer was delighted with the restoration and couldn’t quite believe the huge improvement in the appearance of the tiles, especially in regards to the enhancement in the different colours. Another satisfied customer!
Nigel Stoker
North West Yorkshire Tile Doctor
Find the right local pro for your project
 Tile Doctor Ltd
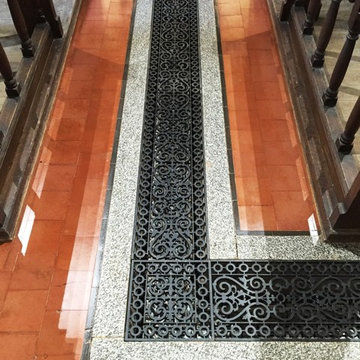
Did you know that Wantage, the town in Oxfordshire where I completed this job, is the birthplace of Alfred the Great? The town is certainly a historic area – in fact, I was contacted by the warden of a church dating back to the 12th century, who asked Tile Doctor Oxfordshire to help restore the building’s flooring, consisting of Quarry and Marble tiles.
This is an interesting mix of hard wearing and high end tiles, and while the floor was in
dire need of a deep clean, it could be restored back to looking fantastic once again.
The church has recently undergone a complete refurbishment with the help of a grant from lottery money. We were called after the builders had finished their work, to restore the floor to the finish required by the church warden.
His specification was to provide the Marble with a Matt finish and the Quarry tiles with a sheen finish. The floor was, at one point in its history, covered in carpet which had been taken up, no doubt exposing many years’ worth of muck.
My first task was to clean the floor with a diluted solution of Tile Doctor Pro-Clean, a high alkaline cleaner safe to use on tile and stone. This was left to dwell for a short period to seep into the tile, before being scrubbed in to remove the initial layers of muck. The resulting residue was promptly vacuumed away.
To tackle the tougher areas of soil buildup, I opted to use Tile Doctor Nanotech HBU which was spread over the floor and left to dwell for about 30 minutes. This product differs from most cleaners in that it uses nano-sized cleaning particles to deal with difficult to reach dirt ingrained in the stone. I then rinsed the area with water and vacuumed this up.
Due to the substantial size of the church floor I had to work in multiple sections, and so the cleaning process took three days to complete. After finishing, I left the church for a few days to allow the floor time to dry.
When I returned to the church I checked the floor with a damp meter and was satisfied that it was dry enough to seal.
First, I sealed the Marble tiles with Tile Doctor Colour Grow, which is a colour enhancing impregnating sealer suitable for use on high end stone such as Marble and Limestone. I applied two coats, leaving a few hours between coats; this brought the colour back without a high shine, as per the church warden’s request.
The next day I returned to seal the Quarry tiles, this time using Tile Doctor Seal & Go Extra which is a topical sealer specially formulated to lea e a nice sheen as requested. I applied several thin coats of the sealer to build up solid protection on the floor.
The warden was extremely pleased with the finished floor, leaving the following feedback:
“We found the Tile Doctor online and watched some of the very helpful slideshows on YouTube. The Victorian Quarry tiles in our 12th century church had been covered with carpet for many years and needed a thorough clean and polish at the end of our major restoration project. Barry was very quick to respond to our enquiry and over the course of a week he did a brilliant job on our tiles. We’re delighted with the results, just in time for our reopening service with our bishop and MP.”
Barry Woodward
Oxfordshire Tile Doctor
 Tile Doctor Ltd
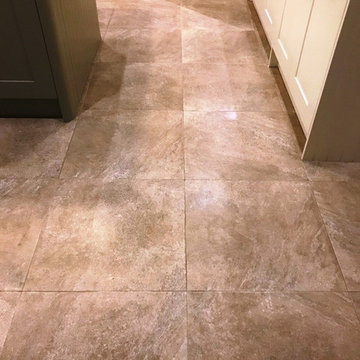
This request came from a client who lives in the Newcastle district of Jesmond who was unhappy with the appearance of their Textured Porcelain floor tiles. The problem was that the Porcelain Tiles were grouted in whilst the underfloor heating was switched on. This resulted in the grout drying out quicker than expected and the tiler struggled to get the excess grout off the tiles. To rectify the problem, the tiler tried to get the dried grout off with acid, but it didn’t work, and the floor was left looking dark and dull. Unable to rectify the problem the client was left with a disappointing pale floor and had searched around the internet for a solution.
Normally grout smears like these (aka Grout Haze) can be removed with an acidic product and Tile Doctor sell Grout Clean-up specially for this purpose. However, some grouts contain acid resistant polymers which need to broken down first. Fortunately, we have a solution for everything tile related and the system we use does not affect the main grout lines only the excess grout. I called in to do a site visit and having surveyed the problem I was confident it could resolved, I gave them a price for the work and agreed a date to return to do the job.
My first task was to spray the tiles with Tile Doctor Remove and Go, this was left to soak into the tile for around ten minutes before being scrubbed in. Remove and Go is a coatings remover that is safe to use on tile and grout; normally we use it to remove old sealers but in this case I applied it to break down the polymers. To work the product into the tile I use a buffing machine fitted with a black scrubbing pad, the mechanical advantage this gives makes the job a lot quicker. Then the slurry generated is rinsed off with water and removed with a wet vacuum. The floor was then left to dry for 30 minutes.
We were then able to remove the excess grout which was done by applying Tile Doctor Grout Clean-Up which I mentioned earlier. The process was the same, i.e. using the buffing machine and a wet vacuum to scrub the floor and extract the soil. The floor was rinsed with water to remove any trace of the products used and dried as much as possible using the wet vacuum. The underfloor heating really helped at this point to dry out the floor.
Once the floor was fully dry including the grout lines a single thin coat of Tile Doctor Colour Grow sealer was applied. The tiles were textured porcelain, so the dirt gets trapped into the textured surface if it is not sealed. We usually find one coat of Tile Doctor Colour Grow is more than enough for this, anything that hadn’t soaked in after three to five minutes was then polished off with clean dry cloths.
The client was very happy with the floor and pleased that the excess grout had been cleaned up and the floor looked as it should. Before leaving I recommended the use a pH Neutral tile cleaner for general cleaning such as Tile Doctor Neutral Tile Cleaner. There is no point sealing the tiles only to have it stripped off later with the use of a bleach based cleaner.
Raf Barrett
Tyneside Tile Doctor
 Tile Doctor Ltd
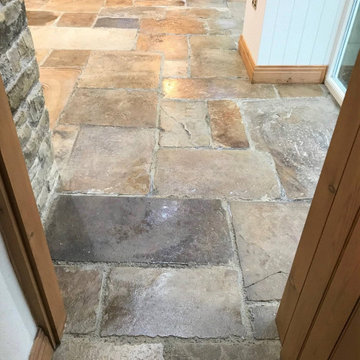
We had been to maintain this Sandstone floor about two years previously at a property in the pretty area of Windermere in the English Lake District. The client had run out of our Tile Doctor Neutral Tile Cleaner that we left after completing the job and had started using a standard cleaner instead (a well-known ecological cleaner). Unfortunately, this product has a 5% non-ionic surfactant in its chemical structure, which will strip a coat of stone sealer off the surface within 6 months, once that topcoat has been removed the sealed surface is only 50% as strong as it should be.
Readers of this article should be aware that even washing up liquid which is a degreaser will strip sealers although it will take many months of regular use before you will start to notice an issue. Stronger bleach-based cleaning products such as Flash and Domestos will cause instant damage to stone sealer which will often go an off-white colour as a result. So, the importance of using the right cleaner is imperative. Having used our services on this floor previously he client knew what to expect and was happy to go ahead with our quote.
My first task would be to clean the floor and completely remove what was left of the old sealer to ensure the floor would have a consistent appearance. On this occasion I used a strong 1:3 dilution of Tile Doctor Pro-Clean worked into the floor with a Black buffing pad fitted to a rotary buffing machine. The Sandstone floor was then rinsed with water, scrubbed again and then the waste extracted using a wet vacuum.
This was followed with acid rinse using a 1:5 dilution of Tile Doctor Grout Clean-Up, this is a Phosphoric Acid (not a Brick Acid). After being scrubbed into the tile it was rinsed off the floor as before using water and the wet vacuum. This process further cleans the stone and neutralises the floor after the use of the strong alkaline Pro-Clean used earlier.
Before leaving for the day I gave the floor one final rinse with water and then dried the floor as much as possible with the wet vacuum. The floor was now clean and free of sealer and left to fully dry off overnight.
I came back the following morning and started by testing the floor with the moisture meter. I always do this as I know from experience how important it is to ensure the floor is dry before applying a sealer.
Happy the Sandstone was dry I then proceed to apply the first of what would be four coats of sealer. For this I used Tile Doctor Seal and Go which leaves a nice low sheen finish. This product is specially formulated blend of acrylic polymers that provides will protect the floor from ingrained dirt and staining; it will make the floor easy to clean and has the added advantage of being water based so it doesn’t leave a solvent smell as it dries.
The client was left another complimentary bottle of Tile Doctor Neutral cleaner and hopefully the seal will last a long longer the 2nd time around. The client was pleased the floor had been restored and vowed to use nothing but Tile Doctor products on it in the future.
Heidi Taylor
South Cumbria Tile Doctor
 Tile Doctor Ltd
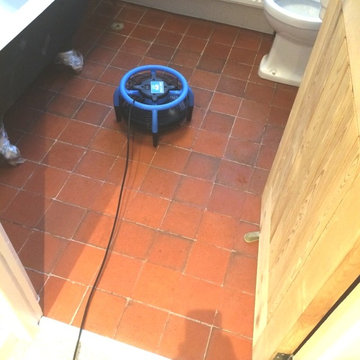
This is a job I recently completed in the small town of Braunstone, which lies just outside the city boundaries of Leicester, Leicestershire. My client wanted a restorative cleaning and sealing service for their very old Quarry tiled bathroom floor, which dates back to the Edwardian period. The floor was suffering from paint and adhesive staining, and was now in dire need of a thorough clean more generally along with a fresh seal to protect it from further damage.
I treated the floor in the first instance Tile Doctor Remove & Go which is a powerful stripper that breaks down old sealers remaining on the floor, as well as inherent paint and adhesive contamination. Remove & Go also contains cleaning properties which allows it to draw out ingrained dirt from the stone, lifting it to the surface. The product was applied to the floor and allowed to dwell for approximately thirty minutes prior to agitation with a hand-held rotary polisher fitted with a small black stripping pad.
The resulting slurry was promptly removed using a wet vacuum machine and our specialist Tile Doctor Acid Gel was then applied to the floor. Acid Gel is a blend of phosphoric and hydrochloric acids in gel form, and is specially formulated to treat grout haze and efflorescence on both wall and floor tiles.
Readers should be aware that this product is not suitable for use on acid-sensitive stone tiles such as Marble, Limestone and Travertine as it can potentially cause severe etching. In this case Acid Gel was left to dwell for ten minutes prior to agitation. This was effective in removing the white efflorescence salt staining that was present in several concentrated areas. Once again, the resulting slurry was vacuumed away, and the entire floor was rinsed with clean water.
The floor was left to dry for roughly twenty four hours before I returned to seal the floor. My choice of sealer in this case was Tile Doctor Colour Grow, a colour enhancing, impregnating sealer. The sealer will help to protect the tiles from soil ingress, and both water and oil based spills.
As you can see from the ‘Before’ and ‘After’ photographs, a marked difference was made to the appearance of this Quarry tiled floor. A professional and carefully thought out approach was taken to tackling the innate problems, particularly relating to efflorescence and paint and adhesive staining, and my client was extremely pleased with the results.
Kay Sylvester
Leicestershire Tile Doctor
 Tile Doctor Ltd
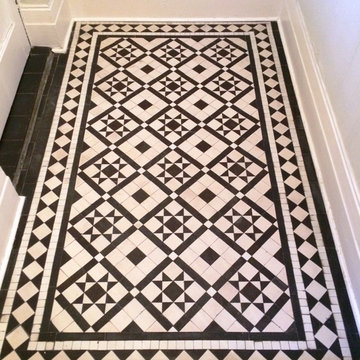
This job was at a house in near Windermere in South Cumbria, a place which is very popular amongst tourists to the Lake District. My client had a Black and White Victorian tiled floor in dire need of a clean and re-seal.
Prior to the application of any cleaning products, my first task was to run damp tests to make sure there were no inherent damp problems. With old floors of this type it’s good to know if there is a damp problem as this will affect the choice of sealer and also the length of time the floor requires to dry.
Fortunately, there were no damp issues present, and I was able to proceed however had the floor been damp and being December I would have offered to carry out the clean and seal in the Summer, when the water tables were lower and the damp levels would be more settled, thus creating a better environment for the sealer to operate in.
I started cleaning the Victorian tiles with Tile Doctor Remove & Go, a product which breaks down old sealers in preparation for a fresh seal to be applied. The product is diluted with water and then scrubbed into the floor with a scrubbing pad fitted to rotary machine; the resulting slurry is then removed using a wet vacuum.
Next step was to apply Tile Doctor Pro-Clean which was applied liberally to the floor, left to dwell for a short period and then agitated with a black scrubbing pad to lift out the ingrained dirt. I also paid special attention to cleaning the grout lines with a stiff scrubbing brush. The floor was then rinsed with clean water, and the resulting residue was extracted using a wet-vac machine.
After the cleaning was completed, the tiles were left for a couple of days to allow them ample time to dry. Upon my return to the house I checked the damp levels again and then applied two coats of the impregnating, colour enhancing sealer Tile Doctor Colour Grow which gives the black tiles more depth of colour, along with the robust surface seal and Matt finish my client had requested.
My client was exceptionally pleased the results – but really, the photographs speak for themselves.
Heidi Taylor
South Cumbria
 Tile Doctor Ltd
This property was situated in the tiny, yet picturesque village of Grafton Underwood in Kettering, Northamptonshire. The village has only a population numbering a few hundred and, interestingly enough, is the childhood home of the famous ‘Bridget Jones’ character. I have previously worked on a number of floors in Grafton Underwood, and on this particular occasion I was called to complete the job through a recommendation – which is always welcome!
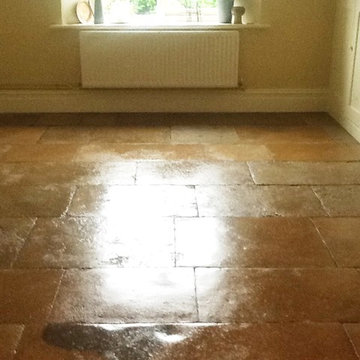
This particular customer had two floors that needed re-finishing; the first was a polished Limestone tiled conservatory (which I will cover in a separate post as the process was different) and the second a Flagstone tiled living room; so on a rather dull day in November, I began my work.
The sealer on the Flagstone tiled living room had failed in certain places, resulting in the floor becoming difficult to clean due to dirt becoming ingrained in the stone. The decline in the sealer is not uncommon, as they do wear down over time – especially in an area of high traffic like a living room. To resolve this issue, the old surface seal needed to be stripped back and re-sealed.
To remove what was left of the old sealer, I applied a dilution of Tile Doctor Remove and Go and scrubbed it into the floor using a rotary machine fitted with black stripping pads. I then gave the floor an initial rinse, before paying special attention to scrubbing the stubborn spots, making sure all of the sealer was removed.
I then gave the floor an acid wash using Tile Doctor Grout Clean-Up in order to remove grout haze and other mineral deposits which were evident. Due to its acidic properties, you have to be very careful with this product on any type of stone, so I didn’t let it dwell for too long and made sure the floor was thoroughly rinsed down afterwards, with all solutions extracted using a wet-vac machine.
The floor was left to dry for more than 24 hours, before I returned to re-seal it using Tile Doctor Seal & Go. This product provides both a stain resistant surface seal and the durable low-sheen finish requested by my client. Seal & Go is suitable for use on internal unsealed, porous surfaces.
I guess the photographs don’t really do the transformation justice however the freshly re-sealed Flagstone living room certainly brightened up what was a very dreary autumn day!
Phil Vissian
Northamptonshire Tile Doctor
 Tile Doctor Ltd
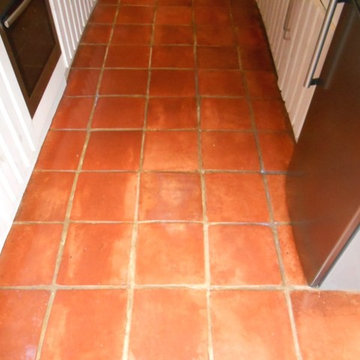
Not too long ago, I visited a house in the town of Fulwood in Preston, Lancashire. My client had a Terracotta tiled floor which had been neglected for many years and in their attempt to improve it had unfortunately been given some very poor advice by tile retailers, all of whom sold him different products, and each of which was unsuitable. Using these different products in succession had resulted in the depreciation of the floor’s texture and smoothness, in turn making the clay difficult to clean and maintain.
As per my usual process I ran a small test clean to demonstrate what could be done to improve the floor and I was commissioned to restore the floor back to its former glory.
I started by mixing a strong cleaning solution consisting of one part Tile Doctor Pro-Clean to three parts water. The solution was applied to the floor and left it to dwell for a short period. The high alkaline cleaner seeps into the pores of the tile getting underneath and lifting out the ingrained dirt and breaking down the old sealers. Then, I agitated the floor using a scrubbing pad fitted to a rotary floor machine before using a wet vacuum to suck up the resulting soiled solution.
There were a few paint marks dotted across the floor, but these were not noticeable until after I had given the Terracotta a deep clean. To remove the paint marks I used Tile Doctor Remove & Go, which is specially formulated to break down paint stains, adhesives and coatings. This product was used in combination with a steamer which, when applied directly to the tiles, helped to lift the paint out. Following this, I rinsed the entire floor a couple of times to remove any trace of cleaning product, and vacuumed up the excess moisture.
It’s always best to let the floor dry completely prior to sealing as applying sealer to a damp floor will affect the sealer. I left the house to allow this to take place overnight returning the next day. To get the best out of the Terracotta I sealed the floor using one coat of Tile Doctor Colour Grow, which is an impregnating sealer that soaks into the pores of the tile and acts as both as a bonding sealer enhancing the natural colours and darkening the clay (as requested by my client).
After the coat of Colour Grow had dried, I applied a further seven coats of Tile Doctor Seal & Go, which achieves a nice, low sheen Satin finish. Before leaving my happy client to enjoy his newly restored Terracotta floor, I made sure to provide some professional cleaning and long-term maintenance advice.
Russell Taylor
Lancashire Tile Doctor
 Tile Doctor Ltd
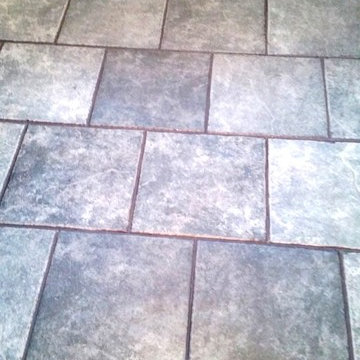
Here’s a quick grout cleaning and re-colouring job I completed in the town of Canvey Island, Essex. Canvey Island lies on the south east coast, and lies just above sea level which in my job is always worth noting as the area can be prone to flooding. This wasn’t the problem here though, simply put, my client was unhappy with the colour of their grout, and wanted it re-coloured to a darker shade to match the grey Ceramic floor tiles.
Cleaning the grout before re-colouring is essential because, as many readers are probably well aware, grouts are porous and therefore can very easily absorb dirt and grease. Most often this will result in grout discolouration if not dealt with promptly.
So, as mentioned above the first step in the re-colouring process involved cleaning the grout lines. For this Tile Doctor has a special Pre-Treat Cleaner which is sprayed on and scrubbed into the grout to both remove any existing dirt and also to prepare the grout joints for a superior bond with the Grout Colourant. Once complete the grout lines looked clean and refreshed.
To clean the ceramic I diluted one part Tile Doctor Pro-Clean to three parts water, and used it to wash down the Ceramic tiles, leaving a consistent level of cleanliness across the entire floor. I then rinsed the floor with water which was then extracted using a wet vacuum and waited for 3 hours for the floor to dry.
Once dry, I began the process of applying the Charcoal Grey (as chosen by the client) Grout Colourant to the grout lines. As well as changing the colour the colourant also forms a barrier over the grout sealing it in and protecting it from future staining for years to come.
Then, once dry, the floor was given another quick clean using a light spray of water and a white buffing pad, resulting in an aesthetically pleasing sheen finish. My client was very happy with the outcome and now has the floor they wanted.
Nick Murphy
South Essex Tile Doctor
 Tile Doctor Ltd
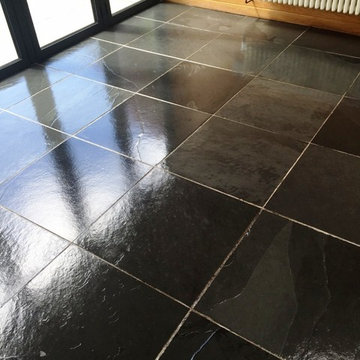
Tenuous link I know but I worked on this semi riven Black Brazilian Slate Tiles in the kitchen and dining room of a house in the seaside town of Thornton-Cleveleys around the time of the Rio Olympics. I love working on Slate as although it’s appearance can degrade without proper maintenance due to a build-up of dirt I knew they would look fantastic by the time I had finished.
The tile itself had lost its rich black colour and the grout lines had become stained, leaving the floor as a whole looking very unattractive. Out of interest honed Slate has a smooth, refined texture whereas the riven Slate has a rougher, more natural texture, and this can make it more difficult to keep clean. Needless to say, the customer was keen to have the tiles restored to looking their best.
To restore the appearance of the Slate, I cleaned the floor and removed what remained of the old sealer off using Tile Doctor Remove and Go. This was scrubbed into the floor using a scrubbing pad fitted to a rotary machine. The floor was then rinsed with water, and the process repeated where necessary to tackle particularly stubborn areas of dirt.
As mentioned previously, the grout lines were in a particularly bad state, and would need special cleaning attention. I cleaned carefully with a strong 5-to-1 dilution of Tile Doctor Pro Clean with water, which is our high alkaline cleaner. The cleaning solution was scrubbed I’m using a stiff handheld grout brush, with the grout lines looking immediately cleaner. When I was satisfied that the grout lines had been restored to the best possible condition, I gave the floor a thorough rinse using the wet pickup function of a wet wax machine to get the floor as dry as possible and then left the whole floor to dry off overnight.
Upon my return to the property I ran some quick damp tests to check that the floor was completely dry. This is important as any excess moisture would have prevented me from sealing the tiles, since it can cloud the sealer and damage it performance.
Previously I discussed sealer options with the customer and they stated that they would prefer a Satin finish, so I applied a sealer called Tile Doctor Seal and Go, our topical sealer which will both protect the Slate from dirt and stains, and also gave it the desired finish. As you can see from the below photographs, the rich, dark shades in the Slate were really enhanced.
The customer was very pleased with the finished result, but was also concerned about keeping the Slate clean in the long-term. For regular cleaning I advised the customer to use a pH neutral cleaner for aftercare called Tile Doctor Neutral Cleaner. As a pH neutral cleaner, it will not erode the sealer compared to acidic cleaners you so often find in supermarkets.
Russell Taylor
Lancashire Tile Doctor

 Grande Decor
Michele Moran Photography
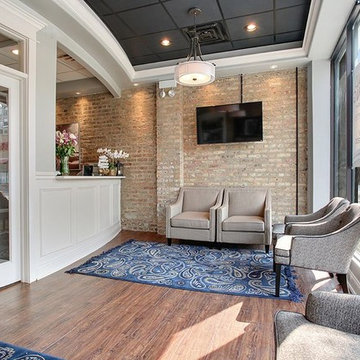
We designed a kitchen for a busy family of 5. When we first met there were calendars scattered, cell phones with wires everywhere, keys on the counters, typical daily chaos. So we knew we had to centralize, then hide the essentials. Here is one cabinet we used. We installed an outlet for power inside to charge phones. It also finished off the run of upper cabinets just perfectly!
 Tile Doctor Ltd
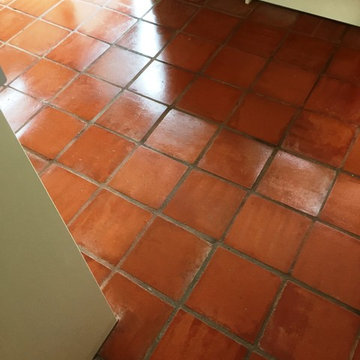
Newly built properties are not without their problems and often take a while to resolve all the snagging which occasionally extends to resolving problems with newly laid tiled floors. At this new property in the village of Malvern, and overlooked by the Malvern hills, the builders had left the Terracotta tiled kitchen floor covered in grout smears (also known as Grout Haze) following installation. They had also neglected to seal the tiles, which was actually quite fortunate in this case as they would have sealed in the grout haze, making it more difficult to remove.
Naturally, the property owner wanted the problem to be resolved as soon as possible, and for me to make the tiles easy to keep clean in future, which can be achieved by sealing the tile.
Before starting work, I made sure to fully protect any exposed woodwork with a plastic sheet covering to protect them from potential damage. I then proceeded to give the floor a thorough clean, using Tile Doctor Remove and Go to clean the floor and eradicate some stains that had been left behind as a result of the building work.
Next, I paid special attention to the grout, where the very visible problem of grout haze had arisen. To neutralise these smears I used Tile Doctor Grout Clean Up, a concentrated phosphoric acid cleaner that can also remove alkaline mineral deposits and efflorescence. Grout Clean Up is only to be used on acid resistant stone, as sensitive stone can suffer from irreparable etching if it comes into contact with the product.
Once completely clean and free of grout smears the floor was thoroughly rinsed with water to remove any trace of product and then dried as much as possible with a wet vacuum, afterwards an air mover was installed to speed up the drying process.
Later that afternoon the floor was dry and I was able to apply a sealer. To do this I opted to use several coats of Tile Doctor Seal and Go Extra, a topical, fully breathable sealer that works really well on Terracotta.
The sealer builds up a layer of protection on the surface of the tiles, protecting against ingrained dirt and stains. Seal and Go Extra also provides a high quality sheen finish which really did well to enhance the look of the Terracotta.
The property owner was exceptionally pleased with the results, and to have this problem dealt with quickly and efficiently, additionally the sealer will ensure the Kitchen floor is easy to keep clean in the future.
 Tile Doctor Ltd
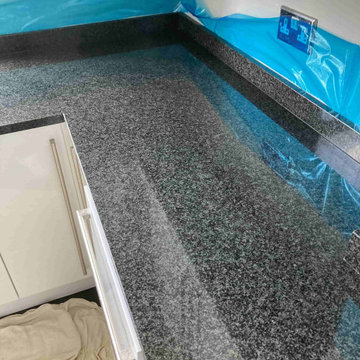
Although expensive Granite makes the most beautiful and practical stone worktop you can install in your kitchen. It gives real wow factor to a room and this kitchen in Folkestone was no different. Normally granite needs little maintenance however Folkestone has very hard water (often referred to as limescale) containing high levels of calcium and over time the calcium in the water gets deposited on nearby surfaces. According to the Affinity Water website the water in Folkestone contains 287.5 mg of calcium per litre which is classed as hard.
The owner of the property contacted us explaining that due to this problem the build-up of calcium deposits had overtaken her sink and countertop to a degree that she couldn`t deal with it through normal cleaning and a restoration was required. There are several household products on the market that can remove limescale however you need to be very careful when using these on natural stone as they use acids to break down the calcium and this can etch stone making the problem worse (always read the label). I went and had a look at the problem and gave her a quote for resolving the problem, which she was happy to accept.
Before starting the renovation, I protected the floor with dust sheets and the walls with a blue film that is easy to remove. Then to tackle the limescale I carefully went over each part of the Granite counter using a set of six-inch Tile Doctor Burnishing pads applying them in sequence from coarse to extra fine. To give extra cleaning power the coarser pads were applied with Tile Doctor Oxy-Gel which is an alkaline cleaning gel. The pads were fitted to a hand buffer and the soil generated by the abrasive pads was rinsed off between pads with water. For the finer detail such as the groves in the granite draining board, I used diamond encrusted handheld burnishing blocks of various grits. With the combination of diamond tooling and lots of elbow grease the job took around five hours to complete and the granite now has the polished look it deserves.
The granite worksurface does not require an actual sealer to be applied. However, maintenance is the key to keeping the stone in great condition so for aftercare I left the owner with a bottle of Tile Doctor Stone Patina Spray. This product is designed for cleaning stone worktops and contains a special ingredient that maintains the lustre. This should ensure the Limescale becomes manageable and can be cleaned more easily.
I made a striking difference to the appearance of the Granite Worktop and the owner was over the moon with the result.
Michael Conlon
South Kent Tile Doctor


 Tile Doctor Ltd
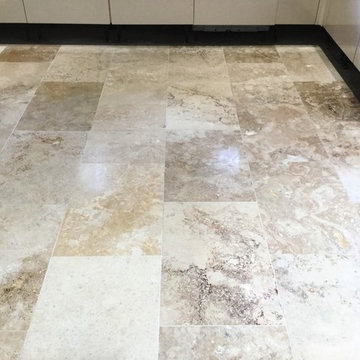
Travertine floor tiles are very appealing and very hardwearing, but without the protection of a sealer to stop dirt becoming ingrained in the pores of the stone their appearance will degrade. Fortunately, this can be remedied as demonstrated in these pictures of a Travertine floor I recently polished at a house in Weston Favell, Northampton.
This owner of the property had called me out as their kitchen floor was looking very sorry for itself and he was concerned that a lot of holes were appearing which was making cleaning the floor difficult as dirt was getting trapped in the holes. I went over and carried out a test clean on two separate tiles in the kitchen and the customer was amazed at how clean they came up and especially the grout.
The kitchen was stunning, but unfortunately the state of the Travertine tiled floor was bringing down its overall appearance. Impressed with the test clean they were keen to get the whole floor renovated so we agreed a price and I scheduled the work in for the following month.
I returned on the agreed data and made a start by protecting the kitchen units by removing the plinths and covering base units and the appliances with a protective film. We then commenced the cleaning process to remove surface dirt by cleaning with Tile Doctor Pro-Clean paying special attention to the grout lines. The holes in the Travertine were filled with a stone resin, mixing it to closely match the colours of the stone.
The resin was allowed to dry before starting to re-polish the Travertine using a set of Tile Doctor Diamond encrusted burnishing pads. These pads are applied individually to each tile in sequence starting with a coarse 400-grit pad before moving onto the 800-grit and finishing with the fine 1500 grit pad. A little water is used to lubricate the process along the way and the floor is rinsed in between each pad with the resulting residue extracted from the floor using a wet vacuum. The process takes some time, but it really brings up the polished appearance of the stone and the results are well worth the effort. After a final rinse the floor was inspected and then left to dry off fully overnight.
When we returned the next day, the floor had dried, and we were able to give the floor a final polish with a very fine 3000-grit burnishing pad applied with a little water sprayed onto the tile. Finally, the floor was then sealed with two coats of Tile Doctor Ultra-Seal which provides excellent protection without changing the colour of the stone to provide a natural look.
The client was over the moon with the outcome and surprised at the improvement. They were left with a floor that would be easy to clean and maintain.
Phil Vissian
Northamptonshire Tile Doctor
 Tile Doctor Ltd
Sandstone is a particularly popular choice for kitchen and hallway floors amongst home owners in the UK. It not only possesses beautiful natural shades and features, but it is also typically hard wearing, making it an ideal stone for tiled flooring in high traffic areas of a house and can often be found laid as large riven flagstones in pubs and other commercial premises.
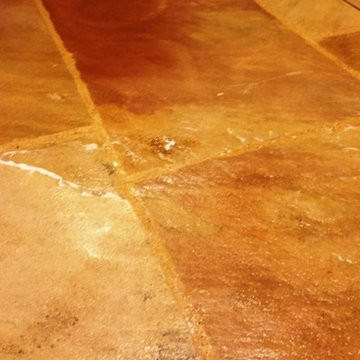
Naturally, just like any other type of tiled floor, Sandstone needs to be maintained using appropriate products and methods. A lack of adequate surface sealer in particular leaves Sandstone susceptible to ingrained dirt, and can leave distinct, unsightly patches such as those in the photograph below.
In this instance, I visited a client in the old Essex town of Thaxted, who believed that her four square meter Sandstone tiled floor might be suffering from damp issues after lifting up the mats covering the area.
However, when I arrived at the property and ran damp tests, I found the issue to be superficial. The Sandstone floor however did require attention in the form of a deep clean and a fresh seal to tackle the white patches and prevent further discolouration.
To begin the cleaning process I spread Tile Doctor Remove & Go evenly across the floor. It was left to dwell for approximately 15 minutes, during which time it worked to break down the old sealer remaining on the tiles. I then agitated the area twice over with both a black scrubbing pad fitted to a rotation machine lift away any dirt.
The resultant slurry was removed using a wet vacuum and the floor was then rinsed with water and then mixed a strong solution of one part Tile Doctor Pro Clean to three parts water which was used to give the floor a final clean and scrub the grout clean before using the wet vacuum again and giving the floor a final rinse with water.
After completing the cleaning process I left the floor to dry over the weekend. Upon my return to the house I proceeded to seal the tiles with three coats of Tile Doctor Colour Grow which is an impregnating sealer that soaks into the pores of the stone and provide durable surface protection going forward. Colour Grow is also specially designed to let the floor breathe and enhance the natural colours in the stone and, in this case, really helped to intensify the natural sand-coloured shades in the tiles.
The difference made to these Sandstone tiles was really noticeable, with the white patches completely removed and the surface more generally back to looking like new, needless to say, my client was very happy with the results.
Nick Murphy
South Essex Tile Doctor

 Columbia Cabinets
This stunning master bath was part of a very special Saratoga Showcase home designed by The Form Collaborative for a family with two small girls. Every detail was considered to maximize the vision of an open floorplan, with emphasis on unique focal points and indoor/outdoor connectivity and symmetry.
The master bath’s modern floating vanities, matte black fixtures and striking 4” x 12” elongated subway tile complement the Mid-Century Modern design and provide an oasis of Zen.
2018 Saratoga Showcase of Homes, Luxury Homes-Best Master Bath
2018 Saratoga Showcase of Homes, Luxury Homes-People’s Choice Award
2