
Search results for "Education costs" in Home Design Ideas

 David Henig, Architect
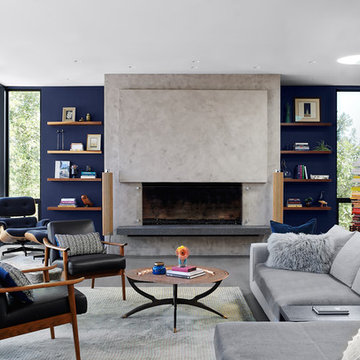
1950s living room library photo in San Francisco with blue walls, a ribbon fireplace, a concrete fireplace and no tv
 Kaplan Thompson Architects
Brett Winter Lemon Photography
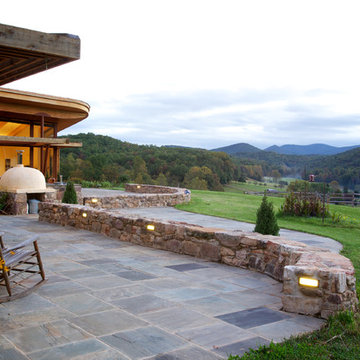
Example of a mountain style backyard stone patio design in Portland Maine with no cover and a fire pit
Example of a mountain style backyard stone patio design in Portland Maine with no cover and a fire pit
Find the right local pro for your project

 Connecticut Stone
Photo Credit: Neil Landino,
Counter Top: Connecticut Stone Calacatta Gold Honed Marble,
Kitchen Sink: 39" Wide Risinger Double Bowl Fireclay,
Paint Color: Benjamin Moore Arctic Gray 1577,
Trim Color: Benjamin Moore White Dove,
Kitchen Faucet: Perrin and Rowe Bridge Kitchen Faucet
VIDEO BLOG, EPISODE 2 – FINDING THE PERFECT STONE
Watch this happy client’s testimonial on how Connecticut Stone transformed her existing kitchen into a bright, beautiful and functional space.Featuring Calacatta Gold Marble and Carrara Marble.
Video Link: https://youtu.be/hwbWNMFrAV0
 User
UserSheila Bridges Design, Inc
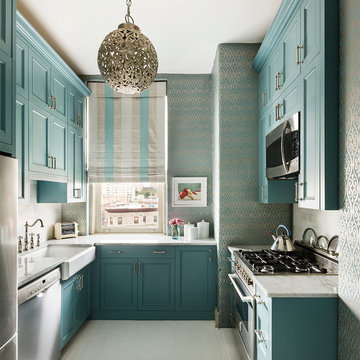
Enclosed kitchen - small transitional u-shaped enclosed kitchen idea in New York with a farmhouse sink, shaker cabinets, marble countertops, stainless steel appliances, no island and turquoise cabinets
Enclosed kitchen - small transitional u-shaped enclosed kitchen idea in New York with a farmhouse sink, shaker cabinets, marble countertops, stainless steel appliances, no island and turquoise cabinets
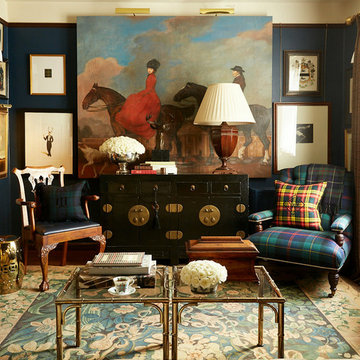
 Scot Meacham Wood Design
By Thayer Allyson Gowdy for House Beautiful
Inspiration for a timeless living room remodel in San Francisco
Inspiration for a timeless living room remodel in San Francisco
 Joyfully Growing Blog, LLC
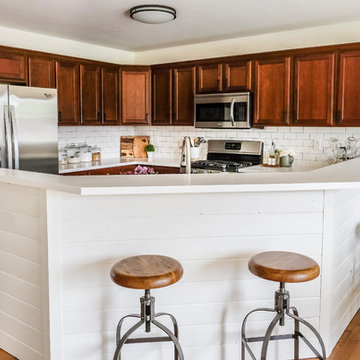
White and Wood 'Budget Kitchen Makeover'
Inspiration for a mid-sized farmhouse u-shaped kitchen remodel
Inspiration for a mid-sized farmhouse u-shaped kitchen remodel

Sponsored
Delaware, OH

Buckeye Basements, Inc.
Central Ohio's Basement Finishing ExpertsBest Of Houzz '13-'21

 cutlerschulze
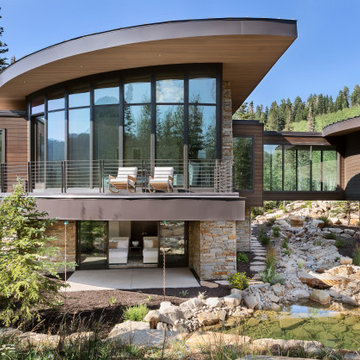
The exterior primary terrace is a serene retreat, enveloped by nature's beauty. A soaring, arced roofline gracefully frames expansive floor-to-ceiling windows, flooding the space with natural light and showcasing panoramic views of the surrounding landscape. Two cozy lounge chairs beckon relaxation, inviting you to unwind and soak in the tranquility. Below the terrace, a winding river meanders through the landscape, creating a soothing soundtrack as it flows towards a natural pool nestled amidst lush greenery. Steps away, a separate guest studio provides a private oasis for visitors, seamlessly blending with the natural surroundings.

 William Hoffman Architect
4 Steps to Achieving a Rewarding Cost Effective Home Renovation
1 Home Renovation an Introduction
A home renovation due to changes in family needs and space requirements can be a challenging, but also a rewarding experience. As a homeowner, gathering and coordinating resources and possibly help from professional consultants are required. Once the construction phase has started, patience, endurance and commitment to follow through are necessary. Despite the challenges, the rewards of a well-planned and successfully completed project are meaningful, adding aesthetic and economic value, also providing the opportunity to personalize a home, encompassing the function, comfort and aesthetics to accommodate individual taste and lifestyle.
A renovation of an existing home is a viable alternative to moving or building a new home, assuming that a home is structurally sound, the expenditure to enlarge or improve can be a cost effective alternative. A home possessing charm, style, historical significance, established landscaping or an exceptional location could be a significant motivation to consider purchasing another home with the intent to renovate.
The complexity of a project could be relatively simple, changing the use of a room, consolidating two rooms into one, or opening up a room to the outdoors. It could also be a more involved task requiring planning, design and construction documents to build a second floor addition, the addition of a new wing or completely gutting the interior. Some projects could be completed in a weekend’s work or more complex projects, using a “Master Plan”, a plan which provides overall guidance; a renovation can be accomplished all at once or divided into manageable projects over a period of time. With the home evolving gradually allowing the renovation to be planned, timed and tailored to meet individual needs and circumstances.
The due diligence phase should precede the decision to renovate whether it’s an existing home or a home that is purchased with the intent to renovate. The due diligence phase will reveal the factors affecting the nature and scope of the project or if a renovation makes sense.
Every renovation project is unique relative to personal requirements, architectural style & construction type. This guide will be helpful in developing an understanding of the preliminary groundwork required to realize a successful project. If properly planned, a home renovation project can be a positive and rewarding experience resulting in a comfortable, practical and an attractive living environment.
The first step of the planning process is documenting the goals and long-range plans referred to as the “Project Program”. This will dictate the nature, scope and feasibility of the project. Providing a guide to achieving defined goals, the timing or phasing of the project and budget required to achieve the desired end result.
2 Documenting Existing Conditions
Once the “Project Program”, has been established, the next step is to determine what there is to work with. This requires documenting the home’s floor plan and site elements which includes drawing an “as built” floor & site plan consisting of the existing exterior walls, interior rooms, doors, windows, etc. and surrounding site elements, landscape and other significant exterior features. Additionally understanding and noting on the “as built” plan, the structural, mechanical and electrical systems as necessary. Gathering the “existing condition” information defines what there is to work with, creating the framework from which to facilitate and organize the decision making process and develop effective “project program” solutions.
3 Evaluating Existing Conditions
The goals and long-range plans have been established, and the existing floor plan and site elements have been documented. Before developing design solutions, the next step is to evaluate existing conditions. The evaluation includes: a detailed analysis of the structural, mechanical and electrical systems, determining the condition of the house, noting functional and aesthetic deficiencies. At the same time recognizing the home’s strengths, assets and evaluating its relationship to its site. The remaining parameters will be defined by the local jurisdiction’s zoning regulations, these regulations will define the “envelope”, within which the proposed project will be required to fit:
•required front, side & rear yard setbacks
•maximum allowable lot coverage & height
The previous three steps have provided the necessary foundation to start the design phase. The goals and long range plans have been established, existing conditions have been documented and the evaluation of what there is to work with are now in place. This will provide the framework from which to facilitate and organize design solutions. The consolidation of this information is manifested in the development of the “Master Plan” which will become the road map by which sound decision-making can be made as a home renovation evolves. Keeping the project, on a linear path, avoiding redundancies and back tracking, on time, within budget, concluding with a well crafted finished product. After all the “up front” research and documentation has been completed, the design phase of the project can now precede, with the creation of diagrammatic design drawings. Organizing interior spaces, taking into account the external elements, prevailing breezes, solar orientation, view, existing outdoor features, etc. Through the development of schematic sketches themes will emerge followed by design development drawings. Wise planning and renovation decisions can save money and time at the same time provide a well crafted finished project. The “Master Plan” provides a strategic path in the planning and decision making process leading to a successful and rewarding home renovation, which will add value and considerable enjoyment, for many years, living in a newly renovated home.
By virtue of having gone through these steps, frustrations sometimes encountered during a home renovation will be minimized, allowing the renovation to be a gratifying and rewarding experience. Being aware of the process allows one to become an “Educated Client,” which is worth quite a bit more than one might realize. The uneducated client may not realize the benefit of going through the planning, evaluation and documentation groundwork. He will only realize its benefits after having completed a prior renovation project. This rational approach keeps the design process on a direct path to achieving prescribed goals.
4 Exploring Design Solutions & Developing a Master Plan
The previous three steps have provided the necessary foundation to start the design phase. The goals and long range plans have been established, existing conditions have been documented and the evaluation of what there is to work with are now in place. This will provide the framework from which to facilitate and organize design solutions. The consolidation of this information is manifested in the development of the “Master Plan” which will become the road map by which sound decision-making can be made as a home renovation evolves. Keeping the project, on a linear path, avoiding redundancies and back tracking, on time, within budget, concluding with a well crafted finished product.
By virtue of having gone through these steps, frustrations sometimes encountered during a home renovation will be minimized, allowing the renovation to be a gratifying and rewarding experience. Being aware of the process allows one to become an “Educated Client,” which is worth quite a bit more than one might realize. The uneducated client may not realize the benefit of going through the planning, evaluation and documentation groundwork. He will only realize its benefits after having completed a prior renovation project. This rational approach keeps the design process on a direct path to achieving prescribed goals.
After all the “up front” research and documentation has been completed, the design phase of the project can now precede, with the creation of diagrammatic design drawings. Organizing interior spaces, taking into account the external elements, prevailing breezes, solar orientation, view, existing outdoor features, etc. Through the development of schematic sketches themes will emerge followed by design development drawings. Wise planning and renovation decisions can save money and time at the same time provide a well crafted finished project. The “Master Plan” provides a strategic path in the planning and decision making process leading to a successful and rewarding home renovation, which will add value and considerable enjoyment, for many years, living in a newly renovated home.
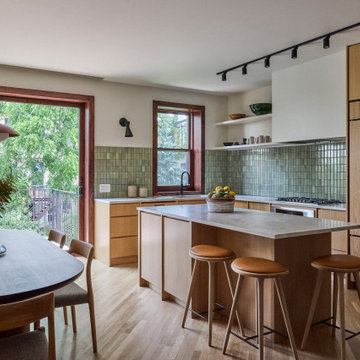
 reBuild Workshop
Eat-in kitchen - mid-sized 1950s l-shaped light wood floor and brown floor eat-in kitchen idea in New York with an undermount sink, flat-panel cabinets, light wood cabinets, marble countertops, green backsplash, ceramic backsplash, paneled appliances, an island and white countertops

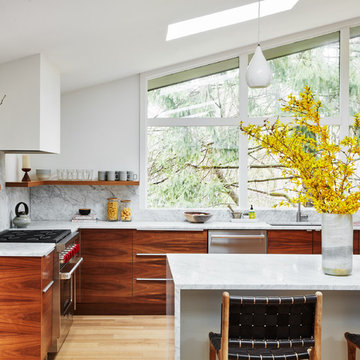
 Park Hill Design & Development LTD
Large trendy l-shaped light wood floor and beige floor eat-in kitchen photo in New York with a single-bowl sink, flat-panel cabinets, marble countertops, white backsplash, marble backsplash, stainless steel appliances, a peninsula, white countertops and medium tone wood cabinets

 Smart-Solutiions
The Science of Light and Learning
To understand the relationship between lighting and learning, it’s critical to grasp the concept of correlated colour temperature (CCT). CCT refers to the warmth or coolness of light, measured in Kelvin (K). Lower CCTs (around 3000K) provide a warm, cosy atmosphere, while higher CCTs (5000K or above) emit a cool, daylight-like glow. Studies have shown that cool white light, which mimics natural daylight, can increase alertness and mood, contributing to improved cognitive performance. LED lighting, with its ability to produce this desired CCT, makes an ideal choice for educational settings.
LED Lighting: Brightening the Future of Education
Energy Efficiency and Cost Effectiveness
One of the main advantages of LED lighting is its energy efficiency. Traditional lighting solutions like fluorescent and incandescent bulbs consume much more energy to produce the same amount of light as LEDs, which is not only environmentally harmful but also financially costly. Switching to LED lights can result in substantial cost savings for schools, enabling them to redirect funds to other critical areas of education.
Durability and Longevity
LED lights are renowned for their durability and longevity. They have a significantly longer lifespan compared to conventional lights, which means less frequent replacement and reduced maintenance costs. This durability also minimises disruptions caused by light failure, providing a consistent, well-lit learning environment.
Improved Visibility and Reduced Eye Strain
With their superior colour rendering index (CRI), LED lights render colours more accurately, leading to improved visibility. This is particularly beneficial in educational settings, where activities often require distinguishing fine details and colours. LED lights also emit less glare than traditional lighting solutions, reducing eye strain and fatigue. This can lead to better concentration and increased comfort for both students and teachers.
Incorporating LED Lighting in Classrooms: Practical Considerations
When transitioning to LED lighting in classrooms, a few key factors need to be taken into account. Firstly, the lighting design should ensure an even distribution of light, preventing shadowy or overly bright spots that could distract or discomfort students. Secondly, the integration of dimming capabilities can provide flexibility, allowing educators to adjust the lighting level based on the task at hand. Finally, lighting controls can be used to take advantage of natural light, automatically dimming or turning off the LEDs when sufficient daylight is present.
Conclusion: The Bright Promise of LED Lighting in Education
As education systems continue to evolve, it’s imperative to keep sight of the physical factors that significantly impact learning, one of which is lighting. LED technology, with its myriad benefits, offers an innovative and effective way to enhance the quality of lighting in classrooms. By prioritising investments in such improvements, we can take a significant step towards creating an optimised learning environment that nurtures the educational success of future generations.
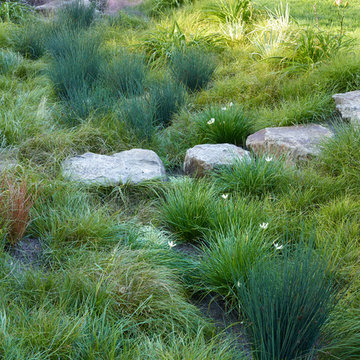
 David Thorne Landscape Architect
A trellised terrace opens up to a quieter view of a magnificent existing redwood grove and bioswale filled with clusters of ornamental grasses and perennials.
Photography by Marion Brenner
 Sweet Smiling Landscape Design
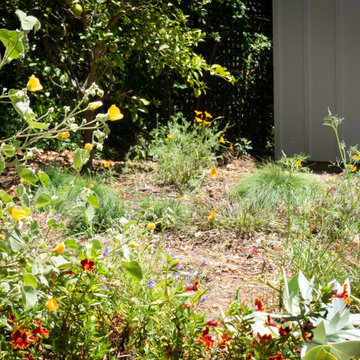
This project was do in collaboration with my friends at Sweetwater Collaborative. Sweetwater Collaborative is a non-profit organization that work to educate the public about water wise and regenerative landscape practices.
Funded by the City of Santa Barbara as well as several other business and agency Sweetwater Collaborative and I worked to installed this project with the help of volunteers. In a hands-on work shop we explained principles of water wise gardening and demonstrated best practices when installing sustainable landscapes.
When the owner of this property decided to build an ADU ( Auxiliary Dwelling Unit) in their back yard they expanded the roof line of their property. In order to be in compliance with new California building the project required that a portion of the rain water coming onto this property must be stored on the property. That is where we came into help. Directing down spouts into basins, or swales in the soil is one of the most efficient and cost-effective way to capture and store rain water on a piece of land.
Calculations were done to determine the volume of water coming of the roof line in a given rain event from the ADU. The calculations go: square footage of roofline times .62 times 1, for 1” of rain. That total gives you the amount of water in gallons. Then divide the number in gallons by 7.48 find the cubic feet in that number of gallons. Then a basin with that holding capacity was designed into the landscape. Then the plantings were chosen. In this project we went with an 100% California Native Plant palette. We did this to help educate people about all the benefits of growing natives and to show case some of the beautiful plants native to Southern California. Sothern California is how to some of the greatest biodiversity of plants in the world. Native Plants are best adapted to thrive conditions from which they are natively found plus they help provide forage to the native fauna such as birds and insects.
Now the tenants in the ADU can look out and enjoy this colorful garden without the home owners needing to pay a huge water bill.
 ED Enterprises, Inc.
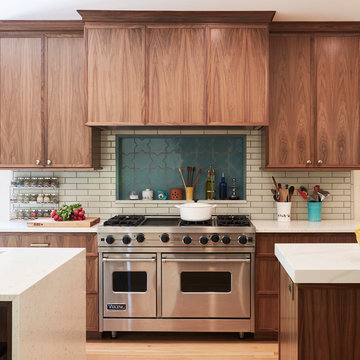
Our craftsmen removed an existing wall, doubling the depth of this kitchen. The doorway from kitchen to foyer and the doorway from kitchen to family room were widened and new headers were installed. Now, the remodeled area allowed for TWO islands and more cabinetry. Plug-molds, hidden under the island and under the wall cabinets, maintained a clean look eliminating receptacles. The finishing touch was the brick pattern subway backsplash tile and the accent tile in the niche above the range. The new Red Oak flooring was our final detail.
 Sweet Smiling Landscape Design
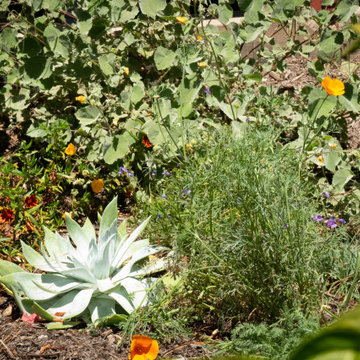
This project was do in collaboration with my friends at Sweetwater Collaborative. Sweetwater Collaborative is a non-profit organization that work to educate the public about water wise and regenerative landscape practices.
Funded by the City of Santa Barbara as well as several other business and agency Sweetwater Collaborative and I worked to installed this project with the help of volunteers. In a hands-on work shop we explained principles of water wise gardening and demonstrated best practices when installing sustainable landscapes.
When the owner of this property decided to build an ADU ( Auxiliary Dwelling Unit) in their back yard they expanded the roof line of their property. In order to be in compliance with new California building the project required that a portion of the rain water coming onto this property must be stored on the property. That is where we came into help. Directing down spouts into basins, or swales in the soil is one of the most efficient and cost-effective way to capture and store rain water on a piece of land.
Calculations were done to determine the volume of water coming of the roof line in a given rain event from the ADU. The calculations go: square footage of roofline times .62 times 1, for 1” of rain. That total gives you the amount of water in gallons. Then divide the number in gallons by 7.48 find the cubic feet in that number of gallons. Then a basin with that holding capacity was designed into the landscape. Then the plantings were chosen. In this project we went with an 100% California Native Plant palette. We did this to help educate people about all the benefits of growing natives and to show case some of the beautiful plants native to Southern California. Sothern California is how to some of the greatest biodiversity of plants in the world. Native Plants are best adapted to thrive conditions from which they are natively found plus they help provide forage to the native fauna such as birds and insects.
Now the tenants in the ADU can look out and enjoy this colorful garden without the home owners needing to pay a huge water bill.
 Sweet Smiling Landscape Design
This project was do in collaboration with my friends at Sweetwater Collaborative. Sweetwater Collaborative is a non-profit organization that work to educate the public about water wise and regenerative landscape practices.
Funded by the City of Santa Barbara as well as several other business and agency Sweetwater Collaborative and I worked to installed this project with the help of volunteers. In a hands-on work shop we explained principles of water wise gardening and demonstrated best practices when installing sustainable landscapes.
When the owner of this property decided to build an ADU ( Auxiliary Dwelling Unit) in their back yard they expanded the roof line of their property. In order to be in compliance with new California building the project required that a portion of the rain water coming onto this property must be stored on the property. That is where we came into help. Directing down spouts into basins, or swales in the soil is one of the most efficient and cost-effective way to capture and store rain water on a piece of land.
Calculations were done to determine the volume of water coming of the roof line in a given rain event from the ADU. The calculations go: square footage of roofline times .62 times 1, for 1” of rain. That total gives you the amount of water in gallons. Then divide the number in gallons by 7.48 find the cubic feet in that number of gallons. Then a basin with that holding capacity was designed into the landscape. Then the plantings were chosen. In this project we went with an 100% California Native Plant palette. We did this to help educate people about all the benefits of growing natives and to show case some of the beautiful plants native to Southern California. Sothern California is how to some of the greatest biodiversity of plants in the world. Native Plants are best adapted to thrive conditions from which they are natively found plus they help provide forage to the native fauna such as birds and insects.
Now the tenants in the ADU can look out and enjoy this colorful garden without the home owners needing to pay a huge water bill.
 Mimi & Hill interiors
Toni Deis Photography
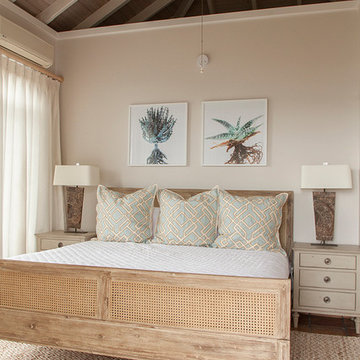
Bedroom - tropical master medium tone wood floor, brown floor and vaulted ceiling bedroom idea with beige walls and no fireplace
Bedroom - tropical master medium tone wood floor, brown floor and vaulted ceiling bedroom idea with beige walls and no fireplace
1