
Search results for "Effectively address" in Home Design Ideas
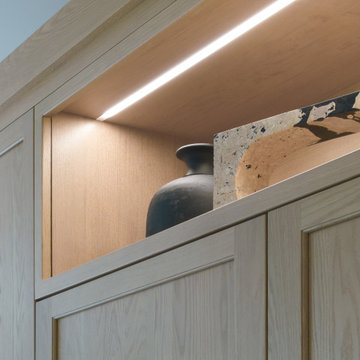
 Drury Design
The Setup:
After purchasing this home, the homeowners faced a unique opportunity to reimagine their kitchen and nearby spaces. Water damage from a burst pipe had left much of the home’s interior in need of repair, and while the existing kitchen was functional and in relatively good shape, it didn’t align with the family’s vision for their new home. The layout included a peninsula that wasn’t ideal, and there were some druthers with the nearby pantry.
Since the space needed to be rebuilt anyway, the homeowners saw this as a chance to create a kitchen that was both highly functional for their four young children and timeless in its design. The project also included a refresh of the adjacent message center and dining room — spaces that play key roles in the family’s daily life. The goal was to create a cohesive flow between these areas, balancing modern functionality with the craftsman-inspired character of the rest of the home.
Design Objectives:
- Replace the outdated peninsula with a large island to maximize counter space and create new seating options.
- Open up the space visually by removing soffits and rethinking the cabinetry layout.
Incorporate concealed refrigeration and freezer units to provide significant storage for the family while maintaining a streamlined aesthetic.
- Integrate black cabinetry into the design without making the space feel harsh or heavy.
- Ensure the lighting plan balances functional task lighting with ambient accent lighting.
- Avoid visual clutter in the cabinetry design while still giving a nod to the craftsman aesthetic.
- Incorporate a slab backsplash as a key design feature.
Design Challenges:
- The outdated peninsula left dead space in the kitchen and lacked sufficient seating for the family.
- The cooktop wall was cramped, with small cabinets flanking the hood, limited storage, and soffits that made the space feel closed-in.
- The family needed significant refrigeration space (two refrigerators and a freezer) but wanted to avoid a cluttered look with visible stainless steel appliances.
- Adding black cabinetry risked making the space feel too dark or heavy.
- The original lighting plan was insufficient, particularly over the dining table where a decorative fixture proved too dim.
- The family wanted shaker-style drawer fronts to match the home’s arts-and-crafts design but worried that too much shaker cabinetry might look overly busy.
- Prioritizing a slab backsplash in the wish list priority planning.
The Renewed Space
Design Solutions:
- A functional island: The peninsula was replaced with a large island that provides continuous countertop space for prepping and serving. The island also features seating for four people, creating a central hub for informal meals and activities.
- Streamlined cooktop wall: The soffits were removed, and the upper cabinets on the cooktop wall were eliminated to create a more open, streamlined design. A custom oversized hood became the focal point of the wall, with the blower unit offset inside it to align with the cooktop while maintaining exterior visual symmetry.
- Concealed refrigeration: Two column refrigerators and one freezer were integrated into the cabinetry, concealing them behind wood paneling that blends seamlessly with the overall design.
- Warm black cabinetry: The black cabinetry was crafted from hickory with a visible grain, softening its appearance and adding warmth. The grain detail gives the cabinetry a rich, textured look that avoids feeling stark or overpowering.
- Additional lighting: In the dining area, recessed can lights were added during an additional installation phase to supplement the gorgeous decorative fixture’s dim output. The new lighting plan creates a layered effect, combining functional task lighting with softer ambient lighting.
- Simplified cabinetry details: Slab drawer fronts were used on the upper drawers, while five-piece shaker fronts (with slightly less prominent rail and stile pieces) were reserved for the middle and lower drawers. This approach simplified the overall look while maintaining the craftsman-inspired aesthetic.
- Slab backsplash priority: The slab backsplash was prioritized by making thoughtful adjustments elsewhere, like opting not to extend cabinetry to the ceiling, which also helped visually prioritize the gorgeous slab backsplash. This decision also enhanced the kitchen’s furniture-like feel, aligning with the home’s craftsman character.
- This kitchen perfectly balances practicality with timeless style. By addressing the family’s functional needs — ample seating, smart storage, and effective lighting — while incorporating thoughtful design elements like warm black cabinetry and a striking slab backsplash, Alicia created a space that works beautifully for a busy household. The result is a cohesive, inviting kitchen that honors the home’s craftsman roots and will serve the family well for years to come.

 Casa de Tierra
Our pioneer project, Casita de Tierra in San Juan del Sur, Nicaragua, showcases the natural building techniques of a rubble trench foundation, earthbag construction, natural plasters, earthen floors, and a composting toilet.
Our earthbag wall system consists of locally available, cost-efficient, polypropylene bags that are filled with a formula of clay and aggregate unearthed from our building site. The bags are stacked like bricks in running bonds, which are strengthened by courses of barbed wire laid between each row, and tamped into place. The walls are then plastered with a mix composed of clay, sand, soil and straw, and are followed by gypsum and lime renders to create attractive walls.
The casita exhibits a load-bearing wall system demonstrating that thick earthen walls, with no rebar or cement, can support a roofing structure. We, also, installed earthen floors, created an indoor dry-composting toilet system, utilized local woods for the furniture, routed all grey water to the outdoor garden, and maximized air flow by including cross-ventilating screened windows below the natural palm frond and cane roof.
Casita de Tierra exemplifies an economically efficient, structurally sound, aesthetically pleasing, environmentally kind, and socially responsible home.
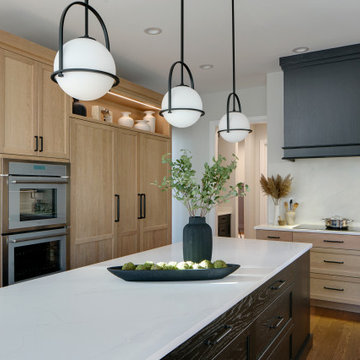 Drury Design
The Setup:
After purchasing this home, the homeowners faced a unique opportunity to reimagine their kitchen and nearby spaces. Water damage from a burst pipe had left much of the home’s interior in need of repair, and while the existing kitchen was functional and in relatively good shape, it didn’t align with the family’s vision for their new home. The layout included a peninsula that wasn’t ideal, and there were some druthers with the nearby pantry.
Since the space needed to be rebuilt anyway, the homeowners saw this as a chance to create a kitchen that was both highly functional for their four young children and timeless in its design. The project also included a refresh of the adjacent message center and dining room — spaces that play key roles in the family’s daily life. The goal was to create a cohesive flow between these areas, balancing modern functionality with the craftsman-inspired character of the rest of the home.
Design Objectives:
- Replace the outdated peninsula with a large island to maximize counter space and create new seating options.
- Open up the space visually by removing soffits and rethinking the cabinetry layout.
Incorporate concealed refrigeration and freezer units to provide significant storage for the family while maintaining a streamlined aesthetic.
- Integrate black cabinetry into the design without making the space feel harsh or heavy.
- Ensure the lighting plan balances functional task lighting with ambient accent lighting.
- Avoid visual clutter in the cabinetry design while still giving a nod to the craftsman aesthetic.
- Incorporate a slab backsplash as a key design feature.
Design Challenges:
- The outdated peninsula left dead space in the kitchen and lacked sufficient seating for the family.
- The cooktop wall was cramped, with small cabinets flanking the hood, limited storage, and soffits that made the space feel closed-in.
- The family needed significant refrigeration space (two refrigerators and a freezer) but wanted to avoid a cluttered look with visible stainless steel appliances.
- Adding black cabinetry risked making the space feel too dark or heavy.
- The original lighting plan was insufficient, particularly over the dining table where a decorative fixture proved too dim.
- The family wanted shaker-style drawer fronts to match the home’s arts-and-crafts design but worried that too much shaker cabinetry might look overly busy.
- Prioritizing a slab backsplash in the wish list priority planning.
The Renewed Space
Design Solutions:
- A functional island: The peninsula was replaced with a large island that provides continuous countertop space for prepping and serving. The island also features seating for four people, creating a central hub for informal meals and activities.
- Streamlined cooktop wall: The soffits were removed, and the upper cabinets on the cooktop wall were eliminated to create a more open, streamlined design. A custom oversized hood became the focal point of the wall, with the blower unit offset inside it to align with the cooktop while maintaining exterior visual symmetry.
- Concealed refrigeration: Two column refrigerators and one freezer were integrated into the cabinetry, concealing them behind wood paneling that blends seamlessly with the overall design.
- Warm black cabinetry: The black cabinetry was crafted from hickory with a visible grain, softening its appearance and adding warmth. The grain detail gives the cabinetry a rich, textured look that avoids feeling stark or overpowering.
- Additional lighting: In the dining area, recessed can lights were added during an additional installation phase to supplement the gorgeous decorative fixture’s dim output. The new lighting plan creates a layered effect, combining functional task lighting with softer ambient lighting.
- Simplified cabinetry details: Slab drawer fronts were used on the upper drawers, while five-piece shaker fronts (with slightly less prominent rail and stile pieces) were reserved for the middle and lower drawers. This approach simplified the overall look while maintaining the craftsman-inspired aesthetic.
- Slab backsplash priority: The slab backsplash was prioritized by making thoughtful adjustments elsewhere, like opting not to extend cabinetry to the ceiling, which also helped visually prioritize the gorgeous slab backsplash. This decision also enhanced the kitchen’s furniture-like feel, aligning with the home’s craftsman character.
- This kitchen perfectly balances practicality with timeless style. By addressing the family’s functional needs — ample seating, smart storage, and effective lighting — while incorporating thoughtful design elements like warm black cabinetry and a striking slab backsplash, Alicia created a space that works beautifully for a busy household. The result is a cohesive, inviting kitchen that honors the home’s craftsman roots and will serve the family well for years to come.
Find the right local pro for your project

 kmjee
kmjeePepper plants are a delightful addition to any garden, offering a vibrant burst of color and spice to your culinary creations. However, even experienced gardeners can encounter challenges when growing pepper plants. In this blog, we'll explore some common issues you might face and provide practical solutions to help your pepper plants thrive.
1. Slow or Stunted Growth
Issue: Slow or stunted growth in pepper plants can be discouraging, but there are specific steps you can take to address this issue effectively.
Solution:
a. Soil Health:
- Well-Draining Soil: Ensure your pepper plants are in well-draining soil to prevent waterlogged roots, which can inhibit growth.
- Organic Matter: Incorporate plenty of organic matter, such as compost or well-rotted manure, into the soil to improve its texture and nutrient content.
- pH Level: Test the soil pH and adjust it to the ideal range between 6.0 and 6.8 using lime or sulfur as needed.
b. Fertilization:
- Balanced Fertilizer: Use a balanced, slow-release fertilizer designed for vegetables to provide essential nutrients steadily throughout the growing season.
- Compost: Amend the soil with compost to enhance nutrient availability and soil structure. This can promote healthier growth.
c. Watering:
- Consistent Moisture: Maintain consistent soil moisture levels by watering your pepper plants regularly but avoid waterlogging. Aim for 1-2 inches of water per week, adjusting based on your local climate and weather conditions.
- Mulching: Apply mulch around the base of the plants to retain soil moisture and regulate temperature.
2. Yellowing Leaves
Issue: Yellowing leaves can be a sign of various underlying problems, but addressing them promptly can restore the vibrancy of your pepper plants.
Solution:
a. Nutrient Deficiencies:
- Balanced Fertilization: Use a well-balanced fertilizer that includes micronutrients to address nutrient deficiencies.
- Specific Nutrients: If you suspect a particular deficiency, such as magnesium, iron, or nitrogen, apply the appropriate nutrient supplement following package instructions.
b. Pest and Disease Control:
- Pest Inspection: Regularly inspect the leaves and stems for common pests like aphids and mites. Remove affected leaves and treat with organic pesticides if necessary.
- Disease Management: Look out for signs of diseases like bacterial leaf spot or fungal issues. Apply organic fungicides or bactericides as recommended.
3. Blossom Drop
Issue: When pepper plants drop their blossoms prematurely, it can hinder fruit development and lead to disappointment.
Solution:
a. Temperature Control:
- Stable Temperatures: Ensure your pepper plants are exposed to consistent temperatures between 70°F and 80°F (21°C to 27°C) during flowering. Avoid sudden temperature fluctuations by providing shelter or using row covers.
b. Pollination:
- Assist with Pollination: If growing peppers indoors or in a greenhouse, help with pollination by gently shaking the plants or using a small brush to transfer pollen between flowers. Outdoor pepper plants are usually pollinated by insects.
4. Wilting Plants
Issue: Wilting or drooping pepper plants can be a sign of various problems, but proper care can revive them.
Solution:
a. Watering:
- Consistent Moisture: Adjust your watering routine to keep the soil consistently moist but not waterlogged. Water early in the day to prevent fungal issues.
- Drainage: Ensure proper soil drainage by amending the soil or using raised beds to prevent waterlogged roots.
b. Pest Control:
- Pest Inspection: Examine the undersides of leaves for signs of pests like aphids, spider mites, or whiteflies. Treat infestations promptly with biological insecticides.
5. Curling Leaves
Issue: Curling or misshapen leaves indicate stress in pepper plants, which can be caused by various factors.
Solution:
a. Environmental Stress:
- Stable Conditions: Ensure your pepper plants are in an environment with stable humidity, temperature, and adequate air circulation. Avoid sudden changes in conditions.
- Proper Ventilation: Adequate air circulation can reduce humidity and prevent fungal issues.
b. Pest and Disease Management:
- Pest Inspection: Regularly inspect your plants for pests and diseases, addressing them promptly with organic remedies as needed.
6. Sunscald
Issue: Sunscald can lead to discolored, leathery patches on pepper fruits when exposed to intense sunlight.
Solution:
a. Shade Cloth:
- Sun Protection: Shield your pepper plants from harsh sunlight during the hottest part of the day using shade cloth or by planting them where they receive some filtered sunlight.
b. Pruning:
- Fruit Shading: Prune excess foliage to allow better fruit shading, reducing the risk of sunscald. Ensure that there's a balance between foliage and fruit.
7. Pepper Plant Pests and Diseases
Issue: Aphids, mites, whiteflies, and various diseases can affect pepper plants, but you can manage them effectively.
Solution:
a. Regular Inspection:
- Vigilant Monitoring: Regularly inspect your pepper plants for signs of pests or diseases, paying close attention to the undersides of leaves and stems.
b. Organic Remedies:
- Pest Control: Use organic remedies like neem oil, insecticidal soap, or diatomaceous earth for pest control.
- Disease Management: Apply organic fungicides or bactericides as recommended to manage diseases like powdery mildew or bacterial spot.
While growing pepper plants can present various challenges, these common issues are manageable with the right knowledge and care. Regular monitoring, proper soil preparation, and timely intervention can help you enjoy a bountiful harvest of vibrant, spicy peppers. Remember that gardening is a learning experience, and each challenge you face is an opportunity to improve your skills and enjoy the rewards of homegrown peppers in your favorite dishes.
 User
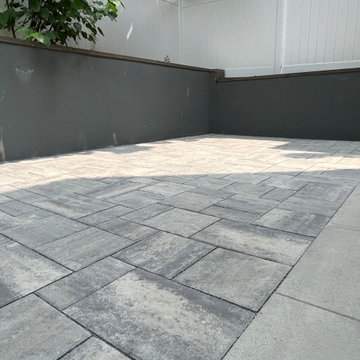
UserOpen Graded crushed stone base with proper drainage grid was installed to effectively address water accumulation. Quality Permeable Concrete Paver Patio was installed to successfully absorb any rain water AND re-route raising ground water to the new drainage system. Another water problem solved, and Owners gained a beautiful hard surface patio to enjoy.
 Villandry Home & Outdoor Living
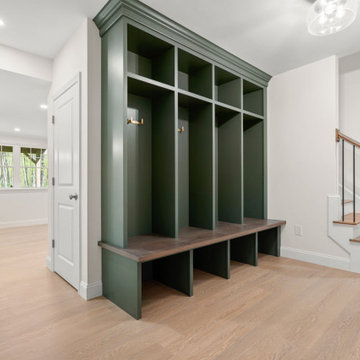
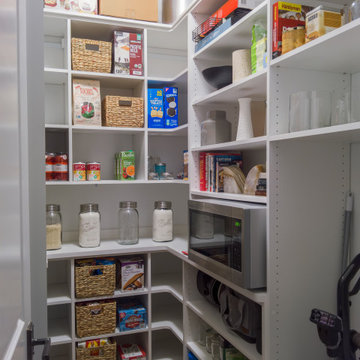
his project aimed to transform a dark and disorganized basement into a bright, functional, and inviting space. The client’s vision focused on creating an organized area for the kids, a dedicated fitness zone for mom, and an overall brighter and more accessible space.
To effectively address the client’s needs, we devised a solution that involved installing four custom built-ins to manage the children’s belongings and creating a dedicated, open fitness area for moM. We also introduced a half bath with convenient access to the outdoor space and improved natural light by enlarging window sizes and fitting a full-light door.
This finished basement now has a simple, clean, and sophisticated feel. A busy family with four young kids, these clients sought a solution to keep their stuff organized and tidy, have a dedicated fitness area, and generally make the space brighter and more inviting. And, now, they have it.

 Outdoor Lighting Perspectives
This landscape lighting project was primarily in the back yard, but this photo shows an interesting retro-fit lighting effect we installed in the front yard. This existing house number box was lit from the inside by our wide-effect Ozark fixture, making for a stunning glow effect.
While this was an existing box, our in-house metal fabrication facility has crafted similar boxes and shapes with cutouts of all sorts. These are great ways to illuminate a street number or the name of a property, and is available in any desired size or finish.
These work particularly well here in Canada, since the point of illumination is shielded from snow, making them excellent year-round effects for important house number and sign lighting.

Sponsored
Sunbury, OH

J.Holderby - Renovations
Franklin County's Leading General Contractors - 2X Best of Houzz!
 safe ZOnea
Staging a home for sale or for a major transition is a strange in-between state. You are still living in the space, but you are also preparing it to impress strangers, support showings, and remain functional until the final move-out day. That tension between “home” and “product” is where storage quietly becomes one of your smartest tools. Used well, storage lets you reduce clutter, protect important items, and create the kind of rooms that photograph beautifully and feel calm when buyers walk through the door.
A staged move is rarely just about shifting boxes from one address to another. It is about managing timing, presentation, and stress at the same time. When storage is built into the plan from day one, the entire process feels less rushed and more strategic. Rooms open up gradually, essentials stay accessible, and you never feel like you are drowning in half-packed chaos. Understanding how to use storage as a staging partner, not just a place to dump excess stuff, is what turns a messy transition into a controlled, professional-looking move.
Why Storage Is the Backbone of Every Staged Move
Visual space is emotional space. When every surface is covered, and every corner is full, buyers feel crowded before they have even evaluated the layout. Storage gives you a way to pull back without making drastic decisions about what to keep or donate. Seasonal décor, bulky furniture, duplicate items, archives, and personal collections can be moved out early, so the home reads cleaner and more open while still feeling lived-in. That balance between warmth and simplicity is exactly what good staging tries to achieve.
In more complex situations, such as live-work properties or home offices, storage becomes even more important. You may need to keep a business running while also presenting a polished environment to viewers. Partnering with local movers in Boston makes it easier to shift equipment, files, and nonessential pieces into storage in phases, so work can continue while the visible areas of the property stay controlled and presentable.
How Staging and Storage Work Together to Control Visual Impact
Staging works best when every object in a room has a clear purpose. A sofa frames a conversation. A table suggests gathering. A lamp softens the mood. Everything else that is not essential to that story competes for attention. Storage supports staging by giving you a clean staging bench off-site, where nonessential items can wait without being constantly shuffled between rooms or piled into overstuffed closets.
The art lies in deciding what stays and what goes. Family photos, extensive collections, excess seating, and rarely used appliances often move into storage first. What remains should be enough to show scale, comfort, and function without revealing the full weight of daily life. Commercial properties go through a similar filtering process. Extra desks, surplus equipment, outdated signage, and inactive files often move out early so the active workspace feels lean, efficient, and future-ready before a relocation supported by commercial movers takes place.
Strategic Timing of Storage before the Actual Move
The worst time to think about storage is when boxes are already stacked in the hallway. In a staged move, storage decisions ideally begin as soon as you know the property will be listed or the space will be transitioned. That might be a month or more before the main moving date. Starting early gives you time to sort, label, and prioritize instead of throwing things together in a panic.
An early storage phase also helps you test how the home feels with less in it. You may discover that removing a few large pieces transforms a cramped room into an open, inviting space. For commercial spaces, early storage lets operations continue with fewer interruptions. Departments can send nonessential items out in waves. When the main relocation comes, much of the excess is already safely stored, and what remains is easier for a commercial movers Boston team to handle with speed and care.
The Emotional Psychology behind Letting Storage Hold Your Belongings
Letting belongings leave the house ahead of you can feel unsettling. There is always a quiet fear that once something is out of sight, it will be forgotten, damaged, or harder to reclaim. That is why some people resist using storage even when they know it would make the staging process easier. Acknowledging that emotion instead of dismissing it helps you plan more honestly and avoids last-minute regret.
The reality is that good storage is not a black hole; it is a temporary pause. When items are packed thoughtfully, labeled clearly, and placed in an environment you trust, they become easier to manage than when they are tucked into random cupboards or stacked in spare rooms. For many people, living with fewer visible possessions during staging actually reduces tension. The home feels lighter and easier to maintain. Businesses notice the same effect when storage removes outdated equipment and clutter from the floor. The workspace looks more focused, and staff can concentrate on current tasks instead of navigating around accumulated history.
Protecting Assets While They Live in Storage
Sending belongings into storage is only a good idea if they come back in the same or better condition. That is where quality control matters. Furniture, textiles, electronics, files, and artwork each have different vulnerabilities. Moisture, temperature swings, dust, and rough handling can all damage them in ways that only become obvious later. Choosing the right type of storage and packing accordingly is central to the genius of using storage as part of a staged move rather than as a desperate overflow container.
Climate-controlled units, padded wrapping, elevated pallets, careful stacking, and clearly marked boxes all reduce risk. The goal is to handle items fewer times, not more. When storage is integrated into the move plan, belongings can travel directly from the home to storage and later from storage to the new address with minimal extra movement. Many owners coordinate those transfers through a well trusted movers in Boston, so the same team that moves items out early also manages their final delivery, preserving continuity and accountability.
How Storage Reduces Risk during Multi-Phase Moves
Few staged moves happen in a single clean step. There are often gaps between listing and selling, between selling and closing, between closing and final move-out. If renovations, inspections, or office reconfigurations are involved, the timeline becomes even more layered. Storage absorbs those gaps, so you are not forced to live among towers of boxes or stack equipment in hallways waiting for the next phase.
By treating storage as a flexible middle ground, you can move things out gradually while still having access when needed. For example, archived files can go first, followed by seasonal décor, then surplus furniture. As each stage ends, fewer items remain to be shifted on the final date. This phased approach reduces the risk of rushed, late-night packing sessions, careless stacking, and damaged items. It also makes it easier for commercial moving crews to work efficiently because they are handling a manageable volume of goods at each phase rather than everything at once.
Using Storage to Maintain Clean Show-Ready Conditions
One of the hardest parts of staging is keeping the property consistently show-ready. Every viewing becomes its own small event. Floors need to be cleared, surfaces wiped, and personal items tucked away. When too many belongings remain in the home, each showing takes a heavy amount of effort. Storage cuts that workload dramatically by taking nonessentials completely off the stage.
With fewer items to move and hide, maintaining a neutral, inviting look becomes much more realistic. You are not scrambling to stuff things into closets or push items under the bed. Instead, the home sits closer to show condition all the time, and the final touches before a viewing are minimal. In commercial environments, using storage helps maintain a professional appearance for clients and staff, even while the space is being prepared for a larger transition. Active tools and furniture stay in play, while inactive pieces quietly support the future from storage.
Storage as a Strategic Tool in Business Relocation Planning
For businesses, storage is more than a convenience; it is part of risk management. Office relocations and staged commercial moves have to juggle lease deadlines, equipment deliveries, IT cutovers, and staffing realities. Trying to shift everything in one move often results in downtime, lost files, and strained teams. Storage turns the move into a series of controlled steps instead of a single disruptive jump.
Unused furniture, archived documents, and non-critical inventory can be moved into storage weeks ahead of the main relocation. As the new space becomes ready, items can move out of storage and directly into position. This reduces double-handling and keeps the old and new locations from filling with half-unpacked material. A business that coordinates these flows with professional commercial movers in Boston usually experiences smoother transitions, because storage is treated as a working part of the operational plan rather than a leftover problem.
The Hidden Cost Benefits of Proper Storage Planning
On paper, storage looks like an extra expense. In reality, poorly managed moves cost far more. When everything is rushed into boxes at the last minute, items are damaged, misplaced, or transported multiple times. Extra labor hours, emergency packing supplies, replacement furniture, and extended timelines quickly outweigh the cost of well-used storage. Staging without storage also tends to keep homes and offices crowded longer, which can hurt impressions and, in the case of a sale, influence offers.
When storage is integrated from the beginning, you minimize waste. You handle items fewer times, you know where things are, and you avoid paying people to shift the same objects repeatedly. Staged homes that look better often sell faster or draw stronger interest, which helps recover investment on the back end. Businesses benefit from less downtime, safer handling of equipment, and predictable work schedules. Those gains are why many clients prefer partnering with a commercial moving company in Boston that understands storage as a cost-control tool, not just a place to park overflow.
Conclusion
The true genius of using storage during a staged home move is that it quietly rewrites the rules of transition. Instead of treating space as something that must absorb every box and belonging until the last possible moment, you treat storage as a flexible extension of the home or office. This shift in thinking opens rooms, clears sightlines, and makes every phase of the move more intentional. Staging becomes easier, maintenance becomes lighter, and the stress of living in a half-moved environment drops noticeably. When storage is chosen carefully, used early, and coordinated with the overall moving plan, it protects both physical assets and emotional energy. Buyers and visitors see a calm, collected space. You experience a less chaotic path from “here” to “there.” Whether you are selling a home, repositioning a business, or managing a complex phased relocation, storage can turn a disruptive event into a managed, almost elegant process.
For people who want that level of control and care during a staged move, Stairhopper movers have built a strong reputation by treating storage, timing, and transport as parts of one connected strategy. Their team is known for listening closely, planning around real-life constraints, and moving both residential and commercial clients through transitions with calm, steady execution. They approach every project as a partnership, aligning storage use, staging needs, and final delivery so that what matters most arrives safely, on schedule, and with as little disruption as possible.
Frequently Asked Questions
Q1. When should I arrange storage for a staged home move?
Ideally, four to six weeks before listing or transition, so clearing, packing, and staging can happen gradually without rushed decisions or last-minute stress.
Q2. Is climate-controlled storage necessary for staged moves?
It is highly recommended for wood furniture, electronics, artwork, and documents, since temperature and humidity swings can quietly damage materials over time.
Q3. How does storage help keep a home show-ready?
By moving nonessential items off-site, daily tidying becomes simpler, and each room can stay closer to a staged condition between viewings or inspections.
Q4. Can storage reduce the length of the final moving day?
Yes. When many items are moved into storage in advance, the final moving day focuses on essentials, which shortens timelines and reduces physical and mental strain.
Q5. Is storage useful for short-term business relocations?
Even in short relocations, storage helps prevent overcrowded offices and allows departments to move in phases without interrupting everyday operations.
Q6. How do I decide what should go into storage first?
Start with rarely used items, seasonal décor, surplus furniture, and archived materials, then work toward pieces that are visually distracting or make rooms feel cramped.
Q7. Will using storage make it harder to find things later?
Not if packing and labeling are done carefully. Clear categories, room-based labels, and simple inventories make stored items easier to locate than when scattered at home.
Q8. Does storage still make sense if my move happens in one day?
Yes, because staging and preparation begin well before that day. Storage keeps the home functional and attractive during the weeks leading up to the final move.
 Drury Design
The Setup:
After purchasing this home, the homeowners faced a unique opportunity to reimagine their kitchen and nearby spaces. Water damage from a burst pipe had left much of the home’s interior in need of repair, and while the existing kitchen was functional and in relatively good shape, it didn’t align with the family’s vision for their new home. The layout included a peninsula that wasn’t ideal, and there were some druthers with the nearby pantry.
Since the space needed to be rebuilt anyway, the homeowners saw this as a chance to create a kitchen that was both highly functional for their four young children and timeless in its design. The project also included a refresh of the adjacent message center and dining room — spaces that play key roles in the family’s daily life. The goal was to create a cohesive flow between these areas, balancing modern functionality with the craftsman-inspired character of the rest of the home.
Design Objectives:
- Replace the outdated peninsula with a large island to maximize counter space and create new seating options.
- Open up the space visually by removing soffits and rethinking the cabinetry layout.
Incorporate concealed refrigeration and freezer units to provide significant storage for the family while maintaining a streamlined aesthetic.
- Integrate black cabinetry into the design without making the space feel harsh or heavy.
- Ensure the lighting plan balances functional task lighting with ambient accent lighting.
- Avoid visual clutter in the cabinetry design while still giving a nod to the craftsman aesthetic.
- Incorporate a slab backsplash as a key design feature.
Design Challenges:
- The outdated peninsula left dead space in the kitchen and lacked sufficient seating for the family.
- The cooktop wall was cramped, with small cabinets flanking the hood, limited storage, and soffits that made the space feel closed-in.
- The family needed significant refrigeration space (two refrigerators and a freezer) but wanted to avoid a cluttered look with visible stainless steel appliances.
- Adding black cabinetry risked making the space feel too dark or heavy.
- The original lighting plan was insufficient, particularly over the dining table where a decorative fixture proved too dim.
- The family wanted shaker-style drawer fronts to match the home’s arts-and-crafts design but worried that too much shaker cabinetry might look overly busy.
- Prioritizing a slab backsplash in the wish list priority planning.
The Renewed Space
Design Solutions:
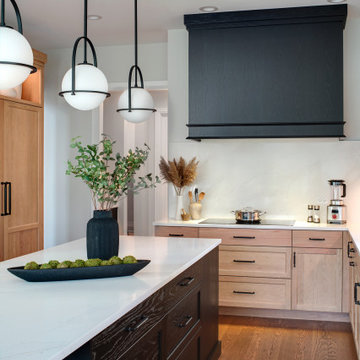
- A functional island: The peninsula was replaced with a large island that provides continuous countertop space for prepping and serving. The island also features seating for four people, creating a central hub for informal meals and activities.
- Streamlined cooktop wall: The soffits were removed, and the upper cabinets on the cooktop wall were eliminated to create a more open, streamlined design. A custom oversized hood became the focal point of the wall, with the blower unit offset inside it to align with the cooktop while maintaining exterior visual symmetry.
- Concealed refrigeration: Two column refrigerators and one freezer were integrated into the cabinetry, concealing them behind wood paneling that blends seamlessly with the overall design.
- Warm black cabinetry: The black cabinetry was crafted from hickory with a visible grain, softening its appearance and adding warmth. The grain detail gives the cabinetry a rich, textured look that avoids feeling stark or overpowering.
- Additional lighting: In the dining area, recessed can lights were added during an additional installation phase to supplement the gorgeous decorative fixture’s dim output. The new lighting plan creates a layered effect, combining functional task lighting with softer ambient lighting.
- Simplified cabinetry details: Slab drawer fronts were used on the upper drawers, while five-piece shaker fronts (with slightly less prominent rail and stile pieces) were reserved for the middle and lower drawers. This approach simplified the overall look while maintaining the craftsman-inspired aesthetic.
- Slab backsplash priority: The slab backsplash was prioritized by making thoughtful adjustments elsewhere, like opting not to extend cabinetry to the ceiling, which also helped visually prioritize the gorgeous slab backsplash. This decision also enhanced the kitchen’s furniture-like feel, aligning with the home’s craftsman character.
- This kitchen perfectly balances practicality with timeless style. By addressing the family’s functional needs — ample seating, smart storage, and effective lighting — while incorporating thoughtful design elements like warm black cabinetry and a striking slab backsplash, Alicia created a space that works beautifully for a busy household. The result is a cohesive, inviting kitchen that honors the home’s craftsman roots and will serve the family well for years to come.
 Villandry Home & Outdoor Living
his project aimed to transform a dark and disorganized basement into a bright, functional, and inviting space. The client’s vision focused on creating an organized area for the kids, a dedicated fitness zone for mom, and an overall brighter and more accessible space.
To effectively address the client’s needs, we devised a solution that involved installing four custom built-ins to manage the children’s belongings and creating a dedicated, open fitness area for moM. We also introduced a half bath with convenient access to the outdoor space and improved natural light by enlarging window sizes and fitting a full-light door.
This finished basement now has a simple, clean, and sophisticated feel. A busy family with four young kids, these clients sought a solution to keep their stuff organized and tidy, have a dedicated fitness area, and generally make the space brighter and more inviting. And, now, they have it.
 Drury Design
The Setup:
After purchasing this home, the homeowners faced a unique opportunity to reimagine their kitchen and nearby spaces. Water damage from a burst pipe had left much of the home’s interior in need of repair, and while the existing kitchen was functional and in relatively good shape, it didn’t align with the family’s vision for their new home. The layout included a peninsula that wasn’t ideal, and there were some druthers with the nearby pantry.
Since the space needed to be rebuilt anyway, the homeowners saw this as a chance to create a kitchen that was both highly functional for their four young children and timeless in its design. The project also included a refresh of the adjacent message center and dining room — spaces that play key roles in the family’s daily life. The goal was to create a cohesive flow between these areas, balancing modern functionality with the craftsman-inspired character of the rest of the home.
Design Objectives:
- Replace the outdated peninsula with a large island to maximize counter space and create new seating options.
- Open up the space visually by removing soffits and rethinking the cabinetry layout.
Incorporate concealed refrigeration and freezer units to provide significant storage for the family while maintaining a streamlined aesthetic.
- Integrate black cabinetry into the design without making the space feel harsh or heavy.
- Ensure the lighting plan balances functional task lighting with ambient accent lighting.
- Avoid visual clutter in the cabinetry design while still giving a nod to the craftsman aesthetic.
- Incorporate a slab backsplash as a key design feature.
Design Challenges:
- The outdated peninsula left dead space in the kitchen and lacked sufficient seating for the family.
- The cooktop wall was cramped, with small cabinets flanking the hood, limited storage, and soffits that made the space feel closed-in.
- The family needed significant refrigeration space (two refrigerators and a freezer) but wanted to avoid a cluttered look with visible stainless steel appliances.
- Adding black cabinetry risked making the space feel too dark or heavy.
- The original lighting plan was insufficient, particularly over the dining table where a decorative fixture proved too dim.
- The family wanted shaker-style drawer fronts to match the home’s arts-and-crafts design but worried that too much shaker cabinetry might look overly busy.
- Prioritizing a slab backsplash in the wish list priority planning.
The Renewed Space
Design Solutions:
- A functional island: The peninsula was replaced with a large island that provides continuous countertop space for prepping and serving. The island also features seating for four people, creating a central hub for informal meals and activities.
- Streamlined cooktop wall: The soffits were removed, and the upper cabinets on the cooktop wall were eliminated to create a more open, streamlined design. A custom oversized hood became the focal point of the wall, with the blower unit offset inside it to align with the cooktop while maintaining exterior visual symmetry.
- Concealed refrigeration: Two column refrigerators and one freezer were integrated into the cabinetry, concealing them behind wood paneling that blends seamlessly with the overall design.
- Warm black cabinetry: The black cabinetry was crafted from hickory with a visible grain, softening its appearance and adding warmth. The grain detail gives the cabinetry a rich, textured look that avoids feeling stark or overpowering.
- Additional lighting: In the dining area, recessed can lights were added during an additional installation phase to supplement the gorgeous decorative fixture’s dim output. The new lighting plan creates a layered effect, combining functional task lighting with softer ambient lighting.
- Simplified cabinetry details: Slab drawer fronts were used on the upper drawers, while five-piece shaker fronts (with slightly less prominent rail and stile pieces) were reserved for the middle and lower drawers. This approach simplified the overall look while maintaining the craftsman-inspired aesthetic.
- Slab backsplash priority: The slab backsplash was prioritized by making thoughtful adjustments elsewhere, like opting not to extend cabinetry to the ceiling, which also helped visually prioritize the gorgeous slab backsplash. This decision also enhanced the kitchen’s furniture-like feel, aligning with the home’s craftsman character.
- This kitchen perfectly balances practicality with timeless style. By addressing the family’s functional needs — ample seating, smart storage, and effective lighting — while incorporating thoughtful design elements like warm black cabinetry and a striking slab backsplash, Alicia created a space that works beautifully for a busy household. The result is a cohesive, inviting kitchen that honors the home’s craftsman roots and will serve the family well for years to come.

 TheMuralSources
This mural is called "Belva", installed in this bathroom, designed by The Address Interiors in Canada. "Belva" is printed on standard wallpaper with a "tea paper" effect background.

 Natural Stone Institute
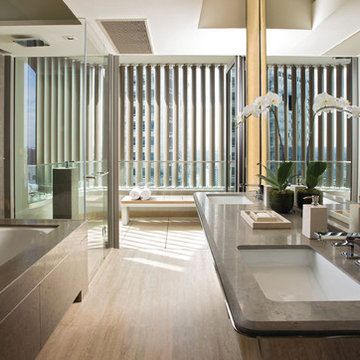
Like an artful masterpiece, Ardmore Residence exhilarates, engages and inspires. Rising boldly above Singapore’s premier residential address, Ardmore Park, the 36-story residential tower redefines the luxury living of an urban home with imagination, privileges and services that are exclusive to its residents.
The apartment’s spaces conjure up the harmony of a light-filled urban cocoon rising above the energy of the city. Orchard Road’s landmarks dazzle in crisp clarity from the apartments facing south, while the units with a north orientation enjoy Bukit Timah Hill’s lush green foliage. The living and dining wing opens to a doublevolume
balcony that presents an impressive space for residents who enjoy entertaining at home in style, or simply relaxing in their luxury of space. At more than 2,000 sq. ft. each, all of the 56 luxurious units have been fitted with premium stone finishes, carefully selected and processed to achieve the optimal aesthetical effect.
M&G inspected and selected the blocks directly from quarries located in Iran, Italy and Spain, and then fabricated according to the customized finishes of each unit type. The flat cut pieces and solid curved pieces for each unit were then laid out per the shop drawings, inspected and approved by the owner’s representatives,
before individually numbered and packed for delivery to site.
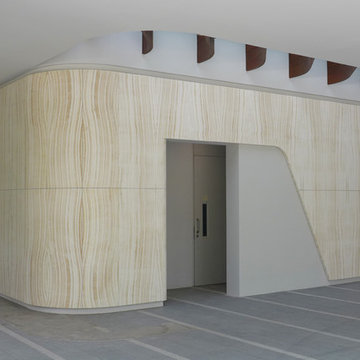
In the main lobby, an impressive onyx feature wall captures the attention of visitors with its stunning book-matched effect. The blocks were individually selected to ensure consistency of the veining, then allocated to each elevation to create optimal symmetry when book-matched. The slabs were then cut and book-matched polished, laid out to visualize the effect and to mark the actual sizes to cut, before finally cutting to size. Special attention was paid to the curved corner pieces in order to achieve a similar book-matched effect as the flat pieces. The landscaped areas also feature granite in
various thicknesses with radial cuts to complement the architectural style of the project.
Sponsored
Sunbury, OH
J.Holderby - Renovations
Franklin County's Leading General Contractors - 2X Best of Houzz!

 Delle Maison
Close up on the silver-like light gray finish, on black background. The picture doesn't render well the kind of hollographic effect. This finish makes the house number really easy to see for darker walls.
 Delle Maison
Close up on the silver-like light gray finish. The picture doesn't render well the kind of hollographic effect. This finish makes the house number really easy to see for darker walls.
 Natural Stone Institute
Like an artful masterpiece, Ardmore Residence exhilarates, engages and inspires. Rising boldly above Singapore’s premier residential address, Ardmore Park, the 36-story residential tower redefines the luxury living of an urban home with imagination, privileges and services that are exclusive to its residents.
The apartment’s spaces conjure up the harmony of a light-filled urban cocoon rising above the energy of the city. Orchard Road’s landmarks dazzle in crisp clarity from the apartments facing south, while the units with a north orientation enjoy Bukit Timah Hill’s lush green foliage. The living and dining wing opens to a doublevolume
balcony that presents an impressive space for residents who enjoy entertaining at home in style, or simply relaxing in their luxury of space. At more than 2,000 sq. ft. each, all of the 56 luxurious units have been fitted with premium stone finishes, carefully selected and processed to achieve the optimal aesthetical effect.
M&G inspected and selected the blocks directly from quarries located in Iran, Italy and Spain, and then fabricated according to the customized finishes of each unit type. The flat cut pieces and solid curved pieces for each unit were then laid out per the shop drawings, inspected and approved by the owner’s representatives,
before individually numbered and packed for delivery to site.
In the main lobby, an impressive onyx feature wall captures the attention of visitors with its stunning book-matched effect. The blocks were individually selected to ensure consistency of the veining, then allocated to each elevation to create optimal symmetry when book-matched. The slabs were then cut and book-matched polished, laid out to visualize the effect and to mark the actual sizes to cut, before finally cutting to size. Special attention was paid to the curved corner pieces in order to achieve a similar book-matched effect as the flat pieces. The landscaped areas also feature granite in
various thicknesses with radial cuts to complement the architectural style of the project.
 Natural Stone Institute
Like an artful masterpiece, Ardmore Residence exhilarates, engages and inspires. Rising boldly above Singapore’s premier residential address, Ardmore Park, the 36-story residential tower redefines the luxury living of an urban home with imagination, privileges and services that are exclusive to its residents.
The apartment’s spaces conjure up the harmony of a light-filled urban cocoon rising above the energy of the city. Orchard Road’s landmarks dazzle in crisp clarity from the apartments facing south, while the units with a north orientation enjoy Bukit Timah Hill’s lush green foliage. The living and dining wing opens to a doublevolume
balcony that presents an impressive space for residents who enjoy entertaining at home in style, or simply relaxing in their luxury of space. At more than 2,000 sq. ft. each, all of the 56 luxurious units have been fitted with premium stone finishes, carefully selected and processed to achieve the optimal aesthetical effect.
M&G inspected and selected the blocks directly from quarries located in Iran, Italy and Spain, and then fabricated according to the customized finishes of each unit type. The flat cut pieces and solid curved pieces for each unit were then laid out per the shop drawings, inspected and approved by the owner’s representatives,
before individually numbered and packed for delivery to site.
In the main lobby, an impressive onyx feature wall captures the attention of visitors with its stunning book-matched effect. The blocks were individually selected to ensure consistency of the veining, then allocated to each elevation to create optimal symmetry when book-matched. The slabs were then cut and book-matched polished, laid out to visualize the effect and to mark the actual sizes to cut, before finally cutting to size. Special attention was paid to the curved corner pieces in order to achieve a similar book-matched effect as the flat pieces. The landscaped areas also feature granite in
various thicknesses with radial cuts to complement the architectural style of the project.


 Natural Stone Institute
Like an artful masterpiece, Ardmore Residence exhilarates, engages and inspires. Rising boldly above Singapore’s premier residential address, Ardmore Park, the 36-story residential tower redefines the luxury living of an urban home with imagination, privileges and services that are exclusive to its residents.
The apartment’s spaces conjure up the harmony of a light-filled urban cocoon rising above the energy of the city. Orchard Road’s landmarks dazzle in crisp clarity from the apartments facing south, while the units with a north orientation enjoy Bukit Timah Hill’s lush green foliage. The living and dining wing opens to a doublevolume
balcony that presents an impressive space for residents who enjoy entertaining at home in style, or simply relaxing in their luxury of space. At more than 2,000 sq. ft. each, all of the 56 luxurious units have been fitted with premium stone finishes, carefully selected and processed to achieve the optimal aesthetical effect.
M&G inspected and selected the blocks directly from quarries located in Iran, Italy and Spain, and then fabricated according to the customized finishes of each unit type. The flat cut pieces and solid curved pieces for each unit were then laid out per the shop drawings, inspected and approved by the owner’s representatives,
before individually numbered and packed for delivery to site.
In the main lobby, an impressive onyx feature wall captures the attention of visitors with its stunning book-matched effect. The blocks were individually selected to ensure consistency of the veining, then allocated to each elevation to create optimal symmetry when book-matched. The slabs were then cut and book-matched polished, laid out to visualize the effect and to mark the actual sizes to cut, before finally cutting to size. Special attention was paid to the curved corner pieces in order to achieve a similar book-matched effect as the flat pieces. The landscaped areas also feature granite in
various thicknesses with radial cuts to complement the architectural style of the project.

 Jack Edward
In the world of property management, fostering positive relationships with tenants, prospects, and landlords is key to ensuring a thriving rental community. One of the most fundamental aspects of tenant satisfaction is ensuring that their living spaces are equipped with functional appliances. Imagine the frustration of a tenant with a malfunctioning refrigerator or a broken washing machine. It's in such moments that the role of property managers becomes crucial. By offering fast and timely appliance repair and maintenance services, property managers can not only address the immediate needs of their tenants but also build lasting trust and loyalty. In this blog, we will explore the importance of reliable appliance repair services for property managers and how they can strengthen their bonds with tenants, prospects, and landlords.
Understanding the Tenant's Perspective:
For tenants, a well-maintained and fully functional home is not just a luxury but a necessity. Appliances like refrigerators, ovens, washing machines, and HVAC systems are integral to their daily lives. When these appliances break down, it can disrupt their routine and cause significant inconvenience. Tenants appreciate property managers who promptly address these issues, demonstrating a commitment to their comfort and well-being.
Meeting Prospective Tenants' Expectations:
When prospects are searching for a new rental property, they evaluate not only the space and location but also the level of service provided. A property managed by professionals who offer reliable appliance repair services stands out in the competitive rental market. Prospective tenants are more likely to choose a property where their potential issues, including appliance repairs, will be promptly resolved.
Earning the Trust of Landlords:
Landlords entrust property managers with their investments, expecting them to maintain the property and keep the tenants satisfied. Providing efficient appliance repair services not only ensures tenant retention but also earns the trust of landlords. A property manager who can handle repairs swiftly and cost-effectively protects the landlord's investment, leading to a positive and enduring partnership.
Benefits of Reliable Appliance Repair Services:
⦁ Tenant Satisfaction: Fast and reliable appliance repairs lead to satisfied tenants, enhancing their overall living experience.
⦁ Reduced Vacancy Rates: Properties with a reputation for excellent maintenance and quick issue resolution attract and retain tenants, minimizing vacancy periods.
⦁ Positive Word-of-Mouth: Happy tenants are more likely to recommend the property to others, increasing the likelihood of attracting new tenants through referrals.
⦁ Enhanced Property Value: Well-maintained properties retain their value and appeal, ensuring a steady stream of income for landlords.
⦁ Improved Tenant-Landlord Relations: Proactive property managers who promptly address repair issues strengthen their relationships with both tenants and landlords, creating a harmonious living environment.
In the competitive world of property management, offering reliable appliance repair services isn't just a service; it's a testament to a property manager's commitment to their tenants, prospects, and landlords. By promptly addressing repair needs and ensuring the smooth functioning of appliances, property managers not only resolve immediate problems but also lay the foundation for enduring, trust-based relationships. After all, in the eyes of tenants, prospects, and landlords, a property manager who can keep the appliances running smoothly is a valuable partner worth keeping. Building strong bonds through reliable appliance repair services isn't just a strategy – it's a pathway to long-lasting success and mutual satisfaction in the realm of property management.

 Twisted Rock Terrascape & Design, Inc.
Another great, simple project with wonderful curb appeal and cost effective for our client. Utilizing concrete edger for ease of maintenance as well as some natural rock for steps and step stones and address rock, we match the natural surroundings without breaking the bank!!
6