
Search results for "Elements consist" in Home Design Ideas
 Dream Outdoor Solutions
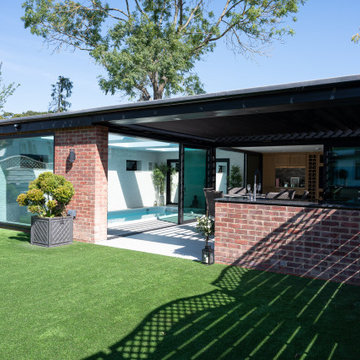
The Louvered Roof Pergola with Folding Doors and Outdoor Kitchen project aims to create an exquisite outdoor living space that seamlessly blends functionality, aesthetics, and versatility. By incorporating a louvered roof system, folding doors, and an outdoor kitchen, this project offers the perfect setting for relaxation, entertainment, and culinary experiences.
The centerpiece of this project is the louvered roof pergola. The louvered roof consists of adjustable slats that can be opened or closed, allowing for precise control over sunlight, shade, and ventilation. This feature enables occupants to adapt to changing weather conditions and preferences, providing a comfortable environment throughout the year.
The pergola's folding doors provide a seamless transition between indoor and outdoor spaces. These doors can be fully opened to extend the living area or closed to create a more intimate setting. The doors are designed to maximize natural light and offer unobstructed views of the surrounding landscape, while also providing privacy and security when needed.
The outdoor kitchen complements the pergola, offering a convenient and functional space for cooking and dining. Equipped with high-quality appliances, ample counter space, and storage options, the kitchen enables the preparation of gourmet meals in an outdoor setting. It can include features such as a grill, sink, refrigerator, and seating area, creating an inviting space for socializing and culinary delights.
Benefits and Uses:
The Louvered Roof Pergola with Folding Doors and Outdoor Kitchen project provides numerous benefits and uses, including:
Outdoor Entertainment: The pergola and outdoor kitchen create an ideal space for hosting gatherings, parties, and barbecues. The versatile design allows for flexible seating arrangements and the integration of audiovisual equipment for an immersive entertainment experience.
Relaxation and Recreation: The outdoor living area offers a tranquil retreat for relaxation, reading, or enjoying the beauty of nature. The adjustable louvered roof provides control over sunlight and shade, ensuring comfort and protection from the elements.
Al Fresco Dining: The outdoor kitchen encourages al fresco dining experiences, enabling homeowners to enjoy meals in the fresh air and picturesque surroundings. The well-equipped kitchen facilitates effortless food preparation and enhances the overall dining experience.
Increased Property Value: The addition of a louvered roof pergola with folding doors and an outdoor kitchen enhances the aesthetic appeal and functionality of the property. This can increase the value of the home and attract potential buyers in the future.
Sustainability Considerations:
Incorporating sustainable elements into the project is crucial. The louvered roof system can be designed to capture rainwater for irrigation purposes, reducing water consumption. The use of energy-efficient appliances and LED lighting in the outdoor kitchen minimizes energy consumption. Additionally, the choice of eco-friendly materials and landscaping practices ensures a sustainable and environmentally conscious design.
Project Timeline and Budget:
The project timeline will depend on the size and complexity of the outdoor living space. A professional design and construction team will be required to ensure the successful implementation of the project. The budget will vary based on the desired features, materials, and appliances, and should be established after careful consideration of all elements involved.
In conclusion, the Louvered Roof Pergola with Folding Doors and Outdoor Kitchen project presents an opportunity to transform an ordinary outdoor space into a luxurious and functional oasis. By incorporating a louvered roof system, folding doors, and a well-equipped outdoor kitchen, this project offers a versatile and aesthetically pleasing environment for entertainment, relaxation, and culinary experiences.
 Dura Supreme Cabinetry
One important element with any design project is the development of a "design path" (or "color path"), that creates a coherent, well-planned look for the entire space. Oftentimes this is called a "color board" and all the swatches, finishes and fabrics are laid out together to see the entire room (or entire home) and how all the design elements coordinate and work together.
In kitchen design, this includes wall paint colors, cabinetry finish colors, flooring, countertops, and tile along with appliance, plumbing, and hardware finishes. For the interior design with a room or entire home, it includes furnishings and other surfaces as well. The idea is to create a cohesive look for the entire space.
To create a color path for your home or remodeling project, begin with your neutral colors and then select the other colors for your space. The colors you select may be based on your existing furnishings, a favorite piece of art, or simply colors that resonate to you. In order to create a visually appealing space, let this color page guide your color selections going forward.
Neutral colors (gray, beige, taupe or white) will usually be the background palette with 1-3 other dominant colors layered.
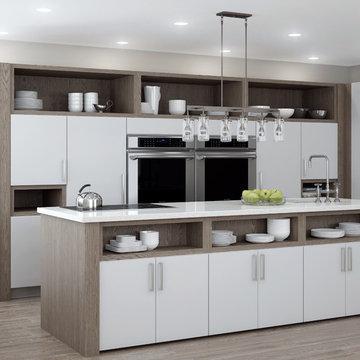
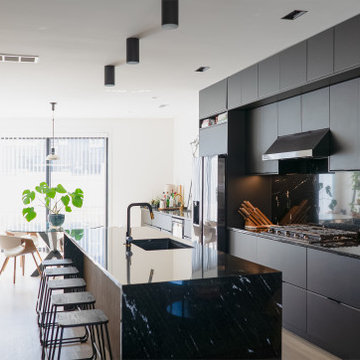
For contemporary or transitional designs, oftentimes a sleek, neutral palette is selected and it's important for all colors to be consistent with this palette. For this soft contemporary kitchen, a neutral palette of gray wood-tone (Weathered "A" finish on Oak) with white-gray paint, stainless and black appliances were selected and then carefully blended throughout the home for a clean, sleek appearance.
Once the "color path" was selected, the cabinetry was specified in the appropriate colors and all of the surfaces, soft goods, plateware, and accent pieces were selected to coordinate.
Featuring Dura Supreme's Bria Frameless Cabinetry shown with the Dura Supreme's Chroma door style. The Chrome door style is one of our many classic slab cabinet door styles. This design combines our Pearl light gray paint finish with our Weathered "A" finish on Red Oak for the accents and shelving.
Request a FREE Dura Supreme Brochure Packet:
http://www.durasupreme.com/request-brochure
Find a Dura Supreme Showroom near you today:
http://www.durasupreme.com/dealer-locator
 Dawson & Clinton
Tucked into the hillsides of Marin, the environment played a predominant role in defining the contemporary yet exotic style of this home.
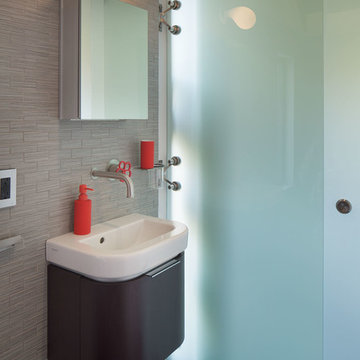
In the master bedroom, a fireplace adds a cozy design element, while an inconspicuous home theater system can be elegantly tucked away when not in use. In the master bathroom, pebbled stone tile adorn the walls of the double shower that overlooks the hillsides of Marin.
A guest bathroom was designed to compliment the eclectic aesthetic of the home. While in the center of the residence, a spiral acrylic staircase climbs 3 floors acting as a consistent element, tying together the varied yet complementary styles.
Find the right local pro for your project

 Elements Landscape
This is one of our custom outdoor kitchens. It includes a grill station, Green Egg compartment, firewood storage, side burner, warming drawer and custom overhead Pergola.
 Dura Supreme Cabinetry
One important element with any design project is the development of a "design path" (or "color path"), that creates a coherent, well-planned look for the entire space. Oftentimes this is called a "color board" and all the swatches, finishes and fabrics are laid out together to see the entire room (or entire home) and how all the design elements coordinate and work together.
In kitchen design, this includes wall paint colors, cabinetry finish colors, flooring, countertops, and tile along with appliance, plumbing, and hardware finishes. For the interior design with a room or entire home, it includes furnishings and other surfaces as well. The idea is to create a cohesive look for the entire space.
To create a color path for your home or remodeling project, begin with your neutral colors and then select the other colors for your space. The colors you select may be based on your existing furnishings, a favorite piece of art, or simply colors that resonate to you. In order to create a visually appealing space, let this color page guide your color selections going forward.
Neutral colors (gray, beige, taupe or white) will usually be the background palette with 1-3 other dominant colors layered.
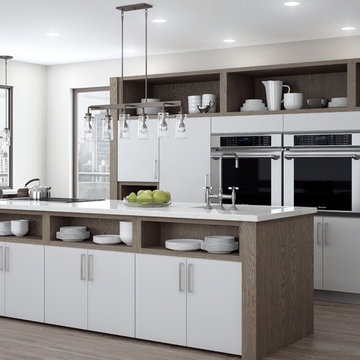
For contemporary or transitional designs, oftentimes a sleek, neutral palette is selected and it's important for all colors to be consistent with this palette. For this soft contemporary kitchen, a neutral palette of gray wood-tone (Weathered "A" finish on Oak) with white-gray paint, stainless and black appliances were selected and then carefully blended throughout the home for a clean, sleek appearance.
Once the "color path" was selected, the cabinetry was specified in the appropriate colors and all of the surfaces, soft goods, plateware, and accent pieces were selected to coordinate.
Featuring Dura Supreme's Bria Frameless Cabinetry shown with the Dura Supreme's Chroma door style. The Chrome door style is one of our many classic slab cabinet door styles. This design combines our Pearl light gray paint finish with our Weathered "A" finish on Red Oak for the accents and shelving.
Request a FREE Dura Supreme Brochure Packet:
http://www.durasupreme.com/request-brochure
Find a Dura Supreme Showroom near you today:
http://www.durasupreme.com/dealer-locator
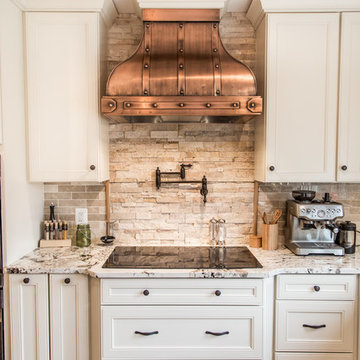
 Elements Design Co. (DBA Kitchen Style, LLC)
Antique white kitchen-
Design and Photography by Vince Winteregg of Kitchen Style, LLC.
Installation by Rochefort Construction, Inc.
Kitchen - traditional kitchen idea in Tampa
Kitchen - traditional kitchen idea in Tampa
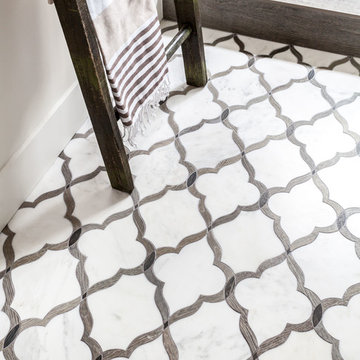
 Juxtaposed Interiors
Kat Alves-Photography
Example of a small cottage home design design in Sacramento
Example of a small cottage home design design in Sacramento
Sponsored
Columbus, OH

Wannemacher Interiors
Customized Award-Winning Interior Design Solutions in Franklin Cnty OH
 Save home
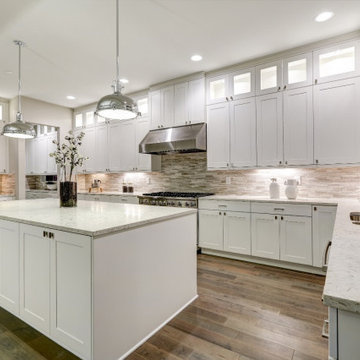
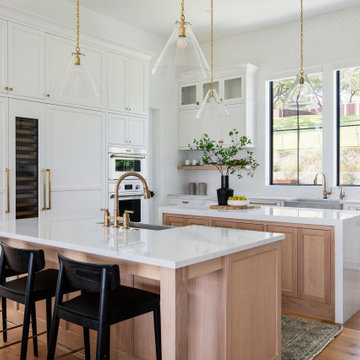
Why are White Shaker Cabinets Still Considered a Classic?
Every few years, if you remodel your kitchen because it feels old, then white shaker cabinets are what you need. Most homeowners feel the need to revamp their kitchen not because the cabinets have worn out but because the interior is a bit old-fashioned. One of the best solutions to this issue is to utilize white shaker cabinets. These are classic, timeless kitchen elements that last longer complements everything, and rarely make your kitchen look outdated.
For this reason, in this article, we have discussed why you need white shaker cabinets in your kitchen and how you can style them.
What is a White Shaker Cabinet?
White shaker cabinets are not new. In fact, these cabinets date back to 1700 when this style was found in every home. These cabinets have a classic look because of recessed door panels, a five-piece door, and a traditional look of pine, maple, or chestnut. Of course. white shaker cabinets are unique and attractive at the same time.
The material used to make these cabinets also makes them durable. You can easily purchase it in less pricing than other wood cabinets, and you can clean it easily. The simplistic structure of white shaker cabinets also makes them complement every type of kitchen; modern or traditional. You can find these cabinets in other light finishes as well, such as peach, off-white, brown, wood brown, etc. The reason we are focusing on white is that this color is timeless and the design of the shaker cabinet is too, which together makes the best combination. You can perfectly strike a chord between every kitchen element if you pair it with white shaker cabinets .
Why White?
The color which is always in style is white. It is highly unlikely to ruin your interior with this color if well-coordinated and properly lit. This is why white shaker cabinets are highly preferred by users.
Here are some reasons to choose white shaker cabinets over other options:
Timeless
Over years, our idea of perfect design changes, and our understanding of the interior also modify. This changes the way we want our kitchen interiors. Hence, if you select vibrant kitchen cabinets and off colors for your countertop, flooring, and paint, then you may end up changing it every few years.
To avoid that from happening, just use white shaker cabinets. In multiple decades, white shaker cabinets have never ceased being classic. White is timeless and it never goes out of trend. Even when you need to change the paint or fittings, you can reduce the cost of cabinets for multiple years.
Versatile
White shaker cabinets are versatile because you have an array of options. You can incorporate multiple elements in your kitchen and tweak color coding and design of countertop, flooring, and paint. For instance, with white shaker cabinets, you can pair white textured back tiles. You can even pair your white cabinets with a black marble countertop; two timeless interior elements together!
Clean
White is the color of clean. In hospitals, bathrooms, and hotel rooms, we find a lot of white because it is clean, fresh, and peaceful. This is why everyone is automatically attracted to this color; it looks clean.
However, you may actually have to make efforts to keep these white shaker cabinets clean from dust and dirt.
Complements Everything
Since cabinets form a big portion of your kitchen, it is necessary to make cabinets complement other interior elements. With white shaker cabinets, you don’t even need to worry about that. White compliments every choice of appliance, countertop, artwork, and flooring. If you decide to get marble grey flooring with white cabinets, you can make that work. If you want colorful kitchen furniture, white complements that too. If you wish to use artwork or warm lighting in your kitchen, white automatically goes well with it.
How to Style White Shaker Cabinets?
If you are styling your kitchen with new white shaker cabinets, here’s what you should keep in mind:
• If your kitchen is small, then white is definitely your color. It reflects more light, hence, makes your space look larger and shinier.
• When you have an open kitchen, you need to follow the same theme to the adjoining rooms and slowly phase it out. This consistency won’t make anything look odd.
• If the rest of the house is filled with artwork and colors, you need the same for your kitchen as well. All white may steal away the classic of shaker cabinets.
• Pair your wall textures and flooring choices with appliances, white cabinets, knobs, and other elements for the best look.
• If the theme for the rest of the house is subtle, then you can even design an all-white kitchen with white shaker cabinets.
Conclusion
Whether you are planning to revamp your kitchen/house or sell your property, white shaker cabinets are always classic. They make a statement in your kitchen and offer a new and clean look all the time. Just focus on coordinating other interior elements of your kitchen and stop worrying about cabinets. White shaker cabinets are durable, beautiful, and timeless! Purchase these classic units now.
For this reason, in this article, we have discussed why you need white shaker cabinets in your kitchen and how you can style them.
What is a White Shaker Cabinet?
White shaker cabinets are not new. In fact, these cabinets date back to 1700 when this style was found in every home. These cabinets have a classic look because of recessed door panels, a five-piece door, and a traditional look of pine, maple, or chestnut. Of course. white shaker cabinets are unique and attractive at the same time.
The material used to make these cabinets also makes them durable. You can easily purchase it in less pricing than other wood cabinets, and you can clean it easily. The simplistic structure of white shaker cabinets also makes them complement every type of kitchen; modern or traditional. You can find these cabinets in other light finishes as well, such as peach, off-white, brown, wood brown, etc. The reason we are focusing on white is that this color is timeless and the design of the shaker cabinet is too, which together makes the best combination. You can perfectly strike a chord between every kitchen element if you pair it with white shaker cabinets .
Why White?
The color which is always in style is white. It is highly unlikely to ruin your interior with this color if well-coordinated and properly lit. This is why white shaker cabinets are highly preferred by users.
Here are some reasons to choose white shaker cabinets over other options:
Timeless
Over years, our idea of perfect design changes, and our understanding of the interior also modify. This changes the way we want our kitchen interiors. Hence, if you select vibrant kitchen cabinets and off colors for your countertop, flooring, and paint, then you may end up changing it every few years.
To avoid that from happening, just use white shaker cabinets. In multiple decades, white shaker cabinets have never ceased being classic. White is timeless and it never goes out of trend. Even when you need to change the paint or fittings, you can reduce the cost of cabinets for multiple years.
Versatile
White shaker cabinets are versatile because you have an array of options. You can incorporate multiple elements in your kitchen and tweak color coding and design of countertop, flooring, and paint. For instance, with white shaker cabinets, you can pair white textured back tiles. You can even pair your white cabinets with a black marble countertop; two timeless interior elements together!
Clean
White is the color of clean. In hospitals, bathrooms, and hotel rooms, we find a lot of white because it is clean, fresh, and peaceful. This is why everyone is automatically attracted to this color; it looks clean.
However, you may actually have to make efforts to keep these white shaker cabinets clean from dust and dirt.
Complements Everything
Since cabinets form a big portion of your kitchen, it is necessary to make cabinets complement other interior elements. With white shaker cabinets, you don’t even need to worry about that. White compliments every choice of appliance, countertop, artwork, and flooring. If you decide to get marble grey flooring with white cabinets, you can make that work. If you want colorful kitchen furniture, white complements that too. If you wish to use artwork or warm lighting in your kitchen, white automatically goes well with it.
How to Style White Shaker Cabinets?
If you are styling your kitchen with new white shaker cabinets, here’s what you should keep in mind:
• If your kitchen is small, then white is definitely your color. It reflects more light, hence, makes your space look larger and shinier.
• When you have an open kitchen, you need to follow the same theme to the adjoining rooms and slowly phase it out. This consistency won’t make anything look odd.
• If the rest of the house is filled with artwork and colors, you need the same for your kitchen as well. All white may steal away the classic of shaker cabinets.
• Pair your wall textures and flooring choices with appliances, white cabinets, knobs, and other elements for the best look.
• If the theme for the rest of the house is subtle, then you can even design an all-white kitchen with white shaker cabinets.
Conclusion
Whether you are planning to revamp your kitchen/house or sell your property, white shaker cabinets are always classic. They make a statement in your kitchen and offer a new and clean look all the time. Just focus on coordinating other interior elements of your kitchen and stop worrying about cabinets. White shaker cabinets are durable, beautiful, and timeless! Purchase these classic units now.


 YS BUILT, LLC
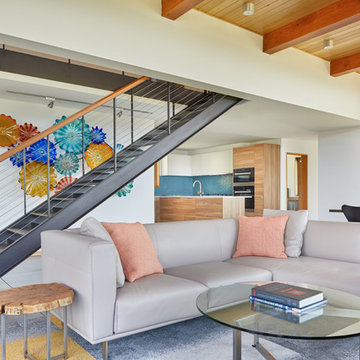
A new custom residence in the Harrison Views neighborhood of Issaquah Highlands.
The home incorporates high-performance envelope elements (a few of the strategies so far include alum-clad windows, rock wall house wrap insulation, green-roofs and provision for photovoltaic panels).
The building site has a unique upper bench and lower bench with a steep slope between them. The siting of the house takes advantage of this topography, creating a linear datum line that not only serves as a retaining wall but also as an organizing element for the home’s circulation.
The massing of the home is designed to maximize views, natural daylight and compliment the scale of the surrounding community. The living spaces are oriented to capture the panoramic views to the southwest and northwest, including Lake Washington and the Olympic mountain range as well as Seattle and Bellevue skylines.
A series of green roofs and protected outdoor spaces will allow the homeowners to extend their living spaces year-round.
With an emphasis on durability, the material palette will consist of a gray stained cedar siding, corten steel panels, cement board siding, T&G fir soffits, exposed wood beams, black fiberglass windows, board-formed concrete, glass railings and a standing seam metal roof.
A careful site analysis was done early on to suss out the best views and determine how unbuilt adjacent lots might be developed.
The total area is 3,425 SF of living space plus 575 SF for the garage.
Photos by Benjamin Benschneider. Architecture by Studio Zerbey Architecture + Design. Cabinets by LEICHT SEATTLE.
 Peter LaBau, LLC
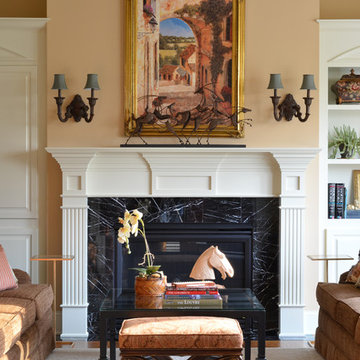
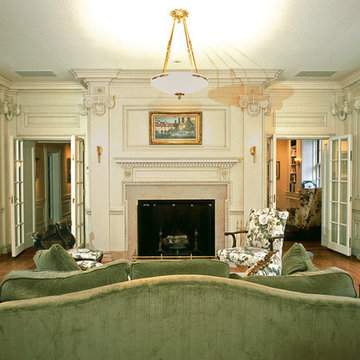
The new, highly decorated interior of a former Library, now used as a Living Room.
Inspiration for a mid-sized timeless formal and enclosed medium tone wood floor living room remodel in Boston with white walls, a standard fireplace, a stone fireplace and no tv
Inspiration for a mid-sized timeless formal and enclosed medium tone wood floor living room remodel in Boston with white walls, a standard fireplace, a stone fireplace and no tv

Sponsored
Columbus, OH

Trish Takacs Design
Award Winning & Highly Skilled Kitchen & Bath Designer in Columbus

 Legendary Escapes Pools
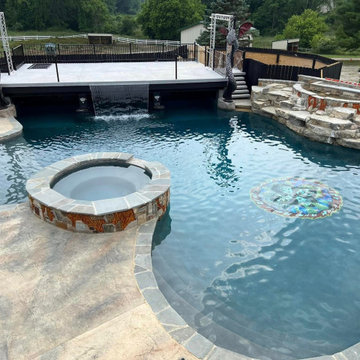
The design strategy included working within the footprint created by the home and backyard, wanting to incorporate a swimming pool “destination” within the backyard that would be large enough to fit the “larger than life” criteria, but without taking away any of the natural beauty or obstructing the view of the horse pastures, barn and nature surrounding the home.
Once the design work began, and the pool area was able to incorporate one of every feature the customer could have wanted, Curtis had some steel grates from a former tilt-a-whirl carnival ride that gave him the idea of suspending a stage over the pool. The initial idea was a modest stage with some waterfall/sheer decent features. With the idea of using steel to form the framework, the stage idea grew into something much more that would include a full stage set up, lighting trusses, a “green room” and staging area. Once the stage was designed to be so large, the pool size and scope needed to match including the patio surround, area underneath the stage, and all the additional features.
The home architecture is a Ranch with a full finished walkout basement adjacent to the pool area. An existing deck had to be removed to allow for the pool build and new Trex deck, as well as a 3 story tall observation tower that overlooks the pool and surrounding horse pastures.
The design strategy was to work within the footprint the house and decks provided to create an extension of the home for outdoor entertaining. Since the exterior of the house was quite long (and dull, the owner equating it to a 1970’s motel), our team needed to incorporate elements to make the space feel more like a backyard resort. The goal was maintaining a cozy at home feel in a grand expanse of space.
It takes a team and a unique blend of artistry to build this project. Sandi Maki, co-owner of the company is responsible for the business side of things, and marketing to reach exceptional customers who allow us to build these backyard dreams. The construction side of our company boasts a diverse, multi-geneational family business. Allan Curtis is the designer/builder and comes up with the fantastic pool plans and ideas. His team consists of his daughter Jesse Curtis, who is high right hand and manages the project just as much as Allan does. She is instrumental in everything from dig day, to tying the steel, pouring the concrete, stonework and tile work, forming the waterfall, applying ecoFinish, pouring and stamping patio, and everything in between. Allan’s nephew Mark Curtis installed and plumbed the three pool filtration systems. Allan’s wife Annie has become very good at stonework on walls and waterfalls adding the unique accents our projects have become known for. Allan’s sister-in-law, Karen Olson also does tile and stonework on the jobs and created the rockstar mural on the patio. Frank DiPiazza assists with structural elements and built the new deck, and college student Brendan Schafer assists where needed and maintains the pool and equipment during the summer on a weekly basis.
As with many homeowners who reach out to Legendary Escapes, this owner, Dale Walter, knew he wanted a “custom” pool without knowing what that really meant. He was able to show Curtis the space, and his initial ideas, and then allowed Allan and his team the freedom to dream and build. The majority of Legendary Escapes customers make the decision to hire the company after the first meeting with Curtis. As long as the project and design are challenging and interesting, the customer meets the criteria of being easy to work with, and is special in their own unique way Curtis will consider taking on their project. From the beginning it is important to Curtis that the customer understands they need to allow the project to take on a life of it’s own, and for Curtis to create without interference or asking too many questions – working together becomes a reality.
The design is typically presented on paper, a hand-colored, hand drawn design that outlines only the large elements, and an accompanying budget which outlines the structural elements and budgets and has a “theme” budget for items to be determined but doesn’t change once it is set.
Once that contract is signed, Curtis and his team over-deliver on what the customer could only have dreamed up in their wildest imagination. Projects proceed in an organic way- not every element is planned before the project begins. As the space begins to take shape, so do the details and finishing elements. When the Rockstar project began, there was no plan for the guitars on the fences, or guitar fire features. The VIP seating area wasn’t added until mid way through the patio pours as the space began to take shape. The murals both in the grotto and on the pool floor were planned just moments before each of them was to be installed. It’s this free-flowing combination of the customers and team’s dreams, ideas, elements and the Legendary Escapes team that creates backyard pools that are as much art as they are design and engineering masterpieces.
 BuilderElements
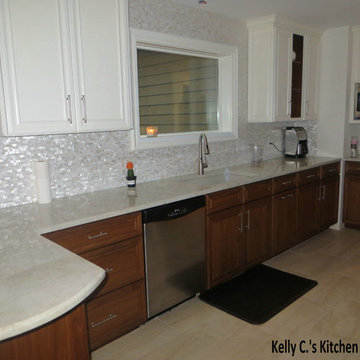
Collection: Light Weight Mother of Pearl Tile
Material: Seashell
Color: Natural White, majority chips are white, with small percentage of natural yellow and minimun natural grey; overall is white
Surface Finish: Glossy, easy for cleaning
Shape: Subway
Size: 12 x 12 In.305*305mm
Chip Size: 3/5 x 1-1/6 In.15*30mm
Thickness: 2mm
Detailed Description: Each sheet of this tile is approximately 1 sq ft per sheet and is mesh mounted on high quality fiber glass for easy installation of your mosaic tile projects.
Application: Mother of Pearl mosaic tiles are impervious to the elements, thus it is great for both interior and exterior use so moisture is not an issue. Mother of Pearl mosaic tiles are great on floors and walls and have been most popular in bathrooms, spas, kitchen backsplash, wall facades and pools as well as a variety of other applications.
Characteristics: The mother of pearl mosaic tile has a zero water absorption rate, and this tile exceeds ANSI standards for water absorption for mosaic tile. It is strong, durable, contamination free, and only the best quality tiles are selected as our tiles are inspected for blemishes before shipment.
Brand Name: Home Elements
Manufacturer: Home Elements,Inc. This manufacturer has the biggest selections of glass mosaic tiles.
Disclaimer: Mother of pearl tile, also called shell tile or shell mosaic tile, is 100% natural and green products made of natural shell, polished and processed by hands. The color variation and occasionally small size variation naturally exist from chip to chip, from sheet to sheet, from job to job. However, the overall sizes are consistent and will NOT have any negative impact on installation; on the contrary, some small variations on sizes reflect the nature of the products thus making your wall or floor tiling project a more natural one. Also, the color variation caused by different computer screen or browser exists from different pc screens. Therefore, the possible color/size variations between the mother of pearl tile sample and actual shipment or the product color shown on the screen and actual shipment should not be considered as quality issues.
 Cassoni Furniture & Accessories
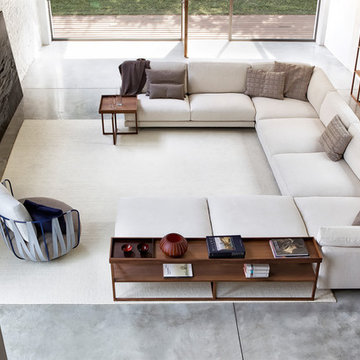
- HOST SECTIONAL. Wooden frame with elastic straps, upholstered in expanded polyurethane, fibre covering matched with fine velveteen. Backrest feather cushions with insert in expanded polyurethane. Seat feather cushions with insert in expanded polyurethane, with differentiated density, upholstered in cotton and heavy cotton. Feet in metal, powder coated, with non-slip ferrules.
Sofa with a particular strap system in the backrest, enabling a flexion up to 2'' inches for a perfect ergonomics and moments of pure relaxation. Elements upholstered in completely removable fabric, elements upholstered in leather with cushions having removable covers and structure with non removable covers.
- MATCH SIDE TABLE. Elegant side tables, in square or rectangular versions, and other elements comprising a bookcase, may be positioned in various manners around the sofa to perform a number of functions, such as: enclosing the seating area, substituting the corner module of the sofa, for positioning between one seating element and another, standing beside the armrest or behind the backrest to become a sofa back furnishing element, or transforming modular seating into dinner sofas. Moreover, all elements may be accessorized with useful trays, for positioning when and where they are needed. Small tables, Consoles, Sofa-back element and bookcase elements for armrest side and sofa back in Canaletto walnut.
Auxiliary Table: 26''W x 26''5/8D x 26''5/8H.
Sofa-back element: 78''3/4W x 12''5/8D x 26''5/8H.
- MIAMI LOUNGE CHAIR. Miami is a chair without frontiers.
Its fabric, woven in varying consistencies, is padded for seating and structured for containing, while also tracing a free and easy, yet comfortable graphic design. The fabric weave executed in bands creates the necessary volume to contain the padding, in what amounts to a new spatial concept. Armchair with pearl white metal frame and bright blue or grey-brown elastic bands. Chair cover in dove grey or neutral fabric and backrest cushions in jacquard, prince of wales checks and interwoven fabric. Endowed with a round swivel base, its spacious seat and two lumbar cushions, one large and another smaller one, guarantee maximum comfort.
38''1/8W x 31''1/2D x 35''1/2H.
 Aardvark Architecture
This proposal is for a new two-story home on the vacant heavily wooded lot with an existing 150-foot-long driveway lined by several beautiful oak trees culminating in a behemoth 43-inch oak tree where the driveway meets the main lot. The far end of the driveway terminates in a grove of three 43/40/43-inch redwoods and at the very center of the vacant lot stands a gargantuan V-twin 59-inch redwood tree paired with a “small” 29-inch redwood tree. The owners want to build a beautiful contemporary-styled home for their family that fully enjoys and embraces the mature trees on their cozy 65-foot by 100-foot lot.
As with all small, constrained lots, this project’s site design started first with meeting the relatively large parking and car maneuvering requirements. Menlo Park’s Department of Transportation typically requires side-facing garages to have 24-feet of backup space. So that they could give the largest feature redwood tree on site an added four feet (50%) of clearance outside of its critical root zone, the owners agreed to install a vehicle turntable at the end of their driveway to eliminate the extra four feet of space needed to back up and turnaround. This allowed them to pull their garage forward an additional four feet towards the front property line on the panhandle side, drastically reducing the rest of the home’s impact on the gargantuan V-Twin paired redwood tree at the center of the lot.
One of the owners has mobility issues, and accordingly, they first sought to design a one-story floor plan that incorporated all their family’s needs including plenty of covered patio and deck space to enjoy our fantastic California weather. But that single-story footprint spread too far into the critical root zones of several of the redwood trees on site, even despite the use of the vehicle turntable. During my interview process with the owners, they made it clear to me that one of their primary concerns is ensuring that the largest trees on site would thrive and become features of their new home after construction is complete. The single-story designs that removed the grove of three huge redwood trees were non-starters, as was the skimpy 5x10 master bath I designed when trying to squeeze the whole house program into an overly compromised single-story design. It was therefore deemed necessary to go with a two-story design despite the owner’s mobility issues. This two-story design has a much more compact ground floor footprint and has no bedrooms downstairs, other than the detached ADU. The owners must give up the floor area and incur the costs to install a residential elevator to access their upstairs master suite.
Our ground floor footprint is smaller due to the two-story design decision, and our foundation is pulled away from the trees thanks to the vehicle turntable. Yet, a tiny portion of the home’s ground floor footprint still encroaches into the critical root zones of the largest 59” redwood tree. Therefore, as outlined in the Arborist Report prepared by Aesculus Arboricultural Consulting, the structural engineers are incorporating an array of drilled piers and shallow-grade beams for the main home’s foundation and deck area nearest the redwood’s critical root zone. This drilled piers and grade beam foundation is a type of “bridging” foundation as outlined in Aesculus’ report to preserve the health of these trees that the property was designed around. The rest of the foundation will be constructed as an insulated slab-on-grade foundation to minimize the number of steps and ramps needed for the owners to enjoy their home and patio areas.
Despite the owner’s desire to keep as many trees as possible on site, and despite the smaller ground floor footprint and the advantage of the vehicle turntable, the need for a 20x20-foot garage and 20x20/25-foot guest parking space on our panhandle lot requires the removal of two heritage trees in the required driveway, a 16” coast redwood, and a 17” coast redwood. An alternate design, such as swapping the garage and guest parking locations north-to-south, still requires the removal of these two trees for vehicle maneuvering but has the added disadvantage of cutting off the home’s sightlines to the behemoth 43” oak tree just outside the currently proposed front patio space and living room. Jim Redman of Elements Landscape is proposing 13 new trees be planted on site to replace the lost value of these two heritage coast redwood trees.
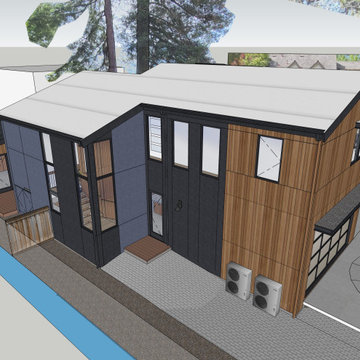
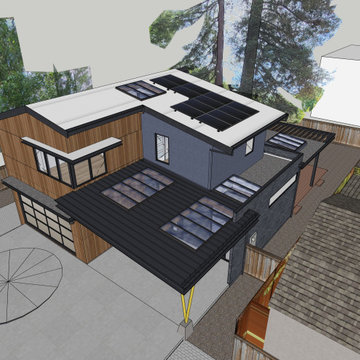
This contemporary architectural design features clean lines, and an abundance of full-height windows and large skylights to best take in the immense trees on site. To blend in with the forest-like setting, the home boasts a mix of rich textures and features a color palette of natural wood tones contrasted with dark blue and black. Once through the new steel gate at the street and down the 150-foot tree-lined driveway, a large covered front patio becomes visible past the neighbor’s detached accessory structure. The covered patio is just across the driveway from the beautiful 43” behemoth coast live oak. The single plane of the covered patio roof is delicately supported by a pair of steel posts in a “V-twin” configuration much like the largest redwood trees that tower over the center of the lot and will still be visible above the new two-story home, even from the front yard. The patio is covered in a dark-colored standing seam roof, with steel C-channel fascias, and tongue-and-groove wood ceiling planks on the underside. Generously sized skylights on the patio roof and inside the living area allow for impressive views of the amazing oak canopy as well as precious natural light.
Supporting the sloped covered patio on the other side is the two-car garage with a secondary bedroom suite stacked above the garage. This two-story volume is to be clad in vertical clear-coated redwood siding, to tie in with the grove of three 43-inch redwood trees just beyond. The garage door, and the bank of windows for Bedroom#2 above feature a steel fascia eyebrow header feature to provide shade and overhang protection, as we are not proposing a large overhang at this “redwood trunk”. The garage and bedroom volume are pulled 16 feet away from the side property line, instead of the minimum required setback of 6’-6”, thus leaving plenty of room for the redwood grove and existing mature pear tree to continue to thrive. This existing mature green screen in this 16-foot-wide side yard is a feature worth soaking in, which is why tall windows with low sill heights are proposed for both the stairs and the upstairs hallway. Though it may be infrequent to approve side-facing 2nd floor windows with sill heights as low as what we’re proposing, we are confident that the mature green screen and the over 16-foot-wide side yard are sufficient to provide for the continued privacy of our neighbor’s rear yard space, especially considering theses windows are in walkway zones.
The covered patio at the front entry is also bound by the 10-foot-tall living room. The great room is clad in a dark blue brick veneer, which wraps around all three sides of the living room. Upon entering the home from the covered patio, you are immediately greeted with one of the most impressive features of the home’s design: a 10-foot-tall by 24-foot-wide set of sliding glass doors. From the entry, this huge opening gives merely an initial glimpse of the massive trunks of the gargantuan V-twin redwoods sitting at the center of the lot. All three sliding glass panels open directly out into the smaller partially covered deck in the rear. This roof overhang element matches the design of the front patio with a steel C-channel fascia and a large skylight. But the rear deck’s roof element is set flat at a ten-foot ceiling height so that the living room’s ceiling seems to float above and out beyond the expanse of full-height sliding doors, thus creating an indoor-outdoor living space that will feel much larger than the home’s actual footprint. This rear covered deck is smaller than the patio in the front and also has a mix of solid and open-slatted roofing to allow for more solar access for the relatively small amount of open sky available.
The downstairs living room is open to the dining and kitchen areas, as well as the stair-and-elevator tower beyond. The stair tower is very open and glassy, and the stairs wind up and around the redwood-clad elevator tower. From certain perspectives in the 16-foot-wide side yard, it will almost seem as if the grove of three redwoods has a fourth tree that the house and the stairs were carefully built around. Other than the 3-foot-wide windows, the exterior walls of the stair tower, downstairs utility spaces, and Bedroom#3 above are finished in cement plaster, painted dark blue and black. The sloped roof over the stair-and-elevator tower continues cleanly over the area of upstairs Bedroom#3. This roof level is set by the side daylight plane and only yields an inside wall height of just under 6 feet in height. The owners are satisfied that the rest of this upstairs room has a nice vaulted ceiling to make up for the one short wall under the daylight plane.
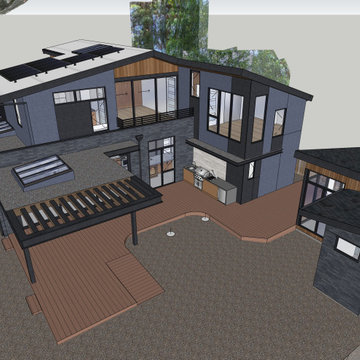
The rest of the ground floor adjacent to the stair tower consists of a small utility wing containing a half-bath, laundry, storage area, and an exterior alcove for the electric heat pump HVAC unit. This short wing also gives more accessible access to the rear yard deck, as well as a backdrop for an outdoor kitchen. The bright white stone backsplash for the outdoor kitchen provides contrast to the otherwise consistent use of cement plaster painted dark blue and black for the two-story wing closest to the detached ADU. Though Bedroom#3 is stacked directly above this small wing, it is relatively short to comply with the side daylight plane of this narrow lot. Still, to further help break up the scale of this wall, another steel fascia eyebrow element is set about 8 feet above the rear deck.
The master suite sits centered above the ten-foot-tall great room. The master bedroom and its balcony, as well as the master bathtub area, have a commanding view of the central redwood trees and their impressive canopy, though the balcony is mostly recessed and should pose no privacy concerns to the neighbor’s rear yards. The master balcony parapet is clad in the same brick veneer continuing up from the living room below. A dark-painted metal rail makes up the rest of the open guardrail height. The entire length of the master balcony is comprised of 9-foot-tall sliding glass doors, but the area above the doors, as well as the area below the master bathroom windows, is accented with more redwood siding. The remainder of the master suite bathroom and walk-in closet is finished in cement plaster painted dark blue. The master bathroom has one side yard-facing window but will be frosted glass for both the owner’s and the neighbor’s privacy.
The 2nd floor is capped under a simple gable roof design with one roof ridge and varying eave and rake overhangs depending on the 2nd-floor layout and solar orientation. Since these roof planes are quite difficult to see in the middle of the heavily wooded panhandle lot, we are proposing a white TPO roofing for these two upper roof planes as a more sustainable choice compared to more dark-colored roofing like the covered patios and detached ADU.
The owners also wish to build a detached 292-square-foot Accessory Dwelling Unit (ADU) as an office and guest suite. For the ADU foundation to be situated outside the central redwood tree’s critical root zone, this relatively tiny structure takes advantage of the narrower 4-foot side and rear setbacks allowed for ADUs smaller than 800 square feet. The small L-shaped detached ADU frames a wonderful quasi-courtyard around the gargantuan V-twin redwoods at the center of the lot. The ADU shares a matching material palette consisting of cement plaster painted blue and black, vertical redwood siding and soffits, and thin brick veneer. The ADU also features large full-height windows. The only difference between the main home and the ADU material palette is that the roofing will be a dark composition shingle roofing since it will be quite visible from the master balcony.
 Aardvark Architecture
This proposal is for a new two-story home on the vacant heavily wooded lot with an existing 150-foot-long driveway lined by several beautiful oak trees culminating in a behemoth 43-inch oak tree where the driveway meets the main lot. The far end of the driveway terminates in a grove of three 43/40/43-inch redwoods and at the very center of the vacant lot stands a gargantuan V-twin 59-inch redwood tree paired with a “small” 29-inch redwood tree. The owners want to build a beautiful contemporary-styled home for their family that fully enjoys and embraces the mature trees on their cozy 65-foot by 100-foot lot.
As with all small, constrained lots, this project’s site design started first with meeting the relatively large parking and car maneuvering requirements. Menlo Park’s Department of Transportation typically requires side-facing garages to have 24-feet of backup space. So that they could give the largest feature redwood tree on site an added four feet (50%) of clearance outside of its critical root zone, the owners agreed to install a vehicle turntable at the end of their driveway to eliminate the extra four feet of space needed to back up and turnaround. This allowed them to pull their garage forward an additional four feet towards the front property line on the panhandle side, drastically reducing the rest of the home’s impact on the gargantuan V-Twin paired redwood tree at the center of the lot.
One of the owners has mobility issues, and accordingly, they first sought to design a one-story floor plan that incorporated all their family’s needs including plenty of covered patio and deck space to enjoy our fantastic California weather. But that single-story footprint spread too far into the critical root zones of several of the redwood trees on site, even despite the use of the vehicle turntable. During my interview process with the owners, they made it clear to me that one of their primary concerns is ensuring that the largest trees on site would thrive and become features of their new home after construction is complete. The single-story designs that removed the grove of three huge redwood trees were non-starters, as was the skimpy 5x10 master bath I designed when trying to squeeze the whole house program into an overly compromised single-story design. It was therefore deemed necessary to go with a two-story design despite the owner’s mobility issues. This two-story design has a much more compact ground floor footprint and has no bedrooms downstairs, other than the detached ADU. The owners must give up the floor area and incur the costs to install a residential elevator to access their upstairs master suite.
Our ground floor footprint is smaller due to the two-story design decision, and our foundation is pulled away from the trees thanks to the vehicle turntable. Yet, a tiny portion of the home’s ground floor footprint still encroaches into the critical root zones of the largest 59” redwood tree. Therefore, as outlined in the Arborist Report prepared by Aesculus Arboricultural Consulting, the structural engineers are incorporating an array of drilled piers and shallow-grade beams for the main home’s foundation and deck area nearest the redwood’s critical root zone. This drilled piers and grade beam foundation is a type of “bridging” foundation as outlined in Aesculus’ report to preserve the health of these trees that the property was designed around. The rest of the foundation will be constructed as an insulated slab-on-grade foundation to minimize the number of steps and ramps needed for the owners to enjoy their home and patio areas.
Despite the owner’s desire to keep as many trees as possible on site, and despite the smaller ground floor footprint and the advantage of the vehicle turntable, the need for a 20x20-foot garage and 20x20/25-foot guest parking space on our panhandle lot requires the removal of two heritage trees in the required driveway, a 16” coast redwood, and a 17” coast redwood. An alternate design, such as swapping the garage and guest parking locations north-to-south, still requires the removal of these two trees for vehicle maneuvering but has the added disadvantage of cutting off the home’s sightlines to the behemoth 43” oak tree just outside the currently proposed front patio space and living room. Jim Redman of Elements Landscape is proposing 13 new trees be planted on site to replace the lost value of these two heritage coast redwood trees.
This contemporary architectural design features clean lines, and an abundance of full-height windows and large skylights to best take in the immense trees on site. To blend in with the forest-like setting, the home boasts a mix of rich textures and features a color palette of natural wood tones contrasted with dark blue and black. Once through the new steel gate at the street and down the 150-foot tree-lined driveway, a large covered front patio becomes visible past the neighbor’s detached accessory structure. The covered patio is just across the driveway from the beautiful 43” behemoth coast live oak. The single plane of the covered patio roof is delicately supported by a pair of steel posts in a “V-twin” configuration much like the largest redwood trees that tower over the center of the lot and will still be visible above the new two-story home, even from the front yard. The patio is covered in a dark-colored standing seam roof, with steel C-channel fascias, and tongue-and-groove wood ceiling planks on the underside. Generously sized skylights on the patio roof and inside the living area allow for impressive views of the amazing oak canopy as well as precious natural light.
Supporting the sloped covered patio on the other side is the two-car garage with a secondary bedroom suite stacked above the garage. This two-story volume is to be clad in vertical clear-coated redwood siding, to tie in with the grove of three 43-inch redwood trees just beyond. The garage door, and the bank of windows for Bedroom#2 above feature a steel fascia eyebrow header feature to provide shade and overhang protection, as we are not proposing a large overhang at this “redwood trunk”. The garage and bedroom volume are pulled 16 feet away from the side property line, instead of the minimum required setback of 6’-6”, thus leaving plenty of room for the redwood grove and existing mature pear tree to continue to thrive. This existing mature green screen in this 16-foot-wide side yard is a feature worth soaking in, which is why tall windows with low sill heights are proposed for both the stairs and the upstairs hallway. Though it may be infrequent to approve side-facing 2nd floor windows with sill heights as low as what we’re proposing, we are confident that the mature green screen and the over 16-foot-wide side yard are sufficient to provide for the continued privacy of our neighbor’s rear yard space, especially considering theses windows are in walkway zones.
The covered patio at the front entry is also bound by the 10-foot-tall living room. The great room is clad in a dark blue brick veneer, which wraps around all three sides of the living room. Upon entering the home from the covered patio, you are immediately greeted with one of the most impressive features of the home’s design: a 10-foot-tall by 24-foot-wide set of sliding glass doors. From the entry, this huge opening gives merely an initial glimpse of the massive trunks of the gargantuan V-twin redwoods sitting at the center of the lot. All three sliding glass panels open directly out into the smaller partially covered deck in the rear. This roof overhang element matches the design of the front patio with a steel C-channel fascia and a large skylight. But the rear deck’s roof element is set flat at a ten-foot ceiling height so that the living room’s ceiling seems to float above and out beyond the expanse of full-height sliding doors, thus creating an indoor-outdoor living space that will feel much larger than the home’s actual footprint. This rear covered deck is smaller than the patio in the front and also has a mix of solid and open-slatted roofing to allow for more solar access for the relatively small amount of open sky available.
The downstairs living room is open to the dining and kitchen areas, as well as the stair-and-elevator tower beyond. The stair tower is very open and glassy, and the stairs wind up and around the redwood-clad elevator tower. From certain perspectives in the 16-foot-wide side yard, it will almost seem as if the grove of three redwoods has a fourth tree that the house and the stairs were carefully built around. Other than the 3-foot-wide windows, the exterior walls of the stair tower, downstairs utility spaces, and Bedroom#3 above are finished in cement plaster, painted dark blue and black. The sloped roof over the stair-and-elevator tower continues cleanly over the area of upstairs Bedroom#3. This roof level is set by the side daylight plane and only yields an inside wall height of just under 6 feet in height. The owners are satisfied that the rest of this upstairs room has a nice vaulted ceiling to make up for the one short wall under the daylight plane.
The rest of the ground floor adjacent to the stair tower consists of a small utility wing containing a half-bath, laundry, storage area, and an exterior alcove for the electric heat pump HVAC unit. This short wing also gives more accessible access to the rear yard deck, as well as a backdrop for an outdoor kitchen. The bright white stone backsplash for the outdoor kitchen provides contrast to the otherwise consistent use of cement plaster painted dark blue and black for the two-story wing closest to the detached ADU. Though Bedroom#3 is stacked directly above this small wing, it is relatively short to comply with the side daylight plane of this narrow lot. Still, to further help break up the scale of this wall, another steel fascia eyebrow element is set about 8 feet above the rear deck.
The master suite sits centered above the ten-foot-tall great room. The master bedroom and its balcony, as well as the master bathtub area, have a commanding view of the central redwood trees and their impressive canopy, though the balcony is mostly recessed and should pose no privacy concerns to the neighbor’s rear yards. The master balcony parapet is clad in the same brick veneer continuing up from the living room below. A dark-painted metal rail makes up the rest of the open guardrail height. The entire length of the master balcony is comprised of 9-foot-tall sliding glass doors, but the area above the doors, as well as the area below the master bathroom windows, is accented with more redwood siding. The remainder of the master suite bathroom and walk-in closet is finished in cement plaster painted dark blue. The master bathroom has one side yard-facing window but will be frosted glass for both the owner’s and the neighbor’s privacy.
The 2nd floor is capped under a simple gable roof design with one roof ridge and varying eave and rake overhangs depending on the 2nd-floor layout and solar orientation. Since these roof planes are quite difficult to see in the middle of the heavily wooded panhandle lot, we are proposing a white TPO roofing for these two upper roof planes as a more sustainable choice compared to more dark-colored roofing like the covered patios and detached ADU.
The owners also wish to build a detached 292-square-foot Accessory Dwelling Unit (ADU) as an office and guest suite. For the ADU foundation to be situated outside the central redwood tree’s critical root zone, this relatively tiny structure takes advantage of the narrower 4-foot side and rear setbacks allowed for ADUs smaller than 800 square feet. The small L-shaped detached ADU frames a wonderful quasi-courtyard around the gargantuan V-twin redwoods at the center of the lot. The ADU shares a matching material palette consisting of cement plaster painted blue and black, vertical redwood siding and soffits, and thin brick veneer. The ADU also features large full-height windows. The only difference between the main home and the ADU material palette is that the roofing will be a dark composition shingle roofing since it will be quite visible from the master balcony.
 Aardvark Architecture
This proposal is for a new two-story home on the vacant heavily wooded lot with an existing 150-foot-long driveway lined by several beautiful oak trees culminating in a behemoth 43-inch oak tree where the driveway meets the main lot. The far end of the driveway terminates in a grove of three 43/40/43-inch redwoods and at the very center of the vacant lot stands a gargantuan V-twin 59-inch redwood tree paired with a “small” 29-inch redwood tree. The owners want to build a beautiful contemporary-styled home for their family that fully enjoys and embraces the mature trees on their cozy 65-foot by 100-foot lot.
As with all small, constrained lots, this project’s site design started first with meeting the relatively large parking and car maneuvering requirements. Menlo Park’s Department of Transportation typically requires side-facing garages to have 24-feet of backup space. So that they could give the largest feature redwood tree on site an added four feet (50%) of clearance outside of its critical root zone, the owners agreed to install a vehicle turntable at the end of their driveway to eliminate the extra four feet of space needed to back up and turnaround. This allowed them to pull their garage forward an additional four feet towards the front property line on the panhandle side, drastically reducing the rest of the home’s impact on the gargantuan V-Twin paired redwood tree at the center of the lot.
One of the owners has mobility issues, and accordingly, they first sought to design a one-story floor plan that incorporated all their family’s needs including plenty of covered patio and deck space to enjoy our fantastic California weather. But that single-story footprint spread too far into the critical root zones of several of the redwood trees on site, even despite the use of the vehicle turntable. During my interview process with the owners, they made it clear to me that one of their primary concerns is ensuring that the largest trees on site would thrive and become features of their new home after construction is complete. The single-story designs that removed the grove of three huge redwood trees were non-starters, as was the skimpy 5x10 master bath I designed when trying to squeeze the whole house program into an overly compromised single-story design. It was therefore deemed necessary to go with a two-story design despite the owner’s mobility issues. This two-story design has a much more compact ground floor footprint and has no bedrooms downstairs, other than the detached ADU. The owners must give up the floor area and incur the costs to install a residential elevator to access their upstairs master suite.
Our ground floor footprint is smaller due to the two-story design decision, and our foundation is pulled away from the trees thanks to the vehicle turntable. Yet, a tiny portion of the home’s ground floor footprint still encroaches into the critical root zones of the largest 59” redwood tree. Therefore, as outlined in the Arborist Report prepared by Aesculus Arboricultural Consulting, the structural engineers are incorporating an array of drilled piers and shallow-grade beams for the main home’s foundation and deck area nearest the redwood’s critical root zone. This drilled piers and grade beam foundation is a type of “bridging” foundation as outlined in Aesculus’ report to preserve the health of these trees that the property was designed around. The rest of the foundation will be constructed as an insulated slab-on-grade foundation to minimize the number of steps and ramps needed for the owners to enjoy their home and patio areas.
Despite the owner’s desire to keep as many trees as possible on site, and despite the smaller ground floor footprint and the advantage of the vehicle turntable, the need for a 20x20-foot garage and 20x20/25-foot guest parking space on our panhandle lot requires the removal of two heritage trees in the required driveway, a 16” coast redwood, and a 17” coast redwood. An alternate design, such as swapping the garage and guest parking locations north-to-south, still requires the removal of these two trees for vehicle maneuvering but has the added disadvantage of cutting off the home’s sightlines to the behemoth 43” oak tree just outside the currently proposed front patio space and living room. Jim Redman of Elements Landscape is proposing 13 new trees be planted on site to replace the lost value of these two heritage coast redwood trees.
This contemporary architectural design features clean lines, and an abundance of full-height windows and large skylights to best take in the immense trees on site. To blend in with the forest-like setting, the home boasts a mix of rich textures and features a color palette of natural wood tones contrasted with dark blue and black. Once through the new steel gate at the street and down the 150-foot tree-lined driveway, a large covered front patio becomes visible past the neighbor’s detached accessory structure. The covered patio is just across the driveway from the beautiful 43” behemoth coast live oak. The single plane of the covered patio roof is delicately supported by a pair of steel posts in a “V-twin” configuration much like the largest redwood trees that tower over the center of the lot and will still be visible above the new two-story home, even from the front yard. The patio is covered in a dark-colored standing seam roof, with steel C-channel fascias, and tongue-and-groove wood ceiling planks on the underside. Generously sized skylights on the patio roof and inside the living area allow for impressive views of the amazing oak canopy as well as precious natural light.
Supporting the sloped covered patio on the other side is the two-car garage with a secondary bedroom suite stacked above the garage. This two-story volume is to be clad in vertical clear-coated redwood siding, to tie in with the grove of three 43-inch redwood trees just beyond. The garage door, and the bank of windows for Bedroom#2 above feature a steel fascia eyebrow header feature to provide shade and overhang protection, as we are not proposing a large overhang at this “redwood trunk”. The garage and bedroom volume are pulled 16 feet away from the side property line, instead of the minimum required setback of 6’-6”, thus leaving plenty of room for the redwood grove and existing mature pear tree to continue to thrive. This existing mature green screen in this 16-foot-wide side yard is a feature worth soaking in, which is why tall windows with low sill heights are proposed for both the stairs and the upstairs hallway. Though it may be infrequent to approve side-facing 2nd floor windows with sill heights as low as what we’re proposing, we are confident that the mature green screen and the over 16-foot-wide side yard are sufficient to provide for the continued privacy of our neighbor’s rear yard space, especially considering theses windows are in walkway zones.
The covered patio at the front entry is also bound by the 10-foot-tall living room. The great room is clad in a dark blue brick veneer, which wraps around all three sides of the living room. Upon entering the home from the covered patio, you are immediately greeted with one of the most impressive features of the home’s design: a 10-foot-tall by 24-foot-wide set of sliding glass doors. From the entry, this huge opening gives merely an initial glimpse of the massive trunks of the gargantuan V-twin redwoods sitting at the center of the lot. All three sliding glass panels open directly out into the smaller partially covered deck in the rear. This roof overhang element matches the design of the front patio with a steel C-channel fascia and a large skylight. But the rear deck’s roof element is set flat at a ten-foot ceiling height so that the living room’s ceiling seems to float above and out beyond the expanse of full-height sliding doors, thus creating an indoor-outdoor living space that will feel much larger than the home’s actual footprint. This rear covered deck is smaller than the patio in the front and also has a mix of solid and open-slatted roofing to allow for more solar access for the relatively small amount of open sky available.
The downstairs living room is open to the dining and kitchen areas, as well as the stair-and-elevator tower beyond. The stair tower is very open and glassy, and the stairs wind up and around the redwood-clad elevator tower. From certain perspectives in the 16-foot-wide side yard, it will almost seem as if the grove of three redwoods has a fourth tree that the house and the stairs were carefully built around. Other than the 3-foot-wide windows, the exterior walls of the stair tower, downstairs utility spaces, and Bedroom#3 above are finished in cement plaster, painted dark blue and black. The sloped roof over the stair-and-elevator tower continues cleanly over the area of upstairs Bedroom#3. This roof level is set by the side daylight plane and only yields an inside wall height of just under 6 feet in height. The owners are satisfied that the rest of this upstairs room has a nice vaulted ceiling to make up for the one short wall under the daylight plane.
The rest of the ground floor adjacent to the stair tower consists of a small utility wing containing a half-bath, laundry, storage area, and an exterior alcove for the electric heat pump HVAC unit. This short wing also gives more accessible access to the rear yard deck, as well as a backdrop for an outdoor kitchen. The bright white stone backsplash for the outdoor kitchen provides contrast to the otherwise consistent use of cement plaster painted dark blue and black for the two-story wing closest to the detached ADU. Though Bedroom#3 is stacked directly above this small wing, it is relatively short to comply with the side daylight plane of this narrow lot. Still, to further help break up the scale of this wall, another steel fascia eyebrow element is set about 8 feet above the rear deck.
The master suite sits centered above the ten-foot-tall great room. The master bedroom and its balcony, as well as the master bathtub area, have a commanding view of the central redwood trees and their impressive canopy, though the balcony is mostly recessed and should pose no privacy concerns to the neighbor’s rear yards. The master balcony parapet is clad in the same brick veneer continuing up from the living room below. A dark-painted metal rail makes up the rest of the open guardrail height. The entire length of the master balcony is comprised of 9-foot-tall sliding glass doors, but the area above the doors, as well as the area below the master bathroom windows, is accented with more redwood siding. The remainder of the master suite bathroom and walk-in closet is finished in cement plaster painted dark blue. The master bathroom has one side yard-facing window but will be frosted glass for both the owner’s and the neighbor’s privacy.
The 2nd floor is capped under a simple gable roof design with one roof ridge and varying eave and rake overhangs depending on the 2nd-floor layout and solar orientation. Since these roof planes are quite difficult to see in the middle of the heavily wooded panhandle lot, we are proposing a white TPO roofing for these two upper roof planes as a more sustainable choice compared to more dark-colored roofing like the covered patios and detached ADU.
The owners also wish to build a detached 292-square-foot Accessory Dwelling Unit (ADU) as an office and guest suite. For the ADU foundation to be situated outside the central redwood tree’s critical root zone, this relatively tiny structure takes advantage of the narrower 4-foot side and rear setbacks allowed for ADUs smaller than 800 square feet. The small L-shaped detached ADU frames a wonderful quasi-courtyard around the gargantuan V-twin redwoods at the center of the lot. The ADU shares a matching material palette consisting of cement plaster painted blue and black, vertical redwood siding and soffits, and thin brick veneer. The ADU also features large full-height windows. The only difference between the main home and the ADU material palette is that the roofing will be a dark composition shingle roofing since it will be quite visible from the master balcony.
7