
Search results for "Enhances problem solving" in Home Design Ideas
 User
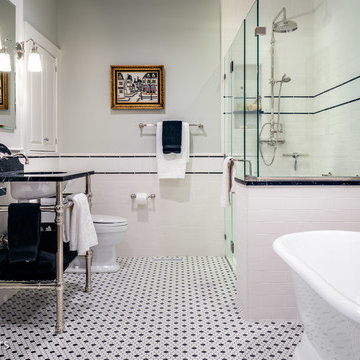
UserOriginal bath of historic 1904 Home in Franklin, TN gets new look by taking in a large hallway that had been made from the original back porch. The original bath of the home was located on the back porch, accessible through the original kitchen and a back door off the hallway between the kitchen and breakfast rooms.
In an earlier remodel, the back porch was taken in to for a hallway leading to a new kitchen addition leaving the original kitchen to become a bedroom. The bathroom was small, there were no closets and no access to the original breakfast room. The new floor plan has solved all of the problems by making the original bath foot print into walk-in closets. Supplying natural light by leaving the original window to the bathroom between the closets and taking in the back hall for the new shower, tub vanities and toilet. Built-in medicine cabinets and storage over the toilet solve storage issues and the original exterior door to the porch was utilized to make the decorative niche over the tub.
 Drury Design
THE SETUP
Sam’s clients wanted to update their hall bathroom used by their three children. The goal was to create a space that is both kid-friendly and elegant, ensuring it remains functional and stylish as the children grow. The original bathroom felt confined due to dark materials and a single-sink vanity. The challenge was to find a design that looks great now and in the future.
Design objectives:
Create a sense of spaciousness
Increase storage for bathroom necessities and daily routines
Enhance lighting
THE REMODEL
Design challenges to be solved:
No structural changes – must keep the tub and wall structure
Transforming a small, dark space into a bright, open one without adding a new window
Multi-user-minded – Improving functionality for multiple users simultaneously
Timeless & kid-friendly – create a comfy kid-friendly look that won’t appear dated as the kids grow older
THE RENEWED SPACE
Design solutions:
Slimmer Tub and Sliding Shower Door installed to free up functional space, making the bathroom feel larger.
Lighter Materials used to reflect more light and add a vibrant feel. Open shelves above the toilet provide storage without making the space feel cramped, while allowing light from the existing window to permeate.
Dual Sink Vanity added, and split the mirror into two, creating individual stations for the kids and enhancing usability during busy routines.
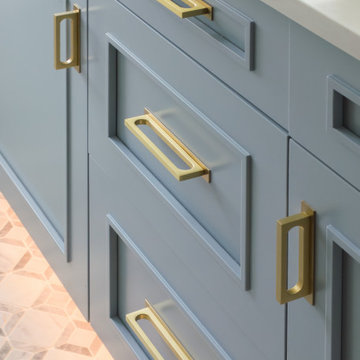
Kid-Friendly Features – Incorporated toe-kick lighting that works as a nightlight, a lower-mounted shower handheld, and a large, accessible shower niche. The geometric shapes and blue color palette contribute to a fun yet sophisticated look.
The clients are thrilled with the transformation. The bathroom is now fun and elegant, providing a timeless look that will grow with the kids. They appreciate the increased functionality and the bright, open feel of the space.
This remodel successfully blends practical solutions with stylish design, ensuring the hall bathroom meets the needs of a busy family while maintaining a sophisticated look.
 RWH Architect PLLC
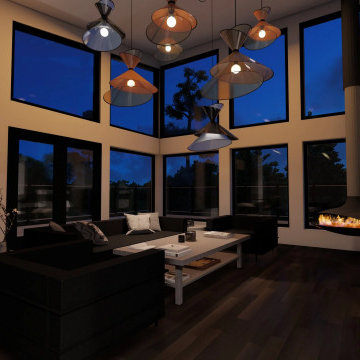
Whistle Hill Lot 2 residence stands as one of the most architecturally ambitious homes in the development, a striking example of RWH Architect’s commitment to elevating modern design. Defined by its dramatic butterfly roof and a façade composed of clean horizontal cladding, vertical accents, and expansive window groupings, the home captures a sculptural presence rarely seen in the region. This is a residence designed to open itself to its surroundings, embracing light, volume, and long views in a way that signals a new era of contemporary architecture.
The home features an attached three-car garage with an adjacent storage area, creating a practical yet visually streamlined entry sequence. Inside, the first floor is designed around livability and connection to the landscape. The foyer opens into a private office and then flows toward the main living areas. The master suite is intentionally tucked into a quiet corner on the first floor, positioned to overlook the backyard and shaped to allow morning light to filter softly into the space. Adjacent to the master suite is the laundry room, placed strategically for convenience. A secondary bedroom on the first floor includes a walk-in closet, and a nearby three-quarter bath offers flexibility for guests or extended family.
The kitchen serves as the central gathering point of the home, anchored by a large island and complemented by a walk-in pantry. It overlooks an expansive wraparound deck that transitions seamlessly to a lower patio, creating layered outdoor living spaces. Both the dining room and the great room open directly to the deck, enhancing the indoor-outdoor connection. The sunken great room is one of the home’s signature moments, featuring a floating fireplace that appears to hover within the space and accentuates the dramatic ceiling height created by the butterfly roof. The result is a room filled with daylight and volume, a contemporary living environment with an architectural presence that feels both bold and welcoming.
Upstairs, the second floor includes two additional bedrooms, each with walk-in closets, and a full bathroom designed with modern simplicity. From the upper level, the design allows for open views extending back toward the dining room, creating visual connectivity between floors and emphasizing the vertical openness of the home. This intentional play of volume heightens the spatial experience and enhances the sense of modern airiness throughout the interior.
This residence presented several unique design challenges that ultimately helped refine and elevate the final architectural expression. The sweeping butterfly roof created structural complexities due to its dramatic angles and its role in defining the home’s entire visual identity. RWH addressed this by carefully coordinating structural supports and framing patterns that allowed the roof to appear effortless while maintaining its sculptural form. Another significant challenge was balancing the extensive glazing with the need to preserve privacy and energy performance. RWH solved this by thoughtfully arranging high windows, angled openings, and varied window groupings that capture natural light without compromising comfort. Integrating a sunken great room with a floating fireplace required a precise approach to grading, floor transitions, and structural anchoring. Through detailed modeling and coordination, RWH ensured that the fireplace would appear weightless while remaining fully functional and safe. Creating uninterrupted views from the second floor to the dining room also required creative alignment of floor systems and rail detailing, which RWH resolved by designing sleek, integrated guardrails that preserve openness while meeting safety requirements.
Whistle Hill Lot 2 stands as a bold architectural statement and a defining example of the evolving design language within the development. Through innovative forms, expansive volumes, and carefully orchestrated transitions between indoor and outdoor spaces, RWH Architect has created a home that reflects the future of contemporary living in the area—forward-thinking, refined, and undeniably modern.
Find the right local pro for your project
 Drury Design
THE SETUP
The original primary bathroom was characterized by a disjointed and segmented layout. The shower featured a bulky glass-block enclosure that overwhelmed the space visually. There was a considerable amount of open, unused space, and despite having a his and hers vanity, the arrangement lacked personal space for each user, as they shared the conjoined space between the sinks. The toilet was inconveniently located right by the door, with a half-wall partition meant to provide privacy but instead contributing to a cramped and unbalanced feel. Overall, the bathroom’s layout and design were fragmented, failing to make the most of the available space and lacking adequate storage solutions.
Design objectives:
- Reconfigure the layout to enhance functionality and flow.
- Create an elegant, upscale aesthetic that is light and bright.
- Incorporate specialized storage solutions for female hair care needs.
- Increase overall storage capacity.
- Develop a spa-like shower experience.
- Provide a significant wow factor to the space.
THE REMODEL
Design challenges to be solved:
- Repositioning the toilet to a more suitable location.
- Designing hair care storage solutions without cluttering the elegant space.
- Balancing an upscale, elegant design with a feminine touch in the color palette.
- Increasing the brightness of the room without adding windows.
- Completely replacing the existing shower to create a spa-like experience.
- Planning new storage solutions without adding bulkiness or clutter to the cabinetry.
THE RENEWED SPACE
Design solutions:
Toilet Relocation: Moved the toilet by the window, creating a better overall layout that also opened up two full walls for cabinetry and storage solutions.
Specialized Vanity Storage: The left side of the left vanity is the wife’s. Open shelves facing across the vanity can be used for decorative or daily needs items. Pull-out docking drawers with power outlets and metal basins handle hot hair appliances.
Bright and Elegant Color Scheme: White cabinets, countertops, floors, and shower walls keep the space bright. The just-off-white wall color with a hint of pink adds a feminine touch. Thin wainscoting with white trim offers traditional-leaning elegance.
Layered Lighting Strategy: Ceiling can lights, sconces, lighted mirrors, and toe-kick lighting were installed. Natural light-rated bulbs keep the space bright and natural-feeling.
Spa-Like Shower: An extra-large shower was created using the same floor tile materials for continuity. Equipped with a Kohler Anthem system with a shower head, hand-held, and four body sprays. His and Hers niches for separate body care product storage.
Enhanced Storage Solutions: Added a linen cabinet within the vanity area for efficient storage of towels and bathroom essentials.
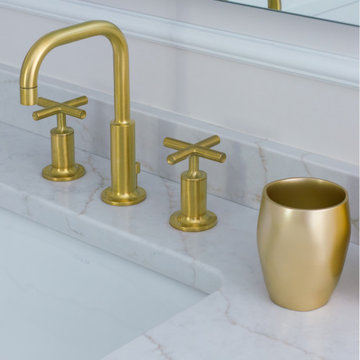
This elegant bathroom feels incredibly spacious now. The color palette and lights keep the room bright and cheery. Gold fixtures, the herringbone pattern on the floor, and exquisite trim work add an elegant touch. With the husband and wife having their own vanity wall sections joined at the corner, each user truly has their own space within the space. The clients are very happy with the final result.
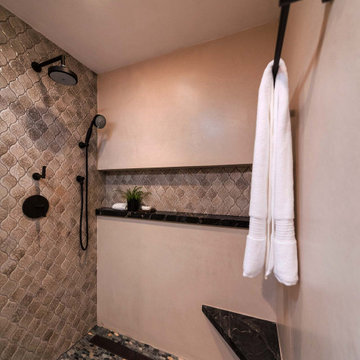
 Designs Daly
The first goal of this project was to address challenges with the home’s flooring and plumbing system. Additionally, the renovation of the guest and master bathrooms was required to meet the client’s preferences and enhance functionality. Ensuring that the new flooring and foundation repair solved the existing crack issue was a crucial aspect of the project. The remodel of the guest bathroom was aimed at making it more suitable for children’s use, while the overhaul of the master bathroom considered the overall style and functionality preferred by the client. Ultimately, the project aimed to enhance the aesthetic appeal and value of the client’s home while addressing the various renovation requirements.
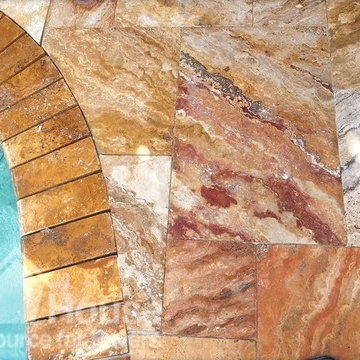
 Paver House
This Tampa Bay homeowner was looking into complete change his backyard. Most pools in Tampa are built with a connected spa. To increase his pool size, he ended up deciding for not to build spa, however, he still wanted an appealing focal point to his pool. To contrast with the beautiful green landscape around the backyard, our customer wanted to add color and movement to his outdoor area.
For the main pool deck area, our customer felt in love with the french pattern autumn blend tumbled travertine pavers. French Pattern Tumbled Autumn Blend Travertine Pavers contain a mixture of mostly red and gold, with some white, dark and light brown tones. Autumn Blend added the perfect amount of color and movement our customer wanted.
Travertine pavers offer a few unique color mixtures that make any outdoor space pops up from others.
A great accent color solution for the coping was the Desert Gold color on the 4×9 tumbled travertine copings. The beautifully blended Desert Gold may be bright and striking but does not lack for warmth and richness as well. To not compete with the strong colors of the pool deck, we advised our customer to add a lighter and more neutral pool tile: 2×2 autumn blend tumbled travertine tiles brought the perfect combination of contrast and harmony we were looking to achieve.
CREATIVITY ON YOUR POOL REMODEL WITH TRAVERTINE PAVER.
Pool remodel with travertine paver does not need to represent neutral colors only. Different than what most people believe, travertine pavers offer a few unique color mixtures that make any outdoor space pop up from others. Don’t be afraid of mixing different patterns, colors and textures to add more character to your outdoor space. Remember that, travertine pavers will display better their color when sealed, like the pictures from this pool remodel. If you are not sure if you would like your paver with the enhanced color, spray the sample with water first.
PREMIUM TRAVERTINE FRENCH PATTERN PAVERS
Pool remodel with travertine paver
POOL REMODEL WITH TRAVERTINE PAVERS
This Tampa Bay homeowner was looking into complete change his backyard. Most pools in Tampa are built with a connected spa. To increase his pool size, he ended up deciding for not to build spa, however, he still wanted an appealing focal point to his pool. To contrast with the beautiful green landscape around the backyard, our customer wanted to add color and movement to his outdoor area.
For the main pool deck area, our customer felt in love with the french pattern autumn blend tumbled travertine pavers. French Pattern Tumbled Autumn Blend Travertine Pavers contain a mixture of mostly red and gold, with some white, dark and light brown tones. Autumn Blend added the perfect amount of color and movement our customer wanted.
pool remodel with travertine paverpool remodel with travertine paverpool remodel with travertine paverpool remodel with travertine paverpool remodel with travertine paver
Previous
Next
Travertine pavers offer a few unique color mixtures that make any outdoor space pops up from others.
A great accent color solution for the coping was the Desert Gold color on the 4×9 tumbled travertine copings. The beautifully blended Desert Gold may be bright and striking but does not lack for warmth and richness as well. To not compete with the strong colors of the pool deck, we advised our customer to add a lighter and more neutral pool tile: 2×2 autumn blend tumbled travertine tiles brought the perfect combination of contrast and harmony we were looking to achieve.
CREATIVITY ON YOUR POOL REMODEL WITH TRAVERTINE PAVER.
Pool remodel with travertine paver does not need to represent neutral colors only. Different than what most people believe, travertine pavers offer a few unique color mixtures that make any outdoor space pop up from others. Don’t be afraid of mixing different patterns, colors and textures to add more character to your outdoor space. Remember that, travertine pavers will display better their color when sealed, like the pictures from this pool remodel. If you are not sure if you would like your paver with the enhanced color, spray the sample with water first.
PREMIUM TRAVERTINE FRENCH PATTERN PAVERS
On this pool remodel project, our customer preferred to use the French Pattern design, which is a good way to break up the monotony of the typical geometric or square appearance of large areas. Just like this outstanding pool deck remodel, patios and walkways will appear more fluid and mosaic by eliminating grout lines and the usual linear effect as well as the need for constant maintenance of the typical square or rectangular paver.
A French Pattern or a Versailles pattern is a paver pattern made up of four different sized tiles. Most French patterns are laid in stone, and nearly all are sold in “bundles” of tile that will cover 16 square feet.
Travertine pavers on your pool deck will reflect heat on hot days, remaining cool to the touch, unlike concrete surface options. Travertine does not discolor or become chalky after installation. The texture of travertine ensures that the stone remains slip resistant for wet feet, while its cool feel prevents burns. Another great advantage of travertine pavers is that there will be no visible grout lines; grout can be a source of both installation problems and added cost for future removal / replacement or up-keep.
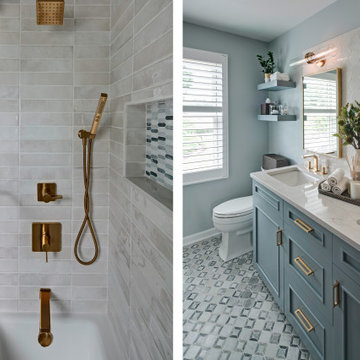 Drury Design
THE SETUP
Sam’s clients wanted to update their hall bathroom used by their three children. The goal was to create a space that is both kid-friendly and elegant, ensuring it remains functional and stylish as the children grow. The original bathroom felt confined due to dark materials and a single-sink vanity. The challenge was to find a design that looks great now and in the future.
Design objectives:
Create a sense of spaciousness
Increase storage for bathroom necessities and daily routines
Enhance lighting
THE REMODEL
Design challenges to be solved:
No structural changes – must keep the tub and wall structure
Transforming a small, dark space into a bright, open one without adding a new window
Multi-user-minded – Improving functionality for multiple users simultaneously
Timeless & kid-friendly – create a comfy kid-friendly look that won’t appear dated as the kids grow older
THE RENEWED SPACE
Design solutions:
Slimmer Tub and Sliding Shower Door installed to free up functional space, making the bathroom feel larger.
Lighter Materials used to reflect more light and add a vibrant feel. Open shelves above the toilet provide storage without making the space feel cramped, while allowing light from the existing window to permeate.
Dual Sink Vanity added, and split the mirror into two, creating individual stations for the kids and enhancing usability during busy routines.
Kid-Friendly Features – Incorporated toe-kick lighting that works as a nightlight, a lower-mounted shower handheld, and a large, accessible shower niche. The geometric shapes and blue color palette contribute to a fun yet sophisticated look.
The clients are thrilled with the transformation. The bathroom is now fun and elegant, providing a timeless look that will grow with the kids. They appreciate the increased functionality and the bright, open feel of the space.
This remodel successfully blends practical solutions with stylish design, ensuring the hall bathroom meets the needs of a busy family while maintaining a sophisticated look.
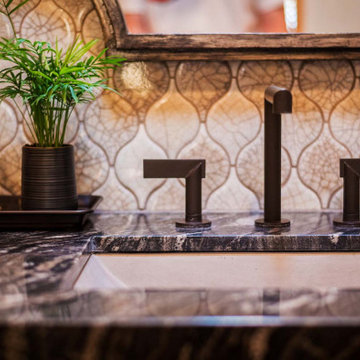 Designs Daly
The first goal of this project was to address challenges with the home’s flooring and plumbing system. Additionally, the renovation of the guest and master bathrooms was required to meet the client’s preferences and enhance functionality. Ensuring that the new flooring and foundation repair solved the existing crack issue was a crucial aspect of the project. The remodel of the guest bathroom was aimed at making it more suitable for children’s use, while the overhaul of the master bathroom considered the overall style and functionality preferred by the client. Ultimately, the project aimed to enhance the aesthetic appeal and value of the client’s home while addressing the various renovation requirements.
 Tile Doctor Ltd
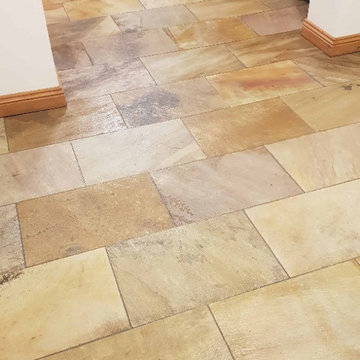
The photos on this page are of a Sandstone Kitchen floor at a house in the High Green suburb of Sheffield. The Sandstone tiles looked grubby and needed some love and attention. Our client was getting fed up trying to keep the stone clean, particularly around the kitchen area where cleaning didn’t seem to make much. You can see how dirty it had become on the before picture below, this is stark contrast to the middle of the of the kitchen where the portable kitchen island normally sits.
I went to the property to get a better look at the problem floor and carried out a small test clean to see which products and methods would have the best impact. The patch came up really clean without much difficulty, so I was confident on being able to restore its appearance.
It was clear to me the original protective sealer had worn off and dirt had become ingrained in the pores of the stone where it was proving difficult to remove. My client was very encouraged by the test clean initial result and agreed to go ahead with the quote. We arranged a suitable time to carry out the work on a day when the family would be out of the way.
I started by taping up the area to make sure the skirting and woodwork were protected from splashing. Once done a strong dilution of Tile Doctor Pro-Clean was sprayed onto Sandstone tile and grout. It was left to dwell for approximately ten minutes to help break down all the grime and dirt and was then worked into the stone using a rotary floor machine fitted with a stiff bristled brush.
This method totally transformed the dull sandstone, the stunning sandstone colours started to leap out and I could see the stone was well on its way to being transformed. The floor was then rinsed several times with water and the now soiled cleaning solution carefully removed with an industrial wet vacuum.
With the floor clean I inspected all the tiles and repeated the process until I was happy the floor was total clean. I should mention It’s not always this easy to clean a stone floor and quite often I find myself having to utilise all sorts of products and methods before I’m totally satisfied it’s as clean as it could possibly be.
With the cleaning done I left the floor to dry out overnight aided with heaters and air blowers.
I returned to seal the floor the next day checking first that the stone was dry with a damp meter. Leaving the blowers on overnight had helped and the readings I took from the floor confirmed it was now ready for sealing.
Earlier I had discussed the different types of sealer available with my clients and they had chosen to have the floor sealed with Tile Doctor Seal & Go. This works really well on Sandstone, enhancing its appearance, improving colour and of course adding protection to the stone to prevent grime and dirt stuck in the pores of the stone. Several coats were applied until I could see if was fully sealed and the right level of finish had been achieved. Sealing a floor can take some time as you need to allow each coat to dry before applying the next.
Once done the floor looked meticulously clean and the new sealer had added a lovely subtle sheen to the stone. My client was very please with the transformation and left the following feedback.
‘Very professional approach, friendly, and offered great advice throughout the job. Very pleased with the finish Cheers Matt we will see you again’
One of the problems we find with many homeowners is that for cleaning they use strong bleach-based cleaning product on their sealed tiles, and this actually strips off the sealer leaving the stone vulnerable to ingrained dirt. As a result, Tile Doctor has developed Tile Doctor Neutral Tile Cleaner, it is pH neutral and gentle enough for everyday use without affecting the sealer.
Matthew Lovett
South Yorkshire Tile Doctor
 Tile Doctor Ltd
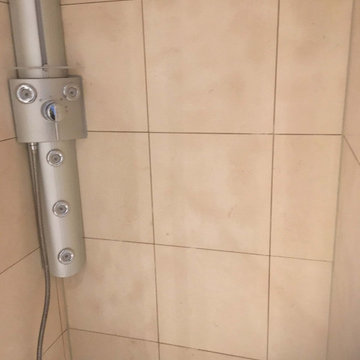
I was asked to look at renovating a shower cubicle at a property in in Manchester city centre that had been clad in White Limestone tiles. I understood the bathroom had been installed 12 years prior, but now the tiles were looking grubby, mouldy and dirty.
The client had lived at the property for the last two years and in an attempt to resolve the problems had used a few different household products such as flash and bleach, they had tried everything, and nothing had helped. I suspected that these strong acidic cleaners had actually made the problem worse by stripping off what was left of the sealer that was protecting the Limestone, allowing dirt to become ingrained in the stone.
I visited the property and ran a few cleaning tests in the shower cubicle with Tile Doctor products. This allows me to see which product will have the best results and gives the customer confidence that we can resolve their issues. The results were immediate, they could see the difference and they were happy to accept my quote and agree a date for my return to complete the work.
I arrived several weeks later and made a start. The tiles were scrubbed by hand with a strong dilution of Tile Doctor Remove and Go with excellent results. This product is designed to remove coatings and sealers, and in this case, it did a great job of drawing out the ingrained stains and dirt build-up. This removed what was left of the sealer and took off most of the dirt and mould. The Limestone tiles and grout were then rinsed with water to remove the soil.
Next I needed to restore the smooth surface of the limestone which had been etched by the use of strong acidic cleaning products. To do this I used a set of six-inch diamond burnishing pads attached to a hand buffer to hone and restore the stone.
I then dried the shower tiles and grout with a heat gun checking the moisture levels with damp meter until I was satisfied it was completely dry.
The last step was to re-seal the Limestone and Grout using a couple of coats of Tile Doctor Colour Grow. This is natural coloured intensifying sealer which provides durable protection to the surface allowing it to breathe and enhancing the colours.
The Customer was amazed with the difference and left the following feedback!
“Kamila was friendly, professional and kept me informed about what to expect before she took on the job and during the tile cleaning. The tiles look absolutely amazing after her work – I feel as though I have a brand new bathroom! Kamila also gave me helpful tips on looking after limestone tiles. I can’t recommend her highly enough.”
For future cleaning I recommended the use of Tile Doctor Aqua-Pro which is a pH neutral shower tile cleaner designed for use on sealed surfaces. Most cleaning products you find in supermarkets are overly strong and will erode the sealer prematurely, so when choosing a cleaning product always read the label and make sure it’s safe to use on Sealed Stone tiles.
Alex Logonzy
Greater Manchester Tile Doctor

 Fitz's Fish Ponds
Our client reached out with a problem for us to solve. Part of his property was an eyesore and difficult to keep up. A tree had fallen into his overgrown pond, it had been leaking for ages, and it had become a major problem for this homeowner.
Mike Hall (Design and Construction manager) saw the land and with the help of Fitz's team and developed this concept of a multi-level waterfall that pours gracefully into the large basin. The challenge was to use the existing layout and keep the feel of the beautiful forest that surrounded it.
This project was a chance to push the limit on scale. We were able to build a large water feature that was complex and build a sustainable healthy pond at the bottom. With over 30,000 gallons of water, our team custom built a filtration system to keep the water clean and healthy for the fish that call it home. The gravel suction grid for filtration worked like a charm. Then added a Used an external pressure filter, to keep the water extra clear.
Our team cleared the whole pond, saved fish, fixed the drainage issues, lined the pond with a massive liner. Then we brought in 50 tons of moss rock boulders. Saved the original bridges and made them stronger and sturdy. Created a look that was natural to the forest surrounding it.
This was an exciting project for the FFP team and we are extremely proud of how it turned out!
 Bridgewater
The new owners were looking forward to living in their new home with an open floor plan, tall vaulted ceilings, and great views. It featured a large Great Room with two big French Doors separating the Dining Room from the Master Bedroom.
But after only a few months they identified a major design flaw: Each of the French Doors had ten glass windows with two large windows above each door. (Check out our before and after designs, traffic flow diagrams and photos of this project.) Glass windows and doors allowed sound and light from guests or the TV in the great room to easily sneak into the bedroom. With unique work and sleep schedules (he’s a pilot, she’s a registered nurse) this design wasn’t working.
Then there was a traffic flow design flaw: The Master Bedroom had a second entrance from a hallway. To get into the bedroom from the hallway you needed to walk down another claustrophobic hallway.
To get from the Master Bedroom to the Master Bath begin at the most remote corner of the bedroom and down a hallway between two closets. Once inside the bath, a huge triangular Jacuzzi dominating the space.
So, from a privacy and traffic flow perspective, this home had some major design issues.
When Craig Weber first met with the owners, he listened to their ideas and concerns. The owners trusted Craig to come up with the most efficient and most effective solution to this design dilemma. He offered a solution that resolved the bed-bath traffic flow problem, offered some bedroom room privacy, and updated the bath.
First, the two French Doors and windows were removed. A new wall was built with sound-absorbing materials, making the Great Room and Dining Room more comfortable spaces for entertaining while creating the bedroom privacy the owners craved.
Solving the Bedroom/Bath traffic flow problem began with removing the two existing closets. The bath door was relocated next to the hall entrance, and then a new walk-in closet was added adjacent to the hallway entrance. The solution offered easy access to and from the bath, closet and hallway without a hint of claustrophobia.
The Master Bath underwent a major transformation designed for convenience and comfort – especially during long, cold Minnesota winters.
Most everything from the former bath was torn out, beginning with the giant Jacuzzi.
A new bathtub that is wider and deeper than the standard size was installed with brushed Nickel fixtures. It’s the perfect place to relax with a glass of wine and candles.
Warm floors are a Minnesota “must have.” The bath’s new ceramic floor features in-floor electric heat. Getting in and out of the tub is easy and comfortable.
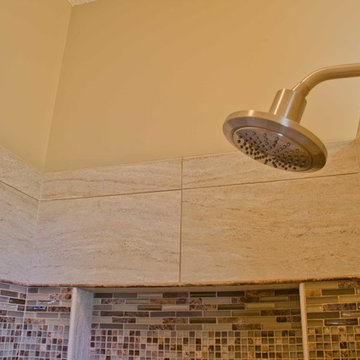
The new walk-in shower again features in-floor heating and a place to sit. The most interesting feature of this shower may the custom ceramic tile installed with unique patterns.
A new vanity Cambria Bradshaw countertops features two under-hung ceramic sinks with matching brushed Nickel fixtures.
Tall ceilings and three glass windows near the ceiling flood the room with natural light. A new energy-efficient window frames an ornamental stained glass window created by the owner’s father – a great personal touch.
A quiet place to sleep. A private dining room for entertaining. A Master Bath to die for. And easy traffic flow. The owners couldn’t have been more delighted with the outcome. And Lilly, their cat, loves it too.
 Best Hot Tubs "Hot Tub and Spa Experts"
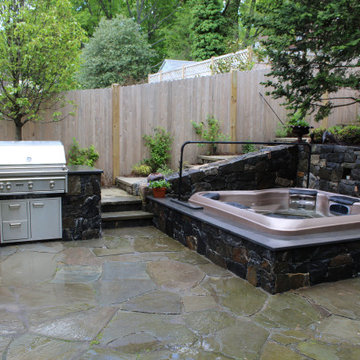
The hot tub installation design closed in the spa only on 3 sides, leaving one side open for repair work. It’s also where the hot tub cover fits onto the spa.
“We recently did a service call for them,” says Bill Renter. “The unenclosed area made it easy to open the control panel and check on the problem they were having. It turned out, in this case, not to be an issue with the hot tub at all. But I was able to diagnose the problem. They had an electricity issue and I recommended a particular switch the electrician could put in. I’m glad I was able to solve the issue for their electrician.”
 Designs Daly
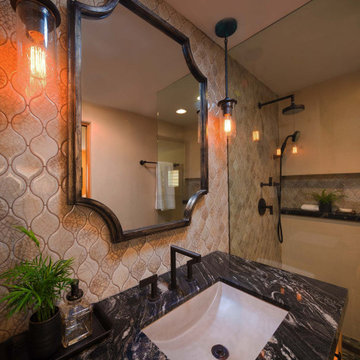
The first goal of this project was to address challenges with the home’s flooring and plumbing system. Additionally, the renovation of the guest and master bathrooms was required to meet the client’s preferences and enhance functionality. Ensuring that the new flooring and foundation repair solved the existing crack issue was a crucial aspect of the project. The remodel of the guest bathroom was aimed at making it more suitable for children’s use, while the overhaul of the master bathroom considered the overall style and functionality preferred by the client. Ultimately, the project aimed to enhance the aesthetic appeal and value of the client’s home while addressing the various renovation requirements.
 Drury Design
The Setup
When our clients decided to remodel their primary bathroom, the goal was to transform the space into a brighter, more open retreat tailored to their needs. The previous layout, with its enclosed zones and limited functionality, no longer met their needs. By reimagining the layout and introducing thoughtful design choices, we created a modern, elegant bathroom that serves their current and future lifestyle.
Design objectives:
- Create a brighter, more open bathroom while maintaining privacy.
- Provide functional storage solutions without relying on the old linen closet.
- Incorporate a freestanding tub, large shower, and a makeup area for added versatility.
- Retain natural light from existing windows.
- Introduce elegant finishes and accents for a timeless aesthetic.
The Remodel
Design challenges to be solved:
- Reconfiguring the layout while keeping the existing plumbing for the toilet.
- Creating storage that houses everything that resided within the linen closet.
- Designing clearance and functionality for a freestanding tub, shower, and makeup area within the limited space.
- Accommodating the client’s desire for a pocket door in the commode room despite spatial constraints.
Introducing accent tile and cabinetry colors that align with the client’s vision yet maintain a cohesive look with the rest of the home.
The Renewed Space
Design solutions:
- Reimagined Layout: Moved the shower from the back of the room, creating a more open feel with additional glass while preserving privacy with a wing wall and bench. The freestanding tub was angled to optimize space and enhance circulation, with textured tile behind it adding visual interest.
- Efficient Storage: Eliminated the original linen closet and incorporated functional base cabinet storage and a designated makeup area for added utility.
- Optimized Access: Adjusted the depth of the makeup vanity to provide sufficient walkway clearance, ensuring a comfortable flow around the tub.
- Tailored Features: Installed a smaller pocket door in the commode room to resolve framing and plumbing limitations.
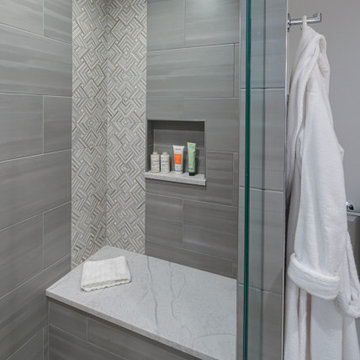
- Elegant Accents: Introduced a subtle marble herringbone mosaic tile in the shower and textured tile behind the tub to enhance the monochromatic palette. Painted cabinetry in a dark gray finish provided a bold yet refined contrast to the light countertops.
Final Thoughts:
The reimagined primary bathroom is a true reflection of the client’s needs and style preferences. By thoughtfully reworking the layout and incorporating functional yet elegant design elements, we created a serene and practical space that serves as a personal retreat. The result is a timeless bathroom that supports their busy lifestyle while providing moments of tranquility.
 AVA service
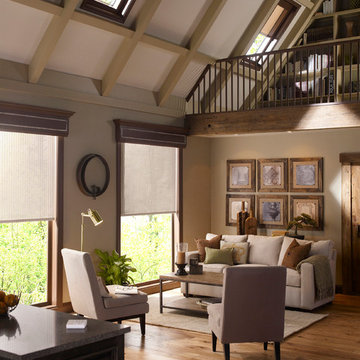
Skylights have always been a problem when it comes to controlling light. Lutron skylight shades can solve this problem with this horizontal shading solution.
 Tile Doctor Ltd
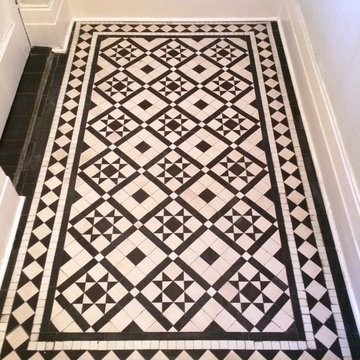
This job was at a house in near Windermere in South Cumbria, a place which is very popular amongst tourists to the Lake District. My client had a Black and White Victorian tiled floor in dire need of a clean and re-seal.
Prior to the application of any cleaning products, my first task was to run damp tests to make sure there were no inherent damp problems. With old floors of this type it’s good to know if there is a damp problem as this will affect the choice of sealer and also the length of time the floor requires to dry.
Fortunately, there were no damp issues present, and I was able to proceed however had the floor been damp and being December I would have offered to carry out the clean and seal in the Summer, when the water tables were lower and the damp levels would be more settled, thus creating a better environment for the sealer to operate in.
I started cleaning the Victorian tiles with Tile Doctor Remove & Go, a product which breaks down old sealers in preparation for a fresh seal to be applied. The product is diluted with water and then scrubbed into the floor with a scrubbing pad fitted to rotary machine; the resulting slurry is then removed using a wet vacuum.
Next step was to apply Tile Doctor Pro-Clean which was applied liberally to the floor, left to dwell for a short period and then agitated with a black scrubbing pad to lift out the ingrained dirt. I also paid special attention to cleaning the grout lines with a stiff scrubbing brush. The floor was then rinsed with clean water, and the resulting residue was extracted using a wet-vac machine.
After the cleaning was completed, the tiles were left for a couple of days to allow them ample time to dry. Upon my return to the house I checked the damp levels again and then applied two coats of the impregnating, colour enhancing sealer Tile Doctor Colour Grow which gives the black tiles more depth of colour, along with the robust surface seal and Matt finish my client had requested.
My client was exceptionally pleased the results – but really, the photographs speak for themselves.
Heidi Taylor
South Cumbria
 RWH Architect PLLC
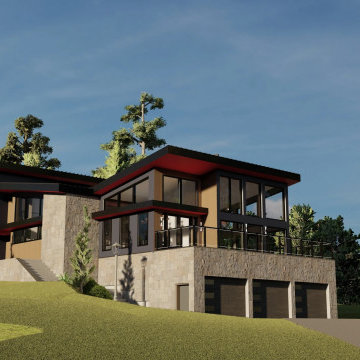
Whistle Hill Lot 2 residence stands as one of the most architecturally ambitious homes in the development, a striking example of RWH Architect’s commitment to elevating modern design. Defined by its dramatic butterfly roof and a façade composed of clean horizontal cladding, vertical accents, and expansive window groupings, the home captures a sculptural presence rarely seen in the region. This is a residence designed to open itself to its surroundings, embracing light, volume, and long views in a way that signals a new era of contemporary architecture.
The home features an attached three-car garage with an adjacent storage area, creating a practical yet visually streamlined entry sequence. Inside, the first floor is designed around livability and connection to the landscape. The foyer opens into a private office and then flows toward the main living areas. The master suite is intentionally tucked into a quiet corner on the first floor, positioned to overlook the backyard and shaped to allow morning light to filter softly into the space. Adjacent to the master suite is the laundry room, placed strategically for convenience. A secondary bedroom on the first floor includes a walk-in closet, and a nearby three-quarter bath offers flexibility for guests or extended family.
The kitchen serves as the central gathering point of the home, anchored by a large island and complemented by a walk-in pantry. It overlooks an expansive wraparound deck that transitions seamlessly to a lower patio, creating layered outdoor living spaces. Both the dining room and the great room open directly to the deck, enhancing the indoor-outdoor connection. The sunken great room is one of the home’s signature moments, featuring a floating fireplace that appears to hover within the space and accentuates the dramatic ceiling height created by the butterfly roof. The result is a room filled with daylight and volume, a contemporary living environment with an architectural presence that feels both bold and welcoming.
Upstairs, the second floor includes two additional bedrooms, each with walk-in closets, and a full bathroom designed with modern simplicity. From the upper level, the design allows for open views extending back toward the dining room, creating visual connectivity between floors and emphasizing the vertical openness of the home. This intentional play of volume heightens the spatial experience and enhances the sense of modern airiness throughout the interior.
This residence presented several unique design challenges that ultimately helped refine and elevate the final architectural expression. The sweeping butterfly roof created structural complexities due to its dramatic angles and its role in defining the home’s entire visual identity. RWH addressed this by carefully coordinating structural supports and framing patterns that allowed the roof to appear effortless while maintaining its sculptural form. Another significant challenge was balancing the extensive glazing with the need to preserve privacy and energy performance. RWH solved this by thoughtfully arranging high windows, angled openings, and varied window groupings that capture natural light without compromising comfort. Integrating a sunken great room with a floating fireplace required a precise approach to grading, floor transitions, and structural anchoring. Through detailed modeling and coordination, RWH ensured that the fireplace would appear weightless while remaining fully functional and safe. Creating uninterrupted views from the second floor to the dining room also required creative alignment of floor systems and rail detailing, which RWH resolved by designing sleek, integrated guardrails that preserve openness while meeting safety requirements.
Whistle Hill Lot 2 stands as a bold architectural statement and a defining example of the evolving design language within the development. Through innovative forms, expansive volumes, and carefully orchestrated transitions between indoor and outdoor spaces, RWH Architect has created a home that reflects the future of contemporary living in the area—forward-thinking, refined, and undeniably modern.
 Drury Design
THE SETUP
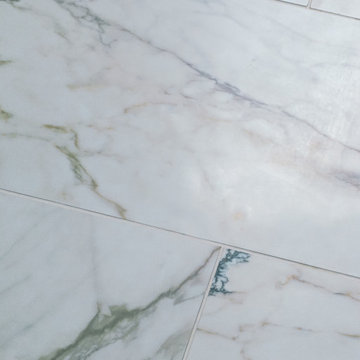
The original primary bathroom was characterized by a disjointed and segmented layout. The shower featured a bulky glass-block enclosure that overwhelmed the space visually. There was a considerable amount of open, unused space, and despite having a his and hers vanity, the arrangement lacked personal space for each user, as they shared the conjoined space between the sinks. The toilet was inconveniently located right by the door, with a half-wall partition meant to provide privacy but instead contributing to a cramped and unbalanced feel. Overall, the bathroom’s layout and design were fragmented, failing to make the most of the available space and lacking adequate storage solutions.
Design objectives:
- Reconfigure the layout to enhance functionality and flow.
- Create an elegant, upscale aesthetic that is light and bright.
- Incorporate specialized storage solutions for female hair care needs.
- Increase overall storage capacity.
- Develop a spa-like shower experience.
- Provide a significant wow factor to the space.
THE REMODEL
Design challenges to be solved:
- Repositioning the toilet to a more suitable location.
- Designing hair care storage solutions without cluttering the elegant space.
- Balancing an upscale, elegant design with a feminine touch in the color palette.
- Increasing the brightness of the room without adding windows.
- Completely replacing the existing shower to create a spa-like experience.
- Planning new storage solutions without adding bulkiness or clutter to the cabinetry.
THE RENEWED SPACE
Design solutions:
Toilet Relocation: Moved the toilet by the window, creating a better overall layout that also opened up two full walls for cabinetry and storage solutions.
Specialized Vanity Storage: The left side of the left vanity is the wife’s. Open shelves facing across the vanity can be used for decorative or daily needs items. Pull-out docking drawers with power outlets and metal basins handle hot hair appliances.
Bright and Elegant Color Scheme: White cabinets, countertops, floors, and shower walls keep the space bright. The just-off-white wall color with a hint of pink adds a feminine touch. Thin wainscoting with white trim offers traditional-leaning elegance.
Layered Lighting Strategy: Ceiling can lights, sconces, lighted mirrors, and toe-kick lighting were installed. Natural light-rated bulbs keep the space bright and natural-feeling.
Spa-Like Shower: An extra-large shower was created using the same floor tile materials for continuity. Equipped with a Kohler Anthem system with a shower head, hand-held, and four body sprays. His and Hers niches for separate body care product storage.
Enhanced Storage Solutions: Added a linen cabinet within the vanity area for efficient storage of towels and bathroom essentials.
This elegant bathroom feels incredibly spacious now. The color palette and lights keep the room bright and cheery. Gold fixtures, the herringbone pattern on the floor, and exquisite trim work add an elegant touch. With the husband and wife having their own vanity wall sections joined at the corner, each user truly has their own space within the space. The clients are very happy with the final result.
 All Marble Tiles
You and your bathroom – Honey Onyx wall and mosaic wall tiles
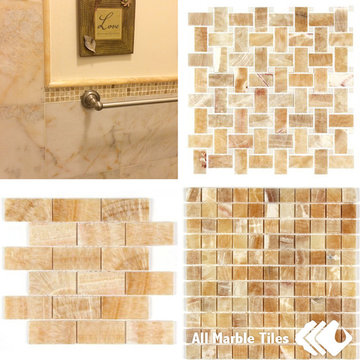
Your client wants you to re-design her bathroom walls. She’s tired of her current bathroom and wants something different. She doesn’t want a pattern or a shape or the same tiles. She wants it to look different, she demands the wow factor, but with a limited budget. You should definitely look at honey onyx wall or honey onyx mosaic wall tiles.
Formed in the gas openings of lava, onyx is found in various regions around the world, from Pakistan to Madagascar. This stone is extremely fragile and porous. So it absorbs moisture and is not stain or crack resistant. Very often a backing of some kind is placed behind the tile due to its fragile nature. Hence its usage as a wall tile although it can be used as a floor tile too. Hardly anyone honey onyx tile looks similar, which creates a fantastic non-patterned natural look. You need to unpack your crates first and blend and mix these tiles in order to get the proper look. Should you need to cut these tiles, ensure that you use a lot of water in the cutting process due to its fragility. Honey onyx wall tiles come in polished, sandblasted or rough finishes.
Honey onyx mosaic wall tiles usually come in honeycomb sheets. Choose sheets which look similar in pattern and color in order to get a natural, patterned look. Use these tiles with care as they crack easily. The last problem you want is blowing the budget because of improper use of tools and the sheets.
Water absorption is at 0.5%; porosity at 0.4% and grain per cubic centimeter density at 2.6. It also has a 1.1% degree in pores which indicates the fragile nature of this lava created tile. Edges come straight, beveled or serrated, depending on choice. Ensure your local tile merchandiser has the necessary knowledge and skills to ensure you get the right advice.
When using Honey Onyx, always be aware of its fragile nature. This natural tile will enhance your bathroom’s look by enhancing warmth and it will feel as if you are in a bathroom somewhere on a mountain. Your client will love the patterns that don’t match, the brown natural rock atmosphere it creates; yet the unique patterns will ensure the bathroom is unique and it will seem like a lot of thought has gone into creating the masterpiece.
http://allmarbletiles.com
28