Search results for "Extracting" in Home Design Ideas

Victorian tiles are very hard-wearing and historically a popular choice for heavy traffic areas such as hallways. Still popular today they are nonetheless like most tiles and can become ingrained with dirt over time.
This particular floor, located in a property in the old market town of Tewkesbury is a good example of a floor that was in good physical condition, but heavily ingrained with dirt due to a lack of regular maintenance. At a loss for how to remedy the situation by themselves, the property owner asked me to pay a visit to restore the tiles back to their best possible condition.
In this particular scenario, I opted to mix and apply a solution of different cleaning products from our professional range, each serving a different purpose. These products were Tile Doctor Pro Clean, Tile Doctor Remove and Go, and Tile Doctor NanoTech HBU. Remove and Go serves the purpose of stripping away any old sealer on the tiles, while Pro Clean is an alkaline cleaner that reliably removes dirt and staining. NanoTech HBU is a particularly powerful cleaner which utilises nano-sized particles to penetrate deep into the pores of the stone, get underneath difficult stains and lift them out.
I spread this potent solution across the length and width of the tiled hallway and left it to soak for approximately 10 minutes, before using a black scrubbing pad fitted to my buffing machine to give the tiles a deep scrub. Next, I rinsed the soiled solution away and neutralised the chemicals with plain water, before extracting any residue using a wet vacuum. I repeated the cleaning process several times to achieve the best results possible, and I also employed the aid of a steam cleaner to spot clean any particularly stubborn marks.
Cleaning the floor took two days in total. At the end of the second day, I gave the floor a thorough and final rinse before leaving it to dry completely overnight. The next day, I returned to the property to seal the floor after checking the floor was dry. Ensuring before sealing that the floor is completely dry is crucial – even the smallest quantity of moisture remaining can potentially cloud the sealer and damage its performance.
My choice of sealer was Tile Doctor Colour Grow, an impregnating sealer that penetrates and fills the pores of the tile to prevent trapped dirt and makes regular cleaning much easier. Colour Grow is a great choice of sealer for Victorian tiles because it really enhances the colourful patterns which are characteristic of this type of tile.
My customer was very impressed with the service and remarked on the huge improvement to the appearance of the floor. You can see this for yourself – just take a look at the before and after photos!
Malcolm Crowther
Gloucester Tile Doctor

I was asked by a Chelford homeowner (near Alderley Edge) to renovate their Ceramic Tiled Shower Cubicle which had an unsightly mould problem. They say pictures speak louder than words, so I’ve added some photos on this page which show how the grout and silicone sealant had become discoloured with mould over the ten years since it was installed.
Mould likes damp warm areas and shower cubicles make a perfect habitat for it, grout especially can be a problem due to its cementitious rough surface that mould can get a grip on. In this case the ventilation in the ensuite was inadequate and ideally there should have been an extraction vent over the cubicle itself. My advice in these situations is to leave doors and windows open after showering and to run the cold water afterwards.
To renovate the Tile and Grout I sprayed on Tile Doctor Duo-Clean which was left to soak into the grout line for ten minutes before being scrubbed in by hand. The Ceramic tiles cleaned quite easily but the grout had to be scrubbed hard and needed several applications before I was satisfied.
The whole shower needed treating in this fashion and once rinsed and dried I set about stripping out all the old silicone sealant that had also been badly affected by mould. This is done carefully using a sharp knife. I removed the debris and moved onto applying a fresh mould resistant silicone sealant.
Last step before leaving was to spray the Ceramic tile and especially the Grout and Silicone with a can of Tile Doctor Aerosol Grout Sealer. This doesn’t last as long as other sealants in the Tile Doctor range but its quick to apply, especially on wall tiles. The sealer ensures water will run straight off the walls into the shower tray and it also makes the shower easier to clean later.
The shower looked like a new installation by the time I had finished, and my client was delighted with the transformation. He was also thankful that I had replaced the silicone, this was something he had considered doing himself but applying it does take practice and you can get yourself into a mess.
Kamila Logonzy
East Cheshire Tile Doctor

EDEN is a family of products for relaxation and slumber, including a chaise longue, a bed and a sofa-bed. The particular feature of the collection is the original frame in metal and wood, entirely covered with cowhide, giving the product a precise connotation of luxury, functioning as the back of the chaise longue or the headboard of the bed and sofa-bed. In the daybed version the L-shaped back forms a support for soft down cushions. The bed comes with a base in wooden slats, with or without a storage compartment, and the headboard can be enhanced by two adjustable lateral wings that open to accommodate small bedside tables. The sofa-bed has a wooden slat platform and comes as a double bed or two twin beds; in the latter solution, the second extractable bed is raised off the ground with a simple touch of the foot, thanks to a patented mechanism that greatly facilitates the operation.
Find the right local pro for your project

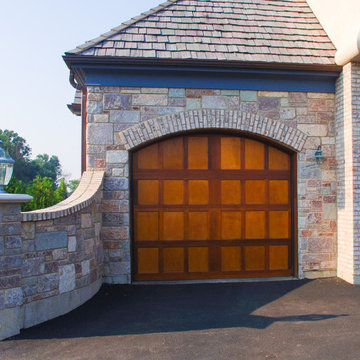
Chilton Royal Chateau is a blend of colors from green, lavender, blue and gray. Believe it or not, all of this stone comes from the same quarry. During extraction, color can vary from layer to layer. All of our Royal Chateau blends are sawn top and bottom for clean, uniform effect.
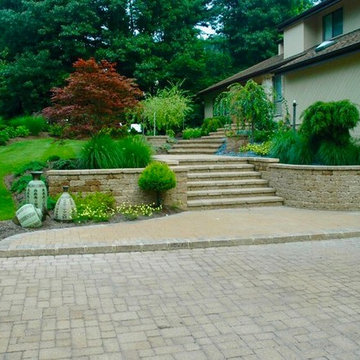
With the backyard completely finished, the old, crumbling asphalt driveway needed serious attention. The Deck and Patio Company’s design required removing the old driveway and replacing it with durable tan Techo-Bloc pavers.
The asphalt walkway was also extracted and a series of graceful Techo-Bloc stairs and landings were installed. www.deckandpatio.com

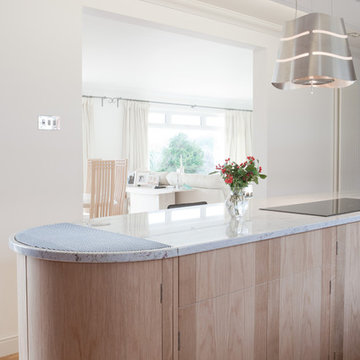
Light and airy kitchen with curved oak island and inbuilt hob. Pop up power sockets are neatly concealed in the island. Above the hob is a wave extraction unit, a red plinth ties the look together with the gloss red features elsewhere in the space.

Our client in Inverallochy, Fraserburgh wanted a modern and functional kitchen with multiple cooking options, an island with an eating area, and a coffee station. In order to meet these requirements, we had to determine how to block up a window without sacrificing their 180-degree sea view.
We opted for Nolte's SoftLack range with Silver MatrixArt handleless trims, paired with integrated lighting. The Sahara beige-coloured furniture mixed with Soft Lack Deep Blue provides a modern yet warm atmosphere.
Dekton Trilium worktops with mitred waterfall ends were chosen for durability and style. A comprehensive range of NEFF appliances was installed, including two ovens, a microwave, and a coffee centre. We also added a large induction hob with ceiling extraction and Liebherr fridge and freezer with built-in ice-making.
Among the additional features are a Blanco undermounted sink and a Quooker Flex stainless steel instant boiling water tap. Karndean flooring was used for its aesthetic appeal and durability. Tall units were built into the ceiling, and a section of the stone wall was left exposed, adding character to the space.
Interested in a kitchen that meets all your needs? Get in touch for a tailored solution.

The kitchen was part of a larger renovation project for the client's family home. The client wanted a modern and functional kitchen with a large island that would require reconfiguring the back of the property to create an efficient, family-friendly space.
We selected the Nolte Feel range for this project, opting for Magnolia as the main colour with Lava accents and Silver Matrix Art handleless trims that include integrated lighting. This colour palette and design choice delivered a stylish and contemporary kitchen.
The island features a 20mm Silestone Coral Clay worktop, complemented by Nolte Platinum Bough Oak worktops for the other surfaces. All appliances are from NEFF and include a single oven, combination microwave, warming drawer, induction hob, ceiling extraction, full-height fridge, and full-height freezer, as well as a dishwasher.
Additional features include a Blanco Subline 1 ½ undermounted sink in Tartufo and a Quooker Fusion Square Stainless Steel instant boiling water tap. The flooring was laid with Pergo laminate to complete the look and meet the functional needs of a busy family.
If you're interested in creating a kitchen that's both stylish and functional, get in touch with us to discuss your project.

This kitchen has very uniquely angles walls, making every wall unique in how we designed the cabinetry to maximize space. Here you can see how we inset the sink so the homeowner can enjoy their beautiful view, while at the sink.
Photo Credit: Kris Harley-Jesson

EDEN is a family of products for relaxation and slumber, including a chaise longue, a bed and a sofa-bed. The particular feature of the collection is the original frame in metal and wood, entirely covered with cowhide, giving the product a precise connotation of luxury, functioning as the back of the chaise longue or the headboard of the bed and sofa-bed. In the daybed version the L-shaped back forms a support for soft down cushions. The bed comes with a base in wooden slats, with or without a storage compartment, and the headboard can be enhanced by two adjustable lateral wings that open to accommodate small bedside tables. The sofa-bed has a wooden slat platform and comes as a double bed or two twin beds; in the latter solution, the second extractable bed is raised off the ground with a simple touch of the foot, thanks to a patented mechanism that greatly facilitates the operation.

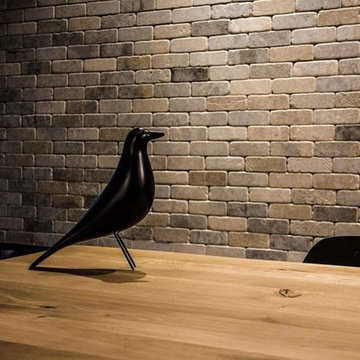
Chilton Royal Chateau is a blend of colors from green, lavender, blue and gray. Believe it or not, all of this stone comes from the same quarry. During extraction, color can vary from layer to layer. All of our Royal Chateau blends are sawn top and bottom for clean, uniform effect. This is an example of the tumbling effect added to soften the edges and give the stone an antiqued appearance.

South Lyon Carpet Cleaning offers truck mounted hot water extraction (steam cleaning), upholstery cleaning, pet stain & odor removal, 3M carpet protection, encapsulation cleaning, as well as flood and water restoration. Not all carpet cleaning services are created equally; choose a company with a great reputation for service and excellence, and one with years of experience behind them. Our pictures speak for themselves! Residential/Commercial. Family Owned & Operated Since 1991. Licensed, Bonded, & Insured.
Free Estimates! (734) 635-8124

In Rosenberg this locksmith business is a mainstream arrangement as a result of their reliability, their consideration regarding every client's desires and also for the different wonderful locksmith administrations they give. Tributes are the # 1 motivation behind why we have been as beneficial as a locksmith all through Rosenberg, we are favored to have this sort of brilliant following in the city.

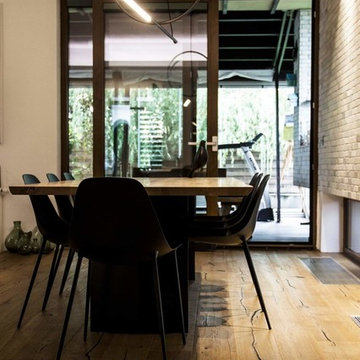
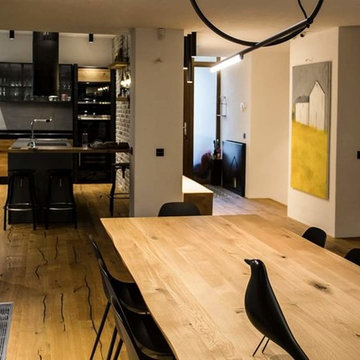
SKY-NATURA NATURAL SIDES C.R. & S. RIVA1920 Table made with a solid wood top having glued boards, with squared or natural edges in combination with iron legs characterised by double sheet metal semi-folded in the shape of a rhombus.Finish: base of oil / natural wax of vegetable origin with pine extracts.
This Terracotta tiled floor was installed in the kitchen of a cottage in the small village of Maidford near Towcester. The tiles were not looking their best and the owner of the property realised it was time to do something about it and contacted Tile Doctor to have the floor stripped and resealed. Stripping and Sealing tile and stone floors is our bread and butter so I was more than happy to pop round and survey the floor which was approximately 9m2.
The grout had darkened with dirt and the previous tile sealer was failing so dirt was now getting ingrained in the Terracotta making it difficult to clean in places and leading to a patchy appearance. We discussed the work involved, my quote was accepted, and a date agreed for me to return and complete the work which would take two days, one to clean and one to seal.
After tidying up the Kitchen and removing the kickboards from underneath the kitchen units I set about working on cleaning and stripping the Terracotta floor of old sealers. To start I tested a small area with a strong dilution of Tile Doctor Wax Away. Wax was quite often used on Terracotta so I figured this product would be a good place to start. My suspicions were proved correct, and I found this to be the best product for removing the many layers of sealant on the floor. Wax Away is a new alkaline product by Tile Doctor and ideal for cleaning clay-based tiles such as Terracotta.
With my sights set on the rest of the floor Wax Away was scrubbed into the tile using a 17” rotary floor scrubbing machine and a black scrubbing pad running on a slow speed which helps to reduce splashing. This activity soon brought the dirt off the floor and the soiled cleaning solution was removed using a wet vacuum and the floor was rinsed down with clean water. The cleaning process was repeated a couple of times until I was happy with the floor, a stiff hand brush was then used along the grout lines with a dilution of Tile Doctor Pro-Clean to clean up the grout.
After rinsing and extracting the floor again the floor was inspected, and I noticed there were a few stubborn paint splashes on the tiles. I managed to remove these and these by spot treating the affected area with Tile Doctor Remove and Go and a steamer to lift the stain out of the clay tile. Once happy the floor was clean it was given a thorough rinse to neutralise it and remove any trace of cleaning products and then left it to dry.
I allowed the floor to dry for several days before returning to seal the Terracotta using numerous coats of Tile Doctor Seal and Go which is an ideal sealer for Terracotta and provides durable stain protection together with a low sheen finish. Terracotta is by its nature very porous and so it’s not unknown for it to take up to nine coats of sealer, which can take some time to apply as like paint you have to wait until it’s dry before it will take the next coat.
The customer was so impressed by the results I achieved in their kitchen they decided to go ahead and book me in to carry out this process throughout the whole of the ground floor which included lounge, study and hallway.
Phil Vissian
Northamptonshire Tile Doctor

Our client had inherited this Travertine floor when purchasing in a lovely street in Walton-On-Thames, close by was the River Thames which runs all the way into London. The new owners were unhappy with the floor in that it did not look very clean, and they were keen to get this rectified. I arranged a site visit to survey the floor and see what could be done to restore its appearance.
The floor itself was in good physical condition, however, it was apparent from the level of dirt ingrained in the stone that it had not been maintained very well by the previous owner. I carried out a small test clean which came out well and they could see straight away what the floor should look really like! They were happy with my renovation quote and we agreed a mutually convenient time where I could work in relation to the COVID guidelines.
The Travertine floor was scrubbed using a mixture of Tile Doctor Pro Clean and Remove and Go. These are heavy duty cleaning products designed for use on tile and stone can be combined to form a powerful cleaning/stripping solution which is left to dwell on the floor surface. After a short while the solution was worked into the stone using a rotary machine fitted with a black scrubbing pad.
This cleaning recipe works extremely well breaking down dirt, stains, and grease in the stone. Following a machine scrub and a more manual hand scrub of the grout lines, we then pressure rinsed the soil away and then it was extracted using an industrial wet vacuum. In a couple of areas, it was necessary to repeat the process to ensure it was completely clean. Once we were satisfied that the stone was fresh and clean, the floor was left to dry off overnight, so it would be ready for sealing the following day.
After drying overnight, the floor was checked with a damp meter to make sure it was dry. Once reassured I started with the application of the fresh sealer to the floor using Tile Doctor Colour Grow Sealer which is a colour enhancing sealer that works from within by soaking into the pores of the stone. Several coats were applied allowing each one to dry before applying the next. This sealer does not provide a glossy finish, just a nice natural sheen. This brought back the contrast and natural colours in the stone, whilst adding protection to stone for many years to come.
The client was very happy with the work we carried out, the floor had come up much better than they had expected, and it really made a difference to the lovely kitchen space. The floor looked like new. I recommended the regular use of Tile Doctor Stone Soap for future cleaning which will keep the floor in great condition and ensure the longevity of the newly applied sealant.
Jonathan Oldham
South Middlesex Tile Doctor

To create a feeling of warmth and coziness a picture (not shown) that inspires the homeowners was used to extract subtle colors that could transform the master bedroom.
Photos by Color ReDesign

The concept and design of the hotel and restaurant was done in collaboration with Sean MacPherson to transform the aging but extraordinary property into an authentic surf shack. The architectural goal was to create simplicity out of natural materials while allowing the physical expansiveness of the location to shine through. This involved extracting the design down to the wood structure, framing, and elements. Locally sourced cedar lines the rooms, absorbing the summer and early fall quality of light, allowing the inside and outside to blue and age together in natural harmony. The perfection of the space embodied in the imperfections.

This job was carried out in a terraced property in Llanelli which had a Victorian Tiled Hallway laid in a diamond pattern that looking worse for wear and in need of some attention. The clients were a young couple who had moved in two years previously and had only recently decided they wanted the floor renovated. This was earlier in the year, so I was able to pop over to the property and take a detailed look at the floor before recommending a course of action to renovate the tiles.
Upon arrival the first thing we noticed was that the border had been laid with an inconsistent pattern, non- matching tiles had been patched in essentially filling voids as you can see in the images. The floor wasn’t terribly dirty however it wasn’t very clean either.
I discussed with the client replacing the non-matching tiles, so the floor pattern was uniform however they decided against it and were happy to just to have it cleaned and sealed. We can usually source either reclaimed original tiles or some great reproduction ones, so most floors can be restored if needed. I worked out a quote for the work and they were happy to go ahead.
If you have never been you should know that Llanelli is the largest town in the county of Carmarthenshire and famous for Rugby and the production of Tin. It is located on the Loughor Estuary, some 10 miles from Swansea and 12 miles from Carmarthen.
With no tiling to do the first job was to protect the woodwork such as skirting and staircase with tape. Once done the process of cleaning began with the application of a 400-grit burnishing pad fitted to a buffing machine. The process is lubricated with water and the pad run over the whole floor two to three times to remove dirt and refine the appearance of the tile. Even after the first application of the pad we could see a massive improvement to the appearance of the tiles. To get right into the edges of the tiled floor we use a 400-grit handheld diamond block, this proved especially useful under the stairs where our buffer machine could not reach.
During this process, the water turns into a fine slurry which is rinsed off with more water and extracted with a wet vacuum. On this occasion the floor was not dirty enough to require any chemicals, the use of water and the machine was enough to get the floor cleaned up.
This job was very straight forward, and we did not run into any problems at all. After allowing the floor to dry out for 24 hours we returned to seal the tiles checking first that the floor was sufficiently dry first using a damp meter. Fortunately, the burnishing method uses a lot less water than a chemical clean, so I was able to get straight on with sealing.
The client wanted a satin sheen finish, so I applied four coats of Tile Doctors Seal and Go which works well on Victorian tiles. The sealer really put the life back into the tiles and will protect them from staining going forward. It will also make the floor much easier to maintain and keep it looking good for much longer.
I’m pleased to say the owners were very happy with the floor and recommended us to one of their friends who we also did some work for. For aftercare I recommended the use of Tile Doctor Neutral Tile Cleaner. This is an everyday tile cleaning product that is sealer friendly and not prematurely reduce the life of the sealer which can happen with many household cleaning products which are simply too strong.
Adrian Iacono
Swansea Tile Doctor

Practical and functional system ELLETIPI for waste separation, provided with metal sliders for total extraction. The buckets are installed in a basket made of chrome plated steel wire and all its components are 100% recyclable. The durability and simplicity of this product are its strong points. All containers are equipped with a lid. It is easy to identify and label the type of waste that goes into each bin, using the multicolor resin stickers that were supplied with the lids. You can install these bins in kitchen bases, specifically under the sink. Its installation on the bottom of the kitchen base, using the supplied 5 self-tapping screws, is easy and practical.
11