
Search results for "Extracting" in Home Design Ideas
 Better Builders
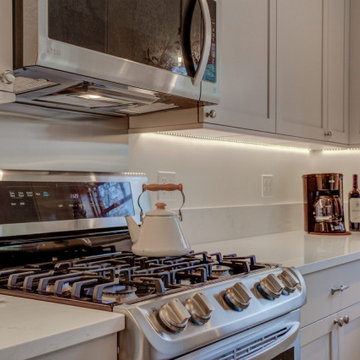
"This 1929 Lakewood home featured classic architectural details like coved ceilings and arched doorways but had a small, dim kitchen lacking storage. To create a modern, spacious layout, the breakfast nook and covered porch were combined, adding square footage. Relocating the sink allowed for a larger window, more natural light, and space for a dishwasher.
The wall between the kitchen and dining room was removed, improving flow and revealing a beautiful arched passageway to the living room. Preserving the coved ceiling required careful extraction and reinstallation during structural upgrades, which included new footings and beams to support the kitchen bump-out.
Finished with matching cedar lap siding and blended paint, the expanded kitchen honors the home’s historic charm while offering improved functionality, natural light, and seamless indoor-outdoor access."
 Better Builders
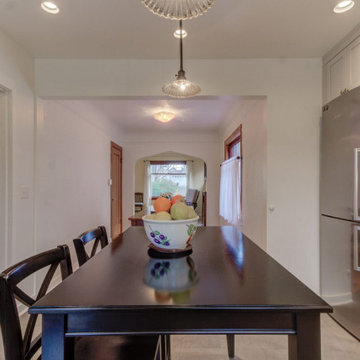
"This 1929 Lakewood home featured classic architectural details like coved ceilings and arched doorways but had a small, dim kitchen lacking storage. To create a modern, spacious layout, the breakfast nook and covered porch were combined, adding square footage. Relocating the sink allowed for a larger window, more natural light, and space for a dishwasher.
The wall between the kitchen and dining room was removed, improving flow and revealing a beautiful arched passageway to the living room. Preserving the coved ceiling required careful extraction and reinstallation during structural upgrades, which included new footings and beams to support the kitchen bump-out.
Finished with matching cedar lap siding and blended paint, the expanded kitchen honors the home’s historic charm while offering improved functionality, natural light, and seamless indoor-outdoor access."
 Better Builders
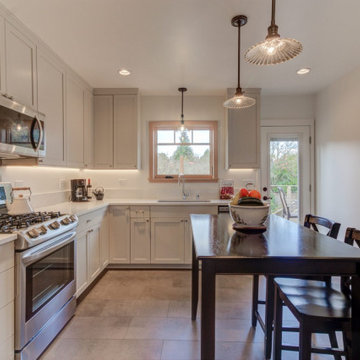
"This 1929 Lakewood home featured classic architectural details like coved ceilings and arched doorways but had a small, dim kitchen lacking storage. To create a modern, spacious layout, the breakfast nook and covered porch were combined, adding square footage. Relocating the sink allowed for a larger window, more natural light, and space for a dishwasher.
The wall between the kitchen and dining room was removed, improving flow and revealing a beautiful arched passageway to the living room. Preserving the coved ceiling required careful extraction and reinstallation during structural upgrades, which included new footings and beams to support the kitchen bump-out.
Finished with matching cedar lap siding and blended paint, the expanded kitchen honors the home’s historic charm while offering improved functionality, natural light, and seamless indoor-outdoor access."
Find the right local pro for your project
 Williamsons Kitchens
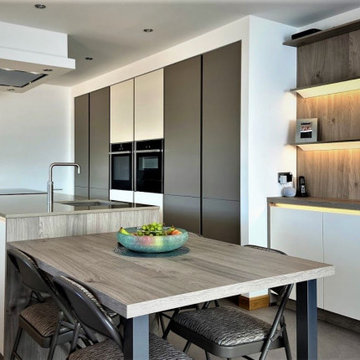
The kitchen was part of a larger renovation project for the client's family home. The client wanted a modern and functional kitchen with a large island that would require reconfiguring the back of the property to create an efficient, family-friendly space.
We selected the Nolte Feel range for this project, opting for Magnolia as the main colour with Lava accents and Silver Matrix Art handleless trims that include integrated lighting. This colour palette and design choice delivered a stylish and contemporary kitchen.
The island features a 20mm Silestone Coral Clay worktop, complemented by Nolte Platinum Bough Oak worktops for the other surfaces. All appliances are from NEFF and include a single oven, combination microwave, warming drawer, induction hob, ceiling extraction, full-height fridge, and full-height freezer, as well as a dishwasher.
Additional features include a Blanco Subline 1 ½ undermounted sink in Tartufo and a Quooker Fusion Square Stainless Steel instant boiling water tap. The flooring was laid with Pergo laminate to complete the look and meet the functional needs of a busy family.
If you're interested in creating a kitchen that's both stylish and functional, get in touch with us to discuss your project.
 Tile Doctor Ltd
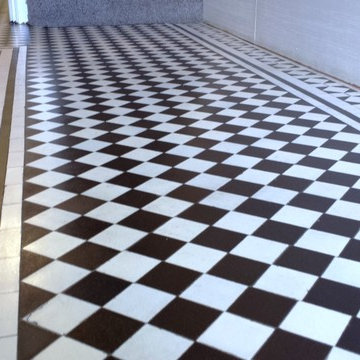
Sometimes you survey a job and you know that if you get the chance to restore it the results will be totally fantastic! This was the case with this Victorian black & white chequer tiled floor in the hallway of a large terraced Victorian house in Cardiff which dated back to around 1900 and was now looking well past its best, I know this because my family used to live in the house opposite. It was a well laid floor with no readings of dampness; I believe it’s imperative you check a floor for dampness before starting so you know what the baseline damp level is and which sealers will work with the floor.
My first action was to hoover the floor and then scrape as much debris off the surface as possible, and then as always I mixed 50/50 Tile Doctor HBU (Heavy Build-Up) remover with Pro-Clean and on this occasion because I wanted the white tiles to become really white I added the same amount of Tile Doctor Grout Clean-Up. This special recipe created a very formidable and strong cleaning solution which is what the job called for. I swept it over the whole floor letting it soak in for about ten minutes and then worked it into the floor using a scrubbing machine fitted with a coarse black pad adding more of the solution to the floor where it was drying out as I went.
The next step was to rinse the floor twice with water and extract the now filthy cleaning solution using a wet vacuum. At this point I inspected the tiles and I could see there were still a few stubborn areas with spots of paint and glue which I addressed with a decorators steam plate together with a scraper and hand held scrubbing pad.
I was now happy that the floor was clean and ready to be sealed, before sealing though it’s important to remove any trace of cleaning solution as it may contaminate the sealer so I gave the floor a thorough rinse and extracted as much of the water as possible to reduce drying times.
I left the floor to dry for 48hrs before coming back to seal the tiles taking a reader on my damp meter first to establish they had indeed dried out. To seal the floor I used eight coats of Tile Doctor Seal & Go which really works well on Victorian tiles and in this case made the whites really stand out.
The customer wanted this floor to look good because they were selling the property and were due to have an open day. The clean tiles really gave the house the wow factor and period features are so desirable these days so I don’t think it will take long to sell.
 Ross Thiele & Son
Gail Owens
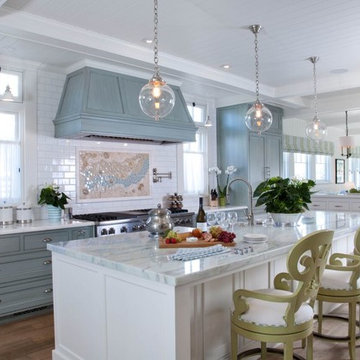
Inspiration for a large coastal l-shaped medium tone wood floor and brown floor eat-in kitchen remodel in San Diego with a farmhouse sink, shaker cabinets, blue cabinets, marble countertops, white backsplash, subway tile backsplash, stainless steel appliances and an island
Inspiration for a large coastal l-shaped medium tone wood floor and brown floor eat-in kitchen remodel in San Diego with a farmhouse sink, shaker cabinets, blue cabinets, marble countertops, white backsplash, subway tile backsplash, stainless steel appliances and an island
 Patience Designs Studio Ltd
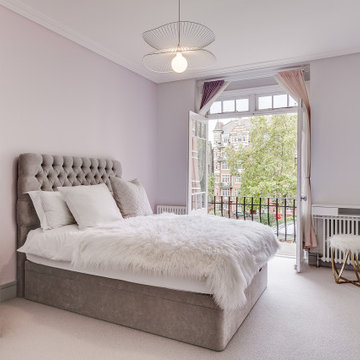
This St Johns Wood mansion block flat was one of our recent projects with a luxurious property developer in the area. We opened up spaces between the hallway, living area and kitchen to create a much more open feel throughout. A bespoke bench wrapped around the living space providing extra seating as well as storage whilst, keeping as much of the floor space free. Hidden cabling, Samsung Frame TV and biofires helped to add the luxuries without drawing away from the tranquillity.
Another view of the St Johns Wood mansion block flat, the modern kitchen layout with it's central island and induction hob and ceiling mounted extraction pendant above. The brushed bronze finish on the island's facade contrasts with the sleek minimal gloss white cabinetry for the rest of the kitchen.
 Patience Designs Studio Ltd
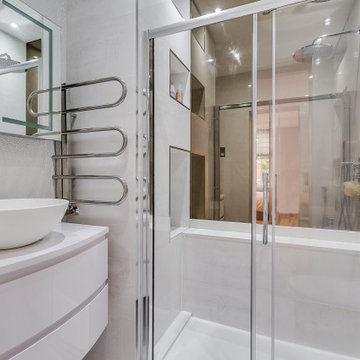
This St Johns Wood mansion block flat was one of our recent projects with a luxurious property developer in the area. We opened up spaces between the hallway, living area and kitchen to create a much more open feel throughout. A bespoke bench wrapped around the living space providing extra seating as well as storage whilst, keeping as much of the floor space free. Hidden cabling, Samsung Frame TV and biofires helped to add the luxuries without drawing away from the tranquillity.
Another view of the St Johns Wood mansion block flat, the modern kitchen layout with it's central island and induction hob and ceiling mounted extraction pendant above. The brushed bronze finish on the island's facade contrasts with the sleek minimal gloss white cabinetry for the rest of the kitchen.
 ERIN KYLE design
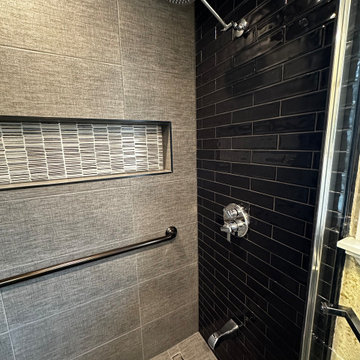
This precision remodel extracted the tub and replaced it with an alcove walk-in shower with tile in linear drain and long horizontal niche. Maintaining a wall spout offers flexibility for all uses. The back wall and shower floor tile extends into the whole bathroom space which was the only element changed outside of the shower. Careful demo preserved the existing paint treatment on the walls as requested by the homeowner. The glossy black subway tile on either end of the new shower balances the existing black counter and toilet on the opposite side of the room. Linen-textured 12x24 tile completes the shower and flooring. Richards & Sterling tile in the niche pulls together the mixed metals in the space and adds a great feature . Three different carefully selected Schluter edges finishes off the tile perfectly. A single hinged glass partition door keeps the space feeling open and reflects the giant existing window.

 Jay Sifford
A vanilla orchid blooms in the garden of Robert Fuchs and Michael Coronado, Homestead,FL. Photo by Jay Sifford.
Home design - tropical home design idea in Miami
Home design - tropical home design idea in Miami
 Tile Doctor Ltd
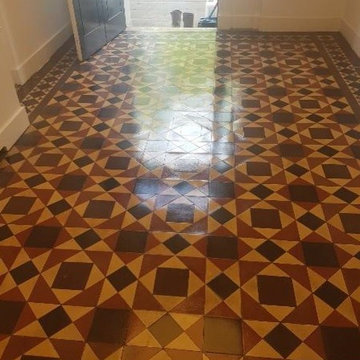
These are photos of a Victorian tiled floor we renovated at the new Scottish head office of the Peoples Postcode Lottery in the centre of Edinburgh City where the building was going through a multi million pound refurbishment. Edinburgh has a lot of Georgian and Victorian architecture, much of which is listed and as a result many still have original Victorian tiled flooring.
I’ve not really looked at the Postcode Lottery until now but put simply you give the lottery £10 a month and your postcode is your winning ticket number, there are prize draws every day and if your postcode comes up every one in the system with that postcode wins; they also give 31% to charity which is impressive.
You can see from the photograph that the floor was in good physical condition but was looking tired and dull. This is not unusual for Victorian tiles as once the sealer wears down dirt can penetrate into the pores of the tile causing it to lose its appearance.
On the first day we set about stripping the floor of what remained of the old sealant using a strong dilution of Tile Doctor Pro-Clean which is an industrial strength alkaline tile and grout cleaning product that is safe to use on Tile and Stone. The product is applied to the floor, left to soak in for ten minutes and the scrubbed into the tile using a black scrubbing pad fitted to a rotary bonnet machine. The floor was then rinsed and the now soiled cleaning solution extracted using a wet vacuum.
The process was repeated several times until we were happy the floor was clean and free of sealer and then given a final rinse with water. Before leaving for the day the floor was dried as much as possible using the wet vacuum to extract as much moisture as possible.
On the second day our first task was to check the floor with a damp meter in several places to ensure the tiles had dried off overnight. All was well and we began the process of sealing the floor with a Tile Doctor Seal and Go. This is a topical sealer which provides a high-quality low-sheen finish and protection against ingrained dirt and stains.
Victorian tiles are quite porous and five coats were needed to fully seal the floor. This took some time to complete as you have to wait until the first coat is dry before applying the next however it was well worth the effort as the floor looked fantastic afterwards.
Thomas Wilson
Edinburgh Tile Doctor
 Patience Designs Studio Ltd
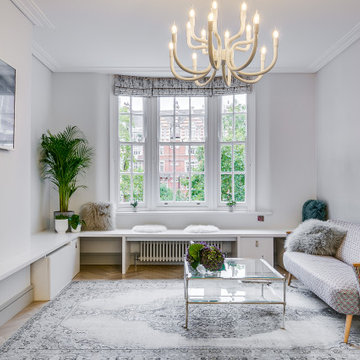
This St Johns Wood mansion block flat was one of our recent projects with a luxurious property developer in the area. We opened up spaces between the hallway, living area and kitchen to create a much more open feel throughout. A bespoke bench wrapped around the living space providing extra seating as well as storage whilst, keeping as much of the floor space free. Hidden cabling, Samsung Frame TV and biofires helped to add the luxuries without drawing away from the tranquillity.
Another view of the St Johns Wood mansion block flat, the modern kitchen layout with it's central island and induction hob and ceiling mounted extraction pendant above. The brushed bronze finish on the island's facade contrasts with the sleek minimal gloss white cabinetry for the rest of the kitchen.
 AMLD INTERIOR INC
AM691079
DESCRIPTION:
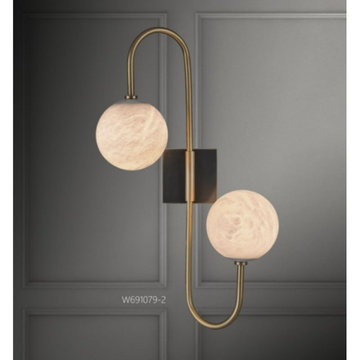
“Alabastron” was the name of a village in Old Egypt, located near the city of Thebes, in which a calcareous-type translucent stone was extracted. It seems that the term also referred to objects (e.g. vessels, cups) originating from that place, which, originally, were made with this material. Eventually, the term began to refer only to the white translucent rock used in art and in the manufacturing of muchappreciated vessels.
SPECIFICATIONS:
Collection:
Size: Custom sizes also available)
Shape: Wall lamp
Metal Finished: (Different finish available at no additional cost)
Materials: Metal,Alabaster
Weight: N/A LBS.
Extension: Adjustable cord customizable up to 12 ft.
Bulbs: N/A
Assembly: Some assembly required.
Dimmer Switch Compatible: Optional
Shipping: Free Door-To-Door Shipping Worldwide!
Rush Order: 4-6 Weeks; 15% added to the total
Regular Lead Time: 6-10 Weeks
Warranty: 5 Years Full Coverage (includes replacement parts)
SIZE OPTIONS:
Custom Sizes, Finishes, Colors Available Upon Request
 Patience Designs Studio Ltd
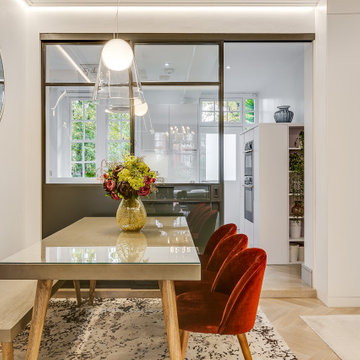
This St Johns Wood mansion block flat was one of our recent projects with a luxurious property developer in the area. We opened up spaces between the hallway, living area and kitchen to create a much more open feel throughout. A bespoke bench wrapped around the living space providing extra seating as well as storage whilst, keeping as much of the floor space free. Hidden cabling, Samsung Frame TV and biofires helped to add the luxuries without drawing away from the tranquillity.
Another view of the St Johns Wood mansion block flat, the modern kitchen layout with it's central island and induction hob and ceiling mounted extraction pendant above. The brushed bronze finish on the island's facade contrasts with the sleek minimal gloss white cabinetry for the rest of the kitchen.
 User
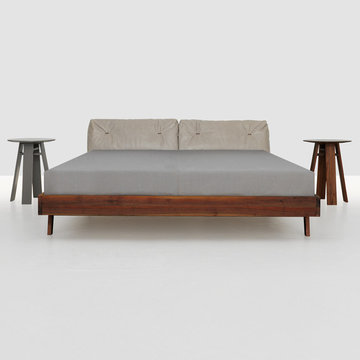
UserEDEN is a family of products for relaxation and slumber, including a chaise longue, a bed and a sofa-bed. The particular feature of the collection is the original frame in metal and wood, entirely covered with cowhide, giving the product a precise connotation of luxury, functioning as the back of the chaise longue or the headboard of the bed and sofa-bed. In the daybed version the L-shaped back forms a support for soft down cushions. The bed comes with a base in wooden slats, with or without a storage compartment, and the headboard can be enhanced by two adjustable lateral wings that open to accommodate small bedside tables. The sofa-bed has a wooden slat platform and comes as a double bed or two twin beds; in the latter solution, the second extractable bed is raised off the ground with a simple touch of the foot, thanks to a patented mechanism that greatly facilitates the operation.
 Patience Designs Studio Ltd
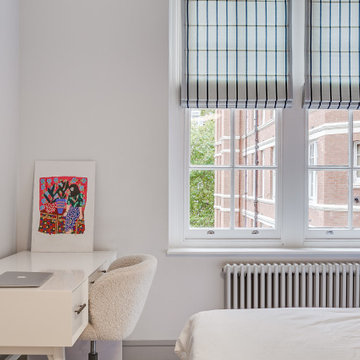
This St Johns Wood mansion block flat was one of our recent projects with a luxurious property developer in the area. We opened up spaces between the hallway, living area and kitchen to create a much more open feel throughout. A bespoke bench wrapped around the living space providing extra seating as well as storage whilst, keeping as much of the floor space free. Hidden cabling, Samsung Frame TV and biofires helped to add the luxuries without drawing away from the tranquillity.
Another view of the St Johns Wood mansion block flat, the modern kitchen layout with it's central island and induction hob and ceiling mounted extraction pendant above. The brushed bronze finish on the island's facade contrasts with the sleek minimal gloss white cabinetry for the rest of the kitchen.
 Williamsons Kitchens
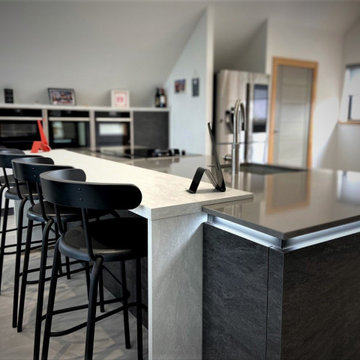
Our client presented us with a unique challenge: to craft a modern, open-plan kitchen in the upstairs open space of their new build. They were looking for a space that wasn’t just functional but also acted as a secondary eating area and transitioned smoothly into the living space.
We selected Nolte Stone in Basalt, complemented by an accent in Glacier. The Quartz Grey MatrixArt handleless trims equipped with integrated lighting add a touch of modernity, ensuring a sleek finish.
A 20mm thick Silestone Gris Expo solid surface worktop was chosen, and we added a Glacier breakfast bar and Basalt table to align with the colour theme. For appliances, we trusted NEFF to deliver on performance, including their single oven, combination microwave, steam oven, induction hob, and gas domino hob. The downdraft extraction was a key addition, ensuring efficiency without the overhead extractor, and we integrated the client's existing American fridge freezer into the design seamlessly.
Special touches include a Blanco 1 ½ bowl undermounted sink paired with a Quooker Flex stainless Steel instant boiling water tap. Laminate flooring was laid to ensure longevity and ease of cleaning. To extend the functionality, we constructed a matching Nolte table and seamlessly moved the design into the living space, adding a contemporary sideboard unit and a media unit in the sitting area.
Thinking about a kitchen revamp? Get in touch for a transformative experience.
 Tile Doctor Ltd
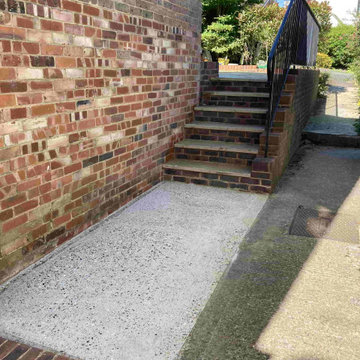
I am sure you will be able relate to this client in Folkstone who had a concrete and brick path and steps to the side of their house that had turned black with dirt. I know many of you reading this post will probably own a Karcher pressure washer and would be happy to do this job themselves, however for those that do not it’s good to know that we don’t just cover expensive patios and driveways and happily deep clean concrete paths as well.
The machine I use for this type of work operates at very high pressure, far higher than that of a Karcher and is so large and heavy its actually installed in a van. This type of machine is known in the trade as a Truck Mount and results in a much deeper clean that cleans and extracts the waste at the same time.
I popped over to see the client to see what needed to be done and gave them a quote for the work. Having looked round the property I was confident of making a difference. I also noted that steps were not only black with dirt but had become green with algae in places which is slippery when wet and dangerous for the elderly.
Before going over with the machine, I wetted the path with Tile Doctor Patio & Brick Driveway Cleaner and left it to soak into the concrete for a good twenty to thirty minutes so it could breakdown the dirt and deal with blackspots, lichen, moss, and general staining.
The concrete path was in several sections so whilst I was waiting for the cleaner to soak into one section, I was able to run the Truck Mount pressure washer over another section. When you use the jet wash at home, it can be a very messy business, bringing up all the dirt and spreading it around the nearby walls and usually the user. With our machine washing and extracting the dirt at the same time there is zero mess, and you can literally see the path become transformed in front of your eyes which is very satisfying.
Once done the concrete path looked like it was laid yesterday. The client was amazed saying it now complimented the work they had recently done on the front and back patios. It does show up the neighbour’s path though so I would not be surprised if I get a call soon to do their path as well!
There was no need to apply any type of sealer to this path. Regular cleaning will maintain it and a once a year deep clean like this would keep it in great shape.
Michael Conlon
South Kent Tile Doctor
 Williamsons Kitchens
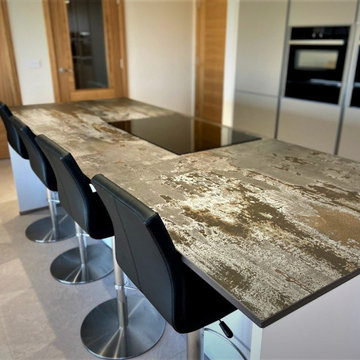
Our client was in the process of building a new house to their specification in Fraserburgh. The centrepiece? A contemporary, open-plan kitchen that not only serves as a functional space but also as an inviting hub for family gatherings.
Opting for the Nolte SoftLack range, we integrated the Silver MatrixArt handleless trims, complemented by elegant integrated lighting. The main furniture showcases a soothing Sahara hue, contrasted smartly by the Lava accent.
The 20mm Dekton Trilium worktop exudes sophistication, while the 40mm Nolte Platinum Bough Oak table adds a touch of warmth. We included a full suite of NEFF appliances: a single oven, combination microwave, induction hob, ceiling extraction, and a full-height fridge and freezer, meeting every culinary need.
Special requests are what make a design truly personal. We incorporated a Blanco Subline undermounted sink in Alumetallic, a state-of-the-art Quooker Fusion Square Stainless Steel instant boiling water tap, and durable Pergo flooring. Notably, the elevated dishwasher was positioned conveniently beside the sink, based on the client's preference. The tall units were seamlessly integrated into the ceiling, complemented by an artful goal-post niche. Furthermore, the extractor finds its home within a stylish ceiling drop box, highlighted by a subtly lit stepped ledge.
Dreaming of your own bespoke kitchen? Let us transform your vision into reality.
 Williamsons Kitchens
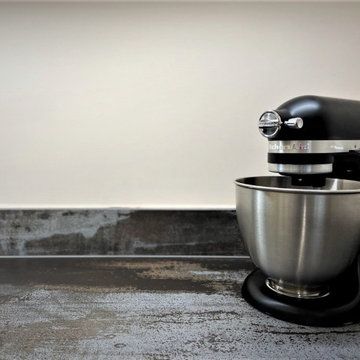
Our client was in the process of building a new house to their specification in Fraserburgh. The centrepiece? A contemporary, open-plan kitchen that not only serves as a functional space but also as an inviting hub for family gatherings.
Opting for the Nolte SoftLack range, we integrated the Silver MatrixArt handleless trims, complemented by elegant integrated lighting. The main furniture showcases a soothing Sahara hue, contrasted smartly by the Lava accent.
The 20mm Dekton Trilium worktop exudes sophistication, while the 40mm Nolte Platinum Bough Oak table adds a touch of warmth. We included a full suite of NEFF appliances: a single oven, combination microwave, induction hob, ceiling extraction, and a full-height fridge and freezer, meeting every culinary need.
Special requests are what make a design truly personal. We incorporated a Blanco Subline undermounted sink in Alumetallic, a state-of-the-art Quooker Fusion Square Stainless Steel instant boiling water tap, and durable Pergo flooring. Notably, the elevated dishwasher was positioned conveniently beside the sink, based on the client's preference. The tall units were seamlessly integrated into the ceiling, complemented by an artful goal-post niche. Furthermore, the extractor finds its home within a stylish ceiling drop box, highlighted by a subtly lit stepped ledge.
Dreaming of your own bespoke kitchen? Let us transform your vision into reality.
24