
Search results for "Final adjusted" in Home Design Ideas
 Organized Living
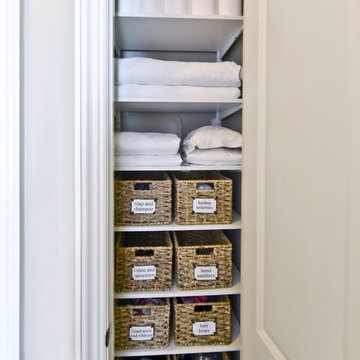
Organized Living freedomRail adjustable shelving is ideal for small spaces because it allows you to adjust shelves according to what is being stored. Design a linen closet at http://organizedliving.com/home/Design-Now/select-your-own-tool/space?store=109 This Organized Living freedomRail design courtesy: The Amandas.
 Nancy Finneson | DeMane Design
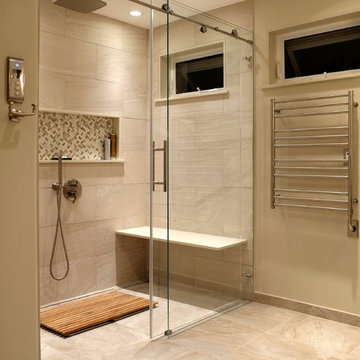
The shower has a curbless entry and a floating seat. A large niche makes it easy to reach items while either sitting or standing. There are 3 shower options; a rain shower from the ceiling, a hand held by the seat, another head that adjust on a bar. Barn style glass door and a towel warmer close at hand.
Luxurious, sophisticated and eclectic as many of the spaces the homeowners lived in abroad. There is a large luxe curbless shower, a private water closet, fireplace and TV. They also have a walk-in closet with abundant storage full of special spaces. After you shower you can dry off with toasty warm towels from the towel. warmer.
This master suite is now a uniquely personal space that functions brilliantly for this worldly couple who have decided to make this home there final destination.
Photo DeMane Design
Winner: 1st Place, ASID WA, Large Bath
 Paintzen, Inc.
When it comes to finding inspiration for your house or apartment design, there are a variety of routes you can take. For some, it is important to dive into the latest trends in fashion and art, using only the most popular decor pieces and embracing the color palettes seen on runways or in home and garden magazines. But for others, it’s simply about discovering what feels most like “home.”
Ashley Steele, the creator of A Styled Affair, was part of the latter group. “Since my husband and I were moving into a space that was previously owned, I needed a way to make it feel like it was truly ours, and unique to us,” she told our team.
A Styled Affair sprang from Ashley’s passion for fashion, and need for a creative outlet. But it soon became more than that. She developed a following, and it quickly became a place where she could share her personal style, travel adventures, and lifestyle tips. “While the blogging industry has become overwhelmed with people sharing their favorite home decor or make-up tips, I think what sets A Styled Affair apart is my commitment to stay true to my unique taste. I have always marched to the beat of my own drum – and that carries through in the clothes I wear, the decor I select for our home, and the travels I plan.”
Paintzen connected with Ashley as she was settling into her new home in Boston’s Seaport District. Although she and her husband have lived in Boston for almost 8 years, they were used to smaller, more traditional spaces. Their new home is much bigger, and more modern, than any place they lived before. “I wanted to select colors of comfort, simplicity, and sophistication so we could elevate the space and make it feel more like a home.” Ashley also accurately pointed out that new construction can sometimes feel a little cold and sterile, almost industrial. “I wanted our home to feel like a peaceful oasis after coming in from the bustling city.”
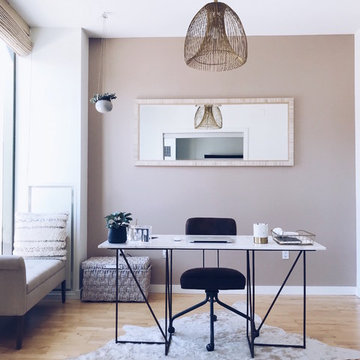
Ashley chose soft white paint for her walls to bring a sense of comfort and zen. With lots of wall decor, art work and carefully selected furniture, the walls serve as a clean and comfortable palette, and allowed her more freedom when making her other design decisions throughout the space. Ashley kept the overall palette fairly neutral, and incorporated “modern bohemian” inspired decor throughout the home; the final product was clean and simple, and catered to her style.
We asked Ashley what she was most excited for now. “I’m most excited to continue to find new decor pieces to compliment the paint colors and decor we’ve already found for the space. We have been really patient with decorating and selected each piece really careful to make sure it is cohesive and flows from room to room. I’m looking forward to enjoying the space with my husband and dog, and entertaining friends and family in the spring and summer!”
A few final questions for Ashley on her experience with Paintzen:
“I would highly recommend Paintzen to anyone, especially those that live in the city. There are so many different paint companies and contractors to choose from but going through Paintzen simplified the process and made me feel comfortable that we had the right team working on our space. Their platform for booking services and choosing paint colors made the process seamless and was a great way to keep track of what we booked and chose for colors. Most importantly, the customer service team was outstanding whenever we had a question or needed to make an adjustment.”
And advice she would give someone repainting their home:
“Patience. I would recommend taking your time and doing your research before selecting paint colors. Lighting changes every color so make sure to bring paint swatches and samples into the space and look at it throughout the day to see the different tones that the light will pick up. I would also recommend researching color trends and recommendations for colors in the family you are looking for. We found our living room color through a blog post listing top-used colors by interior designers and it looks amazing.”
Find the right local pro for your project
 Adrienne DeRosa
Adrienne DeRosa © 2014 Houzz Inc.
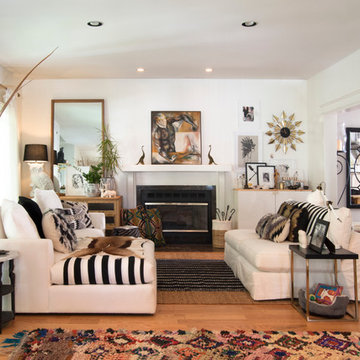
The recently redecorated living space defines a new direction for the first floor of Raymond's and Jennifer's home. Although Jennifer has always redesigned the look of their rooms every 4-5 years, this time around comes with a different perspective. "Now that [the kids] are all moved out and it is just my husband and I, I finally have had the ability to have fun with the house," Jennifer explains. "I have always redecorated every couple years, but this time has been my favorite. I can finally get rid of the clutter and stuff and find chic, fun pieces I know won't get a ball thrown through them."
Wall color: Alabaster White, Duration by Sherwin Williams; sofas: Arhaus
Photo: Adrienne DeRosa © 2014 Houzz
 SabaRehman Abdulrehman
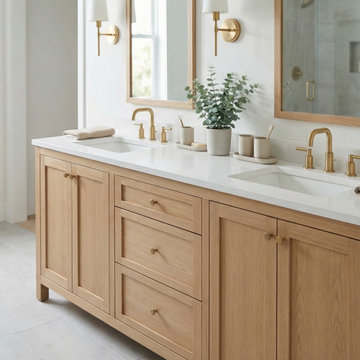
Morning routines shouldn’t involve a traffic jam at the sink. The 2025 Houzz Bathroom Trends Study found that 65 percent of U.S. renovators now choose a double-sink vanity to skip the wait. Designers agree: Titan Builders dubbed 2025 “the year of bigger, storage-packed double vanities,” forecasting dual-basin setups in family, guest, and even powder baths. As KBIS 2025 launches land, prototypes for 2026 layer in spa-grade wood, built-in outlets, and planet-friendly finishes. In this guide, we rank six standout models and show you how to size, install, and enjoy a clutter-free, two-sink future.
Methodology and selection criteria
A well-planned double-sink vanity keeps busy morning routines calm and clutter-free.
Before we crowned any winners, we mapped the entire 2024–2026 double-sink (dual-basin) market. That meant parsing KBIS exhibitor releases, scraping bestseller lists from Home Depot, Lowe’s, and Wayfair, and reviewing designer short lists in trade magazines. The sweep produced 110 candidate vanities, giving us visibility into every style, price tier, and material in play.
We then scored each model against six weighted factors that continue to matter long after installers leave:
- Build quality – 25 percent.Solid hardwood frames, dovetail drawers, and furniture-grade plywood backs, never particleboard in disguise.
- Design versatility – 20 percent.Lines and finishes that suit modern, classic, or farmhouse baths without dating quickly.
- Sustainability – 15 percent.FSC-certified wood, CARB 2 compliance, and low-VOC finishes for healthier air.
- Storage efficiency – 15 percent.Deep drawers, tilt-outs, or power cubbies that corral countertop clutter.
- Value for money – 15 percent.Fair street price for the materials, stone tops, sinks, and soft-close hardware included.
- Brand reputation and warranty – 10 percent.Manufacturers with responsive support and at least a one-year parts guarantee.
- Footprint: 72 W × 22 D × 36 H in. (183 × 56 × 91 cm)
- Crated weight: 506 lb / 230 kg
- Street price: about $2,575 with marble top and basins, Q4 2025
- Footprint: 48 W × 22 D in. (122 × 56 cm)
- Height: 34.8 in. (88 cm) with backsplash
- Sliding barn door plus 3 drawers
- Pre-drilled 8-in. faucet spacing, sinks included
- Footprint: 60 W × 21 D × 34 H in. (152 × 53 × 86 cm)
- Integrated power: 4 AC + 2 USB, UL-listed
- Crated weight: 300 lb / 136 kg
- Street price: about $2,349 at Home Depot, Q4 2025
- Footprint: 72 W × 22 D in. (183 × 56 cm)
- Height: 34 in. (86 cm) plus 4 in. backsplash
- Counter: 1 in. Carrara marble, apron-front sinks included
- Hardware: oil-rubbed bronze, soft-close doors and drawers
- Footprint: 60 W × 22 D × 34 H in. (152 × 56 × 86 cm)
- Construction: solid poplar and plywood, waterfall quartz top
- Integrated slim power bank, soft-close doors and drawers
- Target price: just under $2,300 with top and basins
 Northfield Fireplace & Grills
WINNER OF 2013 HPBA VESTA AWARDS
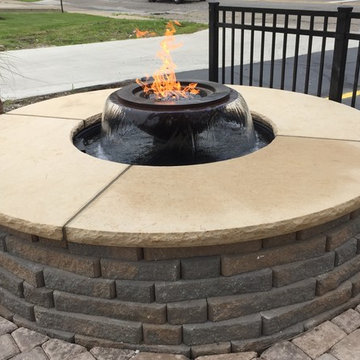
The Evolution 360 Series has won two Vesta Awards at the HPBExpo for Best Outdoor Hearth Product and Best in Show!
HPC has been selling the ambiance of fire through being the leader in Fire Pit Inserts for many years with our wide range of shapes, sizes, and technologies. What better way to compliment fire than to add the elegance and soothing sound of a shear, running water. Our focus over 2 years ago was to develop a turnkey, self-contained water system that is universal, robust, and is cost effective for our dealers - thus evolved HPC’s new Water Pit Insert. Finally this year we are proud to introduce the Evolution 360 Series - our first in a line of Water Pit Inserts.
The Evolution 360 can be installed on practically any patio in a residential or commercial setting - no pond or pool needed! This fully assembled, plug-n-play system comes ready to install - simply level the water pit then connect water, electric, and gas. Finally, enclose with stone, veneer, stucco, etc. to match your patio décor. Operation is even simpler - three switches control the water, LED lights, and fire pit. The Evolution 360 is made of durable, weather resistant, black polyethylene and engineered to last - no on-site guesswork. It is strong enough to allow for the option of our Water Rock to be used to line the floor of the basin.
Evolution 360 Features:
- Beautiful blue LED lights to illuminate water - hidden under scupper.
- Auto fill system- automatically adds water when needed; Low level sensor protects pump if water supply issue.
- Filtration- water is conditioned with a reusable, easy-to-clean filter.
- Water pump- 3,200 gallons per hour (4,000, 4,800, 6,000gph pumps available upon request)
- Leveling / Height Setting- four heavy, 3/4” threaded feet give flexibility of height adjustment and leveling. Easily adjusted on site with ~4” of travel.
- Overflow feature allows water to escape safely.
- Electrical Connection- simply with a 5-lead, 20’ cable ready to connect. Control Panel incorporates 3 push-to-reset breakers for water, LEDs & fire.
- Fire Pit Insert: CSA Certified Remote Electronic Ignition 13SS90HWI 90k Btu, 12” burner.
- Copper Bowls: Choose from a 4-scupper design or the new 360-degree model- both handmade with beautiful hammered copper..
We have three variations of the Evolution 360 series
Copper Fire Bowl Water Pit Insert
Features:
Seperate Operation of Fire with Wall Switch (optional control box available)
Seperate Operation of Water with Wall Switch (optional control box available)
Seperate Operation of Lighting with Wall Switch (optional control box available)
Fully Self Contained, Filtrated System
 RnD Builders Inc
RnD Builders Inc - Custom Home Builders | Woodland Hills
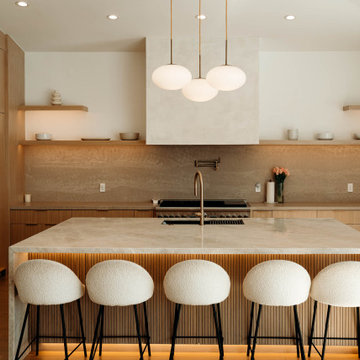
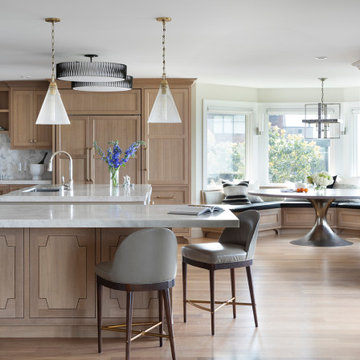
Trendy kitchen photo in Los Angeles
Trendy kitchen photo in Los Angeles


 Architectural Gardens, Inc
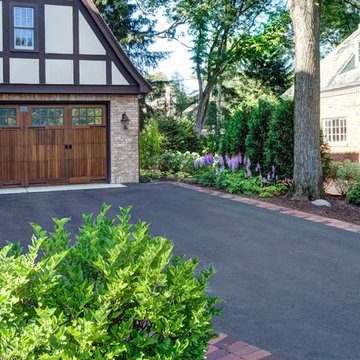
The landscape designer, architect, remodeling contractor and interior designer worked as a team with the homeowner to make final adjustments to the footprint of the driveway, garage, window wells and patios, as well as elevations to enhance usable space and remain within the budget.
Mike Crews Photography
 Beauty on a budget
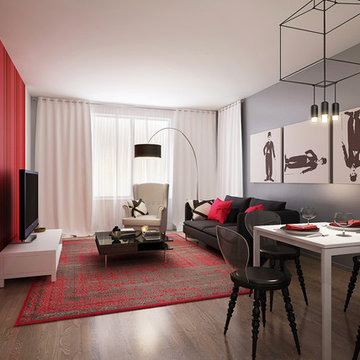
Create the Home of Your Dreams in three steps and in just about a week. Just choose a design for every room and we will adjust it to your floorpan, as well as provide you with the shopping list and installation details. Then you can DIY or with our help. Easy, convenient, prompt & amazing! And with financing available, it is as low as $40 per month / per room with zero down!
Welcome to your new home! We hope this will begin a great chapter in your life and this place will become a true foundation for it.
However, now that you have these empty rooms with white walls, what’s next? Will you rent used furniture or spend weeks in furniture stores buying random pieces? Are you going to paint walls and, if so, in which colors? What about rugs, mirrors, curtains or cushions? How much will it cost? How long will it take? And most importantly, will you be happy at the end?
We believe we have a unique design service that is perfect for you – fast, affordable, and beautiful.
All you need is to choose a design for every room (over 200 designs are already available and we constantly add more), approve the final concept adjusted for your floorplan (exceptionally realistic images) and we will purchase, paint, assemble, mount and stage everything on a turn-key basis under the paradigm of ‘What I See Is What I Get’ within a week or so.
Easy, convenient, prompt and amazing!
And with financing available, a wonderful room (a living room / dining room, a bedroom, a kid's bedroom), fully designed and furnished, can cost as low as $40 per month with no down payment!
For more details please visit www.beauty-on-a-budget.com
 Made To Order Woodworks LLC
Shelley Scarborough Photography - http://www.shelleyscarboroughphotography.com/
 TKS Design Group
Download our free ebook, Creating the Ideal Kitchen. DOWNLOAD NOW
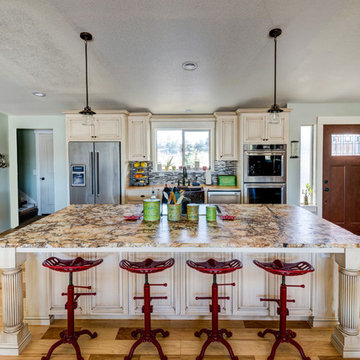
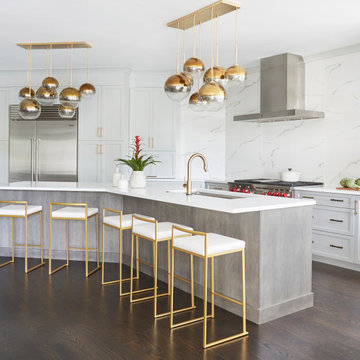
This client was referred to us from a past client. They are a busy 2-career household with young children and enjoy entertaining friends and family in their home. They have a beautiful open concept home but unfortunately the kitchen was not fitting for the rest of the home. They were not quite sure what to do with the space. We talked about trying to refresh it or do more of a minor remodel, but in the end they decided a full gut would get them to where they wanted to be.
One problem was there was no place for guests to hang out other than the large and awkward banquette area. The brick wall and tiled hood area were feeling a bit dated and tired. The space was just not functional for their lifestyle. There was no prep space near the cooktop and no landing area for items coming out of the ovens or refrigerator, plus a big dead zone in the center of the room.
Banquettes, like the one they previously had in the space, are great for small spaces, but when they get really large like this one, it makes getting in and out of the seating area awkward and uncomfortable. Plus, there was room for a large table, so we eliminated the awkward built in.
We started by removing the faux brick wall between the kitchen and back entry. We relocated the entry to the garage over a couple feet in order to get every last inch out of the new kitchen. We also made the decision to close up the primary window that faced the pretty ho hum brick wall of the neighbor’s house. There was plenty of light coming in from the seating area, so we just didn’t feel the window was adding much to the room.
Construction went smoothy. There was a bit of rework with electrical, flooring and HVAC, but in the end, we think it was well worth it.
The clients really wanted a sleek contemporary look, and we originally had planned for a full height slab backsplash, but due to it’s size, it was a budget buster. Instead, we got creative and settled on large format porcelain tiles that have a similar feel but were a fraction of the cost. We made sure the wall was plumb and level so that the fit and finish would mimic that of slab material.
The final space was quite a change. A large prep sink sits directly across from the new pro-style range with plenty additional prep space on the large island. The refrigerator and ovens now have miles of landing space, and a nice tight work triangle makes cooking a breeze.
Since we wanted a more contemporary feel, not many wall cabinets were included. Instead, we outfitted some of the drawers for dish storage with a peg system. Two large pantries flanking the refrigerator hold baking supplies and small appliances. Large drawers by the cooktop hold pots and pans, and an appliance garage tucked away to the left of the range hides away miscellaneous items. The large island also houses a microwave drawer and tons of storage, most of which is drawers offering maximum convenience.
The island now seats 5-6 people comfortably along with the new table in the seating area which can seat up to 8. Entertaining will be a breeze in this space. With such a clean backdrop, we knew we would need some drama with the lighting, so we chose two sets of staggered pendants, which we adjusted for the right visual balance above the island.
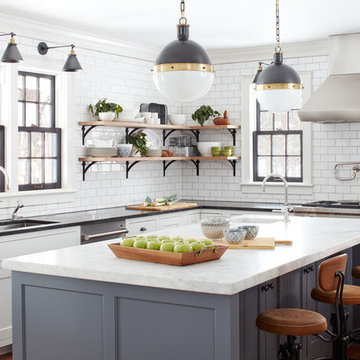
We also included a small coffee station to the right of the main kitchen, which helps keep the coffee clutter out of the kitchen proper. Two tones of complimentary gray are featured in this kitchen. The perimeter is a light gray that reads almost white. The island is a gray stain that adds some depth and interest with the visible wood texture. The countertops are clean white quartz, and the hardware, barstools and light fixtures add warm brass tones. I see lots of cooking and entertaining with family and friends in the near future in this bright and airy new space.
Designed by: Susan Klimala, CKD, CBD
Photography by: Michael Kaskel
For more information on kitchen and bath design ideas go to: www.kitchenstudio-ge.com
 Beauty on a budget
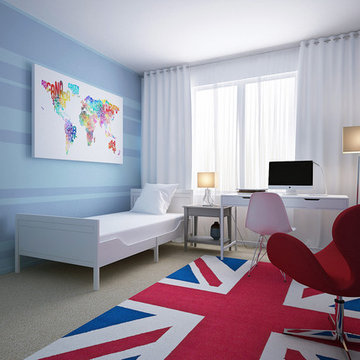
Create the Home of Your Dreams in three steps and in just about a week. Just choose a design for every room and we will adjust it to your floorpan, as well as provide you with the shopping list and installation details. Then you can DIY or with our help. Easy, convenient, prompt & amazing! And with financing available, it is as low as $40 per month / per room with zero down!
Welcome to your new home! We hope this will begin a great chapter in your life and this place will become a true foundation for it.
However, now that you have these empty rooms with white walls, what’s next? Will you rent used furniture or spend weeks in furniture stores buying random pieces? Are you going to paint walls and, if so, in which colors? What about rugs, mirrors, curtains or cushions? How much will it cost? How long will it take? And most importantly, will you be happy at the end?
We believe we have a unique design service that is perfect for you – fast, affordable, and beautiful.
All you need is to choose a design for every room (over 200 designs are already available and we constantly add more), approve the final concept adjusted for your floorplan (exceptionally realistic images) and we will purchase, paint, assemble, mount and stage everything on a turn-key basis under the paradigm of ‘What I See Is What I Get’ within a week or so.
Easy, convenient, prompt and amazing!
And with financing available, a wonderful room (a living room / dining room, a bedroom, a kid's bedroom), fully designed and furnished, can cost as low as $40 per month with no down payment!
For more details please visit www.beauty-on-a-budget.com

 Industrial Projects
Creating a comfortable outdoor living space is a priority for many homeowners and DIY enthusiasts. With rising summer temperatures, installing a shade tarp in your backyard offers an affordable and effective solution for sun protection. We’ve developed this detailed, step-by-step guide to help you confidently install a shade tarp that not only shields you from the sun but also adds aesthetic appeal to your outdoor area.
Benefits of Installing a Backyard Shade Tarp
Before diving into the installation process, let’s explore the key benefits of having a backyard shade tarp:
Provides UV Protection: Keeps your family and guests safe from harmful sun exposure.
Reduces Outdoor Temperatures: Creates a cooler, more enjoyable outdoor space.
Protects Outdoor Furniture: Extends the life of patio furniture by reducing sun damage.
Enhances Outdoor Aesthetics: Adds a modern, stylish look to your yard.
Budget-Friendly: More affordable compared to permanent structures like pergolas.
Materials and Tools You’ll Need
To begin your DIY backyard shade project, gather the following materials and tools:
Materials:
Shade tarp (UV-resistant and breathable)
Sturdy posts or existing structures (trees, fences, walls)
Mounting hardware (eye bolts, D-rings, turnbuckles, snap hooks)
Nylon or polyester rope, or stainless-steel wire
Concrete (if installing new posts)
Tools:
Power drill
Measuring tape
Level
Ladder
Wrench or adjustable spanner
Post hole digger (if installing new posts)
Step 1: Plan Your Shade Tarp Layout
The first step in installing your backyard shade tarp is careful planning. Take time to assess your outdoor area and answer these key questions:
Where is the sun’s path throughout the day?
What size and shape of tarp best suits your space?
Will you anchor the tarp to existing structures or install new posts?
What height do you want the tarp to sit at for maximum shade and airflow?
Pro Tip: Use string or garden hoses to visualize the tarp layout on the ground before making permanent decisions.
Step 2: Measure and Mark Anchor Points
Once you’ve determined the tarp’s location and orientation:
Measure the tarp dimensions.
Mark the exact points where each corner of the tarp will be anchored.
Ensure that the anchor points are at least 5–10% longer than the tarp size to allow for tensioning and slight adjustments.
Consider slope angles for water runoff. Aim for at least a 20-degree angle to prevent water pooling on the tarp.
Step 3: Install Support Posts (If Necessary)
If your backyard lacks existing anchor points like trees or fences, you’ll need to install sturdy support posts:
Dig post holes at least 24 inches deep and 8-12 inches wide for stability.
Set posts in concrete, making sure they remain plumb and level.
Allow the concrete to cure for at least 24–48 hours before applying tension from the tarp.
We recommend using pressure-treated wood, galvanized steel poles, or aluminum posts for longevity and strength.
Step 4: Install Mounting Hardware
With your anchor points ready, it’s time to install the necessary hardware:
Attach eye bolts or pad eyes securely into walls, posts, or other fixed structures.
For added flexibility and adjustability, install turnbuckles or tensioners to fine-tune the tarp’s tightness.
Connect snap hooks, D-rings, or carabiners to make assembly and disassembly easier.
Make sure all hardware is rated for outdoor use to prevent rust and corrosion.
Step 5: Attach and Tension the Shade Tarp
Now it’s time for the most satisfying part—mounting the shade tarp:
Begin by attaching one corner of the tarp to an anchor point.
Gradually attach the remaining corners, moving diagonally for even tension.
Adjust each connection point using your turnbuckles, ropes, or cables.
Pull the tarp tight enough to avoid sagging, but not so tight that it risks tearing.
Check that the tarp maintains the desired slope for rainwater runoff and adjust tension as needed.
Step 6: Final Adjustments and Safety Check
Before enjoying your new shaded area:
Inspect all anchor points and hardware for stability.
Test the tarp’s tension and make adjustments for even distribution.
Ensure that no sharp edges or loose connections remain that could damage the tarp or pose a safety hazard.
Confirm that the tarp is secure in windy conditions by giving it a gentle tug.
If you live in an area with frequent high winds, consider removing the tarp during storms to prevent damage.
Step 7: Enjoy Your Shaded Backyard Oasis
Once installed, your backyard shade tarp provides a comfortable and protective space for outdoor gatherings, relaxation, or family activities. You can decorate underneath with outdoor furniture, string lights, or potted plants to create a personalized outdoor retreat.
Maintenance Tips for Long-Lasting Shade Tarp Performance
To extend the life of your shade tarp, follow these maintenance guidelines:
Regularly check for wear and tear, especially around anchor points and seams.
Clean the tarp periodically with mild soap and water to prevent mildew buildup.
Store the tarp indoors during harsh weather seasons if it's not designed for year-round use.
Tighten hardware as needed to maintain proper tension and avoid sagging.
By following these simple care steps, your shade tarp will continue to deliver years of sun protection and outdoor comfort.
Conclusion: Upgrade Your Outdoor Space with a DIY Shade Tarp
Installing a shade tarp in your backyard is a cost-effective and rewarding DIY project. With careful planning, quality materials, and proper installation techniques, you’ll enjoy cool, shaded outdoor living all season long. This step-by-step guide ensures your project goes smoothly from start to finish.
 Lesley Glotzl
Todd Wright
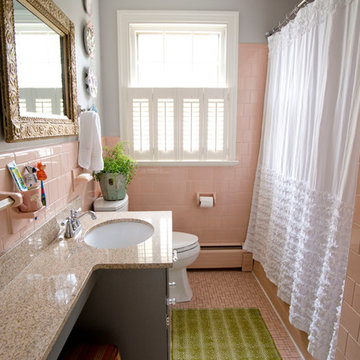
Small eclectic pink tile and ceramic tile ceramic tile bathroom photo in Other with an undermount sink, gray cabinets, granite countertops and gray walls
Small eclectic pink tile and ceramic tile ceramic tile bathroom photo in Other with an undermount sink, gray cabinets, granite countertops and gray walls


 TBS Construction Inc.
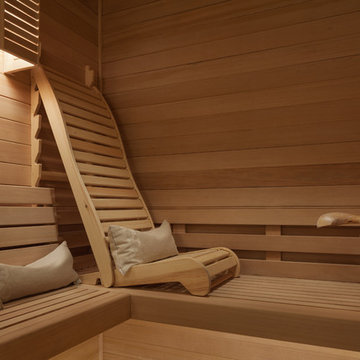
Woodside, CA spa-sauna project is one of our favorites. From the very first moment we realized that meeting customers expectations would be very challenging due to limited timeline but worth of trying at the same time. It was one of the most intense projects which also was full of excitement as we were sure that final results would be exquisite and would make everyone happy.
This sauna was designed and built from the ground up by TBS Construction's team. Goal was creating luxury spa like sauna which would be a personal in-house getaway for relaxation. Result is exceptional. We managed to meet the timeline, deliver quality and make homeowner happy.
TBS Construction is proud being a creator of Atherton Luxury Spa-Sauna.
 Wolf Architects, Inc.
Photo Credit: Eric Roth
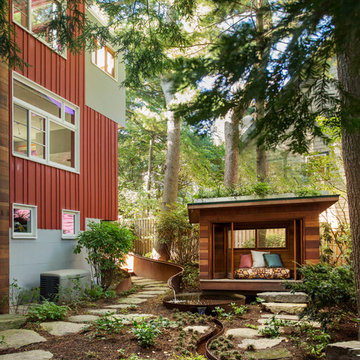
This is an example of a rustic shade backyard stone landscaping in Boston.
This is an example of a rustic shade backyard stone landscaping in Boston.
1