
Search results for "Final decision" in Home Design Ideas
 Swatch Design Group
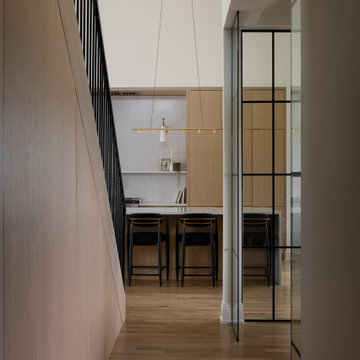
As a part of a larger transformation, the kitchen served as an anchor for rethinking how the home could feel and function. The goal was to create a space that felt truly integrated, flowed naturally within itself, and connected seamlessly to the outdoors. Storage was a top priority, with an emphasis on keeping countertops clean and the space feeling calm and open. Flow was equally important. What began as a layout optimized for entertaining evolved into a more intentional approach, where every sightline and transition was thoughtfully considered. The clients also needed the kitchen to work hard for their lifestyle, with a commercial-size refrigerator and freezer, generous prep space, and room to gather. The challenge was to bring purpose and polish to a space that didn’t quite feel like it belonged. The result is a kitchen that’s not only highly functional but finally feels like part of the home.
Project challenges:
- Maximizing storage was a primary challenge, especially with the inclusion of a commercial-sized fridge and freezer that occupied valuable cabinetry space.
- The need for clean, uninterrupted lines throughout the kitchen required thoughtful detailing, especially around cabinetry transitions and appliance integration.
- The oversized island design required two stone slabs and waterfall edges on both sides which posed both visual and logistical challenges.
- Incorporating electrical outlets into the island in a way that felt intentional and unobtrusive demanded creative problem-solving.
- The unique rooflines created strong visual angles that required a considered design approach to ensure the space felt cohesive rather than disjointed.
- Balancing symmetry and flow in a kitchen with structural constraints required precise layout planning to maintain a cohesive visual rhythm.
- Creating an intentional indoor/outdoor living flow, especially in the transitional space between the sliding doors to the backyard and the kitchen.
Project solutions:
- To balance the visual weight of the commercial-grade fridge and freezer, we flanked the range and hood with full-height pocket cabinetry, which created symmetry while reclaiming storage space. We also took a look into internal organization and carefully mapped out where every kitchen item would live. This allowed us to make informed decisions about drawer versus door configurations, and when to incorporate features like roll-out shelving to maximize accessibility and function.
- Linear light fixtures above the island were chosen for their low visual impact, allowing sightlines to remain clear and emphasizing the thoughtful spatial layout.
- The oversized island was carefully executed using two coordinated slabs, with a subtle brass inlay detail between them to turn a logistical challenge into a design feature.
- Pop-up electrical outlets were integrated into the island to keep surfaces clutter-free while maintaining easy access, which combined form and function seamlessly.
- With multiple focal points and a peaked vaulted ceiling, layout precision was key. The island, hood, and adjacent staircase were all perfectly centered on the vault, creating a sense of alignment across the open space.
- In the transitional area between kitchen and backyard, we added a wet bar that visually and functionally connects the indoor space with the outdoors. This addition provides extra storage and creates a dedicated entertainment spot for guests, enhancing the overall flow and usability of the home.
 Swatch Design Group
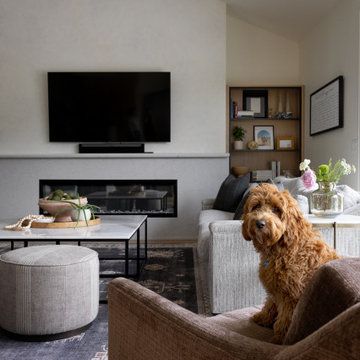
As a part of a larger transformation, the kitchen served as an anchor for rethinking how the home could feel and function. The goal was to create a space that felt truly integrated, flowed naturally within itself, and connected seamlessly to the outdoors. Storage was a top priority, with an emphasis on keeping countertops clean and the space feeling calm and open. Flow was equally important. What began as a layout optimized for entertaining evolved into a more intentional approach, where every sightline and transition was thoughtfully considered. The clients also needed the kitchen to work hard for their lifestyle, with a commercial-size refrigerator and freezer, generous prep space, and room to gather. The challenge was to bring purpose and polish to a space that didn’t quite feel like it belonged. The result is a kitchen that’s not only highly functional but finally feels like part of the home.
Project challenges:
- Maximizing storage was a primary challenge, especially with the inclusion of a commercial-sized fridge and freezer that occupied valuable cabinetry space.
- The need for clean, uninterrupted lines throughout the kitchen required thoughtful detailing, especially around cabinetry transitions and appliance integration.
- The oversized island design required two stone slabs and waterfall edges on both sides which posed both visual and logistical challenges.
- Incorporating electrical outlets into the island in a way that felt intentional and unobtrusive demanded creative problem-solving.
- The unique rooflines created strong visual angles that required a considered design approach to ensure the space felt cohesive rather than disjointed.
- Balancing symmetry and flow in a kitchen with structural constraints required precise layout planning to maintain a cohesive visual rhythm.
- Creating an intentional indoor/outdoor living flow, especially in the transitional space between the sliding doors to the backyard and the kitchen.
Project solutions:
- To balance the visual weight of the commercial-grade fridge and freezer, we flanked the range and hood with full-height pocket cabinetry, which created symmetry while reclaiming storage space. We also took a look into internal organization and carefully mapped out where every kitchen item would live. This allowed us to make informed decisions about drawer versus door configurations, and when to incorporate features like roll-out shelving to maximize accessibility and function.
- Linear light fixtures above the island were chosen for their low visual impact, allowing sightlines to remain clear and emphasizing the thoughtful spatial layout.
- The oversized island was carefully executed using two coordinated slabs, with a subtle brass inlay detail between them to turn a logistical challenge into a design feature.
- Pop-up electrical outlets were integrated into the island to keep surfaces clutter-free while maintaining easy access, which combined form and function seamlessly.
- With multiple focal points and a peaked vaulted ceiling, layout precision was key. The island, hood, and adjacent staircase were all perfectly centered on the vault, creating a sense of alignment across the open space.
- In the transitional area between kitchen and backyard, we added a wet bar that visually and functionally connects the indoor space with the outdoors. This addition provides extra storage and creates a dedicated entertainment spot for guests, enhancing the overall flow and usability of the home.
 Allreno
In What Order Should You Renovate a Kitchen? Revolutionizing Kitchen and Bath Renovation with Allreno's Design AI
Renovating a kitchen can be one of the most exciting and rewarding home improvement projects. However, with so many decisions to make, it can also be overwhelming. From selecting kitchen cabinets to choosing countertops and appliances, the process often involves careful planning and organization. So, how do you ensure the renovation goes smoothly? One important factor is knowing the right order in which to tackle the project.
The Right Order for Kitchen Renovation
Renovating a kitchen involves multiple steps, and knowing the proper order of operations is crucial for both time efficiency and cost savings. Here’s a general guideline for how to approach your kitchen renovation:
1. Planning and Design: The first step in any renovation is planning. This includes deciding on the layout, design, and features you want in your kitchen. At this stage, you’ll also need to think about your budget and timeline. It’s essential to finalize these details before moving forward with the actual work.
2. Demolition: Once the design is set, it’s time to remove old fixtures, cabinets, appliances, and flooring. Demolition can be a messy process, but it’s necessary for starting fresh. Having a professional handle this phase is often a smart move to ensure everything is safely removed.
3. Structural Work: If you plan on altering the layout of the kitchen by knocking down walls or adding new plumbing or electrical work, now is the time to do it. Structural changes can be complicated and costly, so it’s important to ensure these are completed before installing any new elements.
4. Plumbing and Electrical Work: With the structure in place, you can begin installing plumbing and electrical systems. This might include adding new water lines, sinks, or electrical outlets for appliances. It’s best to bring in licensed professionals for this stage, as electrical and plumbing work requires expert knowledge.
5. Cabinet Installation: Once the plumbing and electrical work are in place, you can install the kitchen cabinets. Cabinets are one of the most important elements of the kitchen, and the Allreno design AI can make this process easier. Allreno's AI-driven platform allows you to visualize how different kitchen cabinets will fit into your space, ensuring you make the best choice based on your preferences and layout.
6. Countertops: After the cabinets are installed, it’s time to add countertops. Whether you choose granite, quartz, or a more budget-friendly option, countertops are a focal point of the kitchen, and they should complement the cabinets and other design elements.
7. Flooring: Now that the major structural elements are in place, it’s time to install your flooring. Whether you opt for tile, hardwood, or vinyl, flooring should be installed after the cabinets and countertops to prevent any damage during the installation process.
8. Appliances and Fixtures: With the foundation in place, you can now add your appliances (oven, refrigerator, dishwasher, etc.) and fixtures (sink, faucets, lighting). Allreno’s AI can also help here by offering kitchen design recommendations based on available appliances and space dimensions.
9. Final Touches: The last step is adding the finishing touches to your kitchen. This includes painting the walls, adding backsplash tiles, and installing accessories like handles and knobs on your cabinets. This is also the stage where you can implement any stylistic choices to make the space uniquely yours.
How Allreno's AI Transforms the Renovation Process
One of the biggest challenges of a kitchen renovation is visualizing how everything will come together. Allreno’s design AI changes that by offering an intuitive platform that brings your ideas to life. Here’s how:
• Personalized Design Recommendations: Allreno’s AI suggests design elements based on your preferences, style, and space dimensions. Whether it’s selecting the perfect kitchen cabinets or countertop finishes, the AI ensures everything works together cohesively.
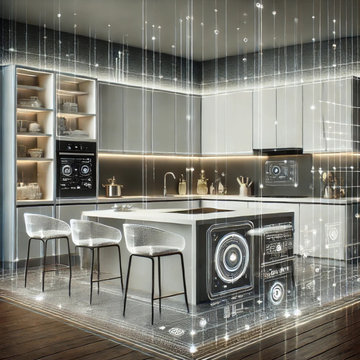
• 3D Visualization: With Allreno’s AI-driven design tools, you can visualize your kitchen layout in 3D before any work begins. This allows you to see how different elements will fit into your space and make adjustments as needed.
• Efficient Project Management: Allreno helps you streamline the entire renovation process by generating accurate material lists, estimates, and timelines. This means you can avoid costly errors and keep your renovation on track.
Conclusion
Renovating a kitchen is an exciting project, but it requires careful planning and organization to ensure it’s done right. By following a strategic order of operations and leveraging cutting-edge technology like Allreno’s design AI, homeowners can streamline the process, save time and money, and bring their dream kitchen to life with ease. Allreno not only simplifies the design process but also provides innovative solutions that make kitchen and bath renovations faster and more efficient than ever before.
Ready to get started with your kitchen renovation? Allreno's AI-powered design platform is here to help you every step of the way.
Find the right local pro for your project
 Advance Design Studio, Ltd.
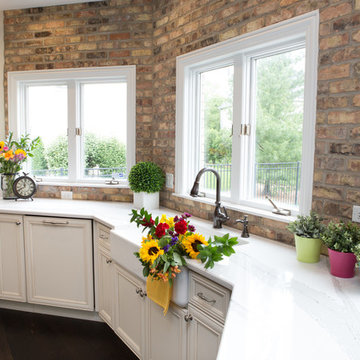
Raza and Baneen purchased their home in Schaumburg IL. knowing it needed work, but they saw the incredible potential it had with its expanse of beautiful kitchen windows and spacious floor plan.
The kitchen technically functioned fine, but was desperately outdated with its honey oak cabinets and plain countertops. This family loved to cook and host parties so it was an easy decision that the kitchen remodel was the first project they needed to tackle to make their home come to life.
Baneen had very specific ideas for her new dream kitchen and had been thinking about it for over 10 years! When they met Advance Design’s Project Designer Claudia Pop, Baneen felt an instant connection.
“From the first meeting, I knew that Claudia would guide us without putting down our ideas,” Baneen said.
The couple had two fears common among remodeling home owners: Would the project be done on time? And, would the project stay on budget? Advance Design was able to alleviate their fears early on, as Claudia shared the “Common Sense Remodeling” process. Raza and Baneen absolutely loved the custom project analysis that helped them understand how a budget could be accurately predicted and then safeguarded during the design process.
“Advance Design was spot on with both the budget and the project timeframe,” Baneen said. “Overall there were no surprises, and the budget was exactly what we were quoted. The experience was phenomenal, everybody was professional, everybody was courteous, everyone was nice, everyone was friendly. It wasn't stressful for us, they still left the house in a presentable state. It wasn't like we would come home and we were bring the kids in and it was going to be hazardous."
After the relationship was cemented, Raza, Baneen and Claudia began to finalize the kitchen design. The main objective was to create a functional space for preparing meals and to create an inviting space for their family and friends to enjoy, while incorporating interesting design elements such as the iconic blue island and reclaimed Chicago brick walls. Sufficient storage space was really important to Baneen, and high quality appliances were a priority. As the overall layout was being completed, together they reviewed each cabinet to determine exactly what would be stored there.
Because cooking was a high priority for this family, Claudia incorporated spice racks close to the range and included two mixer lift shelves for their larger countertop appliances.
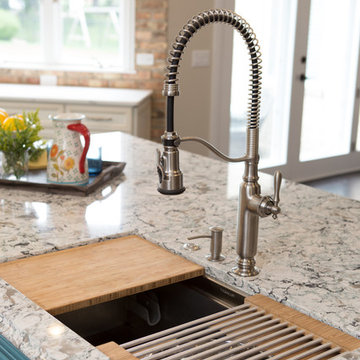
The focal point of the kitchen is the striking blue island constructed from custom colored Dura Supreme cabinets. Designed with decorative shelving and a highly functional prep sink. The couple loves the “galley” prep sink, it adds even more functionality and significantly shortens preparation and cleaning time. This island also includes a 24" Bosch Dishwasher with matching panel to blend in.
"Aesthetically, and in terms of functionality, the island everything I imagined," Baneen said. "I love how beautiful it looks and how functional it is. It just brings everybody together."
The Praa Sands Quartz countertop with an ogee edge profile provides excellent contrast by blending it's subtle tones with the outer cabinetry. It ties the island together with the rest of the space. Overlooking the beautiful backyard through spacious windows, the crisp white farmhouse sink is something that Baneen envisioned in her kitchen for years.
Two tones of Dura Supreme Cabinetry were used throughout the rest of the kitchen. Chestnut Cherry cabinets grace the range and decorative range hood and as panels over the Wolf refrigerator and freezer. Antique White cabinets surround the perimeter, creating a warm balance that beckons guests into the softly rounded space.
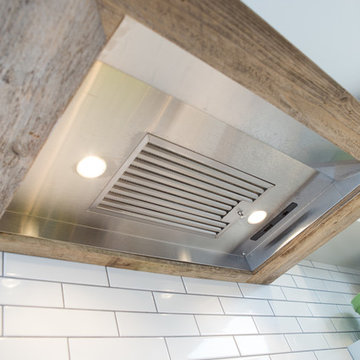
Drawing the eye immediately to the custom wood hood hiding a powerful 1,500 CFM ventilation system and spectacular 60” Duel Fuel Wolf range, a creatively patterned Tessen in Café & Brine backsplash detail stands out from the white subway tile backsplash spanning the outer walls. The vibrant space reflects the lively personality of the family who now loves spending time both cooking and enjoying this kitchen as a family.
“The end result is a beautiful and extremely functional kitchen that is able to handle a growing family, lots of parties and lots of cooking,” Claudia said.
“Advance Design was wonderfully professional and a pleasure to work with. They catered to what my needs and ideas were, while skillfully guiding us to make the right choices where we seemed lost,” Baneen said.
 Tomecek Studio Architecture
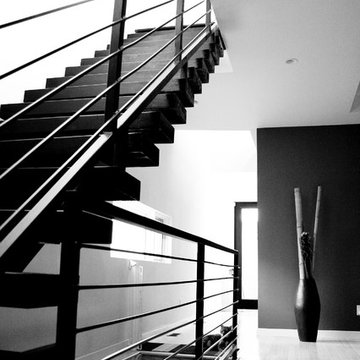
Project by Studio H:T principal in charge Brad Tomecek (now with Tomecek Studio Architecture). This project tests the theory of bringing high quality design to a prefabricated factory setting. Enrolled in the LEED-Home Pilot, this residence completed certification. The modular home was conceived as two boxes that slide above one another to create outdoor living space and a lower covered rear entry. The passive solar design invites large amounts of light from the south while minimizing openings to the east and west. Factory construction saves both time and costs while reducing waste and using a controlled labor force.
Built in a factory north of Denver, the home arrived by flatbed truck in two pieces and was craned into place in about 4 hours providing a fast, sustainable, cost effective alternative to traditional homebuilding techniques. Upgraded lighting fixtures, plumbing fixtures, doors, door hardware, windows, tile and bamboo flooring were incorporated into the design. 80% of the residence was completed in the factory in less than 3 weeks and other items were finished on site including the exterior stucco, garage, metal railing and stair.
Stack-Slide-Stitch describes the conceptual process of how to tie together two distinct modular boxes. Stack refers to setting one modular directly on top of the other. Slide refers to the action that creates an upper southern deck area while simultaneously providing a covered rear entry area. The stitching or interlocking occurs with the upward extension of the lower volume with the front deck walls and with the rear two story vertical.
 Advance Design Studio, Ltd.
After six years of living in their Huntley IL home, Chris and Meghan were tired of their dark, dingy, outdated kitchen and it was finally time for a long-anticipated change. “The kitchen is the place where we live, it’s where we do everything,” Meghan said. “It was important that it be a space where we wanted to be.” Meghan loves cooking and enjoys including their girls in healthy meal prepping, this led them to want a brighter, more enjoyable kitchen with increased functionality and improved storage.
For Chris especially, the laundry room was an entirely dysfunctional eyesore. “We had a washer and a dryer, but it was all kind-of cobbled together!” Chris said. “There were always laundry piles everywhere, we weren’t really sure what we wanted to do in there, but it was time for us to make a change.” The mess of the space was stressful every time they walked in the door from the garage each day. Kids’ backpacks and shoes piled up haphazardly in the makeshift boot-bench closet left the family feeling disorganized and stressed. They needed space for folding clothes and locker cubbies to help keep the family organized.
Having known Christine and Todd in the Huntley community for years, Chris and Meghan were familiar with their work. “We already trusted them personally and having seen their projects for years we knew they did top notch work. After we reviewed the initial round of designs, we knew that hiring them was definitely the right choice,” Meghan and Chris said. Although Chris had done a lot of work in their home himself, the kitchen and laundry room renovation was such a large undertaking that he didn’t want to steal time away from his family to spend what would surely be many long weekends doing the job himself. “That would not have been a wise choice for us,” Chris laughed.
“Our designer, Michelle was very, very, easy to work with; anything we wanted to see or weren’t sure about, she went above and beyond to make this easy for us. She was easy to get hold of and always quick to respond,” the couple said. Michelle pulled ideas that mirrored the couple’s taste and style and was adept at directing the couple to limited choices that didn’t overwhelm them and kept the process moving. “I have a hard time making decisions. Michelle made the decision-making process so easy. I loved how she listened to what I liked and then presented three great options for me to choose from,” Meghan said.
The main objectives for the kitchen were better storage solutions, they wanted the space to reflect their lifestyle and taste, and they wanted it to last for years with low maintenance. One of the first steps in creating a more functional kitchen was relocating the refrigerator, creating an improved workflow for the busy family.
“We didn’t know that we could even move the refrigerator to a new location where it is now, that was something that we never would have thought of,” Chris said. “The new refrigerator location makes the kitchen feel so much bigger. We didn’t add any space, but our whole kitchen with the new design just seems like it’s so much larger than before!” Meghan said.
The perimeter mist colored cabinets helped warm and brighten the entire room, while the graphite colored cabinets on the island added contrast. Using this fresh, clean color palette satisfied the couple’s desire for a bright space that was the exact opposite of what they had before. Organization accessories were also added to the cabinets such as a spice drawer tray and roll outs to create hidden convenience.
“I absolutely love the hidden spices – it makes cooking so much more enjoyable!” Chris said. “And all the pull outs, and the double trash bin, who would think you could get so excited about organization!” the couple said in unison.
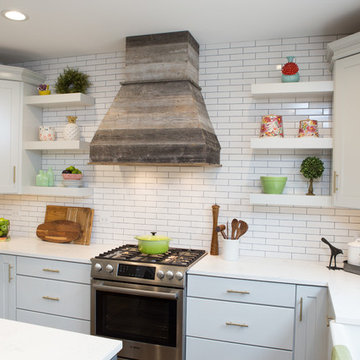
One thing they hated in their original kitchen was how dark the space felt. Added lighting on the ceiling with the new light fixtures combined with the lighter cabinetry colors throughout solved this problem. “Our new kitchen has this warm, almost cozy feeling that our old kitchen never had, it’s just a space that I love spending my time in now,” Meghan said. The light airy feeling was accentuated with the use of floating white shelves on either side of the decorative range hood. “We have so much cabinetry space, the new design is amazing we actually have more storage space than we will ever need,” Meghan said.
The island was extended to create more work surface and added space for stool seating. “The new island changes how we live. Now the kids can be in the kitchen with us, doing homework, eating breakfast, and the three of us have special dinners there when Chris is working late,” Meghan said.
The Carrara Marmi Quartz countertops were chosen because they are, not only beautiful, but are made from hard-working material that doesn’t require maintenance. The white subway tile backsplash that wraps to the ceiling behind the focal point cooktop range/hood compliments the crisp white countertops perfectly, while brushed brass hardware and light fixtures keep the design fresh and new.
The couple had a few fears at the beginning of the project, as most homeowners do. Their biggest fear was being out of their kitchen and laundry room for an extended time. The crew made it very easy for the family to work in a limited space keeping the washer and dryer hooked up the majority of the time, and also getting appliances working with minimal downtime.
“They above and beyond accommodated us to get us through the process,” Meghan said. “They did a great job making sure we were as comfortable as possible throughout the process,” Chris added.
“Our project manager DJ did a great job. He was very good at updating us on schedule changes, getting guys in as quickly as possible. Everyone that stepped in the house was nice and did great work,” said Chris. They thought Advance’s carpenter was phenomenal and were impressed when he took a conceptual idea from a photograph and worked with designer Michelle to create a one of a kind range/hood that has become the topic of conversation with friends and family who visit the new kitchen. “He was in our house literally every day for several weeks. He was easy to work with and good at what he did,” Meghan and Chris said.
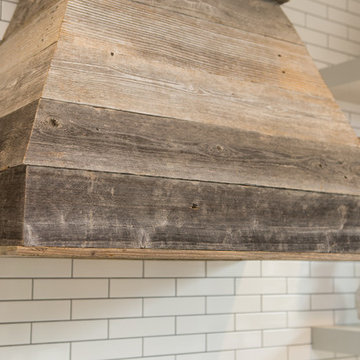
The focal point of the kitchen; a hand-crafted, custom-built ventilation hood was clad with handpicked reclaimed barnwood. Advance Design’s carpenter built the framework and the cladding to create a one-of-a-kind design element that the couple loves.
“I think it was especially fun for him to create something unique from scratch, showcasing his talent in this area,” Meghan said. “I love that my kitchen is not like everyone else’s. I got to pick out the wood on my hood and watch it being built and was able to choose what pieces of wood went where on it. It’s totally unique.”
Red Oak flooring was toothed-in throughout the kitchen and the rest of the first floor anywhere changes were made. Then the whole floor was refinished to tone down the orange undertones in the existing floor stain, ultimately changing the color complexion of the entire first floor. The result is a completely new feeling to the entire home.
Renovating the laundry room was extremely important to Meghan and Chris, but they had trouble visualizing what the possibilities were for the seemingly small space. Michelle produced beautiful 3D illustrations that helped them envision the space in a whole new way.
“I must have told Michelle 100 times that I am a visual person, seeing the designs in 3D made it so easy to make decisions and see what we could really do with our space,” Meghan said.
A dividing wall and doorway were removed between the existing laundry room and hallway formerly containing a coat closet, providing space to design specialized graphite colored cabinetry matching the kitchen island to house custom storage cubbies for each family member. Adding the tall utility cabinetry in the new laundry area helped solve the storage issue, tucking away cleaning supplies, household items, and even the cat got its own cubby.
“I love how everything is now hidden in its own space. I can’t tell you how much I hated coming home and seeing everything sitting around on counters,” Chris said.
Electrical outlets were planned for the inside of utility cabinets, so devices could charge in hidden locations. Stacking the washer and dryer allowed for wider countertop space to provide a folding area and a special space for clothes to hang. “The way I do laundry has been completely transformed! I can actually fold clothes and hang them now right out of the washer and dryer,” Meghan said.
“The end result in the kitchen and the laundry/mud room was an updated light and bright space, with a smarter work flow that better meets the needs of this family,” Michelle said.
“I would totally recommend Advance Design,” Meghan said. “Sometimes I sit and just look at my kitchen and laundry room and think ‘Wow, I can’t believe I get to live here!’ It’s an understatement to say we love our new space.”
 Advance Design Studio, Ltd.
After six years of living in their Huntley IL home, Chris and Meghan were tired of their dark, dingy, outdated kitchen and it was finally time for a long-anticipated change. “The kitchen is the place where we live, it’s where we do everything,” Meghan said. “It was important that it be a space where we wanted to be.” Meghan loves cooking and enjoys including their girls in healthy meal prepping, this led them to want a brighter, more enjoyable kitchen with increased functionality and improved storage.
For Chris especially, the laundry room was an entirely dysfunctional eyesore. “We had a washer and a dryer, but it was all kind-of cobbled together!” Chris said. “There were always laundry piles everywhere, we weren’t really sure what we wanted to do in there, but it was time for us to make a change.” The mess of the space was stressful every time they walked in the door from the garage each day. Kids’ backpacks and shoes piled up haphazardly in the makeshift boot-bench closet left the family feeling disorganized and stressed. They needed space for folding clothes and locker cubbies to help keep the family organized.
Having known Christine and Todd in the Huntley community for years, Chris and Meghan were familiar with their work. “We already trusted them personally and having seen their projects for years we knew they did top notch work. After we reviewed the initial round of designs, we knew that hiring them was definitely the right choice,” Meghan and Chris said. Although Chris had done a lot of work in their home himself, the kitchen and laundry room renovation was such a large undertaking that he didn’t want to steal time away from his family to spend what would surely be many long weekends doing the job himself. “That would not have been a wise choice for us,” Chris laughed.
“Our designer, Michelle was very, very, easy to work with; anything we wanted to see or weren’t sure about, she went above and beyond to make this easy for us. She was easy to get hold of and always quick to respond,” the couple said. Michelle pulled ideas that mirrored the couple’s taste and style and was adept at directing the couple to limited choices that didn’t overwhelm them and kept the process moving. “I have a hard time making decisions. Michelle made the decision-making process so easy. I loved how she listened to what I liked and then presented three great options for me to choose from,” Meghan said.
The main objectives for the kitchen were better storage solutions, they wanted the space to reflect their lifestyle and taste, and they wanted it to last for years with low maintenance. One of the first steps in creating a more functional kitchen was relocating the refrigerator, creating an improved workflow for the busy family.
“We didn’t know that we could even move the refrigerator to a new location where it is now, that was something that we never would have thought of,” Chris said. “The new refrigerator location makes the kitchen feel so much bigger. We didn’t add any space, but our whole kitchen with the new design just seems like it’s so much larger than before!” Meghan said.
The perimeter mist colored cabinets helped warm and brighten the entire room, while the graphite colored cabinets on the island added contrast. Using this fresh, clean color palette satisfied the couple’s desire for a bright space that was the exact opposite of what they had before. Organization accessories were also added to the cabinets such as a spice drawer tray and roll outs to create hidden convenience.
“I absolutely love the hidden spices – it makes cooking so much more enjoyable!” Chris said. “And all the pull outs, and the double trash bin, who would think you could get so excited about organization!” the couple said in unison.
One thing they hated in their original kitchen was how dark the space felt. Added lighting on the ceiling with the new light fixtures combined with the lighter cabinetry colors throughout solved this problem. “Our new kitchen has this warm, almost cozy feeling that our old kitchen never had, it’s just a space that I love spending my time in now,” Meghan said. The light airy feeling was accentuated with the use of floating white shelves on either side of the decorative range hood. “We have so much cabinetry space, the new design is amazing we actually have more storage space than we will ever need,” Meghan said.
The island was extended to create more work surface and added space for stool seating. “The new island changes how we live. Now the kids can be in the kitchen with us, doing homework, eating breakfast, and the three of us have special dinners there when Chris is working late,” Meghan said.
The Carrara Marmi Quartz countertops were chosen because they are, not only beautiful, but are made from hard-working material that doesn’t require maintenance. The white subway tile backsplash that wraps to the ceiling behind the focal point cooktop range/hood compliments the crisp white countertops perfectly, while brushed brass hardware and light fixtures keep the design fresh and new.
The couple had a few fears at the beginning of the project, as most homeowners do. Their biggest fear was being out of their kitchen and laundry room for an extended time. The crew made it very easy for the family to work in a limited space keeping the washer and dryer hooked up the majority of the time, and also getting appliances working with minimal downtime.
“They above and beyond accommodated us to get us through the process,” Meghan said. “They did a great job making sure we were as comfortable as possible throughout the process,” Chris added.
“Our project manager DJ did a great job. He was very good at updating us on schedule changes, getting guys in as quickly as possible. Everyone that stepped in the house was nice and did great work,” said Chris. They thought Advance’s carpenter was phenomenal and were impressed when he took a conceptual idea from a photograph and worked with designer Michelle to create a one of a kind range/hood that has become the topic of conversation with friends and family who visit the new kitchen. “He was in our house literally every day for several weeks. He was easy to work with and good at what he did,” Meghan and Chris said.
The focal point of the kitchen; a hand-crafted, custom-built ventilation hood was clad with handpicked reclaimed barnwood. Advance Design’s carpenter built the framework and the cladding to create a one-of-a-kind design element that the couple loves.
“I think it was especially fun for him to create something unique from scratch, showcasing his talent in this area,” Meghan said. “I love that my kitchen is not like everyone else’s. I got to pick out the wood on my hood and watch it being built and was able to choose what pieces of wood went where on it. It’s totally unique.”
Red Oak flooring was toothed-in throughout the kitchen and the rest of the first floor anywhere changes were made. Then the whole floor was refinished to tone down the orange undertones in the existing floor stain, ultimately changing the color complexion of the entire first floor. The result is a completely new feeling to the entire home.
Renovating the laundry room was extremely important to Meghan and Chris, but they had trouble visualizing what the possibilities were for the seemingly small space. Michelle produced beautiful 3D illustrations that helped them envision the space in a whole new way.
“I must have told Michelle 100 times that I am a visual person, seeing the designs in 3D made it so easy to make decisions and see what we could really do with our space,” Meghan said.
A dividing wall and doorway were removed between the existing laundry room and hallway formerly containing a coat closet, providing space to design specialized graphite colored cabinetry matching the kitchen island to house custom storage cubbies for each family member. Adding the tall utility cabinetry in the new laundry area helped solve the storage issue, tucking away cleaning supplies, household items, and even the cat got its own cubby.
“I love how everything is now hidden in its own space. I can’t tell you how much I hated coming home and seeing everything sitting around on counters,” Chris said.
Electrical outlets were planned for the inside of utility cabinets, so devices could charge in hidden locations. Stacking the washer and dryer allowed for wider countertop space to provide a folding area and a special space for clothes to hang. “The way I do laundry has been completely transformed! I can actually fold clothes and hang them now right out of the washer and dryer,” Meghan said.
“The end result in the kitchen and the laundry/mud room was an updated light and bright space, with a smarter work flow that better meets the needs of this family,” Michelle said.
“I would totally recommend Advance Design,” Meghan said. “Sometimes I sit and just look at my kitchen and laundry room and think ‘Wow, I can’t believe I get to live here!’ It’s an understatement to say we love our new space.”
 Advance Design Studio, Ltd.
Raza and Baneen purchased their home in Schaumburg IL. knowing it needed work, but they saw the incredible potential it had with its expanse of beautiful kitchen windows and spacious floor plan.
The kitchen technically functioned fine, but was desperately outdated with its honey oak cabinets and plain countertops. This family loved to cook and host parties so it was an easy decision that the kitchen remodel was the first project they needed to tackle to make their home come to life.
Baneen had very specific ideas for her new dream kitchen and had been thinking about it for over 10 years! When they met Advance Design’s Project Designer Claudia Pop, Baneen felt an instant connection.
“From the first meeting, I knew that Claudia would guide us without putting down our ideas,” Baneen said.
The couple had two fears common among remodeling home owners: Would the project be done on time? And, would the project stay on budget? Advance Design was able to alleviate their fears early on, as Claudia shared the “Common Sense Remodeling” process. Raza and Baneen absolutely loved the custom project analysis that helped them understand how a budget could be accurately predicted and then safeguarded during the design process.
“Advance Design was spot on with both the budget and the project timeframe,” Baneen said. “Overall there were no surprises, and the budget was exactly what we were quoted. The experience was phenomenal, everybody was professional, everybody was courteous, everyone was nice, everyone was friendly. It wasn't stressful for us, they still left the house in a presentable state. It wasn't like we would come home and we were bring the kids in and it was going to be hazardous."
After the relationship was cemented, Raza, Baneen and Claudia began to finalize the kitchen design. The main objective was to create a functional space for preparing meals and to create an inviting space for their family and friends to enjoy, while incorporating interesting design elements such as the iconic blue island and reclaimed Chicago brick walls. Sufficient storage space was really important to Baneen, and high quality appliances were a priority. As the overall layout was being completed, together they reviewed each cabinet to determine exactly what would be stored there.
Because cooking was a high priority for this family, Claudia incorporated spice racks close to the range and included two mixer lift shelves for their larger countertop appliances.
The focal point of the kitchen is the striking blue island constructed from custom colored Dura Supreme cabinets. Designed with decorative shelving and a highly functional prep sink. The couple loves the “galley” prep sink, it adds even more functionality and significantly shortens preparation and cleaning time. This island also includes a 24" Bosch Dishwasher with matching panel to blend in.
"Aesthetically, and in terms of functionality, the island everything I imagined," Baneen said. "I love how beautiful it looks and how functional it is. It just brings everybody together."
The Praa Sands Quartz countertop with an ogee edge profile provides excellent contrast by blending it's subtle tones with the outer cabinetry. It ties the island together with the rest of the space. Overlooking the beautiful backyard through spacious windows, the crisp white farmhouse sink is something that Baneen envisioned in her kitchen for years.
Two tones of Dura Supreme Cabinetry were used throughout the rest of the kitchen. Chestnut Cherry cabinets grace the range and decorative range hood and as panels over the Wolf refrigerator and freezer. Antique White cabinets surround the perimeter, creating a warm balance that beckons guests into the softly rounded space.
Drawing the eye immediately to the custom wood hood hiding a powerful 1,500 CFM ventilation system and spectacular 60” Duel Fuel Wolf range, a creatively patterned Tessen in Café & Brine backsplash detail stands out from the white subway tile backsplash spanning the outer walls. The vibrant space reflects the lively personality of the family who now loves spending time both cooking and enjoying this kitchen as a family.
“The end result is a beautiful and extremely functional kitchen that is able to handle a growing family, lots of parties and lots of cooking,” Claudia said.
“Advance Design was wonderfully professional and a pleasure to work with. They catered to what my needs and ideas were, while skillfully guiding us to make the right choices where we seemed lost,” Baneen said.
 Advance Design Studio, Ltd.
After six years of living in their Huntley IL home, Chris and Meghan were tired of their dark, dingy, outdated kitchen and it was finally time for a long-anticipated change. “The kitchen is the place where we live, it’s where we do everything,” Meghan said. “It was important that it be a space where we wanted to be.” Meghan loves cooking and enjoys including their girls in healthy meal prepping, this led them to want a brighter, more enjoyable kitchen with increased functionality and improved storage.
For Chris especially, the laundry room was an entirely dysfunctional eyesore. “We had a washer and a dryer, but it was all kind-of cobbled together!” Chris said. “There were always laundry piles everywhere, we weren’t really sure what we wanted to do in there, but it was time for us to make a change.” The mess of the space was stressful every time they walked in the door from the garage each day. Kids’ backpacks and shoes piled up haphazardly in the makeshift boot-bench closet left the family feeling disorganized and stressed. They needed space for folding clothes and locker cubbies to help keep the family organized.
Having known Christine and Todd in the Huntley community for years, Chris and Meghan were familiar with their work. “We already trusted them personally and having seen their projects for years we knew they did top notch work. After we reviewed the initial round of designs, we knew that hiring them was definitely the right choice,” Meghan and Chris said. Although Chris had done a lot of work in their home himself, the kitchen and laundry room renovation was such a large undertaking that he didn’t want to steal time away from his family to spend what would surely be many long weekends doing the job himself. “That would not have been a wise choice for us,” Chris laughed.
“Our designer, Michelle was very, very, easy to work with; anything we wanted to see or weren’t sure about, she went above and beyond to make this easy for us. She was easy to get hold of and always quick to respond,” the couple said. Michelle pulled ideas that mirrored the couple’s taste and style and was adept at directing the couple to limited choices that didn’t overwhelm them and kept the process moving. “I have a hard time making decisions. Michelle made the decision-making process so easy. I loved how she listened to what I liked and then presented three great options for me to choose from,” Meghan said.
The main objectives for the kitchen were better storage solutions, they wanted the space to reflect their lifestyle and taste, and they wanted it to last for years with low maintenance. One of the first steps in creating a more functional kitchen was relocating the refrigerator, creating an improved workflow for the busy family.
“We didn’t know that we could even move the refrigerator to a new location where it is now, that was something that we never would have thought of,” Chris said. “The new refrigerator location makes the kitchen feel so much bigger. We didn’t add any space, but our whole kitchen with the new design just seems like it’s so much larger than before!” Meghan said.
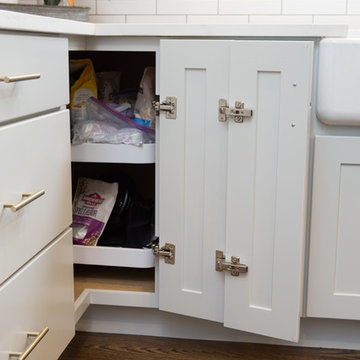
The perimeter mist colored cabinets helped warm and brighten the entire room, while the graphite colored cabinets on the island added contrast. Using this fresh, clean color palette satisfied the couple’s desire for a bright space that was the exact opposite of what they had before. Organization accessories were also added to the cabinets such as a spice drawer tray and roll outs to create hidden convenience.
“I absolutely love the hidden spices – it makes cooking so much more enjoyable!” Chris said. “And all the pull outs, and the double trash bin, who would think you could get so excited about organization!” the couple said in unison.
One thing they hated in their original kitchen was how dark the space felt. Added lighting on the ceiling with the new light fixtures combined with the lighter cabinetry colors throughout solved this problem. “Our new kitchen has this warm, almost cozy feeling that our old kitchen never had, it’s just a space that I love spending my time in now,” Meghan said. The light airy feeling was accentuated with the use of floating white shelves on either side of the decorative range hood. “We have so much cabinetry space, the new design is amazing we actually have more storage space than we will ever need,” Meghan said.
The island was extended to create more work surface and added space for stool seating. “The new island changes how we live. Now the kids can be in the kitchen with us, doing homework, eating breakfast, and the three of us have special dinners there when Chris is working late,” Meghan said.
The Carrara Marmi Quartz countertops were chosen because they are, not only beautiful, but are made from hard-working material that doesn’t require maintenance. The white subway tile backsplash that wraps to the ceiling behind the focal point cooktop range/hood compliments the crisp white countertops perfectly, while brushed brass hardware and light fixtures keep the design fresh and new.
The couple had a few fears at the beginning of the project, as most homeowners do. Their biggest fear was being out of their kitchen and laundry room for an extended time. The crew made it very easy for the family to work in a limited space keeping the washer and dryer hooked up the majority of the time, and also getting appliances working with minimal downtime.
“They above and beyond accommodated us to get us through the process,” Meghan said. “They did a great job making sure we were as comfortable as possible throughout the process,” Chris added.
“Our project manager DJ did a great job. He was very good at updating us on schedule changes, getting guys in as quickly as possible. Everyone that stepped in the house was nice and did great work,” said Chris. They thought Advance’s carpenter was phenomenal and were impressed when he took a conceptual idea from a photograph and worked with designer Michelle to create a one of a kind range/hood that has become the topic of conversation with friends and family who visit the new kitchen. “He was in our house literally every day for several weeks. He was easy to work with and good at what he did,” Meghan and Chris said.
The focal point of the kitchen; a hand-crafted, custom-built ventilation hood was clad with handpicked reclaimed barnwood. Advance Design’s carpenter built the framework and the cladding to create a one-of-a-kind design element that the couple loves.
“I think it was especially fun for him to create something unique from scratch, showcasing his talent in this area,” Meghan said. “I love that my kitchen is not like everyone else’s. I got to pick out the wood on my hood and watch it being built and was able to choose what pieces of wood went where on it. It’s totally unique.”
Red Oak flooring was toothed-in throughout the kitchen and the rest of the first floor anywhere changes were made. Then the whole floor was refinished to tone down the orange undertones in the existing floor stain, ultimately changing the color complexion of the entire first floor. The result is a completely new feeling to the entire home.
Renovating the laundry room was extremely important to Meghan and Chris, but they had trouble visualizing what the possibilities were for the seemingly small space. Michelle produced beautiful 3D illustrations that helped them envision the space in a whole new way.
“I must have told Michelle 100 times that I am a visual person, seeing the designs in 3D made it so easy to make decisions and see what we could really do with our space,” Meghan said.
A dividing wall and doorway were removed between the existing laundry room and hallway formerly containing a coat closet, providing space to design specialized graphite colored cabinetry matching the kitchen island to house custom storage cubbies for each family member. Adding the tall utility cabinetry in the new laundry area helped solve the storage issue, tucking away cleaning supplies, household items, and even the cat got its own cubby.
“I love how everything is now hidden in its own space. I can’t tell you how much I hated coming home and seeing everything sitting around on counters,” Chris said.
Electrical outlets were planned for the inside of utility cabinets, so devices could charge in hidden locations. Stacking the washer and dryer allowed for wider countertop space to provide a folding area and a special space for clothes to hang. “The way I do laundry has been completely transformed! I can actually fold clothes and hang them now right out of the washer and dryer,” Meghan said.
“The end result in the kitchen and the laundry/mud room was an updated light and bright space, with a smarter work flow that better meets the needs of this family,” Michelle said.
“I would totally recommend Advance Design,” Meghan said. “Sometimes I sit and just look at my kitchen and laundry room and think ‘Wow, I can’t believe I get to live here!’ It’s an understatement to say we love our new space.”
 Advance Design Studio, Ltd.
After six years of living in their Huntley IL home, Chris and Meghan were tired of their dark, dingy, outdated kitchen and it was finally time for a long-anticipated change. “The kitchen is the place where we live, it’s where we do everything,” Meghan said. “It was important that it be a space where we wanted to be.” Meghan loves cooking and enjoys including their girls in healthy meal prepping, this led them to want a brighter, more enjoyable kitchen with increased functionality and improved storage.
For Chris especially, the laundry room was an entirely dysfunctional eyesore. “We had a washer and a dryer, but it was all kind-of cobbled together!” Chris said. “There were always laundry piles everywhere, we weren’t really sure what we wanted to do in there, but it was time for us to make a change.” The mess of the space was stressful every time they walked in the door from the garage each day. Kids’ backpacks and shoes piled up haphazardly in the makeshift boot-bench closet left the family feeling disorganized and stressed. They needed space for folding clothes and locker cubbies to help keep the family organized.
Having known Christine and Todd in the Huntley community for years, Chris and Meghan were familiar with their work. “We already trusted them personally and having seen their projects for years we knew they did top notch work. After we reviewed the initial round of designs, we knew that hiring them was definitely the right choice,” Meghan and Chris said. Although Chris had done a lot of work in their home himself, the kitchen and laundry room renovation was such a large undertaking that he didn’t want to steal time away from his family to spend what would surely be many long weekends doing the job himself. “That would not have been a wise choice for us,” Chris laughed.
“Our designer, Michelle was very, very, easy to work with; anything we wanted to see or weren’t sure about, she went above and beyond to make this easy for us. She was easy to get hold of and always quick to respond,” the couple said. Michelle pulled ideas that mirrored the couple’s taste and style and was adept at directing the couple to limited choices that didn’t overwhelm them and kept the process moving. “I have a hard time making decisions. Michelle made the decision-making process so easy. I loved how she listened to what I liked and then presented three great options for me to choose from,” Meghan said.
The main objectives for the kitchen were better storage solutions, they wanted the space to reflect their lifestyle and taste, and they wanted it to last for years with low maintenance. One of the first steps in creating a more functional kitchen was relocating the refrigerator, creating an improved workflow for the busy family.
“We didn’t know that we could even move the refrigerator to a new location where it is now, that was something that we never would have thought of,” Chris said. “The new refrigerator location makes the kitchen feel so much bigger. We didn’t add any space, but our whole kitchen with the new design just seems like it’s so much larger than before!” Meghan said.
The perimeter mist colored cabinets helped warm and brighten the entire room, while the graphite colored cabinets on the island added contrast. Using this fresh, clean color palette satisfied the couple’s desire for a bright space that was the exact opposite of what they had before. Organization accessories were also added to the cabinets such as a spice drawer tray and roll outs to create hidden convenience.
“I absolutely love the hidden spices – it makes cooking so much more enjoyable!” Chris said. “And all the pull outs, and the double trash bin, who would think you could get so excited about organization!” the couple said in unison.
One thing they hated in their original kitchen was how dark the space felt. Added lighting on the ceiling with the new light fixtures combined with the lighter cabinetry colors throughout solved this problem. “Our new kitchen has this warm, almost cozy feeling that our old kitchen never had, it’s just a space that I love spending my time in now,” Meghan said. The light airy feeling was accentuated with the use of floating white shelves on either side of the decorative range hood. “We have so much cabinetry space, the new design is amazing we actually have more storage space than we will ever need,” Meghan said.
The island was extended to create more work surface and added space for stool seating. “The new island changes how we live. Now the kids can be in the kitchen with us, doing homework, eating breakfast, and the three of us have special dinners there when Chris is working late,” Meghan said.
The Carrara Marmi Quartz countertops were chosen because they are, not only beautiful, but are made from hard-working material that doesn’t require maintenance. The white subway tile backsplash that wraps to the ceiling behind the focal point cooktop range/hood compliments the crisp white countertops perfectly, while brushed brass hardware and light fixtures keep the design fresh and new.
The couple had a few fears at the beginning of the project, as most homeowners do. Their biggest fear was being out of their kitchen and laundry room for an extended time. The crew made it very easy for the family to work in a limited space keeping the washer and dryer hooked up the majority of the time, and also getting appliances working with minimal downtime.
“They above and beyond accommodated us to get us through the process,” Meghan said. “They did a great job making sure we were as comfortable as possible throughout the process,” Chris added.
“Our project manager DJ did a great job. He was very good at updating us on schedule changes, getting guys in as quickly as possible. Everyone that stepped in the house was nice and did great work,” said Chris. They thought Advance’s carpenter was phenomenal and were impressed when he took a conceptual idea from a photograph and worked with designer Michelle to create a one of a kind range/hood that has become the topic of conversation with friends and family who visit the new kitchen. “He was in our house literally every day for several weeks. He was easy to work with and good at what he did,” Meghan and Chris said.
The focal point of the kitchen; a hand-crafted, custom-built ventilation hood was clad with handpicked reclaimed barnwood. Advance Design’s carpenter built the framework and the cladding to create a one-of-a-kind design element that the couple loves.
“I think it was especially fun for him to create something unique from scratch, showcasing his talent in this area,” Meghan said. “I love that my kitchen is not like everyone else’s. I got to pick out the wood on my hood and watch it being built and was able to choose what pieces of wood went where on it. It’s totally unique.”
Red Oak flooring was toothed-in throughout the kitchen and the rest of the first floor anywhere changes were made. Then the whole floor was refinished to tone down the orange undertones in the existing floor stain, ultimately changing the color complexion of the entire first floor. The result is a completely new feeling to the entire home.
Renovating the laundry room was extremely important to Meghan and Chris, but they had trouble visualizing what the possibilities were for the seemingly small space. Michelle produced beautiful 3D illustrations that helped them envision the space in a whole new way.
“I must have told Michelle 100 times that I am a visual person, seeing the designs in 3D made it so easy to make decisions and see what we could really do with our space,” Meghan said.
A dividing wall and doorway were removed between the existing laundry room and hallway formerly containing a coat closet, providing space to design specialized graphite colored cabinetry matching the kitchen island to house custom storage cubbies for each family member. Adding the tall utility cabinetry in the new laundry area helped solve the storage issue, tucking away cleaning supplies, household items, and even the cat got its own cubby.
“I love how everything is now hidden in its own space. I can’t tell you how much I hated coming home and seeing everything sitting around on counters,” Chris said.
Electrical outlets were planned for the inside of utility cabinets, so devices could charge in hidden locations. Stacking the washer and dryer allowed for wider countertop space to provide a folding area and a special space for clothes to hang. “The way I do laundry has been completely transformed! I can actually fold clothes and hang them now right out of the washer and dryer,” Meghan said.
“The end result in the kitchen and the laundry/mud room was an updated light and bright space, with a smarter work flow that better meets the needs of this family,” Michelle said.
“I would totally recommend Advance Design,” Meghan said. “Sometimes I sit and just look at my kitchen and laundry room and think ‘Wow, I can’t believe I get to live here!’ It’s an understatement to say we love our new space.”
 Holiday Maldives
Combine ancient temples with overwater villas for the trip of a lifetime
There's a reason savvy travellers are increasingly looking beyond single-destination holidays. The Sri Lanka Maldives multi-centre trip has emerged as one of the most sought-after combinations in tropical travel—and it's easy to understand why. These two Indian Ocean neighbours couldn't be more different, yet together they create a holiday experience that satisfies every type of wanderlust.
Why Combine Sri Lanka and the Maldives?
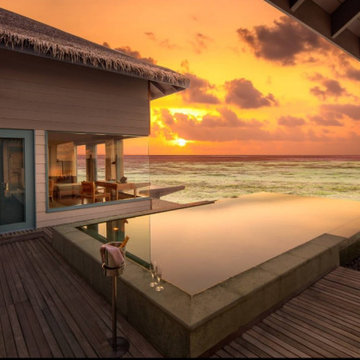
Sri Lanka offers what the Maldives doesn't: lush highlands carpeted in tea plantations, ancient cities steeped in 2,500 years of history, wildlife safaris where leopards roam free, and a culinary scene that'll have you dreaming of hoppers and kottu for years to come. The Maldives, meanwhile, delivers what Sri Lanka can't: those iconic overwater bungalows, some of the planet's most pristine coral reefs, and the kind of barefoot luxury where your biggest decision is whether to have your massage on the beach or in your private villa.
A Sri Lanka and Maldives twin centre holiday lets you experience the thrill of exploration followed by pure, unadulterated relaxation. It's the best of both worlds—literally.
The Perfect Itinerary Balance
Most travellers find that spending 7-10 days in Sri Lanka followed by 4-7 days in the Maldives creates the ideal rhythm. Sri Lanka demands more time because there's simply so much ground to cover. You might start in Colombo, travel through the Cultural Triangle to explore Sigiriya's ancient rock fortress and Dambulla's cave temples, wind through the tea country around Ella, and perhaps end with a safari in Yala National Park before catching your flight to Malé.
Then comes the reward: touching down in the Maldives, boarding a speedboat or seaplane, and watching the stress of everyday life disappear as those famous turquoise lagoons come into view. After days of early morning temple visits and winding mountain roads, there's nothing quite like sinking into a lounger with nothing on the agenda but deciding which shade of blue you're looking at.
Logistics Made Simple
One of the best aspects of this combination is how geographically convenient it is. Colombo and Malé are just over an hour apart by air, with multiple daily flights connecting the two capitals. This proximity means minimal travel fatigue and maximum time enjoying your destinations.Find More here https://holiday.com.mv/sri-lanka-and-maldives-twin-centre-holidays/
For those considering expanding their Indian Ocean adventure even further, Maldives multi-centre holidays open up possibilities beyond Sri Lanka. Dubai, Singapore, and various Indian cities all serve as excellent add-on destinations, turning an already incredible trip into a true odyssey.
Planning Considerations for 2026
Timing matters with this combination. The Maldives enjoys fairly consistent weather year-round, but Sri Lanka has two distinct monsoon seasons affecting different coasts at different times. Generally speaking, December through April works beautifully for both destinations, making it the peak season for this twin-centre route.
Budget-wise, expect Sri Lanka to be significantly more affordable than the Maldives. Many travellers use this to their advantage, opting for boutique hotels and authentic local experiences in Sri Lanka, then splurging on a premium resort for their Maldives finale. It's a strategy that delivers exceptional value without sacrificing that once-in-a-lifetime overwater villa experience.
The Verdict
A Sri Lanka Maldives multi-centre holiday isn't just about ticking two countries off a list. It's about crafting a journey with genuine contrast and emotional arc—adventure followed by serenity, cultural immersion followed by indulgent escape. For couples, honeymooners, families, and solo travellers alike, this combination consistently ranks among the most satisfying itineraries the Indian Ocean has to offer.
If you've been dreaming of ancient ruins at sunrise and sunset cocktails on a private deck over crystalline waters, this might just be your year to make it happen.
Ready to start planning your twin-centre adventure? Work with specialists who know both destinations intimately to create an itinerary that matches your travel style and budget.Find More here https://holiday.com.mv/maldives-multi-centre-holidays/
 Holiday Maldives
Combine ancient temples with overwater villas for the trip of a lifetime
There's a reason savvy travellers are increasingly looking beyond single-destination holidays. The Sri Lanka Maldives multi-centre trip has emerged as one of the most sought-after combinations in tropical travel—and it's easy to understand why. These two Indian Ocean neighbours couldn't be more different, yet together they create a holiday experience that satisfies every type of wanderlust.
Why Combine Sri Lanka and the Maldives?
Sri Lanka offers what the Maldives doesn't: lush highlands carpeted in tea plantations, ancient cities steeped in 2,500 years of history, wildlife safaris where leopards roam free, and a culinary scene that'll have you dreaming of hoppers and kottu for years to come. The Maldives, meanwhile, delivers what Sri Lanka can't: those iconic overwater bungalows, some of the planet's most pristine coral reefs, and the kind of barefoot luxury where your biggest decision is whether to have your massage on the beach or in your private villa.
A Sri Lanka and Maldives twin centre holiday lets you experience the thrill of exploration followed by pure, unadulterated relaxation. It's the best of both worlds—literally.
The Perfect Itinerary Balance
Most travellers find that spending 7-10 days in Sri Lanka followed by 4-7 days in the Maldives creates the ideal rhythm. Sri Lanka demands more time because there's simply so much ground to cover. You might start in Colombo, travel through the Cultural Triangle to explore Sigiriya's ancient rock fortress and Dambulla's cave temples, wind through the tea country around Ella, and perhaps end with a safari in Yala National Park before catching your flight to Malé.
Then comes the reward: touching down in the Maldives, boarding a speedboat or seaplane, and watching the stress of everyday life disappear as those famous turquoise lagoons come into view. After days of early morning temple visits and winding mountain roads, there's nothing quite like sinking into a lounger with nothing on the agenda but deciding which shade of blue you're looking at.
Logistics Made Simple
One of the best aspects of this combination is how geographically convenient it is. Colombo and Malé are just over an hour apart by air, with multiple daily flights connecting the two capitals. This proximity means minimal travel fatigue and maximum time enjoying your destinations.
For those considering expanding their Indian Ocean adventure even further, Maldives multi-centre holidays open up possibilities beyond Sri Lanka. Dubai, Singapore, and various Indian cities all serve as excellent add-on destinations, turning an already incredible trip into a true odyssey.
Planning Considerations for 2026
Timing matters with this combination. The Maldives enjoys fairly consistent weather year-round, but Sri Lanka has two distinct monsoon seasons affecting different coasts at different times. Generally speaking, December through April works beautifully for both destinations, making it the peak season for this twin-centre route.
Budget-wise, expect Sri Lanka to be significantly more affordable than the Maldives. Many travellers use this to their advantage, opting for boutique hotels and authentic local experiences in Sri Lanka, then splurging on a premium resort for their Maldives finale. It's a strategy that delivers exceptional value without sacrificing that once-in-a-lifetime overwater villa experience.
The Verdict
A Sri Lanka Maldives multi-centre holiday isn't just about ticking two countries off a list. It's about crafting a journey with genuine contrast and emotional arc—adventure followed by serenity, cultural immersion followed by indulgent escape. For couples, honeymooners, families, and solo travellers alike, this combination consistently ranks among the most satisfying itineraries the Indian Ocean has to offer.
If you've been dreaming of ancient ruins at sunrise and sunset cocktails on a private deck over crystalline waters, this might just be your year to make it happen.
Ready to start planning your twin-centre adventure? Work with specialists who know both destinations intimately to create an itinerary that matches your travel style and budget.Find more https://holiday.com.mv/sri-lanka-and-maldives-twin-centre-holidays/
 Prime Design and Build
Designing with Intent: Creating Homes That Tell a Story
Have you ever stepped into a home and felt an instant connection, as if the space itself welcomed you? That’s the power of designing with intent—a thoughtful approach that blends beauty with purpose, ensuring every detail has meaning.
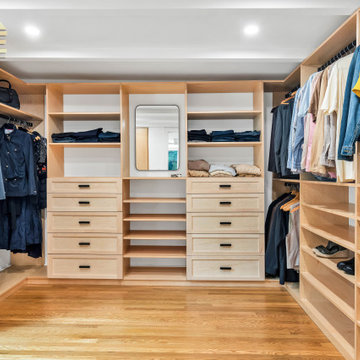
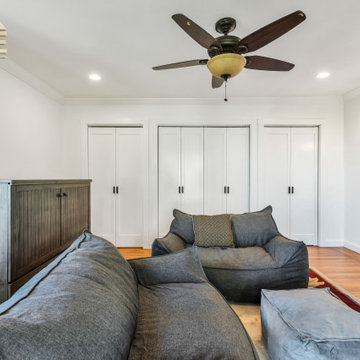
We recently worked on a remarkable 1937 home in Palomar Park, California. The project involved reimagining the second floor to create a master bedroom with a walk in closet and master bathroom while preserving the home’s traditional charm. For the homeowners, this house held decades of memories, and our goal was to honor its legacy while creating a space ready for the next chapter.
The Challenge: Balancing Tradition and Modernity
The homeowners wanted their remodeled space to feel fresh and functional without losing its historic character. This meant every decision, from the layout to the materials, had to strike the perfect balance.
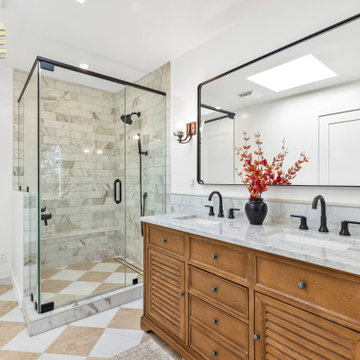
We rebuilt the upstairs including reconstruction of the existing bathroom to make an impressive master bathroom and dressing room, and refinished the hardwood floors to preserve the details that tied back to the home’s 1937 roots. By incorporating traditional elements like marble floors and walls in the bathroom , aged wood vanities and new crown molding for the whole upstairs, we ensured the updated design felt authentic and timeless.
3 Tips for Designing with Intent
Whether you’re working with a historic home or starting a new build, designing with intent can elevate your project. Here are three practical tips to help you create a space that’s as meaningful as it is beautiful:
1. Embrace the Home’s Character
Every home has unique features that tell a story. Whether it’s an original fireplace, old wood floors, or a quirky architectural detail, look for ways to celebrate and integrate these elements into your design.
2. Let Function Drive the Design
No matter how stunning a space looks, it needs to work for your lifestyle. Think about how you use each area and design accordingly. A thoughtful layout, smart storage solutions, and durable materials can transform a home from simply beautiful to truly livable.
In this project, reconfiguring the upstairs wasn’t just about aesthetics—it was about creating a layout that served the family’s everyday needs.
3. Personalize Your Space
The best designs reflect the people who live in them. Incorporate personal touches, such as family heirlooms, meaningful colors, or custom features, to make the space truly yours.
For this home, the homeowners were involved in selecting fixtures and materials that resonated with their style, ensuring the final design felt deeply personal.
Why Intentional Design Matters
Designing with intent transforms a house into a home. It’s about more than just aesthetics—it’s about creating a space that feels deeply connected to your story and needs.
At Prime Design and Build, we believe every project should start with understanding your vision. We work closely with our clients to ensure the design reflects their personality, values, and lifestyle.
Let’s Bring Your Vision to Life
If you’ve been dreaming of a home that feels like a true reflection of you, let’s make it happen. Whether it’s updating a historic property or starting fresh, we’re here to guide you through the process with expertise and care.
As I said in our Palomar Park video, “When we come over to your house, we will get to know you so that we can make your home feel like home too.”
Ready to start your journey? Reach out today for a consultation, and let’s design with intent.
 Prime Design and Build
Designing with Intent: Creating Homes That Tell a Story
Have you ever stepped into a home and felt an instant connection, as if the space itself welcomed you? That’s the power of designing with intent—a thoughtful approach that blends beauty with purpose, ensuring every detail has meaning.
We recently worked on a remarkable 1937 home in Palomar Park, California. The project involved reimagining the second floor to create a master bedroom with a walk in closet and master bathroom while preserving the home’s traditional charm. For the homeowners, this house held decades of memories, and our goal was to honor its legacy while creating a space ready for the next chapter.
The Challenge: Balancing Tradition and Modernity
The homeowners wanted their remodeled space to feel fresh and functional without losing its historic character. This meant every decision, from the layout to the materials, had to strike the perfect balance.
We rebuilt the upstairs including reconstruction of the existing bathroom to make an impressive master bathroom and dressing room, and refinished the hardwood floors to preserve the details that tied back to the home’s 1937 roots. By incorporating traditional elements like marble floors and walls in the bathroom , aged wood vanities and new crown molding for the whole upstairs, we ensured the updated design felt authentic and timeless.
3 Tips for Designing with Intent
Whether you’re working with a historic home or starting a new build, designing with intent can elevate your project. Here are three practical tips to help you create a space that’s as meaningful as it is beautiful:
1. Embrace the Home’s Character
Every home has unique features that tell a story. Whether it’s an original fireplace, old wood floors, or a quirky architectural detail, look for ways to celebrate and integrate these elements into your design.
2. Let Function Drive the Design
No matter how stunning a space looks, it needs to work for your lifestyle. Think about how you use each area and design accordingly. A thoughtful layout, smart storage solutions, and durable materials can transform a home from simply beautiful to truly livable.
In this project, reconfiguring the upstairs wasn’t just about aesthetics—it was about creating a layout that served the family’s everyday needs.
3. Personalize Your Space
The best designs reflect the people who live in them. Incorporate personal touches, such as family heirlooms, meaningful colors, or custom features, to make the space truly yours.
For this home, the homeowners were involved in selecting fixtures and materials that resonated with their style, ensuring the final design felt deeply personal.
Why Intentional Design Matters
Designing with intent transforms a house into a home. It’s about more than just aesthetics—it’s about creating a space that feels deeply connected to your story and needs.
At Prime Design and Build, we believe every project should start with understanding your vision. We work closely with our clients to ensure the design reflects their personality, values, and lifestyle.
Let’s Bring Your Vision to Life
If you’ve been dreaming of a home that feels like a true reflection of you, let’s make it happen. Whether it’s updating a historic property or starting fresh, we’re here to guide you through the process with expertise and care.
As I said in our Palomar Park video, “When we come over to your house, we will get to know you so that we can make your home feel like home too.”
Ready to start your journey? Reach out today for a consultation, and let’s design with intent.
 Prime Design and Build
Designing with Intent: Creating Homes That Tell a Story
Have you ever stepped into a home and felt an instant connection, as if the space itself welcomed you? That’s the power of designing with intent—a thoughtful approach that blends beauty with purpose, ensuring every detail has meaning.
We recently worked on a remarkable 1937 home in Palomar Park, California. The project involved reimagining the second floor to create a master bedroom with a walk in closet and master bathroom while preserving the home’s traditional charm. For the homeowners, this house held decades of memories, and our goal was to honor its legacy while creating a space ready for the next chapter.
The Challenge: Balancing Tradition and Modernity
The homeowners wanted their remodeled space to feel fresh and functional without losing its historic character. This meant every decision, from the layout to the materials, had to strike the perfect balance.
We rebuilt the upstairs including reconstruction of the existing bathroom to make an impressive master bathroom and dressing room, and refinished the hardwood floors to preserve the details that tied back to the home’s 1937 roots. By incorporating traditional elements like marble floors and walls in the bathroom , aged wood vanities and new crown molding for the whole upstairs, we ensured the updated design felt authentic and timeless.
3 Tips for Designing with Intent
Whether you’re working with a historic home or starting a new build, designing with intent can elevate your project. Here are three practical tips to help you create a space that’s as meaningful as it is beautiful:
1. Embrace the Home’s Character
Every home has unique features that tell a story. Whether it’s an original fireplace, old wood floors, or a quirky architectural detail, look for ways to celebrate and integrate these elements into your design.
2. Let Function Drive the Design
No matter how stunning a space looks, it needs to work for your lifestyle. Think about how you use each area and design accordingly. A thoughtful layout, smart storage solutions, and durable materials can transform a home from simply beautiful to truly livable.
In this project, reconfiguring the upstairs wasn’t just about aesthetics—it was about creating a layout that served the family’s everyday needs.
3. Personalize Your Space
The best designs reflect the people who live in them. Incorporate personal touches, such as family heirlooms, meaningful colors, or custom features, to make the space truly yours.
For this home, the homeowners were involved in selecting fixtures and materials that resonated with their style, ensuring the final design felt deeply personal.
Why Intentional Design Matters
Designing with intent transforms a house into a home. It’s about more than just aesthetics—it’s about creating a space that feels deeply connected to your story and needs.
At Prime Design and Build, we believe every project should start with understanding your vision. We work closely with our clients to ensure the design reflects their personality, values, and lifestyle.
Let’s Bring Your Vision to Life
If you’ve been dreaming of a home that feels like a true reflection of you, let’s make it happen. Whether it’s updating a historic property or starting fresh, we’re here to guide you through the process with expertise and care.
As I said in our Palomar Park video, “When we come over to your house, we will get to know you so that we can make your home feel like home too.”
Ready to start your journey? Reach out today for a consultation, and let’s design with intent.
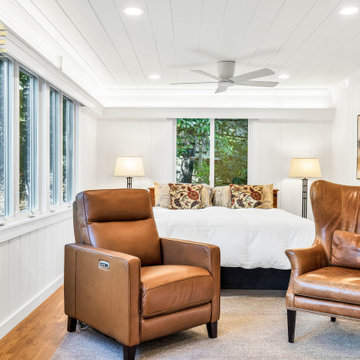 Prime Design and Build
Designing with Intent: Creating Homes That Tell a Story
Have you ever stepped into a home and felt an instant connection, as if the space itself welcomed you? That’s the power of designing with intent—a thoughtful approach that blends beauty with purpose, ensuring every detail has meaning.
We recently worked on a remarkable 1937 home in Palomar Park, California. The project involved reimagining the second floor to create a master bedroom with a walk in closet and master bathroom while preserving the home’s traditional charm. For the homeowners, this house held decades of memories, and our goal was to honor its legacy while creating a space ready for the next chapter.
The Challenge: Balancing Tradition and Modernity
The homeowners wanted their remodeled space to feel fresh and functional without losing its historic character. This meant every decision, from the layout to the materials, had to strike the perfect balance.
We rebuilt the upstairs including reconstruction of the existing bathroom to make an impressive master bathroom and dressing room, and refinished the hardwood floors to preserve the details that tied back to the home’s 1937 roots. By incorporating traditional elements like marble floors and walls in the bathroom , aged wood vanities and new crown molding for the whole upstairs, we ensured the updated design felt authentic and timeless.
3 Tips for Designing with Intent
Whether you’re working with a historic home or starting a new build, designing with intent can elevate your project. Here are three practical tips to help you create a space that’s as meaningful as it is beautiful:
1. Embrace the Home’s Character
Every home has unique features that tell a story. Whether it’s an original fireplace, old wood floors, or a quirky architectural detail, look for ways to celebrate and integrate these elements into your design.
2. Let Function Drive the Design
No matter how stunning a space looks, it needs to work for your lifestyle. Think about how you use each area and design accordingly. A thoughtful layout, smart storage solutions, and durable materials can transform a home from simply beautiful to truly livable.
In this project, reconfiguring the upstairs wasn’t just about aesthetics—it was about creating a layout that served the family’s everyday needs.
3. Personalize Your Space
The best designs reflect the people who live in them. Incorporate personal touches, such as family heirlooms, meaningful colors, or custom features, to make the space truly yours.
For this home, the homeowners were involved in selecting fixtures and materials that resonated with their style, ensuring the final design felt deeply personal.
Why Intentional Design Matters
Designing with intent transforms a house into a home. It’s about more than just aesthetics—it’s about creating a space that feels deeply connected to your story and needs.
At Prime Design and Build, we believe every project should start with understanding your vision. We work closely with our clients to ensure the design reflects their personality, values, and lifestyle.
Let’s Bring Your Vision to Life
If you’ve been dreaming of a home that feels like a true reflection of you, let’s make it happen. Whether it’s updating a historic property or starting fresh, we’re here to guide you through the process with expertise and care.
As I said in our Palomar Park video, “When we come over to your house, we will get to know you so that we can make your home feel like home too.”
Ready to start your journey? Reach out today for a consultation, and let’s design with intent.
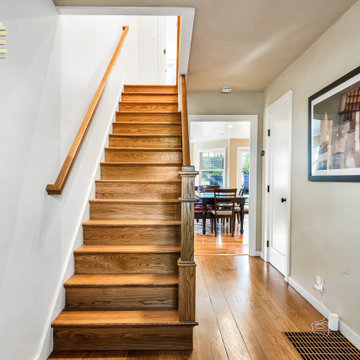 Prime Design and Build
Designing with Intent: Creating Homes That Tell a Story
Have you ever stepped into a home and felt an instant connection, as if the space itself welcomed you? That’s the power of designing with intent—a thoughtful approach that blends beauty with purpose, ensuring every detail has meaning.
We recently worked on a remarkable 1937 home in Palomar Park, California. The project involved reimagining the second floor to create a master bedroom with a walk in closet and master bathroom while preserving the home’s traditional charm. For the homeowners, this house held decades of memories, and our goal was to honor its legacy while creating a space ready for the next chapter.
The Challenge: Balancing Tradition and Modernity
The homeowners wanted their remodeled space to feel fresh and functional without losing its historic character. This meant every decision, from the layout to the materials, had to strike the perfect balance.
We rebuilt the upstairs including reconstruction of the existing bathroom to make an impressive master bathroom and dressing room, and refinished the hardwood floors to preserve the details that tied back to the home’s 1937 roots. By incorporating traditional elements like marble floors and walls in the bathroom , aged wood vanities and new crown molding for the whole upstairs, we ensured the updated design felt authentic and timeless.
3 Tips for Designing with Intent
Whether you’re working with a historic home or starting a new build, designing with intent can elevate your project. Here are three practical tips to help you create a space that’s as meaningful as it is beautiful:
1. Embrace the Home’s Character
Every home has unique features that tell a story. Whether it’s an original fireplace, old wood floors, or a quirky architectural detail, look for ways to celebrate and integrate these elements into your design.
2. Let Function Drive the Design
No matter how stunning a space looks, it needs to work for your lifestyle. Think about how you use each area and design accordingly. A thoughtful layout, smart storage solutions, and durable materials can transform a home from simply beautiful to truly livable.
In this project, reconfiguring the upstairs wasn’t just about aesthetics—it was about creating a layout that served the family’s everyday needs.
3. Personalize Your Space
The best designs reflect the people who live in them. Incorporate personal touches, such as family heirlooms, meaningful colors, or custom features, to make the space truly yours.
For this home, the homeowners were involved in selecting fixtures and materials that resonated with their style, ensuring the final design felt deeply personal.
Why Intentional Design Matters
Designing with intent transforms a house into a home. It’s about more than just aesthetics—it’s about creating a space that feels deeply connected to your story and needs.
At Prime Design and Build, we believe every project should start with understanding your vision. We work closely with our clients to ensure the design reflects their personality, values, and lifestyle.
Let’s Bring Your Vision to Life
If you’ve been dreaming of a home that feels like a true reflection of you, let’s make it happen. Whether it’s updating a historic property or starting fresh, we’re here to guide you through the process with expertise and care.
As I said in our Palomar Park video, “When we come over to your house, we will get to know you so that we can make your home feel like home too.”
Ready to start your journey? Reach out today for a consultation, and let’s design with intent.
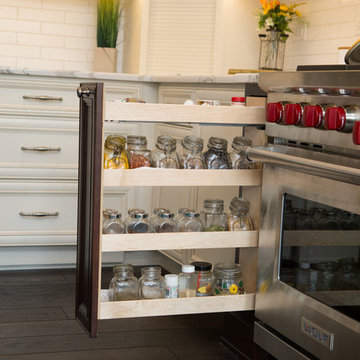 Advance Design Studio, Ltd.
Raza and Baneen purchased their home in Schaumburg IL. knowing it needed work, but they saw the incredible potential it had with its expanse of beautiful kitchen windows and spacious floor plan.
The kitchen technically functioned fine, but was desperately outdated with its honey oak cabinets and plain countertops. This family loved to cook and host parties so it was an easy decision that the kitchen remodel was the first project they needed to tackle to make their home come to life.
Baneen had very specific ideas for her new dream kitchen and had been thinking about it for over 10 years! When they met Advance Design’s Project Designer Claudia Pop, Baneen felt an instant connection.
“From the first meeting, I knew that Claudia would guide us without putting down our ideas,” Baneen said.
The couple had two fears common among remodeling home owners: Would the project be done on time? And, would the project stay on budget? Advance Design was able to alleviate their fears early on, as Claudia shared the “Common Sense Remodeling” process. Raza and Baneen absolutely loved the custom project analysis that helped them understand how a budget could be accurately predicted and then safeguarded during the design process.
“Advance Design was spot on with both the budget and the project timeframe,” Baneen said. “Overall there were no surprises, and the budget was exactly what we were quoted. The experience was phenomenal, everybody was professional, everybody was courteous, everyone was nice, everyone was friendly. It wasn't stressful for us, they still left the house in a presentable state. It wasn't like we would come home and we were bring the kids in and it was going to be hazardous."
After the relationship was cemented, Raza, Baneen and Claudia began to finalize the kitchen design. The main objective was to create a functional space for preparing meals and to create an inviting space for their family and friends to enjoy, while incorporating interesting design elements such as the iconic blue island and reclaimed Chicago brick walls. Sufficient storage space was really important to Baneen, and high quality appliances were a priority. As the overall layout was being completed, together they reviewed each cabinet to determine exactly what would be stored there.
Because cooking was a high priority for this family, Claudia incorporated spice racks close to the range and included two mixer lift shelves for their larger countertop appliances.
The focal point of the kitchen is the striking blue island constructed from custom colored Dura Supreme cabinets. Designed with decorative shelving and a highly functional prep sink. The couple loves the “galley” prep sink, it adds even more functionality and significantly shortens preparation and cleaning time. This island also includes a 24" Bosch Dishwasher with matching panel to blend in.
"Aesthetically, and in terms of functionality, the island everything I imagined," Baneen said. "I love how beautiful it looks and how functional it is. It just brings everybody together."
The Praa Sands Quartz countertop with an ogee edge profile provides excellent contrast by blending it's subtle tones with the outer cabinetry. It ties the island together with the rest of the space. Overlooking the beautiful backyard through spacious windows, the crisp white farmhouse sink is something that Baneen envisioned in her kitchen for years.
Two tones of Dura Supreme Cabinetry were used throughout the rest of the kitchen. Chestnut Cherry cabinets grace the range and decorative range hood and as panels over the Wolf refrigerator and freezer. Antique White cabinets surround the perimeter, creating a warm balance that beckons guests into the softly rounded space.
Drawing the eye immediately to the custom wood hood hiding a powerful 1,500 CFM ventilation system and spectacular 60” Duel Fuel Wolf range, a creatively patterned Tessen in Café & Brine backsplash detail stands out from the white subway tile backsplash spanning the outer walls. The vibrant space reflects the lively personality of the family who now loves spending time both cooking and enjoying this kitchen as a family.
“The end result is a beautiful and extremely functional kitchen that is able to handle a growing family, lots of parties and lots of cooking,” Claudia said.
“Advance Design was wonderfully professional and a pleasure to work with. They catered to what my needs and ideas were, while skillfully guiding us to make the right choices where we seemed lost,” Baneen said.
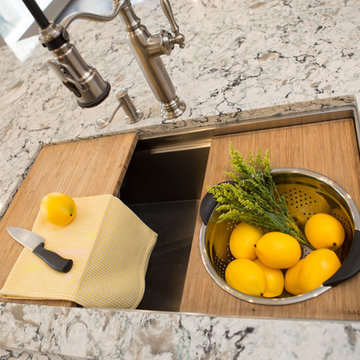 Advance Design Studio, Ltd.
Raza and Baneen purchased their home in Schaumburg IL. knowing it needed work, but they saw the incredible potential it had with its expanse of beautiful kitchen windows and spacious floor plan.
The kitchen technically functioned fine, but was desperately outdated with its honey oak cabinets and plain countertops. This family loved to cook and host parties so it was an easy decision that the kitchen remodel was the first project they needed to tackle to make their home come to life.
Baneen had very specific ideas for her new dream kitchen and had been thinking about it for over 10 years! When they met Advance Design’s Project Designer Claudia Pop, Baneen felt an instant connection.
“From the first meeting, I knew that Claudia would guide us without putting down our ideas,” Baneen said.
The couple had two fears common among remodeling home owners: Would the project be done on time? And, would the project stay on budget? Advance Design was able to alleviate their fears early on, as Claudia shared the “Common Sense Remodeling” process. Raza and Baneen absolutely loved the custom project analysis that helped them understand how a budget could be accurately predicted and then safeguarded during the design process.
“Advance Design was spot on with both the budget and the project timeframe,” Baneen said. “Overall there were no surprises, and the budget was exactly what we were quoted. The experience was phenomenal, everybody was professional, everybody was courteous, everyone was nice, everyone was friendly. It wasn't stressful for us, they still left the house in a presentable state. It wasn't like we would come home and we were bring the kids in and it was going to be hazardous."
After the relationship was cemented, Raza, Baneen and Claudia began to finalize the kitchen design. The main objective was to create a functional space for preparing meals and to create an inviting space for their family and friends to enjoy, while incorporating interesting design elements such as the iconic blue island and reclaimed Chicago brick walls. Sufficient storage space was really important to Baneen, and high quality appliances were a priority. As the overall layout was being completed, together they reviewed each cabinet to determine exactly what would be stored there.
Because cooking was a high priority for this family, Claudia incorporated spice racks close to the range and included two mixer lift shelves for their larger countertop appliances.
The focal point of the kitchen is the striking blue island constructed from custom colored Dura Supreme cabinets. Designed with decorative shelving and a highly functional prep sink. The couple loves the “galley” prep sink, it adds even more functionality and significantly shortens preparation and cleaning time. This island also includes a 24" Bosch Dishwasher with matching panel to blend in.
"Aesthetically, and in terms of functionality, the island everything I imagined," Baneen said. "I love how beautiful it looks and how functional it is. It just brings everybody together."
The Praa Sands Quartz countertop with an ogee edge profile provides excellent contrast by blending it's subtle tones with the outer cabinetry. It ties the island together with the rest of the space. Overlooking the beautiful backyard through spacious windows, the crisp white farmhouse sink is something that Baneen envisioned in her kitchen for years.
Two tones of Dura Supreme Cabinetry were used throughout the rest of the kitchen. Chestnut Cherry cabinets grace the range and decorative range hood and as panels over the Wolf refrigerator and freezer. Antique White cabinets surround the perimeter, creating a warm balance that beckons guests into the softly rounded space.
Drawing the eye immediately to the custom wood hood hiding a powerful 1,500 CFM ventilation system and spectacular 60” Duel Fuel Wolf range, a creatively patterned Tessen in Café & Brine backsplash detail stands out from the white subway tile backsplash spanning the outer walls. The vibrant space reflects the lively personality of the family who now loves spending time both cooking and enjoying this kitchen as a family.
“The end result is a beautiful and extremely functional kitchen that is able to handle a growing family, lots of parties and lots of cooking,” Claudia said.
“Advance Design was wonderfully professional and a pleasure to work with. They catered to what my needs and ideas were, while skillfully guiding us to make the right choices where we seemed lost,” Baneen said.
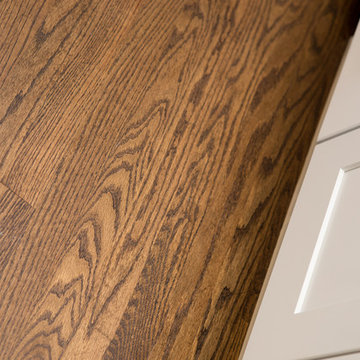 Advance Design Studio, Ltd.
After six years of living in their Huntley IL home, Chris and Meghan were tired of their dark, dingy, outdated kitchen and it was finally time for a long-anticipated change. “The kitchen is the place where we live, it’s where we do everything,” Meghan said. “It was important that it be a space where we wanted to be.” Meghan loves cooking and enjoys including their girls in healthy meal prepping, this led them to want a brighter, more enjoyable kitchen with increased functionality and improved storage.
For Chris especially, the laundry room was an entirely dysfunctional eyesore. “We had a washer and a dryer, but it was all kind-of cobbled together!” Chris said. “There were always laundry piles everywhere, we weren’t really sure what we wanted to do in there, but it was time for us to make a change.” The mess of the space was stressful every time they walked in the door from the garage each day. Kids’ backpacks and shoes piled up haphazardly in the makeshift boot-bench closet left the family feeling disorganized and stressed. They needed space for folding clothes and locker cubbies to help keep the family organized.
Having known Christine and Todd in the Huntley community for years, Chris and Meghan were familiar with their work. “We already trusted them personally and having seen their projects for years we knew they did top notch work. After we reviewed the initial round of designs, we knew that hiring them was definitely the right choice,” Meghan and Chris said. Although Chris had done a lot of work in their home himself, the kitchen and laundry room renovation was such a large undertaking that he didn’t want to steal time away from his family to spend what would surely be many long weekends doing the job himself. “That would not have been a wise choice for us,” Chris laughed.
“Our designer, Michelle was very, very, easy to work with; anything we wanted to see or weren’t sure about, she went above and beyond to make this easy for us. She was easy to get hold of and always quick to respond,” the couple said. Michelle pulled ideas that mirrored the couple’s taste and style and was adept at directing the couple to limited choices that didn’t overwhelm them and kept the process moving. “I have a hard time making decisions. Michelle made the decision-making process so easy. I loved how she listened to what I liked and then presented three great options for me to choose from,” Meghan said.
The main objectives for the kitchen were better storage solutions, they wanted the space to reflect their lifestyle and taste, and they wanted it to last for years with low maintenance. One of the first steps in creating a more functional kitchen was relocating the refrigerator, creating an improved workflow for the busy family.
“We didn’t know that we could even move the refrigerator to a new location where it is now, that was something that we never would have thought of,” Chris said. “The new refrigerator location makes the kitchen feel so much bigger. We didn’t add any space, but our whole kitchen with the new design just seems like it’s so much larger than before!” Meghan said.
The perimeter mist colored cabinets helped warm and brighten the entire room, while the graphite colored cabinets on the island added contrast. Using this fresh, clean color palette satisfied the couple’s desire for a bright space that was the exact opposite of what they had before. Organization accessories were also added to the cabinets such as a spice drawer tray and roll outs to create hidden convenience.
“I absolutely love the hidden spices – it makes cooking so much more enjoyable!” Chris said. “And all the pull outs, and the double trash bin, who would think you could get so excited about organization!” the couple said in unison.
One thing they hated in their original kitchen was how dark the space felt. Added lighting on the ceiling with the new light fixtures combined with the lighter cabinetry colors throughout solved this problem. “Our new kitchen has this warm, almost cozy feeling that our old kitchen never had, it’s just a space that I love spending my time in now,” Meghan said. The light airy feeling was accentuated with the use of floating white shelves on either side of the decorative range hood. “We have so much cabinetry space, the new design is amazing we actually have more storage space than we will ever need,” Meghan said.
The island was extended to create more work surface and added space for stool seating. “The new island changes how we live. Now the kids can be in the kitchen with us, doing homework, eating breakfast, and the three of us have special dinners there when Chris is working late,” Meghan said.
The Carrara Marmi Quartz countertops were chosen because they are, not only beautiful, but are made from hard-working material that doesn’t require maintenance. The white subway tile backsplash that wraps to the ceiling behind the focal point cooktop range/hood compliments the crisp white countertops perfectly, while brushed brass hardware and light fixtures keep the design fresh and new.
The couple had a few fears at the beginning of the project, as most homeowners do. Their biggest fear was being out of their kitchen and laundry room for an extended time. The crew made it very easy for the family to work in a limited space keeping the washer and dryer hooked up the majority of the time, and also getting appliances working with minimal downtime.
“They above and beyond accommodated us to get us through the process,” Meghan said. “They did a great job making sure we were as comfortable as possible throughout the process,” Chris added.
“Our project manager DJ did a great job. He was very good at updating us on schedule changes, getting guys in as quickly as possible. Everyone that stepped in the house was nice and did great work,” said Chris. They thought Advance’s carpenter was phenomenal and were impressed when he took a conceptual idea from a photograph and worked with designer Michelle to create a one of a kind range/hood that has become the topic of conversation with friends and family who visit the new kitchen. “He was in our house literally every day for several weeks. He was easy to work with and good at what he did,” Meghan and Chris said.
The focal point of the kitchen; a hand-crafted, custom-built ventilation hood was clad with handpicked reclaimed barnwood. Advance Design’s carpenter built the framework and the cladding to create a one-of-a-kind design element that the couple loves.
“I think it was especially fun for him to create something unique from scratch, showcasing his talent in this area,” Meghan said. “I love that my kitchen is not like everyone else’s. I got to pick out the wood on my hood and watch it being built and was able to choose what pieces of wood went where on it. It’s totally unique.”
Red Oak flooring was toothed-in throughout the kitchen and the rest of the first floor anywhere changes were made. Then the whole floor was refinished to tone down the orange undertones in the existing floor stain, ultimately changing the color complexion of the entire first floor. The result is a completely new feeling to the entire home.
Renovating the laundry room was extremely important to Meghan and Chris, but they had trouble visualizing what the possibilities were for the seemingly small space. Michelle produced beautiful 3D illustrations that helped them envision the space in a whole new way.
“I must have told Michelle 100 times that I am a visual person, seeing the designs in 3D made it so easy to make decisions and see what we could really do with our space,” Meghan said.
A dividing wall and doorway were removed between the existing laundry room and hallway formerly containing a coat closet, providing space to design specialized graphite colored cabinetry matching the kitchen island to house custom storage cubbies for each family member. Adding the tall utility cabinetry in the new laundry area helped solve the storage issue, tucking away cleaning supplies, household items, and even the cat got its own cubby.
“I love how everything is now hidden in its own space. I can’t tell you how much I hated coming home and seeing everything sitting around on counters,” Chris said.
Electrical outlets were planned for the inside of utility cabinets, so devices could charge in hidden locations. Stacking the washer and dryer allowed for wider countertop space to provide a folding area and a special space for clothes to hang. “The way I do laundry has been completely transformed! I can actually fold clothes and hang them now right out of the washer and dryer,” Meghan said.
“The end result in the kitchen and the laundry/mud room was an updated light and bright space, with a smarter work flow that better meets the needs of this family,” Michelle said.
“I would totally recommend Advance Design,” Meghan said. “Sometimes I sit and just look at my kitchen and laundry room and think ‘Wow, I can’t believe I get to live here!’ It’s an understatement to say we love our new space.”
38