
Search results for "Floor caused" in Home Design Ideas
 Tile Doctor Ltd
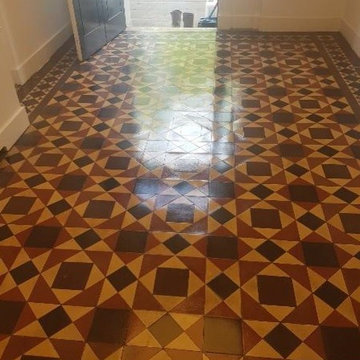
These are photos of a Victorian tiled floor we renovated at the new Scottish head office of the Peoples Postcode Lottery in the centre of Edinburgh City where the building was going through a multi million pound refurbishment. Edinburgh has a lot of Georgian and Victorian architecture, much of which is listed and as a result many still have original Victorian tiled flooring.
I’ve not really looked at the Postcode Lottery until now but put simply you give the lottery £10 a month and your postcode is your winning ticket number, there are prize draws every day and if your postcode comes up every one in the system with that postcode wins; they also give 31% to charity which is impressive.
You can see from the photograph that the floor was in good physical condition but was looking tired and dull. This is not unusual for Victorian tiles as once the sealer wears down dirt can penetrate into the pores of the tile causing it to lose its appearance.
On the first day we set about stripping the floor of what remained of the old sealant using a strong dilution of Tile Doctor Pro-Clean which is an industrial strength alkaline tile and grout cleaning product that is safe to use on Tile and Stone. The product is applied to the floor, left to soak in for ten minutes and the scrubbed into the tile using a black scrubbing pad fitted to a rotary bonnet machine. The floor was then rinsed and the now soiled cleaning solution extracted using a wet vacuum.
The process was repeated several times until we were happy the floor was clean and free of sealer and then given a final rinse with water. Before leaving for the day the floor was dried as much as possible using the wet vacuum to extract as much moisture as possible.
On the second day our first task was to check the floor with a damp meter in several places to ensure the tiles had dried off overnight. All was well and we began the process of sealing the floor with a Tile Doctor Seal and Go. This is a topical sealer which provides a high-quality low-sheen finish and protection against ingrained dirt and stains.
Victorian tiles are quite porous and five coats were needed to fully seal the floor. This took some time to complete as you have to wait until the first coat is dry before applying the next however it was well worth the effort as the floor looked fantastic afterwards.
Thomas Wilson
Edinburgh Tile Doctor
 Astounding Surroundings Staging
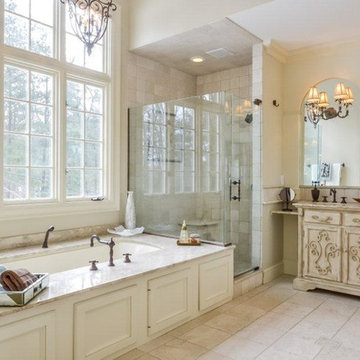
After Staging of the Master Bathroom.
Corner shower - large traditional master beige tile and stone tile travertine floor and beige floor corner shower idea in New York with furniture-like cabinets, beige cabinets, an undermount tub, beige walls, a vessel sink and a hinged shower door
Corner shower - large traditional master beige tile and stone tile travertine floor and beige floor corner shower idea in New York with furniture-like cabinets, beige cabinets, an undermount tub, beige walls, a vessel sink and a hinged shower door
 Kitchen & Bath Design + Construction
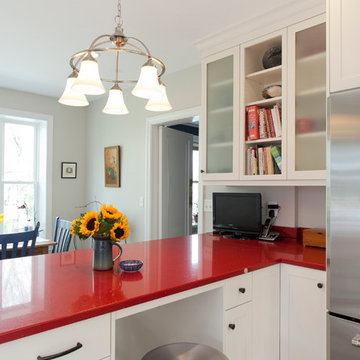
Seating and storage were incorporated into the new, wider peninsula. Frosted glass door inserts in the cabinetry add interest. Photography by Chrissy Racho
Find the right local pro for your project
 S & J Biren Floor Covering
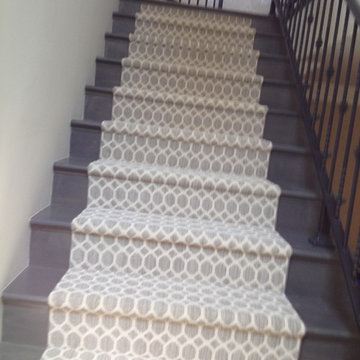
Staircase - mid-sized transitional wooden l-shaped staircase idea in Los Angeles with wooden risers
 Shuler Architecture
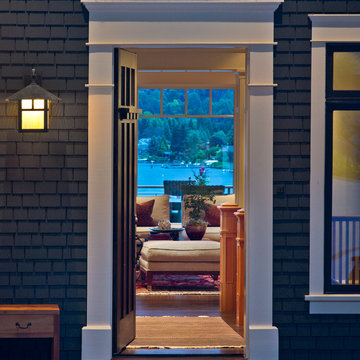
Here's one of our most recent projects that was completed in 2011. This client had just finished a major remodel of their house in 2008 and were about to enjoy Christmas in their new home. At the time, Seattle was buried under several inches of snow (a rarity for us) and the entire region was paralyzed for a few days waiting for the thaw. Our client decided to take advantage of this opportunity and was in his driveway sledding when a neighbor rushed down the drive yelling that his house was on fire. Unfortunately, the house was already engulfed in flames. Equally unfortunate was the snowstorm and the delay it caused the fire department getting to the site. By the time they arrived, the house and contents were a total loss of more than $2.2 million.
Here's one of our most recent projects that was completed in 2011. This client had just finished a major remodel of their house in 2008 and were about to enjoy Christmas in their new home. At the time, Seattle was buried under several inches of snow (a rarity for us) and the entire region was paralyzed for a few days waiting for the thaw. Our client decided to take advantage of this opportunity and was in his driveway sledding when a neighbor rushed down the drive yelling that his house was on fire. Unfortunately, the house was already engulfed in flames. Equally unfortunate was the snowstorm and the delay it caused the fire department getting to the site. By the time they arrived, the house and contents were a total loss of more than $2.2 million.
Our role in the reconstruction of this home was two-fold. The first year of our involvement was spent working with a team of forensic contractors gutting the house, cleansing it of all particulate matter, and then helping our client negotiate his insurance settlement. Once we got over these hurdles, the design work and reconstruction started. Maintaining the existing shell, we reworked the interior room arrangement to create classic great room house with a contemporary twist. Both levels of the home were opened up to take advantage of the waterfront views and flood the interiors with natural light. On the lower level, rearrangement of the walls resulted in a tripling of the size of the family room while creating an additional sitting/game room. The upper level was arranged with living spaces bookended by the Master Bedroom at one end the kitchen at the other. The open Great Room and wrap around deck create a relaxed and sophisticated living and entertainment space that is accentuated by a high level of trim and tile detail on the interior and by custom metal railings and light fixtures on the exterior.
 Maison Birmingham
The main goal of this renovation was to update an authentic mid-century home to suit a modern lifestyle, while still maintaining the original character and aesthetic of the home.
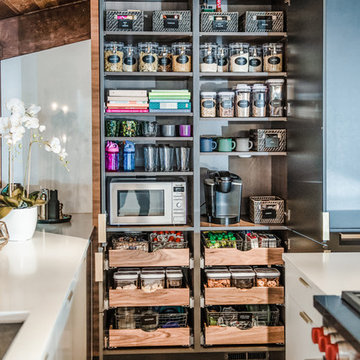
To create a more open, family friendly space also suitable for entertaining, walls between the kitchen, dining room and living room were removed to create an open area to house the 360-sq.-ft. kitchen. Upon demolition, it was noted that some areas of the original tongue and groove ceiling had aged much differently than the rest of the ceiling. Rather than stain the areas and cause them to age differently, we opted to apply oil to darken the wood so that it will all continue to age at the same pace.
Balancing new materials and tones with the existing abundance of wood was challenging, but in the end the balance was achieved with custom cabinetry in both white and anthracite matte lacquer, which is complemented by a custom floating walnut buffet in the dining area. Keeping the island and perimeter base cabinet finishes the same made the space feel more open, and presented the opportunity to create a dark focal wall for the refrigerator and pantry. These custom anthracite matte lacquer cabinets provide a striking yet subtle contrast with the white and wood, while incorporating well concealed pantry storage with microwave, as well as a Sub-Zero refrigerator.
In lieu of a typical exhaust hood, downdraft ventilation was installed in the island, and pendants were omitted to keep the space open, but also more consistent with the original design of the home. Brass globe sconces were installed on either side of the sink to bring in warmth, and frame the view of the gorgeous greenery outside.
This Project was a fantastic collaboration with Lauren Combs of The Neat Method Michigan
Proudly Featured in Detroit Home October 2017
Photography by Boswell Hardwick
 David Rosenkranz Custom Homes
ProMedia Tours
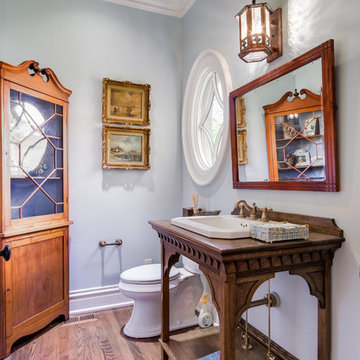
Example of a classic powder room design in Nashville with a drop-in sink, furniture-like cabinets, medium tone wood cabinets, wood countertops, a two-piece toilet and blue walls
Example of a classic powder room design in Nashville with a drop-in sink, furniture-like cabinets, medium tone wood cabinets, wood countertops, a two-piece toilet and blue walls

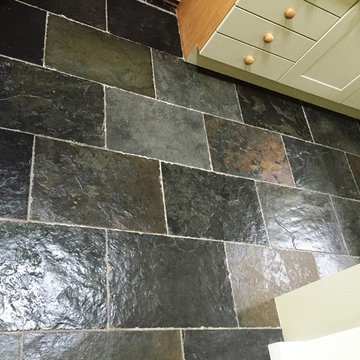 Tile Doctor Ltd
This small rough Chinese Slate floor in the kitchen of a house in the village of Cheadle near Stockport in Greater Manchester had not had any sealer put on it for many years and was very grubby (dishevelled as described by the customer) looking even after the customer had tried to clean it.
Sealers do take a lot of punishment, especially in a high traffic area such as a small kitchen and will wear off over time and once this happens the floor will start to lose its appearance as dirt becomes ingrained in the stone and it can no longer be cleaned effectively.
As we have to apply a liberal amount of water with this sort of work, the first step was to remove the Kicker boards at the bottom of the Kitchen units and silicone the Kitchen units that were fixed; this stops water seeping in and blowing the MDF allowing us to concentrate on cleaning the Slate without causing any damage.
I started the cleaning process by applying a strong dilution of Tile Doctor Pro-Clean to get rid of the built up dirt and any remaining sealer, leaving it to soak into the Slate before scrubbing the floor with a black scrub pad fitted to buffing machine running at slow speed. Tile Doctor Pro-Clean is a strong alkaline cleaner/stripper that is safe to use on natural stone, we do have stronger products available if required but in this case a strong dilution of Pro-Clean was sufficient to tackle any remaining sealer.
This process gave the Slate and grout lines a good deep clean and after rinsing the floor with water which was then extracted using a wet vacuum I repeated the process on stubborn areas until satisfied the floor was as clean and free of old sealer. Last stage of the cleaning process was to give the floor a final rinse and then get it as dry as possible using the wet vacuum to soak up the moisture.
The floor was quite small so I was able to leave the floor to dry off over lunch time and then on my return managed to get it fully dry with a little heat from a heat gun. The customer wanted a mat finish so once dry I applied Tile Doctor Colour Grow sealer which impregnates into the pores of the natural stone protecting it from within and enhancing the natural colours of the Slate at the same time.
For general cleaning of Sealed stone floors, we recommend the use of a PH Neutral Cleaner as anything with a strong PH will degrade the life of the sealer over time.
Steve Keary
Greater Manchester Tile Doctor
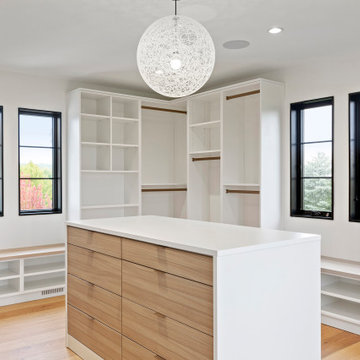
 Zawadski Homes Inc.
Custom closet with island in the master bedroom suite.
Huge trendy gender-neutral light wood floor and brown floor walk-in closet photo in Minneapolis with flat-panel cabinets and white cabinets
Huge trendy gender-neutral light wood floor and brown floor walk-in closet photo in Minneapolis with flat-panel cabinets and white cabinets
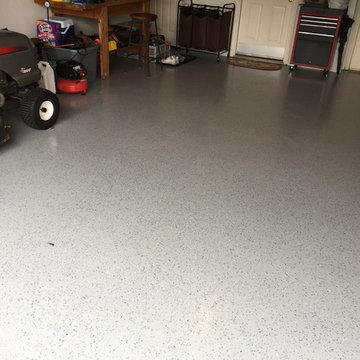
 Versatile Coatings LLC
The customer had VCT on the floor and had a bad water leak that caused it to start coming off. Instead of going back with VCT they wanted something that would hold up if there was another leak and something more decorative. They went with my partial flake garage floor coating and couldn't be happier!
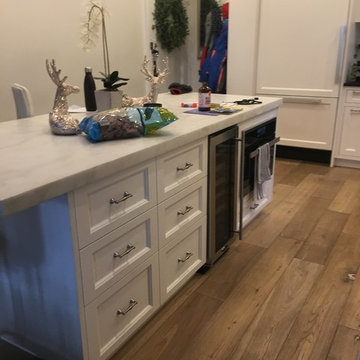
 Huggins Wood Floor Specialist
/Zero VOC means no Volatile Organic Compounds – those long-chain hydrocarbons that contribute to interior air pollution and can combine with nitrogen oxides to form ground-level ozone – are released as the finish cures.
A zero-VOC finish is hard to find in the floor coating industry and we had been searching for one for a while. It’s not exactly clear why the floor finishing business is so far behind the paint industry – VOC-free paints have been available in mainstream retail for at least two years.
Flooring finishes seem to rely heavily on those volatile petroleum-distillate-based solvents that keep the solids and resins in solution until applied but evaporate quickly to allow the finish to dry and cure in a reasonable time.
But mineral spirits and petroleum distillates release high levels of VOCs that can cause eye, skin, nose and throat irritation, and they are neurotoxins that may depress or damage the brain and nervous system. Short-term exposure to VOCs can cause dizziness, headache, drowsiness and nausea.
You could contact us at (908)232-6600 visit our showroom located at 406B West Broad St Westfield, NJ or visit our website https://newyorkcitywoodfloors.com
 River Woodcraft
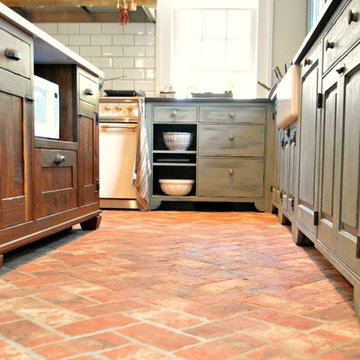
Large farmhouse u-shaped brick floor and red floor enclosed kitchen photo in Philadelphia with a farmhouse sink, raised-panel cabinets, blue cabinets, marble countertops, white backsplash, subway tile backsplash, paneled appliances, an island and gray countertops
 Tile Doctor Ltd
Most stone and tile benefit from the protection that a sealer provides to stop dirt becoming ingrained into its pores. However, the act of walking on the tile causes wear and this over time will lead to the sealer wearing off and dirt reaching the pores; the worse thing is you rarely notice it happening because it takes a long time to wear down a sealer.
Most of my customers have this problem and call on me to clean and reseal the floors every few years when it becomes difficult to clean effectively. The alternative which I do for a number of my clients is to have the floor lightly cleaned and a new layer of sealer added every six to twelve months.
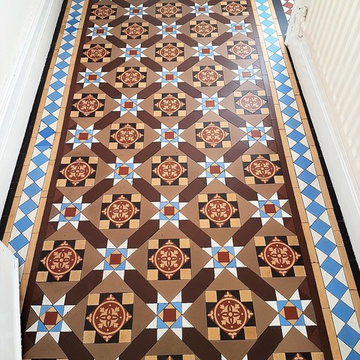
This Victorian tiled entrance at a period house in Ilkley was not in too bad a shape just a little dirty and dull and the owner was keen to have is renovated in the run up to the Christmas holidays. Ilkley is a lovely town in West Yorkshire which became very fashionable in the Victorian era due to the health benefits of the local water, this led to a lot of Victorian architecture and tiled entrance floors like this one are very typical in the area.
To get the dirt out of the tile and grout I applied a strong dilution of Tile Doctor Pro-Clean to the tiles and left it to soak in for fifteen minutes. Pro-Clean is a very reliable cleaner for all types of tile and grout including natural stone, Limestone, Slate and Travertine, amongst others; additionally, when used in a strong dilution it will strip off old sealers. The solution was then worked into the tile using a black scrubbing pad fitted to a rotary machine and the soil extracted using a wet vacuum.
I gave the floor a light rinse with water to remove any trace of cleaning products and then inspected the floor to ensure it was up to standard. At this point I could see there were flecks of paint on the tile around the edges of the floor from previous decorating work and, so I removed carefully removed these with a scrapper and a hand-held diamond block.
The floor was given a final rinse and the wet vacuum used to extract as much moisture from the floor as possible before leaving it to dry for the evening.
I returned the next day to seal the floor first discussing the finish that the customer wanted for the tiles. Typically, I recommend using a satin sealer for Victorian tiles as it adds a nice sheen to the tile however surprisingly the owner wanted a matt finish.
Tile Doctor has a full range of sealers available to cater for all requirements so for this floor I applied three coats of Tile Doctor Colour Grow which leaves a matt finish whilst enriching the colours in the tile.
The tiles are now full of life and with the paint specs removed there is now a crisp black edge between the floor and the skirting which the customer also picked up on.
Nigel Stoker
North West Yorkshire Tile Doctor
Sponsored
Sunbury, OH

J.Holderby - Renovations
Franklin County's Leading General Contractors - 2X Best of Houzz!
 Stone Action
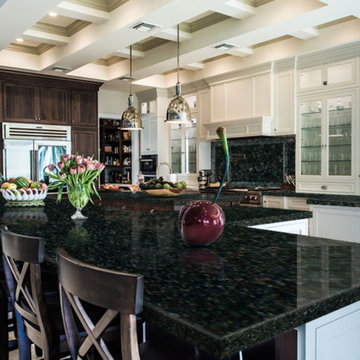
Butterfly Green granite is shown in this project!
Search "Butterfly Greenl" granite, see more granite or other stone options: http://www.stoneaction.com
Learn more about granite to see if it’s right for you:
Granite countertops can last a lifetime. It contains no harmful chemicals and do not emit harmful radiation or gasses. Granite is heat resistant and is one of the most heat-resistant countertops on the market. You can place a hot pan out of the oven directly onto the countertop surface. Experts do recommend the use of a trivet when using appliances that emit heat for long periods of time, such as crockpots. Since the material is so dense, there is a small possibility heating one area of the top and not the entire thing, could cause the countertop to crack.
Granite is scratch resistant. You can cut on it, but it will dull your knives! Granite scores a seven on Moh’s hardness scale.
Granite countertops are considered to be a low maintenance countertop surface. The likelihood of needing to be repaired or resurfaced is low. Granite is a porous material. Most fabricators will apply a sealer to granite countertops before they are installed which will protect them from absorbing liquids too quickly. Many sealers last more than 10 years before needing to be reapplied. When they do need to be reapplied, it is something that most homeowners can do on their own as the process is similar to cleaning. Darker granites are very dense and sometimes don’t even require a sealer.
When it comes to pricing, there are a lot of variables such as edge profile, total square footage, backsplash, etc. Don’t be fooled by the stereotype that all granite is expensive. Lower-range granites will cost less than high-range laminate. Though granite countertops are not considered “low range” in pricing, there are a lot of affordable options.
If you are looking for something truly unique, consider an exotic granite. Some quarries are not easily accessible and/or only able to be quarried for short periods of time throughout the year. If these circumstances exist in a quarry with gorgeous stone, the price will be driven upward.
You won’t find a lot of solid patterns or bright colors, but both do exist. Also, watch for a large range of color and pattern within the same color of stone. It’s always a good idea to view the exact slab(s) that will be fabricated for your kitchen to make sure they are what you expected to see from the sample. Another factor is that many exotic types of granite have huge flowing waves, and a small sample will not be an accurate representation of the whole slab.
Granite countertops are very resistant to chemicals. Acids and bases will not harm the material.
 Windstone Partners
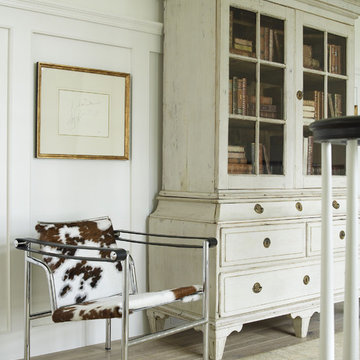
Mid-sized elegant light wood floor and beige floor entry hall photo in Houston with white walls
 Rosen+Co Design Studio
Stephani Buchman
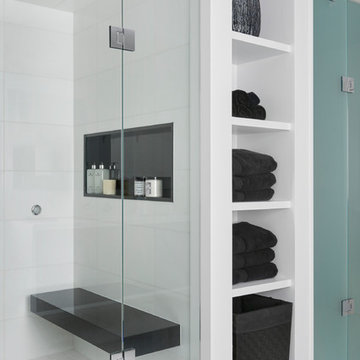
Large transitional master black and white tile and mosaic tile marble floor bathroom photo in Toronto with flat-panel cabinets, black cabinets, white walls, an undermount sink and quartz countertops
Large transitional master black and white tile and mosaic tile marble floor bathroom photo in Toronto with flat-panel cabinets, black cabinets, white walls, an undermount sink and quartz countertops
 JRP Design & Remodel
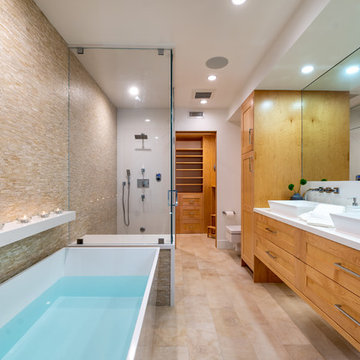
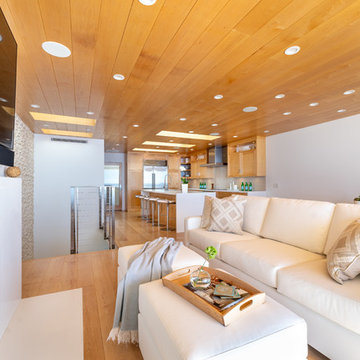
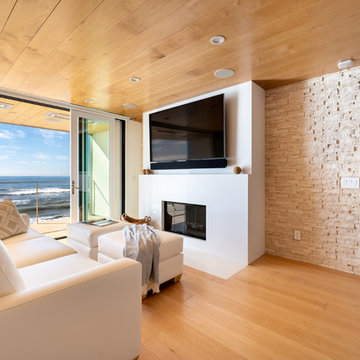
Our clients are seasoned home renovators. Their Malibu oceanside property was the second project JRP had undertaken for them. After years of renting and the age of the home, it was becoming prevalent the waterfront beach house, needed a facelift. Our clients expressed their desire for a clean and contemporary aesthetic with the need for more functionality. After a thorough design process, a new spatial plan was essential to meet the couple’s request. This included developing a larger master suite, a grander kitchen with seating at an island, natural light, and a warm, comfortable feel to blend with the coastal setting.
Demolition revealed an unfortunate surprise on the second level of the home: Settlement and subpar construction had allowed the hillside to slide and cover structural framing members causing dangerous living conditions. Our design team was now faced with the challenge of creating a fix for the sagging hillside. After thorough evaluation of site conditions and careful planning, a new 10’ high retaining wall was contrived to be strategically placed into the hillside to prevent any future movements.
With the wall design and build completed — additional square footage allowed for a new laundry room, a walk-in closet at the master suite. Once small and tucked away, the kitchen now boasts a golden warmth of natural maple cabinetry complimented by a striking center island complete with white quartz countertops and stunning waterfall edge details. The open floor plan encourages entertaining with an organic flow between the kitchen, dining, and living rooms. New skylights flood the space with natural light, creating a tranquil seaside ambiance. New custom maple flooring and ceiling paneling finish out the first floor.
Downstairs, the ocean facing Master Suite is luminous with breathtaking views and an enviable bathroom oasis. The master bath is modern and serene, woodgrain tile flooring and stunning onyx mosaic tile channel the golden sandy Malibu beaches. The minimalist bathroom includes a generous walk-in closet, his & her sinks, a spacious steam shower, and a luxurious soaking tub. Defined by an airy and spacious floor plan, clean lines, natural light, and endless ocean views, this home is the perfect rendition of a contemporary coastal sanctuary.
PROJECT DETAILS:
• Style: Contemporary
• Colors: White, Beige, Yellow Hues
• Countertops: White Ceasarstone Quartz
• Cabinets: Bellmont Natural finish maple; Shaker style
• Hardware/Plumbing Fixture Finish: Polished Chrome
• Lighting Fixtures: Pendent lighting in Master bedroom, all else recessed
• Flooring:
Hardwood - Natural Maple
Tile – Ann Sacks, Porcelain in Yellow Birch
• Tile/Backsplash: Glass mosaic in kitchen
• Other Details: Bellevue Stand Alone Tub
Photographer: Andrew, Open House VC

 JRP Design & Remodel
Our clients are seasoned home renovators. Their Malibu oceanside property was the second project JRP had undertaken for them. After years of renting and the age of the home, it was becoming prevalent the waterfront beach house, needed a facelift. Our clients expressed their desire for a clean and contemporary aesthetic with the need for more functionality. After a thorough design process, a new spatial plan was essential to meet the couple’s request. This included developing a larger master suite, a grander kitchen with seating at an island, natural light, and a warm, comfortable feel to blend with the coastal setting.
Demolition revealed an unfortunate surprise on the second level of the home: Settlement and subpar construction had allowed the hillside to slide and cover structural framing members causing dangerous living conditions. Our design team was now faced with the challenge of creating a fix for the sagging hillside. After thorough evaluation of site conditions and careful planning, a new 10’ high retaining wall was contrived to be strategically placed into the hillside to prevent any future movements.
With the wall design and build completed — additional square footage allowed for a new laundry room, a walk-in closet at the master suite. Once small and tucked away, the kitchen now boasts a golden warmth of natural maple cabinetry complimented by a striking center island complete with white quartz countertops and stunning waterfall edge details. The open floor plan encourages entertaining with an organic flow between the kitchen, dining, and living rooms. New skylights flood the space with natural light, creating a tranquil seaside ambiance. New custom maple flooring and ceiling paneling finish out the first floor.
Downstairs, the ocean facing Master Suite is luminous with breathtaking views and an enviable bathroom oasis. The master bath is modern and serene, woodgrain tile flooring and stunning onyx mosaic tile channel the golden sandy Malibu beaches. The minimalist bathroom includes a generous walk-in closet, his & her sinks, a spacious steam shower, and a luxurious soaking tub. Defined by an airy and spacious floor plan, clean lines, natural light, and endless ocean views, this home is the perfect rendition of a contemporary coastal sanctuary.
PROJECT DETAILS:
• Style: Contemporary
• Colors: White, Beige, Yellow Hues
• Countertops: White Ceasarstone Quartz
• Cabinets: Bellmont Natural finish maple; Shaker style
• Hardware/Plumbing Fixture Finish: Polished Chrome
• Lighting Fixtures: Pendent lighting in Master bedroom, all else recessed
• Flooring:
Hardwood - Natural Maple
Tile – Ann Sacks, Porcelain in Yellow Birch
• Tile/Backsplash: Glass mosaic in kitchen
• Other Details: Bellevue Stand Alone Tub
Photographer: Andrew, Open House VC
 JRP Design & Remodel
Our clients are seasoned home renovators. Their Malibu oceanside property was the second project JRP had undertaken for them. After years of renting and the age of the home, it was becoming prevalent the waterfront beach house, needed a facelift. Our clients expressed their desire for a clean and contemporary aesthetic with the need for more functionality. After a thorough design process, a new spatial plan was essential to meet the couple’s request. This included developing a larger master suite, a grander kitchen with seating at an island, natural light, and a warm, comfortable feel to blend with the coastal setting.
Demolition revealed an unfortunate surprise on the second level of the home: Settlement and subpar construction had allowed the hillside to slide and cover structural framing members causing dangerous living conditions. Our design team was now faced with the challenge of creating a fix for the sagging hillside. After thorough evaluation of site conditions and careful planning, a new 10’ high retaining wall was contrived to be strategically placed into the hillside to prevent any future movements.
With the wall design and build completed — additional square footage allowed for a new laundry room, a walk-in closet at the master suite. Once small and tucked away, the kitchen now boasts a golden warmth of natural maple cabinetry complimented by a striking center island complete with white quartz countertops and stunning waterfall edge details. The open floor plan encourages entertaining with an organic flow between the kitchen, dining, and living rooms. New skylights flood the space with natural light, creating a tranquil seaside ambiance. New custom maple flooring and ceiling paneling finish out the first floor.
Downstairs, the ocean facing Master Suite is luminous with breathtaking views and an enviable bathroom oasis. The master bath is modern and serene, woodgrain tile flooring and stunning onyx mosaic tile channel the golden sandy Malibu beaches. The minimalist bathroom includes a generous walk-in closet, his & her sinks, a spacious steam shower, and a luxurious soaking tub. Defined by an airy and spacious floor plan, clean lines, natural light, and endless ocean views, this home is the perfect rendition of a contemporary coastal sanctuary.
PROJECT DETAILS:
• Style: Contemporary
• Colors: White, Beige, Yellow Hues
• Countertops: White Ceasarstone Quartz
• Cabinets: Bellmont Natural finish maple; Shaker style
• Hardware/Plumbing Fixture Finish: Polished Chrome
• Lighting Fixtures: Pendent lighting in Master bedroom, all else recessed
• Flooring:
Hardwood - Natural Maple
Tile – Ann Sacks, Porcelain in Yellow Birch
• Tile/Backsplash: Glass mosaic in kitchen
• Other Details: Bellevue Stand Alone Tub
Photographer: Andrew, Open House VC
 Elisa Eesley Good Homes Good Cause since 1999
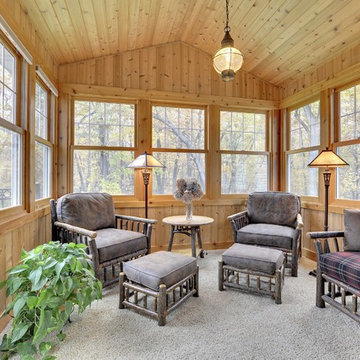
Inspiration for a mid-sized farmhouse carpeted sunroom remodel in Minneapolis with a standard ceiling
33