
Search results for "Floor caused" in Home Design Ideas
 Brad Cox, Architect, Inc.
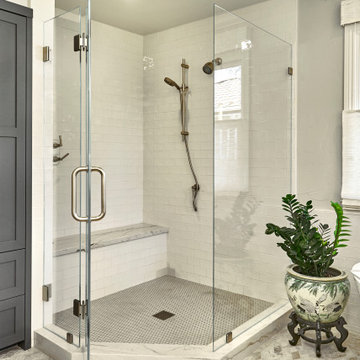
Glass shower walls allow the light to stream in.
Example of a large classic master white tile and ceramic tile porcelain tile and gray floor bathroom design in San Francisco with shaker cabinets, gray walls and a hinged shower door
Example of a large classic master white tile and ceramic tile porcelain tile and gray floor bathroom design in San Francisco with shaker cabinets, gray walls and a hinged shower door

 Tile Doctor Ltd
This job was for a repeat client in Toft near Cambridge who had aa stunning large hallway that was tiled in beautiful pale Limestone. My client had asked me back to work on the floor having previously completed the deep clean and seal of a Terracotta floor previously.
The Limestone tiling in the entrance hall had years of some type of topical sealer applied to it. This caused the stone to look slightly discoloured and from certain lights showed up hundreds of scratches and smudges embedded in the seal. I’ve tried to capture this problem in the photographs on this page, but it was very difficult.
A topical sealer sits on the surface of the tile where it is vulnerable to scratching, hallways are generally high traffic areas and so more likely to see this sort of problem. Ideally an impregnating sealer should have been applied, impregnators work by occupying the pores in the stone thus preventing soiling from becoming ingrained in the stone.
Before starting we protected the woodwork against splashing with blue film, I don’t usually make a great deal of mess, but you can never be too careful when working in someone’s property especially one as beautiful as this.
To strip off the old sealer I began by applying a strong dilution of Tile Doctor Remove and Go to the Limestone tiles. I split the floor into sections and used a 400-grit diamond burnishing pad to work the Tile Doctor Remove and Go into the tiles. The floor was then rinsed off using our high-pressure cleaning system that applies pressurised hot water to the floor whilst simultaneously extracting the soil with its built-in vacuum. The system is quite heavy, so it is built into my van, and I run a large flexible hose to a spinner tool that does the cleaning. It is an expensive tool, but it saves a lot of time and leaves the floor fairly dry afterwards.
The 400-grit pad had released a lot of the sealer but there were quite a few layers to get through, so I changed the burnishing pad to a coarse 200-grit pad and repeated the process. After another rinse and extract I would see it had the desired effect and I was able to carry on building up the finish on the Limestone by apply the 400-grit followed by the 800, 1500 grit pads. It was a large floor and so this took up much of the day so once complete I left for the day so it could dry off overnight.
The next day I finished the polishing process with the application of a 3000-grit burnishing pad which is applied with a little water sprayed onto the tile and really brings up the polish on the stone. This process has the added advantage of leaving the floor dry so not long afterwards I was able to move on to sealing.
For this floor two coats of Tile Doctor Ultra-Seal were applied, it is an impregnating sealer that won’t alter the colour of the tiles leaving a natural look.
My client was much happier with the new finish and has asked for another quotation on some more Terracotta flooring that needs attention. For aftercare I recommend using Tile Doctor stone soap, it’s a special formula that builds on the patina which will help maintain the polished appearance of the Limestone.
Tom Conlon
Cambridge Tile Doctor
 Tile Doctor Ltd
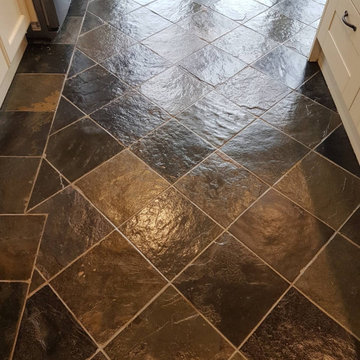
Pictured below is a Slate tiled kitchen floor that had been installed in the kitchen of a property in Harrogate around fifteen years prior. I discovered that the tiles had never been cleaned and resealed since installation and this explained why they were now looking dull and un-interesting. They had lost all character and it wasn’t until I started cleaning them that I realised the must be of the multicoloured Brazilian Slate variety.
As well as looking dull and unattractive, there was also some water damage to some tiles caused by a leak, this had resulted in some shaling and efflorescence staining. This had occurred some time ago and the floor had now dried out fully, so I was not expecting any further efflorescence issues going forward.
Brazil, I understand is the world’s 2nd biggest producer of Slate, it is also exceptionally durable and reasonably priced so its not surprising you see a lot of it over in the UK. Like any natural stone however it is porous and without a sealer to protect it and bring out those natural colours it soon ends up like the example on this pad.
I cleaned the floor with a strong dilution of Tile Doctor Pro-Clean using my usual method of spraying the cleaning solution onto the Slate and grout and then leaving it for a ten minutes to soak in and get to work breaking down the dirt and old sealers. Although I doubted there was much sealer left on the floor after all this time you need to be sure to remove all of it to get the best result. The floor was then scrubbed with a rotary floor buffer fitted with a black scrubbing pad, then after rinsing with water and extracting the soil I inspected the floor.
I detected there was still some sort of sealer present in some of less used parts of the floor, it was proving stubborn to remove so I suspect it may have been an old fashioned wax based product that was used. Not a problem though we Tile Doctors have a solution to every problem, so I spot treated the stubborn areas with Tile Doctor Wax Away to see if I was right. After scrubbing that in followed by another rinse and extraction with the wet vacuum I was pleased to see I was right and was happy all the old seal had now been removed. I gave the floor another rinse at the end of the day and dried it as much as possible with the wet vacuum, then left it to dry off fully overnight.
I came back the next day and checked the floor was dry with a damp meter. The readings were good, so I was able to crack on and seal the tiles using several coats of Tile Doctor Seal and Go. Each coat was applied leaving time to dry between each layer. This gave the floor a uniform appearance which disguised the damaged tiles. It will also help to stop more cracking and reduce the appearance of the efflorescence. The sealer really brought out the natural colours in the Brazilian Slate and the floor looked transformed.
I’m sure you will agree it was a vast improvement, certainly my client was very happy and couldn’t believe the difference I had managed to achieve. Before leaving I recommended, they should invest in some Tile Doctor Neutral Tile Cleaner which would ensure the newly applied seal was prematurely eroded away which is a problem with many of the stronger products you find in supermarkets.
Nigel Stoker
North West Yorkshire Tile Doctor
Find the right local pro for your project
 Interiors by Blackwood
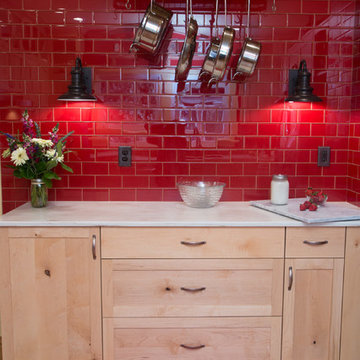
Inspiration for a mid-sized eclectic u-shaped cork floor and beige floor enclosed kitchen remodel in Portland with red backsplash, stainless steel appliances, a double-bowl sink, shaker cabinets, light wood cabinets, marble countertops, porcelain backsplash and a peninsula
 Paul Treseder, AIA Architect
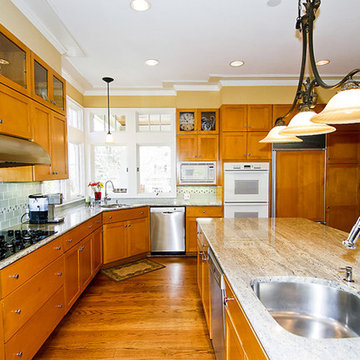
The kitchen window provides a view of the street. A walk-in pantry compensates for the lack of wall storage cause by extensive windows.
Inspiration for a mid-sized timeless u-shaped medium tone wood floor eat-in kitchen remodel in DC Metro with recessed-panel cabinets, medium tone wood cabinets, blue backsplash, white appliances and an island
Inspiration for a mid-sized timeless u-shaped medium tone wood floor eat-in kitchen remodel in DC Metro with recessed-panel cabinets, medium tone wood cabinets, blue backsplash, white appliances and an island
 Renovation and Construction Services
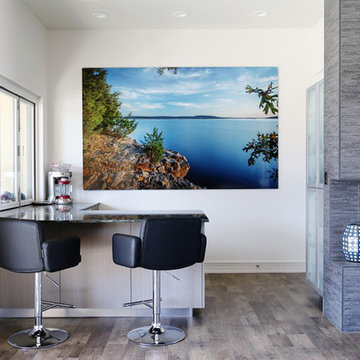
The client wanted a real focal point and conversation piece behind the bar that was a custom one off design. The solution? Hire a local photographer to capture images of the lake during the day, night, shore line, cliff top and on the water. This whole process created some great artwork for the rest of the house and made it a one off piece of art. The artwork is mounted on a thin piece of aluminum that is wall mounted only 1/2" off the wall - it caused this artwork to appears as though its floating.
 Sommers Interiors
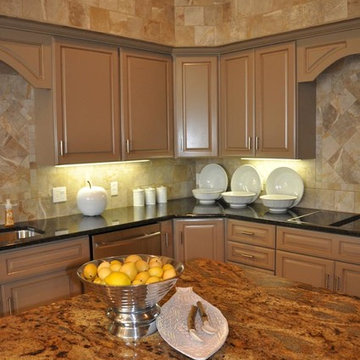
Eat-in kitchen - large modern l-shaped ceramic tile and beige floor eat-in kitchen idea in Other with an undermount sink, raised-panel cabinets, beige cabinets, wood countertops, beige backsplash, ceramic backsplash, paneled appliances and an island
Sponsored
Fredericksburg, OH

High Point Cabinets
Columbus' Experienced Custom Cabinet Builder | 4x Best of Houzz Winner
 Paul Treseder, AIA Architect
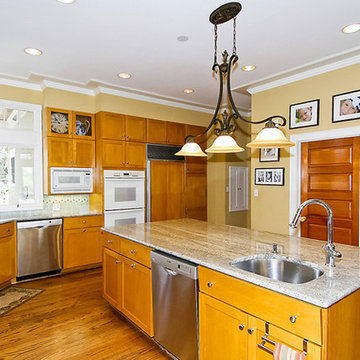
The kitchen window provides a view of the street. A walk-in pantry compensates for the lack of wall storage cause by extensive windows.
Example of a mid-sized classic u-shaped medium tone wood floor eat-in kitchen design in DC Metro with recessed-panel cabinets, medium tone wood cabinets, blue backsplash, white appliances and an island
Example of a mid-sized classic u-shaped medium tone wood floor eat-in kitchen design in DC Metro with recessed-panel cabinets, medium tone wood cabinets, blue backsplash, white appliances and an island
 Tile Doctor Ltd
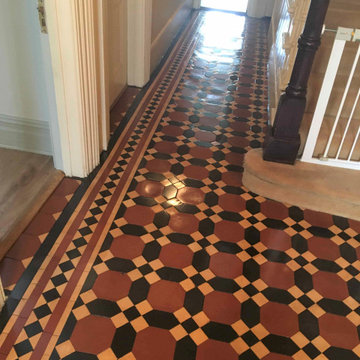
This Victorian tiled hallway floor at a property in Twickenham was in great physical condition considering its age but just hadn’t been cleaned or sealed in quite a few years. Over the years the protective sealer has worn away and dirt tracked in from outside had sunk deep into the pores of the tile. The floor looked dull, and my customer was finding it hard to clean and maintain effectively.
To remove the ground in dirt from within the pores of the tile I needed to apply a strong cleaning product that would breakdown the dirt and deal with any remaining sealer left on the floor. Usually, I find the sealer down the center of the hallway is worn away with use, but you still find traces towards the wall. To do the renovation effectively I would need to remove all the sealer during cleaning otherwise you risk an uneven appearance.
The best sealer stripper and cleaner for the job is a product called Tile Doctor Remove and Go so I mopped a strong dilution onto the floor and then left it to soak in for around fifteen minutes. To get the best from this product it’s advised to give it a long dwell time thereby allowing it to break down old sealer and dissolve the dirt and contaminants.
The floor was then scrubbed with a rotary floor machine to work the product into the pores of the tile and release the trapped dirt. After the first pass the floor was rinsed with a little water and the soil extracted using a machine. After inspecting the floor some areas were re-treated using the same process to ensure all the sealer and dirt had been removed.
After a final inspection I left the tiles to dry off overnight.
The following day I returned and started by taking moisture readings from different parts of the floor. Its not a good idea to apply a sealer to a damp tile and damp areas should be dried out with a heat gun first.
My client was keen to have a classic shiny appearance, so I chose Tile Doctor Seal and Go to add protection to the tiles. The sealer will prevent dirt becoming ingrained in the tile and protect the floor from staining caused by spillages whilst making it very easy for our customer to maintain in the future. As you can see from the pictures, it also gives a nice sheen finish to add lustre to the floor as requested by my customer.
Before leaving we had a quick chat about maintaining the floor and a warning about the use of strong floor cleaning products which can be over strong and prematurely strip the sealer away over time. For this floor I recommend Tile Doctor Neutral cleaner which is an effective cleaner but as its name suggests is pH neutral and mild enough not to harm the sealer.
Jonathan Oldham
South Middlesex Tile Doctor


 Faulkner Perrin Custom Homes
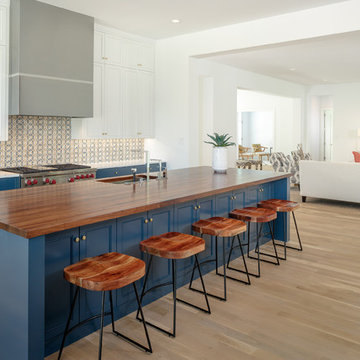
Inspiration for a large transitional galley light wood floor and beige floor open concept kitchen remodel in Dallas with an undermount sink, shaker cabinets, white cabinets, wood countertops, multicolored backsplash, ceramic backsplash, stainless steel appliances and an island
 Brad Cox, Architect, Inc.
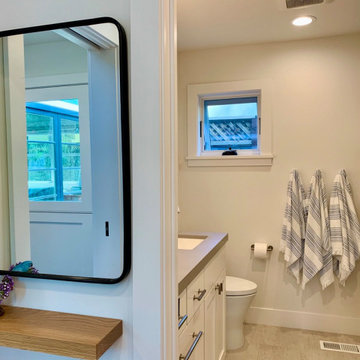
This bathroom has a heated floor and a shower over an extra-deep tub. The mirror just outside allows two people to get ready at the same time without trying to crowd into the bathroom.

 Interiors by Natasha
This open floor plan family room for a family of four—two adults and two children was a dream to design. I wanted to create harmony and unity in the space bringing the outdoors in. My clients wanted a space that they could, lounge, watch TV, play board games and entertain guest in. They had two requests: one—comfortable and two—inviting. They are a family that loves sports and spending time with each other.
One of the challenges I tackled first was the 22 feet ceiling height and wall of windows. I decided to give this room a Contemporary Rustic Style. Using scale and proportion to identify the inadequacy between the height of the built-in and fireplace in comparison to the wall height was the next thing to tackle. Creating a focal point in the room created balance in the room. The addition of the reclaimed wood on the wall and furniture helped achieve harmony and unity between the elements in the room combined makes a balanced, harmonious complete space.
Bringing the outdoors in and using repetition of design elements like color throughout the room, texture in the accent pillows, rug, furniture and accessories and shape and form was how I achieved harmony. I gave my clients a space to entertain, lounge, and have fun in that reflected their lifestyle.
Photography by Haigwood Studios


 Mary Rossi Designs
I chose lighting fixtures that created patterns that mimic the way the sun causes light to reflect off the lake. I wanted the furniture to impart a real sense of sophisticated warmth and style, without compromising function. I pulled together cottage contemporary mélange with mid-century modern and refinished carefully selected family vintage pieces. The home has an elegantly casual feel that’s eclectic, as if it has been assembled over a long period of life experiences.


 Susan Yeley Homes
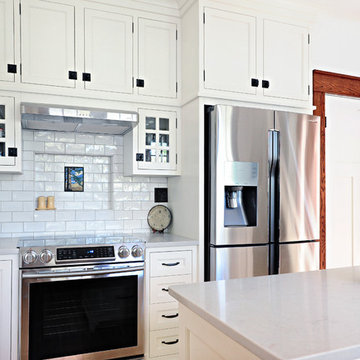
Like most of our projects, we can't gush about this reno—a new kitchen and mudroom, ensuite closet and pantry—without gushing about the people who live there. The best projects, we always say, are the ones in which client, contractor and design team are all present throughout, conception to completion, each bringing their particular expertise to the table and forming a cohesive, trustworthy team that is mutually invested in a smooth and successful process. They listen to each other, give the benefit of the doubt to each other, do what they say they'll do. This project exemplified that kind of team, and it shows in the results.
Most obvious is the opening up of the kitchen to the dining room, decompartmentalizing somewhat a century-old bungalow that was originally quite purposefully compartmentalized. As a result, the kitchen had to become a place one wanted to see clear through from the front door. Inset cabinets and carefully selected details make the functional heart of the house equal in elegance to the more "public" gathering spaces, with their craftsman depth and detail. An old back porch was converted to interior space, creating a mudroom and a much-needed ensuite walk-in closet. A new, larger deck went on: Phase One of an extensive design for outdoor living, that we all hope will be realized over the next few years. Finally, a duplicative back stairwell was repurposed into a walk-in pantry.
Modernizing often means opening spaces up for more casual living and entertaining, and/or making better use of dead space. In this re-conceptualized old house, we did all of that, creating a back-of-the-house that is now bright and cheerful and new, while carefully incorporating meaningful vintage and personal elements.
The best result of all: the clients are thrilled. And everyone who went in to the project came out of it friends.
Contractor: Stumpner Building Services
Cabinetry: Stoll’s Woodworking
Photographer: Gina Rogers
Sponsored
Sunbury, OH

J.Holderby - Renovations
Franklin County's Leading General Contractors - 2X Best of Houzz!
 Marvin Design Gallery by Eldredge Lumber
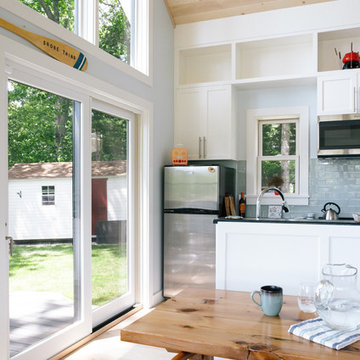
Integrity from Marvin Windows and Doors open this tiny house up to a larger-than-life ocean view.
Inspiration for a small contemporary single-wall light wood floor open concept kitchen remodel in Portland Maine with shaker cabinets, white cabinets, granite countertops, blue backsplash, subway tile backsplash, stainless steel appliances, an island and black countertops
Inspiration for a small contemporary single-wall light wood floor open concept kitchen remodel in Portland Maine with shaker cabinets, white cabinets, granite countertops, blue backsplash, subway tile backsplash, stainless steel appliances, an island and black countertops
 Tile Doctor Ltd
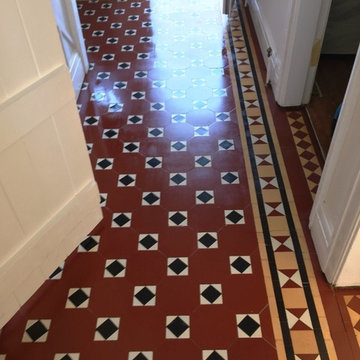
This Victorian tiled hallway was one of the most beautiful Victorian floors I have ever had the pleasure to work on. With the wide range of patterns and colours they are available in, it seems no two Victorian tiled floors are exactly the same, and this uniqueness is part of what makes them so appealing to property owners.
Unfortunately, this floor had been poorly maintained over the years, even suffering from a few loose and missing tiles. There was a thick coating of dust and dirt soiling its appearance, and the property owner was understandably keen to remedy the situation. Having realised that everyday household cleaners are not likely to achieve great results, she asked me to carry out a full professional restoration, including making some repairs where necessary. I was pleasantly surprised to find out that this property was situated in the town of Wyken, which is a few miles outside of Coventry city centre and in fact just down the road from where I live myself!
Before making a start on the cleaning process, it was first necessary to re-fix the small number of loose tiles and replace a single missing tile by the radiator. Fortunately, I’ve been working on these types of floors for some time and have built up a good collection of replacement Victorian tiles so I was able to find one that matched in nicely with the rest of the floor without too much problem.
To clean the tiles, I began by applying a layer of Tile Doctor Oxy-Gel directly into the floor with a small brush. This product is very similar to the popular Tile Doctor Pro Clean: both are strong alkaline cleaners, strippers and degreasers, with the main difference being that Oxy-Clean comes in a gel form, making it easier to control and therefore ideal for precise cleaning, or for application to vertical surfaces. Like Pro Clean and being an alkaline base it is suitable for use on all types of natural stone and tile. The Oxy-Gel was left to soak into the tiles for around ten minutes before being scrubbed in and then rinsed off carefully with water, I then used a wet vacuum to extract the now soiled cleaning solution off the floor.
The next step was to acid wash the floor using Tile Doctor Acid Gel; this served to break down alkaline mineral deposits inherent in the grout along with some excess grout that had been left on the untidily left on tile from installation. It is recommended not to use this product on acid-sensitive soon such as Marble and Limestone as it can cause irreparable etching but its fine on Victorian tiles as long as you don’t leave it on too long.
Finally, the floor was given a rinse with clean water to remove any trace of chemicals from the cleaning and to neutralise the area in preparation for sealing.
I left the floor for 48 hours to dry before returning to the property to seal the tiles. This allowed plenty of time for the floor to dry completely, which is important as any excess moisture can damage the ability of the sealer to protect against dirt and stains.
My choice of sealer for this floor was Tile Doctor High Shine; three coats in total were applied, providing – as the product name suggests – the high shine finish that the customer had requested. The sealer will provide durable surface protection going forward preventing dirt from becoming ingrained into the pores of the tile and ensuring it remains easy to clean and keeping its appearance for some time to come.
As a big fan of Victorian tiles, it was a great pleasure to restore this floor, and my customer was certainly pleased too. It’s amazing how far a little professional maintenance can go to improving the appearance of these fantastic types of floor.
Mick Gayton
Warwickshire Tile Doctor
 Sun Marble
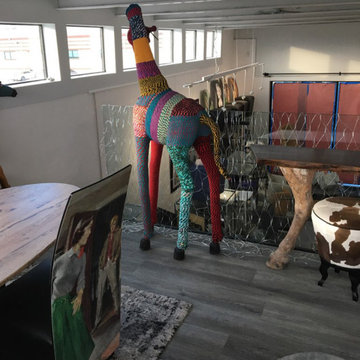
Sun Mable carries StoneRidge Flooring that has 50 years warranty. StoneRidged Flooring is made from a composite material consisting of approximately 70% calcium carbonate (limestone), 25% PVC, and 5% other materials. Once extruded it forms an extremely durable core offering features that WPC and Standard Vinyl Flooring cannot. Structural features include 100% Waterproof, Stronger Dent Resistance, No warping caused by thermal expansion and a time saving feature for quicker cutting and installation.
31