
Search results for "Follow request" in Home Design Ideas
 Paradise Tiny Homes LLC
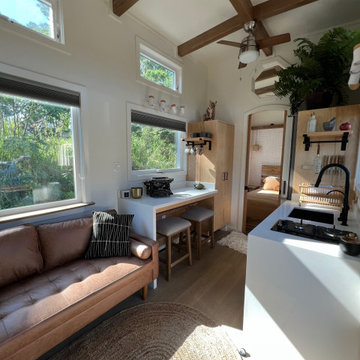
This Paradise Model ATU is extra tall and grand! As you would in you have a couch for lounging, a 6 drawer dresser for clothing, and a seating area and closet that mirrors the kitchen. Quartz countertops waterfall over the side of the cabinets encasing them in stone. The custom kitchen cabinetry is sealed in a clear coat keeping the wood tone light. Black hardware accents with contrast to the light wood. A main-floor bedroom- no crawling in and out of bed. The wallpaper was an owner request; what do you think of their choice?
The bathroom has natural edge Hawaiian mango wood slabs spanning the length of the bump-out: the vanity countertop and the shelf beneath. The entire bump-out-side wall is tiled floor to ceiling with a diamond print pattern. The shower follows the high contrast trend with one white wall and one black wall in matching square pearl finish. The warmth of the terra cotta floor adds earthy warmth that gives life to the wood. 3 wall lights hang down illuminating the vanity, though durning the day, you likely wont need it with the natural light shining in from two perfect angled long windows.
This Paradise model was way customized. The biggest alterations were to remove the loft altogether and have one consistent roofline throughout. We were able to make the kitchen windows a bit taller because there was no loft we had to stay below over the kitchen. This ATU was perfect for an extra tall person. After editing out a loft, we had these big interior walls to work with and although we always have the high-up octagon windows on the interior walls to keep thing light and the flow coming through, we took it a step (or should I say foot) further and made the french pocket doors extra tall. This also made the shower wall tile and shower head extra tall. We added another ceiling fan above the kitchen and when all of those awning windows are opened up, all the hot air goes right up and out.
 Paradise Tiny Homes LLC
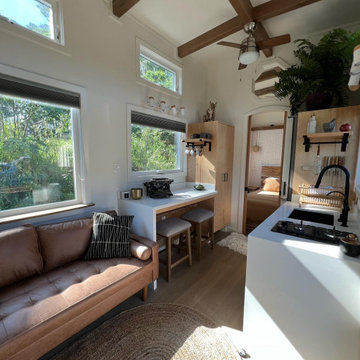
This Paradise Model ATU is extra tall and grand! As you would in you have a couch for lounging, a 6 drawer dresser for clothing, and a seating area and closet that mirrors the kitchen. Quartz countertops waterfall over the side of the cabinets encasing them in stone. The custom kitchen cabinetry is sealed in a clear coat keeping the wood tone light. Black hardware accents with contrast to the light wood. A main-floor bedroom- no crawling in and out of bed. The wallpaper was an owner request; what do you think of their choice?
The bathroom has natural edge Hawaiian mango wood slabs spanning the length of the bump-out: the vanity countertop and the shelf beneath. The entire bump-out-side wall is tiled floor to ceiling with a diamond print pattern. The shower follows the high contrast trend with one white wall and one black wall in matching square pearl finish. The warmth of the terra cotta floor adds earthy warmth that gives life to the wood. 3 wall lights hang down illuminating the vanity, though durning the day, you likely wont need it with the natural light shining in from two perfect angled long windows.
This Paradise model was way customized. The biggest alterations were to remove the loft altogether and have one consistent roofline throughout. We were able to make the kitchen windows a bit taller because there was no loft we had to stay below over the kitchen. This ATU was perfect for an extra tall person. After editing out a loft, we had these big interior walls to work with and although we always have the high-up octagon windows on the interior walls to keep thing light and the flow coming through, we took it a step (or should I say foot) further and made the french pocket doors extra tall. This also made the shower wall tile and shower head extra tall. We added another ceiling fan above the kitchen and when all of those awning windows are opened up, all the hot air goes right up and out.
 Paradise Tiny Homes LLC
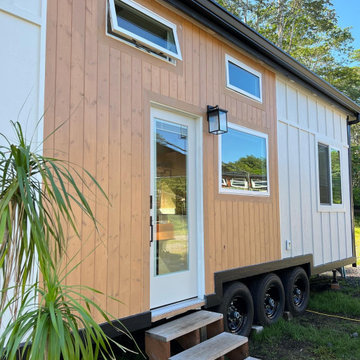
This Paradise Model ATU is extra tall and grand! As you would in you have a couch for lounging, a 6 drawer dresser for clothing, and a seating area and closet that mirrors the kitchen. Quartz countertops waterfall over the side of the cabinets encasing them in stone. The custom kitchen cabinetry is sealed in a clear coat keeping the wood tone light. Black hardware accents with contrast to the light wood. A main-floor bedroom- no crawling in and out of bed. The wallpaper was an owner request; what do you think of their choice?
The bathroom has natural edge Hawaiian mango wood slabs spanning the length of the bump-out: the vanity countertop and the shelf beneath. The entire bump-out-side wall is tiled floor to ceiling with a diamond print pattern. The shower follows the high contrast trend with one white wall and one black wall in matching square pearl finish. The warmth of the terra cotta floor adds earthy warmth that gives life to the wood. 3 wall lights hang down illuminating the vanity, though durning the day, you likely wont need it with the natural light shining in from two perfect angled long windows.
This Paradise model was way customized. The biggest alterations were to remove the loft altogether and have one consistent roofline throughout. We were able to make the kitchen windows a bit taller because there was no loft we had to stay below over the kitchen. This ATU was perfect for an extra tall person. After editing out a loft, we had these big interior walls to work with and although we always have the high-up octagon windows on the interior walls to keep thing light and the flow coming through, we took it a step (or should I say foot) further and made the french pocket doors extra tall. This also made the shower wall tile and shower head extra tall. We added another ceiling fan above the kitchen and when all of those awning windows are opened up, all the hot air goes right up and out.
Find the right local pro for your project
 Jerilyn Horn Kitchen & Bath Design Co.
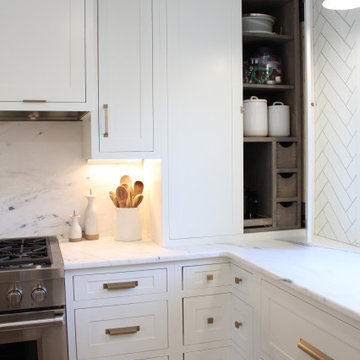
Construction work and cabinetry installed by Curtis Rice of Countertops By Design. Plus, the beautiful inset custom cabinets in Sherwin Williams "Alabaster" were hand-crafted by Curtis and combined with island cabinetry by Dura Supreme Cabinetry in the Reese door, maple with their Cashew stain. He even went above and beyond for my request to match the stain on the interiors of the 3 countertop larder cabinets and made them into pocket doors! EPIC Stone, LLC natural Arabescus White honed marble including a full marble splash behind the stove and followed by TileBar Manchester Bianco White 3x12 Subway Glazed Ceramic Wall Tiles installed as a herringbone by Norton Ceramic Tile. The beautiful mix of metals include dark bronze finished lighting and Top Knobs Channing pulls and knobs in their Honey Bronze finish and plumbing fixtures in the Rook style by Brizo Faucet in their Luxe Gold finish. How about those floors? ?Provided and installed by Rheinschmidt's Flooring America in Burlington. Luxury appliances provided and installed by The Appliance Barn Inc in Kalona and, of course, interior design by Jerilyn Horn Kitchen & Bath Design Co. ❤️
 Pierre Jean-Baptiste Interiors
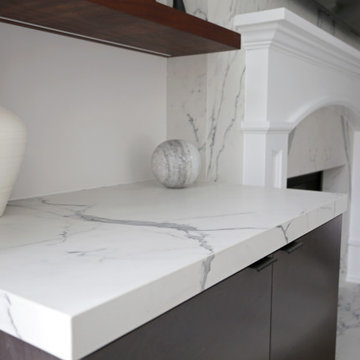
Our latest redesign of this home’s main level seamlessly blends architectural elegance with contemporary comfort. The foyer now makes a striking first impression, featuring refined wall molding, a fresh coat of paint, and a custom veneer bench seat. A breathtaking chandelier in polished nickel and crystal serves as the focal point, adding a layer of timeless sophistication. Moving into the family room, we introduced a textured Manila hemp wallpaper on the ceiling, evoking the soft movement of clouds. The fireplace was refaced in quartz while the existing mantel was carefully reapplied per the client’s request. A 14-foot curved performance fabric sofa, complemented by custom velvet throw pillows, sets the stage for a welcoming yet luxurious space. To enhance the room’s flow, we incorporated a 10-foot diameter rug that follows the sofa’s elegant curve, along with new drapery, swivel chairs, and carefully selected occasional tables.
Storage and smart functionality were key in this redesign. Custom cabinetry flanking the fireplace provides ample storage while floating shelves above, equipped with smart home-enabled LED strip lighting, showcase thoughtfully curated accessories. In the powder room, we introduced an ebony veneer push-to-open custom vanity topped with a striking Calacatta Viola marble sink. A custom mirror and premium light fixtures accentuate the rich new paint colors, elevating this small yet impactful space. The result is a refined, harmonious interior that reflects both the home’s architecture and the client’s desire for warmth and sophistication.
Tags: interior design, home renovation, foyer design, luxury interiors, modern classic style, family room makeover, fireplace redesign, custom cabinetry, smart home integration, powder room update, bespoke furniture, home decor, elegant interiors, ceiling wallpaper, LED lighting, high-end finishes, design inspiration, contemporary home, architectural details, home styling
 Schmechtig Landscapes
Request Free Quote
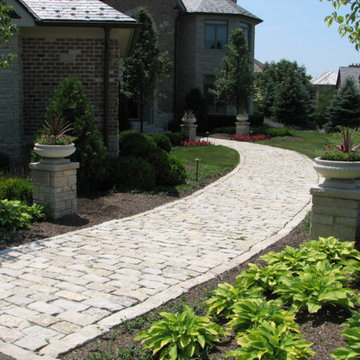
The first impression is a granite cobblestone entry walk, flanked by natural stone pillars, which take you from the driveway to the front door. Drawing your attention to the front walk are decorative planters on pillars, displaying vibrant colors of seasonal arrangements that draw your attention to the front walk. Following the natural stone steps into the backyard are large stone outcropping walls and raised beds along the back and side foundation.
 Home Improvements
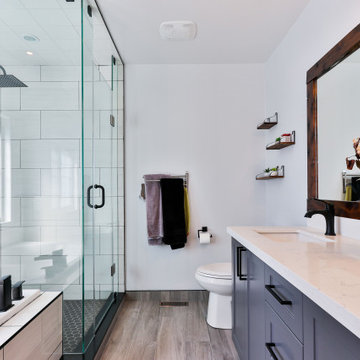
Embarking on a bathroom remodeling project is an exciting endeavor that can greatly enhance the functionality, aesthetics, and value of your home. However, finding a reliable and skilled contractor in a bustling city like Los Angeles can be a daunting task. To simplify the process and ensure a successful bathroom renovation, we have compiled a comprehensive guide on how to find a reputable bathroom remodeling contractor in Los Angeles, California.
Start with Online Research:
The first step in your quest for a reliable contractor is to conduct thorough online research. Utilize search engines like Google to find bathroom remodeling contractors in Los Angeles. Be sure to include specific keywords such as "bathroom remodeling," "contractor," and "Los Angeles" to refine your search results.
Check Online Directories and Review Platforms:
Explore online directories and review platforms like Yelp, Angie's List, and Houzz to find a curated list of bathroom remodeling contractors in Los Angeles. These platforms often provide detailed information about contractors, including customer reviews, ratings, project photos, and contact details. Assess the overall rating and read through multiple reviews to gauge the contractor's reputation and reliability.
Seek Recommendations:
Ask friends, family, neighbors, and colleagues who have recently undergone a bathroom remodeling project in Los Angeles for recommendations. Personal referrals can provide valuable insights and firsthand experiences that online research may not uncover. Inquire about the contractor's professionalism, craftsmanship, adherence to timelines, and overall satisfaction with the project.
Verify Credentials and Licensing:
Once you have shortlisted potential contractors, it is crucial to verify their credentials and licensing. Check if they are licensed by the Contractors State License Board (CSLB) in California. A valid license ensures that the contractor meets the state's requirements and regulations. Additionally, inquire about their insurance coverage to protect against any potential liabilities during the remodeling process.
Evaluate Experience and Expertise:
Assess the experience and expertise of the contractors on your list. Look for contractors who specialize in bathroom remodeling and have a proven track record of successful projects. Review their portfolios or ask for references to see examples of their previous work. A skilled contractor should be able to handle a variety of bathroom designs and styles, and provide creative solutions to meet your specific needs.
Schedule In-Person Consultations:
Arrange in-person consultations with the shortlisted contractors. Use this opportunity to discuss your remodeling goals, budget, timeline, and any specific requirements you may have. A reputable contractor will listen attentively, provide insights, and offer suggestions based on their expertise. Pay attention to their communication style, professionalism, and responsiveness, as these qualities are crucial for a smooth working relationship.
Request Detailed Quotes and Contracts:
Ask the contractors for detailed written quotes that outline the project's scope, materials, labor costs, and any additional expenses. A comprehensive quote will help you compare the estimates provided by different contractors effectively. Once you have selected a contractor, ensure that you have a detailed contract in place that covers all aspects of the project, including timelines, payment schedules, warranties, and dispute resolution processes.
Seek Permits and Building Code Compliance:
Bathroom remodeling projects often require permits and adherence to building codes. A reputable contractor will be familiar with the local building regulations in Los Angeles and should handle the permit application process on your behalf. Verify that the contractor will obtain the necessary permits and ensure that all work is compliant with local codes and regulations.
Conclusion:
Finding a bathroom remodeling contractor in Los Angeles, California, may seem overwhelming, but by following these guidelines, you can streamline the process and select a contractor who meets your expectations. Conduct thorough online research, seek recommendations, verify credentials, evaluate experience, and schedule in-person consultations to make an informed decision.

Sponsored
Sunbury, OH

J.Holderby - Renovations
Franklin County's Leading General Contractors - 2X Best of Houzz!
 Drury Design
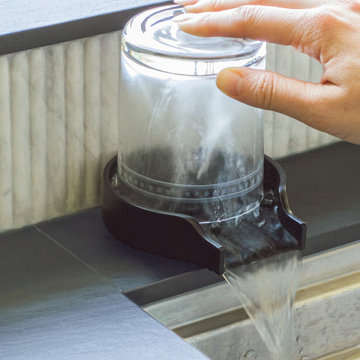
Along with the primary Galley workstation in the kitchen, the homeowner requested a glass rinser for ease when she has company!
THE SETUP
Our journey began with a familiar face — Alicia had previously transformed the client’s mother’s home, establishing a trusted relationship that naturally led to this personal project. The client desired a kitchen that truly reflected her own style while facilitating seamless entertaining.
Design Vision:
The original kitchen, segregated from the dining area by a wall, hindered the flow of interaction and space. Our client envisioned a unified area where she could engage with guests in both the kitchen and dining room simultaneously. Moreover, the space lacked a central island, relying instead on a floorplan anchored by cabinetry in a u-shaped layout.
Design Objectives:
Open up the space for an airy design conducive to entertaining large gatherings
Modernize the kitchen to be both stylish and functional
Integrate the design with the home’s new black-framed windows and doors
Relocate the cooktop to a central position to enhance usability and interaction
Design Challenges:
Removing the wall between the kitchen and dining room would necessitate the rerouting of existing HVAC ductwork that services the upper floor
Limited pantry space in the existing kitchen
The existing u-shaped layout of the kitchen restricted functionality and storage options
Insufficient space for wine storage
The client desired a raised-furniture look for the island, but without showing a new downdraft vent
THE RENEWED SPACE
Design Solutions:
We added a second HVAC unit to the upper floor and rerouted the existing ductwork in that wall
Created tall pantry pullouts on either side of the fridge to maximize dry goods storage
Designed a long island to facilitate cooking stations and dining moments
Created a stylish open display cabinet for wine
Engineered a dual-design island with a footed floating aesthetic on one side, and a full floor reach on the other to conceal the new downdraft ventilation.
Paired with the newly opened adjacent dining room featuring a wet bar, the kitchen has become a stylish and highly functional space for cooking and entertaining. Following a large baby shower hosted by the client (which seamlessly accommodated an 80-person gathering!), it is clear that the new design not only meets but exceeds the needs for hosting and everyday living. This project was a harmonious blend of the client’s vision and Alicia’s innovative design solutions, resulting in a kitchen that truly embodies personalized elegance and functionality.
 Paradise Tiny Homes LLC
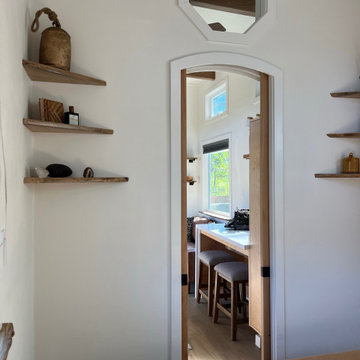
This Paradise Model ATU is extra tall and grand! As you would in you have a couch for lounging, a 6 drawer dresser for clothing, and a seating area and closet that mirrors the kitchen. Quartz countertops waterfall over the side of the cabinets encasing them in stone. The custom kitchen cabinetry is sealed in a clear coat keeping the wood tone light. Black hardware accents with contrast to the light wood. A main-floor bedroom- no crawling in and out of bed. The wallpaper was an owner request; what do you think of their choice?
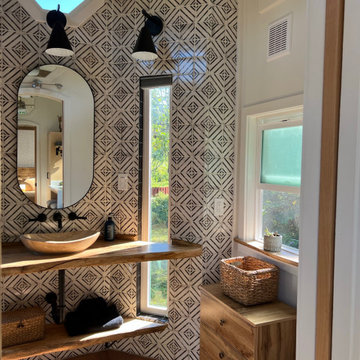
The bathroom has natural edge Hawaiian mango wood slabs spanning the length of the bump-out: the vanity countertop and the shelf beneath. The entire bump-out-side wall is tiled floor to ceiling with a diamond print pattern. The shower follows the high contrast trend with one white wall and one black wall in matching square pearl finish. The warmth of the terra cotta floor adds earthy warmth that gives life to the wood. 3 wall lights hang down illuminating the vanity, though durning the day, you likely wont need it with the natural light shining in from two perfect angled long windows.
This Paradise model was way customized. The biggest alterations were to remove the loft altogether and have one consistent roofline throughout. We were able to make the kitchen windows a bit taller because there was no loft we had to stay below over the kitchen. This ATU was perfect for an extra tall person. After editing out a loft, we had these big interior walls to work with and although we always have the high-up octagon windows on the interior walls to keep thing light and the flow coming through, we took it a step (or should I say foot) further and made the french pocket doors extra tall. This also made the shower wall tile and shower head extra tall. We added another ceiling fan above the kitchen and when all of those awning windows are opened up, all the hot air goes right up and out.
 John Rogers Design
Transitional Architectural Theatre Lighting & Interior Design
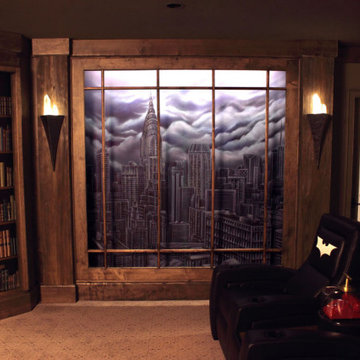
This Batman themed theater was not part of the original theater plans. I was hired by the owners to do lighting design for their new construction home. In my first preliminary lighting plan presentation the husband expressed his passion for a Batman themed theater and showed me an image of a Batman themed theater he liked. Which he followed up to say it was out of his budget.
I was hired for lighting design. What the owners did not know was that I have an interior design degree. I asked what amount he was willing to spend for a Batman themed theatre. I knew I could design the theatre for a quarter of the cost of the theatre he had shown me. I felt comfortable saying I could design lighting and interiors for the theatre within their budget.
I proceeded with bringing in my team of artists to review the images of his Batman comic magazine collection that had to be in the theater: Batcave, Wayne Manor, Lincoln Penney, Bat phone and the Joker.
As the images indicate, we succeeded in designing and installing the Batman themed theatre to meet the client's criteria.
At the owner’s request: Linear LEDs lit the Batcave faux wall murals of stone and Wayne Manor aged wood columns, custom crystal wall sconces, and a library with a life size Batman costume hidden behind a false bookcase. A false wooden window with a Gotham City Mural of the Bat signal were revealed by using ultraviolet black lights.
It was a fun project but could not have been accomplished without a team of excellent artists, building contractors, A.V. control company, millwork fabricators and electricians.
Lighting Designer: John Rogers Design
Interior Design Concept & Millwork Design: John Rogers Design
Faux stone and murals Artist: Robin Tucker
Builder: Richard Harp Homes https://www.richardharphomes.com
A.V. Company:
Electrical:
Photographer: John Watson
Published
AY Magazine
 Innovative Design Build
Five stars isn’t enough! Our project was to reconfigure and update the main floor of a house we recently purchased that was built in 1961. We wanted to maintain some of the unique feeling it originally had but bring it up-to-date and eliminate the closed-in rooms and downright weird layout that was the result of multiple, partial remodeling projects. We began with a long wishlist of changes which also required replacement of very antiquated plumbing, electrical wiring and HVAC. We even found a fireplace that had been walled in and needed major re-construction. Many other aspects and details on this incredible list we made included an all new kitchen layout, converting a bedroom into a master closet, adding new half-bath, completely rebuilding the master bath, and adding stone, tile and custom built cabinetry. Our design plans included many fixtures and details that we specified and required professional installation and careful handling. Innovative helped us make reasonable decisions. Their skilled staff took us through a design process that made sense. There were many questions and all were answered with sincere conversation and positive – innovation – on how we could achieve our goals. Innovative provided us with professional consultants, who listened and were courteous and creative, with solid knowledge and informative judgement. When they didn’t have an answer, they did the research. They developed a comprehensive project plan that exceeded our expectations. Every item on our long list was checked-off. All agreed on work was fulfilled and they completed all this in just under four months. Innovative took care of putting together a team of skilled professional specialists who were all dedicated to make everything right. Engineering, construction, supervision, and I cannot even begin to describe how much thanks we have for the demolition crew! Our multiple, detailed project designs from Raul and professional design advice from Mindy and the connections she recommended are all of the best quality. Diego Jr., Trevor and his team kept everything on track and neat and tidy every single day and Diego Sr., Mark, Ismael, Albert, Santiago and team are true craftsmen who follow-up and make the most minuscule woodworking details perfect. The cabinets by Tim and electrical work and installation of fixtures by Kemchan Harrilal-BB and Navindra Doolratram, and Augustine and his crew on tile and stone work – all perfection. Aisling and the office crew were always responsive to our calls and requests. And of course Clark and Eric who oversaw everything and gave us the best of the best! Apologies if we didn’t get everyone on this list – you’re all great! Thank you for your hard work and dedication. We can’t thank you enough Innovative Construction – we kind of want to do it again!
Dave Hallman & Matt DeGraffenreid
 Paradise Tiny Homes LLC
This Paradise Model ATU is extra tall and grand! As you would in you have a couch for lounging, a 6 drawer dresser for clothing, and a seating area and closet that mirrors the kitchen. Quartz countertops waterfall over the side of the cabinets encasing them in stone. The custom kitchen cabinetry is sealed in a clear coat keeping the wood tone light. Black hardware accents with contrast to the light wood. A main-floor bedroom- no crawling in and out of bed. The wallpaper was an owner request; what do you think of their choice?
The bathroom has natural edge Hawaiian mango wood slabs spanning the length of the bump-out: the vanity countertop and the shelf beneath. The entire bump-out-side wall is tiled floor to ceiling with a diamond print pattern. The shower follows the high contrast trend with one white wall and one black wall in matching square pearl finish. The warmth of the terra cotta floor adds earthy warmth that gives life to the wood. 3 wall lights hang down illuminating the vanity, though durning the day, you likely wont need it with the natural light shining in from two perfect angled long windows.
This Paradise model was way customized. The biggest alterations were to remove the loft altogether and have one consistent roofline throughout. We were able to make the kitchen windows a bit taller because there was no loft we had to stay below over the kitchen. This ATU was perfect for an extra tall person. After editing out a loft, we had these big interior walls to work with and although we always have the high-up octagon windows on the interior walls to keep thing light and the flow coming through, we took it a step (or should I say foot) further and made the french pocket doors extra tall. This also made the shower wall tile and shower head extra tall. We added another ceiling fan above the kitchen and when all of those awning windows are opened up, all the hot air goes right up and out.
 Harbour Towne Construction
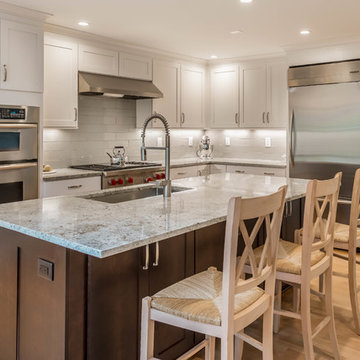
The new arrangement gave the cook much more usable counter space in addition to appliances that would work with her culinary skills. A large island and an opening to the living area provided greater ability to entertain guests. In addition an 8’ x 10’ offset in the garage was closed in to create a mudroom.
The homeowner requested a kitchen that would uphold their culinary ability and appliances that will do the same. The following appliances were used in this remodel:
- Zephyr Tempest 1 Pro-Style Under Cabinet Range Hood
- Moen Align Single Lever Stainless Faucet
- Elkay Crosstown Stainless Single Bowl Farmhouse sink
- Colonial White Granite
- Daltile Elevare Glazed Ceramic backsplash in Element
- Maple Wood Floor in Waterborne finish
- Custom Wedge Casing
Sponsored
Sunbury, OH
J.Holderby - Renovations
Franklin County's Leading General Contractors - 2X Best of Houzz!
 Haifa Architects
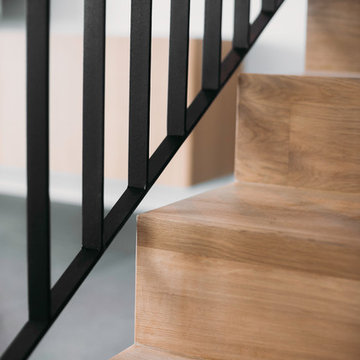
Duplex Y is located in a multi apartment building, typical to the Carmel mountain neighborhoods. The building has several entrances due to the slope it sits on.
Duplex Y has its own separate entrance and a beautiful view towards Haifa bay and the Golan Heights that can be seen on a clear weather day.
The client - a computer high-tech couple, with their two small daughters asked us for a simple and functional design that could remind them of their frequent visits to central and northern Europe. Their request has been accepted.
Our planning approach was simple indeed, maybe even simple in a radical way:
We followed the principle of clean and ultra minimal spaces, that serve their direct mission only.
Complicated geometry of the rooms has been simplified by implementing built-in wood furniture into numerous niches.
The most 'complicated' room (due to its broken geometry, narrow proportions and sloped ceiling) has been turned into a kid's room shaped as a clean 'wood box' for fun, games and 'edutainment'.
The storage room has been refurbished to maximize it's purpose by creating enough space to store 90% of the entire family's demand.
We've tried to avoid unnecessary decoration. 97% of the design has its functional use in addition to its atmospheric qualities.
Several elements like the structural cylindrical column were exposed to show their original material - concrete.
Photos: Julia Berezina
 Wine Cellar Specialists
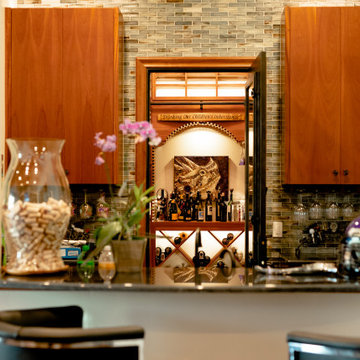
We completed another residential wine cellar installation project in North Dallas. You can see the wine room from the elegant wine bar. The lattice arch with a tabletop and lattice diamond bins are some of the racking features.
Follow us on Twitter: https://twitter.com/winecellarspec
Wine Cellar Specialists
1134 Commerce Drive
Richardson 75081
(972)454-048
info@winecellarspec.com
Request a wine cellar design for FREE: http://www.winecellarspec.com/free-3d-drawing/
 Jerilyn Horn Kitchen & Bath Design Co.
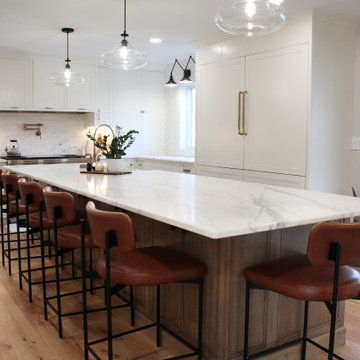
Construction work and cabinetry installed by Curtis Rice of Countertops By Design. Plus, the beautiful inset custom cabinets in Sherwin Williams "Alabaster" were hand-crafted by Curtis and combined with island cabinetry by Dura Supreme Cabinetry in the Reese door, maple with their Cashew stain. He even went above and beyond for my request to match the stain on the interiors of the 3 countertop larder cabinets and made them into pocket doors! EPIC Stone, LLC natural Arabescus White honed marble including a full marble splash behind the stove and followed by TileBar Manchester Bianco White 3x12 Subway Glazed Ceramic Wall Tiles installed as a herringbone by Norton Ceramic Tile. The beautiful mix of metals include dark bronze finished lighting and Top Knobs Channing pulls and knobs in their Honey Bronze finish and plumbing fixtures in the Rook style by Brizo Faucet in their Luxe Gold finish. How about those floors? ?Provided and installed by Rheinschmidt's Flooring America in Burlington. Luxury appliances provided and installed by The Appliance Barn Inc in Kalona and, of course, interior design by Jerilyn Horn Kitchen & Bath Design Co. ❤️

 Tile Doctor Ltd
During an inspection for alteration work, this customer from Cheshunt discovered what appeared to be an original encaustic tiled floor under the hallway carpet. Keen to work out what it was, and have it restored, I was asked to pop round and look.
I went over as requested to survey the hallway floor and confirm their suspicions. The carpet had been secured with gripper rods glued onto the floor and that came away easily enough. Underneath, the tiles had been covered with self-levelling cement which had to be carefully scraped away to reveal the tiles.
I ran a test to see if the cement leveller could be easily removed and using a combination of a scraper with Tile Doctor Pro-Clean, I was able to confirm the tiled floor was indeed salvageable. The house was Edwardian, and the tiles had been laid in a classic black and white geometric pattern typical of the period so I suspect the floor was indeed original.
I worked out a quote to restore the whole floor including the removal of the cement, deep cleaning and then sealing the tiles. Without removing all the cement, it would be difficult to price for replacing broken tiles, but I suspected there may be a few as its quite usual for a floor of this age. Keen to have the floor restored we were given the go-ahead and a date scheduled for the work to start.
The first step was to remove all the carpet and gripper rod so we could see the full extent of the self-levelling screed. Once done it was a case of carefully chipping and scraping away to break up the cement until the tiled floor had been fully revealed. Its slow and detailed work but quite rewarding when the tiled floor is finally revealed. The tiles had survived well under the carpet and cement but as suspected a few repairs and replacement would be needed.
With all the cement brushed away work moved onto cleaning which started with a strong dilution of Tile Doctor Pro-Clean applied to the floor and left to soak in for fifteen minutes the scrubbed in with a rotary machine fitted with a Black pad. A lot of soiling is generated from this which is rinsed off with water and extracted with a wet vacuum. The floor was then inspected and the process repeated where required.
The next step was to treat the tiles to an acid wash using Tile Doctor Grout Clean-up. This is applied as before and has several benefits including dissolving the remaining cement residue and neutralising the pH of the floor after the use of Tile Doctor Pro-Clean which is a strong alkaline.
The floor was then inspected and the broken tiles carefully removed so they could be replaced. This is delicate work as lifting a tile can sometimes upset its neighbour and before you know it the size of the work has tripled. Replacement tiles were then cut to fit the existing geometric pattern and secured into place with a rapid set adhesive and grouted in.
Once the replacement tile and grout had set, the floor was given a light clean using Tile Doctor Neutral Tile Cleaner and then left to dry out overnight.
The next day the tiles were sealed using a single coat of Tile Doctor Colour Grow and the followed up with give coats of Tile Doctor Seal & Go. Colour Grow is an impregnator that soaks into the pores of the tile protecting it from within and improving colour, where as Seal and Go adds a nice subtle sheen to the tiles. Both products are breathable which is an important feature with old floors that don’t have a damp proof membrane.
For aftercare I recommended Neutral Tile Cleaner which is a gentle but effective tile cleaning product that won’t damage the sealer.
Robert Voyce
Hertfordshire TIle Doctor
 Tile Doctor Ltd
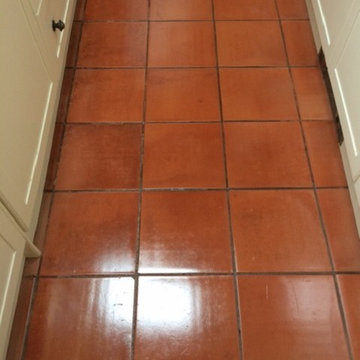
Terracotta is an interesting type of stone manufactured using a variety of techniques dependant on the country of origin which leads to a number of differences such as Spanish Terracotta being less porous than its Mexican counterpart: the former is semi-hand made and finished in a factory kiln, while the latter is completely handmade. Spanish Terracotta is therefore a lot less than porous and ultimately, of a higher quality.
But despite the Spanish Terracotta being less porous, and therefore being less prone to ingrained dirt, it still, like any other stone, needs regular maintenance to keep it looking smart. In the tiling trade, we quite often refer to this as a good old fashioned ‘Clean and Seal’ and this is exactly what was requested by this property owner in Halifax, for their Spanish Terracotta tiled floors in the kitchen and adjacent hallway.
I cleaned both sets of Terracotta tiles using the same process, which involved the application of our reliable alkaline cleaner known as Tile a Doctor Pro Clean, diluted with five parts of warm water. Once the solution had been left to dwell for a short period, it was scrubbed into the tiles to remove all dust, dirt, and general muck. This created a slurry of cleaning residue, which I promptly soaked up using a wet vac. A wet vac machine is an essential tool when it comes to cleaning porous tiles since, unlike a traditional mop and bucket, it sucks the excess trapped dirt out of the clay and thus provides a superior clean.
Following this, I applied a small amount of our heavy duty remover, known as Tile Doctor Remove & Go, to deal with some of the more stubborn stains and paint splashes, before rinsing with clean water and wet vaxing in a similar fashion to before.
Once the clean had been completed I left the tiles to dry completely. This can take 12 to 24 hours depending on numerous factors including whether a Damp proof Membrane and underfloor heating has been installed which can really help reduce drying times. Letting the tiles dry completely before sealing is paramount as moisture can cloud the sealer and affect its performance.
Upon my return to the property I ran some quick damp tests, which revealed the tiles were ready to be sealed. I then applied several coats of Tile Doctor Seal and Go, our topical sealer which provides a satin finish and accentuates colour. A new coat of this product is recommended every six months on Terracotta to ensure the continuous protection of the tiles’ soft clay particles.
My customer was extremely pleased with her refreshed Terracotta tiles. It goes to show what a big difference a bit of regular maintenance can make. I advised the customer that an everyday cleaner called Tile Doctor pH Neutral cleaner can also be used regularly to keep the tiles looking great without damaging the sealer.
Nigel Stoker
North West Yorkshire Tile Doctor
 Jerilyn Horn Kitchen & Bath Design Co.
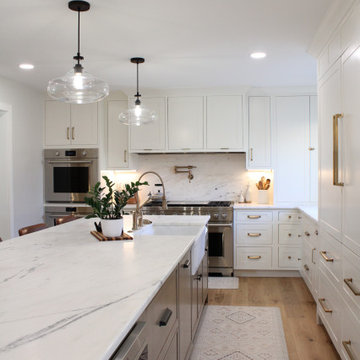
Construction work and cabinetry installed by Curtis Rice of Countertops By Design. Plus, the beautiful inset custom cabinets in Sherwin Williams "Alabaster" were hand-crafted by Curtis and combined with island cabinetry by Dura Supreme Cabinetry in the Reese door, maple with their Cashew stain. He even went above and beyond for my request to match the stain on the interiors of the 3 countertop larder cabinets and made them into pocket doors! EPIC Stone, LLC natural Arabescus White honed marble including a full marble splash behind the stove and followed by TileBar Manchester Bianco White 3x12 Subway Glazed Ceramic Wall Tiles installed as a herringbone by Norton Ceramic Tile. The beautiful mix of metals include dark bronze finished lighting and Top Knobs Channing pulls and knobs in their Honey Bronze finish and plumbing fixtures in the Rook style by Brizo Faucet in their Luxe Gold finish. How about those floors? ?Provided and installed by Rheinschmidt's Flooring America in Burlington. Luxury appliances provided and installed by The Appliance Barn Inc in Kalona and, of course, interior design by Jerilyn Horn Kitchen & Bath Design Co. ❤️
 Innovative Design Build
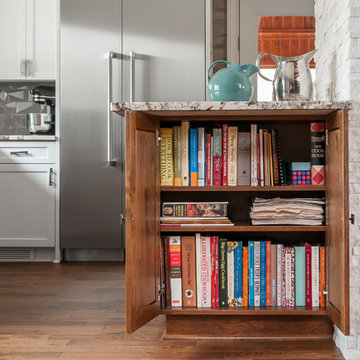
Five stars isn’t enough! Our project was to reconfigure and update the main floor of a house we recently purchased that was built in 1961. We wanted to maintain some of the unique feeling it originally had but bring it up-to-date and eliminate the closed-in rooms and downright weird layout that was the result of multiple, partial remodeling projects. We began with a long wishlist of changes which also required replacement of very antiquated plumbing, electrical wiring and HVAC. We even found a fireplace that had been walled in and needed major re-construction. Many other aspects and details on this incredible list we made included an all new kitchen layout, converting a bedroom into a master closet, adding new half-bath, completely rebuilding the master bath, and adding stone, tile and custom built cabinetry. Our design plans included many fixtures and details that we specified and required professional installation and careful handling. Innovative helped us make reasonable decisions. Their skilled staff took us through a design process that made sense. There were many questions and all were answered with sincere conversation and positive – innovation – on how we could achieve our goals. Innovative provided us with professional consultants, who listened and were courteous and creative, with solid knowledge and informative judgement. When they didn’t have an answer, they did the research. They developed a comprehensive project plan that exceeded our expectations. Every item on our long list was checked-off. All agreed on work was fulfilled and they completed all this in just under four months. Innovative took care of putting together a team of skilled professional specialists who were all dedicated to make everything right. Engineering, construction, supervision, and I cannot even begin to describe how much thanks we have for the demolition crew! Our multiple, detailed project designs from Raul and professional design advice from Mindy and the connections she recommended are all of the best quality. Diego Jr., Trevor and his team kept everything on track and neat and tidy every single day and Diego Sr., Mark, Ismael, Albert, Santiago and team are true craftsmen who follow-up and make the most minuscule woodworking details perfect. The cabinets by Tim and electrical work and installation of fixtures by Kemchan Harrilal-BB and Navindra Doolratram, and Augustine and his crew on tile and stone work – all perfection. Aisling and the office crew were always responsive to our calls and requests. And of course Clark and Eric who oversaw everything and gave us the best of the best! Apologies if we didn’t get everyone on this list – you’re all great! Thank you for your hard work and dedication. We can’t thank you enough Innovative Construction – we kind of want to do it again!
Dave Hallman & Matt DeGraffenreid
17