
Search results for "Formulations" in Home Design Ideas
 RoomService 360
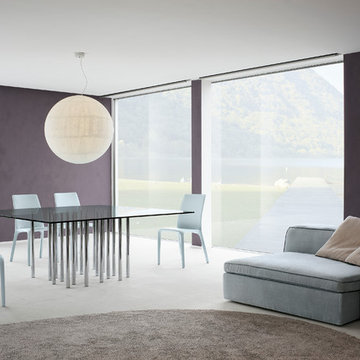
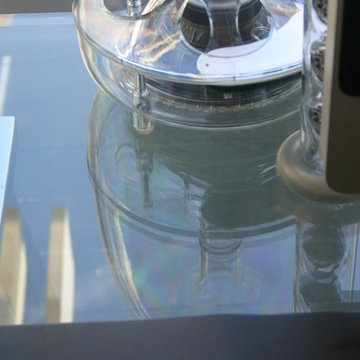
Equally spellbinding and sophisticated, Mille Italian Dining Table is formulated as a harmonious solitary element with architectural focal point. A Bartoli Design, Mille Modern Dining Table is manufactured in Italy by Bonaldo and is ultimately an exquisite example of an extraordinary aesthetic.
Mille Dining Table is available in 5 round sizes, 2 square sizes, 5 rectangular sizes and 2 oval sizes. With a base that is dominated by repetition in the form of chrome-plated steel bars, the differently sizes table tops of the Mille Table are made of clear tempered glass, which yields to a spectacular display of dramatic modernism.
 My Kitchen And Bath
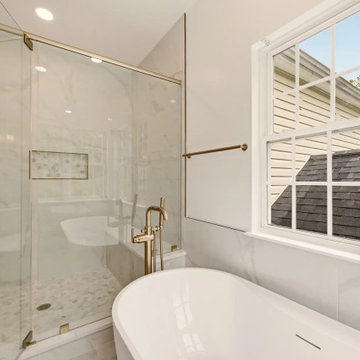
A complete primary bathroom remodel in Springfield, Virginia, designed around three priorities our clients came in with: a real walk-in shower, a freestanding tub by the windows, and a proper double vanity with storage that actually worked.
The original layout had everything in the wrong place. The tub sat against an interior wall away from the natural light. A small stall shower took up real estate across the room. The vanity was squeezed into whatever space was left over. Three windows on the back wall were doing nothing for the room because the layout was fighting them. Our solution involved knocking down the dividing wall between the old shower and vanity area, relocating plumbing for both the tub and the new vanities, and placing the freestanding tub directly under the bay of windows so morning light became part of the experience.
Design Approach
We anchored the room around contrast: deep navy cabinetry against soft white walls, warm brushed gold against cool marble tile, sharp Shaker lines against the curved silhouette of the freestanding tub. Navy was the design decision the rest of the room was built around — the clients knew they wanted color but didn't want anything that would feel dated in five years. Navy reads bold without being loud, pairs with virtually any metal finish, and has staying power that trendier choices don't.
We used Fabuwood Galaxy Indigo for the vanities — all-plywood construction with solid wood doors and drawer fronts, soft close throughout. Shaker-style flat panels keep the navy from feeling heavy. The brushed gold (Jeffrey Alexander 635-96SBZ in satin bronze) shows up across hardware, faucets, lighting, the tub filler, and the shower trim, creating a quiet continuity throughout the room.
The Shower
Removing the wall between the old shower and old vanity area created room for a proper walk-in. We tiled the entire shower floor to ceiling in Decovita Calacatta Suave 24x48" porcelain — large format installed in a 50% offset horizontal pattern, with cement board and redgard underneath. The marble-look porcelain gives the visual depth of natural marble without the maintenance.
A built-in shower bench, custom-built into the corner, is wrapped in the same wall tile on the front with a quartz top matching the vanity counter. The shower niche is detailed with MSI Arabescato Carrara 2" honed hex mosaic at the back, the same tile used on the shower floor. All tile edges are finished with Schluter in satin bronze to match the room's metal finishes. The shower door is custom frameless 3/8" tempered glass with a satin bronze pull — no metal frame interrupting the sight line.
The Vanities and Countertops
The new double vanity gives both clients their own space for morning routines. Counter tops are MSI Calacatta Miraggio Cielo quartz with pencil edging and a 4" backsplash — a soft white with subtle gray veining that reads like real Calacatta marble without the porosity issues. Two undermount square porcelain sinks finish the surface cleanly.
The Tub
A 60" freestanding soaker tub sits under the bay of three windows. The floor-mounted tub filler is satin bronze with a handheld sprayer. We relocated the drain and supply lines to make the centered placement work. The tub is the room's quietest feature and its strongest — clients tell us they use this bathroom differently than they used the old one.
Flooring
MSI Sande Ivory 12x24" matte porcelain runs throughout the bathroom floor in a 50% offset pattern parallel to the vanity wall. Cement board underneath, 4" white wood baseboard, Whisper Grey grout that handles daily use without showing wear.
Paint and Lighting
Walls are Benjamin Moore Chantilly Lace 2121-70 in satin — a true crisp white that doesn't lean cool or warm. The ceiling uses Benjamin Moore Aura Bath and Spa White, which is formulated to resist mildew in high-humidity spaces. Lighting is layered: three new 6" LED recessed lights on a dimmer, two satin bronze vanity sconces above the mirrors, and the existing three windows providing the daytime ambient light.
Project Specs
Location: Springfield, Virginia
Project type: Full primary bathroom remodel
Project duration: Approximately 5 weeks
Style: Modern, Transitional
Color palette: Navy, white, brushed gold, marble
Materials
Cabinetry: Fabuwood Galaxy Indigo, Shaker-style flat panel maple, all-plywood construction
Cabinet hardware: Jeffrey Alexander 635-96SBZ Satin Bronze pulls
Vanity counter and bench top: MSI Calacatta Miraggio Cielo Quartz, pencil edge with 4" backsplash
Sinks: Undermount white porcelain BR-202 square (x2)
Wall tile: Decovita Calacatta Suave 24x48" porcelain
Floor tile: MSI Sande Ivory 12x24" matte porcelain
Shower floor + niche back: MSI Arabescato Carrara 2" honed hex mosaic marble
Edge trim: Schluter satin bronze
Shower door: Custom frameless 3/8" tempered glass
Tub: 60" freestanding acrylic soaker (Ferguson)
Tub filler: Floor-mounted satin bronze (Ferguson)
Vanity faucets, mirrors, sconces, toilet: Satin bronze coordinated finishes (Ferguson)
Wall paint: Benjamin Moore Chantilly Lace 2121-70 Satin
Ceiling paint: Benjamin Moore Aura Bath and Spa White
Grout: Whisper Grey (floor), Standard White (walls and shower)
Designed and built by My Kitchen and Bath out of our Alexandria showroom at 5710 General Washington Drive. We've been designing and building kitchens, bathrooms, and full home renovations across Northern Virginia and the DMV since 1994.

 MYWAY Home Improvement
 energetic. It consists of traditional constituents and is very robust and powerful and this formula is an robust combination of ordinary ingredients that is validated by way of reliable laboratories as good.The consumption of fatty and unhealthy meals can carry out many antagonistic effects that shoots down your entire believe to flawlessly perform the
Exoslim work. So Exo Slim is a greater strategy to get rid of all these issues and to make your lifestyles happy and peaceful and it saves your money as good as you do not need to go for any variety of painful surgical procedures. It presents sustainable and desirable outcome.As all the components which can be present in Exo Slim are amassed from medicinal crops from the land of India. These normal parts make this formulation absolutely secure and very optimistic for use via buyers. Researchers and creators of this components have worked difficult to organize this potent mixture of Exo Slim. They combined the principles of Ayurveda and science to organize the group of workers that system helps you lose weight in only some days and it also presents all of the critical vitamins and minerals that the physique desires. After making each and every bottle is validated with http://drozforskolin.org/exoslim-reviews/
Find the right local pro for your project

 Tile Doctor Ltd
This is a large 17.2 m2 Sandstone Floor installed throughout the living and kitchen areas of a property in the beautiful village of Disley close to Lyme Park which is run by the National Trust. The floor had been installed four years ago and my client was unhappy with the original sealer which hadn’t lasted very long. Without the protection of a sealer dirt had become ingrained in the pores of the stone which was now difficult to clean. Another issue was the rough nature of the Sandstone meant it was impossible to mop as it shreds the mop! As a result, the floor was mainly cleaned with a hoover which was not ideal, especially in a kitchen.
I went over to survey the floor and before quoting I ran a small test clean in the kitchen which took the floor back to its natural pale colour and really showed how dirty the floor had become. Test cleans are great as it helps me to formulate an effective cleaning plan and provide an accurate quote. My client was impressed with the result and so I was booked to come back and deep clean and then reseal the whole floor. Due to its size I estimated the floor would take two days to deep clean and a further day to apply a new sealer, so three days in total.
Working in large sections I started by cleaning the floor and stripping off the old sealer with a strong dilution of Tile Doctor Remove and Go which is a coatings remover that is safe to use on stone. The solution was left to soak into the pores of the Sandstone for ten minutes before being worked in with a 200-grit diamond pad fitted to a rotary floor machine. This action not only removed the old sealer and cleaned the floor but the 200-grit pad being vey coarse removed a lot of the roughness from the surface of the Sandstone so it shouldn’t shred any more mops.
After rinsing the floor with water and removing the slurry with a wet vacuum I set about cleaning the grout with Tile Doctor Pro-Clean worked into the grout line with a stiff brush and assisted with steam from a professional steam cleaner with a grout attachment. Once done the floor was rinsed and extracted again to remove the soil from the grouting. There was also an area near one of the doors where the grout had become loose and needed replacing so I made up a batch of matching grout and filled this in. The floor was then left overnight to dry with assistance from a couple of air movers.
I returned the next day to finish the floor by applying a sealer. First, I double checked the floor was dry with the damp meter. The readings confirmed the air movers had done a good job and that the floor was within the accepted parameters, so I was ready to seal. The sealer I chose was Tile Doctor Seal and Go which being water based doesn’t leave a smell as it dries, it really works well on Sandstone and adds a nice subtle sheen to the stone.
Once finished the floor looked much cleaner, lighter in colour overall more inviting, you could even see the fossils in some of the tiles.
The surface was also smoother so the customer should find cleaning with a mop much easier in future. On that subject its worth pointing out that owners of sealed floors should always use a neutral pH tile cleaner on their floors as most supermarket products are simply too strong and will prematurely strip the sealer off a tile if used repeatedly. Tile Doctor sell a product called Tile Doctor Neutral Cleaner which is ideal for cleaning sealed Sandstone floors like this one.
My client was really happy with the results and sent me a message later saying: “the floor looks amazing!”
Kamila Logonzy
East Cheshire Tile Doctor
 Personalized Wallpaper Installers
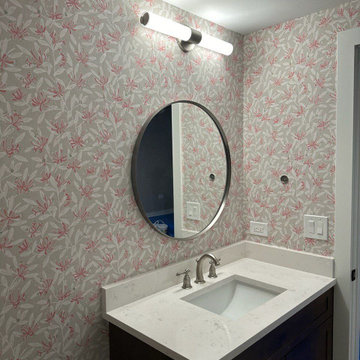
Elevate your Hill Country home with artisan wallpaper installation designed for Wimberley's distinctive style. Our master craftsmen specialize in transforming powder rooms into breathtaking retreats that blend rustic charm with modern sophistication.
Texas-Tough Wallpaper Solutions
✔ Humidity-Proof Installations - specially formulated for Central Texas climate
✔ Reclaimed-Look Wallcoverings - perfect for Hill Country aesthetics
✔ Peel-and-Stick Heritage Patterns - ideal for historic homes
✔ Custom Texas-Themed Murals - bluebonnets, live oaks, and hilltop vistas
✔ Antique Mirror & Tin Tile Effects - rustic luxe finishes
Why Wimberley Homeowners Trust Us
✅ 15 Years Serving the Hill Country
✅ Native Materials Expertise (stone walls, cedar surfaces)
✅ Dust-Free Installation Process - protects your home
✅ Vintage Pattern Matching for period homes
✅ Flexible Scheduling around market days and events
Signature Wimberley Styles
• Western-inspired leather-look wallpapers
• Organic linen textures with turquoise accents
• Whiskey-barrel stave patterns
• Custom bluebonnet and wildflower designs
Serving All of Wimberley - From the Square to Woodcreek Ranch
 Tile Doctor Ltd
This ground floor flat in the City of Oxford had been converted from a shop which as you can imagine, was quite complex. One significant element involved in the conversation was the restoration of an old Quarry tiled floor which ran through the main hallway and had for many years been covered in a commercial linoleum covering.
When the linoleum covering was removed, the sheer amount of glue which had been used to affix it had completely ruined the appearance and condition of the Quarry tiles. There was also a lot of concrete in the bathroom, and our client was keen to have this removed in the hope that the tiles beneath were salvageable.
My first task at the property was to deal with the adhesive. I covered the entire floor area with Tile Doctor Remove and Go and then covered it with a plastic sheet and leaving it to soak into the glue and break it down overnight. Remove and Go is powerful stripper with a long-dwell time, formulated to break down adhesives and paint stains, amongst other coatings.
I returned the next day and, removing the plastic sheeting, I scrubbed the floor with a carbon brush attached to a rotary floor scrubber to remove the huge glue deposits. I worked in sections, rinsing each area of the floor with water after it had been scrubbed. Once I had finished the entire floor there was still some glue remaining, so I covered it again with a solution of Remove and Go combined with Tile Doctor HBU Nanotech, which utilises nano-sized particles to get underneath tough stains, dissolve them, and lift them out. I left this solution on the floor for about two hours to dwell and scrubbed it again.
During the next day of work, I used a very coarse 100 grit diamond burnishing pad to manually grind away the remaining stubborn bits of glue. Paying attention to the bathroom, I used a 50-grit coarse milling pad followed up with a 100-grit diamond burnishing pad to do the same to the area of concrete.
The next part of the process was to use Tile Doctor Grout Clean Up to acid wash the floor. This was successful in removing the last bits of cement and the remaining residue of the glue. To complete the cleaning process, I then rinsed the floor with plenty of water and vacuumed up any soiled solution.
I opted to leave the floor alone for a couple of days to fully dry off so that it could be sealed upon my return. This is crucial as any moisture or damp issues can damage the performance of the sealer and expose the floor to further ingrained dirt and staining.
To seal the floor, I used Tile Doctor Colour Grow. This is an impregnating sealer that also enhances the natural reddish shades in the Quarry. I applied two coats of the sealer, giving the floor the natural look matte finish the customer desired.
The customer was very impressed with the results of this thorough restoration. She even left the following feedback:
“I cannot recommend this service enough. The Oxford Tile Doctor (Barry) was a superstar: he cleaned up the tiles in my hallway, which were covered in a very thick layer of glue, and removed concrete from the tiles. They now look superb and I’m really happy with the outcome. Barry was always on time, considerate, and kept me up to date. The quote for the job was exactly right. I would not hesitate to recommend him.”
 Custom Kitchens by John Wilkins, Inc.
Mike Kaskel
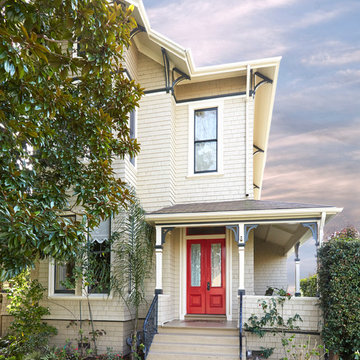
Large victorian beige two-story house exterior idea in San Francisco
Large victorian beige two-story house exterior idea in San Francisco
 Tile Doctor Ltd
We received a request to renovate Victorian tiled hallway floor at a house in the London borough of Harlesden NW10. My client had modernised the heating system and this unfortunately required a section of the tiled flooring to be dug up so new pipework could be laid.
After speaking on the phone, I arranged an initial visit to the property so I could properly assess the work required and provide a price for restoring the floor. During my visit I could see there was another section of missing tiles at one of the door thresholds which would need attention. Except for the missing sections of floor I could see that the tiles themselves were in good condition for their age and would respond well to a deep clean and fresh seal.
I was confident on being able to source matching replacements for the missing tiles and reassured my client that we would be able not only repair the floor but also renovate it to a good standard. I gave them a price to do the restoration which they were happy to accept, and the work was booked.
After some research I managed to source replacement tiles from the Vintage Floor Tile Company in Kent; Victorian tiles are still popular so there a few companies that keep stock so we can usually find a match.
With the replacements in hand, work started by removing the cement and loose material from the missing sections of flooring and backfilling with self-levelling compound to bring the exposed base up to the right level for tiling.
The tiles were then cut to shape as required to match the existing patten and fixed into place with a quick setting adhesive and then grouted.
The floor was left to overnight to allow the adhesive to harden fully, and I returned the next day to deep clean the whole floor. To give the tiles are deep clean a strong dilution of Tile Doctor Remove and Go was sprayed onto the floor and left to soak in for ten minutes. It was then scrubbed into the floor using a rotary machine fitted with a with a black pad. This action lifted the dirt out of the tiles and the resulting slurry was removed with the wet vacuum.
It turned out that the pores of the tiles were holding a lot of dirt, so the process was repeated until I was satisfied. Due to the age of the property, there was no damp-proof membrane installed so I do try to minimise the amount of water I use in this process as there is always a chance of exacerbating any latent efflorescence issues.
Efflorescence occurs where moisture rises through the tile bringing with it salts from underneath the floor as it evaporates on the surface. This can lead to unsightly white marks appearing on the tile. To counteract this potential problem the cleaning was followed by an acid wash using Tile Doctor Acid Gel applied with a 100 then 200-grit pad, before finishing on a 400-grit burnishing pad. The floor was again rinsed with water after the application of each pad to remove the slurry and extracted with a wet vacuum.
Once I was satisfied the floor was as clean as possible, we left site and the area was left to dry over the weekend ready for application of a new sealer.
I returned on the Monday and started by taking a few moisture readings to check the floor was dry. The floor was in an acceptable range, so I applied the first of 4 coats of sealer. For this floor I chose Tile Doctor Seal and Go Extra which is specially formulated product that provides stain resistance with a hard wearing low-sheen finish.
This product is also breathable which is an important feature for old floors, anything that blocks moisture from rising through the tile will cause it to become trapped underneath where it will pool and eventually reach out to the walls and result in rising damp.
Once complete the floor looked brand new and I’m pleased to say with the deep clean and a fresh sealer applied it was impossible to tell the difference between the original and repaired sections of flooring.
For the aftercare of sealed Victorian tiled floors, I recommend Tile Doctor Neutral Cleaner, it’s a mild day to day cleaner with a neutral pH that won’t damage the sealer. Many of the tile cleaning products you find in supermarkets are simply too strong.
Andrew Newstead
North London Tile Doctor
 Laidlaw Schultz architects
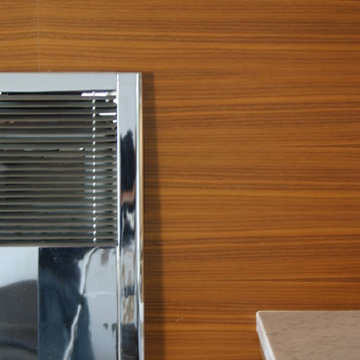
The project’s starting point was to understand the building’s original post and beam structure and to use that internal logic to formulate a sympathetic remodel. With an emphasis on the upper back unit, the owner’s private residence within this recently purchased Edward Killingsworth triplex, the first order of business was to strip the excess out and to return the complex to something that resembled the original. With a limited budget, the tact was to restore where possible, and to insert where needed, but always with a sympathetic eye. The kitchen quickly became the primary focus and it was soon realized that by removing the division between the existing galley and family room that the essence of the structural system could be revealed. Once opened the datum of the layered beams was adhered to with the kitchen reinforcing this overhead water line. The primary internal wall was then highlighted with a new wood veneer with the refrigerator recessed (borrowing a bit of space from the master closet) and the existing heater chromed.
 Gappsi
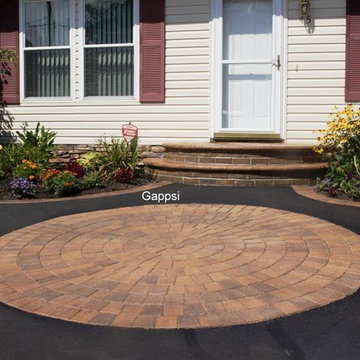
Patio, walkway, and front steps were built by Gappsi in Wyandanch Long Island, NY in Suffolk County. The stone used is over-sized ridge brick and ridge circle pavers in a golden brown blend. The pavers are mixed randomly in square and rectangular sizes. This stone has a textured riven surface and slightly chamfered edges. The sealing process begins with pressure washing the entire patio, removing all dirt and debris from the stone surface and in between the joints. Next, Nexgel Techniseal synthetic sand is applied in between the pavers joints and vibrated with a mechanical plate compactor. The plate compactor has rubber rollers to prevent the stones from cracking or scratching. This vibrating process allows the sand to fall in between the joints to densify. Then, we clean the pavers with brooms and landscape blowers, to clean the excess sand from the pavers surface and to evenly spread the sand in between the pavers joints. The next step is to wash the pavers by misting water to penetrate the synthetic sand into the paver joints all the way down below the pavers. The sand and water activate a chemical reaction of the pollen that's in the sand to cause the sand to harden. Finally, the application of the sealer. A two parts components urethane dealer, specially formulated for Gappsi, is applied to the pavers surface and the sand joints to prevent stones from staining, extend their life cycle and further enhance their texture, color, and surface.
https://www.youtube.com/watch?v=Z2t3swbuYXo
 Laidlaw Schultz architects
The project’s starting point was to understand the building’s original post and beam structure and to use that internal logic to formulate a sympathetic remodel. With an emphasis on the upper back unit, the owner’s private residence within this recently purchased Edward Killingsworth triplex, the first order of business was to strip the excess out and to return the complex to something that resembled the original. With a limited budget, the tact was to restore where possible, and to insert where needed, but always with a sympathetic eye. The kitchen quickly became the primary focus and it was soon realized that by removing the division between the existing galley and family room that the essence of the structural system could be revealed. Once opened the datum of the layered beams was adhered to with the kitchen reinforcing this overhead water line. The primary internal wall was then highlighted with a new wood veneer with the refrigerator recessed (borrowing a bit of space from the master closet) and the existing heater chromed.
 Fein Construction LLC
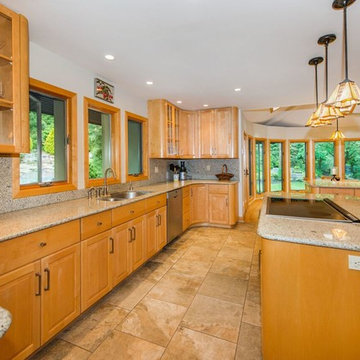
At Fein Construction we build each custom home with top notch craftsmanship and attention to detail. Check out our portfolio of this custom built house in Kinnelon, NJ to formulate your own home design ideas.
 Hankins & Associates, Inc. - Kitchens and Baths
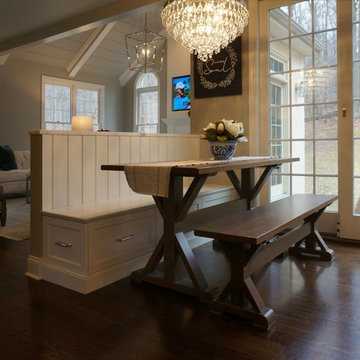
Partition wall provides slight separation to between the family room and breakfast area. Bench seating with storage was designed and made and will be topped with a custom navy-blue cushion. The alder wood table and bench were custom made for the space with a color formulated to meet the homeowners’ specifications.
 Tile Doctor Ltd
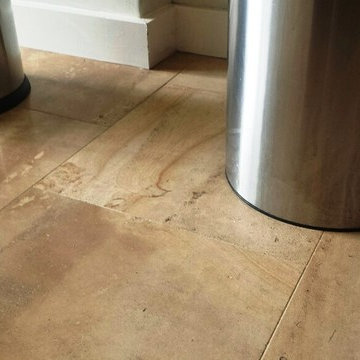
The following post is follows on from the Limestone tiled kitchen floor restoration I recently completed in Cardiff. You may recall that the floor had not been maintained properly since it was first installed in 2008 and one of the key problems I had to deal with during that particular restoration was a number of dark stains left on the tiles by the kitchen dustbin. Here’s a detailed account of how I tacked the staining.
To deal with the stains, I suggested to the client that I experiment with a Tile Doctor product called Reduxa, which is formulated to remove certain stains, including red wine stains, from natural stone. It is suitable on Limestone, Marble and Travertine tiles, amongst others. Nonetheless, I did have to advise the client that unfortunately some stains are unavoidably permanent and that there was no guarantee that the product would be able to remove these particular stains. Had the sealer been maintained on this floor, then the problem would have been much easier to tackle. However, in this case the sealer had worn off over the years.
I began treating the problem area by applying the Reduxa solution, before heating up the tile with a heat gun to lift out the stains. This process of spraying and heating was repeated around eight times.
To cut a long story short, the process worked very well, and both myself and the client were amazed at the results the Reduxa stain removal solution had on the floor. This product really does what it says on the label!
If you would like more information on the product, check out the video on the Reduxa page on the Tile Doctor website.
Julian Iancono
SE Wales Tile Doctor

 AAA Distributor, LLC
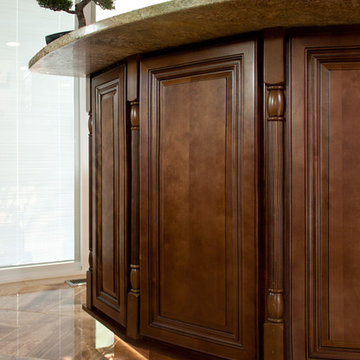
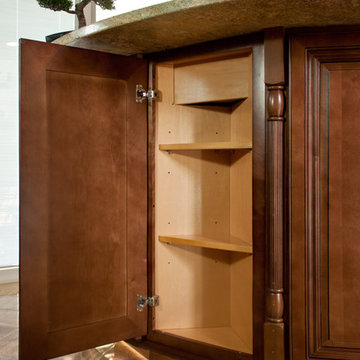
One of our favorite collections, the Geneva Cabinetry Collection, will easily catch the eye of visitors with its traditional and skillfully crafted custom appearance. Emerging with an unprecedented hand applied rich chocolate glaze and charming contour boundaries, our Geneva kitchen and bath cabinetry collection was formulated for universal application to any room - bathroom, bedroom, office, laundry, or kitchen.
As with all of our products, our natural wood interior finish is smoothly illusive throughout and can be contrasted by of some of the lighter color palettes. To further our suggestions, we recommend selecting pure chrome and elite, silver accents. Any of the indirect tones such as playful pearl or even sophisticated mosaic backdrop will joyfully consent to the newly installed Geneva kitchen and bath cabinetry collection.
Specifications:
- Full overlay
- All wood construction
- Hand applied rich dark chocolate glaze
- Natural wood interior finish
- Solid wood frame
- 1/2" plywood box
- 3/4" 5-piece drawer front raised solid wood panel
- 3/4" plywood half-depth adjustable base cabinet shelve
- Dead-lock shelve clip technology
- Quiet smooth-close door hinges on all doors
- Full extension dovetailed drawer with soft-close glides
Click the link below to build and order your kitchen with our convenient online ordering system.
 AAA Distributor, LLC
One of our favorite collections, the Geneva Cabinetry Collection, will easily catch the eye of visitors with its traditional and skillfully crafted custom appearance. Emerging with an unprecedented hand applied rich chocolate glaze and charming contour boundaries, our Geneva kitchen and bath cabinetry collection was formulated for universal application to any room - bathroom, bedroom, office, laundry, or kitchen.
As with all of our products, our natural wood interior finish is smoothly illusive throughout and can be contrasted by of some of the lighter color palettes. To further our suggestions, we recommend selecting pure chrome and elite, silver accents. Any of the indirect tones such as playful pearl or even sophisticated mosaic backdrop will joyfully consent to the newly installed Geneva kitchen and bath cabinetry collection.
Specifications:
- Full overlay
- All wood construction
- Hand applied rich dark chocolate glaze
- Natural wood interior finish
- Solid wood frame
- 1/2" plywood box
- 3/4" 5-piece drawer front raised solid wood panel
- 3/4" plywood half-depth adjustable base cabinet shelve
- Dead-lock shelve clip technology
- Quiet smooth-close door hinges on all doors
- Full extension dovetailed drawer with soft-close glides
Click the link below to build and order your kitchen with our convenient online ordering system.
 About All Floors
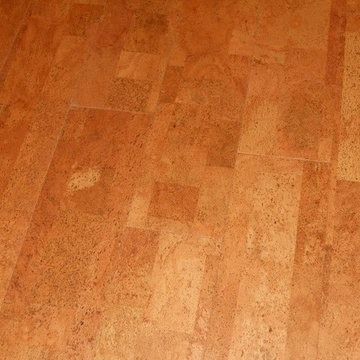
Close up of Cork Planking
Home design - mid-sized contemporary home design idea in Philadelphia
Home design - mid-sized contemporary home design idea in Philadelphia
 DMB Interior Design-Build
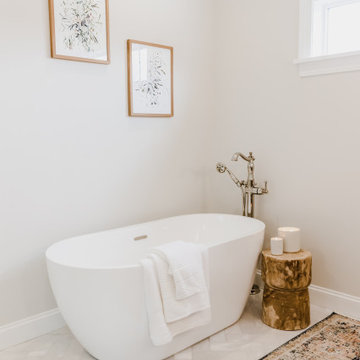
The Master Suite of the Elmwood project was formulated from scratch in the spacious addition of a branching household. Our clients wanted to keep the neighborhood they loved while creating space for a growing family. DMB Design came into the project at the blueprint phase, offering our intentional consideration to the layout of the space before its physical creation. This offered us an opportunity to present our idealized iteration of a self-contained sanctuary space. We created a spa-inspired atmosphere, starting with the floating tub that captured our hearts from the very beginning. You'll find plenty of space to hang your robe in the 15-foot walk in closet complete with floor-to-ceiling custom built-ins. The suite maintains an aura of romance, creating a sense of delicacy without an ounce of fussiness.
 Asher Seaton Homes
INTERIOR
---
-Two-zone heating and cooling system results in higher energy efficiency and quicker warming/cooling times
-Fiberglass and 3.5” spray foam insulation that exceeds industry standards
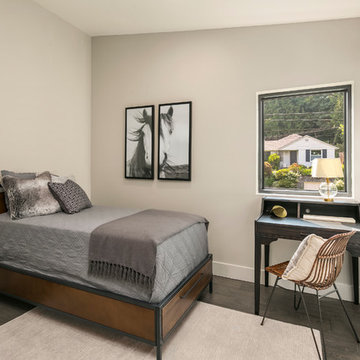
-Sophisticated hardwood flooring, engineered for an elevated design aesthetic, greater sustainability, and the highest green-build rating, with a 25-year warranty
-Custom cabinetry made from solid wood and plywood for sustainable, quality cabinets in the kitchen and bathroom vanities
-Fisher & Paykel DCS Professional Grade home appliances offer a chef-quality cooking experience everyday
-Designer's choice quartz countertops offer both a luxurious look and excellent durability
-Danze plumbing fixtures throughout the home provide unparalleled quality
-DXV luxury single-piece toilets with significantly higher ratings than typical builder-grade toilets
-Lighting fixtures by Matteo Lighting, a premier lighting company known for its sophisticated and contemporary designs
-All interior paint is designer grade by Benjamin Moore
-Locally sourced and produced, custom-made interior wooden doors with glass inserts
-Spa-style mater bath featuring Italian designer tile and heated flooring
-Lower level flex room plumbed and wired for a secondary kitchen - au pair quarters, expanded generational family space, entertainment floor - you decide!
-Electric car charging
29