
Search results for "Functioning appropriately" in Home Design Ideas
 Kathleen Jennison
An Arts & Crafts Bungalow is one of my favorite styles of homes. We have quite a few of them in our Stockton Mid-Town area. And when C&L called us to help them remodel their 1923 American Bungalow, I was beyond thrilled.
As per usual, when we get a new inquiry, we quickly Google the project location while we are talking to you on the phone. My excitement escalated when I saw the Google Earth Image of the sweet Sage Green bungalow in Mid-Town Stockton. "Yes, we would be interested in working with you," I said trying to keep my cool.
But what made it even better was meeting C&L and touring their home, because they are the nicest young couple, eager to make their home period perfect. Unfortunately, it had been slightly molested by some bad house-flippers, and we needed to bring the bathroom back to it "roots."
We knew we had to banish the hideous brown tile and cheap vanity quickly. But C&L complained about the condensation problems and the constant fight with mold. This immediately told me that improper remodeling had occurred and we needed to remedy that right away.
The Before: Frustrations with a Botched Remodel
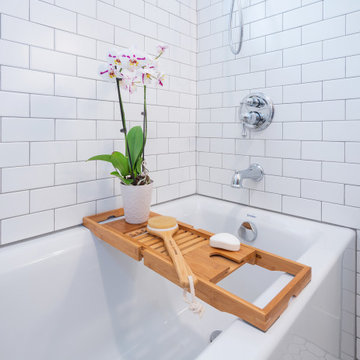
The bathroom needed to be brought back to period appropriate design with all the functionality of a modern bathroom. We thought of things like marble countertop, white mosaic floor tiles, white subway tile, board and batten molding, and of course a fabulous wallpaper.
This small (and only) bathroom on a tight budget required a little bit of design sleuthing to figure out how we could get the proper look and feel. Our goal was to determine where to splurge and where to economize and how to complete the remodel as quickly as possible because C&L would have to move out while construction was going on.
The Process: Hard Work to Remedy Design and Function
During our initial design study, (which included 2 hours in the owners’ home), we noticed framed images of William Morris Arts and Crafts textile patterns and knew this would be our design inspiration. We presented C&L with three options and they quickly selected the Pimpernel Design Concept.
We had originally selected the Black and Olive colors with a black vanity, mirror, and black and white floor tile. C&L liked it but weren’t quite sure about the black, We went back to the drawing board and decided the William & Co Pimpernel Wallpaper in Bayleaf and Manilla color with a softer gray painted vanity and mirror and white floor tile was more to their liking.
After the Design Concept was approved, we went to work securing the building permit, procuring all the elements, and scheduling our trusted tradesmen to perform the work.
We did uncover some shoddy work by the flippers such as live electrical wires hidden behind the wall, plumbing venting cut-off and buried in the walls (hence the constant dampness), the tub barely balancing on two fence boards across the floor joist, and no insulation on the exterior wall.
All of the previous blunders were fixed and the bathroom put back to its previous glory. We could feel the house thanking us for making it pretty again.
The After Reveal: Cohesive Design Decisions
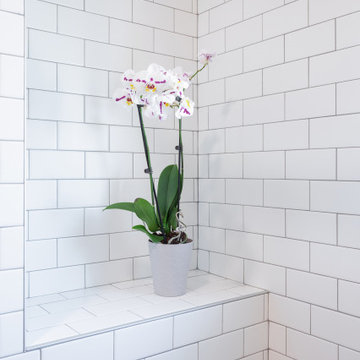
We selected a simple white subway tile for the tub/shower. This is always classic and in keeping with the style of the house.
We selected a pre-fab vanity and mirror, but they look rich with the quartz countertop. There is much more storage in this small vanity than you would think.
The Transformation: A Period Perfect Refresh
We began the remodel just as the pandemic reared and stay-in-place orders went into effect. As C&L were already moved out and living with relatives, we got the go-ahead from city officials to get the work done (after all, how can you shelter in place without a bathroom?).
All our tradesmen were scheduled to work so that only one crew was on the job site at a time. We stayed on the original schedule with only a one week delay.
The end result is the sweetest little bathroom I've ever seen (and I can't wait to start work on C&L's kitchen next).
Thank you for joining me in this project transformation. I hope this inspired you to think about being creative with your design projects, determining what works best in keeping with the architecture of your space, and carefully assessing how you can have the best life in your home.
 Medallion Cabinetry
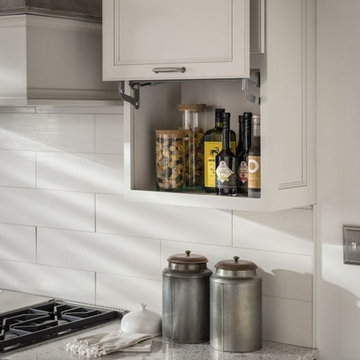
This culinary kitchen design has a transitional style and incorporates beautiful clean lines. The designer selected a beautiful combination of three different finishes from Medallion to create a well-designed and functional space to satisfy your inner chef. The custom designed kitchen island showcases our Greystone finish from the New Stoney Brooke Collection and creates defined cooking, cleaning, and prep zones within the overall space.
Medallion’s new Stoney Brooke Collection is uniquely textured in subtle shades of grays and browns. This unique finish is achieved by artfully brushing multiple glaze materials onto a stained surface. The varying shades of this glaze application create a subtle textural feel and appearance.
The component hood creates a function focal point and is finished in both Greystone and our new Irish Crème painted finish. The Irish Crème wall cabinetry coordinates beautifully with the Smoke stained base cabinets which provide a neutral backdrop for your culinary creations.
Extend the style and well-appropriated design of your kitchen into the pantry. Select coordinating cabinetry and specialized storage options to fit your culinary needs.
Find a Medallion Showroom near you today: http://www.medallioncabinetry.com/DealerLocator
 Kathleen Jennison
An Arts & Crafts Bungalow is one of my favorite styles of homes. We have quite a few of them in our Stockton Mid-Town area. And when C&L called us to help them remodel their 1923 American Bungalow, I was beyond thrilled.
As per usual, when we get a new inquiry, we quickly Google the project location while we are talking to you on the phone. My excitement escalated when I saw the Google Earth Image of the sweet Sage Green bungalow in Mid-Town Stockton. "Yes, we would be interested in working with you," I said trying to keep my cool.
But what made it even better was meeting C&L and touring their home, because they are the nicest young couple, eager to make their home period perfect. Unfortunately, it had been slightly molested by some bad house-flippers, and we needed to bring the bathroom back to it "roots."
We knew we had to banish the hideous brown tile and cheap vanity quickly. But C&L complained about the condensation problems and the constant fight with mold. This immediately told me that improper remodeling had occurred and we needed to remedy that right away.
The Before: Frustrations with a Botched Remodel
The bathroom needed to be brought back to period appropriate design with all the functionality of a modern bathroom. We thought of things like marble countertop, white mosaic floor tiles, white subway tile, board and batten molding, and of course a fabulous wallpaper.
This small (and only) bathroom on a tight budget required a little bit of design sleuthing to figure out how we could get the proper look and feel. Our goal was to determine where to splurge and where to economize and how to complete the remodel as quickly as possible because C&L would have to move out while construction was going on.
The Process: Hard Work to Remedy Design and Function
During our initial design study, (which included 2 hours in the owners’ home), we noticed framed images of William Morris Arts and Crafts textile patterns and knew this would be our design inspiration. We presented C&L with three options and they quickly selected the Pimpernel Design Concept.
We had originally selected the Black and Olive colors with a black vanity, mirror, and black and white floor tile. C&L liked it but weren’t quite sure about the black, We went back to the drawing board and decided the William & Co Pimpernel Wallpaper in Bayleaf and Manilla color with a softer gray painted vanity and mirror and white floor tile was more to their liking.
After the Design Concept was approved, we went to work securing the building permit, procuring all the elements, and scheduling our trusted tradesmen to perform the work.
We did uncover some shoddy work by the flippers such as live electrical wires hidden behind the wall, plumbing venting cut-off and buried in the walls (hence the constant dampness), the tub barely balancing on two fence boards across the floor joist, and no insulation on the exterior wall.
All of the previous blunders were fixed and the bathroom put back to its previous glory. We could feel the house thanking us for making it pretty again.
The After Reveal: Cohesive Design Decisions
We selected a simple white subway tile for the tub/shower. This is always classic and in keeping with the style of the house.
We selected a pre-fab vanity and mirror, but they look rich with the quartz countertop. There is much more storage in this small vanity than you would think.
The Transformation: A Period Perfect Refresh
We began the remodel just as the pandemic reared and stay-in-place orders went into effect. As C&L were already moved out and living with relatives, we got the go-ahead from city officials to get the work done (after all, how can you shelter in place without a bathroom?).
All our tradesmen were scheduled to work so that only one crew was on the job site at a time. We stayed on the original schedule with only a one week delay.
The end result is the sweetest little bathroom I've ever seen (and I can't wait to start work on C&L's kitchen next).
Thank you for joining me in this project transformation. I hope this inspired you to think about being creative with your design projects, determining what works best in keeping with the architecture of your space, and carefully assessing how you can have the best life in your home.
Find the right local pro for your project
 George Clemens Architecture
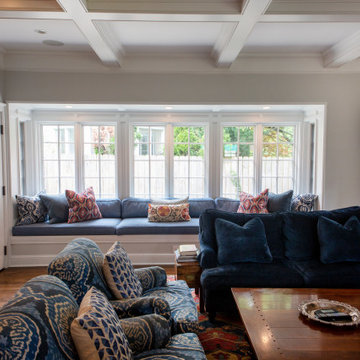
Renovation of this remarkable 1936 Monte Copper Tudor demonstrates how we sensitively transform historic homes to beautifully perform in contemporary life. The challenge was to connect first floor spaces, including the kitchen; dining room; and a lower family room added in a previous addition. The family room received thoughtful and appropriate detailing along with a graceful and functional two-sided bar element linking it with the kitchen. The kitchen was expanded and reimagined with a seamless addition. Diagonal views and openings allow all the rooms to function as a connected whole.
 Charlie Allen Renovations, Inc.
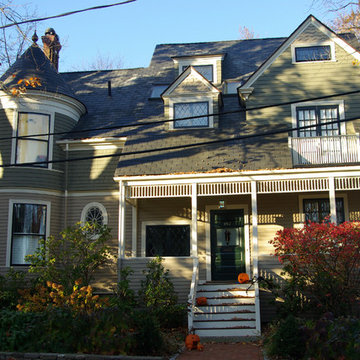
Unlike many similar houses of the era, this 1870s Shingle Style house was built without a cap on the turret. Because neighboring houses of a similar style did have a cap, its owners asked if we could construct something period-appropriate. In addition, asphalt shingles were replaced with faux slate, which is indistinguishable from natural slate but far more long-lasting. Historically correct wood-turned spandrels were introduced to a railing and the exterior was painted in period-appropriate colors. The turret's original curved bay windows, which no longer operated properly, were restored and made functional again. Photo by Shelly Harrison.
 Medallion Cabinetry
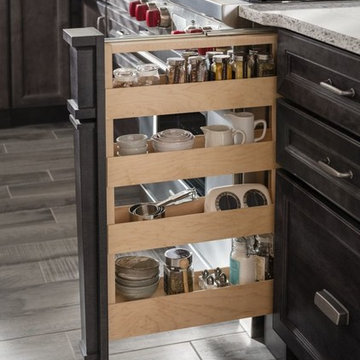
This culinary kitchen design has a transitional style and incorporates beautiful clean lines. The designer selected a beautiful combination of three different finishes from Medallion to create a well-designed and functional space to satisfy your inner chef. The custom designed kitchen island showcases our Greystone finish from the New Stoney Brooke Collection and creates defined cooking, cleaning, and prep zones within the overall space.
Medallion’s new Stoney Brooke Collection is uniquely textured in subtle shades of grays and browns. This unique finish is achieved by artfully brushing multiple glaze materials onto a stained surface. The varying shades of this glaze application create a subtle textural feel and appearance.
The component hood creates a function focal point and is finished in both Greystone and our new Irish Crème painted finish. The Irish Crème wall cabinetry coordinates beautifully with the Smoke stained base cabinets which provide a neutral backdrop for your culinary creations.
Extend the style and well-appropriated design of your kitchen into the pantry. Select coordinating cabinetry and specialized storage options to fit your culinary needs.
Find a Medallion Showroom near you today: http://www.medallioncabinetry.com/DealerLocator
 Kathleen Jennison
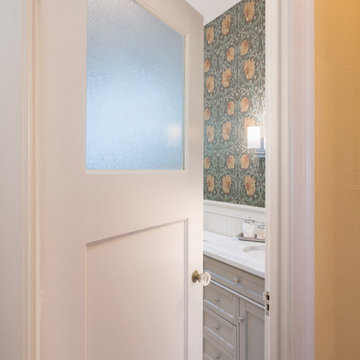
An Arts & Crafts Bungalow is one of my favorite styles of homes. We have quite a few of them in our Stockton Mid-Town area. And when C&L called us to help them remodel their 1923 American Bungalow, I was beyond thrilled.
As per usual, when we get a new inquiry, we quickly Google the project location while we are talking to you on the phone. My excitement escalated when I saw the Google Earth Image of the sweet Sage Green bungalow in Mid-Town Stockton. "Yes, we would be interested in working with you," I said trying to keep my cool.
But what made it even better was meeting C&L and touring their home, because they are the nicest young couple, eager to make their home period perfect. Unfortunately, it had been slightly molested by some bad house-flippers, and we needed to bring the bathroom back to it "roots."
We knew we had to banish the hideous brown tile and cheap vanity quickly. But C&L complained about the condensation problems and the constant fight with mold. This immediately told me that improper remodeling had occurred and we needed to remedy that right away.
The Before: Frustrations with a Botched Remodel
The bathroom needed to be brought back to period appropriate design with all the functionality of a modern bathroom. We thought of things like marble countertop, white mosaic floor tiles, white subway tile, board and batten molding, and of course a fabulous wallpaper.
This small (and only) bathroom on a tight budget required a little bit of design sleuthing to figure out how we could get the proper look and feel. Our goal was to determine where to splurge and where to economize and how to complete the remodel as quickly as possible because C&L would have to move out while construction was going on.
The Process: Hard Work to Remedy Design and Function
During our initial design study, (which included 2 hours in the owners’ home), we noticed framed images of William Morris Arts and Crafts textile patterns and knew this would be our design inspiration. We presented C&L with three options and they quickly selected the Pimpernel Design Concept.
We had originally selected the Black and Olive colors with a black vanity, mirror, and black and white floor tile. C&L liked it but weren’t quite sure about the black, We went back to the drawing board and decided the William & Co Pimpernel Wallpaper in Bayleaf and Manilla color with a softer gray painted vanity and mirror and white floor tile was more to their liking.
After the Design Concept was approved, we went to work securing the building permit, procuring all the elements, and scheduling our trusted tradesmen to perform the work.
We did uncover some shoddy work by the flippers such as live electrical wires hidden behind the wall, plumbing venting cut-off and buried in the walls (hence the constant dampness), the tub barely balancing on two fence boards across the floor joist, and no insulation on the exterior wall.
All of the previous blunders were fixed and the bathroom put back to its previous glory. We could feel the house thanking us for making it pretty again.
The After Reveal: Cohesive Design Decisions
We selected a simple white subway tile for the tub/shower. This is always classic and in keeping with the style of the house.
We selected a pre-fab vanity and mirror, but they look rich with the quartz countertop. There is much more storage in this small vanity than you would think.
The Transformation: A Period Perfect Refresh
We began the remodel just as the pandemic reared and stay-in-place orders went into effect. As C&L were already moved out and living with relatives, we got the go-ahead from city officials to get the work done (after all, how can you shelter in place without a bathroom?).
All our tradesmen were scheduled to work so that only one crew was on the job site at a time. We stayed on the original schedule with only a one week delay.
The end result is the sweetest little bathroom I've ever seen (and I can't wait to start work on C&L's kitchen next).
Thank you for joining me in this project transformation. I hope this inspired you to think about being creative with your design projects, determining what works best in keeping with the architecture of your space, and carefully assessing how you can have the best life in your home.


 Kathleen Jennison
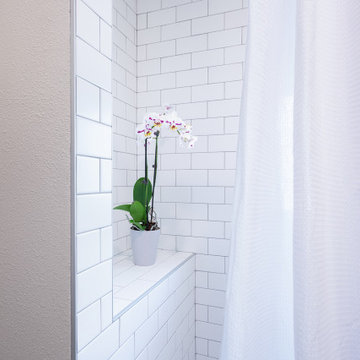
An Arts & Crafts Bungalow is one of my favorite styles of homes. We have quite a few of them in our Stockton Mid-Town area. And when C&L called us to help them remodel their 1923 American Bungalow, I was beyond thrilled.
As per usual, when we get a new inquiry, we quickly Google the project location while we are talking to you on the phone. My excitement escalated when I saw the Google Earth Image of the sweet Sage Green bungalow in Mid-Town Stockton. "Yes, we would be interested in working with you," I said trying to keep my cool.
But what made it even better was meeting C&L and touring their home, because they are the nicest young couple, eager to make their home period perfect. Unfortunately, it had been slightly molested by some bad house-flippers, and we needed to bring the bathroom back to it "roots."
We knew we had to banish the hideous brown tile and cheap vanity quickly. But C&L complained about the condensation problems and the constant fight with mold. This immediately told me that improper remodeling had occurred and we needed to remedy that right away.
The Before: Frustrations with a Botched Remodel
The bathroom needed to be brought back to period appropriate design with all the functionality of a modern bathroom. We thought of things like marble countertop, white mosaic floor tiles, white subway tile, board and batten molding, and of course a fabulous wallpaper.
This small (and only) bathroom on a tight budget required a little bit of design sleuthing to figure out how we could get the proper look and feel. Our goal was to determine where to splurge and where to economize and how to complete the remodel as quickly as possible because C&L would have to move out while construction was going on.
The Process: Hard Work to Remedy Design and Function
During our initial design study, (which included 2 hours in the owners’ home), we noticed framed images of William Morris Arts and Crafts textile patterns and knew this would be our design inspiration. We presented C&L with three options and they quickly selected the Pimpernel Design Concept.
We had originally selected the Black and Olive colors with a black vanity, mirror, and black and white floor tile. C&L liked it but weren’t quite sure about the black, We went back to the drawing board and decided the William & Co Pimpernel Wallpaper in Bayleaf and Manilla color with a softer gray painted vanity and mirror and white floor tile was more to their liking.
After the Design Concept was approved, we went to work securing the building permit, procuring all the elements, and scheduling our trusted tradesmen to perform the work.
We did uncover some shoddy work by the flippers such as live electrical wires hidden behind the wall, plumbing venting cut-off and buried in the walls (hence the constant dampness), the tub barely balancing on two fence boards across the floor joist, and no insulation on the exterior wall.
All of the previous blunders were fixed and the bathroom put back to its previous glory. We could feel the house thanking us for making it pretty again.
The After Reveal: Cohesive Design Decisions
We selected a simple white subway tile for the tub/shower. This is always classic and in keeping with the style of the house.
We selected a pre-fab vanity and mirror, but they look rich with the quartz countertop. There is much more storage in this small vanity than you would think.
The Transformation: A Period Perfect Refresh
We began the remodel just as the pandemic reared and stay-in-place orders went into effect. As C&L were already moved out and living with relatives, we got the go-ahead from city officials to get the work done (after all, how can you shelter in place without a bathroom?).
All our tradesmen were scheduled to work so that only one crew was on the job site at a time. We stayed on the original schedule with only a one week delay.
The end result is the sweetest little bathroom I've ever seen (and I can't wait to start work on C&L's kitchen next).
Thank you for joining me in this project transformation. I hope this inspired you to think about being creative with your design projects, determining what works best in keeping with the architecture of your space, and carefully assessing how you can have the best life in your home.
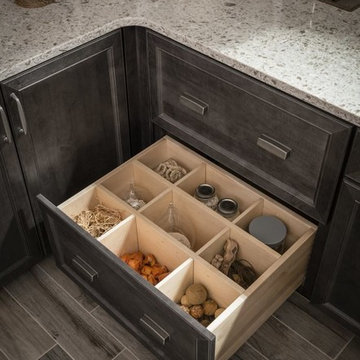 Medallion Cabinetry
This culinary kitchen design has a transitional style and incorporates beautiful clean lines. The designer selected a beautiful combination of three different finishes from Medallion to create a well-designed and functional space to satisfy your inner chef. The custom designed kitchen island showcases our Greystone finish from the New Stoney Brooke Collection and creates defined cooking, cleaning, and prep zones within the overall space.
Medallion’s new Stoney Brooke Collection is uniquely textured in subtle shades of grays and browns. This unique finish is achieved by artfully brushing multiple glaze materials onto a stained surface. The varying shades of this glaze application create a subtle textural feel and appearance.
The component hood creates a function focal point and is finished in both Greystone and our new Irish Crème painted finish. The Irish Crème wall cabinetry coordinates beautifully with the Smoke stained base cabinets which provide a neutral backdrop for your culinary creations.
Extend the style and well-appropriated design of your kitchen into the pantry. Select coordinating cabinetry and specialized storage options to fit your culinary needs.
Find a Medallion Showroom near you today: http://www.medallioncabinetry.com/DealerLocator
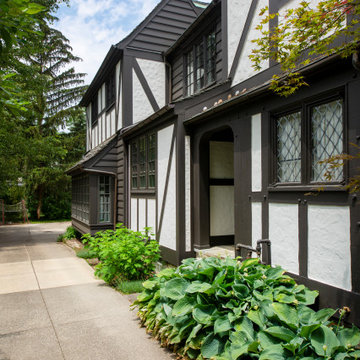 George Clemens Architecture
Renovation of this remarkable 1936 Monte Copper Tudor demonstrates how we sensitively transform historic homes to beautifully perform in contemporary life. The challenge was to connect first floor spaces, including the kitchen; dining room; and a lower family room added in a previous addition. The family room received thoughtful and appropriate detailing along with a graceful and functional two-sided bar element linking it with the kitchen. The kitchen was expanded and reimagined with a seamless addition. Diagonal views and openings allow all the rooms to function as a connected whole.
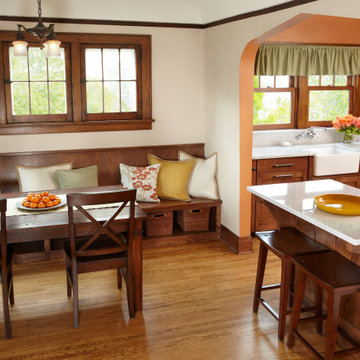
 DiGiacomo Homes & Renovation
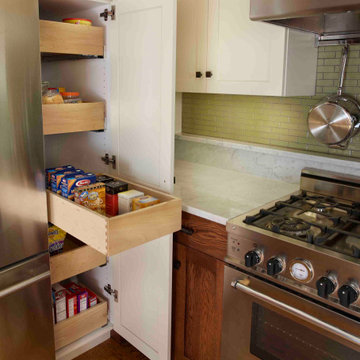
A 1929 urban Bungalow well preserved save for the kitchen. The kitchen had been twice remodeled – most recently in the 1970’s by previous homeowners. Our clients wished to restore the original Craftsman-era charm to their kitchen (which adjoined the dining room and was visible from the front entry). At the same time, our clients were looking to increase the functionality of the kitchen space and create additional seating for frequent dinner guests. Our clients’ tight budget restricted the finish pallet to rather simple options, but that simplicity became the project’s strength.
Custom cabinets (using FSC-certified maple) were designed with simple flat panel doors and fabricated using dove-tail joinery as was typical of Bungalow cabinetry. Red oak, stained to match the home’s original millwork was used to construct the cabinet lowers and a new bench to create continuity with the remainder of the home. Carrara marble, authentic to the 1920s period, was used to aesthetically brighten the space. Cabinet uppers were enameled in a historically appropriate cream hue to compliment the countertop stone. The backsplash tile was selected to pay tribute to the home’s original 1929 wall color – found beneath several layers of wallpaper during demolition. Walls were painted a bold, but historically, accurate, copper color (a perfect compliment the red oak cabinetry and trim). Lighting issues in this north-facing kitchen were addressed using hidden over-cabinet lights, task-specific under-cabinet lighting, sink cans and several period fixtures – hand fashioned by a local artisan specializing in historic reproductions to complete the bungalow look and honor the Arts-n-Crafts practice of using local craftsman. Simple and practical…in budget and in period.
To solve the seating issue, a new bench (with storage below) was custom built to span the 12’ dining room wall – allowing plenty of room for family and guests alike during dinner. The larger kitchen approach provided room for a new serve-through with counter seating where snacks, homework, and spill-over food prep can occur. No new square footage… six new seats!
To solve storage needs, the base cabinets in the kitchen were designed 3” deeper than standard 24” box cabinets and a new 28” deep pantry added allowing some of the wasted space at the center of this square kitchen to be used more efficiently. A tall backsplash capped with a 4” ledge provides a place for all of the inevitable items that clutter valuable counter real estate (cooking timers, seasoning jars, etc …) Specialized, task-specific storage - the highlight of Bungalow kitchens - was incorporated throughout: 1) An angled cabinet, built to accommodate an awkward side door location, now holds a trash can, tin-lined recycling bins, and a knife drawer; 2) A difficult deep corner necessitated by the 28” deep fridge gave rise to open cookbook shelves, an appliance cubby and narrow, and a deep pantry with full-extension roll-out trays; 3) An open pot & pan rack, built-in wall spice cabinet, kid-height microwave (a special request from our clients), customized cell-phone/electronics storage, built-in chalk board message center, and new rear entry coat/backpack storage with cork board complete the net storage gain. No new square footage … lots of new, innovative, high-functioning storage.
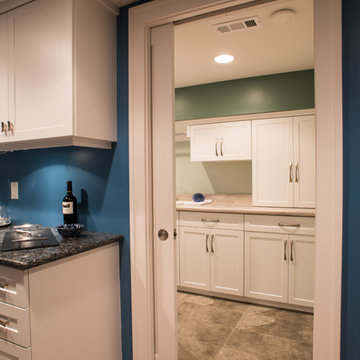
 Constantine Design Group, Inc.
Basement spaces can be a "catch-all" for storage, laundry, entertaining and mechanical systems. Thisearly 20th century Indianapolis, IN basement remodel called for a more "warm, friendly and inviting"space where the family can enjoy entertaining, TV watching, homework or laundry chores. Architect LeeConstantine worked with these clients to create "zones" for the different functions, allowing one zone to"flow" into the next. Where appropriate, walls and pocket doors separate utilitarian zones fromentertaining zones. Mechanical systems were organized to accommodate the highest ceilings possibleand under-stair space is better utilized with a custom "built-in organizer". Now the family enjoys usingthe basement as a desirable and well functioning "extension" of the home
 DiGiacomo Homes & Renovation
A 1929 urban Bungalow well preserved save for the kitchen. The kitchen had been twice remodeled – most recently in the 1970’s by previous homeowners. Our clients wished to restore the original Craftsman-era charm to their kitchen (which adjoined the dining room and was visible from the front entry). At the same time, our clients were looking to increase the functionality of the kitchen space and create additional seating for frequent dinner guests. Our clients’ tight budget restricted the finish pallet to rather simple options, but that simplicity became the project’s strength.
Custom cabinets (using FSC-certified maple) were designed with simple flat panel doors and fabricated using dove-tail joinery as was typical of Bungalow cabinetry. Red oak, stained to match the home’s original millwork was used to construct the cabinet lowers and a new bench to create continuity with the remainder of the home. Carrara marble, authentic to the 1920s period, was used to aesthetically brighten the space. Cabinet uppers were enameled in a historically appropriate cream hue to compliment the countertop stone. The backsplash tile was selected to pay tribute to the home’s original 1929 wall color – found beneath several layers of wallpaper during demolition. Walls were painted a bold, but historically, accurate, copper color (a perfect compliment the red oak cabinetry and trim). Lighting issues in this north-facing kitchen were addressed using hidden over-cabinet lights, task-specific under-cabinet lighting, sink cans and several period fixtures – hand fashioned by a local artisan specializing in historic reproductions to complete the bungalow look and honor the Arts-n-Crafts practice of using local craftsman. Simple and practical…in budget and in period.
To solve the seating issue, a new bench (with storage below) was custom built to span the 12’ dining room wall – allowing plenty of room for family and guests alike during dinner. The larger kitchen approach provided room for a new serve-through with counter seating where snacks, homework, and spill-over food prep can occur. No new square footage… six new seats!
To solve storage needs, the base cabinets in the kitchen were designed 3” deeper than standard 24” box cabinets and a new 28” deep pantry added allowing some of the wasted space at the center of this square kitchen to be used more efficiently. A tall backsplash capped with a 4” ledge provides a place for all of the inevitable items that clutter valuable counter real estate (cooking timers, seasoning jars, etc …) Specialized, task-specific storage - the highlight of Bungalow kitchens - was incorporated throughout: 1) An angled cabinet, built to accommodate an awkward side door location, now holds a trash can, tin-lined recycling bins, and a knife drawer; 2) A difficult deep corner necessitated by the 28” deep fridge gave rise to open cookbook shelves, an appliance cubby and narrow, and a deep pantry with full-extension roll-out trays; 3) An open pot & pan rack, built-in wall spice cabinet, kid-height microwave (a special request from our clients), customized cell-phone/electronics storage, built-in chalk board message center, and new rear entry coat/backpack storage with cork board complete the net storage gain. No new square footage … lots of new, innovative, high-functioning storage.
Sponsored
Columbus, OH

Structural Remodeling
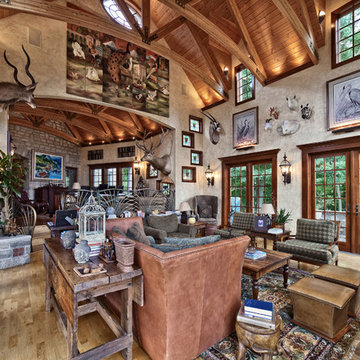
Franklin County's Heavy Timber Specialists | Best of Houzz 2020!
 Story Homes
From Attic to Awesome
Many of the classic Tudor homes in Minneapolis are defined as 1 ½ stories. The ½ story is actually an attic; a space just below the roof and with a rough floor often used for storage and little more. The owners were looking to turn their attic into about 900 sq. ft. of functional living/bedroom space with a big bath, perfect for hosting overnight guests.
This was a challenging project, considering the plan called for raising the roof and adding two large shed dormers. A structural engineer was consulted, and the appropriate construction measures were taken to address the support necessary from below, passing the required stringent building codes.
The remodeling project took about four months and began with reframing many of the roof support elements and adding closed cell spray foam insulation throughout to make the space warm and watertight during cold Minnesota winters, as well as cool in the summer.
You enter the room using a stairway enclosed with a white railing that offers a feeling of openness while providing a high degree of safety. A short hallway leading to the living area features white cabinets with shaker style flat panel doors – a design element repeated in the bath. Four pairs of South facing windows above the cabinets let in lots of South sunlight all year long.
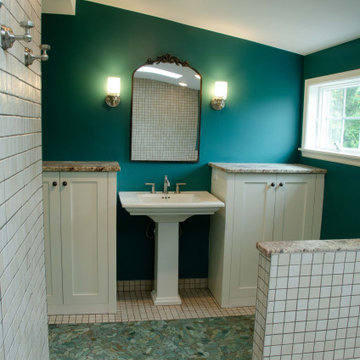
The 130 sq. ft. bath features soaking tub and open shower room with floor-to-ceiling 2-inch porcelain tiling. The custom heated floor and one wall is constructed using beautiful natural stone. The shower room floor is also the shower’s drain, giving this room an open feeling while providing the ultimate functionality. The other half of the bath consists of a toilet and pedestal sink flanked by two white shaker style cabinets with Granite countertops. A big skylight over the tub and another north facing window brightens this room and highlights the tiling with a shade of green that’s pleasing to the eye.
The rest of the remodeling project is simply a large open living/bedroom space. Perhaps the most interesting feature of the room is the way the roof ties into the ceiling at many angles – a necessity because of the way the home was originally constructed. The before and after photos show how the construction method included the maximum amount of interior space, leaving the room without the “cramped” feeling too often associated with this kind of remodeling project.
Another big feature of this space can be found in the use of skylights. A total of six skylights – in addition to eight South-facing windows – make this area warm and bright during the many months of winter when sunlight in Minnesota comes at a premium.
The main living area offers several flexible design options, with space that can be used with bedroom and/or living room furniture with cozy areas for reading and entertainment. Recessed lighting on dimmers throughout the space balances daylight with room light for just the right atmosphere.
The space is now ready for decorating with original artwork and furnishings. How would you furnish this space?
 Creative Design Landscapes
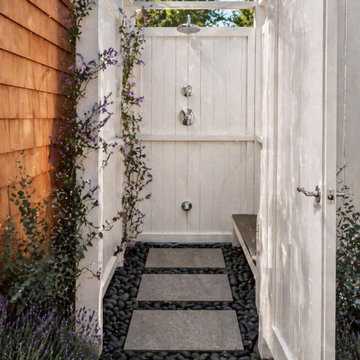
This project involved the removal of an aging wood shower enclosure and surrounding fencing, which had begun to deteriorate and contribute to poor drainage conditions. The existing area retained moisture, creating a muddy, unstable surface that impacted both usability and long-term durability.
The redesigned space introduces a fully upgraded outdoor shower system positioned discreetly behind a new white privacy enclosure. The structure was selected for its clean architectural lines, low-maintenance material, and ability to brighten and modernize the space while maintaining privacy.
A primary focus of the project was drainage correction. The ground plane was regraded and rebuilt using a permeable system consisting of oversized stone slabs set within polished black river rock. This layout allows water to move efficiently through the surface while maintaining a stable, clean, and visually refined finish. The contrast between the large-format slabs and the dark stone creates a structured, intentional foundation that elevates the overall design.
Planting was incorporated with both aesthetic and functional intent. Lavender was installed and trained along the enclosure to soften the structure and introduce seasonal fragrance. In addition to its visual contribution, it serves as a natural pest deterrent, helping to reduce mosquito activity and improve comfort within the space. Supporting plant material was kept minimal and scaled appropriately to maintain a clean, uncluttered environment.
The result is a fully integrated outdoor feature that transforms a previously underperforming area into a functional, durable, and visually cohesive extension of the home. The space now supports consistent use while delivering a refined, spa-like experience aligned with the surrounding landscape.
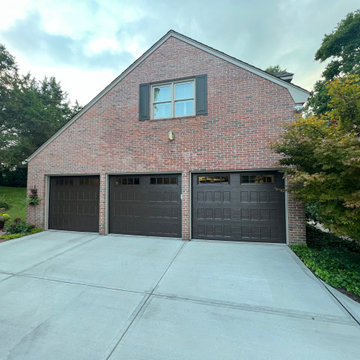
 Garage Door Solutions of TN, LLC
Garage door maintenance near Knoxville is essential to the longevity and proper function of a garage door. When a garage door receives appropriate care, irritating noise is reduced and the warranty is maintained. Having a professional service your door brings peace of mind and saves money in the long run by avoiding costly repairs or even replacement.
Garage Door Solutions of Tennessee is proud to carry the best garage door motors in the business. Our products offer features like: battery backup for when the power is out, and WiFi control, so you can access your garage door even if you are not home, LED Lighting, whisper quiet action and warranties.
If your garage doors are over 15 years old and are not operating properly, now may be the time to replace your garage doors. Garage door repairs on older garage doors often cost more than installing new ones. This is due to the limited availability of parts and upgraded garage door opener designs.
New garage doors provide quieter operation, more efficient functionality and increased curb appeal.
Tell them Houzz sent you
865-219-5543
333 TROY CIRCLE
SUITE V
KNOXVILLE, TN 37919
INFO@GARAGEDOORSOLUTIONSTN.COM

 Southwest Fence & Deck, Inc.
This project involved the construction of a large circular deck at a confidential federal headquarters, designed to enhance employee wellness and outdoor engagement. The deck functions as a relaxing park-like space where employees can step outside, walk, and enjoy a break in a natural setting.
A second large circular walking deck was also constructed to encourage movement throughout the workday, providing a functional and inviting space for daily activity. Together, these outdoor elements support well-being while maintaining discretion and simplicity appropriate for a federal facility.
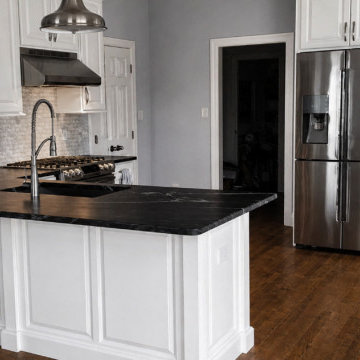
 Swift Creek Cabinets & Design
This old farmhouse kitchen was completely reimagined while honoring the character of the home. Though I wish I had the before photos, the transformation was dramatic—bringing new function, light, and timeless detailing to a space that had long outlived its original layout.
Classic white inset-style cabinetry keeps the kitchen feeling true to the age of the home, while thoughtful updates make it work beautifully for modern living. Dark countertops add grounding contrast, and the soft, textural backsplash introduces subtle pattern without overwhelming the space.
A large island was designed as both a workhorse and gathering space, generous work surface, and furniture-like detailing that feels appropriate to a farmhouse setting.
Throughout the design, the goal was not to make the kitchen feel “new,” but to make it feel as though it had always belonged in the home—just functioning far better than it ever had before.
The result is a kitchen that feels timeless, hardworking, and quietly elegant.
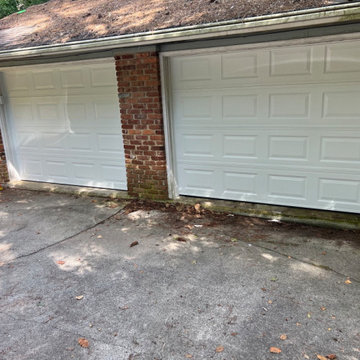 Garage Door Solutions of TN, LLC
Garage door maintenance near Knoxville is essential to the longevity and proper function of a garage door. When a garage door receives appropriate care, irritating noise is reduced and the warranty is maintained. Having a professional service your door brings peace of mind and saves money in the long run by avoiding costly repairs or even replacement.
Garage Door Solutions of Tennessee is proud to carry the best garage door motors in the business. Our products offer features like: battery backup for when the power is out, and WiFi control, so you can access your garage door even if you are not home, LED Lighting, whisper quiet action and warranties.
If your garage doors are over 15 years old and are not operating properly, now may be the time to replace your garage doors. Garage door repairs on older garage doors often cost more than installing new ones. This is due to the limited availability of parts and upgraded garage door opener designs.
New garage doors provide quieter operation, more efficient functionality and increased curb appeal.
Tell them Houzz sent you
865-219-5543
333 TROY CIRCLE
SUITE V
KNOXVILLE, TN 37919
INFO@GARAGEDOORSOLUTIONSTN.COM
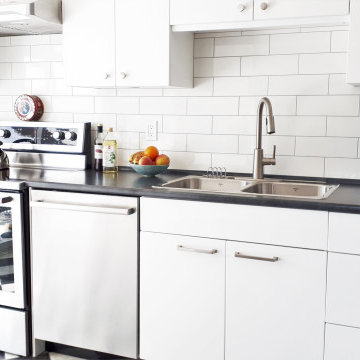
 Elizabeth Minish Design
The original slab doored cabinets from the 1950s were replaced with a modern version that looks appropriate to the era, but with much better function. The uppers were raised to standard height above the countertop and taken up to the ceiling to gain much needed storage in this compact kitchen. Integrating the dishwasher into this run, while removing storage, greatly improved the function of the entire space.
19