
Search results for "Hallway tile" in Home Design Ideas
 Tile Doctor Ltd
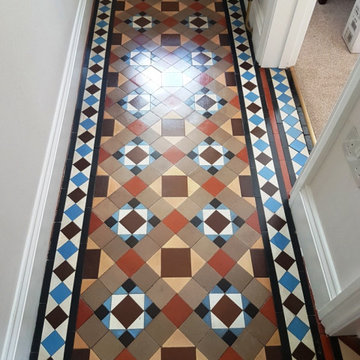
I was contacted by a homeowner who had moved into a property in the small Yorkshire market town of Masham and discovered a Victorian tiled floor under the hallway carpet. Realising this was a valuable period feature he was keen to see if it could be restored. As you can imagine he was delighted when I told him that it should be possible, and he was keen to get it uncovered and back on show.
After discussing the floor on the phone, I visited the property and removed the carpet so we could take a long look at the Victorian tile’s underneath. The carpet had protected the floor well and it was in good physical order, (i.e. no cracks etc.) it was just very dirty but was also marked with paint splashes from some untidy decorating work from the past. I confirmed none of these issues should present a problem and got the go ahead for the work to start.
There was no sealer on the floor, so I started the cleaning process using a medium dilution of Tile Doctor Pro-Clean which was worked into the tiles using a coarse 200-grit pad fitted to a rotary floor buffer. I then used a 400-grit hand-held diamond block to clean the edges which couldn’t be reached by the machine. This also removed the paint splashes which should have been on the skirting boards and not the floor!
The floor was then rinsed with water and the soil extracted with a wet vacuum. I was able to inspect the floor at this stage and spot treat areas that needed more work as they were a little stubborn. It wasn’t a large hallway and except for the paint it only needed a light clean. The result was I was able to complete the cleaning process by lunch time. I dried the floor as much as possible and left an air blower in the space for a couple of hours.
I returned later that afternoon and checked the floor for moisture using a damp meter. The floor was mostly dry, but some areas needed some more help with a heat gun. It was late summer and so still warm and so there was no need on this occasion to leave the floor overnight.
Once I was happy the floor was dry, I started sealing the tiles with the first of four coats of Tile Doctor Seal and Go. This is a specially formulated water-based blend of acrylic polymers that provides both a stain resistant surface seal and a durable low-sheen finish. It is perfect for a floor of this age as it allows moisture vapour to pass through, this is an important feature when considering a sealer for old floors which will not have a damp-proof membrane installed. If you were to apply a non-breathable sealer moisture can get trapped under the floor causing it to spread out to the walls resulting in rising damp.
The combination of the cleaning and new sealer brought the floor back to life and it now looked in keeping with the rest of the property which had numerous other period features. My client was over the moon with the difference and very happy to see the back of the grubby carpet.
Nigel Stoker
North West Yorkshire Tile Doctor
 Thaddeus Drew Remodeling
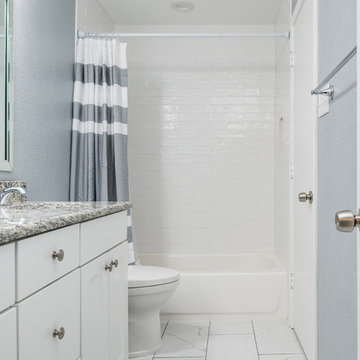
Simple yet beautiful hallway bathroom.
Small trendy 3/4 gray tile porcelain tile and white floor alcove bathtub photo in Dallas with flat-panel cabinets, white cabinets, a one-piece toilet, blue walls, an undermount sink and quartzite countertops
Small trendy 3/4 gray tile porcelain tile and white floor alcove bathtub photo in Dallas with flat-panel cabinets, white cabinets, a one-piece toilet, blue walls, an undermount sink and quartzite countertops
 Masterpiece Building of Austin, LLC
Roxanne Gutierrez
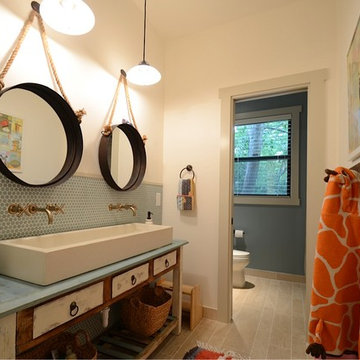
Transitional kids' bathroom photo in Austin with a trough sink
Transitional kids' bathroom photo in Austin with a trough sink
Find the right local pro for your project
 Robert Thomas Homes
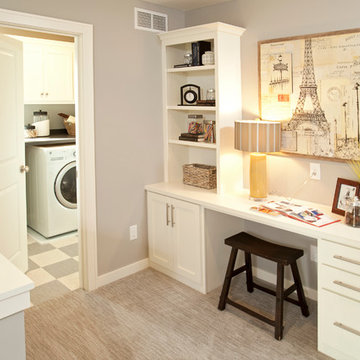
This home is built by Robert Thomas Homes located in Minnesota. Our showcase models are professionally staged. Please contact Ambiance at Home for information on furniture - 952.440.6757
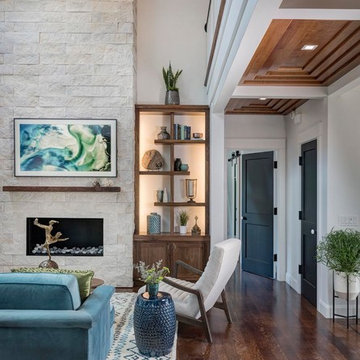
 Eldorado Stone
Stone: Vantage30 - White Elm
Vantage30 delivers a unique planking appearance with its long 30″ linear lines. The gentle textural surface brings an additional element of movement while uniformly stacking tight for clean installation.
Get a Sample of Vantage30:
https://shop.eldoradostone.com/products/vantage-30
 Tile Doctor Ltd
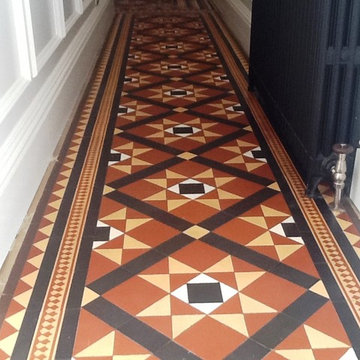
Here’s a job I completed just before Christmas last year, at a house in Northampton which has a rich history and mix of architectural styles. The run up to Christmas is always popular as people try to get their household projects finished off in time for celebrating the festive season with family so this is always a busy time for Tile Doctor.
The photos below show a neglected Victorian Quarry tiled floor in need of repair, with cracked tiles along the edges. These were caused by somebody in the past using brute force to remove carpet gripper rods which had been glued to the tiles. These cracks were present around the edges of the entire hallway, however; this particular type of tile is very hard to get hold of. Furthermore, it is a costly process to replace the tiles as the skirting boards would have had to have been removed.
As well as the physical issues the floor had a dull appearance due to the build-up of builder’s dust and the general wearing down of the paintwork over time. I agreed with the client that the best course of action would be to fill the tiles, and paint the damaged tiles using a colour that matched as close as possible. Many of my Tile Doctor colleagues would disagree with this approach opting to source the correct tile and rebuild the damaged section however unfortunately in this case we didn’t have the time or the budget.
My first action was to use a brush and vacuum to remove as much loose debris and dust as possible. I followed this by agitating the tiles with a dilution of Tile Doctor Pro Clean which is a strong alkaline product and safe to use on tile and stone. I use a combination of a coarse burnishing pad fitted to a rotary machine and hand held brushes, in order to get the floor clean. The resulting slurry was then rinsed and removed using a wet vacuum. This process was repeated twice followed by a thorough rinse to ensure any trace of cleaning agent had been removed and the floor neutralised.
As this was such an old property, I then used a steamer to heat up the tiles in order to draw out any contaminants and assist with the drying process. I installed a fan to dry the floor before starting repairs, mixing up some coloured grout and filling all holes and cracks along the edges, including the doormat area.
I allowed the coloured grout to dry overnight, before hand painting the black and Terracotta tiles. These were then given time to dry (about a couple of hours). Following this, I carefully painted in the other colours: brown and cream. The overall effect was quite convincing and you had to look very closely to notice.
Due to the fact that there were other tradesmen working in the house at the time, the floors were sheeted up to protect from additional dust and muck. I then left the house for a week, allowing the floor ample time to dry completely in preparation for sealing.
Upon my return, I took damp meter readings, and once satisfied with the dryness of the tiles, I began the sealing process with the impregnating, colour-enhancing sealer Tile Doctor Colour Grow. The sealer provides both durable surface protection and an aesthetically pleasing matte finish.
The below photos show how the product has enriched the colours with the two coats applied.
The process of restoring this wonderful Victorian Quarry tiled floor was certainly time consuming, but very rewarding. I am exceptionally pleased with the results myself, and my client couldn’t have been happier and I’m sure the newly revitalised hallway will have been a talking point for all their visitors during the Christmas break.
Phil Vissian
Northamptonshire Tile Doctor
 Vivid Interior Design - Danielle Loven
Photography: Alyssa Lee Photography
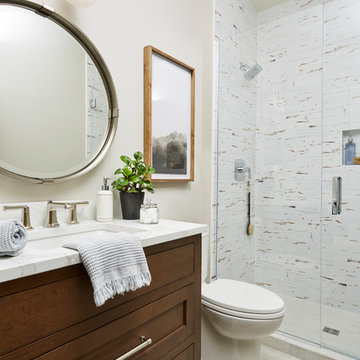
Mid-sized transitional 3/4 porcelain tile and multicolored tile porcelain tile and beige floor alcove shower photo in Minneapolis with a two-piece toilet, beige walls, an undermount sink, quartz countertops, a hinged shower door, white countertops, dark wood cabinets and shaker cabinets
Mid-sized transitional 3/4 porcelain tile and multicolored tile porcelain tile and beige floor alcove shower photo in Minneapolis with a two-piece toilet, beige walls, an undermount sink, quartz countertops, a hinged shower door, white countertops, dark wood cabinets and shaker cabinets
Sponsored
Fredericksburg, OH

High Point Cabinets
Columbus' Experienced Custom Cabinet Builder | 4x Best of Houzz Winner
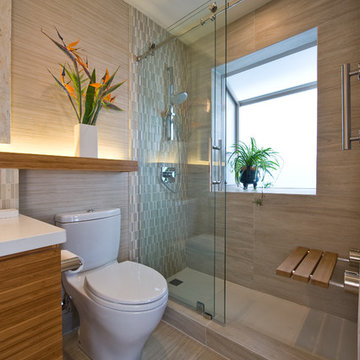
 MCYIA Interior Architecture and Design
The garden window allows more light to pass through and provides more free movement in the shower without adding square footage. The bathroom became brighter and now exudes an open, airy and uplifting atmosphere. It is also a space for a changing display of seasonal flora.
{Photo Credit: Augie Salbosa}

 Drawing Dept
Reading garden.
4x4 'Tennessee Tumbled' cobblestones and blue slate chips. Bloodgood Japanese Maple.
Architect: Drawing Dept
Contractor: Camery Hensley Construction
Photography: Ross Van Pelt

 Element Home Builders
This is a 4 bedrooms, 4.5 baths, 1 acre water view lot with game room, study, pool, spa and lanai summer kitchen.
Inspiration for a large transitional enclosed dark wood floor living room remodel in Orlando with white walls, a standard fireplace, a stone fireplace and a media wall
Inspiration for a large transitional enclosed dark wood floor living room remodel in Orlando with white walls, a standard fireplace, a stone fireplace and a media wall
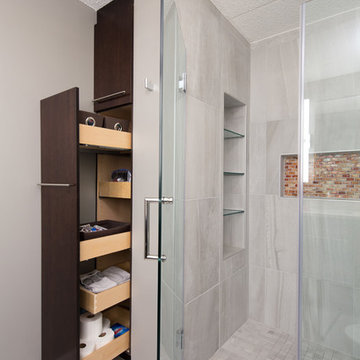
 Chi Renovation & Design
A small bathroom is given a clean, bright, and contemporary look. Storage was key to this design, so we made sure to give our clients plenty of hidden space throughout the room. We installed a full-height linen closet which, thanks to the pull-out shelves, stays conveniently tucked away as well as vanity with U-shaped drawers, perfect for storing smaller items.
The shower also provides our clients with storage opportunity, with two large shower niches - one with four built-in glass shelves. For a bit of sparkle and contrast to the all-white interior, we added a copper glass tile accent to the second niche.
Designed by Chi Renovation & Design who serve Chicago and it's surrounding suburbs, with an emphasis on the North Side and North Shore. You'll find their work from the Loop through Lincoln Park, Skokie, Evanston, and all of the way up to Lake Forest.
For more about Chi Renovation & Design, click here: https://www.chirenovation.com/
To learn more about this project, click here: https://www.chirenovation.com/portfolio/northshore-bathroom-renovation/
 Tile Doctor Ltd
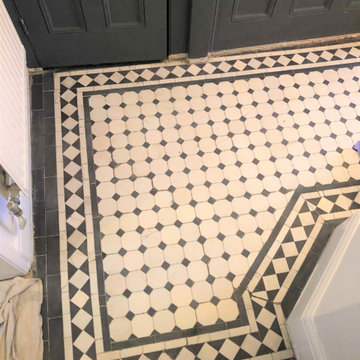
The owners of this Edwardian property in Finchley had purchased it a couple of years prior and since then had slowly been renovating it to restore its original character. The project was almost complete and now attention had turned to the tiled floor. The tiles were in quite a state and I was asked to work our Tile Doctor magic and bring it back to its original condition.
When they moved in the hallway had been covered with carpet which gave the tiles underneath some protection. Unfortunately, however the carpet has been secured with carpet grippers that had been glued to the tiles around the edges. There were also paint splashes on the surface that would need dealing with. On top of that the floor had a few missing tiles that had been back filled by cement to provide a level base for the carpet, the client wanted like them replaced if possible.
After surveying the floor, I explained what could be done and ever completed a small test clean to demonstrate how the tiles would look once deep cleaned. I was confident on being able to source very similar reclaimed tiles so replacing the missing should not be a problem. The client was very happy with the initial test result and my quotation so booked me in to restore the floor.
On my return I started by applying Tile Doctor Remove and Go to soften up the glue which allowed it to be carefully peeled off the tiles with scrappers. Once all the carpet adhesive was gone, I worked a strong dilution of Tile Doctor Remove and Go into the tiles using a black pad to work the cleaning solution deeper into the tiles. A wet vacuum was used to remove the slurry created, and I followed this by giving the tiles an extra clean using a 200-grit diamond burnishing pad lubricated with water.
The last step in the cleaning process was to give the floor an acid rinse using Tile Doctor Grout Clean-up, I did this for several reasons, first it removes old grout smears from the surface of the tile and second it neutralised any efflorescent salts lying dormant in the floor. This can be quite a problem for old floors which don’t have the benefit of a protective damp proof membrane under the floor. The floor was given a final rinse with water which was again extracted with a wet vacuum.
I then set about lifting all the loose tiles (approximately ten) and carefully removing the concrete infills. I had previously managed to source replacements for these holes from original features. Unfortunately, they didn’t sell the correct sized octagon tiles, so I had bought 150mm square tiles and then needed to cut them on site to get the right size.
After cutting and fixing the tiles I fixed them in place and regrouted the rest of the floor.
I then left the floor to dry out overnight and returned in the morning. Before applying a sealer, I took several moisture readings with the damp meter to make sure the tiles were dry enough to take the sealer.
I was able to confirm the floor was dry, so went ahead and applied three coats of Tile Doctor Colour Grow sealant. Colour Grow is an impregnating sealer that is fully breathable sealer which is important when it comes to old floors like these that don’t have a damp proof membrane installed.
My client was very happy with the renovated floor and for aftercare I left them with a bottle of Tile Doctor Neutral Tile Cleaner and gave advice on how best to clean the floor going forward.
Andrew Newstead
North London Tile Doctor
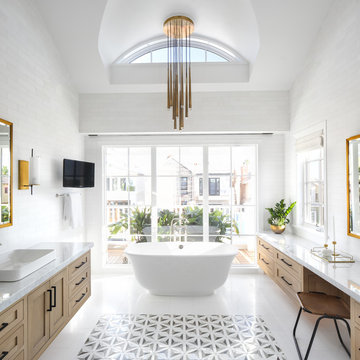
 Lindye Galloway Interiors
Chad Mellon Photographer
Freestanding bathtub - large modern master white tile and subway tile white floor freestanding bathtub idea in Orange County with shaker cabinets, light wood cabinets, white walls, a vessel sink and marble countertops
Freestanding bathtub - large modern master white tile and subway tile white floor freestanding bathtub idea in Orange County with shaker cabinets, light wood cabinets, white walls, a vessel sink and marble countertops

Sponsored
Columbus, OH

Hope Restoration & General Contracting
Columbus Design-Build, Kitchen & Bath Remodeling, Historic Renovations
 Tile Doctor Ltd
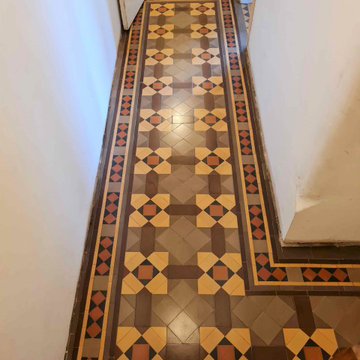
We were contacted by a customer in West Kirby who needed help renovating a Victorian tiled hallway in a house they had just purchased. Kirby is a desirable seaside location North of Heswall that expanded with the arrival of the railway in 1848. The railway brought a demand for property and so it’s not unusual to find housing stock in this area dating back to the Victorian era.
The Victorian tiles at this property appear to have been neglected by the previous owner and were now looking very dull and marked by paint from decorating; all the colours looked washed out and the floor was now looking very unappealing.
The good news however is that this problem is not uncommon and with a deep clean and a fresh sealer applied it can be transformed. I gave the owner a quote which was accepted a date agreed for my return to do the work.
On the first day the floor was sprayed with a neat solution of Tile Doctor Remove and Go which is a powerful alkaline cleaning and stripping agent used to remove old seals and paint. The solution was left to dwell for about twenty minutes so it could soak in and get to work. It was then scrubbed into the tiles using a coarse 200-grit pad fitted to a heavy buffing machine. Water was then added to the floor for lubrication and the soils released from the pores of the tile during scrubbing was removed by with a wet vacuum.
To treat the stubborn paint stains and remains of what I suspect was carpet adhesive a hand scraper and wire brush was used, this was made easier by the Remove and Go which had softened the paint etc.
The next stage was to give the Victorian tiles a mild acid wash using Acid Gel which is applied to the floor, scrubbed in, and rinsed off with a little water then extracted using the wet vacuum. We always recommend an acid wash for old floors like these as it will counter any efflorescent salts resident in the tiles and helps to remove other mineral contaminates and old grout that can mask the true beauty of the tiles.
I left the tiles to dry out for two days before returning to apply the sealer, first checking it was dry by testing for moisture in various places with an electronic damp tester. It’s not a good idea to apply a sealer to a damp floor so we always check first.
Satisfied the floor was dry, I started applying a coat of Tile Doctor Colour Grow which is a colour enhancing impregnating sealer that helps to bring out the true colours in the tile. This was allowed to dry for thirty minutes and then followed up five coats of Tile Doctor Seal and Go Extra which is a breathable sealer that leaves a lovely satin finish and builds on the protection.
Once done the Victorian hallway tiles looked so much cleaner and healthier. It was quite a transformation and the new sealer had given the floor a nice low sheen shine which the customer was very happy with.
For aftercare cleaning I left them with a bottle of Tile Doctor Neutral Cleaner which is specially formulated for cleaning sealed tiles. We don’t recommend tile cleaning products you find on supermarket shelves as the are usually too strong and can strip a sealer off the floor prematurely. If your choosing another product to clean your floor always read the label to make sure its compatible.
Andrew Robb
Merseyside Tile Doctor
 Studio McGee
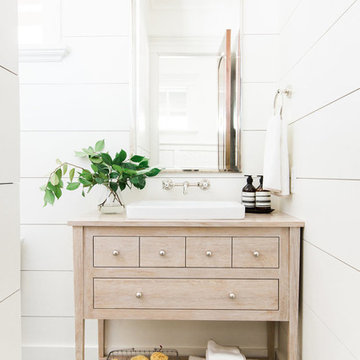
See the photo tour here: https://www.studio-mcgee.com/studioblog/2016/8/10/mountainside-remodel-beforeafters?rq=mountainside
Watch the webisode: https://www.youtube.com/watch?v=w7H2G8GYKsE
Travis J. Photography
 Redstart Construction, Inc.
Picture Perfect House
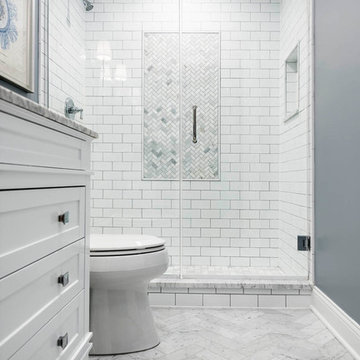
Mid-sized transitional 3/4 white tile and subway tile marble floor and white floor alcove shower photo in Chicago with recessed-panel cabinets, white cabinets, a two-piece toilet, gray walls and a hinged shower door
Mid-sized transitional 3/4 white tile and subway tile marble floor and white floor alcove shower photo in Chicago with recessed-panel cabinets, white cabinets, a two-piece toilet, gray walls and a hinged shower door
 Walker Coen Lorentzen Architects
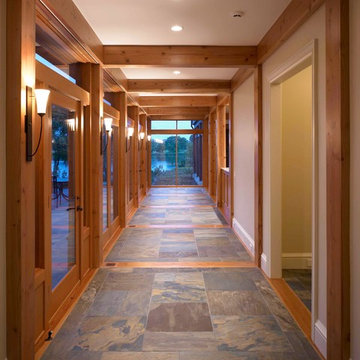
Hallway - huge rustic slate floor and multicolored floor hallway idea in Cedar Rapids with white walls


 BUILD
BUILD@Amber Frederiksen Photography
Large trendy open concept carpeted family room photo in Miami with white walls, a ribbon fireplace, a stone fireplace and a wall-mounted tv
Large trendy open concept carpeted family room photo in Miami with white walls, a ribbon fireplace, a stone fireplace and a wall-mounted tv

 Ed Hughey, Architect & Realtor
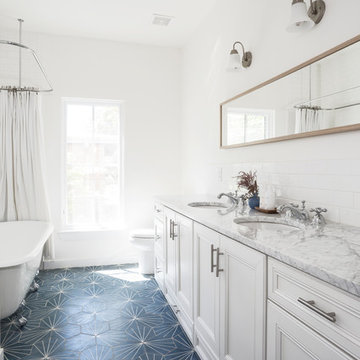
Example of a mid-sized farmhouse 3/4 white tile and subway tile blue floor claw-foot bathtub design in Austin with white cabinets, a two-piece toilet, white walls, an undermount sink, marble countertops, a hinged shower door, gray countertops and recessed-panel cabinets
28