
Search results for "Hazards" in Home Design Ideas
 HQ Construction & Supplies, Inc.
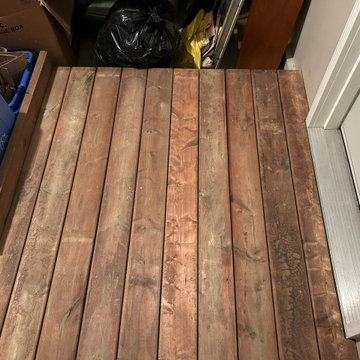
Our client had hired someone to build an accessibility ramp for the front entrance of his home. The work done was not done properly as the spacing between the boards were uneven and some spaces were too large which posed as a potential hazard. The planks of wood were also cut incorrectly; some were not utilized as full pieces to run across the joists.
Client requested for us to complete an accessibility ramp in his garage which turned out beautiful with even cuts and spacing, solid stability, and accurate to the design we made for him before starting the project.
 DSLD Land Management Company, Inc.
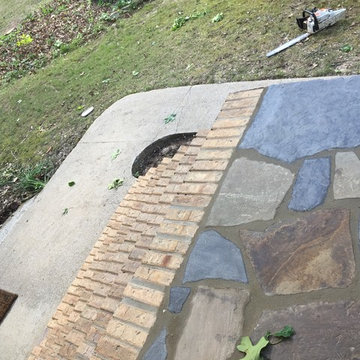
This home was built in the 70's and as you can imagine has acquired a few "ailments" over the past 40 years, one of the more serious being the deterioration of the front entrance. The brick started to loosen over the years and eventually started to break apart completely, it got to the point that the family could not use the front entrance at all due to the safety hazard it represented. After interviewing with several contractors the home owners contacted David Sharp with DSLD Land Management and he was able to ease the tension and offer a solution that not only resulted in a beautifully restored front entrance but that also fit comfortably into their budget. The project took less than a week to complete and as you can imagine the home owners are thrilled with the final product!
 Sinclair Interiors, LLC
After-
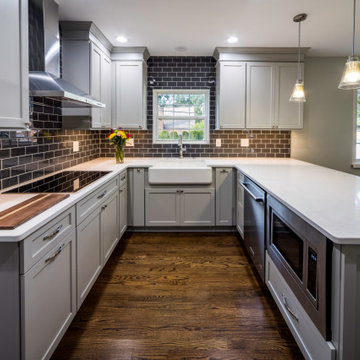
The existing kitchen was closed off in the back of the house with the floor raised 2" from the other floors in this single-story home. The floor height change made for a big trip hazard. During this remodel, we opened the kitchen to the dining room by removing the separation wall. We removed the floor height difference and added new hardwoods to the kitchen that tie into the existing dining room hardwoods. The new open kitchen design allowed for a peninsula with seating, a tall cabinet area that has the Refrigerator, double oven, a pantry cabinet, and a coffee bar featuring glass door cabinets. This kitchen also features an apron front sink, induction cooktop, quartz countertops, a chimney hood, and a barn door to the laundry room. My favorite part of this kitchen is the bold choice of color for the backsplash. The charcoal glass tile really stands out and pulls all the whites, greys, and stainless steel together.
Find the right local pro for your project

 FormLA Landscaping
Toyon (aka Christmas Berry) is well-loved habitat known for its December harvest of bright red berries. It's summer blooms are every bit as charming. In every season, it tweets as if it were itself a bird.
Photo: Lesly Hall Photography, Summer 2019


 KL Designs Residential Landscape Planning LLC
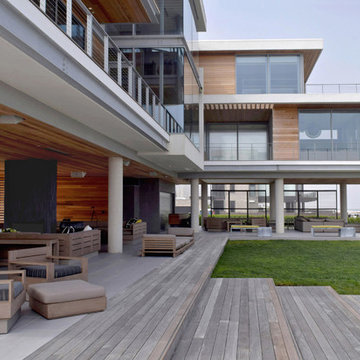
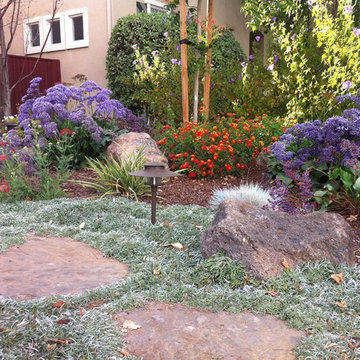
Dymondia is a great ground cover between step stones that stays low so it isn't a tripping hazard.
Inspiration for a traditional front yard landscaping in San Francisco.
Inspiration for a traditional front yard landscaping in San Francisco.
 Chamberland Professional Painting
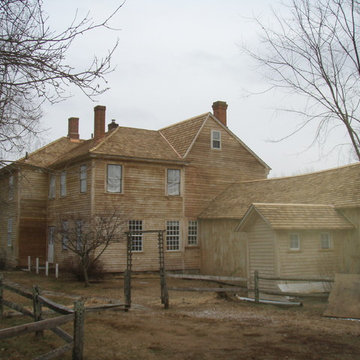
An amazing amount of hard work and skilled labor went in to getting this 18th century home back to its original exposed cedar siding! All done without making any hazardous dust or harming any of the nature and landscape.
 Irene Designs
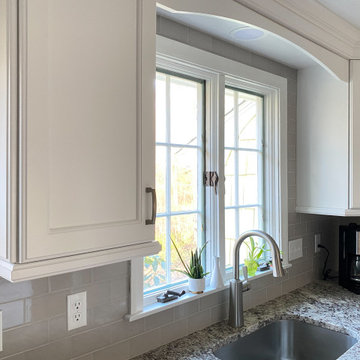
The new space looks nothing like it was before. Original kitchen was too small, and adjacent areas had a few other problems.
The front door opened straight into the wall of a long narrow hallway. It created a 90 degree turn to get into the family room.
The door between the kitchen and dining room made the traffic flow awkward for both areas.
Coat closet in the front hallway located right across the stairwell, created potential fall hazard when opening the door.
Solution:
With the rear porch door left in place, the two side windows were swapped and the kitchen was relocated to the opposite wall.
Hallway walls were taken down and the coat closet was relocated away from the stairs.
Door opening between the dining room and former kitchen was restored.
After remodeling, all rooms became bigger and more functional. New beautiful kitchen has a central island and a built-in breakfast nook.
Family room also feels more open. Dining Room has a better traffic flow and holds the potential for a bigger table to seat more guests.
 TVL Creative Ltd.
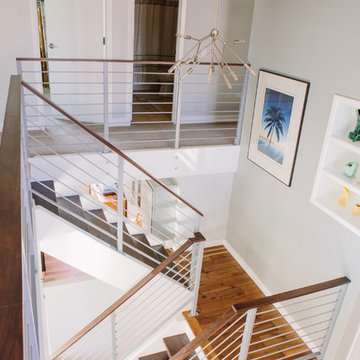
We were excited to take on this full home remodel with our Arvada clients! They have been living in their home for years, and were ready to delve into some major construction to make their home a perfect fit. This home had a lot of its original 1970s features, and we were able to work together to make updates throughout their home to make it fit their more modern tastes. We started by lowering their raised living room to make it level with the rest of their first floor; this not only removed a major tripping hazard, but also gave them a lot more flexibility when it came to placing furniture. To make their newly leveled first floor feel more cohesive we also replaced their mixed flooring with a gorgeous engineered wood flooring throughout the whole first floor. But the second floor wasn’t left out, we also updated their carpet with a subtle patterned grey beauty that tied in with the colors we utilized on the first floor. New taller baseboards throughout their entire home also helped to unify the spaces and brought the update full circle. One of the most dramatic changes we made was to take down all of the original wood railings and replace them custom steel railings. Our goal was to design a staircase that felt lighter and created less of a visual barrier between spaces. We painted the existing stringer a crisp white, and to balance out the cool steel finish, we opted for a wooden handrail. We also replaced the original carpet wrapped steps with dark wooden steps that coordinate with the finish of the handrail. Lighting has a major impact on how we feel about the space we’re in, and we took on this home’s lighting problems head on. By adding recessed lighting to the family room, and replacing all of the light fixtures on the first floor we were able to create more even lighting throughout their home as well as add in a few fun accents in the dining room and stairwell. To update the fireplace in the family room we replaced the original mantel with a dark solid wood beam to clean up the lines of the fireplace. We also replaced the original mirrored gold doors with a more contemporary dark steel finished to help them blend in better. The clients also wanted to tackle their powder room, and already had a beautiful new vanity selected, so we were able to design the rest of the space around it. Our favorite touch was the new accent tile installed from floor to ceiling behind the vanity adding a touch of texture and a clear focal point to the space. Little changes like replacing all of their door hardware, removing the popcorn ceiling, painting the walls, and updating the wet bar by painting the cabinets and installing a new quartz counter went a long way towards making this home a perfect fit for our clients
 Progressive Design Build
It was in 2012 when Mike Spreckelmeier first met Roy and Patti. They had been despondent after meeting with multiple contractors in an attempt to start their kitchen remodel. The contractors lacked follow through, came tardy to meetings and even failed to show up at others.
Determined to leave nothing to chance in the pursuit of their dream, Roy and Patti followed up on a recommendation after overhearing a conversation that was taking place while they were standing in a gallingly long line waiting to cast a vote on Election Day.
With a solid recommendation to pursue, Roy and Patti contacted Progressive Design Build. The rest is history.
Mike showed up on time. For a small retainer, he provided preliminary sketches, ideas for maximizing space and storage, and solutions for a sunken family room that created a safety hazard and a problem with traffic flow. More importantly, he designed the project to the homeowners’ budget.
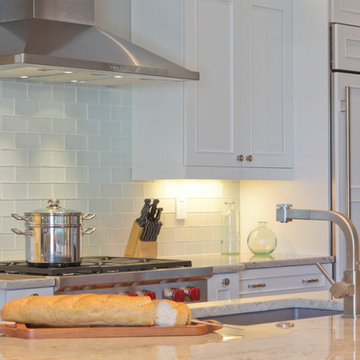
Progressive Design Build shot some different elevations and designed a plan to raise the floor, allowing all finished floors to be on the same level. Upon completion, the kitchen was stunning. Features included LED backlit fire glass shelving, white recessed panel cabinets, a subway tile backsplash, Granite countertop, integrated refrigerator, undermount sink, and more.
The living room was designed with complimentary finishes and included a natural stone fireplace wall with open cabinets flanked on both sides. The 12’ fireplace was made with a floor-to-ceiling white pebble finish.
This Bonita Bay project completed on time and on budget—allowing this fabulous family a wonderful opportunity to create lasting memories for many years to come.
 Bloomin Blinds of North Charlotte
Discover how premium light-filtering materials and smart-home automation can secure street-level entryway glass without losing natural daylight.
Choosing the right window treatments for a home's front entrance is one of the most challenging design decisions a homeowner can face. The front door is the focal point of a home's curb appeal, often featuring expansive glass panels or side-by-side double doors designed to make a grand architectural statement.
During the day, these large glass features are an asset, flooding entryways and foyers with beautiful natural daylight. However, for homes situated on busy local roads or highly trafficked street-level lots, the dynamic completely changes once the sun goes down.
The moment interior lights are switched on in the evening, a stark contrast is created with the dark outdoors. This creates a severe privacy issue, leaving the entire foyer completely exposed to passing traffic and pedestrians. Finding a solution that delivers absolute evening privacy without permanently plunging the front entrance into darkness during the day requires understanding how modern window treatment materials and operating systems interact.
Light-Filtering vs. Blackout Fabrics
The first step in solving street-level privacy is selecting the correct fabric type. Many homeowners mistakenly assume they need heavy, opaque blackout shades to secure their home from outside eyes at night. While blackout fabrics certainly block 100% of the view, they also block 100% of the natural daylight during the day, forcing you to constantly raise and lower the shades just to see inside your own foyer.
A more effective approach for entryways utilizes premium light-filtering materials. These specialized fabrics are engineered with a precise, tight weave that operates on the principles of directional light and optical density.
Daytime Functionality: When the sun is shining outside, the exterior light levels are significantly higher than the interior light levels. The light-filtering fabric diffuses the intense, direct sunlight into a soft, ambient glow throughout the entryway. This keeps the home bright, eliminates harsh glares, and protects interior hardwood flooring, paint, and trim from damaging UV rays.
Night-Time Functionality: At night, the lighting dynamic reverses. The interior foyer lights make the inside bright, while the outside is dark. Because of the specialized tight weave, the fabric blocks the transmission of clear shapes and details. To a person standing out on the street or driving by on a busy road, the view inside is completely obstructed, delivering total privacy when the family is home for the evening.
Challenges of Front Door Installations
Securing privacy for a double wide front entrance introduces unique structural hurdles that standard windows do not face. Traditional blinds with hanging cords or manual pull chains are poorly suited for front doors. They disrupt the clean architectural lines of a grand foyer, create a safety hazard, and can easily get tangled or damaged when the doors are opened and closed.
The window treatments must be mounted high and wide enough above the door trim to ensure that the front doors can swing open and close freely without ever catching on the fabric or the lower hem bar.
How We Applied These Principles in Sherrills Ford, NC
Applying these exact educational principles to real-world homes is what Cole and I do every day at Bloomin' Blinds of North Charlotte. We recently worked with a homeowner in Sherrills Ford whose beautiful new construction property sat on a highly trafficked road. They loved their double wide front door entrance but felt entirely too exposed to the street at night.
We brought our mobile showroom directly to their driveway. This allowed us to hold up premium light-filtering fabric samples directly against their entryway glass, matching the materials perfectly to their home's natural lighting, interior paint, and trim before making a single cut.
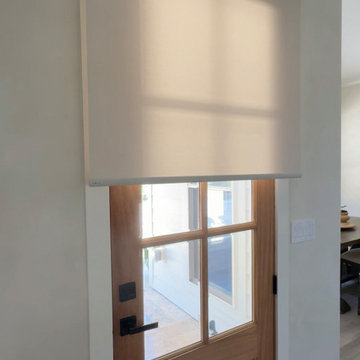
To solve their street-level privacy issue, we custom-built and installed two matching light-filtering roller shades, mounting them flawlessly side-by-side above the front door frame. To keep the home’s interior design completely cohesive, we carried the exact same style to the back of the house, installing a matching single roller shade on the rear door.
Smart Home Window Automation at Your Fingertips
Because entryway windows can be tall and awkward to reach manually, our family team integrated advanced smart-home motorization into this Sherrills Ford project.
Beyond the convenience of a handheld remote control, these automated roller shades feature seamless Wi-Fi integration. The homeowners can control their privacy through a dedicated smartphone app or link the system directly to their existing voice-activated smart home networks, including Amazon Alexa, Google Assistant, and Apple HomeKit.
This allows for complete hands-free window automation. The clients can program custom daily routines—such as setting the front entry shades to automatically lower exactly at sunset—or simply use a voice command to secure the foyer instantly from the comfort of the couch.
 Allman Remodeling Contractors
Before & After: Deck Railing Transformation
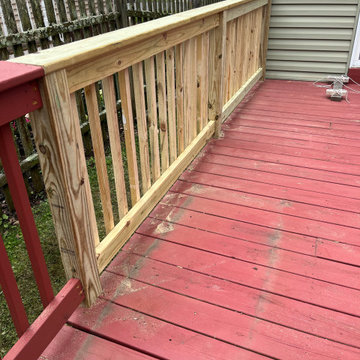
We don't do a lot of small repairs, but these were friends of ours and other contractors were not showing up or responding. We were thrilled to restore their outdoor oasis so they could enjoy it again. This old leaning railing was not only an eyesore—it was a safety hazard. We removed the failing structure and replaced it with a clean, pressure-treated railing system that enhances both the look and safety of the deck.
✅ Sturdy 4x4 posts
✅ Tight, evenly spaced balusters
✅ Clean top rail for a polished finish
✅ Ready for stain or paint to match the deck
 Atlanta Fireplace Specialists
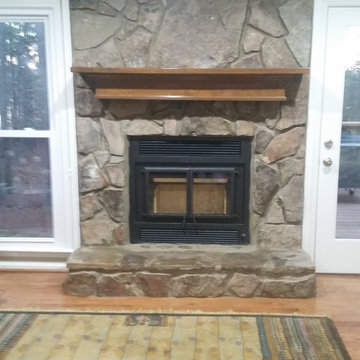
We replaced the insert with an EPA rated zero clearance wood stove fireplace. This unit functions like a wood stove, but is safe to put in a wooden framed wall. We carefully removed the stone from the wall under the mantel, replaced the fireplace, and put the stone back to fit the new box. It almost looks like we were never here.
 Jennifer Ryan Design
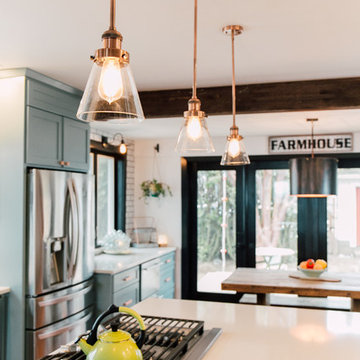
Opening up 2 walls gave this 1920's home an open floor plan plus more cabinetry and working space. Blue base cabinets come completer with a low dog bowl drawer to alleviate the trip hazard and mess of bowls on the floor. Adding double sets of french doors brings light and air to the kitchen.

 Industrial Projects
Creating a comfortable outdoor living space is a priority for many homeowners and DIY enthusiasts. With rising summer temperatures, installing a shade tarp in your backyard offers an affordable and effective solution for sun protection. We’ve developed this detailed, step-by-step guide to help you confidently install a shade tarp that not only shields you from the sun but also adds aesthetic appeal to your outdoor area.
Benefits of Installing a Backyard Shade Tarp
Before diving into the installation process, let’s explore the key benefits of having a backyard shade tarp:
Provides UV Protection: Keeps your family and guests safe from harmful sun exposure.
Reduces Outdoor Temperatures: Creates a cooler, more enjoyable outdoor space.
Protects Outdoor Furniture: Extends the life of patio furniture by reducing sun damage.
Enhances Outdoor Aesthetics: Adds a modern, stylish look to your yard.
Budget-Friendly: More affordable compared to permanent structures like pergolas.
Materials and Tools You’ll Need
To begin your DIY backyard shade project, gather the following materials and tools:
Materials:
Shade tarp (UV-resistant and breathable)
Sturdy posts or existing structures (trees, fences, walls)
Mounting hardware (eye bolts, D-rings, turnbuckles, snap hooks)
Nylon or polyester rope, or stainless-steel wire
Concrete (if installing new posts)
Tools:
Power drill
Measuring tape
Level
Ladder
Wrench or adjustable spanner
Post hole digger (if installing new posts)
Step 1: Plan Your Shade Tarp Layout
The first step in installing your backyard shade tarp is careful planning. Take time to assess your outdoor area and answer these key questions:
Where is the sun’s path throughout the day?
What size and shape of tarp best suits your space?
Will you anchor the tarp to existing structures or install new posts?
What height do you want the tarp to sit at for maximum shade and airflow?
Pro Tip: Use string or garden hoses to visualize the tarp layout on the ground before making permanent decisions.
Step 2: Measure and Mark Anchor Points
Once you’ve determined the tarp’s location and orientation:
Measure the tarp dimensions.
Mark the exact points where each corner of the tarp will be anchored.
Ensure that the anchor points are at least 5–10% longer than the tarp size to allow for tensioning and slight adjustments.
Consider slope angles for water runoff. Aim for at least a 20-degree angle to prevent water pooling on the tarp.
Step 3: Install Support Posts (If Necessary)
If your backyard lacks existing anchor points like trees or fences, you’ll need to install sturdy support posts:
Dig post holes at least 24 inches deep and 8-12 inches wide for stability.
Set posts in concrete, making sure they remain plumb and level.
Allow the concrete to cure for at least 24–48 hours before applying tension from the tarp.
We recommend using pressure-treated wood, galvanized steel poles, or aluminum posts for longevity and strength.
Step 4: Install Mounting Hardware
With your anchor points ready, it’s time to install the necessary hardware:
Attach eye bolts or pad eyes securely into walls, posts, or other fixed structures.
For added flexibility and adjustability, install turnbuckles or tensioners to fine-tune the tarp’s tightness.
Connect snap hooks, D-rings, or carabiners to make assembly and disassembly easier.
Make sure all hardware is rated for outdoor use to prevent rust and corrosion.
Step 5: Attach and Tension the Shade Tarp
Now it’s time for the most satisfying part—mounting the shade tarp:
Begin by attaching one corner of the tarp to an anchor point.
Gradually attach the remaining corners, moving diagonally for even tension.
Adjust each connection point using your turnbuckles, ropes, or cables.
Pull the tarp tight enough to avoid sagging, but not so tight that it risks tearing.
Check that the tarp maintains the desired slope for rainwater runoff and adjust tension as needed.
Step 6: Final Adjustments and Safety Check
Before enjoying your new shaded area:
Inspect all anchor points and hardware for stability.
Test the tarp’s tension and make adjustments for even distribution.
Ensure that no sharp edges or loose connections remain that could damage the tarp or pose a safety hazard.
Confirm that the tarp is secure in windy conditions by giving it a gentle tug.
If you live in an area with frequent high winds, consider removing the tarp during storms to prevent damage.
Step 7: Enjoy Your Shaded Backyard Oasis
Once installed, your backyard shade tarp provides a comfortable and protective space for outdoor gatherings, relaxation, or family activities. You can decorate underneath with outdoor furniture, string lights, or potted plants to create a personalized outdoor retreat.
Maintenance Tips for Long-Lasting Shade Tarp Performance
To extend the life of your shade tarp, follow these maintenance guidelines:
Regularly check for wear and tear, especially around anchor points and seams.
Clean the tarp periodically with mild soap and water to prevent mildew buildup.
Store the tarp indoors during harsh weather seasons if it's not designed for year-round use.
Tighten hardware as needed to maintain proper tension and avoid sagging.
By following these simple care steps, your shade tarp will continue to deliver years of sun protection and outdoor comfort.
Conclusion: Upgrade Your Outdoor Space with a DIY Shade Tarp
Installing a shade tarp in your backyard is a cost-effective and rewarding DIY project. With careful planning, quality materials, and proper installation techniques, you’ll enjoy cool, shaded outdoor living all season long. This step-by-step guide ensures your project goes smoothly from start to finish.
 TVL Creative Ltd.
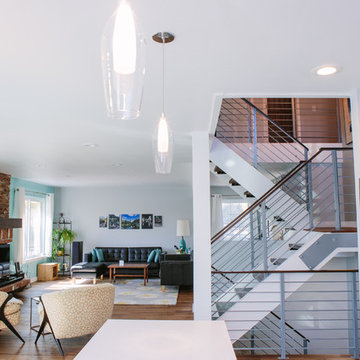
We were excited to take on this full home remodel with our Arvada clients! They have been living in their home for years, and were ready to delve into some major construction to make their home a perfect fit. This home had a lot of its original 1970s features, and we were able to work together to make updates throughout their home to make it fit their more modern tastes. We started by lowering their raised living room to make it level with the rest of their first floor; this not only removed a major tripping hazard, but also gave them a lot more flexibility when it came to placing furniture. To make their newly leveled first floor feel more cohesive we also replaced their mixed flooring with a gorgeous engineered wood flooring throughout the whole first floor. But the second floor wasn’t left out, we also updated their carpet with a subtle patterned grey beauty that tied in with the colors we utilized on the first floor. New taller baseboards throughout their entire home also helped to unify the spaces and brought the update full circle. One of the most dramatic changes we made was to take down all of the original wood railings and replace them custom steel railings. Our goal was to design a staircase that felt lighter and created less of a visual barrier between spaces. We painted the existing stringer a crisp white, and to balance out the cool steel finish, we opted for a wooden handrail. We also replaced the original carpet wrapped steps with dark wooden steps that coordinate with the finish of the handrail. Lighting has a major impact on how we feel about the space we’re in, and we took on this home’s lighting problems head on. By adding recessed lighting to the family room, and replacing all of the light fixtures on the first floor we were able to create more even lighting throughout their home as well as add in a few fun accents in the dining room and stairwell. To update the fireplace in the family room we replaced the original mantel with a dark solid wood beam to clean up the lines of the fireplace. We also replaced the original mirrored gold doors with a more contemporary dark steel finished to help them blend in better. The clients also wanted to tackle their powder room, and already had a beautiful new vanity selected, so we were able to design the rest of the space around it. Our favorite touch was the new accent tile installed from floor to ceiling behind the vanity adding a touch of texture and a clear focal point to the space. Little changes like replacing all of their door hardware, removing the popcorn ceiling, painting the walls, and updating the wet bar by painting the cabinets and installing a new quartz counter went a long way towards making this home a perfect fit for our clients
 Momentous Impressions Ltd.
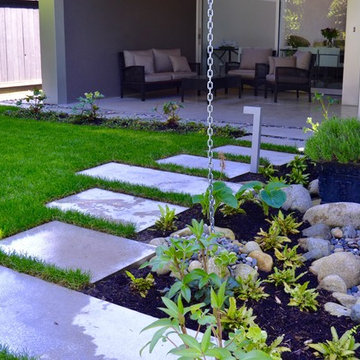
Smooth transition of lawn and pavers – no tripping hazards for children, while new garden accommodates area where lawn previously grew poorly, now adds value to overall look
 PlushGrass Custom Synthetic Turf
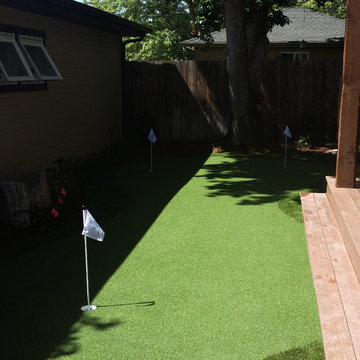
PlushGrass installs personal putting greens of all shapes, sizes, and skill levels. We will bring your design to life or simulate a particular green that has been giving you problems over the years. We also install water hazards/water features and sand traps. PlushGrass Putting Greens are constructed with chipping practice in mind, they accept shots like a natural grass putting green. Improve your short game by practicing anytime you like with a custom artificial putting green by PlushGrass.
 Montgomery Property Solutions
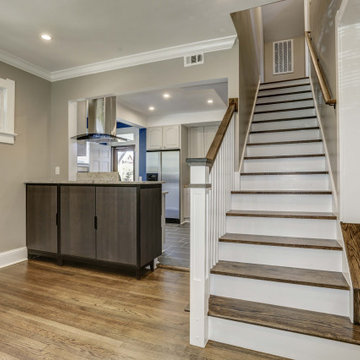
This full home renovation consisted of making significant structural modifications to the stairs, rearranging the first level floor plan to create a larger kitchen and two bedrooms, rewiring non-code compliant/hazardous electrical work and adding multiple recessed lights, installing uniform doors and hardware throughout, custom barn-door installation, refinishing hardwood floors, installing a new kitchen tile floor, and finishing the basement with a new drywall ceiling, waterproof vinyl flooring, drywall repair and painting.
Stair Modification: Removal of unsafe stairs to the basement and to the attic. Relocation of the two flights of stairs to the basement and the attic 180 degrees with code compliant stairs.
46