
Search results for "Helping address" in Home Design Ideas
 Castle Building & Remodeling
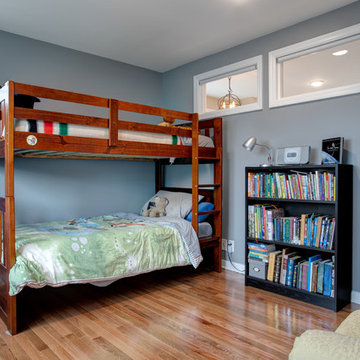
These homeowners came to Castle looking for a solution that would allow them to stay in their 1946 stucco bungalow in the St. Paul neighborhood that they loved.
What was once a young couple’s starter home (1 ½ story with two bedrooms on the main floor and a tiny attic space) was no longer big enough after having two kids.
The need for more room became the family’s highest priority, so they came to Castle for help creating the space they needed for their growing family.
With very little headroom in the attic, the decision was made to tear off the roof and add a completely new 2nd story addition with three bedrooms, a bathroom, and a commons area.
The stairway to the new 2nd-floor space needed to be rebuilt to comply with code requirements and was extended slightly into the dining room below.
The new 2nd story addition gave the homeowners an opportunity to revise the exterior look of the home with vertical board and batten siding above the 1st-floor stucco.
A new front entry portico was added to compliment the addition, and the existing masonry chimney was extended above the new roof line.
The homeowners took over the work on the project after drywall was installed and did all the interior trim & millwork, tile, flooring, and painting & staining themselves.
They’re loving the results!
Tour this project in person, September 28 – 29, during the 2019 Castle Home Tour!
 Inspired Closets Baton Rouge
If there’s one thing buyers of upscale homes want to see these days, it’s custom everything.
David, our longtime partner and a local custom homebuilder, sees it all the time.
And he’s adjusted his business model to meet his clients’ needs.
What Buyers Really Want
Upscale homebuyers are selective.
When building a high-value custom home, they usually want to address these things in order:
It has to be in the right location.
It has to be their ideal size.
They want to customize from floor to ceiling.
At the top of these clients’ custom wish lists?
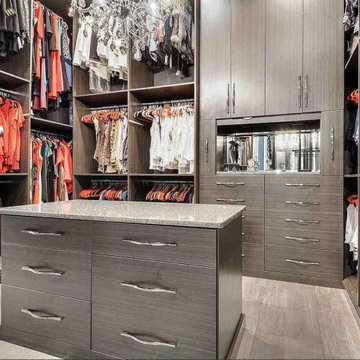
Chef-quality gourmet kitchens, 5-star spa-worthy baths, custom floor-to-ceiling closets (in every bedroom!), pantries that look more like second kitchens, and garages that rival any pro workshop.
These upgrades do more than add value – and nudge the price point – for a home.
They also add signature…a uniqueness that reflects a client’s personal taste and way of life.
An upscale buyer wants a home that screams “This is me!” in function, design, and amenities.
Make Us Part of Your Dream Team
We’ve been working closely with David on his projects for years.
In his custom homes, we’ve worked together to integrate custom closets and storage spaces tailored exactly to his client’s wishes and needs.
We’ve also served as design-planning consultants, helping David and his clients envision the endless possibilities for the home before signing on the dotted line and breaking ground.
Every client scenario is different and we like to meet David and his clients where their comfort level lies.
Sometimes we’re poring over closet blueprints one-on-one with the homeowner in our showroom and sometimes we’re conceptualizing closet designs with David while leaning up against the drywall onsite.
Either way, we’re honored to be part of David’s consultant ‘dream team’ as we work to make his homebuyers’ dreams come true.
We’d love to do the same for you.
Add Us To Your Dream Team!
 Alair Homes Arlington
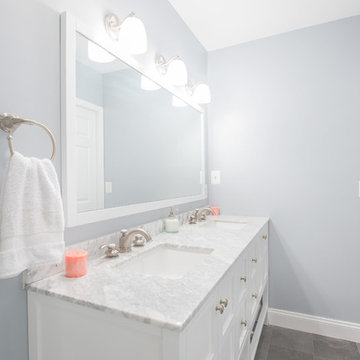
Addition off the side of a typical mid-century post-WWII colonial, including master suite with master bath expansion, first floor family room addition, a complete basement remodel with the addition of new bedroom suite for an AuPair. The clients realized it was more cost effective to do an addition over paying for outside child care for their growing family. Additionally, we helped the clients address some serious drainage issues that were causing settling issues in the home.
Find the right local pro for your project
 Alvarez Architects Inc.
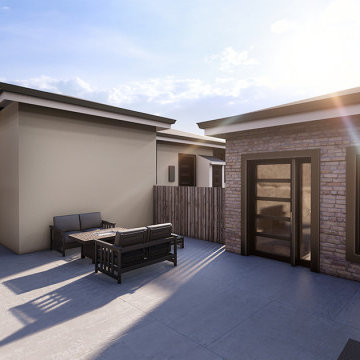
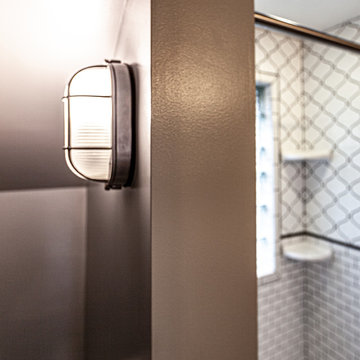
This 1962 Mid Century Lakewood house was remodeled to update the functionality of the home while staying true to the original style. Opening up the floor plan and capturing natural light in the home where some of the key design elements we address. we incorporated modern materials often found in Mid Century these include Natural Stone, Wood, Steel, and a minimal color pallet. Updating appliances and mechanical systems helped make the home more efficient and convenient for our client.
 Castle Building & Remodeling
These homeowners came to Castle looking for a solution that would allow them to stay in their 1946 stucco bungalow in the St. Paul neighborhood that they loved.
What was once a young couple’s starter home (1 ½ story with two bedrooms on the main floor and a tiny attic space) was no longer big enough after having two kids.
The need for more room became the family’s highest priority, so they came to Castle for help creating the space they needed for their growing family.
With very little headroom in the attic, the decision was made to tear off the roof and add a completely new 2nd story addition with three bedrooms, a bathroom, and a commons area.
The stairway to the new 2nd-floor space needed to be rebuilt to comply with code requirements and was extended slightly into the dining room below.
The new 2nd story addition gave the homeowners an opportunity to revise the exterior look of the home with vertical board and batten siding above the 1st-floor stucco.
A new front entry portico was added to compliment the addition, and the existing masonry chimney was extended above the new roof line.
The homeowners took over the work on the project after drywall was installed and did all the interior trim & millwork, tile, flooring, and painting & staining themselves.
They’re loving the results!
Tour this project in person, September 28 – 29, during the 2019 Castle Home Tour!
 Bellwether Windows, Siding & Doors
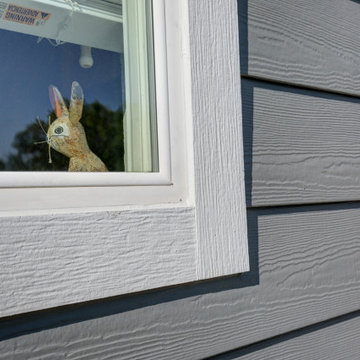
This 1970s ranch home in South East Denver was roasting in the summer and freezing in the winter. It was also time to replace the wood composite siding throughout the home. Since Colorado Siding Repair was planning to remove and replace all the siding, we proposed that we install OSB underlayment and insulation under the new siding to improve it’s heating and cooling throughout the year.
After we addressed the insulation of their home, we installed James Hardie ColorPlus® fiber cement siding in Grey Slate with Arctic White trim. James Hardie offers ColorPlus® Board & Batten. We installed Board & Batten in the front of the home and Cedarmill HardiPlank® in the back of the home. Fiber cement siding also helps improve the insulative value of any home because of the quality of the product and how durable it is against Colorado’s harsh climate.
We also installed James Hardie beaded porch panel for the ceiling above the front porch to complete this home exterior make over. We think that this 1970s ranch home looks like a dream now with the full exterior remodel. What do you think?
 TVL Creative Ltd.
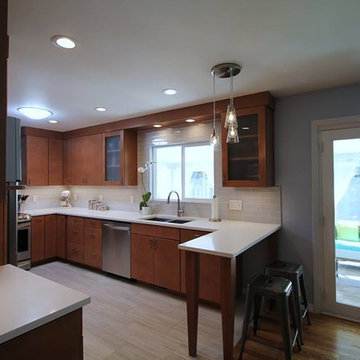
The owners of this lovely 1960s ranch home were over living with an out of date and awkward kitchen, so they enlisted our help to bring their dream kitchen to life. Right off the bat we all agreed that is was best to keep with the era of the home with a sleek modern kitchen featuring slab door cabinets. Our clients also wanted to space to feel brighter and more spacious with room for entertaining friends and family. So we knocked down a wall, filled in an unused door, and shortened a window so we could wrap this kitchen and create an optimal working triangle. We selected a maple cabinet with a medium-light stain, a light neutral porcelain floor tile, bright white glass backsplash with a mid-mod feature tile, and a variety of lighting. To create a space perfect for entertaining, we added a small peninsula for barstool seating. Behind the cabinet doors and drawers are many storage features including a double bin pull-out trash can, full access roll-out trays, pull out base cabinet pantry, super-susan corner cabinet, a wall cabinet for the microwave, and a pantry/fridge enclosure with roll-out trays. The sunroom received a facelift that covered the exterior brick to hide the modifications of walling up a door and raising the window sill height. It also created the sense that this space is an extension of the home, not just an exterior sunroom. We addressed the awkward step into the sunroom and installed new tile flooring. We finished the space of with a warm gray paint and soft sheers. This was such a fun and exciting project!! Cheers to our lovely clients and their gorgeous new kitchen and sunroom.

 SUPERIOR CHIMNEY SERVICES CORPORATION
A friend noticed a damp, musty smell coming from her living room fireplace the week after a February thaw. When she called a masonry technician from Superior Chimney, to take a look, and found that water had been working its way behind the bricks for years. What started as a small crack now meant her chimney needed structural repairs before she could safely use it again.
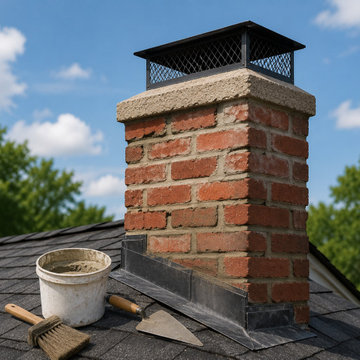
Chimney repairs are any work done to restore the structural and weatherproof condition of a chimney. This can include mortar joint repair, brick replacement, crown repair, flue repair, and cap or flashing replacement. Most Chicagoland homeowners discover the need for chimney repairs often times after winter, when the freeze and thaw cycles have already done its damage. Uncovering the symptoms early is the best way to keep chimney repairs down. Let’s discuss how that can be done.
Why Chicagoland Weather Is Especially Hard on Chimneys
Chicagoland has some of the most polarized weather. One day it’s a blizzard and the next week hot, humid and 100 degrees. That swing in weather conditions and temperatures are the real reasons why chimney repairs are needed.
When moisture from humid and rainy days’ soak into brick and mortar and then freezes, it expands. As it begins to thaw, the materials contract. Repeat that cycle dozens of times in a single Illinois winter and even solid masonry in the chimney starts to crack, spall, and separate from the joints holding it together. This is called the freeze thaw cycle. We’ve talked about it many times over the years, and it continues to be the single biggest reason homes need chimney repairs more often than homes in milder climates.
The Chimney Safety Institute of America (CSIA), the leading nonprofit certifying body for chimney professionals in the United States, notes that water intrusion is one of the most damaging and most preventable problems. If the problem is left to mature, it affects more than the appearance. It compromises the structure itself.
What Do Chimney Repairs Involve?
Not every chimney problem requires the same fix. Chimney repairs generally fall into a few categories. Understanding the difference, helps homeowners have a more informed conversation with the expert technician.
Mortar joint repair or tuckpointing. This involves removing deteriorated mortar between bricks and replacing it with fresh mortar, matched to the original color and texture as closely as possible.
Brick replacement. When individual bricks have spalled, meaning the face has cracked or popped off from trapped moisture, those bricks are removed and replaced.
Crown and cap repair. The crown is the concrete slab at the very top of the chimney. Cracks both big and small let water directly into the chimney flue. Chimney crown repair is often one of the most urgent forms of chimney repairs.
Flashing repair. Flashing is the barrier where the chimney meets the roofline. Loose, damaged or poorly installed flashing is a common source for water leaks. The roof gets the blame as it is the largest piece that covers the house. However, it certainly can be the overlooked chimney.
Flue and liner repair. Cracked flue tiles or damaged liners affect how safely a chimney vents smoke and combustion gases.
When to Know a Chimney Needs Repair
Most chimney damage shows up as small, easy to dismiss way. Let’s take a look at the following list. Be sure to print this out and keep it handy so if/when something happens, you know what to look for.
• Water stains near the fireplace or on the ceiling
• A brownish stain on the wall around your fireplace, or a stain on the ceiling near an exterior chimney. This means water is getting in somewhere it should not.
• Crumbling or missing mortar
• If you can see gaps between bricks, or mortar that flakes off when you touch it
• A leaning or visibly shifting chimney
• A chimney that appears to pull away from the house, even slightly, could indicate a structural issue
• White staining on the brick (efflorescence)
• Chalky white residue left behind as water evaporates out of the masonry. It is a visible sign that moisture is moving through brick
• Rusted damper or firebox components
• Metal parts inside a fireplace that are rusting are a strong indicator that moisture is present
• Debris in the fireplace
• Small chunks of brick, mortar, or tile landing in the firebox
What are the Various Types of Chimney Repair?
This is a compiled list of chimney repairs so you can be aware of what to look for. If you have any questions, contact us directly at 877-244-6349.
Homeowners who schedule chimney repairs at the first sign of trouble typically spend far less than those who wait until water damage reaches the interior of the home. This is a great reason to contact Superior Chimney at 877-244-6349.
Why an Annual Inspection Matters More Than People Think
The CSIA and the National Fire Protection Association both recommend that chimneys, fireplaces, and vents be inspected at least once a year, whether or not the fireplace gets used. This recommendation exists because damage does not take a break just because a chimney sits without any use.
According to data stated by the CSIA, chimney related fires still contribute to tens of thousands of residential fires across the United States each year, and a large share of those incidents can be traced back to deferred maintenance. An annual chimney inspection is what catches the small mortar crack or the hairline crown crack before it turns into a repair bill.
Hiring the Right Company for Chimney Repairs
Not every company who offers chimney repair work has the certified training to diagnose a problem correctly. CSIA certification is the most widely recognized credential in the industry, and it requires technicians to study chimney physics, venting systems, and fire codes. After the studies, the new technician needs to pass an exam and agree to a professional code of ethics.
When you call, be sure to ask:
Are your technicians CSIA certified, and can I verify that certification?
Will you show me photos or video of the damage before starting work?
Does the estimate distinguish between cosmetic repair and structural repair?
At Superior Chimney, we welcome these and other of your questions.
How Chimney Repairs Affect Insurance and Resale
A chimney in poor condition can complicate a home sale or an insurance claim. Home inspectors routinely report on visible mortar loss, leaning chimneys, or missing chimney caps. Some insurers will request proof of repair before renewing a policy on an older home. Addressing chimney repairs proactively protects more than curb appeal. It protects the sale timeline and the claims history associated to the property.
Frequently Asked Questions
How often should a Chicago area chimney be inspected? At least once a year, per CSIA and NFPA guidance, regardless of how often the fireplace is used.
Can chimney repairs be done in winter? Some interior repairs can happen in cold weather, but most masonry repair requires temperatures consistently above freezing. Spring and fall are the most common repair times in the Chicago area.
Is tuckpointing the same thing as chimney repair? Tuckpointing is one type of chimney repair, focused on replacing deteriorated mortar joints.
Does homeowners insurance cover chimney repairs? It depends. Sudden damage from a storm may be covered, while gradual deterioration from lack of maintenance typically is not.
So Finally…
Taking care of your home includes a chimney. Just because you don’t see it every day, doesn’t mean things aren’t happening. Be sure to get a chimney inspection done once per year by a certified and credible company such as Superior Chimney to take care of the issues. Contact us today by calling 877-244-6349.
 RFK Kitchens
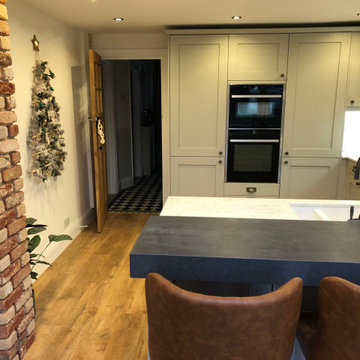
"I wanted to say a big thank you for all your recent help before, during and following the installation of our new kitchen. All the dates, you scheduled in, were adhered to and you made sure that any small issues we had, were addressed promptly. Our new kitchen really is life changing. Most important of all, we are very happy with the results. Great work Erica. We would have no hesitation in recommending you and the team at RFK in the future."
VANESSA & MARK
 Drury Design
The Setup:
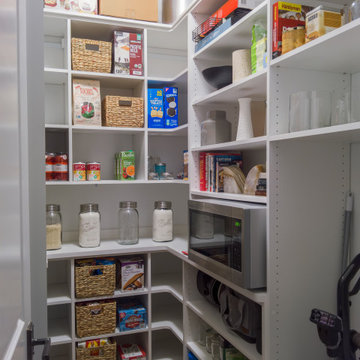
After purchasing this home, the homeowners faced a unique opportunity to reimagine their kitchen and nearby spaces. Water damage from a burst pipe had left much of the home’s interior in need of repair, and while the existing kitchen was functional and in relatively good shape, it didn’t align with the family’s vision for their new home. The layout included a peninsula that wasn’t ideal, and there were some druthers with the nearby pantry.
Since the space needed to be rebuilt anyway, the homeowners saw this as a chance to create a kitchen that was both highly functional for their four young children and timeless in its design. The project also included a refresh of the adjacent message center and dining room — spaces that play key roles in the family’s daily life. The goal was to create a cohesive flow between these areas, balancing modern functionality with the craftsman-inspired character of the rest of the home.
Design Objectives:
- Replace the outdated peninsula with a large island to maximize counter space and create new seating options.
- Open up the space visually by removing soffits and rethinking the cabinetry layout.
Incorporate concealed refrigeration and freezer units to provide significant storage for the family while maintaining a streamlined aesthetic.
- Integrate black cabinetry into the design without making the space feel harsh or heavy.
- Ensure the lighting plan balances functional task lighting with ambient accent lighting.
- Avoid visual clutter in the cabinetry design while still giving a nod to the craftsman aesthetic.
- Incorporate a slab backsplash as a key design feature.
Design Challenges:
- The outdated peninsula left dead space in the kitchen and lacked sufficient seating for the family.
- The cooktop wall was cramped, with small cabinets flanking the hood, limited storage, and soffits that made the space feel closed-in.
- The family needed significant refrigeration space (two refrigerators and a freezer) but wanted to avoid a cluttered look with visible stainless steel appliances.
- Adding black cabinetry risked making the space feel too dark or heavy.
- The original lighting plan was insufficient, particularly over the dining table where a decorative fixture proved too dim.
- The family wanted shaker-style drawer fronts to match the home’s arts-and-crafts design but worried that too much shaker cabinetry might look overly busy.
- Prioritizing a slab backsplash in the wish list priority planning.
The Renewed Space
Design Solutions:
- A functional island: The peninsula was replaced with a large island that provides continuous countertop space for prepping and serving. The island also features seating for four people, creating a central hub for informal meals and activities.
- Streamlined cooktop wall: The soffits were removed, and the upper cabinets on the cooktop wall were eliminated to create a more open, streamlined design. A custom oversized hood became the focal point of the wall, with the blower unit offset inside it to align with the cooktop while maintaining exterior visual symmetry.
- Concealed refrigeration: Two column refrigerators and one freezer were integrated into the cabinetry, concealing them behind wood paneling that blends seamlessly with the overall design.
- Warm black cabinetry: The black cabinetry was crafted from hickory with a visible grain, softening its appearance and adding warmth. The grain detail gives the cabinetry a rich, textured look that avoids feeling stark or overpowering.
- Additional lighting: In the dining area, recessed can lights were added during an additional installation phase to supplement the gorgeous decorative fixture’s dim output. The new lighting plan creates a layered effect, combining functional task lighting with softer ambient lighting.
- Simplified cabinetry details: Slab drawer fronts were used on the upper drawers, while five-piece shaker fronts (with slightly less prominent rail and stile pieces) were reserved for the middle and lower drawers. This approach simplified the overall look while maintaining the craftsman-inspired aesthetic.
- Slab backsplash priority: The slab backsplash was prioritized by making thoughtful adjustments elsewhere, like opting not to extend cabinetry to the ceiling, which also helped visually prioritize the gorgeous slab backsplash. This decision also enhanced the kitchen’s furniture-like feel, aligning with the home’s craftsman character.
- This kitchen perfectly balances practicality with timeless style. By addressing the family’s functional needs — ample seating, smart storage, and effective lighting — while incorporating thoughtful design elements like warm black cabinetry and a striking slab backsplash, Alicia created a space that works beautifully for a busy household. The result is a cohesive, inviting kitchen that honors the home’s craftsman roots and will serve the family well for years to come.
 SHELLEY RODNER DESIGN / DDI
DESIGN CHALLENGES ADDRESSED:
To anyone who may be reading this project overview, I do hope you'll have the opportunity to
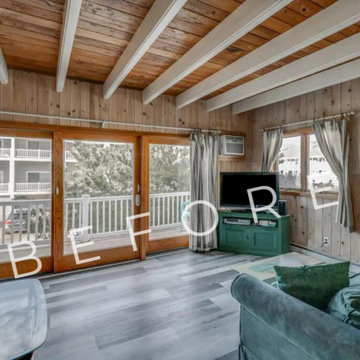
have a look at the 'before' photo of this space. It's quite a transformation!
Our homeowners purchased their condo at the beach several years ago. As shown in the 'before'
photo, at the time, their family room was a dark and dated space with unsightly paneled walls,
heavy faux ceiling beams and odds and ends for furniture. Everything felt cramped and cluttered
throughout the condo, especially their family room. The client's vision was for an airy and
relaxed coastal vibe for their 'place at the beach'.
DESIGN SOLUTIONS PROVIDED:
The entire condo was taken down to stud. The faux beams were edited out and the ceiling raised.
The heavy out-dated paneling was removed and replaced with fresh clean walls that were painted
in a calming creamy sand tone throughout the entire condo.
The existing dark and gloomy furniture was replaced with stylish updated pieces. Great thought
was given to the size, scale and textiles used. The sofa and loveseat, done in a softly textured
herring boned pattern, was the perfect choice. It's cremey toned easy care fabric created a 'pet
friendly' environment for the clients. The homeowners have two dogs and a cat who love a visit
to the beach as much as their 'humans'.
Worn out window treatments were replaced with fresh custom draperies in a playful botanical
print featuring tones of kiwi, leaf green and cerulean blue. A special 'solar friendly' lining was
used to tame the harmful rays of direct sun.
A variety of special curated accents were added to the room. The richly textured rug, round
coffee table with an organic feel, comfy pillows and a few special art pieces all helped to
complete this space.
The overall effect of the renovation was quite dramatic and the clients were thrilled with the
results. This family room went from being dark and dated to light and airy and is now a space
that is inviting and relaxing which perfectly suits the homeowner's coastal lifestyle.
RETAIL PROJECT PRICE: $ 9,000.00
Retail price is defined as the total sale you submitted on your sales repor
 Ginkgo Leaf Studio
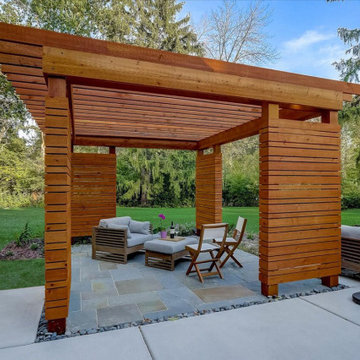
The bluestone dining area has a custom cedar pergola overhead with built-in downlighting. Beach pebble runnels help to visually separate the outdoor rooms of the patio and slate chip in some of the plant beds adds a Zen aspect to the design.
 BMR BelMax Remodeling
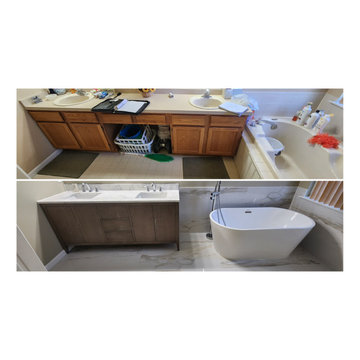
Master Bathroom Remodeling in Maple Glen, PA: A Stunning Transformation by BMR Belmax Remodeling
At BMR Belmax Remodeling, we pride ourselves on delivering exceptional remodeling services that combine elegance, functionality, and personalized design. One of our recent projects involved a master bathroom remodeling in Maple Glen, PA, where we transformed a dated bathroom into a luxurious retreat. This comprehensive bathroom renovation in Maple Glen, PA showcases our commitment to craftsmanship and attention to detail, leaving our client thrilled with the results.
A Vision for the Perfect Master Bathroom
Our client envisioned a serene and modern master bathroom that would elevate the aesthetics and functionality of their space. They sought a design that offered a balance of contemporary style and practicality, incorporating sleek fixtures, premium materials, and improved lighting. We collaborated closely with the client to bring their vision to life, ensuring that every detail met their expectations. The result was a master bathroom that perfectly aligned with their lifestyle and design preferences.
Key Features of the Master Bathroom Remodel
Our team tackled every aspect of this master bathroom remodeling project with precision and care. Here’s a breakdown of the upgrades and improvements we completed:
1. Plumbing Reconfiguration
To accommodate the updated design, we reconfigured the bathroom’s plumbing to support a sleek, smaller vanity and a stylish freestanding bathtub. This change not only optimized the layout but also created a more open and inviting feel.
2. Upgraded Bathroom Fixtures
The client opted for high-quality bathroom fixtures to enhance the space’s overall look and functionality. We installed a modern bathtub faucet, a new toilet, and other premium fixtures that seamlessly complemented the updated design.
3. Enhanced Lighting and Electrical Work
Lighting was a crucial element of this remodel. We installed new electrical wiring to accommodate lighted mirrors, which added a touch of sophistication and practicality. Additional lighting was installed above the mirrors to ensure optimal brightness for daily grooming routines, and a new exhaust fan was added to improve ventilation and maintain air quality.
4. Large-Format Tile Installation
To achieve a luxurious and contemporary look, we used 24″x48″ large-format tiles for the walls in the bathtub area and on the flooring. These tiles created a clean, seamless aesthetic, with fewer grout lines to maintain and a striking visual impact. The client was particularly impressed with the elegance and durability of this choice.
5. Freestanding Bathtub Installation
A standout feature of this remodel was the addition of a stunning freestanding bathtub. Positioned as a focal point of the bathroom, it offered both aesthetic appeal and a relaxing space for unwinding after a long day.
A Seamless Process and Impressive Results
The project was completed in just eight working days, thanks to our efficient project management and skilled team of professionals. From the initial consultation to the final walkthrough, we ensured clear communication with the client to address their questions and keep them updated on progress.
Our streamlined process involved careful planning, precise execution, and meticulous attention to detail. This approach not only delivered a beautiful transformation but also minimized disruptions for the client, ensuring a stress-free remodeling experience.
Why Choose BMR Belmax Remodeling?
This master bathroom remodeling in Maple Glen, PA exemplifies the quality and care that define our work. Here are some reasons why homeowners trust us for their bathroom renovation needs:
Expert Craftsmanship: Our team is skilled in delivering high-quality finishes and innovative solutions tailored to your preferences.
Personalized Designs: We work closely with you to create a space that aligns with your style, needs, and budget.
Premium Materials: We use top-tier materials to ensure durability, functionality, and aesthetic appeal.
Efficient Project Management: Our well-coordinated approach ensures that projects are completed on time without compromising quality.
Customer Satisfaction: We prioritize your satisfaction, striving to exceed your expectations in every aspect of the project.
Client Satisfaction and Lasting Value
The client was overjoyed with their newly remodeled master bathroom, expressing appreciation for the seamless process and stunning results. They particularly loved the enhanced lighting, the luxurious feel of the large-format tiles, and the functionality of the upgraded features. The renovation not only improved the bathroom’s aesthetics but also added significant value to their home.
Transform Your Bathroom with BMR Belmax Remodeling
If you’re considering a bathroom renovation in Maple Glen, PA, BMR Belmax Remodeling is here to help. Whether you’re looking for a complete master bathroom transformation or specific upgrades, we bring expertise, creativity, and a commitment to excellence to every project.
Contact us today to schedule a consultation and let us bring your dream bathroom to life. With BMR Belmax Remodeling, your ideal space is closer than you think!

Sponsored
Delaware, OH

Buckeye Basements, Inc.
Central Ohio's Basement Finishing ExpertsBest Of Houzz '13-'21
 Sweet Smiling Landscape Design
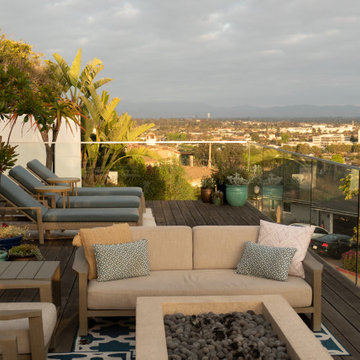
Located on a steep hill above downtown Ventura, this modern Spanish house features panoramic views of town with the ocean and Channel Islands beyond. While the views are amazing from a large front deck, the steep slope presented some constraints on the landscape design.
Although the property is about a third-of-an-acre, the only useable and open garden space is a small (about 500 square feet) area to the West of the house. The house sits at the back of the property, and another steep hill on the neighboring property behind is held back by a tall retaining wall, leaving just enough room for a narrow, hardscaped patio in the back yard.
Bright plantings along the back of the property delineate the home from the neighboring property, and we chose plantings to help stabilize the soil and further develop the Spanish garden look while creating a lush, inviting feel. Additionally, we added 52 pieces of pottery to soften and add interest to the back garden and patio areas. Succulents, herbs, and California natives fill the pottery along with bright, sweet-smelling, tropical-looking, and climate-appropriate plants.
Slope stabilization was paramount for the front hill. Beyond that, finding plants that would thrive on the steep slope was the next obstacle. Finally, the aesthetics could be addressed, and we worked to find plants that meshed with the architecture—blending plants with white and orange to play off the red-tiled roofs and white-plastered walls that are emblematic of the Spanish style of this house as well as the predominate style of the neighborhood.
The flattish area to the West was designed with the idea of creating a contemporary take on the parterre garden. Reminiscent of Mediterranean gardens, this vegetable and herb garden substitutes formal hedges with formal Corten steel planters to honor the modern Spanish architecture of the house. The citrus, herbs, and vegetables serve the foodie clients well.
 Windy City Painters
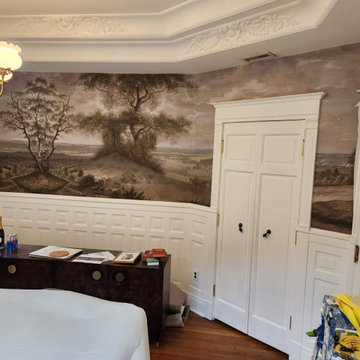
Professional wallpaper installation Old Town requires expertise that honors the neighborhood's historic character while delivering modern durability and beauty.
Project Overview and Architecture
This Old Town wallpaper installation showcased our ability to work with the area's distinctive architecture, from classic greystones to renovated vintage condos that define this prestigious neighborhood.
Materials and Products
We selected premium wallpaper materials specifically designed for Chicago's climate conditions, using high-quality adhesives and primers that ensure long-lasting adhesion on various surface types.
Installation Process
Step 1: Surface preparation including cleaning, smoothing, and addressing imperfections common in older buildings
Step 2: Professional repairs to walls ensuring perfect foundation for wallpaper application
Step 3: Quality primer application designed specifically for wallpaper adhesion and longevity
Step 4: Expert wallpaper installation with precise pattern matching and seamless application techniques
Chicago-Specific Challenges
Old Town homes present unique challenges including weather exposure, aging building materials, potential lead paint considerations, and vintage surfaces requiring specialized preparation techniques.
Results Achieved
Windy City Painters delivered flawless wallpaper installation that enhanced the room's aesthetic while respecting the architectural integrity of this historic Old Town property.
Professional Tips
Homeowners should always hire experienced professionals for wallpaper installation, especially in historic properties where surface preparation and material selection significantly impact long-term success and beauty.
See more work and request free estimate at windypainters.com.
FAQs
Q: Why hire professionals for wallpaper installation Old Town homes? / A: Expert installation prevents costly mistakes, ensures proper adhesion, and preserves historic property values through quality craftsmanship.
Q: What wallpaper materials work best in Chicago climate? / A: High-quality papers with proper backing designed for humidity fluctuations and temperature changes typical in Chicago homes.
Q: How do you prepare Old Town walls for wallpaper? / A: Thorough cleaning, surface smoothing, repairs, and specialized primers ensure optimal wallpaper installation adhesion and longevity.
Q: Can wallpaper be installed over existing paint? / A: Sometimes, but professional assessment determines if surface preparation or primer application is needed for successful wallpaper installation.
Q: How long does professional wallpaper installation take? / A: Most rooms completed within one day, depending on size, pattern complexity, and surface preparation requirements.
Q: What about removing old wallpaper first? / A: We safely remove existing wallpaper using proper techniques that protect walls and prepare surfaces for new installation.
Q: Do you offer design consultation for wallpaper selection? / A: Yes, we help choose patterns and materials that complement Old Town architectural character and personal style preferences.
Q: How do you handle pattern matching across walls? / A: Precise measurements and expert techniques ensure seamless wallpaper installation with perfect pattern alignment throughout rooms.
Q: What's your wallpaper installation warranty coverage? / A: Comprehensive warranties cover both materials and workmanship, giving you confidence in your wallpaper installation investment.
Q: Can you work around furniture and schedules? / A: Absolutely! We coordinate timing and setup to minimize disruption during your professional wallpaper installation project.
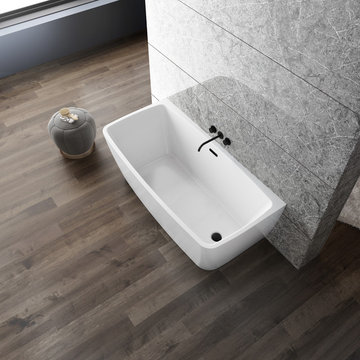
 BainUltra
VIBE IS A NEW COLLECTION OF THERAPEUTIC BATHTUBS WITH MINIMALIST AND CONTEMPORARY FLAIR. THE COLLECTION IS PERFECT FOR URBAN CITY DWELLERS WHO WANT TO BRING VALUE AND REFINEMENT TO SMALLER BATHROOMS.
The VIBE Collection is the first offering from BainUltra’s urBAIN category to address the needs of younger, sophisticated bathers. Inspired by the city skyline and architectures of cosmopolitan cities, you can feel miles away from the streets below as you rest your mind, body and spirit in an expertly crafted bath.
GET THE VIBE
Designed to fit in smaller installations without compromising the quality, comfort and ergonomics of a therapeutic bath. VIBE helps create an urban oasis of sensual therapies that allows the bather to recharge. The clean lines, pure design and sloping walls bring class, sophistication and style to even the smallest of spaces.
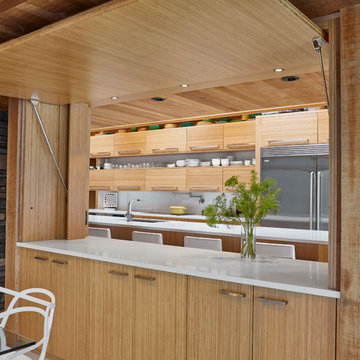
 Effect Home Builders Ltd.
Inspiration for a large modern galley concrete floor and gray floor enclosed kitchen remodel in Edmonton with an undermount sink, flat-panel cabinets, light wood cabinets, quartz countertops, white backsplash, glass sheet backsplash, stainless steel appliances and an island

Sponsored
Delaware, OH
Buckeye Basements, Inc.
Central Ohio's Basement Finishing ExpertsBest Of Houzz '13-'21
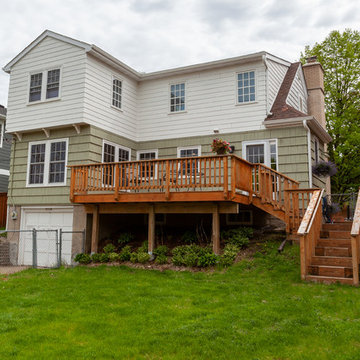 Castle Building & Remodeling
As with many residents of the Armitage neighborhood in South Minneapolis, the owners of this 1940-built Tudor home love where they live. So much so, they were willing to commit to a large, whole-house remodel in order to stay put.
Castle worked diligently with these homeowners to help them realize their ultimate goals for their home.
By redesigning the first-floor layout, Castle was able to create a much more open space. Walls previously separating the kitchen and dining room were removed and replaced with more countertop space in the form of a seated peninsula. The kitchen was also updated with new granite countertops, more backsplash tile to match the existing, and partial new cabinetry by The Woodshop of Avon to match existing.
New hardwood flooring was installed in the kitchen to match the existing dining room. The size of the dining room was then almost doubled by removing an adjacent first-floor bedroom.
A new sunroom was added in the back which opened the space even further. Dixie Caress carpet in the color “Wisteria” was chosen for the sunroom and throughout the 2nd floor.
The 2nd floor was given a total makeover with a large dormer addition and a master bedroom suite above the new sunroom. Corbels decorate the exterior while giving support to the overhanging floor of the master bedroom.
Now with three bedrooms and two bathrooms upstairs, there’s room for everyone, and a wonderful great room on the main floor to go with it.
See this project in person on the Castle Home Tour, September 28 – 29th, 2019.
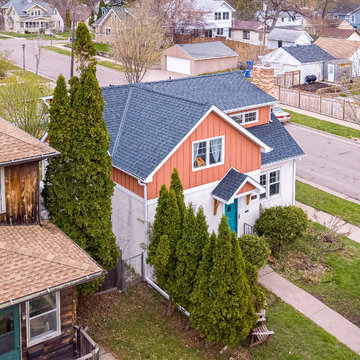 Castle Building & Remodeling
These homeowners came to Castle looking for a solution that would allow them to stay in their 1946 stucco bungalow in the St. Paul neighborhood that they loved.
What was once a young couple’s starter home (1 ½ story with two bedrooms on the main floor and a tiny attic space) was no longer big enough after having two kids.
The need for more room became the family’s highest priority, so they came to Castle for help creating the space they needed for their growing family.
With very little headroom in the attic, the decision was made to tear off the roof and add a completely new 2nd story addition with three bedrooms, a bathroom, and a commons area.
The stairway to the new 2nd-floor space needed to be rebuilt to comply with code requirements and was extended slightly into the dining room below.
The new 2nd story addition gave the homeowners an opportunity to revise the exterior look of the home with vertical board and batten siding above the 1st-floor stucco.
A new front entry portico was added to compliment the addition, and the existing masonry chimney was extended above the new roof line.
The homeowners took over the work on the project after drywall was installed and did all the interior trim & millwork, tile, flooring, and painting & staining themselves.
They’re loving the results!
Tour this project in person, September 28 – 29, during the 2019 Castle Home Tour!
 Adam Gibson Design
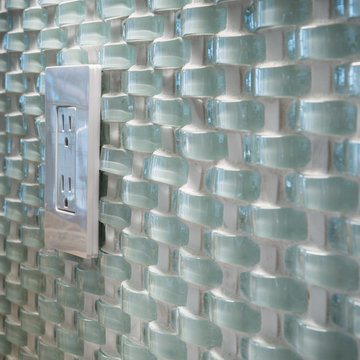
Closeup of the glass and marble wavy mosaic backsplash.
Photography ©2014 Adam Gibson
Example of a large transitional kitchen design in Indianapolis
Example of a large transitional kitchen design in Indianapolis
41