
Search results for "Implementing proper" in Home Design Ideas

 JSE Interior Design
Plaza 400 is a premiere full-service luxury co-op in Manhattan’s Upper East Side. Built in 1968 by architect Philip Birnbaum and Associates, the well-known building has 40 stories and 627 residences. Amenities include a heated outdoor pool, state of the art fitness center, garage, driveway, bike room, laundry room, party room, playroom and rooftop deck.
The extensive 2017 renovation included the main lobby, elevator lift hallway and mailroom. Plaza 400’s gut renovation included new 4’x8′ Calacatta floor slabs, custom paneled feature wall with metal reveals, marble slab front desk and mailroom desk, modern ceiling design, hand blown cut mirror on all columns and custom furniture for the two “Living Room” areas.
The new mailroom was completely gutted as well. A new Calacatta Marble desk welcomes residents to new white lacquered mailboxes, Calacatta Marble filing countertop and a Jonathan Adler chandelier, all which come together to make this space the new jewel box of the Lobby.
The hallway’s gut renovation saw the hall outfitted with new etched bronze mirrored glass panels on the walls, 4’x8′ Calacatta floor slabs and a new vaulted/arched pearlized faux finished ceiling with crystal chandeliers and LED cove lighting.
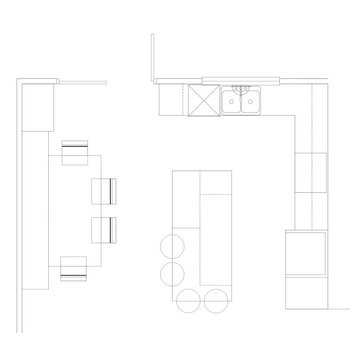


 Plaistow Cabinet
Shiloh Cabinetry. Polar White, Inset
Kitchen - transitional kitchen idea in Manchester with white cabinets, beaded inset cabinets, marble countertops, white backsplash, marble backsplash and stainless steel appliances
Kitchen - transitional kitchen idea in Manchester with white cabinets, beaded inset cabinets, marble countertops, white backsplash, marble backsplash and stainless steel appliances
Find the right local pro for your project

 Woodwerd, LLC
Woodwerd
Inspiration for a large contemporary open concept family room remodel in Austin with gray walls
Inspiration for a large contemporary open concept family room remodel in Austin with gray walls

 Cherry City Interiors & Design
Materials and interior paint selected by Cherry City Interiors & Design
Freestanding bathtub - mid-sized contemporary master beige tile and ceramic tile porcelain tile freestanding bathtub idea in Portland with shaker cabinets, dark wood cabinets, white walls, a drop-in sink and tile countertops
Freestanding bathtub - mid-sized contemporary master beige tile and ceramic tile porcelain tile freestanding bathtub idea in Portland with shaker cabinets, dark wood cabinets, white walls, a drop-in sink and tile countertops

 Debra Kay George Interiors
"Vintage Aviator" shower
Inspiration for a large modern master gray tile and porcelain tile porcelain tile walk-in shower remodel with white walls and a vessel sink
Inspiration for a large modern master gray tile and porcelain tile porcelain tile walk-in shower remodel with white walls and a vessel sink

 Borden Interiors & Associates
Riad Tile
Bathroom - contemporary cement tile floor and pink floor bathroom idea in Santa Barbara
Bathroom - contemporary cement tile floor and pink floor bathroom idea in Santa Barbara

 Regina Sturrock Design Inc.
This grand residence is situated on the picturesque Lakeshore Road of Burlington, Ontario Canada. Representing a 'from-the-ground-up' project, the 10,000 square foot home boasts classic architecture with a fresh contemporary overlay.
Roy Timm Photography

 Hudson Environments
"Builder Beige" new construction. This guest bath came with bare white cabinets, grey walls and basic frame less square mirror with vanity light over the mirror. I added this black oversize picket tile back splash with charcoal/black grout. I replaced the builder grade mirror with a round metal framed one. We changed the lighting by, removing the light above the mirror and added two sconces, one on each side. For the final touch, I added the black hardware, to ensure the white cabinets remain white for as long as possible. Cabinets without hardware tend to get dirty quicker, because the doors pick up the oils from our hands. I wanted to avoid that for as long as possible.
The water closet came with this out-swing shower door.
The space was extremely tight for the smallest of people,
so for anyone of any size would feel closed in. So, I
switched out the builder grade out-swing shower door with a semi-frame-less sliding shower door. This allows for more room to move around, opening the space up just a tad.

 Victor Mulbauer
New Installation of Red Oak Wood, 3 1/4 in width. White-washed Bona Stain was used, Bona Finish, as well as Bona Traffic HD.
**This photo is of the Red Oak Wood (3 1/4 inch) prior to the application of the white-washed Bona Stain.

 Refined House, LLC
Example of a small transitional kids' gray tile and ceramic tile ceramic tile and white floor alcove shower design with shaker cabinets, blue cabinets, a two-piece toilet, gray walls, an undermount sink, quartz countertops and a hinged shower door

 MW Design Workshop
Josiah Zukowski
Staircase - mid-sized modern carpeted straight carpeted staircase idea in Portland with white walls and carpeted risers
Staircase - mid-sized modern carpeted straight carpeted staircase idea in Portland with white walls and carpeted risers

 Custom Surface Solutions
 (www.css-tile.com) - Owner Craig Thompson (512) 430-1215. This project shows new 12 x 24 tile installed vertically with offset layout pattern on wall and floor. Includes shower box with linear glass accent tile back and vertical glass accent band. Tile edges are finished with Schluter Jolly satin aluminum profile edge trim.
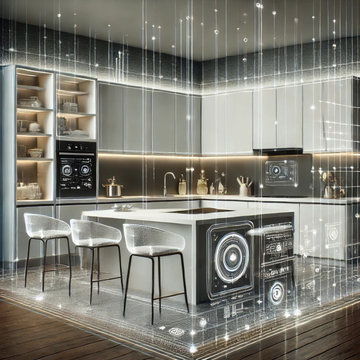
 Allreno
In What Order Should You Renovate a Kitchen? Revolutionizing Kitchen and Bath Renovation with Allreno's Design AI
Renovating a kitchen can be one of the most exciting and rewarding home improvement projects. However, with so many decisions to make, it can also be overwhelming. From selecting kitchen cabinets to choosing countertops and appliances, the process often involves careful planning and organization. So, how do you ensure the renovation goes smoothly? One important factor is knowing the right order in which to tackle the project.
The Right Order for Kitchen Renovation
Renovating a kitchen involves multiple steps, and knowing the proper order of operations is crucial for both time efficiency and cost savings. Here’s a general guideline for how to approach your kitchen renovation:
1. Planning and Design: The first step in any renovation is planning. This includes deciding on the layout, design, and features you want in your kitchen. At this stage, you’ll also need to think about your budget and timeline. It’s essential to finalize these details before moving forward with the actual work.
2. Demolition: Once the design is set, it’s time to remove old fixtures, cabinets, appliances, and flooring. Demolition can be a messy process, but it’s necessary for starting fresh. Having a professional handle this phase is often a smart move to ensure everything is safely removed.
3. Structural Work: If you plan on altering the layout of the kitchen by knocking down walls or adding new plumbing or electrical work, now is the time to do it. Structural changes can be complicated and costly, so it’s important to ensure these are completed before installing any new elements.
4. Plumbing and Electrical Work: With the structure in place, you can begin installing plumbing and electrical systems. This might include adding new water lines, sinks, or electrical outlets for appliances. It’s best to bring in licensed professionals for this stage, as electrical and plumbing work requires expert knowledge.
5. Cabinet Installation: Once the plumbing and electrical work are in place, you can install the kitchen cabinets. Cabinets are one of the most important elements of the kitchen, and the Allreno design AI can make this process easier. Allreno's AI-driven platform allows you to visualize how different kitchen cabinets will fit into your space, ensuring you make the best choice based on your preferences and layout.
6. Countertops: After the cabinets are installed, it’s time to add countertops. Whether you choose granite, quartz, or a more budget-friendly option, countertops are a focal point of the kitchen, and they should complement the cabinets and other design elements.
7. Flooring: Now that the major structural elements are in place, it’s time to install your flooring. Whether you opt for tile, hardwood, or vinyl, flooring should be installed after the cabinets and countertops to prevent any damage during the installation process.
8. Appliances and Fixtures: With the foundation in place, you can now add your appliances (oven, refrigerator, dishwasher, etc.) and fixtures (sink, faucets, lighting). Allreno’s AI can also help here by offering kitchen design recommendations based on available appliances and space dimensions.
9. Final Touches: The last step is adding the finishing touches to your kitchen. This includes painting the walls, adding backsplash tiles, and installing accessories like handles and knobs on your cabinets. This is also the stage where you can implement any stylistic choices to make the space uniquely yours.
How Allreno's AI Transforms the Renovation Process
One of the biggest challenges of a kitchen renovation is visualizing how everything will come together. Allreno’s design AI changes that by offering an intuitive platform that brings your ideas to life. Here’s how:
• Personalized Design Recommendations: Allreno’s AI suggests design elements based on your preferences, style, and space dimensions. Whether it’s selecting the perfect kitchen cabinets or countertop finishes, the AI ensures everything works together cohesively.
• 3D Visualization: With Allreno’s AI-driven design tools, you can visualize your kitchen layout in 3D before any work begins. This allows you to see how different elements will fit into your space and make adjustments as needed.
• Efficient Project Management: Allreno helps you streamline the entire renovation process by generating accurate material lists, estimates, and timelines. This means you can avoid costly errors and keep your renovation on track.
Conclusion
Renovating a kitchen is an exciting project, but it requires careful planning and organization to ensure it’s done right. By following a strategic order of operations and leveraging cutting-edge technology like Allreno’s design AI, homeowners can streamline the process, save time and money, and bring their dream kitchen to life with ease. Allreno not only simplifies the design process but also provides innovative solutions that make kitchen and bath renovations faster and more efficient than ever before.
Ready to get started with your kitchen renovation? Allreno's AI-powered design platform is here to help you every step of the way.

 threshold interiors
Location: New York, NY, United States
This Loft was tastefully renovated back in the '90s, but was due for an update and an expansion of the kitchen and dining areas to accommodate the client's cooking skills and entertaining needs. EnlargIing the island and adding cabinetry to delineate the office, bar and dining areas was a priority. The bathroom was updated to feel like a tranquil spa with beautiful new tile, plumbing fixtures and cabinets. Our biggest challenge was coordinating the entire renovation while our client was out of town for the Summer!
Photographed by: James Salomon
 TreHus Architects+Interior Designers+Builders
Example of a large classic u-shaped dark wood floor eat-in kitchen design in Minneapolis with a double-bowl sink, recessed-panel cabinets, white cabinets, white backsplash, stainless steel appliances, an island and black countertops

 ValHolla LLC
Valerie Holland
Eat-in kitchen - large cottage u-shaped medium tone wood floor eat-in kitchen idea in Wichita with a double-bowl sink, recessed-panel cabinets, distressed cabinets, granite countertops, white backsplash, ceramic backsplash, stainless steel appliances and an island
Eat-in kitchen - large cottage u-shaped medium tone wood floor eat-in kitchen idea in Wichita with a double-bowl sink, recessed-panel cabinets, distressed cabinets, granite countertops, white backsplash, ceramic backsplash, stainless steel appliances and an island

 Ranger Glass And Mirror
Inspiration for a mid-sized transitional 3/4 white tile and porcelain tile porcelain tile and beige floor alcove shower remodel in Dallas with gray walls and a hinged shower door


7