
Search results for "Initially start" in Home Design Ideas
 Kathleen Jennison
An Arts & Crafts Bungalow is one of my favorite styles of homes. We have quite a few of them in our Stockton Mid-Town area. And when C&L called us to help them remodel their 1923 American Bungalow, I was beyond thrilled.
As per usual, when we get a new inquiry, we quickly Google the project location while we are talking to you on the phone. My excitement escalated when I saw the Google Earth Image of the sweet Sage Green bungalow in Mid-Town Stockton. "Yes, we would be interested in working with you," I said trying to keep my cool.
But what made it even better was meeting C&L and touring their home, because they are the nicest young couple, eager to make their home period perfect. Unfortunately, it had been slightly molested by some bad house-flippers, and we needed to bring the bathroom back to it "roots."
We knew we had to banish the hideous brown tile and cheap vanity quickly. But C&L complained about the condensation problems and the constant fight with mold. This immediately told me that improper remodeling had occurred and we needed to remedy that right away.
The Before: Frustrations with a Botched Remodel
The bathroom needed to be brought back to period appropriate design with all the functionality of a modern bathroom. We thought of things like marble countertop, white mosaic floor tiles, white subway tile, board and batten molding, and of course a fabulous wallpaper.
This small (and only) bathroom on a tight budget required a little bit of design sleuthing to figure out how we could get the proper look and feel. Our goal was to determine where to splurge and where to economize and how to complete the remodel as quickly as possible because C&L would have to move out while construction was going on.
The Process: Hard Work to Remedy Design and Function
During our initial design study, (which included 2 hours in the owners’ home), we noticed framed images of William Morris Arts and Crafts textile patterns and knew this would be our design inspiration. We presented C&L with three options and they quickly selected the Pimpernel Design Concept.
We had originally selected the Black and Olive colors with a black vanity, mirror, and black and white floor tile. C&L liked it but weren’t quite sure about the black, We went back to the drawing board and decided the William & Co Pimpernel Wallpaper in Bayleaf and Manilla color with a softer gray painted vanity and mirror and white floor tile was more to their liking.
After the Design Concept was approved, we went to work securing the building permit, procuring all the elements, and scheduling our trusted tradesmen to perform the work.
We did uncover some shoddy work by the flippers such as live electrical wires hidden behind the wall, plumbing venting cut-off and buried in the walls (hence the constant dampness), the tub barely balancing on two fence boards across the floor joist, and no insulation on the exterior wall.
All of the previous blunders were fixed and the bathroom put back to its previous glory. We could feel the house thanking us for making it pretty again.
The After Reveal: Cohesive Design Decisions
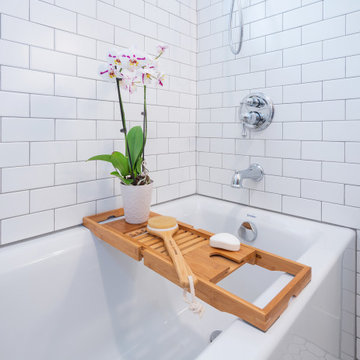
We selected a simple white subway tile for the tub/shower. This is always classic and in keeping with the style of the house.
We selected a pre-fab vanity and mirror, but they look rich with the quartz countertop. There is much more storage in this small vanity than you would think.
The Transformation: A Period Perfect Refresh
We began the remodel just as the pandemic reared and stay-in-place orders went into effect. As C&L were already moved out and living with relatives, we got the go-ahead from city officials to get the work done (after all, how can you shelter in place without a bathroom?).
All our tradesmen were scheduled to work so that only one crew was on the job site at a time. We stayed on the original schedule with only a one week delay.
The end result is the sweetest little bathroom I've ever seen (and I can't wait to start work on C&L's kitchen next).
Thank you for joining me in this project transformation. I hope this inspired you to think about being creative with your design projects, determining what works best in keeping with the architecture of your space, and carefully assessing how you can have the best life in your home.
 Gappsi
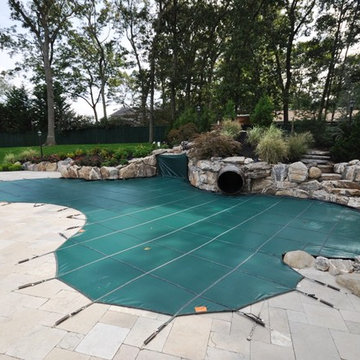
Mesh covers are the most common way to safeguard your pool during the winter. A winter cover has to be strong and made of good quality material. There are many manufactures of pool liners and mesh safety covers, and mesh covers can be ordered according to the initial pool liner measurements.
Gappsi can supply and install a mesh pool cover, we are authorized dealers and installers for every brand, from Loop-Loc, Merlin, Lathem, Vynall and many other others.
Manufactures make many grades of covers, the better the grade the more expensive to cover is. Tight thin mesh and strong fibers used to manufacture the covers will give your pool cover the quality to last for many years.
Swimming pool winter covers installed by Gappsi will give you all the protection, security, and safety you need for your family, pets, and neighbors. Winter pool covers are manufactured to let the water from the rain drain through. Also, it allows you to put your pump in the middle of the cover and allow the extra water in the pool to come through and get pumped out. Winter covers are manufactured in all mesh or solid rubber with a 24x24 mesh hole in the center to let water drain into the pool. Anchors are installed in the patio about 36 inches away from the swimming pool. The way they are installed is by drilling a hole in the patio, brass anchors are slid through, and the cover is then attached to the anchors. If the patio is not installed correctly, the cover may become loose and it will not be as safe as it should be.
The Gappsi way of installation starts with the proper installation of the patio. Four foot wide slabs with reinforced rebar are always installed around the swimming pool to prevent settling of the patio, then the finished paving material is installed over the concrete base. The Gappsi installation of the safety pool cover is then installed over the patio by drilling holes straight through the finished paving material all the way down into the concrete base. A sleeve is installed into the hole about 6 inches into the patio going through the 4 inches of concrete base and further in the ground, and a brass screw pin is then installed into the pipe. By unscrewing the brass screw pin; it comes up above the patio and allows for the cover ring hooks to attach to the brass screw. After this is all done for every strap of the cover, your Gappsi installed pool cover is safe to walk on with no chance of breaking.
 Liberty Kitchen Design
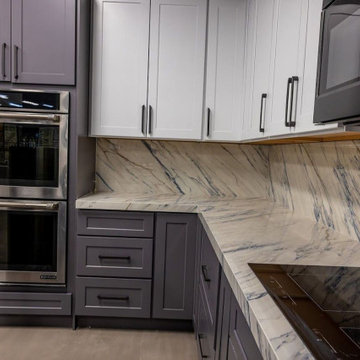
At Liberty Kitchen Design, we understand that the kitchen is more than just a space for cooking; it's the heart of your home, where memories are made and shared. Our kitchen remodeling service in Delray Beach is tailored to bring your vision to life, ensuring that every corner of your kitchen reflects your personal style and meets your needs. With an expansive showroom filled with a vast selection of cabinets, countertops, and handles, we offer everything you need to create a space that's uniquely yours. Our team of experts is here to guide you through every step of the remodeling process, from initial design to final touches, making sure your kitchen remodeling journey is as seamless and enjoyable as possible.
Our showroom stands as a testament to the endless possibilities that await your kitchen. Whether you're looking for a modern, sleek design or a cozy, traditional feel, Liberty Kitchen Design has the materials and expertise to bring your dream kitchen to life. Our showroom allows you to touch, feel, and visualize how different options can transform your space, providing a tangible sense of what your finished kitchen will look like. This hands-on experience is invaluable, empowering you to make informed decisions about the elements that will make up your new kitchen. From the latest in minimalist cabinets to classic granite countertops and innovative handles that add the perfect finishing touch, our showroom is designed to inspire and excite every visitor.
Liberty Kitchen Design is more than just a kitchen remodeling service; we're a family-owned business with over eight years of experience in creating stunning, functional kitchens. Our passion for design and commitment to quality have been the cornerstone of our success, driving us to exceed our clients' expectations at every turn. This experience is not just reflected in the craftsmanship of our work but also in the personalized service we provide to each client. We understand that a kitchen remodel is a significant investment, both emotionally and financially. That's why we treat every project with the respect and dedication it deserves, ensuring that your new kitchen is not just beautiful but also a perfect fit for your lifestyle and budget.
Liberty Kitchen Design is your partner in transforming your kitchen into the heart of your home. Our expansive showroom, filled with a wide range of high-quality materials, combined with our expertise and personalized approach, makes us the ideal choice for your kitchen remodeling project. From our family to yours, we're dedicated to providing a remodeling experience that is not only satisfying but also brings your dream kitchen to life. Visit us today and start the journey toward a kitchen that's uniquely yours, filled with the beauty and function that you've always desired.
Find the right local pro for your project
 Liberty Kitchen Design
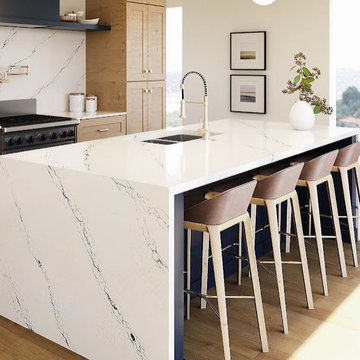
At Liberty Kitchen Design, we understand that the kitchen is more than just a space for cooking; it's the heart of your home, where memories are made and shared. Our kitchen remodeling service in Delray Beach is tailored to bring your vision to life, ensuring that every corner of your kitchen reflects your personal style and meets your needs. With an expansive showroom filled with a vast selection of cabinets, countertops, and handles, we offer everything you need to create a space that's uniquely yours. Our team of experts is here to guide you through every step of the remodeling process, from initial design to final touches, making sure your kitchen remodeling journey is as seamless and enjoyable as possible.
Our showroom stands as a testament to the endless possibilities that await your kitchen. Whether you're looking for a modern, sleek design or a cozy, traditional feel, Liberty Kitchen Design has the materials and expertise to bring your dream kitchen to life. Our showroom allows you to touch, feel, and visualize how different options can transform your space, providing a tangible sense of what your finished kitchen will look like. This hands-on experience is invaluable, empowering you to make informed decisions about the elements that will make up your new kitchen. From the latest in minimalist cabinets to classic granite countertops and innovative handles that add the perfect finishing touch, our showroom is designed to inspire and excite every visitor.
Liberty Kitchen Design is more than just a kitchen remodeling service; we're a family-owned business with over eight years of experience in creating stunning, functional kitchens. Our passion for design and commitment to quality have been the cornerstone of our success, driving us to exceed our clients' expectations at every turn. This experience is not just reflected in the craftsmanship of our work but also in the personalized service we provide to each client. We understand that a kitchen remodel is a significant investment, both emotionally and financially. That's why we treat every project with the respect and dedication it deserves, ensuring that your new kitchen is not just beautiful but also a perfect fit for your lifestyle and budget.
Liberty Kitchen Design is your partner in transforming your kitchen into the heart of your home. Our expansive showroom, filled with a wide range of high-quality materials, combined with our expertise and personalized approach, makes us the ideal choice for your kitchen remodeling project. From our family to yours, we're dedicated to providing a remodeling experience that is not only satisfying but also brings your dream kitchen to life. Visit us today and start the journey toward a kitchen that's uniquely yours, filled with the beauty and function that you've always desired.
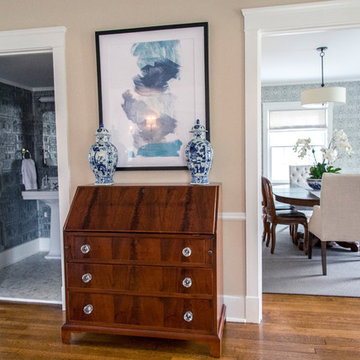
 Reflections Interior Design
We initially were hired to work with our clients on their upstairs bathrooms. Once we started working together the upstairs bathrooms were put on hold and instead we updated the entire first floor!
We painted or put wallpaper in each space and added new pieces of furniture to blend with existing pieces. Lighting was updated and added throughout. Staying in tune with the original character of the home was an important focus and we paid close attention to that in our selection of light fixtures, furniture and fabrics. We added a hall closet, put wainscoting in the dining room, updated the fireplace tile surround and added details to the living room bookcase. The kitchen got a fresh new look with minimal renovating - we removed some cabinetry, added floating shelves, tiled the wall and designed a custom built-in breakfast nook. We most recently worked on converting an upstairs sun porch to a home office. We opened up the ceilings, added hardwood flooring to match the rest of the house and furnished it with a few of our client's existing pieces and some new. The end result of this project is a beautiful and welcoming space that we feel truly reflects our clients!
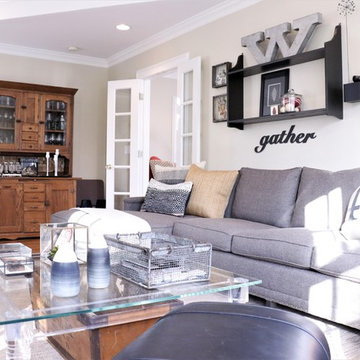
 Cure Design Group
This designer client relationship is one based on friendship. Senior Designer Cori Dyer and client have an indescribable partnership and unmentioned understanding when it comes to decorating this home. A vintage charmer with a modern flair, filled with collectables and uncommon goods that make this space a unique and spectacular.
Cori Dyer:
I first met Sally when our boys became friends at Chaminade in 2007.
Since then, we have stayed close and become great friends.
Several years back she asked for my help giving her ideas on ways to spruce things up a bit and work with her on a major remodel.
A little intimidating as Sally has a beautiful home and is an avid collector of vintage finds.... way before the trend of blending old and new was popular.
She has an eye for unique ways to use vintage pieces and incorporating those into some of the most interesting and compelling displays. What has made this design relationship work is simply one of respect. I know when to give her that push outside of her comfort zone and incorporate her collections with selections that work with what she has, but that offer a new spin on putting it all together.
From that initial "spruce up" has come a makeover in her Living Room and currently one completed in her Family Room.
Although there are signs of my design throughout her home, the detail and selection of the collections and vintage finds are all Sally!!
I truly think that is how Design should be. Blending old and new, and a Designer listening to what makes the client happy.
Client: It was fun to be in style for a year or two, but it’s back to being the quirky lady. I started collecting in my teens and enjoy the hunt for new finds of all types. Cori helped me to enjoy my collections in a new and modern way! As always I had too many things. With her designer eye she taught me to blend the old and the new and to use different materials. The best part was going shopping with one of my best friends, who just happens to be a designer!! She is definitely the ying to my much needed yang.
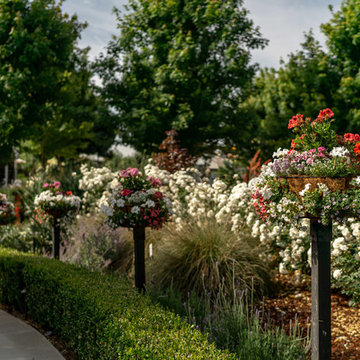
 Charter Oak Landscape Development
What started out as demonstration gardens with rambling paths and open gathering spaces and transformed into a magical outdoor venue. We have had the please of designing and installing the initial concept, along with the modifications throughout the years to meet the ever changing needs of this space.
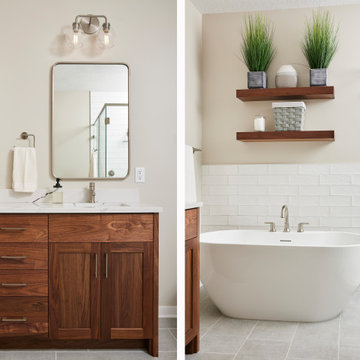
 Murphy Bros. Design | Build | Remodel
It was going to be a simple bath remodel, and then life happened. We can't always know where our journeys will take us, especially when it comes to the world of remodeling. However, the important thing is that they end up where we most want to go. That was the case in this bathroom remodel project that ended up in a new destination. In this case, the homeowner started off with a desire to “finish off” a lower-level bathroom that had barely been roughed in. There was more to it of course than just hooking up a sink and a shower.
By the time we got through the initial design phase and narrowed down both the focus and the costs, it became very clear to all of us that what would make our clients truly happy, what would really improve their lives at home, was to invest their budget in a master bath on the main level and spend a bit less on the lower-level bathroom.
Reordering priorities and understanding the true value of tradeoffs in material selections were key turning points during the design process. Having clarity about what is best for you and your goals is so very critical in a successful remodel.
 Aardvark Architecture
This proposal is for a new two-story home on the vacant heavily wooded lot with an existing 150-foot-long driveway lined by several beautiful oak trees culminating in a behemoth 43-inch oak tree where the driveway meets the main lot. The far end of the driveway terminates in a grove of three 43/40/43-inch redwoods and at the very center of the vacant lot stands a gargantuan V-twin 59-inch redwood tree paired with a “small” 29-inch redwood tree. The owners want to build a beautiful contemporary-styled home for their family that fully enjoys and embraces the mature trees on their cozy 65-foot by 100-foot lot.
As with all small, constrained lots, this project’s site design started first with meeting the relatively large parking and car maneuvering requirements. Menlo Park’s Department of Transportation typically requires side-facing garages to have 24-feet of backup space. So that they could give the largest feature redwood tree on site an added four feet (50%) of clearance outside of its critical root zone, the owners agreed to install a vehicle turntable at the end of their driveway to eliminate the extra four feet of space needed to back up and turnaround. This allowed them to pull their garage forward an additional four feet towards the front property line on the panhandle side, drastically reducing the rest of the home’s impact on the gargantuan V-Twin paired redwood tree at the center of the lot.
One of the owners has mobility issues, and accordingly, they first sought to design a one-story floor plan that incorporated all their family’s needs including plenty of covered patio and deck space to enjoy our fantastic California weather. But that single-story footprint spread too far into the critical root zones of several of the redwood trees on site, even despite the use of the vehicle turntable. During my interview process with the owners, they made it clear to me that one of their primary concerns is ensuring that the largest trees on site would thrive and become features of their new home after construction is complete. The single-story designs that removed the grove of three huge redwood trees were non-starters, as was the skimpy 5x10 master bath I designed when trying to squeeze the whole house program into an overly compromised single-story design. It was therefore deemed necessary to go with a two-story design despite the owner’s mobility issues. This two-story design has a much more compact ground floor footprint and has no bedrooms downstairs, other than the detached ADU. The owners must give up the floor area and incur the costs to install a residential elevator to access their upstairs master suite.
Our ground floor footprint is smaller due to the two-story design decision, and our foundation is pulled away from the trees thanks to the vehicle turntable. Yet, a tiny portion of the home’s ground floor footprint still encroaches into the critical root zones of the largest 59” redwood tree. Therefore, as outlined in the Arborist Report prepared by Aesculus Arboricultural Consulting, the structural engineers are incorporating an array of drilled piers and shallow-grade beams for the main home’s foundation and deck area nearest the redwood’s critical root zone. This drilled piers and grade beam foundation is a type of “bridging” foundation as outlined in Aesculus’ report to preserve the health of these trees that the property was designed around. The rest of the foundation will be constructed as an insulated slab-on-grade foundation to minimize the number of steps and ramps needed for the owners to enjoy their home and patio areas.
Despite the owner’s desire to keep as many trees as possible on site, and despite the smaller ground floor footprint and the advantage of the vehicle turntable, the need for a 20x20-foot garage and 20x20/25-foot guest parking space on our panhandle lot requires the removal of two heritage trees in the required driveway, a 16” coast redwood, and a 17” coast redwood. An alternate design, such as swapping the garage and guest parking locations north-to-south, still requires the removal of these two trees for vehicle maneuvering but has the added disadvantage of cutting off the home’s sightlines to the behemoth 43” oak tree just outside the currently proposed front patio space and living room. Jim Redman of Elements Landscape is proposing 13 new trees be planted on site to replace the lost value of these two heritage coast redwood trees.
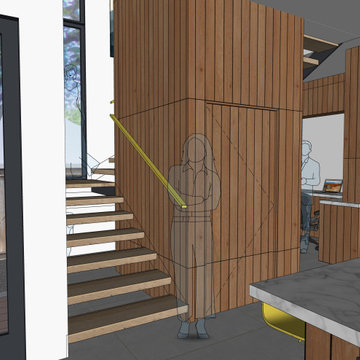
This contemporary architectural design features clean lines, and an abundance of full-height windows and large skylights to best take in the immense trees on site. To blend in with the forest-like setting, the home boasts a mix of rich textures and features a color palette of natural wood tones contrasted with dark blue and black. Once through the new steel gate at the street and down the 150-foot tree-lined driveway, a large covered front patio becomes visible past the neighbor’s detached accessory structure. The covered patio is just across the driveway from the beautiful 43” behemoth coast live oak. The single plane of the covered patio roof is delicately supported by a pair of steel posts in a “V-twin” configuration much like the largest redwood trees that tower over the center of the lot and will still be visible above the new two-story home, even from the front yard. The patio is covered in a dark-colored standing seam roof, with steel C-channel fascias, and tongue-and-groove wood ceiling planks on the underside. Generously sized skylights on the patio roof and inside the living area allow for impressive views of the amazing oak canopy as well as precious natural light.
Supporting the sloped covered patio on the other side is the two-car garage with a secondary bedroom suite stacked above the garage. This two-story volume is to be clad in vertical clear-coated redwood siding, to tie in with the grove of three 43-inch redwood trees just beyond. The garage door, and the bank of windows for Bedroom#2 above feature a steel fascia eyebrow header feature to provide shade and overhang protection, as we are not proposing a large overhang at this “redwood trunk”. The garage and bedroom volume are pulled 16 feet away from the side property line, instead of the minimum required setback of 6’-6”, thus leaving plenty of room for the redwood grove and existing mature pear tree to continue to thrive. This existing mature green screen in this 16-foot-wide side yard is a feature worth soaking in, which is why tall windows with low sill heights are proposed for both the stairs and the upstairs hallway. Though it may be infrequent to approve side-facing 2nd floor windows with sill heights as low as what we’re proposing, we are confident that the mature green screen and the over 16-foot-wide side yard are sufficient to provide for the continued privacy of our neighbor’s rear yard space, especially considering theses windows are in walkway zones.
The covered patio at the front entry is also bound by the 10-foot-tall living room. The great room is clad in a dark blue brick veneer, which wraps around all three sides of the living room. Upon entering the home from the covered patio, you are immediately greeted with one of the most impressive features of the home’s design: a 10-foot-tall by 24-foot-wide set of sliding glass doors. From the entry, this huge opening gives merely an initial glimpse of the massive trunks of the gargantuan V-twin redwoods sitting at the center of the lot. All three sliding glass panels open directly out into the smaller partially covered deck in the rear. This roof overhang element matches the design of the front patio with a steel C-channel fascia and a large skylight. But the rear deck’s roof element is set flat at a ten-foot ceiling height so that the living room’s ceiling seems to float above and out beyond the expanse of full-height sliding doors, thus creating an indoor-outdoor living space that will feel much larger than the home’s actual footprint. This rear covered deck is smaller than the patio in the front and also has a mix of solid and open-slatted roofing to allow for more solar access for the relatively small amount of open sky available.
The downstairs living room is open to the dining and kitchen areas, as well as the stair-and-elevator tower beyond. The stair tower is very open and glassy, and the stairs wind up and around the redwood-clad elevator tower. From certain perspectives in the 16-foot-wide side yard, it will almost seem as if the grove of three redwoods has a fourth tree that the house and the stairs were carefully built around. Other than the 3-foot-wide windows, the exterior walls of the stair tower, downstairs utility spaces, and Bedroom#3 above are finished in cement plaster, painted dark blue and black. The sloped roof over the stair-and-elevator tower continues cleanly over the area of upstairs Bedroom#3. This roof level is set by the side daylight plane and only yields an inside wall height of just under 6 feet in height. The owners are satisfied that the rest of this upstairs room has a nice vaulted ceiling to make up for the one short wall under the daylight plane.
The rest of the ground floor adjacent to the stair tower consists of a small utility wing containing a half-bath, laundry, storage area, and an exterior alcove for the electric heat pump HVAC unit. This short wing also gives more accessible access to the rear yard deck, as well as a backdrop for an outdoor kitchen. The bright white stone backsplash for the outdoor kitchen provides contrast to the otherwise consistent use of cement plaster painted dark blue and black for the two-story wing closest to the detached ADU. Though Bedroom#3 is stacked directly above this small wing, it is relatively short to comply with the side daylight plane of this narrow lot. Still, to further help break up the scale of this wall, another steel fascia eyebrow element is set about 8 feet above the rear deck.
The master suite sits centered above the ten-foot-tall great room. The master bedroom and its balcony, as well as the master bathtub area, have a commanding view of the central redwood trees and their impressive canopy, though the balcony is mostly recessed and should pose no privacy concerns to the neighbor’s rear yards. The master balcony parapet is clad in the same brick veneer continuing up from the living room below. A dark-painted metal rail makes up the rest of the open guardrail height. The entire length of the master balcony is comprised of 9-foot-tall sliding glass doors, but the area above the doors, as well as the area below the master bathroom windows, is accented with more redwood siding. The remainder of the master suite bathroom and walk-in closet is finished in cement plaster painted dark blue. The master bathroom has one side yard-facing window but will be frosted glass for both the owner’s and the neighbor’s privacy.
The 2nd floor is capped under a simple gable roof design with one roof ridge and varying eave and rake overhangs depending on the 2nd-floor layout and solar orientation. Since these roof planes are quite difficult to see in the middle of the heavily wooded panhandle lot, we are proposing a white TPO roofing for these two upper roof planes as a more sustainable choice compared to more dark-colored roofing like the covered patios and detached ADU.
The owners also wish to build a detached 292-square-foot Accessory Dwelling Unit (ADU) as an office and guest suite. For the ADU foundation to be situated outside the central redwood tree’s critical root zone, this relatively tiny structure takes advantage of the narrower 4-foot side and rear setbacks allowed for ADUs smaller than 800 square feet. The small L-shaped detached ADU frames a wonderful quasi-courtyard around the gargantuan V-twin redwoods at the center of the lot. The ADU shares a matching material palette consisting of cement plaster painted blue and black, vertical redwood siding and soffits, and thin brick veneer. The ADU also features large full-height windows. The only difference between the main home and the ADU material palette is that the roofing will be a dark composition shingle roofing since it will be quite visible from the master balcony.
 Atlanta Porch & Patio
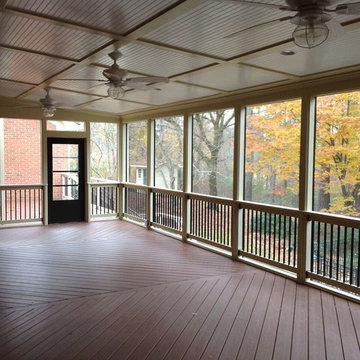
At Atlanta Porch & Patio we are dedicated to building beautiful custom porches, decks, and outdoor living spaces throughout the metro Atlanta area. Our mission is to turn our clients’ ideas, dreams, and visions into personalized, tangible outcomes. Clients of Atlanta Porch & Patio rest easy knowing each step of their project is performed to the highest standards of honesty, integrity, and dependability. Our team of builders and craftsmen are licensed, insured, and always up to date on trends, products, designs, and building codes. We are constantly educating ourselves in order to provide our clients the best services at the best prices.
We deliver the ultimate professional experience with every step of our projects. After setting up a consultation through our website or by calling the office, we will meet with you in your home to discuss all of your ideas and concerns. After our initial meeting and site consultation, we will compile a detailed design plan and quote complete with renderings and a full listing of the materials to be used. Upon your approval, we will then draw up the necessary paperwork and decide on a project start date. From demo to cleanup, we strive to deliver your ultimate relaxation destination on time and on budget.
 Talon Construction Inc.
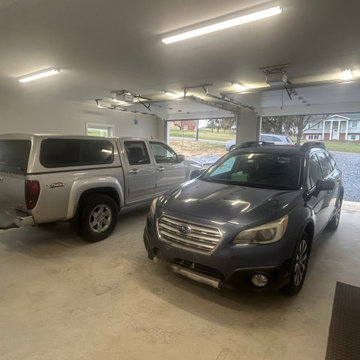
Looking to build a garage addition in the Frederick area?
Talon Construction is here to help! We are thrilled to showcase our recently completed garage addition and remodel in Middletown, MD.
At Talon Construction, we specialize in seamless design-build projects that look like they’ve always been part of your home. Whether you need extra space for vehicles, a new workshop, or a dedicated hobby area, our team manages the entire process—from initial permits to the final coat of paint.
Why choose Talon Construction for your addition?
• Design-Build Experts: We handle both the design and the build, ensuring your vision is executed perfectly while staying on budget.
• Award-Winning Quality: Voted Frederick’s Best for 13 consecutive years!
• Professionalism: We treat your home like our own, maintaining a clean and respectful job site every single day.
• Local Experience: With over 25 years serving Frederick and Montgomery Counties, we know the local styles and building codes inside and out.
Ready to start your own home transformation? Visit our website to see more of our Home Addition Portfolio or give us a call to discuss your project!
 MHM LIVING
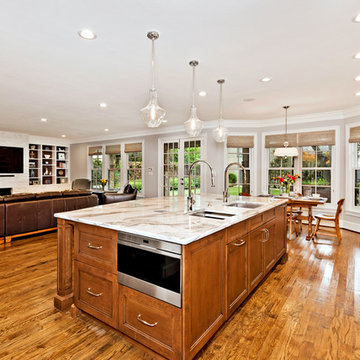
Our client came as a referral. They had seen a kitchen project we had completed where we opened up the kitchen to the living room. They were inspired to do the same in their kitchen. While they initially came to us looking to simply remove a wall to open up the space, in conversation it was clear we could help them really make the space function better for their family and entertaining. Ultimately they wanted to have an open bright space that was family friendly, great for entertaining and satisfied their love of cooking.
By far, the greatest challenge we faced with this project was removing the load bearing wall that started the conversation to begin with. This wall was supporting 2 stories and housed the majority of electricity and plumbing for the kitchen and bathrooms above.
Some of the key features are:
An island enlarged to the maximum size that the beautiful Calacatta Retro slab allowed. The island houses a Galley 5-foot prep station sink with two faucets, dishwasher, two beverage coolers, drawer microwave, trash disposal, and a charging station for all of the family’s digital devices, are all conveniently located in the island.
A vibrant tile from Porcelanosa is installed as the backsplash.
The butler pantry was transformed into a coffee and wine bar.
Installed Mocket pop-up outlets on the island that close flush to the island when not in use, but are easily accessible.
Sonos speakers discreetly concealed in the ceiling for music throughout the space.
The kitchen with dark colors and heavy gothic like style trim is gone, and a light, bright, kitchen with clean lines and an abundance of features has taken its place. The client is beyond delighted with the transformation of their kitchen and now combined living room space.
 Klopf Architecture
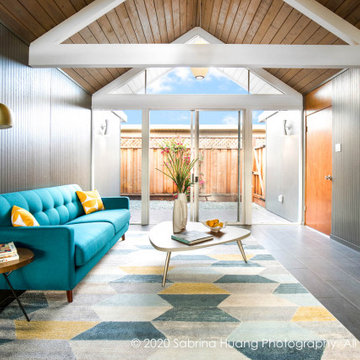
Joseph Eichler developed his moderately priced houses for the mass-market starting in 1949. His homes were designed using affordable materials and simple construction techniques. Nearly 70 years later these homes are in need of updating and remodeling an Eichler home today can become an imposing and costly project if you’re not careful. For this project the clients, who had undergone several previous house renovations, were determined to stick with an established budget from the beginning. Klopf Architecture helped them modernize their Eichler with a premium appearance on a reasonable budget.
The clients challenged the Klopf team to create a design that had a high-end feel and nicely done while adhering to their budget. That meant not all of the initial project scope could be built. Like many other Eichler homes, the original floor plan did not meet the family’s needs leaving them feeling disconnected from one room to another. While an early goal was to expand the house into a carport and create a larger garage, it did not survive the contractor pricing phase of the project.
The goals that did survive through to the end of the project included blurring some of the boundaries and opening up some of the spaces, making them more functional and creating a smoother flow in the house. The Klopf team joined the former separate kitchen and formal living room into one large space and shift the dining room where it is now connected to the kitchen. Klopf swapped the family room to the front alongside the living room, so the spaces feel more cohesive and are now better suited for family activities. The functional layout of the master bathroom was changed to include a large, curbless shower.
Installing a complete IKEA kitchen including cabinets, countertops, appliances, light fixtures, and furnishings was key to staying within budget. Bath fixtures in this house are also exclusively IKEA. Klopf Architecture has designed many homes using IKEA products, which are quite compatible offering an affordable, contemporary take on Eichler homes. The clients saved additional money from the simplicity and availability of IKEA products and by orchestrating the orders and purchases themselves. Following each construction meeting, the clients would make a run to IKEA and purchase items, pick up needed spare parts, and bring them back right away to stay ahead of the contractor’s schedule and minimize the chance of delays and bottlenecks.
Klopf balanced material selections by retaining some of the original woodwork and simply refinishing the mahogany paneling. They were able to retain the original windows and sliding doors which were still in good shape, avoiding some of the most costly replacement expenses. Additionally interior doors were simply refinished and the exterior siding cleaned up and repainted. Formerly dark interiors are now illuminated with new slimmer semi-recessed lighting eliminating the need for costly roof work.
Attention to design details allowed the Klopf team to ensure the house ended up with a high quality feel. Key visual elements were strictly aligned and Klopf worked with the clients to select a unified materials palette throughout the spaces so the house flows seamlessly together. Aligning the tile layout with the trusses and keeping it level with the concrete slab outside allowed them to achieve a level of quality that may otherwise be missed.
The clients were able to keep their budget on track by determining clear goals and making critical decisions upfront, choosing materials and furnishings wisely, working with the right design and construction teams in place and to a large part, their willingness to participate throughout the process. In the end the clients were much happier with their reconfigured Eichler home and Klopf Architecture managed to keep their remodeling costs to about $325/sf – a good amount below the average Bay Area Eichler remodel.
Project Team: John Klopf, Angela Todorova, Sherry Tan
Contractor: Keycon Construction
Structural Engineer: Sezen & Moon
Photography: Sabrina Huang
Year Completed: 2020
 Anss Inface Interiors
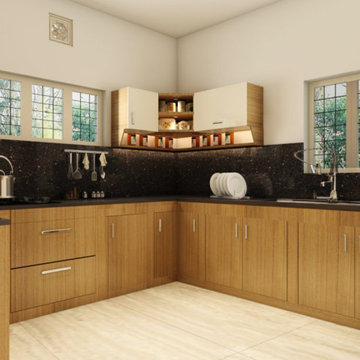
What makes us the best turnkey interior solution provider?
ANSS Inface is a full service design firm assisting the clients with the whole venture, starting from the initial sketch up till the final outcome while maintaining the quality and adhere to the deadlines of the project.
Whether it’s a table we’re setting, a home we are designing or a workspace we are styling, we approach it all with an urbane eye that captures the unique mix of tradition and modern architecture. Our architects have the unique capacity to align our processes as per the client’s requirements and also offer them with customized packages according to their budgetary needs.
 Gappsi
Mesh covers are the most common way to safeguard your pool during the winter. A winter cover has to be strong and made of good quality material. There are many manufactures of pool liners and mesh safety covers, and mesh covers can be ordered according to the initial pool liner measurements.
Gappsi can supply and install a mesh pool cover, we are authorized dealers and installers for every brand, from Loop-Loc, Merlin, Lathem, Vynall and many other others.
Manufactures make many grades of covers, the better the grade the more expensive to cover is. Tight thin mesh and strong fibers used to manufacture the covers will give your pool cover the quality to last for many years.
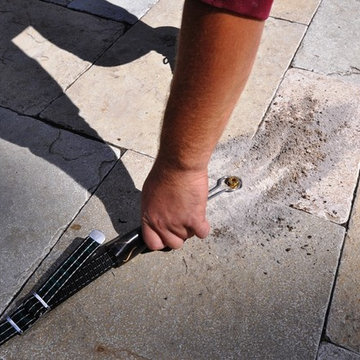
Swimming pool winter covers installed by Gappsi will give you all the protection, security, and safety you need for your family, pets, and neighbors. Winter pool covers are manufactured to let the water from the rain drain through. Also, it allows you to put your pump in the middle of the cover and allow the extra water in the pool to come through and get pumped out. Winter covers are manufactured in all mesh or solid rubber with a 24x24 mesh hole in the center to let water drain into the pool. Anchors are installed in the patio about 36 inches away from the swimming pool. The way they are installed is by drilling a hole in the patio, brass anchors are slid through, and the cover is then attached to the anchors. If the patio is not installed correctly, the cover may become loose and it will not be as safe as it should be.
The Gappsi way of installation starts with the proper installation of the patio. Four foot wide slabs with reinforced rebar are always installed around the swimming pool to prevent settling of the patio, then the finished paving material is installed over the concrete base. The Gappsi installation of the safety pool cover is then installed over the patio by drilling holes straight through the finished paving material all the way down into the concrete base. A sleeve is installed into the hole about 6 inches into the patio going through the 4 inches of concrete base and further in the ground, and a brass screw pin is then installed into the pipe. By unscrewing the brass screw pin; it comes up above the patio and allows for the cover ring hooks to attach to the brass screw. After this is all done for every strap of the cover, your Gappsi installed pool cover is safe to walk on with no chance of breaking.
 Red House Remodeling
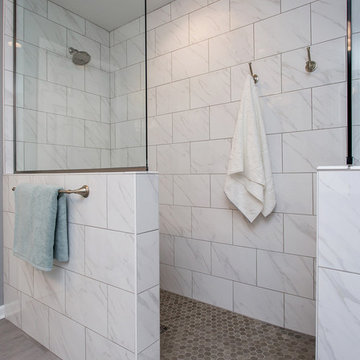
Initially this master bath was home to a small standard size shower and linen closet that left too little vanity space on one side of the room, and awkward open space on the other. Our professional design team started with a clean slate to maximize the floor plan and give these homeowners not only an updated master bath, but a master bath that better fit the space and their functional needs. Now the homeowners have plenty of vanity space along with a lavish shower and soaking tub for relaxation.
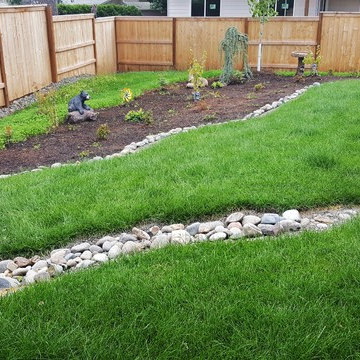
 Rain Garden Nursery LandscapeMakeoverDesignStaging
Scott & Catherine Buley, HTT&T, High Tech Turf & Trees, LandscapeMakeover.biz, Rain Garden Nursery
Inspiration for an eclectic landscaping in Portland.
Inspiration for an eclectic landscaping in Portland.
 Anna O Design
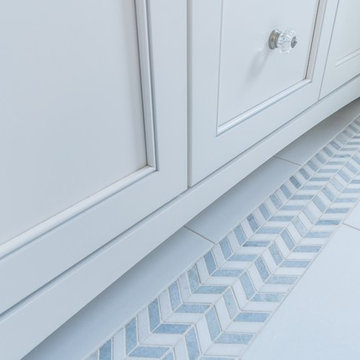
The homeowners of this Marblehead residence wished to remodel their master bathroom, which had been redone only a few years prior. The previous renovation, however, was not a pleasant experience and they were hesitant to dive-in again. After an initial conversation, the homeowners agreed to meet with me to discuss the project.
listened to their vision for the room, paid close attention to their concerns, and desire to create a tranquil environment, that would be functional and practical for their everyday lifestyle.
In my first walk-through of the existing bathroom, several major issues became apparent. First, the vanity, a wooden table with two vessel sinks, did not allow access to the medicine cabinets due to its depth. Second, an oversized window installed in the shower did not provide privacy and had visible signs of rot. Third, the wallpaper by the shower was peeling and contained mold due to moisture. Finally, the hardwood flooring selected was impractical for a master bathroom.
My suggestion was to incorporate timeless and classic materials that would provide longevity and create an elegant environment. I designed a standard depth custom vanity which contained plenty of storage. We chose lovely white and blue quartzite counter tops, white porcelain tile that mimic the look of Thasos marble, along with blue accents, polished chrome fixtures and coastal inspired lighting. Next, we replaced, relocated, and changed the window style and shape. We then fabricated a window frame out of the quartzite for protection which proved to give the shower a lovely focal point. Lastly, to keep with the coastal theme of the room, we installed shiplap for the walls.
The homeowners now look forward to starting and ending their day in their bright and relaxing master bath. It has become a sanctuary to escape the hustle and bustle of everyday life.
 ASR DESIGN STUDIO
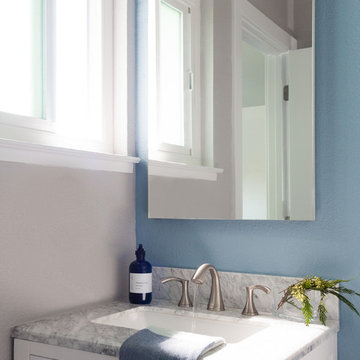
Our clients wanted to make the most of space so we gutted the home and rebuilt the inside to create a functional and kid-friendly home with timeless style.
Our clients’ vision was clear: They wanted a warm and timeless design that was easy to clean and maintain with two-active boys.
“It’s not unusual for our friends and family to drop past unannounced any day of the week. And we love it!” They told us during our initial Design Therapy Sesh.
We knew immediately what she meant - we have an open-door policy with our families, too! Which was why we consciously created living spaces that were open, inviting and welcoming.
Now, the only problem our clients would have would be convincing their guests to leave!
Our clients also enjoy coffee and tea so we created a separate coffee nook to help them kick start their day.
Photography: Helynn Ospina
 Home Dr Pros LLC
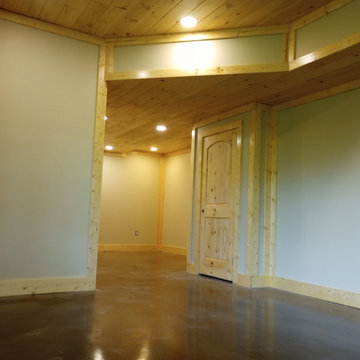
We're excited to showcase our latest work in home remodeling and renovation! Our team collaborates closely with homeowners to create stunning new room additions, enhancing both space and functionality. Our kitchen remodeling services transform outdated spaces into modern, efficient, and stylish areas that become the heart of the home. Bathroom remodeling is another specialty, where we focus on integrating high-end fixtures, stylish vanities, and spacious walk-in showers. From the initial consultation to the final touches, our collaborative approach ensures every detail aligns with the homeowner's vision. Our general contractor services also include various upgrades, such as new flooring, updated lighting, and improved insulation. We take pride in making homes more beautiful and comfortable. Contact us to start your home improvement journey today!
Home Dr Pros LLC is a general contractor providing room additions, kitchen remodeling, and bathroom conversions in Knoxville, Maryville, Farragut, and the greater Knoxville area.
27