
Search results for "Inspect" in Home Design Ideas


 Central Roofing Inc.
Another great client with a great roof system. We’re really proud of this project, it presented many challenges. The customer was in a time crunch to get the work done. We where able to get the permits, inspections, and do the job in a 2 week window. The project came out great. Our team is awesome.
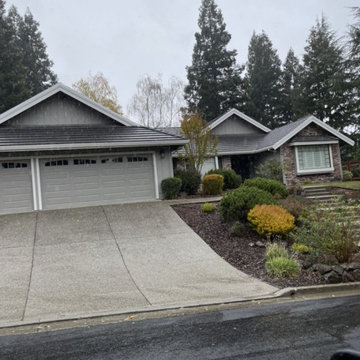 Central Roofing Inc.
Another great client with a great roof system. We’re really proud of this project, it presented many challenges. The customer was in a time crunch to get the work done. We where able to get the permits, inspections, and do the job in a 2 week window. The project came out great. Our team is awesome.
Find the right local pro for your project
 Novo Kitchen and Bath
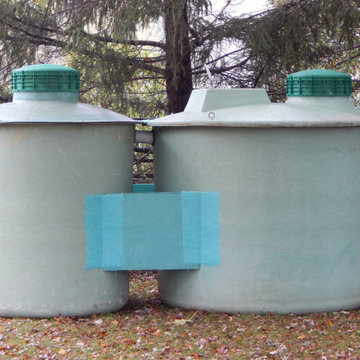
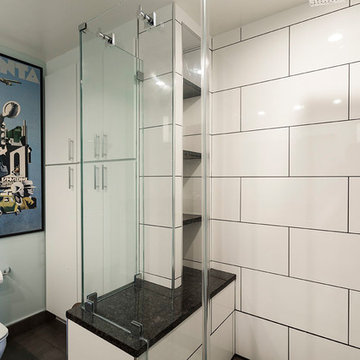
Example of a mid-sized minimalist master white tile and porcelain tile ceramic tile and gray floor alcove shower design in DC Metro with flat-panel cabinets, white cabinets, a one-piece toilet, green walls, an undermount sink and granite countertops

 SUPERIOR CHIMNEY SERVICES CORPORATION
Preparing for the Thanksgiving holiday is turning out to be a bit different. Gone this year is the uncle who throws crumbs of food and bits of trash in the fireplace. Or the kids that like to poke the fireplace logs sending sparks in every direction.
This year, we get to create our own scene. Once you and your family have finished the delicious meal, now it’s time to make the rounds of Internet calls. Whether you use Zoom, Facebook, Skype or any other system, one thing is for sure…you need a warm, inviting, good-looking background.
The fireplace is the perfect go-to background, especially when you can see and hear the crackling of the fire. Put a little extra time in decorating around the fireplace, and of course, include the cookies and pumpkin pie. To ensure chaos isn’t erupting behind you, make sure your fireplace and chimney is ready to go.
Begin with a Chimney & Fireplace Inspection
By getting a chimney inspection you’ll help to ensure smoke goes up and out of the house, debris is not blocking it and any animals are safely living outside of your chimney. You certainly don’t want your online guests to think you smoked the turkey in the fireplace.
Chimney backup or a Smokey fireplace is usually caused by an insufficient draft in the flue. However, there are lots of other reasons for smoke backup including the partially open dampers, too small of a flue or a dirty chimney. This is one situation that’s best left to a certified technician to identify and repair.
Debris knows how to make its way into the chimney. Leaves, twigs, paper, plastic, and anything else flying around on windy days, has this special radar, and when it finds a chimney, it’ll try to make its way in. If the chimney doesn’t have a chimney cap, or if it was blown off or shifted from the high winds, debris found a new home!
Animals are wonderful to watch outside. We’ve watched a couple of the squirrels in our yard go from a lean body to a very plump size, all in preparation for winter. What comes next is a cozy place to sleep. The chimney is a perfect. It’s warm and protects the animals from the outdoor elements. If there isn’t a chimney cap or if the cap is loose or moved in a way to squeeze in…perfect!
What is a 14 Point Inspection?
A 14 point chimney inspection for your fireplace tells us a story about the events that occurred over the past year’s freeze and thaw cycle. It reveals to us any wear and tear, the frequency of use and the age of the chimney. This is great information to have in order to stay on top of any necessary chimney repairs and know the current conditions of worthiness for use.
Since the chimney is high on the roof, we take pictures of your chimney to show you the current condition. If any repairs are needed, you can see it for yourself.
You have a little time before the ‘live’ internet chat on Thanksgiving Day. As part of your preparations, get your chimney swept and inspected today. Call 877-244-6349.

 Talon Construction Inc.
Designing and building a kitchen addition is a complex process that involves multiple steps and considerations. Here is a general outline to help you get started on your kitchen addition project:
Define Your Goals and Budget:
• Determine the purpose of the kitchen addition. Is it for more cooking space, a dining area, or a combination of both?
• Establish a realistic budget for your project. Consider all costs, including construction, permits, materials, and furnishings.
Hire a Design Professional:
• Seek the services of a design build company who specializes in kitchen additions.
• Discuss your vision, needs, and budget with the design professional to create a design concept.
Site Evaluation:
• Assess the existing space and structural condition of your home to ensure it can support the addition.
• Consider factors like zoning regulations, setbacks, and building codes.
Design Development:
• Collaborate with your design professional to refine the concept, including the layout, size, and architectural style.
• Choose materials, finishes, and fixtures that fit your design and budget.
Obtain Permits:
• Consult with your local design build contractor to determine the necessary permits and approvals.
• Prepare and submit all required documents, including architectural drawings and engineering plans.
Create Construction Documents:
• Work with your design build professional to develop detailed construction drawings and specifications.
• These documents will serve as a guide for contractors during construction.
Hire a design build contractor:
• Check references, credentials, and licenses before selecting a contractor.
• Sign a detailed contract that outlines the scope of work, timeline, and payment schedule.
Construction Phase:
• Demolition: If needed, remove any existing structures or walls.
• Foundation: Construct the foundation for the addition.
• Framing: Build the structural framework of the addition.
• Plumbing, Electrical, and HVAC: Install or update utilities as required.
• Insulation: Ensure proper insulation for energy efficiency.
• Drywall and Finish Work: Complete the walls and ceilings.
• Flooring and Cabinetry: Install flooring and kitchen cabinets.
• Appliances and Fixtures: Add appliances, plumbing fixtures, and lighting.
• Paint and Finish: Apply paint and finishes to achieve the desired look.
• Final Inspection: Schedule inspections to ensure compliance with building codes.
Final Inspections and Approvals:
• Arrange for final inspections to ensure the addition meets all safety and code requirements.
• Obtain any necessary certificates of occupancy or compliance.
Move In and Enjoy:
• Once all inspections and approvals are received, you can move into your new kitchen addition and start enjoying it.
Remember that every kitchen addition project is unique, so adapt this outline to your specific needs and circumstances. Consulting with professionals and obtaining the required permits and inspections is crucial to a successful and safe project.
 Talon Construction Inc.
Designing and building a kitchen addition is a complex process that involves multiple steps and considerations. Here is a general outline to help you get started on your kitchen addition project:
Define Your Goals and Budget:
• Determine the purpose of the kitchen addition. Is it for more cooking space, a dining area, or a combination of both?
• Establish a realistic budget for your project. Consider all costs, including construction, permits, materials, and furnishings.
Hire a Design Professional:
• Seek the services of a design build company who specializes in kitchen additions.
• Discuss your vision, needs, and budget with the design professional to create a design concept.
Site Evaluation:
• Assess the existing space and structural condition of your home to ensure it can support the addition.
• Consider factors like zoning regulations, setbacks, and building codes.
Design Development:
• Collaborate with your design professional to refine the concept, including the layout, size, and architectural style.
• Choose materials, finishes, and fixtures that fit your design and budget.
Obtain Permits:
• Consult with your local design build contractor to determine the necessary permits and approvals.
• Prepare and submit all required documents, including architectural drawings and engineering plans.
Create Construction Documents:
• Work with your design build professional to develop detailed construction drawings and specifications.
• These documents will serve as a guide for contractors during construction.
Hire a design build contractor:
• Check references, credentials, and licenses before selecting a contractor.
• Sign a detailed contract that outlines the scope of work, timeline, and payment schedule.
Construction Phase:
• Demolition: If needed, remove any existing structures or walls.
• Foundation: Construct the foundation for the addition.
• Framing: Build the structural framework of the addition.
• Plumbing, Electrical, and HVAC: Install or update utilities as required.
• Insulation: Ensure proper insulation for energy efficiency.
• Drywall and Finish Work: Complete the walls and ceilings.
• Flooring and Cabinetry: Install flooring and kitchen cabinets.
• Appliances and Fixtures: Add appliances, plumbing fixtures, and lighting.
• Paint and Finish: Apply paint and finishes to achieve the desired look.
• Final Inspection: Schedule inspections to ensure compliance with building codes.
Final Inspections and Approvals:
• Arrange for final inspections to ensure the addition meets all safety and code requirements.
• Obtain any necessary certificates of occupancy or compliance.
Move In and Enjoy:
• Once all inspections and approvals are received, you can move into your new kitchen addition and start enjoying it.
Remember that every kitchen addition project is unique, so adapt this outline to your specific needs and circumstances. Consulting with professionals and obtaining the required permits and inspections is crucial to a successful and safe project.
 Talon Construction Inc.
Designing and building a kitchen addition is a complex process that involves multiple steps and considerations. Here is a general outline to help you get started on your kitchen addition project:
Define Your Goals and Budget:
• Determine the purpose of the kitchen addition. Is it for more cooking space, a dining area, or a combination of both?
• Establish a realistic budget for your project. Consider all costs, including construction, permits, materials, and furnishings.
Hire a Design Professional:
• Seek the services of a design build company who specializes in kitchen additions.
• Discuss your vision, needs, and budget with the design professional to create a design concept.
Site Evaluation:
• Assess the existing space and structural condition of your home to ensure it can support the addition.
• Consider factors like zoning regulations, setbacks, and building codes.
Design Development:
• Collaborate with your design professional to refine the concept, including the layout, size, and architectural style.
• Choose materials, finishes, and fixtures that fit your design and budget.
Obtain Permits:
• Consult with your local design build contractor to determine the necessary permits and approvals.
• Prepare and submit all required documents, including architectural drawings and engineering plans.
Create Construction Documents:
• Work with your design build professional to develop detailed construction drawings and specifications.
• These documents will serve as a guide for contractors during construction.
Hire a design build contractor:
• Check references, credentials, and licenses before selecting a contractor.
• Sign a detailed contract that outlines the scope of work, timeline, and payment schedule.
Construction Phase:
• Demolition: If needed, remove any existing structures or walls.
• Foundation: Construct the foundation for the addition.
• Framing: Build the structural framework of the addition.
• Plumbing, Electrical, and HVAC: Install or update utilities as required.
• Insulation: Ensure proper insulation for energy efficiency.
• Drywall and Finish Work: Complete the walls and ceilings.
• Flooring and Cabinetry: Install flooring and kitchen cabinets.
• Appliances and Fixtures: Add appliances, plumbing fixtures, and lighting.
• Paint and Finish: Apply paint and finishes to achieve the desired look.
• Final Inspection: Schedule inspections to ensure compliance with building codes.
Final Inspections and Approvals:
• Arrange for final inspections to ensure the addition meets all safety and code requirements.
• Obtain any necessary certificates of occupancy or compliance.
Move In and Enjoy:
• Once all inspections and approvals are received, you can move into your new kitchen addition and start enjoying it.
Remember that every kitchen addition project is unique, so adapt this outline to your specific needs and circumstances. Consulting with professionals and obtaining the required permits and inspections is crucial to a successful and safe project.
 Talon Construction Inc.
Designing and building a kitchen addition is a complex process that involves multiple steps and considerations. Here is a general outline to help you get started on your kitchen addition project:
Define Your Goals and Budget:
• Determine the purpose of the kitchen addition. Is it for more cooking space, a dining area, or a combination of both?
• Establish a realistic budget for your project. Consider all costs, including construction, permits, materials, and furnishings.
Hire a Design Professional:
• Seek the services of a design build company who specializes in kitchen additions.
• Discuss your vision, needs, and budget with the design professional to create a design concept.
Site Evaluation:
• Assess the existing space and structural condition of your home to ensure it can support the addition.
• Consider factors like zoning regulations, setbacks, and building codes.
Design Development:
• Collaborate with your design professional to refine the concept, including the layout, size, and architectural style.
• Choose materials, finishes, and fixtures that fit your design and budget.
Obtain Permits:
• Consult with your local design build contractor to determine the necessary permits and approvals.
• Prepare and submit all required documents, including architectural drawings and engineering plans.
Create Construction Documents:
• Work with your design build professional to develop detailed construction drawings and specifications.
• These documents will serve as a guide for contractors during construction.
Hire a design build contractor:
• Check references, credentials, and licenses before selecting a contractor.
• Sign a detailed contract that outlines the scope of work, timeline, and payment schedule.
Construction Phase:
• Demolition: If needed, remove any existing structures or walls.
• Foundation: Construct the foundation for the addition.
• Framing: Build the structural framework of the addition.
• Plumbing, Electrical, and HVAC: Install or update utilities as required.
• Insulation: Ensure proper insulation for energy efficiency.
• Drywall and Finish Work: Complete the walls and ceilings.
• Flooring and Cabinetry: Install flooring and kitchen cabinets.
• Appliances and Fixtures: Add appliances, plumbing fixtures, and lighting.
• Paint and Finish: Apply paint and finishes to achieve the desired look.
• Final Inspection: Schedule inspections to ensure compliance with building codes.
Final Inspections and Approvals:
• Arrange for final inspections to ensure the addition meets all safety and code requirements.
• Obtain any necessary certificates of occupancy or compliance.
Move In and Enjoy:
• Once all inspections and approvals are received, you can move into your new kitchen addition and start enjoying it.
Remember that every kitchen addition project is unique, so adapt this outline to your specific needs and circumstances. Consulting with professionals and obtaining the required permits and inspections is crucial to a successful and safe project.
 Talon Construction Inc.
Designing and building a kitchen addition is a complex process that involves multiple steps and considerations. Here is a general outline to help you get started on your kitchen addition project:
Define Your Goals and Budget:
• Determine the purpose of the kitchen addition. Is it for more cooking space, a dining area, or a combination of both?
• Establish a realistic budget for your project. Consider all costs, including construction, permits, materials, and furnishings.
Hire a Design Professional:
• Seek the services of a design build company who specializes in kitchen additions.
• Discuss your vision, needs, and budget with the design professional to create a design concept.
Site Evaluation:
• Assess the existing space and structural condition of your home to ensure it can support the addition.
• Consider factors like zoning regulations, setbacks, and building codes.
Design Development:
• Collaborate with your design professional to refine the concept, including the layout, size, and architectural style.
• Choose materials, finishes, and fixtures that fit your design and budget.
Obtain Permits:
• Consult with your local design build contractor to determine the necessary permits and approvals.
• Prepare and submit all required documents, including architectural drawings and engineering plans.
Create Construction Documents:
• Work with your design build professional to develop detailed construction drawings and specifications.
• These documents will serve as a guide for contractors during construction.
Hire a design build contractor:
• Check references, credentials, and licenses before selecting a contractor.
• Sign a detailed contract that outlines the scope of work, timeline, and payment schedule.
Construction Phase:
• Demolition: If needed, remove any existing structures or walls.
• Foundation: Construct the foundation for the addition.
• Framing: Build the structural framework of the addition.
• Plumbing, Electrical, and HVAC: Install or update utilities as required.
• Insulation: Ensure proper insulation for energy efficiency.
• Drywall and Finish Work: Complete the walls and ceilings.
• Flooring and Cabinetry: Install flooring and kitchen cabinets.
• Appliances and Fixtures: Add appliances, plumbing fixtures, and lighting.
• Paint and Finish: Apply paint and finishes to achieve the desired look.
• Final Inspection: Schedule inspections to ensure compliance with building codes.
Final Inspections and Approvals:
• Arrange for final inspections to ensure the addition meets all safety and code requirements.
• Obtain any necessary certificates of occupancy or compliance.
Move In and Enjoy:
• Once all inspections and approvals are received, you can move into your new kitchen addition and start enjoying it.
Remember that every kitchen addition project is unique, so adapt this outline to your specific needs and circumstances. Consulting with professionals and obtaining the required permits and inspections is crucial to a successful and safe project.

 TECTA associates
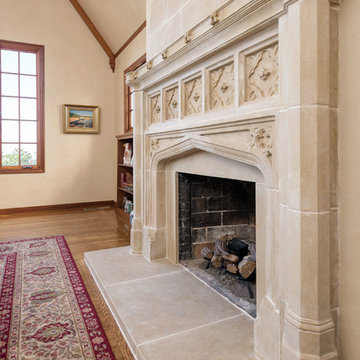
The fireplace was hand inspected and preassembled by Tecta. 49 stone segments and carvings craft this magnificent, custom Tudor stone mantle. Site specific openings, ceiling height and room configurations were incorporated into the design. To make the installation go as smooth as possible the installation was strategically planned out in advance and conformity to the design and quality was supervised by the project architect.
Photography by: Ross Pushinaitis
 Rachel Perls
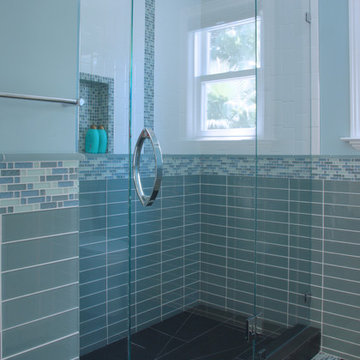
The lucky teenager who uses this bathroom requested blue. On close inspection, the tiles selected for the space were more aqua than blue, so a careful balance with the complimentary paint color had to be made so that aqua was "nudged" in the blue direction.
 Jere Bradwell / J Bradwells Home & Design
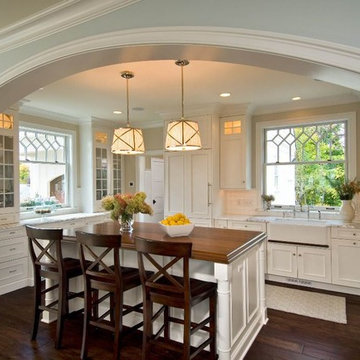
 Farmhouse style updated for a transitional feel
Inspiration for a timeless dark wood floor and brown floor kitchen remodel in Philadelphia with a farmhouse sink, glass-front cabinets, white cabinets, window backsplash, stainless steel appliances and an island
Inspiration for a timeless dark wood floor and brown floor kitchen remodel in Philadelphia with a farmhouse sink, glass-front cabinets, white cabinets, window backsplash, stainless steel appliances and an island

 Seldin Design Studios
Rachel Seldin
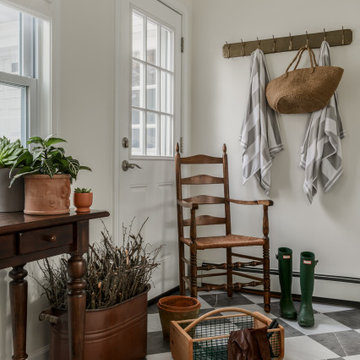
Example of a mid-sized eclectic medium tone wood floor entry hall design in San Francisco with white walls
Example of a mid-sized eclectic medium tone wood floor entry hall design in San Francisco with white walls
 HCS Exterior
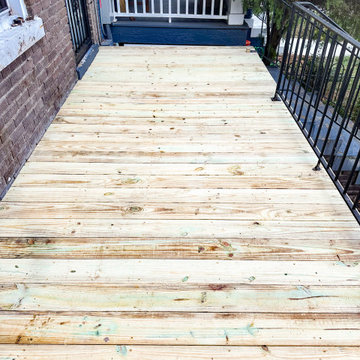
The project involved replacing 100 sq ft of 1st story porch decking with new PT wood boards (2''x6''), inspecting joists, and reattaching metal railing. Used #9 x 3'' wood screws for 1 1/2''x5 1/2''x14' boards.

 HCS Exterior
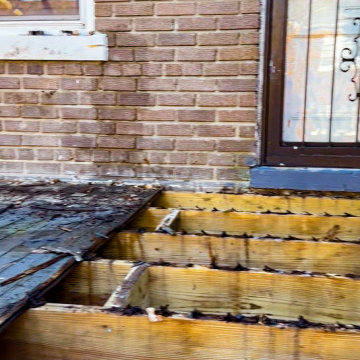
The project involved replacing 100 sq ft of 1st story porch decking with new PT wood boards (2''x6''), inspecting joists, and reattaching metal railing. Used #9 x 3'' wood screws for 1 1/2''x5 1/2''x14' boards.
 Southern Supply
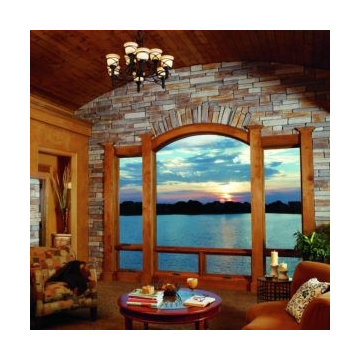
Experts say there are some dead indictors that will signal if a window will need to be repaired. Drafts of air should be a red flag that a window will need maintenance. If a window is difficult to open then it’s officially fallen into disrepair. Setting time aside each year to inspect your windows for proper maintenance will help keep your home in good condition.
44