
Search results for "Involving multiple" in Home Design Ideas
 Howell Custom Building Group
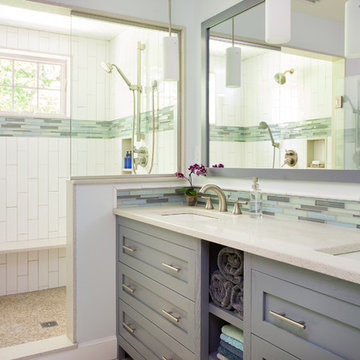
This project consisted of remodeling an existing master bath and closet. The owners asked for a
functional and brighter space that would more easily accommodate two people simultaneously getting ready for work. The original bath had multiple doors that opened into each other, a small dark shower, and little natural light. The solution was to add a new shed dormer to expand the room’s footprint. This proved to be an interesting structural problem, as the owners did not want to involve any of the first floor spaces in the project. So, the new shed was hung off of the existing rafters (in a sense this bath is hanging from the rafters.)
The expanded space allowed for a generous window in the shower, with a high window sill height to provide privacy from the back yard. The Strasser vanities were a great value and had the desired finish. The mirror frame and center shelves were painted to match the cabinet finish. The shower can easily function for two, allowing for their busy morning schedules. All of the fixtures matched nicely in a brushed nickel finish.
Toto Eco Dartmouth toilet; Fairmont undermount Rectangular sinks; Toto widespread lav faucet; Toto multispray handshower and showerhead
Photography by Emily O'brien
 Vetter Architects
A tea pot, being a vessel, is defined by the space it contains, it is not the tea pot that is important, but the space.
Crispin Sartwell
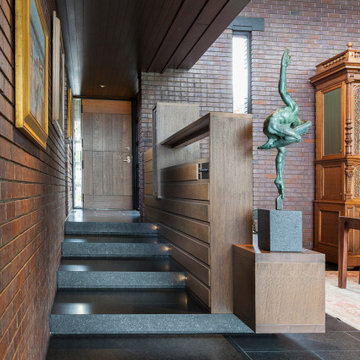
Located on a lake outside of Milwaukee, the Vessel House is the culmination of an intense 5 year collaboration with our client and multiple local craftsmen focused on the creation of a modern analogue to the Usonian Home.
As with most residential work, this home is a direct reflection of it’s owner, a highly educated art collector with a passion for music, fine furniture, and architecture. His interest in authenticity drove the material selections such as masonry, copper, and white oak, as well as the need for traditional methods of construction.
The initial diagram of the house involved a collection of embedded walls that emerge from the site and create spaces between them, which are covered with a series of floating rooves. The windows provide natural light on three sides of the house as a band of clerestories, transforming to a floor to ceiling ribbon of glass on the lakeside.
The Vessel House functions as a gallery for the owner’s art, motorcycles, Tiffany lamps, and vintage musical instruments – offering spaces to exhibit, store, and listen. These gallery nodes overlap with the typical house program of kitchen, dining, living, and bedroom, creating dynamic zones of transition and rooms that serve dual purposes allowing guests to relax in a museum setting.
Through it’s materiality, connection to nature, and open planning, the Vessel House continues many of the Usonian principles Wright advocated for.
Overview
Oconomowoc, WI
Completion Date
August 2015
Services
Architecture, Interior Design, Landscape Architecture
 Vetter Architects
A tea pot, being a vessel, is defined by the space it contains, it is not the tea pot that is important, but the space.
Crispin Sartwell
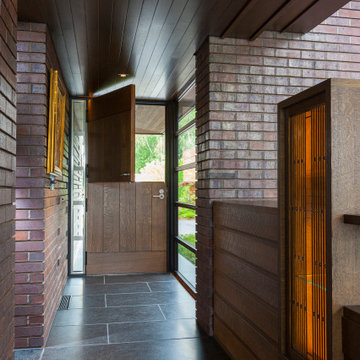
Located on a lake outside of Milwaukee, the Vessel House is the culmination of an intense 5 year collaboration with our client and multiple local craftsmen focused on the creation of a modern analogue to the Usonian Home.
As with most residential work, this home is a direct reflection of it’s owner, a highly educated art collector with a passion for music, fine furniture, and architecture. His interest in authenticity drove the material selections such as masonry, copper, and white oak, as well as the need for traditional methods of construction.
The initial diagram of the house involved a collection of embedded walls that emerge from the site and create spaces between them, which are covered with a series of floating rooves. The windows provide natural light on three sides of the house as a band of clerestories, transforming to a floor to ceiling ribbon of glass on the lakeside.
The Vessel House functions as a gallery for the owner’s art, motorcycles, Tiffany lamps, and vintage musical instruments – offering spaces to exhibit, store, and listen. These gallery nodes overlap with the typical house program of kitchen, dining, living, and bedroom, creating dynamic zones of transition and rooms that serve dual purposes allowing guests to relax in a museum setting.
Through it’s materiality, connection to nature, and open planning, the Vessel House continues many of the Usonian principles Wright advocated for.
Overview
Oconomowoc, WI
Completion Date
August 2015
Services
Architecture, Interior Design, Landscape Architecture
Find the right local pro for your project
 Studio 76 Kitchens and Baths
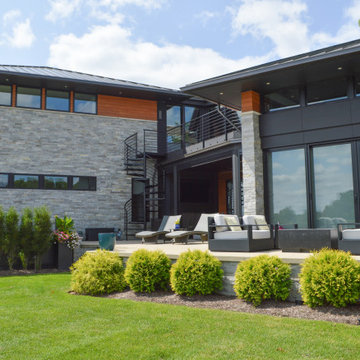
This lovely, contemporary lakeside home underwent a major renovation that also involved a two-story addition. Exterior design includes cedar siding, natural stone cladding, wrought iron entry door, balcony, spiral staircase down to an outdoor kitchen area with fireplace, seating, and hot tub. The windows' design was intentionally strategic with smaller, higher windows for privacy on the right and left sides of the house and a multiplicity of expansive windows facing the lake.
 Cascade West Development
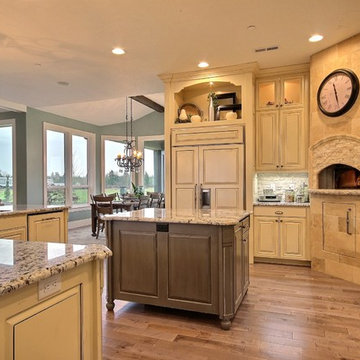
Party Palace - Custom Ranch on Acreage in Ridgefield Washington by Cascade West Development Inc.
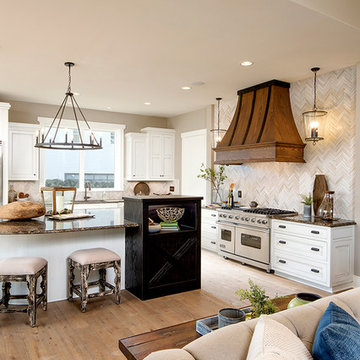
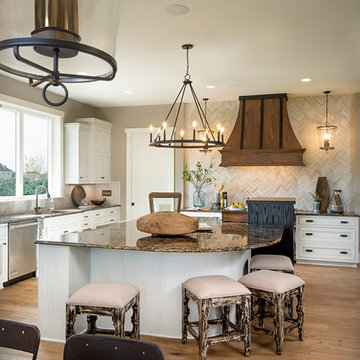
This family is very involved with their church and hosts community events weekly; so the need to access the kitchen, seating areas, dining and entryways with 100+ guests present was imperative. This prompted us and the homeowner to create extra square footage around these amenities. The kitchen also received the double island treatment. Allowing guests to be hosted at one of the larger islands (capable of seating 5-6) while hors d'oeuvres and refreshments can be prepared on the smaller more centrally located island, helped these happy hosts to staff and plan events accordingly. Placement of these rooms relative to each other in the floor plan was also key to keeping all of the excitement happening in one place, making regular events easy to monitor, easy to maintain and relatively easy to clean-up. Some other important features that made this house a party-palace were a hidden butler's pantry, multiple wetbars and prep spaces, sectional seating inside and out, and double dining nooks (formal and informal).
Cascade West Facebook: https://goo.gl/MCD2U1
Cascade West Website: https://goo.gl/XHm7Un
These photos, like many of ours, were taken by the good people of ExposioHDR - Portland, Or
Exposio Facebook: https://goo.gl/SpSvyo
Exposio Website: https://goo.gl/Cbm8Ya
 Stage Coach Services LLC dba "The Stage Coach"
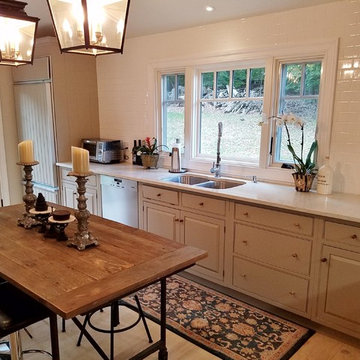
Complete remodel design involving relocation of appliances, entry door and windows. Green remodel using predominantly salvaged materials. Cabinets salvaged from multiple places and SubZero salvaged from yet another source were unified with paint and knobs.
 Jordan Design Build Group
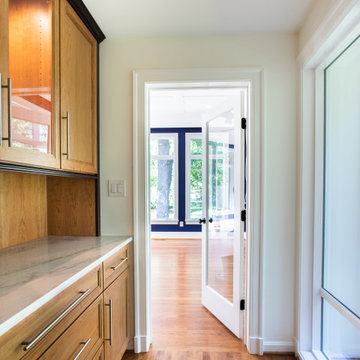
JDBG is wrapping up work on an expansive 2-story sunroom addition that also included modifications to the existing home’s interior and significant exterior improvements as well. The original project brief was to provide a conditioned 4-season sunroom addition where the homeowners could relax and enjoy their wooded views. As we delved deeper into our client’s overall objectives, it became clear that this would be no ordinary sunroom addition. The resulting 16’x25’ sunroom is a showstopper with 10’ high ceilings and wall to wall windows offering expansive views of the surrounding landscape.
As we recommend with most addition projects, the process started with our Preliminary Design Study to determine project goals, design concepts, project feasibility and associated budget estimates. During this process, our design team worked to ensure that both interior and exterior were fully integrated. We conducted in-depth programming to identify key goals and needs which would inform the design and performed a field survey and zoning analysis to identify any constraints that could impact the plans. The next step was to develop conceptual designs that addressed the program requirements.
Using a combination of 3-D massing, interior/exterior renderings, precedent imaging and space planning, the design concept was revised and refined. At the end of the study we had an approved schematic design and comprehensive budget estimates for the 2-story addition and were ready to move into design development, construction documentation, trade coordination, and final pricing. A complex project such as this involves architectural and interior design, structural and civil engineering, landscape design and environmental considerations. Multiple trades and subs are engaged during construction, from HVAC to electrical and plumbing, framers, carpenters and masons, roofers and painters just to name a few. JDBG was there every step of the way to ensure quality construction.
Other notable features of the renovation included expanding the home’s existing dining room, incorporating a custom ‘dish room,’ and providing fully conditioned storage and his & her workrooms on the lower level. A new front portico will visually connect the old and new structures and a brand new roof, shutters and paint will further transform the exterior. Thoughtful planning was also given to the landscape, including a back deck, stone patio and walkways, plantings and exterior lighting. Stay tuned for more photos as this sunroom addition nears completion.

 KCBR Design | Remodel
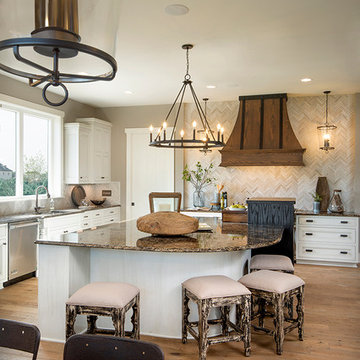
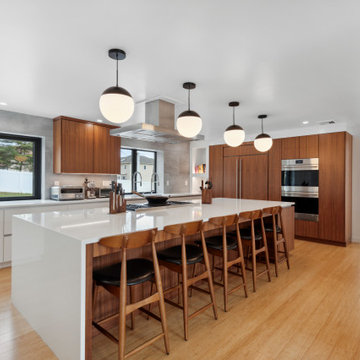
Designed for repeat clients, this Overland Park remodel focused on improving function, flow, and everyday livability across multiple spaces.
In the kitchen, the layout was refined to create a more open and efficient environment. An enlarged island now serves as a central hub for cooking, gathering, and daily use, while ceiling-height cabinetry maximizes storage and creates a clean, built-in aesthetic. New hardwood flooring ties the space together, adding warmth and continuity.
A key transformation involved reconfiguring the layout to better support storage needs. By relocating the laundry room door, a dedicated pantry was introduced, significantly improving organization and accessibility. The adjacent laundry room was also updated, along with the addition of custom cubbies to streamline daily routines.
For a bold contrast, the powder bath was reimagined as a moody, speakeasy-inspired space, bringing depth, character, and a memorable design moment to the home.
The result is a cohesive, thoughtfully redesigned interior that enhances how the family lives day to day, balancing function, storage, and distinctive style.
 Cordeiro Construction, Inc
This project in Blue Bell involved a thorough renovation, including plumbing upgrades in multiple bathrooms and the addition of a tiki bar in the existing garage. We facilitated various plumbing installations, such as running gas pipes and adding an exterior faucet. Within the garage, we transformed spaces into a movie room, a powder room, and a tiki bar, complete with custom features like shelving and a gas fireplace. We also tackled flooring, doors, trim, and windows throughout the property, ensuring a cohesive aesthetic. Bathroom renovations included custom glass shower doors and unique design elements like cedar accents. Exterior improvements, such as door replacements and deck construction, were also part of our scope. Throughout the project, we adhered to building codes, completed necessary insulation and fireblocking, and applied paint according to the owner's preferences.

 John
JohnCoco coir is a versatile and sustainable growing medium that is gaining popularity among gardeners. Made from the fibrous husk of coconuts, it’s an eco-friendly alternative to peat moss and can greatly enhance the quality of your soil. In gardening, it is often utilized in systems like Coco Coir Hydroponic, where it helps create an efficient water and nutrient delivery system.
What is Coco Coir?
Coco coir is a natural fiber extracted from coconut husks. It has a neutral pH, excellent water retention, and is reusable, making it a favorite among gardeners who prefer organic and sustainable practices. It is available in different forms such as blocks, bricks, or loose coir, each requiring some preparation before use in gardening.
Benefits of Using Coco Coir in Gardening
Coco coir offers several advantages for gardening. Here are the benefits of using coco coir in gardening:
Holds up to 10 times its weight in water, ensuring plants have consistent moisture.
Promotes oxygen flow to plant roots, leading to healthier root systems.
Coco coir is a renewable and eco-friendly alternative to peat moss.
It can be washed, rehydrated, and reused, reducing waste.
Naturally pH neutral, making it suitable for various plants without major adjustments.
Enhances the texture and moisture retention of garden soil.
How to Prepare Coco Coir for Planting
Preparing coco coir for planting involves a few essential steps. First, you need to hydrate the coir block, as it typically comes in a compressed form. Place the block in a large container and add warm water, allowing the block to expand and absorb the water. Once fully expanded, the coir should be fluffed up by breaking it apart with your hands or a tool to ensure it becomes loose and airy. After the coir has been fluffed, it is important to drain any excess water, as overly wet coir can lead to root suffocation. Finally, since coco coir is inert and does not contain nutrients, it’s a good idea to add organic compost or liquid fertilizer to enrich the coir before planting.
Do You Need to Soak Coco Coir Before Planting?
Yes, soaking coco coir before planting is necessary. Since it comes in a compressed form, it needs to be broken down and hydrated for proper use. The soaking process allows the coir to expand and release the fibers, making it usable as a growing medium. After soaking, the coir should be fluffed to ensure the water is evenly distributed. Draining any excess water is crucial because overly wet coir may impede plant root health.
How to Prepare Coco Peat for Planting
Coco peat, a fine, powdery form of coco coir, is highly beneficial for seed starting and improving water retention in soil. To prepare coco peat, it first needs to be hydrated, similar to how you prepare coir blocks. Slowly add water to the peat in a container and allow it to absorb and fluff up. Once hydrated, coco peat can be used on its own or mixed with other growing media such as perlite or vermiculite for added aeration and drainage. It is advisable to check the pH level of your final mix, as coco peat generally has a neutral pH, but adjustments may be necessary depending on the plants being grown.
Can You Use Just Coco Coir for Plants?
Yes, coco coir can be used by itself to grow plants, especially in hydroponic systems or as a seed-starting medium. However, because coco coir does not naturally contain nutrients, you will need to provide regular fertilizer to support plant growth. This makes it particularly suitable for plants grown in controlled environments, such as hydroponics, where nutrient solutions can be carefully managed. In traditional soil-based gardening, mixing coco coir with other organic materials like compost is recommended to provide essential nutrients and improve the overall soil structure.
How to Use Coco Coir in Hydroponics
Coco coir is widely used in hydroponic systems due to its water retention and aeration properties. To use coco coir in hydroponics, it first needs to be soaked and hydrated, as discussed earlier. Once the coir is fully prepared, it can be placed in the hydroponic system. Since coco coir does not contain natural nutrients, you will need to supply a balanced nutrient solution tailored for hydroponic plants. Regular monitoring of water and nutrient levels is essential to prevent nutrient imbalances or root rot. One of the benefits of coco coir in hydroponics is its reusability. After completing a growing cycle, the coir can be washed, rehydrated, and used again in future plantings.
Using Coco Coir as a Soil Amendment
Coco coir is also an excellent soil amendment, as it improves the texture and moisture retention of garden soil. To use coco coir in this way, mix loose coir with your existing garden soil at a ratio of one part coco coir to two parts soil. This will help retain moisture without compacting the soil, improving both water drainage and root growth. For optimal results, you can also add organic compost to the mix, ensuring that the nutrient levels are sufficient for plant growth. Coco coir works particularly well in raised beds, where it helps maintain proper soil structure over time.
Advantages of Using Coco Coir Over Peat Moss
While peat moss has been traditionally used as a growing medium, coco coir offers several advantages over it. Coco coir is a renewable resource, as it is a byproduct of coconut processing, while peat moss is harvested from peat bogs that take centuries to regenerate. Coco coir is also more durable, as it can be reused multiple times without breaking down, while peat moss disintegrates after a single use. Another key benefit is its neutral pH, whereas peat moss is more acidic and may require balancing to meet the needs of specific plants.
Conclusion
Coco coir is a highly versatile and sustainable growing medium that benefits both novice and experienced gardeners alike. Whether you are using it for hydroponics, as a soil amendment, or as a standalone medium for growing plants, knowing how to properly prepare and use it is key to maximizing its benefits. By following the steps detailed above, you can improve water retention, aeration, and overall plant health in your garden, all while contributing to eco-friendly gardening practices.
 Talon Construction Inc.
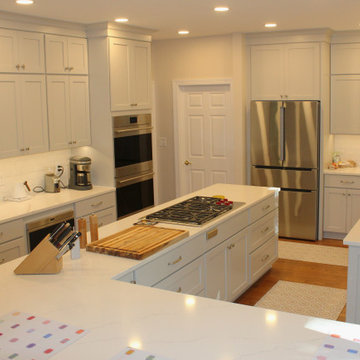
Renovating an open kitchen can be an exciting project that can improve the functionality, aesthetics, and value of your home. Here are some steps to guide you through the process:
Planning and Design:
Define your goals and budget for the renovation.
Determine the layout of your open kitchen. Consider factors like the work triangle (the relationship between the stove, sink, and refrigerator) and the flow of traffic.
Choose a design style and color scheme that suits your preferences and complements the rest of your home.
Research and Inspiration:
Collect inspiration from magazines, websites, and social media platforms to get ideas for your open kitchen design.
Create a mood board or vision board to help you visualize the final look.
Hiring Professionals:
Depending on the scale of your renovation, you may need to hire professionals, such as architects, interior designers, contractors, and electricians. Make sure to check references and get multiple quotes.
Demolition and Structural Work:
If your renovation involves structural changes, like removing walls, this is the time to do it. Ensure that the necessary permits are obtained.
Plumbing and Electrical Work:
Update or reconfigure plumbing and electrical systems as needed. This may include adding or moving outlets, switches, and lighting fixtures.
Cabinetry and Countertops:
Choose and install new kitchen cabinets and countertops. This is a significant part of your renovation and will greatly influence the kitchen's appearance and functionality.
Appliances:
Update or install new kitchen appliances, including the refrigerator, stove, oven, microwave, and dishwasher.
Flooring:
Select and install flooring that is suitable for a kitchen, such as hardwood, tile, laminate, or vinyl. Ensure it complements the overall design.
Backsplash and Wall Finishes:
Install a backsplash that matches your design and protects your walls. Consider materials like tile, glass, or stainless steel.
Lighting:
Choose and install various types of lighting, including ambient, task, and accent lighting. Pendant lights above an island or breakfast bar can add style and functionality.
Paint and Finishing Touches:
Paint the walls and ceiling in the colors you've selected. Add finishing touches like hardware, window treatments, and decorative elements.
Furniture and Accessories:
Bring in furniture, such as a dining table and chairs, barstools, and any other pieces you need to complete the space. Decorate with accessories like artwork, plants, and decorative items.
Final Inspection and Cleanup:
Ensure that all work meets safety and building code requirements. Clean the entire area thoroughly.
Enjoy Your New Kitchen:
Once the renovation is complete and everything is in its place, enjoy your beautiful, functional open kitchen.
Remember that open kitchen renovations can be complex and may require careful planning. It's essential to stay within your budget, communicate with your contractors and designers, and be flexible as unexpected issues may arise during the process. Ultimately, a well-executed open kitchen renovation can enhance the heart of your home and improve your overall living space.

 CRC Builders Inc.
The client purchased a mature, small, NAPA Valley vineyard to be their home and for personal enjoyment.
Once they began converting their new "hobby" grapes into wine, they soon realized they needed a place to "age" their labors and a place to then enjoy them. They decided to design such a place within the confines of their home where they could entertain family and friends.
The structure was modified to allow storage of more than 200 individual bottles, cases, and magnum size bottles. A cask room was added as was a well-appointed tasting room. The storage area is separated from the tasting and social area by a tempered glass doors and windows. The space to be converted was a challenge. No surface was plumb or level, therefore, the remodel involved interior walls, new floors and ceilings.
Until these issues were addressed, the beautiful cabinet work, and a complete temperature and humidity control system to store, maintain, and enjoy the wine could not be started. The floors had to be floated out and chases with faux finishes provided for HVAC and electrical. Lighting in the tasting room is provided by a series of recessed and puck lights.
The bar/counter area is highlighted by a custom, Tiffany style chandelier. Enough space was left in front of the bar to accommodate two serving tables for food and snacks, with plenty of room to move about the space. Discreetly hidden behind the bar is a large capacity cooler that can chill several bottles at once.
The bar is capped with eight lineal feet of Calcutta Gold Marble and sports a brass foot rail. The bar has grape panels between Acanthus Corbels and the bottle storage cabinet areas are a unique blend of Acanthus overlays under precisely cut and mitered grape design crown molding over and around a cleverly designed bottle storage system.
Traffic flow is achieved through the multiple points of entry through any of three pairs of 6' custom double doors which, when weather permitting, can remain open while entertaining. The host and hostess can attend food and beverage service from behind and around the bar through a separate doorway.
The temperature controlled cask storage area is large enough for the clients' current needs, and can accommodate a larger number of casks should the need arise.
The floor and walls of the cask room are designed for easy maintenance.. Both rooms are delightfully decorated with earthen tone faux finishes on walls, ceilings and floors reminiscent of a nonspecific European wine making region.
This effect is extended to the soffits in the tasting room. A unique wine racking system is easily stored, providing even greater ability to maintain and move about the storage area.
 Rooftopia, LLC
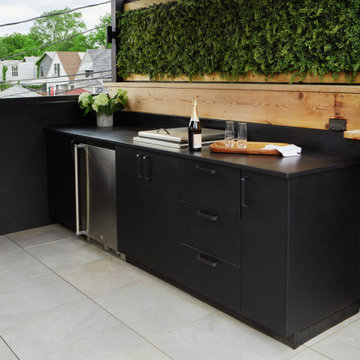
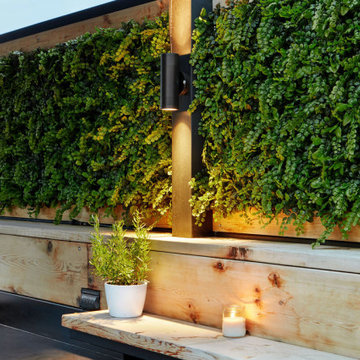
Rooftopia continues to enjoy working with this client on multiple projects, starting with this lovely first collaboration. The clients goals were to use mostly black finishes with a pink statement dining chair! We developed the space with some existing project challenges so our first tasks involved modifications to the existing pergola and flooring tiles. We integrated a retractable fabric shade canopy and several up/down light fixtures into the new space. We designed, built and installed privacy screens made of faux greenery to block out unsightly views toward the alley. We added cedar screens for privacy and to act as a backdrop for an outdoor TV. We also customized and installed a lovely outdoor cabinet system with drawers and a built-in outdoor refrigerator. Their coffee table doubles as an ice bin to top off the overall party vibe!

 Georgia Outdoor Services
The backyard in this Dunwoody, GA residence presented several challenges, including failing cinder block walls, unsafe steps, and an aging deck. These issues rendered the space largely unusable and created drainage problems, limiting both safety and functionality for the homeowners. Our team addressed these issues by removing all existing structures and undertaking a comprehensive rebuild. This involved regrading the area for proper drainage, constructing new retaining walls, and installing integrated steps for safe access throughout the yard. Multiple paver patios were also installed to create defined entertaining areas. The outcome is a safe and highly functional outdoor living space in Dunwoody. The new retaining walls provide essential structural support, the drainage system manages stormwater effectively, and the integrated patios and walkways offer inviting areas for recreation and access.
 Great American Landscapes
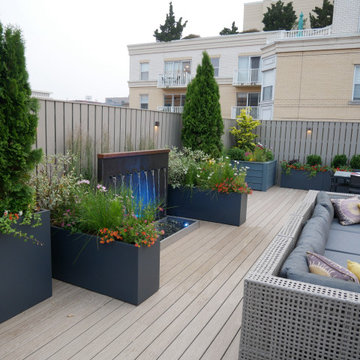
Being part of a team of that transformed a newly built DC rooftop deck into a year-round outdoor retreat required a seamless collaboration of talents. Together with the acclaimed Tomi Landis and Landis Architects-Builders, we added layered beauty to planters surrounding this gorgeous rooftop space, blending lush greenery, modern design, and thoughtful details. To achieve this, we introduced a mix of perennial shrubs, trees, and vibrant seasonal annuals, creating layers of texture and color that change with the seasons. A custom water feature and expertly placed lighting added both tranquility and ambiance, elevating the overall experience of the space.
Executing this project involved meticulous planning and precision logistics. All materials—including large containers, trees, shrubs, soil, and structural elements—were craned to the rooftop, ensuring no detail was overlooked. Dark, contemporary planters were selected to create a cohesive perimeter around the expansive deck, offering a polished and unified look while framing the breathtaking city views. With the rooftop fully exposed to the sun, plant selection focused on hardy, sun-loving species to ensure long-term vitality. Multiple crews worked in tandem to deliver a seamless installation, balancing efficiency with craftsmanship.
Beyond installation, our commitment to the space continues through tailored maintenance, ensuring the plantings thrive and evolve beautifully over time. This rooftop deck now serves as a vibrant oasis, offering its owners a perfect balance of urban sophistication and natural serenity.
 KCBR Design | Remodel
Designed for repeat clients, this Overland Park remodel focused on improving function, flow, and everyday livability across multiple spaces.
In the kitchen, the layout was refined to create a more open and efficient environment. An enlarged island now serves as a central hub for cooking, gathering, and daily use, while ceiling-height cabinetry maximizes storage and creates a clean, built-in aesthetic. New hardwood flooring ties the space together, adding warmth and continuity.
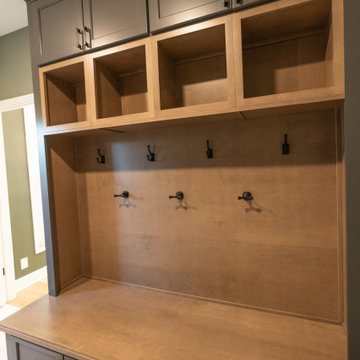
A key transformation involved reconfiguring the layout to better support storage needs. By relocating the laundry room door, a dedicated pantry was introduced, significantly improving organization and accessibility. The adjacent laundry room was also updated, along with the addition of custom cubbies to streamline daily routines.
For a bold contrast, the powder bath was reimagined as a moody, speakeasy-inspired space, bringing depth, character, and a memorable design moment to the home.
The result is a cohesive, thoughtfully redesigned interior that enhances how the family lives day to day, balancing function, storage, and distinctive style.
 Vetter Architects
A tea pot, being a vessel, is defined by the space it contains, it is not the tea pot that is important, but the space.
Crispin Sartwell
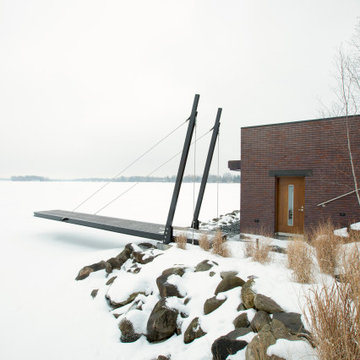
Located on a lake outside of Milwaukee, the Vessel House is the culmination of an intense 5 year collaboration with our client and multiple local craftsmen focused on the creation of a modern analogue to the Usonian Home.
As with most residential work, this home is a direct reflection of it’s owner, a highly educated art collector with a passion for music, fine furniture, and architecture. His interest in authenticity drove the material selections such as masonry, copper, and white oak, as well as the need for traditional methods of construction.
The initial diagram of the house involved a collection of embedded walls that emerge from the site and create spaces between them, which are covered with a series of floating rooves. The windows provide natural light on three sides of the house as a band of clerestories, transforming to a floor to ceiling ribbon of glass on the lakeside.
The Vessel House functions as a gallery for the owner’s art, motorcycles, Tiffany lamps, and vintage musical instruments – offering spaces to exhibit, store, and listen. These gallery nodes overlap with the typical house program of kitchen, dining, living, and bedroom, creating dynamic zones of transition and rooms that serve dual purposes allowing guests to relax in a museum setting.
Through it’s materiality, connection to nature, and open planning, the Vessel House continues many of the Usonian principles Wright advocated for.
Overview
Oconomowoc, WI
Completion Date
August 2015
Services
Architecture, Interior Design, Landscape Architecture
 Rooftopia, LLC
Rooftopia continues to enjoy working with this client on multiple projects, starting with this lovely first collaboration. The clients goals were to use mostly black finishes with a pink statement dining chair! We developed the space with some existing project challenges so our first tasks involved modifications to the existing pergola and flooring tiles. We integrated a retractable fabric shade canopy and several up/down light fixtures into the new space. We designed, built and installed privacy screens made of faux greenery to block out unsightly views toward the alley. We added cedar screens for privacy and to act as a backdrop for an outdoor TV. We also customized and installed a lovely outdoor cabinet system with drawers and a built-in outdoor refrigerator. Their coffee table doubles as an ice bin to top off the overall party vibe!
 Bonsai Group
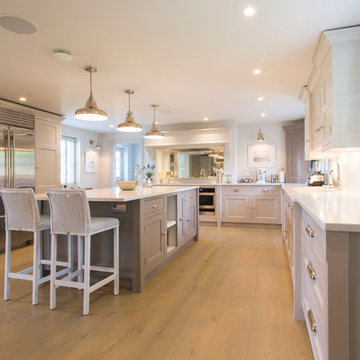
Bonsai's part of this lovely project involved only the timber floor as it was to be given a new lease of life as part of the house's renovation. Our team carefully sanded back the existing finish and applied a subtle, grey oil along with multiple coats of highly durable clear protective oil.
Thanks to Etienne Laine for the shots: http://etiennelaine.com/
 Bonsai Group
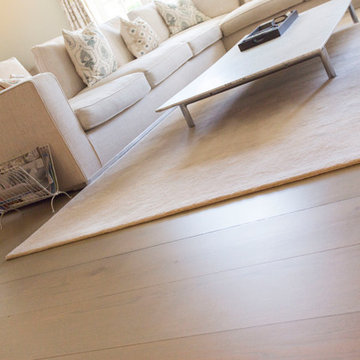
Bonsai's part of this lovely project involved only the timber floor as it was to be given a new lease of life as part of the house's renovation. Our team carefully sanded back the existing finish and applied a subtle, grey oil along with multiple coats of highly durable clear protective oil.
Thanks to Etienne Laine for the shots: http://etiennelaine.com/
26