
Search results for "Key industry" in Home Design Ideas
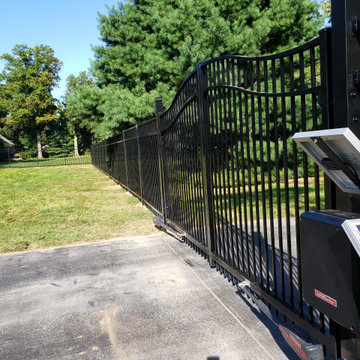
 Paramount Fencing
Supply and install approx. 603' of 6' tall Commercial Aluminum Fencing with (3) 4' walk gate. Supply and install (1) Liftmaster
LA400XL20W Dual 24VDC with XL Control Panel and (2) Solar Panels. Install (1) Internet gateway controller for remote control, (1)
wireless keypad with pedestal post for key code entry, (1) exit loop detector for automatic exit. Supply and install (1) 14' wide Industrial gate Style "C". Gate posts shall be 4” x 4” x 108” with decorative solar caps.
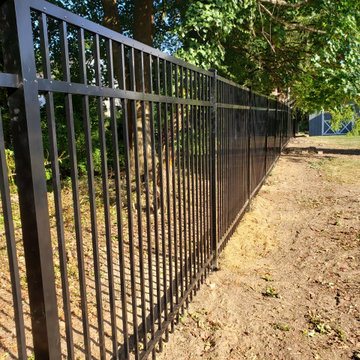 Paramount Fencing
Supply and install approx. 603' of 6' tall Commercial Aluminum Fencing with (3) 4' walk gate. Supply and install (1) Liftmaster
LA400XL20W Dual 24VDC with XL Control Panel and (2) Solar Panels. Install (1) Internet gateway controller for remote control, (1)
wireless keypad with pedestal post for key code entry, (1) exit loop detector for automatic exit. Supply and install (1) 14' wide Industrial gate Style "C". Gate posts shall be 4” x 4” x 108” with decorative solar caps.
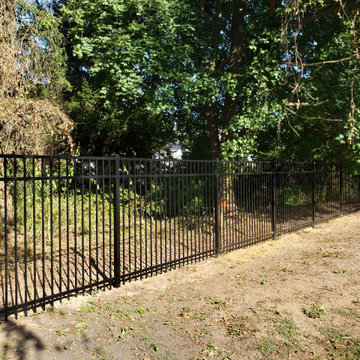 Paramount Fencing
Supply and install approx. 603' of 6' tall Commercial Aluminum Fencing with (3) 4' walk gate. Supply and install (1) Liftmaster
LA400XL20W Dual 24VDC with XL Control Panel and (2) Solar Panels. Install (1) Internet gateway controller for remote control, (1)
wireless keypad with pedestal post for key code entry, (1) exit loop detector for automatic exit. Supply and install (1) 14' wide Industrial gate Style "C". Gate posts shall be 4” x 4” x 108” with decorative solar caps.
Find the right local pro for your project

 New Key Construction
This efficient, modern laundry room boasts a sleek design with black cabinetry and a wood countertop. The stacked washer and dryer maximize space, allowing for ample storage in the surrounding cabinets. The room also includes a deep sink with an industrial-style faucet, providing practicality for various laundry tasks. The floor features a durable, speckled surface, perfect for a high-use area.

 New Key Construction
This efficient, modern laundry room boasts a sleek design with black cabinetry and a wood countertop. The stacked washer and dryer maximize space, allowing for ample storage in the surrounding cabinets. The room also includes a deep sink with an industrial-style faucet, providing practicality for various laundry tasks. The floor features a durable, speckled surface, perfect for a high-use area.
Sponsored
Sunbury, OH

J.Holderby - Renovations
Franklin County's Leading General Contractors - 2X Best of Houzz!
 Key Lime Construction, LLC
Patricia Norrell, Photographer
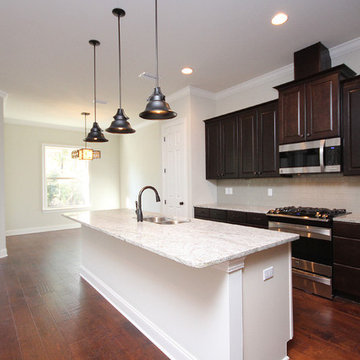
beautiful, dark cabinets with light granite countertops. Industrial style pendants and modern light in breakfast area.

 Industrial Projects
Creating a comfortable outdoor living space is a priority for many homeowners and DIY enthusiasts. With rising summer temperatures, installing a shade tarp in your backyard offers an affordable and effective solution for sun protection. We’ve developed this detailed, step-by-step guide to help you confidently install a shade tarp that not only shields you from the sun but also adds aesthetic appeal to your outdoor area.
Benefits of Installing a Backyard Shade Tarp
Before diving into the installation process, let’s explore the key benefits of having a backyard shade tarp:
Provides UV Protection: Keeps your family and guests safe from harmful sun exposure.
Reduces Outdoor Temperatures: Creates a cooler, more enjoyable outdoor space.
Protects Outdoor Furniture: Extends the life of patio furniture by reducing sun damage.
Enhances Outdoor Aesthetics: Adds a modern, stylish look to your yard.
Budget-Friendly: More affordable compared to permanent structures like pergolas.
Materials and Tools You’ll Need
To begin your DIY backyard shade project, gather the following materials and tools:
Materials:
Shade tarp (UV-resistant and breathable)
Sturdy posts or existing structures (trees, fences, walls)
Mounting hardware (eye bolts, D-rings, turnbuckles, snap hooks)
Nylon or polyester rope, or stainless-steel wire
Concrete (if installing new posts)
Tools:
Power drill
Measuring tape
Level
Ladder
Wrench or adjustable spanner
Post hole digger (if installing new posts)
Step 1: Plan Your Shade Tarp Layout
The first step in installing your backyard shade tarp is careful planning. Take time to assess your outdoor area and answer these key questions:
Where is the sun’s path throughout the day?
What size and shape of tarp best suits your space?
Will you anchor the tarp to existing structures or install new posts?
What height do you want the tarp to sit at for maximum shade and airflow?
Pro Tip: Use string or garden hoses to visualize the tarp layout on the ground before making permanent decisions.
Step 2: Measure and Mark Anchor Points
Once you’ve determined the tarp’s location and orientation:
Measure the tarp dimensions.
Mark the exact points where each corner of the tarp will be anchored.
Ensure that the anchor points are at least 5–10% longer than the tarp size to allow for tensioning and slight adjustments.
Consider slope angles for water runoff. Aim for at least a 20-degree angle to prevent water pooling on the tarp.
Step 3: Install Support Posts (If Necessary)
If your backyard lacks existing anchor points like trees or fences, you’ll need to install sturdy support posts:
Dig post holes at least 24 inches deep and 8-12 inches wide for stability.
Set posts in concrete, making sure they remain plumb and level.
Allow the concrete to cure for at least 24–48 hours before applying tension from the tarp.
We recommend using pressure-treated wood, galvanized steel poles, or aluminum posts for longevity and strength.
Step 4: Install Mounting Hardware
With your anchor points ready, it’s time to install the necessary hardware:
Attach eye bolts or pad eyes securely into walls, posts, or other fixed structures.
For added flexibility and adjustability, install turnbuckles or tensioners to fine-tune the tarp’s tightness.
Connect snap hooks, D-rings, or carabiners to make assembly and disassembly easier.
Make sure all hardware is rated for outdoor use to prevent rust and corrosion.
Step 5: Attach and Tension the Shade Tarp
Now it’s time for the most satisfying part—mounting the shade tarp:
Begin by attaching one corner of the tarp to an anchor point.
Gradually attach the remaining corners, moving diagonally for even tension.
Adjust each connection point using your turnbuckles, ropes, or cables.
Pull the tarp tight enough to avoid sagging, but not so tight that it risks tearing.
Check that the tarp maintains the desired slope for rainwater runoff and adjust tension as needed.
Step 6: Final Adjustments and Safety Check
Before enjoying your new shaded area:
Inspect all anchor points and hardware for stability.
Test the tarp’s tension and make adjustments for even distribution.
Ensure that no sharp edges or loose connections remain that could damage the tarp or pose a safety hazard.
Confirm that the tarp is secure in windy conditions by giving it a gentle tug.
If you live in an area with frequent high winds, consider removing the tarp during storms to prevent damage.
Step 7: Enjoy Your Shaded Backyard Oasis
Once installed, your backyard shade tarp provides a comfortable and protective space for outdoor gatherings, relaxation, or family activities. You can decorate underneath with outdoor furniture, string lights, or potted plants to create a personalized outdoor retreat.
Maintenance Tips for Long-Lasting Shade Tarp Performance
To extend the life of your shade tarp, follow these maintenance guidelines:
Regularly check for wear and tear, especially around anchor points and seams.
Clean the tarp periodically with mild soap and water to prevent mildew buildup.
Store the tarp indoors during harsh weather seasons if it's not designed for year-round use.
Tighten hardware as needed to maintain proper tension and avoid sagging.
By following these simple care steps, your shade tarp will continue to deliver years of sun protection and outdoor comfort.
Conclusion: Upgrade Your Outdoor Space with a DIY Shade Tarp
Installing a shade tarp in your backyard is a cost-effective and rewarding DIY project. With careful planning, quality materials, and proper installation techniques, you’ll enjoy cool, shaded outdoor living all season long. This step-by-step guide ensures your project goes smoothly from start to finish.
 Younger Homes
Craig Washburn
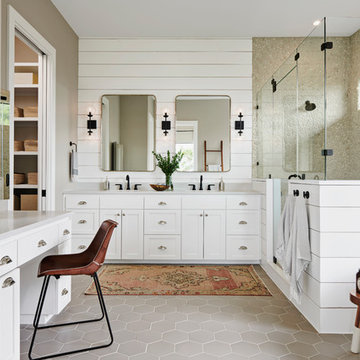
Example of a large farmhouse master porcelain tile and gray floor bathroom design in Austin with shaker cabinets, white cabinets, white walls, a drop-in sink, quartz countertops, a hinged shower door and white countertops
Example of a large farmhouse master porcelain tile and gray floor bathroom design in Austin with shaker cabinets, white cabinets, white walls, a drop-in sink, quartz countertops, a hinged shower door and white countertops
 Nantucket Looms
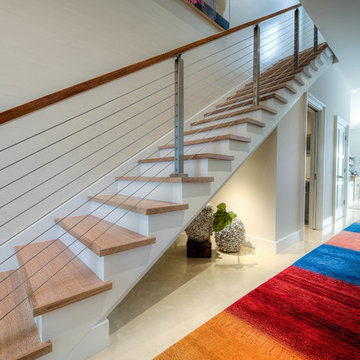
In keeping with the Key West tradition, shiplap walls were added and painted in Benjamin Moore 'Sail Cloth'. The 'Gabbeh' rug runner, purchased at a local Key West rug store, greets the visitor with a wonderful pop of color, inviting you into the kitchen / sitting area. Under the staircase are some handcrafted barnacle vessels purchased by the Nantucket Looms design team from an antiques store.
 Nantucket Looms
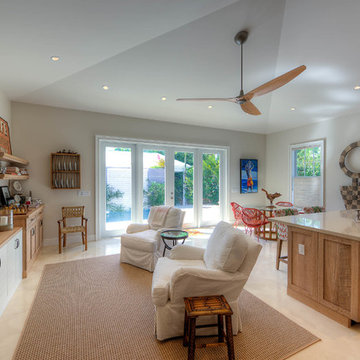
An open floor concept was used for this Key West Guest House kitchen / sitting area. A polished concrete floor, which spans the whole first floor, can be seen here in this light, bright room which opens up onto the dipping pool deck. Atop the polished concrete floor is a user friendly polypropylene rug. The cabinets are custom-built, the light color in keeping with the airy feel throughout the house. Eclectic pieces, including the 'Key West Rooster' on the table, were chosen to keep the decor interesting and fun.
 Rebel Builders
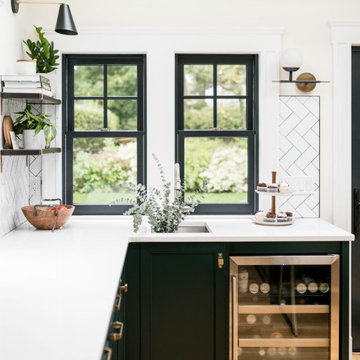
Industrial transitional English style kitchen. The addition and remodeling were designed to keep the outdoors inside. Replaced the uppers and prioritized windows connected to key parts of the backyard and having open shelvings with walnut and brass details.
Custom dark cabinets made locally. Designed to maximize the storage and performance of a growing family and host big gatherings. The large island was a key goal of the homeowners with the abundant seating and the custom booth opposite to the range area. The booth was custom built to match the client's favorite dinner spot. In addition, we created a more New England style mudroom in connection with the patio. And also a full pantry with a coffee station and pocket doors.
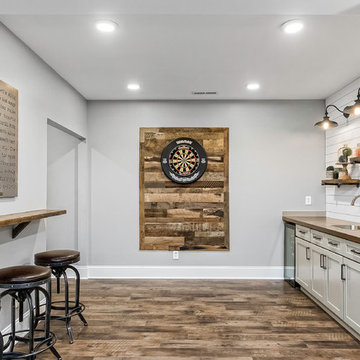
Sponsored
Sunbury, OH
J.Holderby - Renovations
Franklin County's Leading General Contractors - 2X Best of Houzz!
 Maraya Interior Design
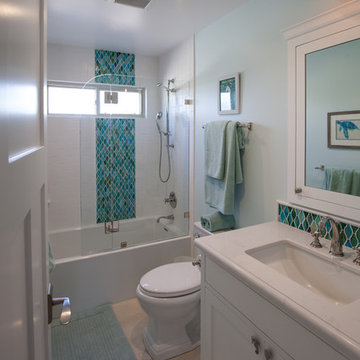
Children's beach bath with bright glass tiles.
A small weekend beach resort home for a family of four with two little girls. Remodeled from a funky old house built in the 60's on Oxnard Shores. This little white cottage has the master bedroom, a playroom, guest bedroom and girls' bunk room upstairs, while downstairs there is a 1960s feel family room with an industrial modern style bar for the family's many parties and celebrations. A great room open to the dining area with a zinc dining table and rattan chairs. Fireplace features custom iron doors, and green glass tile surround. New white cabinets and bookshelves flank the real wood burning fire place. Simple clean white cabinetry in the kitchen with x designs on glass cabinet doors and peninsula ends. Durable, beautiful white quartzite counter tops and yes! porcelain planked floors for durability! The girls can run in and out without worrying about the beach sand damage!. White painted planked and beamed ceilings, natural reclaimed woods mixed with rattans and velvets for comfortable, beautiful interiors Project Location: Oxnard, California. Project designed by Maraya Interior Design. From their beautiful resort town of Ojai, they serve clients in Montecito, Hope Ranch, Malibu, Westlake and Calabasas, across the tri-county areas of Santa Barbara, Ventura and Los Angeles, south to Hidden Hills- north through Solvang and more.
 Ben Herzog
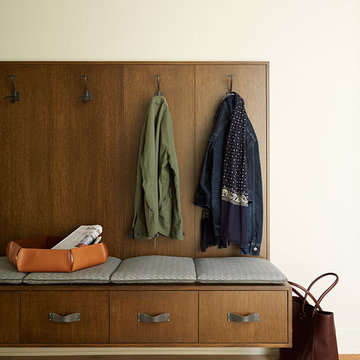
Storage at Entry Hall
Inspiration for a contemporary medium tone wood floor entry hall remodel in New York
Inspiration for a contemporary medium tone wood floor entry hall remodel in New York
 PB Kitchen Design
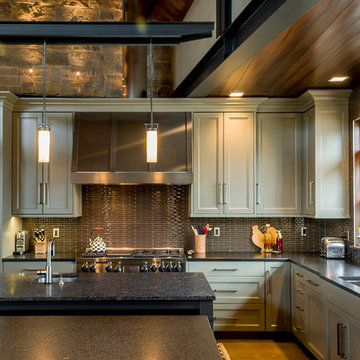
The key to this project was to create a kitchen fitting of a residence with strong Industrial aesthetics. The PB Kitchen Design team managed to preserve the warmth and organic feel of the home’s architecture. The sturdy materials used to enrich the integrity of the design, never take away from the fact that this space is meant for hospitality. Functionally, the kitchen works equally well for quick family meals or large gatherings. But take a closer look at the use of texture and height. The vaulted ceiling and exposed trusses bring an additional element of awe to this already stunning kitchen.
Project specs: Cabinets by Quality Custom Cabinetry. 48" Wolf range. Sub Zero integrated refrigerator in stainless steel.
Project Accolades: First Place honors in the National Kitchen and Bath Association’s 2014 Design Competition
 A.Jennison Interiors
Photo - Jessica Glynn Photography
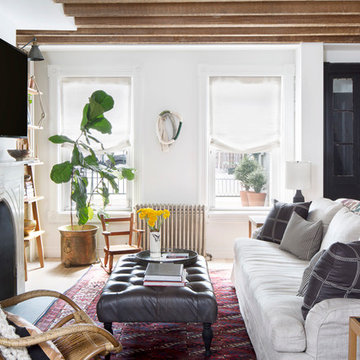
Example of a mid-sized transitional enclosed light wood floor and beige floor living room design in New York with multicolored walls, a standard fireplace, a stone fireplace and a wall-mounted tv
Example of a mid-sized transitional enclosed light wood floor and beige floor living room design in New York with multicolored walls, a standard fireplace, a stone fireplace and a wall-mounted tv
Sponsored
Sunbury, OH
J.Holderby - Renovations
Franklin County's Leading General Contractors - 2X Best of Houzz!
 PB Kitchen Design
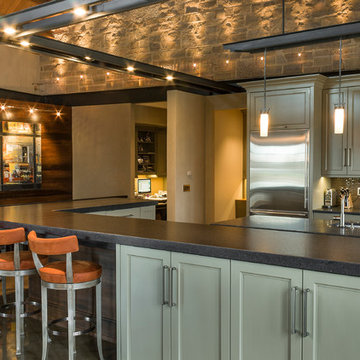
The key to this project was to create a kitchen fitting of a residence with strong Industrial aesthetics. The PB Kitchen Design team managed to preserve the warmth and organic feel of the home’s architecture. The sturdy materials used to enrich the integrity of the design, never take away from the fact that this space is meant for hospitality. Functionally, the kitchen works equally well for quick family meals or large gatherings. But take a closer look at the use of texture and height. The vaulted ceiling and exposed trusses bring an additional element of awe to this already stunning kitchen.
Project specs: Cabinets by Quality Custom Cabinetry. 48" Wolf range. Sub Zero integrated refrigerator in stainless steel.
Project Accolades: First Place honors in the National Kitchen and Bath Association’s 2014 Design Competition
 Regan Baker Design Inc.
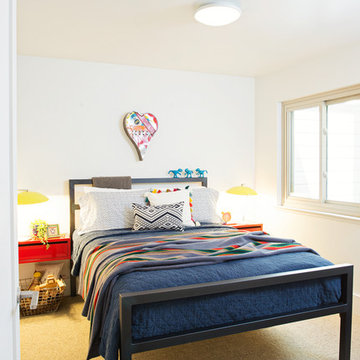
Stylish brewery owners with airline miles that match George Clooney’s decided to hire Regan Baker Design to transform their beloved Duboce Park second home into an organic modern oasis reflecting their modern aesthetic and sustainable, green conscience lifestyle. From hops to floors, we worked extensively with our design savvy clients to provide a new footprint for their kitchen, dining and living room area, redesigned three bathrooms, reconfigured and designed the master suite, and replaced an existing spiral staircase with a new modern, steel staircase. We collaborated with an architect to expedite the permit process, as well as hired a structural engineer to help with the new loads from removing the stairs and load bearing walls in the kitchen and Master bedroom. We also used LED light fixtures, FSC certified cabinetry and low VOC paint finishes.
Regan Baker Design was responsible for the overall schematics, design development, construction documentation, construction administration, as well as the selection and procurement of all fixtures, cabinets, equipment, furniture,and accessories.
Key Contributors: Green Home Construction; Photography: Sarah Hebenstreit / Modern Kids Co.
 PB Kitchen Design
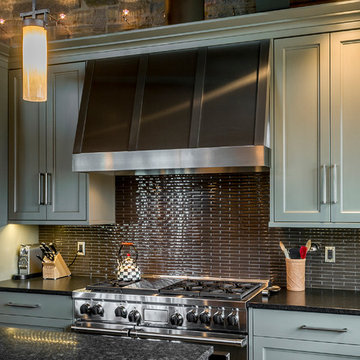
The key to this project was to create a kitchen fitting of a residence with strong Industrial aesthetics. The PB Kitchen Design team managed to preserve the warmth and organic feel of the home’s architecture. The sturdy materials used to enrich the integrity of the design, never take away from the fact that this space is meant for hospitality. Functionally, the kitchen works equally well for quick family meals or large gatherings. But take a closer look at the use of texture and height. The vaulted ceiling and exposed trusses bring an additional element of awe to this already stunning kitchen.
Project specs: Cabinets by Quality Custom Cabinetry. 48" Wolf range. Sub Zero integrated refrigerator in stainless steel.
Project Accolades: First Place honors in the National Kitchen and Bath Association’s 2014 Design Competition
15