
Search results for "Leave difficult" in Home Design Ideas

 George Ocampo
Designed for good energy...
Our client was looking to create a space for retreat, tranquility, serenity. The existing space was somewhat funky without balance and made it difficult to feel good. Working within an existing courtyard space, we were limited. No matter, our goal was to remedy this
outdoor courtyard/sunset balcony space. Our idea
was to keep the space cozy but create destination
spaces where you can lay down in the grass and look
up at the stars. Walk bare foot atop the different
hardscape surfaces, reclaimed brick patio & walkway,
Silvermist flagstone, terra cotta tiles & tiffway
bermuda. The idea of sitting in front of a magical
rock island stone fireplace reading a book, sharing
conversation with family & friends gives us warm feelings. Bubbling water features dance through out this space creating sounds of trickling brooks you could only hear if you were in a far far away place. The courtyard walls disappear, with plants and trees wrapping there arms around our client while relaxing under a 45 year old ascalone olive tree. A healing garden was the finished product, so much, its a space that you don't ever want to leave....
 George Ocampo
Designed for good energy...
Our client was looking to create a space for retreat, tranquility, serenity. The existing space was somewhat funky without balance and made it difficult to feel good. Working within an existing courtyard space, we were limited. No matter, our goal was to remedy this
outdoor courtyard/sunset balcony space. Our idea
was to keep the space cozy but create destination
spaces where you can lay down in the grass and look
up at the stars. Walk bare foot atop the different
hardscape surfaces, reclaimed brick patio & walkway,
Silvermist flagstone, terra cotta tiles & tiffway
bermuda. The idea of sitting in front of a magical
rock island stone fireplace reading a book, sharing
conversation with family & friends gives us warm feelings. Bubbling water features dance through out this space creating sounds of trickling brooks you could only hear if you were in a far far away place. The courtyard walls disappear, with plants and trees wrapping there arms around our client while relaxing under a 45 year old ascalone olive tree. A healing garden was the finished product, so much, its a space that you don't ever want to leave....
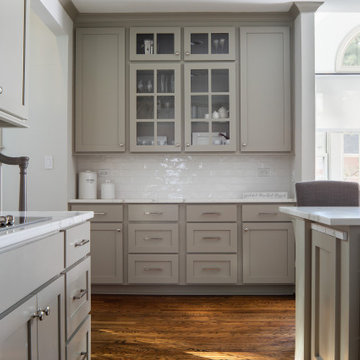
 Merits Design Group, Inc.
We reduced the number of glass profiles in the uppers to hide the practical items that aren't as pretty. Swapping about huge base cabinets with useful drawers offered more options for this service area.
Find the right local pro for your project
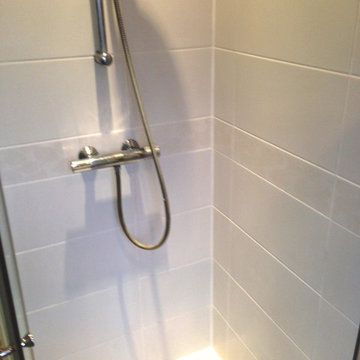
 Tile Doctor Ltd
Shower cubicles can be the most difficult of tiled features to keep clean. Most are exposed to various acid-based soaps and shampoos on a daily basis, allowing mould and general muck to quickly build up along the grout lines and silicone. This leaves the entire area looking quite unappealing. In some cases, the grout lines become stained beyond a point where they can be restored to their original condition, so property owners will typically request to have the grout cut out and replaced however a faster and cheaper method is to have the grout completely recoloured.
Such was the case with this Ceramic tiled shower cubicle at a house in Wigan. It would take a lot to get the cubicle looking great again, having not been cleaned properly for a long time. The property owner decided to contact me for a professional refresh, including cleaning, new silicone sealer and recolouring of the grout.
I started the refresh by applying Tile Doctor Mould Away spray to the tiles and grout, and leaving it to dwell for an hour. As the name of the product suggests, Mould Away is a fast and effective cleaner for the removal of mould from silicone and grout, making it ideal for use on shower cubicles similar to this one. I then rinsed the entire area down with water before scrubbing the grout lines and tiles with a stiff grout brush to remove any remaining mould and lime scale, leaving them looking a lot cleaner.
The cleaning process made a big improvement however the grout was still too stained so after removing the silicone strip from around the base of the shower I proceeded to recolour with our white Grout Colourant. The colourant is painted onto the grout and any excess is wiped of the tile before it dries which both improves the appearance of the grout and seals it in to protect it from further staining. The last step was to apply fresh white silicone along the base of the shower.
The customer was very pleased with the refreshed appearance of their shower and you must admit it looks much more inviting now.
Steve Keary
Greater Manchester Tile Doctor



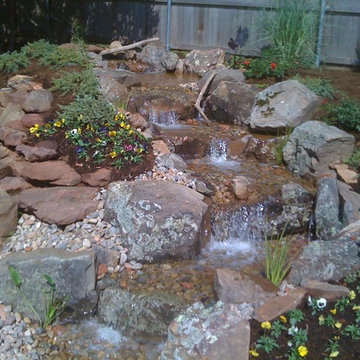
 Continental Ponds
Pondless Waterfall
Pondless Waterfalls are simply a re-circulating waterfall and/or stream without the presence of a pond. You can enjoy the sight and sound of running water without the maintenance of a pond.
The waterfall is undoubtedly the most beautiful and favored feature in a water garden. If space is lacking in your yard or you have safety concerns with a pond, go Pondless! The name basically explains it all. It’s a waterfall and stream, without the pond. So why would you want a waterfall without a pond? The truth is that a Pondless Waterfall isn’t for everyone, but it can be a great alternative for someone who isn’t quite sure if a pond is right for their family.
Safety
Because there is no pool of water, a Pondless Waterfall is a great option if you are concerned about safety issues associated with a traditional pond.
Cost
Cost can be a big factor when considering the type of pond you want to build. In most cases, the price of a Pondless waterfall will be less than a pond, because there is less labor involved, as well as less rock and materials. Operating costs are also less. Because you’re not dealing with an established ecosystem, it’s not necessary to run the pump 24/7.
Space
The small size of the Pondless Waterfall means you can build and enjoy a beautiful waterfall anywhere in you yard.
Maintenance - Taking care of your Pondless Waterfall is easy. Filling the reservoir every few weeks to compensate for water loss because of evaporation is all that’s required.
Flexibility
Perhaps the best part of the Pondless Waterfall is the possibility for the future. If you change your mind later, wishing you’d build a pond, that’s ok! If you leave enough room around the base of the waterfall, it’s easy to add a pond onto a Pondless Waterfall.
Complete System
It might be difficult to imagine a waterfall and stream without a pond. Where does the water go? A Pondless Waterfall works much like a regular pond. The hole, deeper than a normal pond, is dug then lined with rock and gravel, and filled with water. The water is then circulated from beneath the rocks and gravel by a pump that sits on the bottom, inside a Snorkel Vault and Centipede Module. A pipe runs from there up to a BioFalls Filter and into an overflowing waterfall, where it falls back into the reservoir. Since the water level never pools above the level of the rock and gravel fill, it give the appearance of a waterfall without a pond, when in fact, the “pond” is there but not visible.
The Pondless Waterfall has made many water-lovers who were previously unable to indulge in the sweet sounds of falling water, very happy. It’s a great alternative for those who are trying to get their feet wet, or looking to fit a little bit of paradise into their own backyard. In other words, when all else fails … go Pondless!
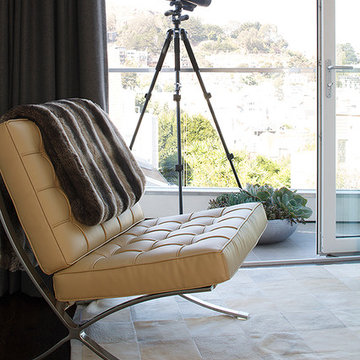
 Doyle McCullar
Photo by Eric Rorer
Inspiration for a large contemporary living room remodel in San Francisco
Inspiration for a large contemporary living room remodel in San Francisco



 Solid Apollo LED
Solid Apollo LED. For this small bar area, the owner wanted to bring exciting color changing light to an otherwise dull area. As traditional lighting would have been difficult to intigrate, the owner realized he could leave a small reccessed channel around the back of each shelf area, just large enough to place color changing RGB LED strip light. At each corner, Snap & Lite 90 degree L connectors were used for quick connections, without the need for soldering. The both strip light areas are controlled by the Black Glass Touch In-Wall RGB Controller, with a basic color wheel, pre-programmed color changing programs, and full dimming control.
 AC Pacific Corporation
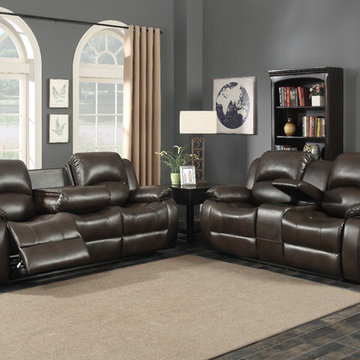
The Samara Collection Modern Upholstered Transitional Reclining Sofa with Dual Recliners and a Center Drop Down Table with Cup Holders is the Ultimate Luxury Item for Your Home. Comfortably Seating 3, the Sofa Measures 85" X 39" X 40" and has Ample Proportions that Make for Generous Seating. Equipped with Dual Recliners, Plush Cushioning Throughout, and a Center Drop Down Table with 2 Built-In Cup Holders, the Upholstered Sofa is an Ultra Comfortable Seating Choice. Independent of the Other's Motion, Each Recliner Smoothly Moves You into Your Favorite Position without Disturbing the Person Next to You. You and Your Guests will Find it Difficult to Leave the Sofa Once You have all Sat Down. Perfect for the Living Room, Den, or Entertainment Room, the Recliner Sofa is the Place to Relax and Lounge with a Movie or TV Show after a Long Day's Work. If You Fall Asleep on the Leather Sofa Before Making it to Your Bed, You'll Find that You won't Feel Sore but Refreshed! Upholstered in a Gorgeous Dark Brown Polyester Blend Fabric, the Modern Sofa is a Stylish and Functional Piece.
 STEPHANIE BRADSHAW
Jennifer Hughes Photography
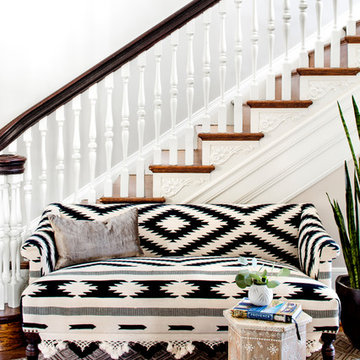
Staircase - mediterranean wooden wood railing staircase idea in Baltimore with wooden risers
Staircase - mediterranean wooden wood railing staircase idea in Baltimore with wooden risers
 AC Pacific Corporation
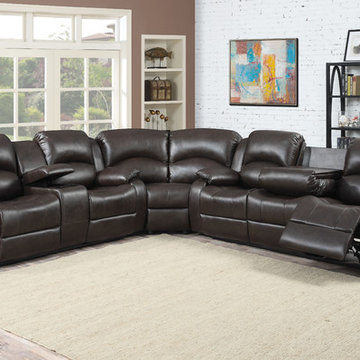
The Samara Collection Modern Upholstered Transitional Reclining Sofa with Dual Recliners and a Center Drop Down Table with Cup Holders is the Ultimate Luxury Item for Your Home. Comfortably Seating 3, the Sofa Measures 85" X 39" X 40" and has Ample Proportions that Make for Generous Seating. Equipped with Dual Recliners, Plush Cushioning Throughout, and a Center Drop Down Table with 2 Built-In Cup Holders, the Upholstered Sofa is an Ultra Comfortable Seating Choice. Independent of the Other's Motion, Each Recliner Smoothly Moves You into Your Favorite Position without Disturbing the Person Next to You. You and Your Guests will Find it Difficult to Leave the Sofa Once You have all Sat Down. Perfect for the Living Room, Den, or Entertainment Room, the Recliner Sofa is the Place to Relax and Lounge with a Movie or TV Show after a Long Day's Work. If You Fall Asleep on the Leather Sofa Before Making it to Your Bed, You'll Find that You won't Feel Sore but Refreshed! Upholstered in a Gorgeous Dark Brown Polyester Blend Fabric, the Modern Sofa is a Stylish and Functional Piece.
 Tile Doctor Ltd
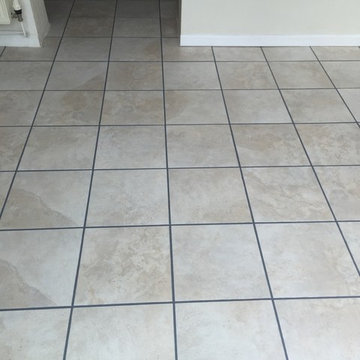
The task of keeping these white Ceramic Kitchen and Conservatory tiles clean was proving very challenging for this customer, who lives in the town of Somerton in Somerset. Somerton is known for its bustling market, which has supposedly been run on a weekly basis since the Middle Ages, and its famous ‘Market Cross’ at the centre of the beautiful marketplace is a popular tourist attraction for visitors to the West Country.
It probably comes as no surprise to anyone that white tiles are often more difficult to keep clean than others. However, in this case, rather than being badly marked or damaged, these Ceramic tiles had become dirty due to the surface being pitted rather than smooth which trapped ground in marks from spills and dirty footprints etc. The pitted rough surface is very characteristic and provides better grip however they do trap dirt are therefore more difficult to keep clean.
The grout had also suffered over the years, losing a lot of its colour in the process so as well as cleaning the tiles we agreed to give the grout a really deep clean and also to colour the grout to make it more uniform.
To clean the tiles, I firstly created a strong diluted of Tile Doctor Pro Clean and applied it liberally across the entire floor, leaving it to dwell and soak into the tile for a short period in order to soften the ingrained dirt. I then used my heavy weight rotary machine fitted with a black scrubbing pad to agitate the solution and break down the muck.
Once satisfied with the condition of the tiles I turned my attention to the grout lines, cleaning them carefully by hand using a stiff tile cleaning brush and the same solution of Pro Clean and water. This provided a deep, penetrating that clean that left the grout lines clean and free from the dirt and grease that had dulled their appearance for so long.
With some great results achieved through the cleaning, I rinsed the whole floor to wash away any leftover Pro-Clean and left it to dry fully overnight.
I returned to the property the next day to check on the floor and after ensuring the floor was completely dry, proceeded to recolour the grout lines using Tile Doctor’s Grout Colourant. Our Grout Colourants are a waterborne epoxy that recolours, seals and rejuvenates existing grout joints and is available in ten different colours ranging from white to dark greys. The scrubbing with Pro-Clean the day before would also ensure the surface of the grout was clean and would make a good surface for the colourant to bond with.
Since in the past the grout lines had undergone a number of repairs, the existing colour was a mix of different greys. It made most sense then that they picked our ‘Natural Grey’ Grout Colourant for me to use. I painted the Colourant on carefully and waited for 30 minutes before removing any excess, leaving the grout lines perfectly covered in a uniform colour.
The difference was really noticeable and the property owner was really happy with the results. As you can see from the photos, the new grey Colourant really made the grout lines stand out against the clean white Ceramic tiles. Another satisfied customer.
Dave Hurst
Somerset Tile Doctor
 Tile Doctor Ltd
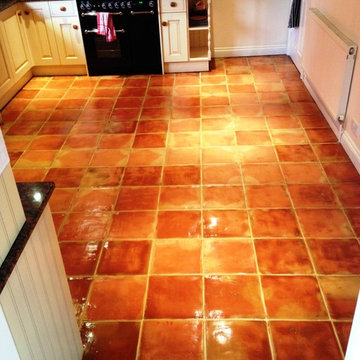
Terracotta may be one of the most aesthetically pleasing types of tiled floor, but as many of our customers will tell you can be particularly difficult to keep clean. This is due to the naturally high porosity of clay, which allows dirt to become very easily trapped. Quite commonly this situation is made worse by a lack of an adequate sealer to block the intrusion of muck. Of course, poor quality cleaning products also make it difficult for property owners to keep their Terracotta tiles clean, and a combination of the two problems can leave these floors looking a lot like this one, located in the kitchen of a house in the beautiful Forest of Dean.
The property owner was keen to have me restore some character to her dull Terracotta tiles. It was proving increasingly difficult for her to keep them clean due to the reasons described before, and the grout had also become very dirty. So, the customer turned to me for some professional assistance.
While these Terracotta tiles had been sealed previously it had, over time, lost its ability to protect the stone against ingrained dirt. To remove the old excess sealer my product of choice was the heavy duty soil remover and stripper, Tile Doctor Remove & Go, which I applied liberally across the surface and scrubbed in to the tile used a rotary machine fitted with a scrubbing pad. This also helped to remove the trapped dirt and left the stone looking fresher.
Once the old sealer was removed – to be replaced with a fresh sealer once cleaning was complete – I was free to focus on the troublesome grout lines with Tile Doctor Pro Clean, an alkaline cleaner that reliably breaks down dirt. When cleaning the grout, I opted to use a handheld grout brush that allowed for more precise, careful application of the product.
As per usual, the floor was given a good rinse and left to dry for 24 hours.
Upon returning to the property I checked the floor was completely dry, ready for sealing. My process for sealing actually involved the application of two different kinds of sealer; initially I applied a single coat of Tile Doctor Colour Grow which has soaks into the pores of the tile and has the added bonus of enhancing its natural colours.
Once this had dried I then applied ix coats of Tile Doctor Seal and Go, a product which forms a durable layer of protection of the surface of the tiles and at the same time provides a lovely sheen finish.
The combination of the two sealers will certainly offer a long-term solution to the ingrained dirt problem, and the appearance-enhancing properties in the products really helped to transform the tiles from dull and dirty to lively and eye-catching. Nonetheless, before departing the property, I also left my very pleased customer with some cleaning advice for the future.
Paul Wales
Monmouthshire Tile Doctor


 Tile Doctor Ltd
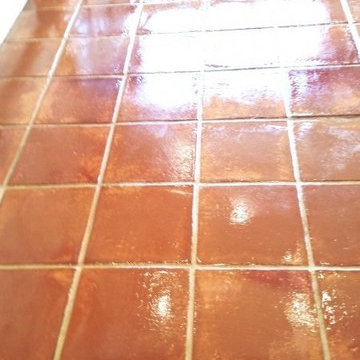
Sealers really do bring out the best in Terracotta tiles, however the catch is they will wear off over time and if you want to maintain that appearance you have to work out a regular maintenance plan. If you don’t maintain the sealer you will find that the sealer near the most heavily used areas such as doors etc. will wear away first and once that happens dirt will become ingrained in the tile and becomes difficult to clean resulting in a patchy appearance.
The remaining sealer on this Terracotta tiled kitchen floor at a house in the town of Wickford, Essex was no longer effective and had worn completely off in places. The solution was to strip off the old sealer, clean the Terracotta tile and gout and then re-seal with a fresh seal.
I started by giving the floor a deep clean with Tile Doctor Pro Clean diluted 2 parts water to 1 part cleaner. This is quite a strong dilution designed to allow the removal of the sealer and was left to dwell on the floor for ten minutes before working it into the floor using a scrubbing machine fitted with a black pad. Surprisingly the sealer was proving difficult to shift in certain areas and I had to repeat the process a few times and made sure to give the grout a good scrubbing as well.
I managed to get rid of most of the sealer using this process and for the remaining stubborn areas I used a stronger product called Tile Doctor Remove and Go which is a very effective coatings remover that is safe to use on tiles. This did the trick and the floor was now free of sealers and the grout was looking much better too, the resultant slurry was removed using a wet vacuum and I then rinsed the floor several times with water before leaving it to dry for weekend.
Tile Doctor Colour Grow which is an impregnating sealer that seeps into the pores of the tile to block them and prevent contaminates becoming ingrained in there and it also enhances the natural colours. Once this was dry I followed up with a number of coats of Tile Doctor Seal and Go which is topical sealer that will protect the surface and adds a nice sheen to the floor and is a popular choice for Terracotta and Quarry tiles.
I’m not sure my photographs do this post any justice however hopefully you can see that floor was quite transformed, the grout is much cleaner and the colours in the Terracotta have really come to life.
Nick Murphy
South Essex Tile Doctor
 Splash Pools & Construction
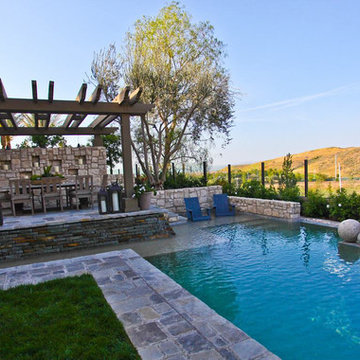
The owner had several requirements when we started the design of this pool, including: negative edge, Tuscan style to match the house, raised outdoor living area adjacent to pool and a large reef step.
The Tuscan style was easy to match, by using the stone similar to the house on the decking, patio and wall; and similar flagstone on the tiered stone spillway. The stone wall on the raised patio also provides great privacy from neighbors.
The negative edge and outdoor living area adjacent to the pool required more creativity and coordination to work. This lot was completely flat, making it difficult to give a negative edge look and the owner did not want a raised pool. We were able to achieve the negative edge look by lowering the soil level down behind the pool and only having a short drop from the negative edge to the water basin. We added the decorative concrete balls to give an artsy look to the pool.
The outdoor living area is a unique raised deck to take advantage of the view and includes a freestanding-latticed patio. The patio footings were integrated into the pool, while leaving enough space for a water trough and plumbing for the tiered spillway that flows down from the raised patio.
We incorporated the large reef step around the raised patio with the pool entrance at the far end.
At just under 600 SF, this Tuscan-style pool provides a great view, lounging area and plenty of space for swimming!
This is a Toll Brothers model home pool in the Marbella Collection, Avalon Model in Irvine. California.

 Виктория Якуша
Forest house
Year: 2019
Area: 235 sq. m.
Kyiv region, Ukraine
Architecture has a power to transform space. Often it`s too aggressive to the natural landscape. The principles of "live minimalism" in architectural projects is that you do not need to choose “man or nature”. Ukrainian architect and designer Viktoria Yakusha created residential house in the middle of the pine forest with zero harm to the environment.
The location of the house was not chosen by chance.Pine forest, convenient location near Kyiv – an ideal place for a quiet flow of life and a cosy weekend.Preserving wildlife, leaving pine trees on the site,while ensuring comfortable spatial planning of the house, was a fundamental point in the entire project and the most difficult task for the designer.
The first floor of the house is an open space. Thanks To the large window and terrace, the interior and exterior are combined and merged into a single harmonious space.The second-floor hangs over the terrace, creating a cosy place for family evenings. The construction of the outer wall of the building provides barbecue facilities.
The house is formed from several clear volumes, which are additionally highlighted with different materials: decorative plaster,porcelain stoneware, wooden beams. The colour scheme continues and partially reproduces the colours of the surrounding landscape as if the house emerges among the trees.
“Nature was not just an inspiration for design team, but a co-author of this house,” - says the architect Victoria Yakusha. - “During our work, we were guided by the principles of“living minimalism”. This allowed us to create a special space combining man and nature.”
8