
Search results for "Maintenance plans" in Home Design Ideas
 Klopf Architecture
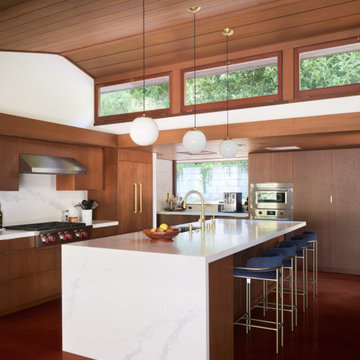
Nestled in the hills of Orinda, California, this 1951 residence is one of only seven extant homes, now known as “The Magnificent Seven”, designed by architect Olof Dahlstrand, a protégé of Frank Lloyd Wright. With its low-slung rooflines, natural materials, and deep integration with the sloping landscape, the home is a pristine example of mid-century modern design inspired by Wright’s organic principles. Over the years, prior homeowners have emphasized preservation, ensuring that the house remained relatively untouched. Each owner has respected the original architecture and stayed true to Dahlstrand’s intent. When a family of five—two college-aged sons and a middle school-aged daughter—acquired the property, they were captivated by its history, legacy of care, and architectural significance. While they appreciated Dahlstrand’s original vision, they also recognized the need to adapt the home for contemporary living while preserving its design integrity.
The remodel was conceived as a thoughtful response to the past—an effort to bring the house into the 21st century without compromising its soul. The primary mandate was to maintain architectural continuity while improving the functionality, comfort, and livability for a modern family. The design team—architects and contractor alike—worked with a shared reverence for the original architecture, allowing that mindset to guide even the most technical or pragmatic decisions.
A key objective was to increase natural light in the kitchen—a departure from Wrightian principles of enclosed, intimate cooking spaces—while maintaining the home’s architectural language. The kitchen was reconfigured to foster a stronger connection to adjacent living spaces while retaining the underlying concept of spatial separation. One of the most transformative architectural changes was the removal of a ridge beam that was originally planned to remain visible through the kitchen. During construction, the team collaborated on a better solution: a wide-flanged steel beam concealed within the roof envelope. This subtle move preserved the clean lines and ceiling continuity, a modern update carried out with utmost respect for the existing framework.
The home’s original powder room, previously accessible only through the kitchen, was relocated for better flow and privacy. A new powder room was carved out of former kitchen cabinetry—a narrow, interior space that could have felt dark and enclosed. To avoid this, the design extended the line of original transom windows into the new powder room and added a skylight above the vanity. The result is a bright and airy space that feels consistent with the rest of the home. Other updates included the installation of new solid-core interior doors with veneers carefully matched to the original mahogany, enhancing the continuity of the interiors. Even smaller decisions, such as placing the door knobs at 42 inches high, mirrored the original proportions. Every choice reflected a shared belief between the architect, contractor, and client: that new work should serve the integrity of the old.
The home’s extensive interior redwood millwork and paneling was meticulously restored. Where new materials were introduced—such as the replacement redwood soffit paneling—the contractor took pains to find finish nails that matched the original, rather than using modern equivalents. This level of craftsmanship and collaboration defined the project. It extended even to the detailing of a blind door to the new powder room, which had to disappear into the existing redwood board-and-batten wall. It was a team effort: the owner found a suitable handle, the architects devised the custom in-swing mechanism, and the contractor executed it so the door aligned precisely with the battens. Throughout, the homeowners were deeply engaged in the design process. One, a meticulous design enthusiast, focused on aesthetic integrity and historic detail. The other brought a practical and function-driven perspective, ensuring that new fixtures and materials would be durable and require minimal maintenance.
While the home’s location posed no major site challenges, sustainability was a key concern. The team upgraded the roof insulation, installed solar panels with battery storage, and added ductless mini-split cooling systems. Lighting was another area where modern technology was woven into a historic framework: new square LED fixtures echo the original custom perimeter soffit lights, maintaining the design language while offering advanced performance.
A planned expansion of a bedroom into suite with a bathroom had to be shelved due to budget constraints and the high cost of below-grade foundation work. Still, the team focused their efforts on making the most of the existing footprint, resolving constraints through design ingenuity rather than adding square footage. This renovation represents a collaborative achievement in preserving and evolving a historically significant home. Every decision was shaped by a shared ethos among clients, architects, and contractor: to maintain the home’s architectural soul while updating it for contemporary life. The result is a timeless modernist residence that continues Olof Dahlstrand’s legacy, remaining grounded in nature, craftsmanship, and human-scale design.
Klopf Architecture Team: John Klopf, AIA, Klara Kevane, Fernanda Bernardes
Interior Architectural Design: Klopf Architecture
Structural Engineer: Daniel Bastiao
Contractor: Don Larwood, Larwood Construction
Photography: Mariko Reed
Year Completed: 2022
 Spratley & Partners
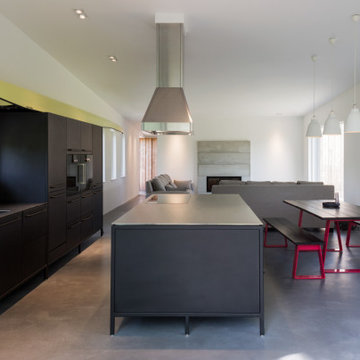
A robust, modern, riverside home with minimalist detailing that blends seamlessly into the surroundings. The home is used as a year-round weekend retreat for a family with children and as such they wanted it to be private and offer a sense of escape and freedom. The clients wanted it to be a low maintenance, energy efficient home making use of natural materials.
Clad with innovative treated timber, the house nestles harmoniously into its rural, riverside setting; making the most of its context, orientation and views while minimising any impact on the surrounding area. Two opposing blocks, forming a 'T' shape in plan, taper up in height towards the river to the east and fields to the south and define the internal spaces. The open-plan living, kitchen and dining areas benefit from fully-glazed sliding doors set in a deep reveal to the south which maximises light and provides shelter above. Large windows look out over the river and a raised, cantilevered deck wraps around the east and south elevations, creating an extension to the internal space that bleeds out into the landscape beyond.
 Klopf Architecture
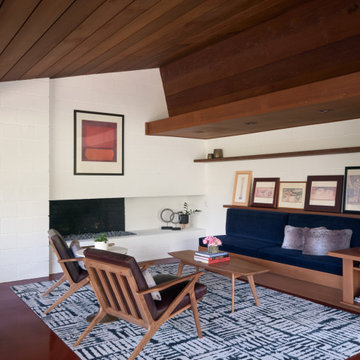
Nestled in the hills of Orinda, California, this 1951 residence is one of only seven extant homes, now known as “The Magnificent Seven”, designed by architect Olof Dahlstrand, a protégé of Frank Lloyd Wright. With its low-slung rooflines, natural materials, and deep integration with the sloping landscape, the home is a pristine example of mid-century modern design inspired by Wright’s organic principles. Over the years, prior homeowners have emphasized preservation, ensuring that the house remained relatively untouched. Each owner has respected the original architecture and stayed true to Dahlstrand’s intent. When a family of five—two college-aged sons and a middle school-aged daughter—acquired the property, they were captivated by its history, legacy of care, and architectural significance. While they appreciated Dahlstrand’s original vision, they also recognized the need to adapt the home for contemporary living while preserving its design integrity.
The remodel was conceived as a thoughtful response to the past—an effort to bring the house into the 21st century without compromising its soul. The primary mandate was to maintain architectural continuity while improving the functionality, comfort, and livability for a modern family. The design team—architects and contractor alike—worked with a shared reverence for the original architecture, allowing that mindset to guide even the most technical or pragmatic decisions.
A key objective was to increase natural light in the kitchen—a departure from Wrightian principles of enclosed, intimate cooking spaces—while maintaining the home’s architectural language. The kitchen was reconfigured to foster a stronger connection to adjacent living spaces while retaining the underlying concept of spatial separation. One of the most transformative architectural changes was the removal of a ridge beam that was originally planned to remain visible through the kitchen. During construction, the team collaborated on a better solution: a wide-flanged steel beam concealed within the roof envelope. This subtle move preserved the clean lines and ceiling continuity, a modern update carried out with utmost respect for the existing framework.
The home’s original powder room, previously accessible only through the kitchen, was relocated for better flow and privacy. A new powder room was carved out of former kitchen cabinetry—a narrow, interior space that could have felt dark and enclosed. To avoid this, the design extended the line of original transom windows into the new powder room and added a skylight above the vanity. The result is a bright and airy space that feels consistent with the rest of the home. Other updates included the installation of new solid-core interior doors with veneers carefully matched to the original mahogany, enhancing the continuity of the interiors. Even smaller decisions, such as placing the door knobs at 42 inches high, mirrored the original proportions. Every choice reflected a shared belief between the architect, contractor, and client: that new work should serve the integrity of the old.
The home’s extensive interior redwood millwork and paneling was meticulously restored. Where new materials were introduced—such as the replacement redwood soffit paneling—the contractor took pains to find finish nails that matched the original, rather than using modern equivalents. This level of craftsmanship and collaboration defined the project. It extended even to the detailing of a blind door to the new powder room, which had to disappear into the existing redwood board-and-batten wall. It was a team effort: the owner found a suitable handle, the architects devised the custom in-swing mechanism, and the contractor executed it so the door aligned precisely with the battens. Throughout, the homeowners were deeply engaged in the design process. One, a meticulous design enthusiast, focused on aesthetic integrity and historic detail. The other brought a practical and function-driven perspective, ensuring that new fixtures and materials would be durable and require minimal maintenance.
While the home’s location posed no major site challenges, sustainability was a key concern. The team upgraded the roof insulation, installed solar panels with battery storage, and added ductless mini-split cooling systems. Lighting was another area where modern technology was woven into a historic framework: new square LED fixtures echo the original custom perimeter soffit lights, maintaining the design language while offering advanced performance.
A planned expansion of a bedroom into suite with a bathroom had to be shelved due to budget constraints and the high cost of below-grade foundation work. Still, the team focused their efforts on making the most of the existing footprint, resolving constraints through design ingenuity rather than adding square footage. This renovation represents a collaborative achievement in preserving and evolving a historically significant home. Every decision was shaped by a shared ethos among clients, architects, and contractor: to maintain the home’s architectural soul while updating it for contemporary life. The result is a timeless modernist residence that continues Olof Dahlstrand’s legacy, remaining grounded in nature, craftsmanship, and human-scale design.
Klopf Architecture Team: John Klopf, AIA, Klara Kevane, Fernanda Bernardes
Interior Architectural Design: Klopf Architecture
Structural Engineer: Daniel Bastiao
Contractor: Don Larwood, Larwood Construction
Photography: Mariko Reed
Year Completed: 2022
Find the right local pro for your project
 Klopf Architecture
Nestled in the hills of Orinda, California, this 1951 residence is one of only seven extant homes, now known as “The Magnificent Seven”, designed by architect Olof Dahlstrand, a protégé of Frank Lloyd Wright. With its low-slung rooflines, natural materials, and deep integration with the sloping landscape, the home is a pristine example of mid-century modern design inspired by Wright’s organic principles. Over the years, prior homeowners have emphasized preservation, ensuring that the house remained relatively untouched. Each owner has respected the original architecture and stayed true to Dahlstrand’s intent. When a family of five—two college-aged sons and a middle school-aged daughter—acquired the property, they were captivated by its history, legacy of care, and architectural significance. While they appreciated Dahlstrand’s original vision, they also recognized the need to adapt the home for contemporary living while preserving its design integrity.
The remodel was conceived as a thoughtful response to the past—an effort to bring the house into the 21st century without compromising its soul. The primary mandate was to maintain architectural continuity while improving the functionality, comfort, and livability for a modern family. The design team—architects and contractor alike—worked with a shared reverence for the original architecture, allowing that mindset to guide even the most technical or pragmatic decisions.
A key objective was to increase natural light in the kitchen—a departure from Wrightian principles of enclosed, intimate cooking spaces—while maintaining the home’s architectural language. The kitchen was reconfigured to foster a stronger connection to adjacent living spaces while retaining the underlying concept of spatial separation. One of the most transformative architectural changes was the removal of a ridge beam that was originally planned to remain visible through the kitchen. During construction, the team collaborated on a better solution: a wide-flanged steel beam concealed within the roof envelope. This subtle move preserved the clean lines and ceiling continuity, a modern update carried out with utmost respect for the existing framework.
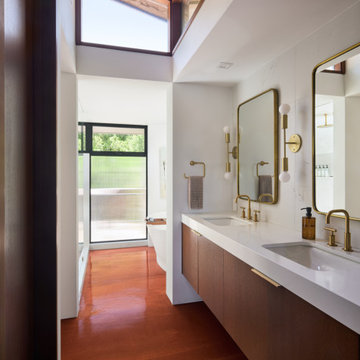
The home’s original powder room, previously accessible only through the kitchen, was relocated for better flow and privacy. A new powder room was carved out of former kitchen cabinetry—a narrow, interior space that could have felt dark and enclosed. To avoid this, the design extended the line of original transom windows into the new powder room and added a skylight above the vanity. The result is a bright and airy space that feels consistent with the rest of the home. Other updates included the installation of new solid-core interior doors with veneers carefully matched to the original mahogany, enhancing the continuity of the interiors. Even smaller decisions, such as placing the door knobs at 42 inches high, mirrored the original proportions. Every choice reflected a shared belief between the architect, contractor, and client: that new work should serve the integrity of the old.
The home’s extensive interior redwood millwork and paneling was meticulously restored. Where new materials were introduced—such as the replacement redwood soffit paneling—the contractor took pains to find finish nails that matched the original, rather than using modern equivalents. This level of craftsmanship and collaboration defined the project. It extended even to the detailing of a blind door to the new powder room, which had to disappear into the existing redwood board-and-batten wall. It was a team effort: the owner found a suitable handle, the architects devised the custom in-swing mechanism, and the contractor executed it so the door aligned precisely with the battens. Throughout, the homeowners were deeply engaged in the design process. One, a meticulous design enthusiast, focused on aesthetic integrity and historic detail. The other brought a practical and function-driven perspective, ensuring that new fixtures and materials would be durable and require minimal maintenance.
While the home’s location posed no major site challenges, sustainability was a key concern. The team upgraded the roof insulation, installed solar panels with battery storage, and added ductless mini-split cooling systems. Lighting was another area where modern technology was woven into a historic framework: new square LED fixtures echo the original custom perimeter soffit lights, maintaining the design language while offering advanced performance.
A planned expansion of a bedroom into suite with a bathroom had to be shelved due to budget constraints and the high cost of below-grade foundation work. Still, the team focused their efforts on making the most of the existing footprint, resolving constraints through design ingenuity rather than adding square footage. This renovation represents a collaborative achievement in preserving and evolving a historically significant home. Every decision was shaped by a shared ethos among clients, architects, and contractor: to maintain the home’s architectural soul while updating it for contemporary life. The result is a timeless modernist residence that continues Olof Dahlstrand’s legacy, remaining grounded in nature, craftsmanship, and human-scale design.
Klopf Architecture Team: John Klopf, AIA, Klara Kevane, Fernanda Bernardes
Interior Architectural Design: Klopf Architecture
Structural Engineer: Daniel Bastiao
Contractor: Don Larwood, Larwood Construction
Photography: Mariko Reed
Year Completed: 2022
 Change Your Bathroom©
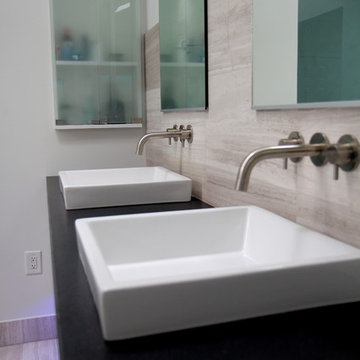
The goal of this project was to upgrade the builder grade finishes and create an ergonomic space that had a contemporary feel. This bathroom transformed from a standard, builder grade bathroom to a contemporary urban oasis. This was one of my favorite projects, I know I say that about most of my projects but this one really took an amazing transformation. By removing the walls surrounding the shower and relocating the toilet it visually opened up the space. Creating a deeper shower allowed for the tub to be incorporated into the wet area. Adding a LED panel in the back of the shower gave the illusion of a depth and created a unique storage ledge. A custom vanity keeps a clean front with different storage options and linear limestone draws the eye towards the stacked stone accent wall.
Houzz Write Up: https://www.houzz.com/magazine/inside-houzz-a-chopped-up-bathroom-goes-streamlined-and-swank-stsetivw-vs~27263720
The layout of this bathroom was opened up to get rid of the hallway effect, being only 7 foot wide, this bathroom needed all the width it could muster. Using light flooring in the form of natural lime stone 12x24 tiles with a linear pattern, it really draws the eye down the length of the room which is what we needed. Then, breaking up the space a little with the stone pebble flooring in the shower, this client enjoyed his time living in Japan and wanted to incorporate some of the elements that he appreciated while living there. The dark stacked stone feature wall behind the tub is the perfect backdrop for the LED panel, giving the illusion of a window and also creates a cool storage shelf for the tub. A narrow, but tasteful, oval freestanding tub fit effortlessly in the back of the shower. With a sloped floor, ensuring no standing water either in the shower floor or behind the tub, every thought went into engineering this Atlanta bathroom to last the test of time. With now adequate space in the shower, there was space for adjacent shower heads controlled by Kohler digital valves. A hand wand was added for use and convenience of cleaning as well. On the vanity are semi-vessel sinks which give the appearance of vessel sinks, but with the added benefit of a deeper, rounded basin to avoid splashing. Wall mounted faucets add sophistication as well as less cleaning maintenance over time. The custom vanity is streamlined with drawers, doors and a pull out for a can or hamper.
A wonderful project and equally wonderful client. I really enjoyed working with this client and the creative direction of this project.
Brushed nickel shower head with digital shower valve, freestanding bathtub, curbless shower with hidden shower drain, flat pebble shower floor, shelf over tub with LED lighting, gray vanity with drawer fronts, white square ceramic sinks, wall mount faucets and lighting under vanity. Hidden Drain shower system. Atlanta Bathroom.
 Berry Outdoor Living, Inc.
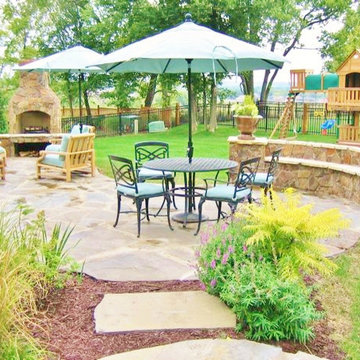
One of my favorites and most popular jobs ever. First, an affordable price range. Second, the attractive stonework on the sitting wall and fire place. Full color bluestone patio is gorgous and no maintenance. the layout and curves of the project are great. The lawn is immaculate, with plenty of room for kids to play and pets. Love the teal color and furnishings the client chose. It just feels easy and relaxed.
Landscape Designer Values:
Landscape Designer and Landscape Contractor, Brett Berry of Berry Outdoor Living creates living areas that feel connected to the home. As a Landscape Designer and Landscape Contractor, when we've created a project the right way, the space feels relaxed. It's like it's been in place with the home for years and not an "add-on". As a Landscape Contractor that merges old and new construction into the landscape design, it's difficult to describe, but people just want to spend time in the new area, whether at the bar of the outdoor kitchen, fire pit, patio, or covered porch. When a space becomes a large part of the homeowners' daily life, that's when I know a project has been completed with excellence.
For a space to be relaxing, it must feel easy. A quality landscape design must allow the space to feel like it flows from the adjoining room inside the home out. When accomplished correctly, the patio and outdoor living space feels like an extension of the home, or another "room" of the home and feels wrapped with fresh, low-maintenance landscaping.
Landscape Architect and Landscape Designer Design, Landscape Architect and Landscape Designer Plan, Landscape Architect and Landscape Designer style, Landscape Architect and Landscape Designer feel, Landscape Architect and Landscape Designer Kansas City, Landscape Architect and Landscape Designer Overland Park, Landscape Architect and Landscape Designer Mission Hills, Landscape Architect and Landscape Designer Lee's Summit, Landscape Architect and Landscape Designer Lenexa, Landscape Architect and Landscape Designer Shawnee, Landscape Architect and Landscape Designer Olathe, Landscape Architect and Landscape Designer Riss Lake, Landscape Architect and Landscape Designer Tiffany, Landscape Architect and Landscape Designer Loch Lloyd, Landscape Architect and Landscape Designer Lionsgate, Landscape Architect and Landscape Designer Deer Creek, Landscape Architect and Landscape Designer Ward Parkway, Landscape Architect and Landscape Designer Cedar Creek
 Integrate Architecture & Planning
Michelle Wood
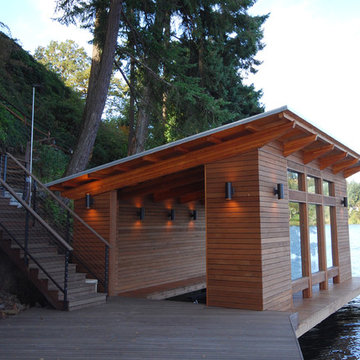
Small minimalist one-story wood exterior home photo in Portland with a shed roof
Small minimalist one-story wood exterior home photo in Portland with a shed roof

 TKS Design Group
Download our free ebook, Creating the Ideal Kitchen. DOWNLOAD NOW
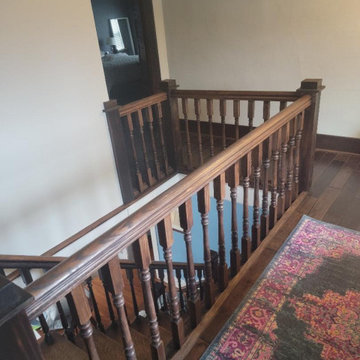
Lakefront property in the northwest suburbs of Chicago is hard to come by, so when we were hired by this young family with exactly that, we were immediately inspired by not just the unusually large footprint of this 1950’s colonial revival but also the lovely views of the manmade lake it was sited on. The large 5-bedroom home was solidly stuck in the 1980’s, but we saw tons of potential. We started out by updating the existing staircase with a fresh coat of paint and adding new herringbone slate to the entry hall.
The powder room off the entryway also got a refresh - new flooring, new cabinets and fixtures. We ran the new slate right through into this space for some consistency. A fun wallpaper and shiplap trim add a welcoming feel and set the tone for the home.
Next, we tackled the kitchen. Located away from the rest of the first floor, the kitchen felt a little isolated, so we immediately began planning for how to better connect it to the rest of the first floor. We landed on removing the wall between the kitchen and dining room and designed a modified galley style space with separate cooking and clean up zones. The cooking zone consists of the refrigerator, prep sink and cooktop, along with a nice long run of prep space at the island. The cleanup side of the kitchen consists of the main sink and dishwasher. Both areas are situated so that the user can view the lake during prep work and cleanup!
One of the home’s main puzzles was how to incorporate the mudroom and area in front of the patio doors at the back of the house. We already had a breakfast table area, so the space by the patio doors was a bit of a no man’s land. We decided to separate the kitchen proper from what became the new mudroom with a large set of barn doors. That way you can quickly hide any mudroom messes but have easy access to the light coming in through the patio doors as well as the outdoor grilling station. We also love the impact the barn doors add to the overall space.
The homeowners’ first words to us were “it’s time to ditch the brown,” so we did! We chose a lovely blue pallet that reflects the home’s location on the lake which is also vibrant yet easy on the eye. Countertops are white quartz, and the natural oak floor works well with the other honey accents. The breakfast table was given a refresh with new chairs, chandelier and window treatments that frame the gorgeous views of the lake out the back.
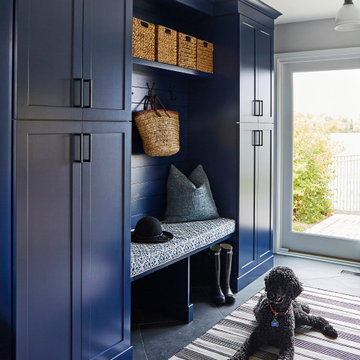
We coordinated the slate mudroom flooring with that used in the home’s main entrance for a consistent feel. The storage area consists of open and closed storage to allow for some clutter control as needed.
Next on our “to do” list was revamping the dated brown bar area in the neighboring dining room. We eliminated the clutter by adding some closed cabinets and did some easy updates to help the space feel more current. One snag we ran into here was the discovery of a beam above the existing open shelving that had to be modified with a smaller structural beam to allow for our new design to work. This was an unexpected surprise, but in the end we think it was well worth it!
We kept the colors here a bit more muted to blend with the homeowner’s existing furnishings. Open shelving and polished nickel hardware add some simple detail to the new entertainment zone which also looks out onto the lake!
Next we tackled the upstairs starting with the homeowner’s son’s bath. The bath originally had both a tub shower and a separate shower, so we decided to swap out the shower for a new laundry area. This freed up some space downstairs in what used to be the mudroom/laundry room and is much more convenient for daily laundry needs.
We continued the blue palette here with navy cabinetry and the navy tile in the shower. Porcelain floor tile and chrome fixtures keep maintenance to a minimum while matte black mirrors and lighting add some depth the design. A low maintenance runner adds some warmth underfoot and ties the whole space together.
We added a pocket door to the bathroom to minimize interference with the door swings. The left door of the laundry closet is on a 180 degree hinge to allow for easy full access to the machines. Next we tackled the master bath which is an en suite arrangement. The original was typical of the 1980’s with the vanity outside of the bathroom, situated near the master closet. And the brown theme continued here with multiple shades of brown.
Our first move was to segment off the bath and the closet from the master bedroom. We created a short hall from the bedroom to the bathroom with his and hers walk-in closets on the left and right as well as a separate toilet closet outside of the main bathroom for privacy and flexibility.
The original bathroom had a giant soaking tub with steps (dangerous!) as well as a small shower that did not work well for our homeowner who is 6’3”. With other bathtubs in the home, they decided to eliminate the tub and create an oversized shower which takes up the space where the old tub was located. The double vanity is on the opposite wall and a bench is located under the window for morning conversations and a place to set a couple of towels.
The pallet in here is light and airy with a mix of blond wood, creamy porcelain and marble tile, and brass accents. A simple roman shade adds some texture and it’s top-down mechanism allows for light and privacy.
This large whole house remodel gave our homeowners not only the ability to maximize the potential of their home but also created a lovely new frame from which to view their fabulous lake views.
Designed by: Susan Klimala, CKD, CBD
Photography by: Michael Kaskel
For more information on kitchen and bath design ideas go to: www.kitchenstudio-ge.com
 Urbafloria
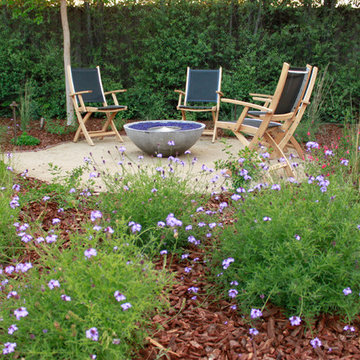
This backyard used to be just plain, boring grass. Now it's a beautiful, low water garden with a space for night time entertaining around an eco-friendly fire pit. The fire pit runs on bio-ethanol which is very clean burning. Plants attract butterflies and hummingbirds. This photo is just a couple of months after planting, all from 1 gallon size plants or smaller. Photo by Jacky Surber.
 Advance Design Studio, Ltd.
After six years of living in their Huntley IL home, Chris and Meghan were tired of their dark, dingy, outdated kitchen and it was finally time for a long-anticipated change. “The kitchen is the place where we live, it’s where we do everything,” Meghan said. “It was important that it be a space where we wanted to be.” Meghan loves cooking and enjoys including their girls in healthy meal prepping, this led them to want a brighter, more enjoyable kitchen with increased functionality and improved storage.
For Chris especially, the laundry room was an entirely dysfunctional eyesore. “We had a washer and a dryer, but it was all kind-of cobbled together!” Chris said. “There were always laundry piles everywhere, we weren’t really sure what we wanted to do in there, but it was time for us to make a change.” The mess of the space was stressful every time they walked in the door from the garage each day. Kids’ backpacks and shoes piled up haphazardly in the makeshift boot-bench closet left the family feeling disorganized and stressed. They needed space for folding clothes and locker cubbies to help keep the family organized.
Having known Christine and Todd in the Huntley community for years, Chris and Meghan were familiar with their work. “We already trusted them personally and having seen their projects for years we knew they did top notch work. After we reviewed the initial round of designs, we knew that hiring them was definitely the right choice,” Meghan and Chris said. Although Chris had done a lot of work in their home himself, the kitchen and laundry room renovation was such a large undertaking that he didn’t want to steal time away from his family to spend what would surely be many long weekends doing the job himself. “That would not have been a wise choice for us,” Chris laughed.
“Our designer, Michelle was very, very, easy to work with; anything we wanted to see or weren’t sure about, she went above and beyond to make this easy for us. She was easy to get hold of and always quick to respond,” the couple said. Michelle pulled ideas that mirrored the couple’s taste and style and was adept at directing the couple to limited choices that didn’t overwhelm them and kept the process moving. “I have a hard time making decisions. Michelle made the decision-making process so easy. I loved how she listened to what I liked and then presented three great options for me to choose from,” Meghan said.
The main objectives for the kitchen were better storage solutions, they wanted the space to reflect their lifestyle and taste, and they wanted it to last for years with low maintenance. One of the first steps in creating a more functional kitchen was relocating the refrigerator, creating an improved workflow for the busy family.
“We didn’t know that we could even move the refrigerator to a new location where it is now, that was something that we never would have thought of,” Chris said. “The new refrigerator location makes the kitchen feel so much bigger. We didn’t add any space, but our whole kitchen with the new design just seems like it’s so much larger than before!” Meghan said.
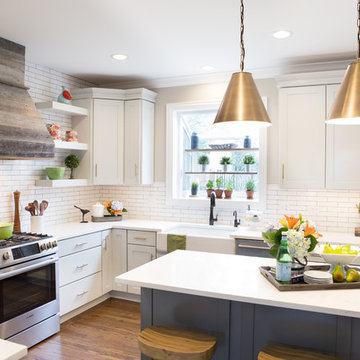
The perimeter mist colored cabinets helped warm and brighten the entire room, while the graphite colored cabinets on the island added contrast. Using this fresh, clean color palette satisfied the couple’s desire for a bright space that was the exact opposite of what they had before. Organization accessories were also added to the cabinets such as a spice drawer tray and roll outs to create hidden convenience.
“I absolutely love the hidden spices – it makes cooking so much more enjoyable!” Chris said. “And all the pull outs, and the double trash bin, who would think you could get so excited about organization!” the couple said in unison.
One thing they hated in their original kitchen was how dark the space felt. Added lighting on the ceiling with the new light fixtures combined with the lighter cabinetry colors throughout solved this problem. “Our new kitchen has this warm, almost cozy feeling that our old kitchen never had, it’s just a space that I love spending my time in now,” Meghan said. The light airy feeling was accentuated with the use of floating white shelves on either side of the decorative range hood. “We have so much cabinetry space, the new design is amazing we actually have more storage space than we will ever need,” Meghan said.
The island was extended to create more work surface and added space for stool seating. “The new island changes how we live. Now the kids can be in the kitchen with us, doing homework, eating breakfast, and the three of us have special dinners there when Chris is working late,” Meghan said.
The Carrara Marmi Quartz countertops were chosen because they are, not only beautiful, but are made from hard-working material that doesn’t require maintenance. The white subway tile backsplash that wraps to the ceiling behind the focal point cooktop range/hood compliments the crisp white countertops perfectly, while brushed brass hardware and light fixtures keep the design fresh and new.
The couple had a few fears at the beginning of the project, as most homeowners do. Their biggest fear was being out of their kitchen and laundry room for an extended time. The crew made it very easy for the family to work in a limited space keeping the washer and dryer hooked up the majority of the time, and also getting appliances working with minimal downtime.
“They above and beyond accommodated us to get us through the process,” Meghan said. “They did a great job making sure we were as comfortable as possible throughout the process,” Chris added.
“Our project manager DJ did a great job. He was very good at updating us on schedule changes, getting guys in as quickly as possible. Everyone that stepped in the house was nice and did great work,” said Chris. They thought Advance’s carpenter was phenomenal and were impressed when he took a conceptual idea from a photograph and worked with designer Michelle to create a one of a kind range/hood that has become the topic of conversation with friends and family who visit the new kitchen. “He was in our house literally every day for several weeks. He was easy to work with and good at what he did,” Meghan and Chris said.
The focal point of the kitchen; a hand-crafted, custom-built ventilation hood was clad with handpicked reclaimed barnwood. Advance Design’s carpenter built the framework and the cladding to create a one-of-a-kind design element that the couple loves.
“I think it was especially fun for him to create something unique from scratch, showcasing his talent in this area,” Meghan said. “I love that my kitchen is not like everyone else’s. I got to pick out the wood on my hood and watch it being built and was able to choose what pieces of wood went where on it. It’s totally unique.”
Red Oak flooring was toothed-in throughout the kitchen and the rest of the first floor anywhere changes were made. Then the whole floor was refinished to tone down the orange undertones in the existing floor stain, ultimately changing the color complexion of the entire first floor. The result is a completely new feeling to the entire home.
Renovating the laundry room was extremely important to Meghan and Chris, but they had trouble visualizing what the possibilities were for the seemingly small space. Michelle produced beautiful 3D illustrations that helped them envision the space in a whole new way.
“I must have told Michelle 100 times that I am a visual person, seeing the designs in 3D made it so easy to make decisions and see what we could really do with our space,” Meghan said.
A dividing wall and doorway were removed between the existing laundry room and hallway formerly containing a coat closet, providing space to design specialized graphite colored cabinetry matching the kitchen island to house custom storage cubbies for each family member. Adding the tall utility cabinetry in the new laundry area helped solve the storage issue, tucking away cleaning supplies, household items, and even the cat got its own cubby.
“I love how everything is now hidden in its own space. I can’t tell you how much I hated coming home and seeing everything sitting around on counters,” Chris said.
Electrical outlets were planned for the inside of utility cabinets, so devices could charge in hidden locations. Stacking the washer and dryer allowed for wider countertop space to provide a folding area and a special space for clothes to hang. “The way I do laundry has been completely transformed! I can actually fold clothes and hang them now right out of the washer and dryer,” Meghan said.
“The end result in the kitchen and the laundry/mud room was an updated light and bright space, with a smarter work flow that better meets the needs of this family,” Michelle said.
“I would totally recommend Advance Design,” Meghan said. “Sometimes I sit and just look at my kitchen and laundry room and think ‘Wow, I can’t believe I get to live here!’ It’s an understatement to say we love our new space.”
 London Bay Homes
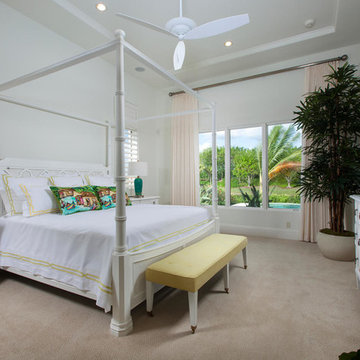
The fully furnished, maintenance-free Benita embraces inspired villa living in the lakefront Portofino neighborhood at Miromar Lakes Beach & Golf Club.
Overlooking a picturesque lake, the model home is shown with three bedrooms plus a den, or optional fourth bedroom. The Benita’s open floor plan includes a formal dining room; a kitchen with upgraded appliances and cabinetry, and a café and great room with oversized sliding glass doors that open to an outdoor living area with outdoor kitchen.
Flanked by an arbor and sculptured trellis tails, the pool and spa are both of an ornate sculptured curved design, and include a water feature that cascades gentle water into a circular pool shelf complete with decorative up-lighting.
Interior design, furnishings and selections completed by the award-winning Romanza Interior Design.
Image ©Advanced Photography Specialists
 Crystal Kitchen + Bath
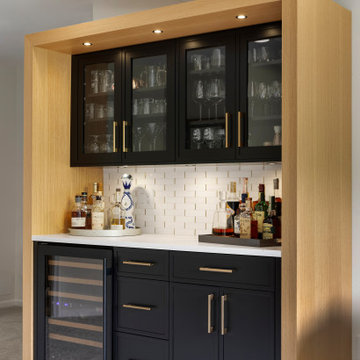
Located in Minnetonka, MN, this remodel was designed for a couple who wanted to transform their lower level into an upscale, entertaining retreat. The husband envisioned a sleek, fully stocked bar with room for barware, a beverage fridge, and his whiskey collection. We delivered with a custom quarter sawn oak and black cabinetry design, topped with durable Cambria quartz, and accented with warm brass hardware.
The adjacent movie room was given dramatic depth with the blackest paint we could source, creating a true cinematic atmosphere. A nearby powder bath received a complete refresh with quality, low-maintenance materials, including a stylish wood vanity, coordinating mirror, modern fixtures, and new flooring.
Though the original plan called for removing a wall in the movie room, structural limitations led to a design pivot, focusing instead on maximizing style and function within the existing layout. Materials were repeated throughout the home for a cohesive, high-end feel. Now, the homeowners can comfortably host friends and family in a space that blends modern sophistication with easy, everyday living.
 LifeHouse Construction
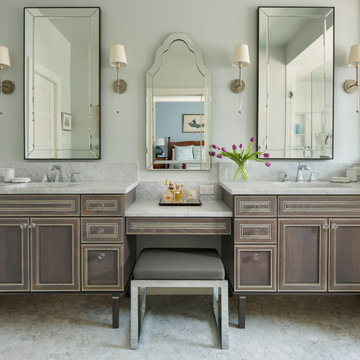
These owners know craftsmanship and appreciate high-quality details. The owner hand crafted some of the furniture pieces included in this remodel, including the master bed frame. To update the home and do justice to the owner’s own furniture pieces, we installed a sky light in the upstairs bedroom hallway to bathe the space in light and added new doors with brass hardware. The master bathroom was transformed into an oasis and the kitchen underwent a remodel to make it more functional with modern appliances.
Photos by Kimberly Gavin Photography
Sponsored
Sunbury, OH

J.Holderby - Renovations
Franklin County's Leading General Contractors - 2X Best of Houzz!
 Elite Custom Builders, LLC.
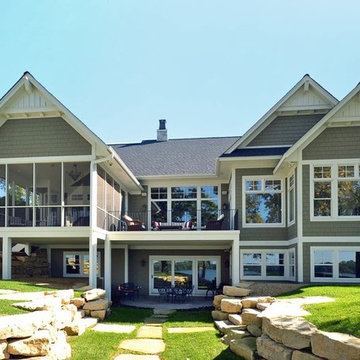
As a new build project, this charming lake home, was designed for easy entertaining, and to capture the breathtaking views of the lake on which it is sited. Custom-built walk-out rambler, with stone front and James Hardie shakes, brackets, columns and a stately steep pitched roof including stone chimney with a Jack Arnold copper knight cap. Enjoy the views of the lake in the screened in deck with vaulted bead board ceiling accessible from open deck or master bedroom or walk out kitchen/dinette area to open deck with maintenance free decking.


 TOM WILLIAMSON LANDSCAPING
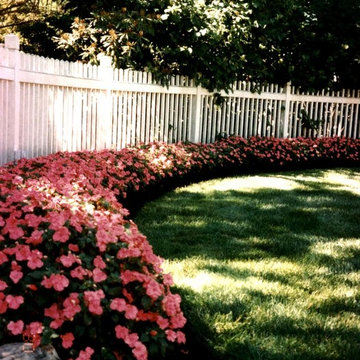
4-acre Property in Chappaqua NY. Large pond Creation with aeration, Masonry, granite slate porch with Stone center fire pit. Land design and installation of gardens around deck and yard with sporadic trees.
About us:
Tom Williamson Landscaping, Inc.
Simple. Elegant. Landscaping.
When preserving or remodeling your outdoor inspirational gardens, entertainment areas, or read-a-book oasis, you can rely on a professional landscaper for the best in beautiful design. As your advocates, they shop multiple nurseries to ensure that you get the healthiest of shrubs, trees, flowers, ground cover, and seed for your installations. Other design elements professionals consider are strong defining rock walls, delightful three-season blooming beds, and healthy rolling lawns. Plus, their planning and project management are additional skills that significantly affect the look and life of your garden.
Years of experience and training and working alongside horticultural experts develop the important skills of the trade. But, the ability to turn a home into a representation of the family’s successes and accomplishments is the artistry that only a seasonal professional landscaper can deliver.
Welcome to Tom Williamson Landscaping. We design, install and maintain brilliant gardens and lawns, providing this high level of beauty. Our 30 years of servicing Westchester County’s fine homes and families is a testament to our ability to listen and respond to your visions and needs. We have the artists, the muscle, and the management to provide — not only gardens and lawns your neighbors will envy — but the “experience” that ensures you hired the right landscaper.
So, if you are planning on refreshing your home and outdoors with stone or living environments, visit our gallery to see our work. We are here, happy to answer your questions. Call us today at 914-762-4927 or email us.
Services provided are everything great gardening:
Landscaping and Masonry; Ground cover, Pachysandra installation, Rose bush installation, Boxwood installation, Tree installation, Bushes, Plantings, Trees, Seasonal plantings, Urns, Pruning, Fertilization, Lawn care & Maintenance, Mulching, Installation of Large Trees, Holiday Trimming, Snowplowing to keep your home enjoyable even in the winter. Landscape Design and construction, Lawn care and maintenance, Lawn Installation: sod, hydro seeding, spot seeding, Lawn Fertilizing and Lyme application, Landscape design plans and installation, Masonry: stone walls, patios, walkways, garden paths, boulder steps, Planting Bed Care: mulching, weeding, edging, trimming, Pruning: trees & shrubs, Deep Root Feeding: Trees and shrubs, Tree Installation: dwarf to large, ornamental, flowering, evergreen, Maple, Cedar, Dogwood, Cherry, Apple, Red Bud, Shrub Installation: Boxwood, Holly, Juniper, Cypress, Dogwood twig, Leucothoe, Andromeda, Viburnum, Hydrangea, Lylac, Installation Ornamental Grasses: Fountain grass, Fox Tail grass, Hakone grass, ferns, Ground Cover Installation: Pachysandra, Ivy, Vinca, Perennial Installation: Daffodils, Tulips, Lilies, Lavender, Hibiscus, Black-eyed Susan, Bleeding Heart, Peony, Sage, Clematis, Sedum, Hosta, Sage, Iris, Plumbago, Astilbe, and Ferns, Flowering Annuals Installation: Pansies, Begonias, Petunias, Daises, Geraniums, Impatiens, Lantana, Fushia, Bacopa, Flower Pots, Urns and Boxes: Overflowing mixture of annuals, perennials and hangers for spring, summer, fall and winter, Gutter Cleaning: Late fall, Snow Removal: Plowing, salting, walkways shoveled, roofs raked, Winter Holiday Trimming
Areas cover:
10504, 10506, 10510, 10514, 10546, 10549, 10562, 10570, 10510
Servicing Chappaqua, Briarcliff Manor, Ossining, Scarborough, Pleasantville, Armonk, and Mt. Kisco
Chappaqua 10514 Landscaping: http://www.tomwilliamsonlandscaping.com/photos
Scarsdale landscaping: http://www.tomwilliamsonlandscaping.com/photos
Masonry in Chappaqua: http://www.tomwilliamsonlandscaping.com/photos
Masonry in Pleasantville: http://www.tomwilliamsonlandscaping.com/photos
Armonk landscaping specialists: http://www.tomwilliamsonlandscaping.com/photos
Mt. Kisco landscaping specialists: http://www.tomwilliamsonlandscaping.com/photos
Briarcliff Manor 10510 landscaping contractors: http://www.tomwilliamsonlandscaping.com/photos
Braircliff masonry 10510 contractors: http://www.tomwilliamsonlandscaping.com/photos
Armonk Masonry contractors: http://www.tomwilliamsonlandscaping.com/photos
Chappaqua rock wall specialists: http://www.tomwilliamsonlandscaping.com/photos
Ossining landscaping: http://www.tomwilliamsonlandscaping.com/photos
Ossining Masonry: http://www.tomwilliamsonlandscaping.com/photos
Scarborough Landscaper: http://www.tomwilliamsonlandscaping.com/photos
Scarborough Stone Wall and Mason: http://www.tomwilliamsonlandscaping.com/photos
Pleasantville land design and installation of large trees: http://www.tomwilliamsonlandscaping.com/photos
Pleasantville landscaper: http://www.tomwilliamsonlandscaping.com/photos
Mt. Kisco masonry contractors: http://www.tomwilliamsonlandscaping.com/photos
Armonk stone wall, driveway and pathway designer: http://www.tomwilliamsonlandscaping.com/photos
Best Landscaper in Westchester, NY : http://www.tomwilliamsonlandscaping.com/photos
Hottest landscape business in Westchester, NY: http://www.tomwilliamsonlandscaping.com/photos
 TOM WILLIAMSON LANDSCAPING
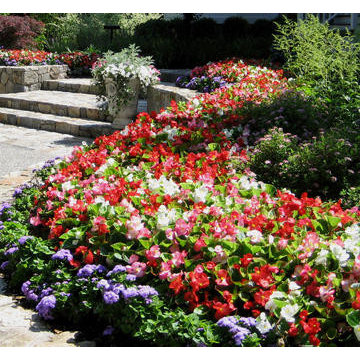
4-acre Property in Chappaqua NY. Large pond Creation with aeration, Masonry, granite slate porch with Stone center fire pit. Land design and installation of gardens around deck and yard with sporadic trees.
About us:
Tom Williamson Landscaping, Inc.
Simple. Elegant. Landscaping.
When preserving or remodeling your outdoor inspirational gardens, entertainment areas, or read-a-book oasis, you can rely on a professional landscaper for the best in beautiful design. As your advocates, they shop multiple nurseries to ensure that you get the healthiest of shrubs, trees, flowers, ground cover, and seed for your installations. Other design elements professionals consider are strong defining rock walls, delightful three-season blooming beds, and healthy rolling lawns. Plus, their planning and project management are additional skills that significantly affect the look and life of your garden.
Years of experience and training and working alongside horticultural experts develop the important skills of the trade. But, the ability to turn a home into a representation of the family’s successes and accomplishments is the artistry that only a seasonal professional landscaper can deliver.
Welcome to Tom Williamson Landscaping. We design, install and maintain brilliant gardens and lawns, providing this high level of beauty. Our 30 years of servicing Westchester County’s fine homes and families is a testament to our ability to listen and respond to your visions and needs. We have the artists, the muscle, and the management to provide — not only gardens and lawns your neighbors will envy — but the “experience” that ensures you hired the right landscaper.
So, if you are planning on refreshing your home and outdoors with stone or living environments, visit our gallery to see our work. We are here, happy to answer your questions. Call us today at 914-762-4927 or email us.
Services provided are everything great gardening:
Landscaping and Masonry; Ground cover, Pachysandra installation, Rose bush installation, Boxwood installation, Tree installation, Bushes, Plantings, Trees, Seasonal plantings, Urns, Pruning, Fertilization, Lawn care & Maintenance, Mulching, Installation of Large Trees, Holiday Trimming, Snowplowing to keep your home enjoyable even in the winter. Landscape Design and construction, Lawn care and maintenance, Lawn Installation: sod, hydro seeding, spot seeding, Lawn Fertilizing and Lyme application, Landscape design plans and installation, Masonry: stone walls, patios, walkways, garden paths, boulder steps, Planting Bed Care: mulching, weeding, edging, trimming, Pruning: trees & shrubs, Deep Root Feeding: Trees and shrubs, Tree Installation: dwarf to large, ornamental, flowering, evergreen, Maple, Cedar, Dogwood, Cherry, Apple, Red Bud, Shrub Installation: Boxwood, Holly, Juniper, Cypress, Dogwood twig, Leucothoe, Andromeda, Viburnum, Hydrangea, Lylac, Installation Ornamental Grasses: Fountain grass, Fox Tail grass, Hakone grass, ferns, Ground Cover Installation: Pachysandra, Ivy, Vinca, Perennial Installation: Daffodils, Tulips, Lilies, Lavender, Hibiscus, Black-eyed Susan, Bleeding Heart, Peony, Sage, Clematis, Sedum, Hosta, Sage, Iris, Plumbago, Astilbe, and Ferns, Flowering Annuals Installation: Pansies, Begonias, Petunias, Daises, Geraniums, Impatiens, Lantana, Fushia, Bacopa, Flower Pots, Urns and Boxes: Overflowing mixture of annuals, perennials and hangers for spring, summer, fall and winter, Gutter Cleaning: Late fall, Snow Removal: Plowing, salting, walkways shoveled, roofs raked, Winter Holiday Trimming
Areas cover:
10504, 10506, 10510, 10514, 10546, 10549, 10562, 10570, 10510
Servicing Chappaqua, Briarcliff Manor, Ossining, Scarborough, Pleasantville, Armonk, and Mt. Kisco
Chappaqua 10514 Landscaping: http://www.tomwilliamsonlandscaping.com/photos
Scarsdale landscaping: http://www.tomwilliamsonlandscaping.com/photos
Masonry in Chappaqua: http://www.tomwilliamsonlandscaping.com/photos
Masonry in Pleasantville: http://www.tomwilliamsonlandscaping.com/photos
Armonk landscaping specialists: http://www.tomwilliamsonlandscaping.com/photos
Mt. Kisco landscaping specialists: http://www.tomwilliamsonlandscaping.com/photos
Briarcliff Manor 10510 landscaping contractors: http://www.tomwilliamsonlandscaping.com/photos
Braircliff masonry 10510 contractors: http://www.tomwilliamsonlandscaping.com/photos
Armonk Masonry contractors: http://www.tomwilliamsonlandscaping.com/photos
Chappaqua rock wall specialists: http://www.tomwilliamsonlandscaping.com/photos
Ossining landscaping: http://www.tomwilliamsonlandscaping.com/photos
Ossining Masonry: http://www.tomwilliamsonlandscaping.com/photos
Scarborough Landscaper: http://www.tomwilliamsonlandscaping.com/photos
Scarborough Stone Wall and Mason: http://www.tomwilliamsonlandscaping.com/photos
Pleasantville land design and installation of large trees: http://www.tomwilliamsonlandscaping.com/photos
Pleasantville landscaper: http://www.tomwilliamsonlandscaping.com/photos
Mt. Kisco masonry contractors: http://www.tomwilliamsonlandscaping.com/photos
Armonk stone wall, driveway and pathway designer: http://www.tomwilliamsonlandscaping.com/photos
Best Landscaper in Westchester, NY : http://www.tomwilliamsonlandscaping.com/photos
Hottest landscape business in Westchester, NY: http://www.tomwilliamsonlandscaping.com/photos

Sponsored
Columbus, OH

Hope Restoration & General Contracting
Columbus Design-Build, Kitchen & Bath Remodeling, Historic Renovations
 TOM WILLIAMSON LANDSCAPING
4-acre Property in Chappaqua NY. Large pond Creation with aeration, Masonry, granite slate porch with Stone center fire pit. Land design and installation of gardens around deck and yard with sporadic trees.
About us:
Tom Williamson Landscaping, Inc.
Simple. Elegant. Landscaping.
When preserving or remodeling your outdoor inspirational gardens, entertainment areas, or read-a-book oasis, you can rely on a professional landscaper for the best in beautiful design. As your advocates, they shop multiple nurseries to ensure that you get the healthiest of shrubs, trees, flowers, ground cover, and seed for your installations. Other design elements professionals consider are strong defining rock walls, delightful three-season blooming beds, and healthy rolling lawns. Plus, their planning and project management are additional skills that significantly affect the look and life of your garden.
Years of experience and training and working alongside horticultural experts develop the important skills of the trade. But, the ability to turn a home into a representation of the family’s successes and accomplishments is the artistry that only a seasonal professional landscaper can deliver.
Welcome to Tom Williamson Landscaping. We design, install and maintain brilliant gardens and lawns, providing this high level of beauty. Our 30 years of servicing Westchester County’s fine homes and families is a testament to our ability to listen and respond to your visions and needs. We have the artists, the muscle, and the management to provide — not only gardens and lawns your neighbors will envy — but the “experience” that ensures you hired the right landscaper.
So, if you are planning on refreshing your home and outdoors with stone or living environments, visit our gallery to see our work. We are here, happy to answer your questions. Call us today at 914-762-4927 or email us.
Services provided are everything great gardening:
Landscaping and Masonry; Ground cover, Pachysandra installation, Rose bush installation, Boxwood installation, Tree installation, Bushes, Plantings, Trees, Seasonal plantings, Urns, Pruning, Fertilization, Lawn care & Maintenance, Mulching, Installation of Large Trees, Holiday Trimming, Snowplowing to keep your home enjoyable even in the winter. Landscape Design and construction, Lawn care and maintenance, Lawn Installation: sod, hydro seeding, spot seeding, Lawn Fertilizing and Lyme application, Landscape design plans and installation, Masonry: stone walls, patios, walkways, garden paths, boulder steps, Planting Bed Care: mulching, weeding, edging, trimming, Pruning: trees & shrubs, Deep Root Feeding: Trees and shrubs, Tree Installation: dwarf to large, ornamental, flowering, evergreen, Maple, Cedar, Dogwood, Cherry, Apple, Red Bud, Shrub Installation: Boxwood, Holly, Juniper, Cypress, Dogwood twig, Leucothoe, Andromeda, Viburnum, Hydrangea, Lylac, Installation Ornamental Grasses: Fountain grass, Fox Tail grass, Hakone grass, ferns, Ground Cover Installation: Pachysandra, Ivy, Vinca, Perennial Installation: Daffodils, Tulips, Lilies, Lavender, Hibiscus, Black-eyed Susan, Bleeding Heart, Peony, Sage, Clematis, Sedum, Hosta, Sage, Iris, Plumbago, Astilbe, and Ferns, Flowering Annuals Installation: Pansies, Begonias, Petunias, Daises, Geraniums, Impatiens, Lantana, Fushia, Bacopa, Flower Pots, Urns and Boxes: Overflowing mixture of annuals, perennials and hangers for spring, summer, fall and winter, Gutter Cleaning: Late fall, Snow Removal: Plowing, salting, walkways shoveled, roofs raked, Winter Holiday Trimming
Areas cover:
10504, 10506, 10510, 10514, 10546, 10549, 10562, 10570, 10510
Servicing Chappaqua, Briarcliff Manor, Ossining, Scarborough, Pleasantville, Armonk, and Mt. Kisco
Chappaqua 10514 Landscaping: http://www.tomwilliamsonlandscaping.com/photos
Scarsdale landscaping: http://www.tomwilliamsonlandscaping.com/photos
Masonry in Chappaqua: http://www.tomwilliamsonlandscaping.com/photos
Masonry in Pleasantville: http://www.tomwilliamsonlandscaping.com/photos
Armonk landscaping specialists: http://www.tomwilliamsonlandscaping.com/photos
Mt. Kisco landscaping specialists: http://www.tomwilliamsonlandscaping.com/photos
Briarcliff Manor 10510 landscaping contractors: http://www.tomwilliamsonlandscaping.com/photos
Braircliff masonry 10510 contractors: http://www.tomwilliamsonlandscaping.com/photos
Armonk Masonry contractors: http://www.tomwilliamsonlandscaping.com/photos
Chappaqua rock wall specialists: http://www.tomwilliamsonlandscaping.com/photos
Ossining landscaping: http://www.tomwilliamsonlandscaping.com/photos
Ossining Masonry: http://www.tomwilliamsonlandscaping.com/photos
Scarborough Landscaper: http://www.tomwilliamsonlandscaping.com/photos
Scarborough Stone Wall and Mason: http://www.tomwilliamsonlandscaping.com/photos
Pleasantville land design and installation of large trees: http://www.tomwilliamsonlandscaping.com/photos
Pleasantville landscaper: http://www.tomwilliamsonlandscaping.com/photos
Mt. Kisco masonry contractors: http://www.tomwilliamsonlandscaping.com/photos
Armonk stone wall, driveway and pathway designer: http://www.tomwilliamsonlandscaping.com/photos
Best Landscaper in Westchester, NY : http://www.tomwilliamsonlandscaping.com/photos
Hottest landscape business in Westchester, NY: http://www.tomwilliamsonlandscaping.com/photos

 Industrial Projects
Creating a comfortable outdoor living space is a priority for many homeowners and DIY enthusiasts. With rising summer temperatures, installing a shade tarp in your backyard offers an affordable and effective solution for sun protection. We’ve developed this detailed, step-by-step guide to help you confidently install a shade tarp that not only shields you from the sun but also adds aesthetic appeal to your outdoor area.
Benefits of Installing a Backyard Shade Tarp
Before diving into the installation process, let’s explore the key benefits of having a backyard shade tarp:
Provides UV Protection: Keeps your family and guests safe from harmful sun exposure.
Reduces Outdoor Temperatures: Creates a cooler, more enjoyable outdoor space.
Protects Outdoor Furniture: Extends the life of patio furniture by reducing sun damage.
Enhances Outdoor Aesthetics: Adds a modern, stylish look to your yard.
Budget-Friendly: More affordable compared to permanent structures like pergolas.
Materials and Tools You’ll Need
To begin your DIY backyard shade project, gather the following materials and tools:
Materials:
Shade tarp (UV-resistant and breathable)
Sturdy posts or existing structures (trees, fences, walls)
Mounting hardware (eye bolts, D-rings, turnbuckles, snap hooks)
Nylon or polyester rope, or stainless-steel wire
Concrete (if installing new posts)
Tools:
Power drill
Measuring tape
Level
Ladder
Wrench or adjustable spanner
Post hole digger (if installing new posts)
Step 1: Plan Your Shade Tarp Layout
The first step in installing your backyard shade tarp is careful planning. Take time to assess your outdoor area and answer these key questions:
Where is the sun’s path throughout the day?
What size and shape of tarp best suits your space?
Will you anchor the tarp to existing structures or install new posts?
What height do you want the tarp to sit at for maximum shade and airflow?
Pro Tip: Use string or garden hoses to visualize the tarp layout on the ground before making permanent decisions.
Step 2: Measure and Mark Anchor Points
Once you’ve determined the tarp’s location and orientation:
Measure the tarp dimensions.
Mark the exact points where each corner of the tarp will be anchored.
Ensure that the anchor points are at least 5–10% longer than the tarp size to allow for tensioning and slight adjustments.
Consider slope angles for water runoff. Aim for at least a 20-degree angle to prevent water pooling on the tarp.
Step 3: Install Support Posts (If Necessary)
If your backyard lacks existing anchor points like trees or fences, you’ll need to install sturdy support posts:
Dig post holes at least 24 inches deep and 8-12 inches wide for stability.
Set posts in concrete, making sure they remain plumb and level.
Allow the concrete to cure for at least 24–48 hours before applying tension from the tarp.
We recommend using pressure-treated wood, galvanized steel poles, or aluminum posts for longevity and strength.
Step 4: Install Mounting Hardware
With your anchor points ready, it’s time to install the necessary hardware:
Attach eye bolts or pad eyes securely into walls, posts, or other fixed structures.
For added flexibility and adjustability, install turnbuckles or tensioners to fine-tune the tarp’s tightness.
Connect snap hooks, D-rings, or carabiners to make assembly and disassembly easier.
Make sure all hardware is rated for outdoor use to prevent rust and corrosion.
Step 5: Attach and Tension the Shade Tarp
Now it’s time for the most satisfying part—mounting the shade tarp:
Begin by attaching one corner of the tarp to an anchor point.
Gradually attach the remaining corners, moving diagonally for even tension.
Adjust each connection point using your turnbuckles, ropes, or cables.
Pull the tarp tight enough to avoid sagging, but not so tight that it risks tearing.
Check that the tarp maintains the desired slope for rainwater runoff and adjust tension as needed.
Step 6: Final Adjustments and Safety Check
Before enjoying your new shaded area:
Inspect all anchor points and hardware for stability.
Test the tarp’s tension and make adjustments for even distribution.
Ensure that no sharp edges or loose connections remain that could damage the tarp or pose a safety hazard.
Confirm that the tarp is secure in windy conditions by giving it a gentle tug.
If you live in an area with frequent high winds, consider removing the tarp during storms to prevent damage.
Step 7: Enjoy Your Shaded Backyard Oasis
Once installed, your backyard shade tarp provides a comfortable and protective space for outdoor gatherings, relaxation, or family activities. You can decorate underneath with outdoor furniture, string lights, or potted plants to create a personalized outdoor retreat.
Maintenance Tips for Long-Lasting Shade Tarp Performance
To extend the life of your shade tarp, follow these maintenance guidelines:
Regularly check for wear and tear, especially around anchor points and seams.
Clean the tarp periodically with mild soap and water to prevent mildew buildup.
Store the tarp indoors during harsh weather seasons if it's not designed for year-round use.
Tighten hardware as needed to maintain proper tension and avoid sagging.
By following these simple care steps, your shade tarp will continue to deliver years of sun protection and outdoor comfort.
Conclusion: Upgrade Your Outdoor Space with a DIY Shade Tarp
Installing a shade tarp in your backyard is a cost-effective and rewarding DIY project. With careful planning, quality materials, and proper installation techniques, you’ll enjoy cool, shaded outdoor living all season long. This step-by-step guide ensures your project goes smoothly from start to finish.
 TOM WILLIAMSON LANDSCAPING
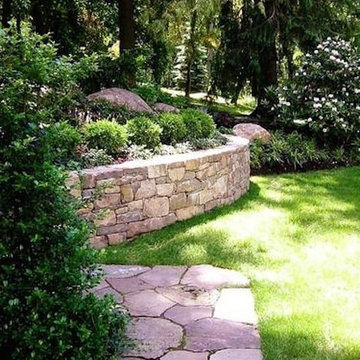
4-acre Property in Chappaqua NY. Large pond Creation with aeration, Masonry, granite slate porch with Stone center fire pit. Land design and installation of gardens around deck and yard with sporadic trees.
About us:
Tom Williamson Landscaping, Inc.
Simple. Elegant. Landscaping.
When preserving or remodeling your outdoor inspirational gardens, entertainment areas, or read-a-book oasis, you can rely on a professional landscaper for the best in beautiful design. As your advocates, they shop multiple nurseries to ensure that you get the healthiest of shrubs, trees, flowers, ground cover, and seed for your installations. Other design elements professionals consider are strong defining rock walls, delightful three-season blooming beds, and healthy rolling lawns. Plus, their planning and project management are additional skills that significantly affect the look and life of your garden.
Years of experience and training and working alongside horticultural experts develop the important skills of the trade. But, the ability to turn a home into a representation of the family’s successes and accomplishments is the artistry that only a seasonal professional landscaper can deliver.
Welcome to Tom Williamson Landscaping. We design, install and maintain brilliant gardens and lawns, providing this high level of beauty. Our 30 years of servicing Westchester County’s fine homes and families is a testament to our ability to listen and respond to your visions and needs. We have the artists, the muscle, and the management to provide — not only gardens and lawns your neighbors will envy — but the “experience” that ensures you hired the right landscaper.
So, if you are planning on refreshing your home and outdoors with stone or living environments, visit our gallery to see our work. We are here, happy to answer your questions. Call us today at 914-762-4927 or email us.
Services provided are everything great gardening:
Landscaping and Masonry; Ground cover, Pachysandra installation, Rose bush installation, Boxwood installation, Tree installation, Bushes, Plantings, Trees, Seasonal plantings, Urns, Pruning, Fertilization, Lawn care & Maintenance, Mulching, Installation of Large Trees, Holiday Trimming, Snowplowing to keep your home enjoyable even in the winter. Landscape Design and construction, Lawn care and maintenance, Lawn Installation: sod, hydro seeding, spot seeding, Lawn Fertilizing and Lyme application, Landscape design plans and installation, Masonry: stone walls, patios, walkways, garden paths, boulder steps, Planting Bed Care: mulching, weeding, edging, trimming, Pruning: trees & shrubs, Deep Root Feeding: Trees and shrubs, Tree Installation: dwarf to large, ornamental, flowering, evergreen, Maple, Cedar, Dogwood, Cherry, Apple, Red Bud, Shrub Installation: Boxwood, Holly, Juniper, Cypress, Dogwood twig, Leucothoe, Andromeda, Viburnum, Hydrangea, Lylac, Installation Ornamental Grasses: Fountain grass, Fox Tail grass, Hakone grass, ferns, Ground Cover Installation: Pachysandra, Ivy, Vinca, Perennial Installation: Daffodils, Tulips, Lilies, Lavender, Hibiscus, Black-eyed Susan, Bleeding Heart, Peony, Sage, Clematis, Sedum, Hosta, Sage, Iris, Plumbago, Astilbe, and Ferns, Flowering Annuals Installation: Pansies, Begonias, Petunias, Daises, Geraniums, Impatiens, Lantana, Fushia, Bacopa, Flower Pots, Urns and Boxes: Overflowing mixture of annuals, perennials and hangers for spring, summer, fall and winter, Gutter Cleaning: Late fall, Snow Removal: Plowing, salting, walkways shoveled, roofs raked, Winter Holiday Trimming
Areas cover:
10504, 10506, 10510, 10514, 10546, 10549, 10562, 10570, 10510
Servicing Chappaqua, Briarcliff Manor, Ossining, Scarborough, Pleasantville, Armonk, and Mt. Kisco
Chappaqua 10514 Landscaping: http://www.tomwilliamsonlandscaping.com/photos
Scarsdale landscaping: http://www.tomwilliamsonlandscaping.com/photos
Masonry in Chappaqua: http://www.tomwilliamsonlandscaping.com/photos
Masonry in Pleasantville: http://www.tomwilliamsonlandscaping.com/photos
Armonk landscaping specialists: http://www.tomwilliamsonlandscaping.com/photos
Mt. Kisco landscaping specialists: http://www.tomwilliamsonlandscaping.com/photos
Briarcliff Manor 10510 landscaping contractors: http://www.tomwilliamsonlandscaping.com/photos
Braircliff masonry 10510 contractors: http://www.tomwilliamsonlandscaping.com/photos
Armonk Masonry contractors: http://www.tomwilliamsonlandscaping.com/photos
Chappaqua rock wall specialists: http://www.tomwilliamsonlandscaping.com/photos
Ossining landscaping: http://www.tomwilliamsonlandscaping.com/photos
Ossining Masonry: http://www.tomwilliamsonlandscaping.com/photos
Scarborough Landscaper: http://www.tomwilliamsonlandscaping.com/photos
Scarborough Stone Wall and Mason: http://www.tomwilliamsonlandscaping.com/photos
Pleasantville land design and installation of large trees: http://www.tomwilliamsonlandscaping.com/photos
Pleasantville landscaper: http://www.tomwilliamsonlandscaping.com/photos
Mt. Kisco masonry contractors: http://www.tomwilliamsonlandscaping.com/photos
Armonk stone wall, driveway and pathway designer: http://www.tomwilliamsonlandscaping.com/photos
Best Landscaper in Westchester, NY : http://www.tomwilliamsonlandscaping.com/photos
Hottest landscape business in Westchester, NY: http://www.tomwilliamsonlandscaping.com/photos
38