Search results for "Moisturizing" in Home Design Ideas
With the pending arrival of a beautiful baby girl, the homeowners of this 1928 Minneapolis Tudor wanted a basement that was conducive to a young child, but would still allow a place for family to gather and the occasional house guest. The original basement was typical; cold, lacking natural light with tiny, uncomfortably confined rooms and that “unique” basement smell. The goal was to reverse all of the ill effects of a rarely unappreciated space while increasing the performance of the older home.
The frigid temperatures and wet, mildew odor was remedied by demolishing the entire slab floor and excavating to gain an extra six inches in ceiling height. It also allowed us to insulate to R-15, moisture proof under the new slab, install a drain tile and sump pump. Within the concrete slab is a hydronic, in-floor radiant heating system which further helps to add comfort to the space. Lastly, we also sprayed a closed-cell, expanding urethane foam on the inside of the foundation walls all the way to the first floor.
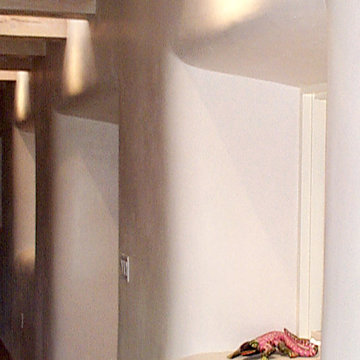
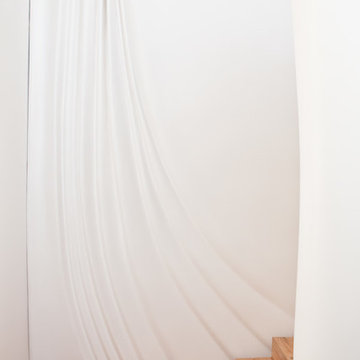
To help bring more light down to the basement, we started by opening up the staircase on both sides. A curved wall bends light into the lower level while a countertop and cubbies below provide storage space for odds and ends. On the opposite wall, creatively placed cubbies provide places for paintings, ceramics and plants. We also removed the tiny 18” x 34” window on the south wall and installed a full-sized, high-efficiency, triple pane Pella egress window. To let lots of natural light into the window, we expanded the size of the cedar-lined egress well and included a built-in planter at the base to help bring life into an otherwise empty cavity.
Small, unspecified spaces that became storage areas now have purpose. The areas are defined, yet open. Upon descending down the stairs, one is greeted by a large living room with curved walls, custom design media center, built-in daybed and bookshelves. Use of paint was important in the design. Naturally in older homes basements are going to have exposed beams, soffits and a whole gambit of nooks and crannies. Instead of disguising them, we played them up, which created a layer effect with the color. The color also adds a touch of playfulness which anyone, regardless of age, can enjoy.
We scavenged the client’s garage and discovered that the previous homeowner kept the old, full-view glass front entry door in the garage. We re-installed the original glass knob and attached the door to sliding barn door hardware which was attached to the main structural beam of the lower level. On the other side of the door was the homeowners’ combined office and small fitness area. The office floor is a blend of thin strips of different colored cork. A built-in storage cabinet sits across from a site-built desk which forms to the curve of the dividing wall. A small, square hole in the curved wall provides a view to see who is coming down the stairs. Opposite of the office area and directly at the base of the stairs is a place for the homeowner’s treadmill.
Hidden is the mechanical room, which is home to many green and energy efficient products. The washing machine is a low-water consumption unit while the dryer requires less energy to operate than most standard units. Both sit atop a checkerboard pattern of different colored VCT tiles. We also replaced the aging boiler, which only heated the first and second level, with a 95% efficient heat source for the entire house—including the basement.
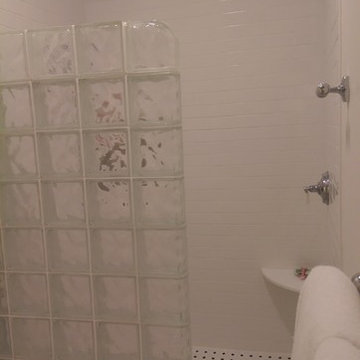
Behind the curved wall, the bathroom is conveniently located. A large, custom built no-formaldehyde added vanity supports the slab of remnant granite countertop. A piece of eco-resin wall panel, embedded with organic material, contains water in the shower and blends beautifully with the updated colors. Tucked under the stairs, we installed a dual-flush, low-water consumption toilet.
Through creative space planning, we packed a lot of into a rather small space. As a result, we have three very happy homeowners who are enjoying their light, clean and safe lower level of their home—however, they’ve been hard pressed to think of it as a “basement”.
highlights
Moisture management system
Insulated slab
Hydronic in-floor heat
Formaldehyde free cabinetry
MN-made custom cabinets
Ultra-low VOC paints
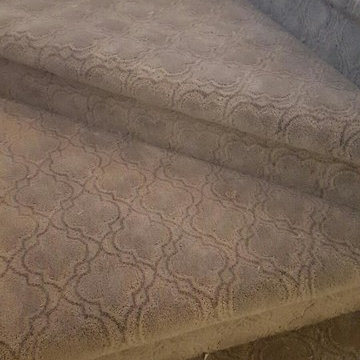
Wool carpet
Dual-flush toilet
Cork floor
No recessed lights
Cedar egress window well with planter
Re-used door
Eco-resin

Retail Spaces Winter Tips: Preventing Excessive Moisture
Check for Leaks: Inspect the retail space for any potential sources of moisture, such as leaks from the roof, windows, or pipes. Moisture can damage the paint and cause it to peel or bubble. Seal any leaks and address damp spots before painting or during the winter months.
Condensation: In cold weather, condensation can form on walls, especially near windows or exterior walls. This can cause issues with paint adhesion and durability. Keep indoor temperatures consistent to minimize condensation.
#winter #painter #contractor #commercialpainter #atlantaGA

Living room - small rustic formal and enclosed dark wood floor and brown floor living room idea in Atlanta with beige walls, no fireplace and a concealed tv
Find the right local pro for your project
Von Tobel designer, Ron Nowobielski, had the pleasure of working on this beautiful beach house in Porter, Indiana. The deck features green treated deck framing, decking by Moisture Shield Elevate Collection in Lake Fog, and Regal Railing in black with glass and pickets. He used RB&B 4” OC paneling for the hot tub and front wall, and trimmed the hot tub in cedar. Does your deck need a refresh? Schedule a FREE design consultation today!

Stadler Form Oskar Evaporative Humidifier
Home design - modern home design idea in Toronto

Von Tobel designer, Ron Nowobielski, had the pleasure of working on this beautiful beach house in Porter, Indiana. The deck features green treated deck framing, decking by Moisture Shield Elevate Collection in Lake Fog, and Regal Railing in black with glass and pickets. He used RB&B 4” OC paneling for the hot tub and front wall, and trimmed the hot tub in cedar. Does your deck need a refresh? Schedule a FREE design consultation today!

Von Tobel designer, Ron Nowobielski, had the pleasure of working on this beautiful beach house in Porter, Indiana. The deck features green treated deck framing, decking by Moisture Shield Elevate Collection in Lake Fog, and Regal Railing in black with glass and pickets. He used RB&B 4” OC paneling for the hot tub and front wall, and trimmed the hot tub in cedar. Does your deck need a refresh? Schedule a FREE design consultation today!

"Transform Your Basement with Premium Wallpaper Installation in Cudahy – Where Durable Style Meets Function!"
Turn your underutilized basement into a stunning, inviting space with our expert wallpaper installation services in Cudahy. We specialize in moisture-resistant, long-lasting designs that withstand basement conditions while adding personality and warmth.
Why Cudahy Homeowners Choose Our Basement Wallpaper Services
✔ Moisture-Control Materials – Mold-resistant vinyl perfect for below-ground spaces
✔ Light-Enhancing Designs – Bright patterns to combat basement gloom
✔ Concrete Wall Expertise – Proper surface prep for flawless adhesion
✔ 1-2 Day Transformations – Quick updates with minimal disruption
✔ Free 3D Design Consultation – Visualize your basement makeover
Popular Cudahy Basement Styles
? Entertainment Hub – Theater-themed or bold geometrics for rec rooms
?️ Gym Motivation – Energizing patterns and inspirational quotes
? Speakeasy Chic – Vintage brick or bourbon-barrel textures
? Craft Room Creative – Cheerful prints for creative spaces
Our Hassle-Free Service Includes:
✅ Free Moisture Evaluation – Essential for basement installations
✅ Wall Preparation – Proper sealing for concrete or paneling
✅ Trim & Ceiling Coordination
✅ 3-Year Performance Warranty
Recent Client Praise:
"Turned our damp basement into the family's favorite hangout spot!" – The Lopez Family, Cudahy

These garden benches and chairs were revitalized with the help of new Patio Lane cushions done in Canvas Jockey Red. For additional moisture protection, this wise customer opted for Sunbrella RAIN cushions.
Introduced in 2016, Sunbrella RAIN fabric combines the traditional Sunbrella performance fabric with a waterproof coating that when manufactured using special techniques such as self-swelling thread and multiple moisture vents, repel moisture and become usable for guests within a few minutes.
https://patiolane.com/blog/sunbrella-rain-bench-chair-cushions-canvas-jockey-red-revitalize-garden-seating/

This 1920s single bay house in Earlsdon had been restored by the builder from top to bottom. The hallway floor had been covered in laminate flooring which had been removed, revealing an Edwardian tiled floor beneath. Unfortunately, the plasterer had not covered the floor when working on the walls, so the tiles were now covered in plaster!
The client was keen to keep as many original features as possible and called me in to see if the original 100-year-old floor could be renovated in keeping with the rest of the house. I visited the property to survey the tiles and explained that it certainly could be and having worked on hundreds of these renovations before I was confident of getting a good result. They were happy to go with my quotation and we arranged a time to carry out the work.
The floor tiles themselves were in good condition, but I had to hand carefully scrape the plaster off the tiles before starting on the deep clean. With the plaster removed from the floor I applied Tile Doctor Acid Gel and worked it into the tiles with a coarse 100-grit pad. The floor was then rinsed, and the waste extracted from the floor using a wet vacuum. The process was then repeated with a 200-Grit and then a 400-grit pad until I was happy.
The floor was then speed dried with fans whilst I worked on a repair around the threshold of one of the doors. The repair was relatively straight forward, and I managed to restore the tiling, so the repair was unnoticeable.
The floor was then left overnight to completely dry out. Floors of this age don’t have a damp proof membrane so moisture can build up if they have been covered as in this case. The next stage in the restoration would be to apply a sealer and the floor needs to be dry before you do this otherwise the result can be patchy.
Returning the following day, I first tested the floor with a damp meter to check the moisture levels in different parts of the floor to ensure it was dry enough to seal. The fans had done a good job and I was pleased to find that the floor was dry.
To seal this floor, I used Tile Doctor Seal and Go Extra, it’s a breathable acrylic based sealer that allows for moisture vapour to rise through the tile and evaporate at the surface. This makes it ideal for situations where no damp proof membrane has been installed and there is a low risk of mineral salt deposits being formed (efflorescence).
Once completed the transformation was huge and he Victorian tiles looked well suited to the hallway. Feedback from my client was they were over the moon with the newly restored floor!
For regular cleaning, I recommended Tile Doctor Neutral Tile Cleaner, this is a gentle pH neutral cleaner that will ensure the newly applied seal is retained and not eroded prematurely. This can be the problem with most household cleaning products which contain strong chemicals like bleach which can break down the sealer over time. Without a sealer dirt gets back into the pores of the tile which will mean the homeowner will need to get the floor cleaned and sealed again – a vicious circle!
Mick Gayton
Warwickshire Tile Doctor

I was contacted by a homeowner who had moved into a property in the small Yorkshire market town of Masham and discovered a Victorian tiled floor under the hallway carpet. Realising this was a valuable period feature he was keen to see if it could be restored. As you can imagine he was delighted when I told him that it should be possible, and he was keen to get it uncovered and back on show.
After discussing the floor on the phone, I visited the property and removed the carpet so we could take a long look at the Victorian tile’s underneath. The carpet had protected the floor well and it was in good physical order, (i.e. no cracks etc.) it was just very dirty but was also marked with paint splashes from some untidy decorating work from the past. I confirmed none of these issues should present a problem and got the go ahead for the work to start.
There was no sealer on the floor, so I started the cleaning process using a medium dilution of Tile Doctor Pro-Clean which was worked into the tiles using a coarse 200-grit pad fitted to a rotary floor buffer. I then used a 400-grit hand-held diamond block to clean the edges which couldn’t be reached by the machine. This also removed the paint splashes which should have been on the skirting boards and not the floor!
The floor was then rinsed with water and the soil extracted with a wet vacuum. I was able to inspect the floor at this stage and spot treat areas that needed more work as they were a little stubborn. It wasn’t a large hallway and except for the paint it only needed a light clean. The result was I was able to complete the cleaning process by lunch time. I dried the floor as much as possible and left an air blower in the space for a couple of hours.
I returned later that afternoon and checked the floor for moisture using a damp meter. The floor was mostly dry, but some areas needed some more help with a heat gun. It was late summer and so still warm and so there was no need on this occasion to leave the floor overnight.
Once I was happy the floor was dry, I started sealing the tiles with the first of four coats of Tile Doctor Seal and Go. This is a specially formulated water-based blend of acrylic polymers that provides both a stain resistant surface seal and a durable low-sheen finish. It is perfect for a floor of this age as it allows moisture vapour to pass through, this is an important feature when considering a sealer for old floors which will not have a damp-proof membrane installed. If you were to apply a non-breathable sealer moisture can get trapped under the floor causing it to spread out to the walls resulting in rising damp.
The combination of the cleaning and new sealer brought the floor back to life and it now looked in keeping with the rest of the property which had numerous other period features. My client was over the moon with the difference and very happy to see the back of the grubby carpet.
Nigel Stoker
North West Yorkshire Tile Doctor

For a newly constructed South Florida home, we installed 2,500 square feet of wide plank wood flooring throughout both levels, including a custom wood staircase. The stairs featured one-piece treads, avoiding joints and separate nosing, treated with a custom stain to match the pre-finished wood, and accented with white risers. We reinforced the second-floor plywood sub-flooring with an additional layer to support the wide plank wood flooring, which was glued down directly to the plywood. On the first floor, we used a high moisture tolerant adhesive to glue the wood flooring directly to the concrete, ensuring a moisture-free environment. The result is a stunning, durable, and moisture-resistant wood flooring throughout the entire home.

This image shows the original front entry condition before renovation. While the exterior appeared generally intact, there were signs of moisture intrusion at the base of the door and a localized area above the opening.
Issues like these are often not fully visible from the surface and can indicate underlying deterioration behind the siding and trim, which was addressed during the repair and replacement process.

Challenge:
Our clients needed a functional powder room in the basement of their lake house, positioned strategically next to the entrance for swimmers and guests. The space required materials that could withstand high moisture and frequent use while maintaining an inviting, modern aesthetic that would complement the relaxed lakeside lifestyle.
Solution:
We designed a vibrant, practical powder room that balances durability with playful sophistication. The design centers around selecting materials specifically chosen for their ability to handle moisture and heavy use without sacrificing style. By incorporating bold color elements and modern finishes, we created a space that feels fresh and energizing—perfect for the lakeside setting.
Highlights:
• Durable terrazzo tile flooring that withstands moisture and heavy foot traffic
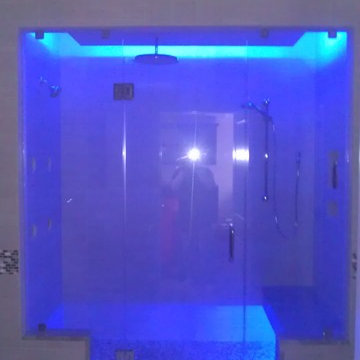
• Bright blue illuminated glass tile feature that adds modern vibrancy and visual interest
• Strategic material selection prioritizing both functionality and aesthetic appeal
• Fun, contemporary design that complements the relaxed lake house atmosphere
Results:
The transformed powder room now serves as a practical yet stylish transition space for swimmers and guests, combining the durability needed for lakeside living with a modern, vibrant aesthetic. This project showcases our ability to create functional spaces that don't compromise on style, proving that high-traffic areas can still deliver visual impact and personality.

These garden benches and chairs were revitalized with the help of new Patio Lane cushions done in Canvas Jockey Red. For additional moisture protection, this wise customer opted for Sunbrella RAIN cushions.
Introduced in 2016, Sunbrella RAIN fabric combines the traditional Sunbrella performance fabric with a waterproof coating that when manufactured using special techniques such as self-swelling thread and multiple moisture vents, repel moisture and become usable for guests within a few minutes.
https://patiolane.com/blog/sunbrella-rain-bench-chair-cushions-canvas-jockey-red-revitalize-garden-seating/

Mid-sized mountain style dark wood floor and brown floor hallway photo in Atlanta with beige walls
16