
Search results for "Neglecting" in Home Design Ideas
 Deskins Group LLC
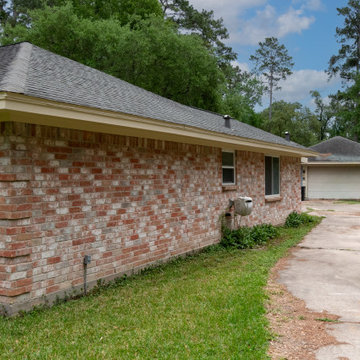
This home started as a typical suburban all‑brick house, but years of deferred maintenance led to the complete failure of the original wood fascia and soffit. The damage was extensive enough that full replacement was the only long‑term solution.
We removed the deteriorated wood and rebuilt the exterior details using James Hardie fascia, soffit, trim, and selective siding replacement to restore structural integrity and give the home a clean, modern finish. Once the new Hardie components were installed, we protected and unified everything with two coats of Sherwin‑Williams Emerald Rain Refresh, providing a durable, low‑maintenance coating designed to stand up to Houston’s heat, humidity, and storms.
Need fascia, soffit, or trim repairs in Cypress, Tomball, or Northwest Houston?
Contact Deskins Siding & Exteriors today for a free, no‑pressure estimate and expert guidance on James Hardie upgrades.

 PS & Daughters
Example of a large transitional u-shaped dark wood floor and brown floor kitchen pantry design in Philadelphia with a farmhouse sink, shaker cabinets, white cabinets, quartz countertops, white backsplash, ceramic backsplash, stainless steel appliances and an island

 Campion Walker Landscapes
To anchor a modern house, designed by Frederick Fisher & Partners, Campion Walker brought in a mature oak grove that at first frames the home and then invites the visitor to explore the grounds including an intimate culinary garden and stone fruit orchard.
The neglected hillside on the back of the property once overgrown with ivy was transformed into a California native oak woodland, with under-planting of ceanothus and manzanitas.
We used recycled water to create a dramatic water feature cut directly into the limestone entranceway framed by a cacti and succulent garden.
Find the right local pro for your project

 June Scott Design
Blending a modern sensibility with traditional architecture, this garden features a front yard meadow with native grasses (Carex praecracilis) and wildflowers. Poured-in-place concrete pavers in a meandering pattern slow the approach from the sidewalk to the entry. The modest backyard has been maximized for entertaining with outdoor dining and seating areas. Native plants, herbs, and edibles share the back garden beds, and a raised pond brings the garden to life.

 Campion Walker Landscapes
To anchor a modern house, designed by Frederick Fisher & Partners, Campion Walker brought in a mature oak grove that at first frames the home and then invites the visitor to explore the grounds including an intimate culinary garden and stone fruit orchard.
The neglected hillside on the back of the property once overgrown with ivy was transformed into a California native oak woodland, with under-planting of ceanothus and manzanitas.
We used recycled water to create a dramatic water feature cut directly into the limestone entranceway framed by a cacti and succulent garden.

 Fine Line Home Design LLC
Contractor Jim Schmitt made these 48" wide doors himself!
Mountain style living room photo in DC Metro with yellow walls
Mountain style living room photo in DC Metro with yellow walls

 PNJ Property Group
Being a compact master ensuite bathroom we used a sliding glass shower door as we had no space for a swing glass door. Shower fixture includes rain shower head, jets and hand spray ($180). Marble hexagon feature in shower continues floor to ceiling and to back splash. Mirror was heightened to the ceiling which elongates the room and high gloss white vanity with double draws for maximum storage. A blue Barn door to access the space and heated floors keep the toes warm!
Pixilink

 PNJ Property Group
Supporting wall between the kitchen and dining was removed as was the drop ceiling in the kitchen to vault it. 2lb spray foam used in the ceiling.
Huge 9'x5' quartz island with marble effect was chosen ($4500) to keep it bright andis perfect of entertaining. Marble herringbone tile for backsplash with dark grey quartz countertop for contrast. Storage draw on the outside of island for additional storage and a double bowl undermount black granite sink with touch tap,, DW, 3-compartment garbage/recycling pullout & wine fridge are on the other side for full functionality. White shaker style kitchen cabinets were chosen with black hardware for that industrial feel. A small workspace was created for the kids to do homework while preparing dinner or for a small computer/office space.
Industrial & contemporary fixtures used including an oversized clock give the space a warm yet fun feel. We are not afraid of colour and the rich blue wall make the kitchen pop out! New french doors were put ($1900 each set) in to replace the old wooden ones and the kitchen one was re-positioned away from the corner to maximize light and space for the desk. The large door on the left hide a laundry with side-by-side washer dryer, and just past that is a double fridge and pantry. Black-trim square LED pot recessed lights in the ceiling
 Deskins Group LLC
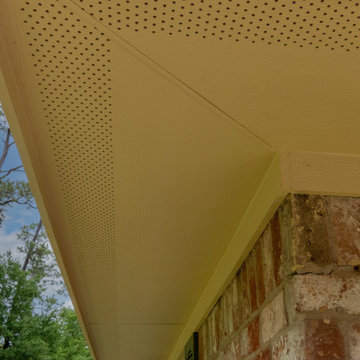
This home started as a typical suburban all‑brick house, but years of deferred maintenance led to the complete failure of the original wood fascia and soffit. The damage was extensive enough that full replacement was the only long‑term solution.
We removed the deteriorated wood and rebuilt the exterior details using James Hardie fascia, soffit, trim, and selective siding replacement to restore structural integrity and give the home a clean, modern finish. Once the new Hardie components were installed, we protected and unified everything with two coats of Sherwin‑Williams Emerald Rain Refresh, providing a durable, low‑maintenance coating designed to stand up to Houston’s heat, humidity, and storms.
Need fascia, soffit, or trim repairs in Cypress, Tomball, or Northwest Houston?
Contact Deskins Siding & Exteriors today for a free, no‑pressure estimate and expert guidance on James Hardie upgrades.
 Deskins Group LLC
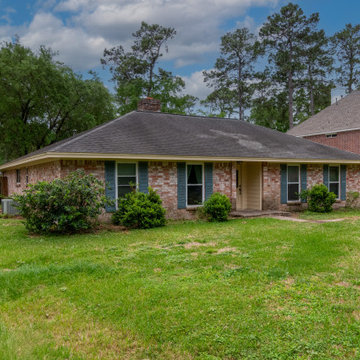
This home started as a typical suburban all‑brick house, but years of deferred maintenance led to the complete failure of the original wood fascia and soffit. The damage was extensive enough that full replacement was the only long‑term solution.
We removed the deteriorated wood and rebuilt the exterior details using James Hardie fascia, soffit, trim, and selective siding replacement to restore structural integrity and give the home a clean, modern finish. Once the new Hardie components were installed, we protected and unified everything with two coats of Sherwin‑Williams Emerald Rain Refresh, providing a durable, low‑maintenance coating designed to stand up to Houston’s heat, humidity, and storms.
Need fascia, soffit, or trim repairs in Cypress, Tomball, or Northwest Houston?
Contact Deskins Siding & Exteriors today for a free, no‑pressure estimate and expert guidance on James Hardie upgrades.

 Donald Lococo Architects
©️Maxwell MacKenzie THE HOME, ESSENTIALLY A RUIN WAS PRESERVED THROUGH NEGLECT. A CLARIFIED HISTORIC RENOVATION REMOVES BAY WINDOWS AND 1950’S WINDOWS FROM THE MAIN FAÇADE. TWO WINGS AND A THIRD FLOOR AND A SYMPATHETIC STAIRWAY ACCOMMODATE MODERN LIFE. MASONS WERE TASKED TO MAKE THE STONE WORK LOOK AS THOUGH “A FARMER BUILT THE WALLS DURING THE NON-PLANTING SEASON,” THE FINAL DESIGN SIMPLIFIES THE FIRST FLOOR PLAN AND LEAVES LOGICAL LOCATIONS FOR EXPANSION INTO COMING DECADES. AMONG OTHER AWARDS, THIS TRADITIONAL YET HISTORIC RENOVATION LOCATED IN MIDDLEBURG, VA HAS RECEIVED 2 AWARDS FROM THE AMERICAN INSTITUTE OF ARCHITECTURE.. AND A NATIONAL PRIVATE AWARD FROM VETTE WINDOWS
WASHINGTON DC ARCHITECT DONALD LOCOCO UPDATED THIS HISTORIC STONE HOUSE IN MIDDLEBURG, VA.lauded by the American Institute of Architects with an Award of Excellence for Historic Architecture, as well as an Award of Merit for Residential Architecture
 Craig Reynolds Landscape Architecture
Stephen Dunn
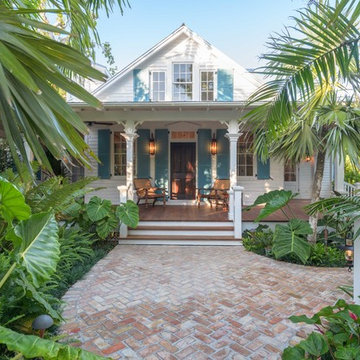
Home design - mid-sized tropical home design idea in Miami
Home design - mid-sized tropical home design idea in Miami
 PNJ Property Group
Large double vanity for family bath. We ensured wood backing behind so we were able to make it a floating vanity. Marble effect porcelain floor tile, tile feature around custom sized mirror with hole for light is stuck to tile behind, large vanity with extra storage, single fixed panel glass for tub/shower. Wave tile laid vertically as feature wall in tub, accents of fresh yellow and large opaque windows for natural light. Heated flooring of course.
Pixilink pics
 Deskins Group LLC
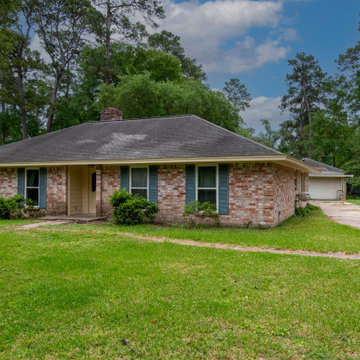
This home started as a typical suburban all‑brick house, but years of deferred maintenance led to the complete failure of the original wood fascia and soffit. The damage was extensive enough that full replacement was the only long‑term solution.
We removed the deteriorated wood and rebuilt the exterior details using James Hardie fascia, soffit, trim, and selective siding replacement to restore structural integrity and give the home a clean, modern finish. Once the new Hardie components were installed, we protected and unified everything with two coats of Sherwin‑Williams Emerald Rain Refresh, providing a durable, low‑maintenance coating designed to stand up to Houston’s heat, humidity, and storms.
Need fascia, soffit, or trim repairs in Cypress, Tomball, or Northwest Houston?
Contact Deskins Siding & Exteriors today for a free, no‑pressure estimate and expert guidance on James Hardie upgrades.
 PNJ Property Group
Supporting wall between the kitchen and dining was removed as was the drop ceiling in the kitchen to vault it. 2lb spray foam used in the ceiling.
Huge 9'x5' quartz island with marble effect was chosen ($4500) to keep it bright and is perfect of entertaining. Marble herringbone tile for backsplash with dark grey quartz countertop for contrast. Storage draw on island for additional storage and black granite under-mount sink with touch tap, DW, 3-compartment garbage/recycling pullout & wine fridge are on the other side for full functionality. White shaker style kitchen cabinets were chosen with black hardware for that industrial feel. A small workspace was created for the kids to do homework while preparing dinner or for a small computer/office space.
Industrial & contemporary fixtures used give the space a warm yet fun feel. We are not afraid of colour and the rich blue wall make the kitchen pop out! New french doors were put ($1900 each set) in to replace the old wooden ones and the kitchen one was re-positioned away from the corner to maximize light and space for the desk.
To the left of the fridge is also a pull-out pantry 18" wide and hidden behind those large doors is a hidden laundry with side-by-side washer/dryer & countertop.
Black-trim square LED pot recessed lights in the ceiling and speaker part of whole-house sound system.
 PNJ Property Group
Supporting wall between the kitchen and dining was removed as was the drop ceiling in the kitchen to vault it. 2lb spray foam used in the ceiling.
Huge 9'x5' quartz island with marble effect was chosen ($4500) to keep it bright and is perfect of entertaining. Marble herringbone tile for backsplash with dark grey quartz countertop for contrast. Storage draw on island for additional storage and black granite under-mount sink with touch tap, DW, 3-compartment garbage/recycling pullout & wine fridge are on the other side for full functionality. White shaker style kitchen cabinets were chosen with black hardware for that industrial feel. A small workspace was created for the kids to do homework while preparing dinner or for a small computer/office space.
Industrial & contemporary fixtures used give the space a warm yet fun feel. We are not afraid of colour and the rich blue wall make the kitchen pop out! New french doors were put ($1900 each set) in to replace the old wooden ones and the kitchen one was re-positioned away from the corner to maximize light and space for the desk.
To the left of the fridge is also a pull-out pantry 18" wide. Black-trim square LED pot recessed lights in the ceiling and speaker part of whole-house sound system.

 Gridley + Graves Photographers
Gridley + Graves Photographers
BeDe Design
Example of a farmhouse exterior home design in Philadelphia
Example of a farmhouse exterior home design in Philadelphia

 Catherine Macfee Interior Design
David Duncan Livingston
Kitchen - country kitchen idea in San Francisco
Kitchen - country kitchen idea in San Francisco
6