
Search results for "Neutralize acids" in Home Design Ideas
 Tile Doctor Ltd
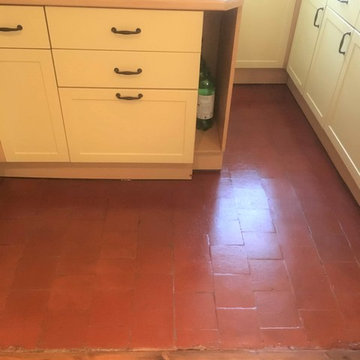
I received a call from this client in Old Marston around two miles north east of the centre of Oxford. They had lifted a lino floor in their kitchen and found an old Quarry Tiled floor underneath and decided to see if they could have it restored.
I went over to survey the floor and could see that the tiles had been covered with a thin layer of levelling screed to ensure the lino didn’t sink into the recesses. I ran some tests to demonstrate how the screed could be removed which worked well and it was apparent that the tiles underneath were intact and could be renovated. I submitted a quotation for removing all the screed, deep cleaning the Quarry tiles and then sealing the tiles to protect them. The client was really pleased that we could restore the floor and the quote was accepted, with a date booked to do the work.
To start the work, I applied undiluted Tile Doctor Grout Clean-up worked in with a small carbide brush attached to a hand-held rotary buffer. The combination of the acid in the Tile Doctor Grout Clean-up combined with the scrubbing action of the brush were effective at removing most of the screed. The small bits of remaining screed were carefully removed by hand, using a floor scraper. The floor was then rinsed with water and the soil removed with a wet vacuum.
For the second phase of the cleaning process I applied Tile Doctor Oxy-Gel which was scrubbed into the floor with a stiff brush rinsing after with water and the soil extracted again using the wet vacuum. After cleaning the floor to remove the dirt I could still see some evidence of the screed on the tiles, so I decided to give the floor an Acid Wash using Tile Doctor Acid Gel which was scrubbed into the floor and rinsed off as before. Tile Doctor Acid Gel is of course an acidic product so once it was removed, I decided to rinse the floor with Tile Doctor Neutral Cleaner to neutralise the pH levels in the floor. The wet vacuum was used again to remove as much moisture from the Quarry tiles as possible before leaving the now clean floor to dry off fully overnight.
I returned to seal this floor the next day. First, I checked the floor was fully dry with the damp meter, it was within the recommended range, so I was ready to complete the sealing process.
The client was not too sure if they wanted a matt or sheen finish, so I first put a coat of Tile Doctor Colour Grow on the floor to show them the matt finish. Colour Grow is an impregnating sealer that enhances natural colour and protects from within by occupying the pores in the tile. After reviewing the floor, they decided it was not for them, so I followed up by applying several coats of Tile Doctor Seal & Go which adds a nice sheen finish and is compatible with Colour Grow.
The combination of sealers worked very well together, and they were very satisfied with the final result and of course that we had been able to restore the Quarry tiles.
Barry Woodward
Oxfordshire Tile Doctor
 Tile Doctor Ltd
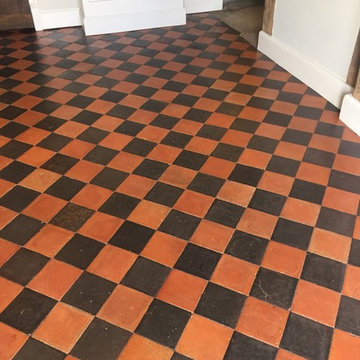
Sometimes it isn’t until you’ve deep cleaned your tiles that you realise just how dirty they were to begin with. This was the case with my customer in Thame, in the south of Oxfordshire where I worked on a classic red and black Quarry tiled floor which was far from being in its best condition.
My starting point in the cleaning process was to mix a strong solution of Tile Doctor Pro Clean, which is the reliable, multi-purpose alkaline cleaner that is safe to use on tile, stone and grout. The solution was left to soak into the tiles for ten minutes before being scrubbed into the floor with a rotary floor machine fitted with a stiff brush.
Following this, I rinsed the floor with clean water and then proceeded to wash it with Tile Doctor Grout Clean Up. This is a concentrated phosphoric acid cleaner designed to remove efflorescence and other mineral deposits such as grout smears.
Finally, I rinsed the tiles again with water and Tile Doctor Neutral Tile Cleaner, which is a pH neutral solution, to neutralise the chemicals and leave the floor fresh and clean, ready to be sealed. The floor was left to dry overnight.
The next day I returned to seal the floor after checking the tiles were dry. I opted to use two different sealers. The first was Tile Doctor Colour Grow, which is an impregnating sealer with the added effect of enhancing the natural colour in the stone. The second was Tile Doctor Seal & Go, a topical sealer that adds the high quality, durable sheen finish to the floor that the customer had requested.
I took the photograph below after sealing half the floor, it really shows the difference a sealer can make to a tiled floor.
Here’s the photo of theQuarry tiled floorafter sealing the whole floor. As you can see, they now have a new lease of life, and they’ll be much easier for the customer to keep looking great in the future.
Barry Woodward
Oxfordshire Tile Doctor
 Tile Doctor Ltd
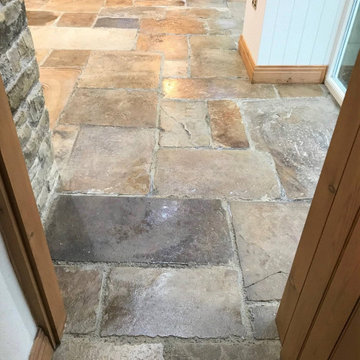
We had been to maintain this Sandstone floor about two years previously at a property in the pretty area of Windermere in the English Lake District. The client had run out of our Tile Doctor Neutral Tile Cleaner that we left after completing the job and had started using a standard cleaner instead (a well-known ecological cleaner). Unfortunately, this product has a 5% non-ionic surfactant in its chemical structure, which will strip a coat of stone sealer off the surface within 6 months, once that topcoat has been removed the sealed surface is only 50% as strong as it should be.
Readers of this article should be aware that even washing up liquid which is a degreaser will strip sealers although it will take many months of regular use before you will start to notice an issue. Stronger bleach-based cleaning products such as Flash and Domestos will cause instant damage to stone sealer which will often go an off-white colour as a result. So, the importance of using the right cleaner is imperative. Having used our services on this floor previously he client knew what to expect and was happy to go ahead with our quote.
My first task would be to clean the floor and completely remove what was left of the old sealer to ensure the floor would have a consistent appearance. On this occasion I used a strong 1:3 dilution of Tile Doctor Pro-Clean worked into the floor with a Black buffing pad fitted to a rotary buffing machine. The Sandstone floor was then rinsed with water, scrubbed again and then the waste extracted using a wet vacuum.
This was followed with acid rinse using a 1:5 dilution of Tile Doctor Grout Clean-Up, this is a Phosphoric Acid (not a Brick Acid). After being scrubbed into the tile it was rinsed off the floor as before using water and the wet vacuum. This process further cleans the stone and neutralises the floor after the use of the strong alkaline Pro-Clean used earlier.
Before leaving for the day I gave the floor one final rinse with water and then dried the floor as much as possible with the wet vacuum. The floor was now clean and free of sealer and left to fully dry off overnight.
I came back the following morning and started by testing the floor with the moisture meter. I always do this as I know from experience how important it is to ensure the floor is dry before applying a sealer.
Happy the Sandstone was dry I then proceed to apply the first of what would be four coats of sealer. For this I used Tile Doctor Seal and Go which leaves a nice low sheen finish. This product is specially formulated blend of acrylic polymers that provides will protect the floor from ingrained dirt and staining; it will make the floor easy to clean and has the added advantage of being water based so it doesn’t leave a solvent smell as it dries.
The client was left another complimentary bottle of Tile Doctor Neutral cleaner and hopefully the seal will last a long longer the 2nd time around. The client was pleased the floor had been restored and vowed to use nothing but Tile Doctor products on it in the future.
Heidi Taylor
South Cumbria Tile Doctor
Find the right local pro for your project

 Structural Associates
Patterson Architecture + Interior Photography
Example of a mountain style corner shower design in Denver with shaker cabinets, dark wood cabinets and white walls
Example of a mountain style corner shower design in Denver with shaker cabinets, dark wood cabinets and white walls

 Leigh Olive Mowry-Olive Interiors
Scobey Photography
Living room - large contemporary living room idea in Atlanta with beige walls and a standard fireplace
Living room - large contemporary living room idea in Atlanta with beige walls and a standard fireplace
 Tile Doctor Ltd
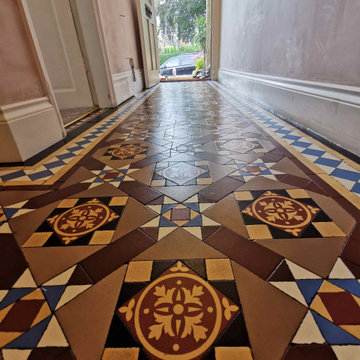
A young couple recently bought a house in Barnsley and were renovating it from top to bottom, included in the plan was the desire to have the previously unloved Victorian floor made beautiful again. The house stands in an area of Barnsley famous for its’ big Victorian villas and quite rightly they felt it was important to ensure period features like this original floor were correctly maintained.
Due to the floor being covered up for many years the floor had developed damp staining, it also had a lot of paint splattered on it. There were also some loose tiles that needed fixing back in place and the layer of old floor polish was present which would need removing.
I started by protecting all the skirting boards, doors and carpets bordering the tiles from splashing. The loose tiles were then cleaned up and then secured back in place using a fast-setting adhesive.
Once the adhesive was set, I turned my attention to stripping and cleaning the floor starting with the application of a coarse 200-grit diamond pad fitted to a weighted rotary buffing machine. The pad was lubricated using a dilution of Tile Doctor Remove & Go which was applied to small sections of the floor and left to soak in for ten minutes first. I run the buffing machine at a slow speed to minimise splashing. Remove & Go is amazing at removing old floor coatings (i.e. sealers), dirt and grime from the floor. When the diamond pad had been used on each section of the floor for five minutes the slurry was vacuumed up using a wet vac machine and I moved onto the next section. Once the whole floor had been cleaned in this way it was time to start the next step.
Old floors like this which don’t have the benefit of a damp proof membrane, and have been covered up for a long time, can suffer from efflorescence issues due to moisture being trapped in the tile. This will result in white salt staining appearing on the tiles for days, weeks and sometimes months afterwards. To counter this the alkaline salts are neutralised by giving the floor an acid rinse using Tile Doctor Acid Gel and leaving it to dwell for five minutes before going over the floor again with the coarse diamond pad. The slurry was again removed with a wet vacuum and the floor was scrubbed clean with damp cloths.
I returned a few days later once the floor had dried to seal the floor. The client wanted a satin finish so knowing the floor had damp and efflorescence issues I opted for Tile Doctor Seal and Go Extra. This is a topical sealer which leaves a lovely satin finish but also allows for the floor to breathe. six coats were required to make the floor look perfect, allowing the lovely colours to come through.
Once complete the floor looked much brighter and the colours really shone through. The owners were really happy with the renovation we carried out and before leaving I took time to discuss how best to maintain the tiles going forward including the use of Neutral Tile cleaner.
Matthew Lovett
South Yorkshire Tile Doctor

 Paul Brant Williger Architect
Pool - modern backyard concrete and rectangular pool idea in Los Angeles with a bbq area



 SHM Architects
Architectural by David Stocker, AIA; Design Team: Enrique Montenegro, AIA, Kevin Pauzer{Photo by Nathan Schroder Photography}
Living room - contemporary concrete floor and brown floor living room idea in Dallas
Living room - contemporary concrete floor and brown floor living room idea in Dallas

 DEANE Inc | Distinctive Design & Cabinetry
A beautifully laid out kitchen created by DEANE inc that incorporates both universally desired custom kitchen features and personal style in its color scheme. The custom lime green kitchen island centers the open floor plan.
Photography by Jane Beiles

 Jute Interior Design
Photo- Lisa Romerein
Inspiration for a mediterranean orange floor front door remodel in San Francisco with white walls and a medium wood front door
Inspiration for a mediterranean orange floor front door remodel in San Francisco with white walls and a medium wood front door
 Tile Doctor Ltd
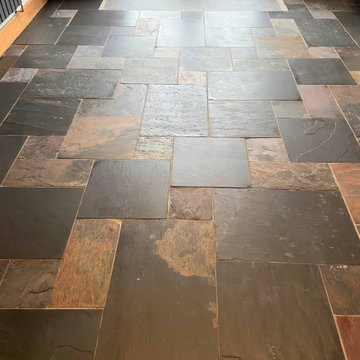
The pictures below are of Chinese Slate floor in the Kitchen of a property in the small village of Clifton just south of Penrith. We often get asked what the difference is between Rough and Semi Riven Slate, and this floor was a mixture of both.
If you look closely at the pictures and check out the darker parts of the floor you will see these smoother Semi Riven Slate, whereas the light copper-coloured parts of the floor were of the rougher textured variety. It’s not that unusual for stone to be mixed in this fashion as it can be supplied from different quarries in order to achieve a particular look.
The blend of different slates makes little difference when it comes to cleaning as the process is essentially the same. I would advise though if you intend to clean the floor using a mop then you should opt for Semi Riven Slate as Rough Slate can shred your mops and make it harder to maintain. We tend to use industrial floor buffing machines which work well on both surfaces so are less effected.
There was a bit of wax on this floor so to remove this Tile Doctor Wax Away was applied. The product was left to stand for fifteen minutes before being scrubbed into the stone, rinsed and then the soil extracted with a wet vacuum.
We then finished the cleaning with an Acid Rinse which involves scrubbing the Slate with Tile Doctor Grout Clean-up. This not only works well at cleaning up the stone and grout but also neutralises the alkaline pH left over from using Wax Away. I am very wary of the pH level of the floor as it could have an impact on the new sealer, giving the floor an acid rinse before sealing also ensures a better bond with the sealer.
Naturally, you can’t leave a strong product like Grout Clean-up on the Stone for long as it could etch the surface so once done the floor was thoroughly rinsed with water and extracted again with a wet vacuum. A mop and bucket and lots of sponges won’t do the job on a large area like this.
Once we finished the clean, we left it to dry off overnight and came back the next day to apply the sealer. We were originally going to apply a satin finish sealer, but the client had a big dog with sharp claws which could of scratched and marked the sealer so decided against it. I advised the client to use an Impregnating sealer called Tile Doctor Colour Grow, which lifts the natural colours in the stone, but is not a topical shiny sealer as the seal soaks into the Slate and leaves a a nice matt finish instead. Only two coats of sealer were needed, and the floor looked like new again.
My client was very happy with the difference in the appearance of the stone and how much cleaner the grout was, so much so they the following feedback for us, which is always appreciated.
“Totally impressed with the team they couldn’t have been more professional and even left me with some cleaner. My horrible 12 year old slate tiles look fabulous”
As usual we left a free bottle of Tile Doctor Neutral Tile Cleaner for aftercare, it’s very important not to undo all that hard work by using a product which will damage the seal, using a pH neutral cleaner will keep the seal looking sharp and fresh for years to come.
Heidi Taylor
North Cumbria Tile Doctor

 AVB
Kirk Shultz
Trendy brown tile alcove shower photo in Grand Rapids with an integrated sink and white cabinets
Trendy brown tile alcove shower photo in Grand Rapids with an integrated sink and white cabinets
 Tile Doctor Ltd
It’s not just major restoration work we do at Tile Doctor, sometimes a simple clean and seal is all that is required and that was the case at this property in Evesham. This medieval market town lies within the Vale of Evesham and is encompassed by the River Avon. It is located between the larger towns of Worcester, Cheltenham and Stratford-upon-Avon.
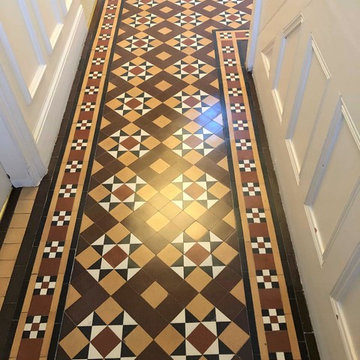
I was contacted by the owner and I arranged a visit to view their Victorian Hallway. The floor was in very good condition, but the previous sealer was now in-effective and the floor was dull and needed a good clean and seal. The colours were starting to fade, and it was due some attention. Sealers do wear off over time so if you have a similar floor to this it’s worth bearing that in mind. We discussed the work required and the cost involved, my quote was accepted, and the work scheduled.
On arrival I set up my equipment and covered any areas of carpet to protect from splashing during cleaning. I then used Tile Doctor Remove and Go spraying the product onto the floor allowing it to dwell for 10 minutes thus breaking down any sealers. This product is a non-flammable, multi-purpose stripper which works best when left to soak in for some time before scrubbing. This product is also great for drawing out ingrained stains and removing heavy grease build up.
The floor was then pasted with Tile Doctor Acid Gel which works to neutralise any alkaline salts in the tiles that can cause efflorescence later. This is a common issue with old floors which often do not have a damp proof membrane in place. I then went to work with my scrubbing machine and a black pad and worked the products into the tile. The resulting slurry was then rinsed off with water and removed with a wet vacuum.
I then went over the floor with microfibres and water to remove any remaining marks before leaving it to dry off overnight and ready for sealing.
I returned the following day and started by checking the floor was dry using a moisture meter. To seal the floor, I chose Tile Doctor Seal and Go Extra which is a fully breathable semi- gloss sealer which made a huge difference to the floor. Choosing a fully breathable sealer is important for floors that don’t have a damp proof membrane as you want to encourage any dampness to rise through the tile and not get trapped underneath where it might spread into the walls.
The deep clean and new seal brought out the vibrant colours in the tiles which were now shining through enhances by the lovely sheen which customer was very pleased with.
For aftercare I left the customer with a bottle of Tile Doctor Neutral Tile Cleaner which being concentrated goes a long way. Once diluted with water the product becomes completely pH neutral which unlike most household cleaners and washing up liquids which contain bleaches won’t prematurely degrade the sealer with use.
Mark Conway
Worcestershire Tile Doctor

Sponsored
Columbus, OH

Snider & Metcalf Interior Design, LTD
Leading Interior Designers in Columbus, Ohio & Ponte Vedra, Florida
 Tile Doctor Ltd
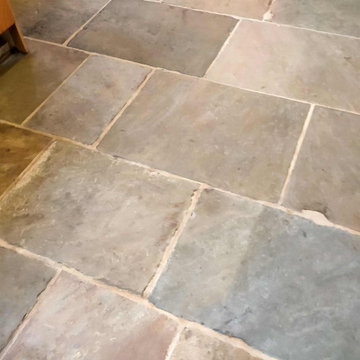
The owner of this period cottage in the old market town of Tadcaster near Leeds, had what was once a beautiful Yorkshire stone floor in the kitchen. It has been a long time since it had been given a proper clean so over the years and with the Kitchen being a high traffic area the whole floor including the grout had darkened and he now wanted it refurbished in time for Christmas.
I visited the property to assess what needed to be done and could see straight away that any protective sealer that was once on the floor had long since worn off. In fact, it was so consistently dirty with years of built-up grease and dirt I had to wonder if one had ever been applied.
I explained what the floor needed was a really deep intensive clean and then a sealer applied to make it easy to keep clean. The problem with most tile and stone is its porosity and if left unprotected dirt easily becomes lodged into its pores making cleaning a struggle.
To prove the difference that can be achieved and to allow me to work out a process on which I could base an accurate quote I ran a test clean on part of the kitchen floor. The test clean went very well, the difference was remarkable, and the cleaned section really stood out. Pleased with the potential of a clean floor they accepted my quote, and we pencilled a date in the diary.
I returned on the appointed date and began by removing the kickboards from under the kitchen units to protect them from splashing. Next, I set about spaying the floor with a strong dilution of Tile Doctor Pro-Clean, this is a purpose made tile and grout cleaner that eats into the grease and dirt so it can be removed. This product works best if you leave it for ten minutes before scrubbing in using a heavy-duty machine fitted with a heavy-duty brush. The soil released from the floor was then extracted using a wet vacuum.
The Pro-Clean did a good job on the grout however it was clear something stronger was required to really get the stone clean, so I stepped up a gear and applied Tile Doctor Remove and Go using the same process as before. This is a really good product for removing deeply ingrained grease and dirt.
The final step of the cleaning process was to give the stone and acid wash using Tile Doctor Grout Clean-Up to remove old grout haze and other mineral deposits; additionally, being an acidic product, it counters the alkaline cleaning products used earlier neutralising the pH level of the floor and leaving it ready for sealing.
Before sealing I like to discuss the different products available and the finishes they can provide. In this case my clients’ main concerns were that they wanted the stone to look natural and easy to maintain going forward.
With this in mind, Tile Doctor Seal & Go Extra was chosen, it’s a modern acrylic-based sealer that brings out the natural colours in the stone and gives a very slight smooth finish. The protection it provides will prevent dirt becoming ingrained int the pores of the stone and ensure the floor is easier to maintain. Several coats were applied, until we achieved the required finish.
The deep cleaning process and fresh sealer transformed the stone floor bringing out its original beauty and my customer couldn’t believe the difference in the floor and was highly delighted.
For aftercare I gave the client a bottle of Tile Doctor Neutral Cleaner, this product is pH neutral so it will clean the floor but won’t damage the sealer. Often people use household cleaners for cleaning tiled floors, but due to the strong chemicals they contain, they can do more harm than good by slowly stripping away the protective sealer and taking the floor back to square one. Tile Doctor Neutral Tile Cleaner is reasonably priced, and the concentrated formula means a small amount goes a long way so it’s well worth using.
This was a pleasurable job for me as it was good to see the floor transform from dull and lifeless to clean and showing the natural colour and beauty of the York stone, and always lovely to have another satisfied client.
Simon Testa
North East Yorkshire Tile Doctor

 Heather Banks
Photo: Heather Banks © 2015 Houzz
Example of a trendy living room design in Austin with white walls, a standard fireplace, a tile fireplace and a wall-mounted tv
Example of a trendy living room design in Austin with white walls, a standard fireplace, a tile fireplace and a wall-mounted tv

 Moderne Builders
Example of a mid-century modern formal and open concept concrete floor living room design in Los Angeles with a wall-mounted tv

Sponsored
Columbus, OH

Wannemacher Interiors
Customized Award-Winning Interior Design Solutions in Franklin Cnty OH
 Tile Doctor Ltd
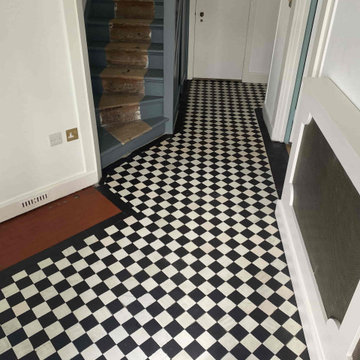
This client from North London had recently bought a property in Highgate N6 and during renovation had discovered an original Victorian tiled floor in the hallway. The floor was laid in a classic black and white diamond pattern but unfortunately a large section was missing and had been filled with concrete. Furthermore, most of the remaining floor had been covered in cement and glue.
I carried out a survey of the floor to determine the main issues and was then able to email over a quote later that day that included rebuilding the missing section of flooring. I suspect the floor had been excavated at some point in the past to install central heating and then rather than have the excavated section restored it was simply back filled and then levelled with a cement screed before finally gluing down a carpet on top.
Once the quote was accepted, I sourced replacement tiles from the Vintage Floor Tile company. Situated in Kent they are a reclamation yard that specialises in supplying original geometric and encaustic tiles including the major historical makers such as Minton and Craven Dunnill.
Armed with replacement tiles I started by removing the concrete that had been used to backfill the missing section and prepare a new surface for tiling with quick drying cement. When ready I was able to carefully build back the original pattern using the replacements. The tiles were secured with tile adhesive and once that had gone off, they were grouted.
The floor was left to set fully overnight and then the next day I was able to return and clean the whole floor using a strong dilution of Tile Doctor Remove and Go. As usual this was left to soak into the tiles for a good ten minutes before being scrubbed into the tiles using a black scrubbing pad. The Tile Doctor Remove and Go did a good job of cleaning the floor and the cleaning solution soon turned black with dirt during the scrubbing. The floor was rinsed with water and the soil extracted with a wet vacuum. After inspecting the floor any areas that needed further work were hand scrubbed and rinsed again until I was happy the floor was clean.
The last part of the cleaning process was to give the tiles an acid wash using Tile Doctor Acid Gel which further cleans the floor by removing old cement residue and grout haze. It also neutralises efflorescent salts in the tiles which are a common issue with floors of this age with no damp proof membrane. After another rinse and extraction, the floor was given a final rinse and then dried as much as possible using the wet vacuum.
I left the floor to dry out for a couple of days before returning to apply a protective sealer. Tile and Stone should be dry before sealing so I use a damp meter first to double check. All was well so to seal the tiles I proceeded to apply the first of what would be three coats of sealer. I used Tile Doctor Colour Grow for this, it works by impregnating the tile occupying the pores and thereby preventing dirt from becoming ingrained there. This product also enhances the black and white colour of the tiles and makes the floor much easier to clean.
Once done the floor was transformed and needless to say my customer was very pleased with the result. For the aftercare of Victorian Tiled floors, I recommend the use of a ph neural tile cleaner such as Tile Doctor Neutral Cleaner; most supermarket tile cleaners are simply too strong for use on sealed floors and can strip off the sealer prematurely.
Andrew Newstead
North London Tile Doctor

 Pete Veilleux, East Bay Wilds
Parry Manzanita / Arctostaphylos manzanita
Photo by Pete Veilleux, East Bay Wilds
1