
Search results for "Neutralize acids" in Home Design Ideas

 Tile Doctor Ltd
I was asked to look at renovating a shower cubicle at a property in in Manchester city centre that had been clad in White Limestone tiles. I understood the bathroom had been installed 12 years prior, but now the tiles were looking grubby, mouldy and dirty.
The client had lived at the property for the last two years and in an attempt to resolve the problems had used a few different household products such as flash and bleach, they had tried everything, and nothing had helped. I suspected that these strong acidic cleaners had actually made the problem worse by stripping off what was left of the sealer that was protecting the Limestone, allowing dirt to become ingrained in the stone.
I visited the property and ran a few cleaning tests in the shower cubicle with Tile Doctor products. This allows me to see which product will have the best results and gives the customer confidence that we can resolve their issues. The results were immediate, they could see the difference and they were happy to accept my quote and agree a date for my return to complete the work.
I arrived several weeks later and made a start. The tiles were scrubbed by hand with a strong dilution of Tile Doctor Remove and Go with excellent results. This product is designed to remove coatings and sealers, and in this case, it did a great job of drawing out the ingrained stains and dirt build-up. This removed what was left of the sealer and took off most of the dirt and mould. The Limestone tiles and grout were then rinsed with water to remove the soil.
Next I needed to restore the smooth surface of the limestone which had been etched by the use of strong acidic cleaning products. To do this I used a set of six-inch diamond burnishing pads attached to a hand buffer to hone and restore the stone.
I then dried the shower tiles and grout with a heat gun checking the moisture levels with damp meter until I was satisfied it was completely dry.
The last step was to re-seal the Limestone and Grout using a couple of coats of Tile Doctor Colour Grow. This is natural coloured intensifying sealer which provides durable protection to the surface allowing it to breathe and enhancing the colours.
The Customer was amazed with the difference and left the following feedback!
“Kamila was friendly, professional and kept me informed about what to expect before she took on the job and during the tile cleaning. The tiles look absolutely amazing after her work – I feel as though I have a brand new bathroom! Kamila also gave me helpful tips on looking after limestone tiles. I can’t recommend her highly enough.”
For future cleaning I recommended the use of Tile Doctor Aqua-Pro which is a pH neutral shower tile cleaner designed for use on sealed surfaces. Most cleaning products you find in supermarkets are overly strong and will erode the sealer prematurely, so when choosing a cleaning product always read the label and make sure it’s safe to use on Sealed Stone tiles.
Alex Logonzy
Greater Manchester Tile Doctor
 Tile Doctor Ltd
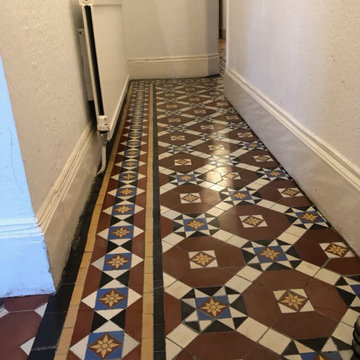
We received a request to renovate Victorian tiled hallway floor at a house in the London borough of Harlesden NW10. My client had modernised the heating system and this unfortunately required a section of the tiled flooring to be dug up so new pipework could be laid.
After speaking on the phone, I arranged an initial visit to the property so I could properly assess the work required and provide a price for restoring the floor. During my visit I could see there was another section of missing tiles at one of the door thresholds which would need attention. Except for the missing sections of floor I could see that the tiles themselves were in good condition for their age and would respond well to a deep clean and fresh seal.
I was confident on being able to source matching replacements for the missing tiles and reassured my client that we would be able not only repair the floor but also renovate it to a good standard. I gave them a price to do the restoration which they were happy to accept, and the work was booked.
After some research I managed to source replacement tiles from the Vintage Floor Tile Company in Kent; Victorian tiles are still popular so there a few companies that keep stock so we can usually find a match.
With the replacements in hand, work started by removing the cement and loose material from the missing sections of flooring and backfilling with self-levelling compound to bring the exposed base up to the right level for tiling.
The tiles were then cut to shape as required to match the existing patten and fixed into place with a quick setting adhesive and then grouted.
The floor was left to overnight to allow the adhesive to harden fully, and I returned the next day to deep clean the whole floor. To give the tiles are deep clean a strong dilution of Tile Doctor Remove and Go was sprayed onto the floor and left to soak in for ten minutes. It was then scrubbed into the floor using a rotary machine fitted with a with a black pad. This action lifted the dirt out of the tiles and the resulting slurry was removed with the wet vacuum.
It turned out that the pores of the tiles were holding a lot of dirt, so the process was repeated until I was satisfied. Due to the age of the property, there was no damp-proof membrane installed so I do try to minimise the amount of water I use in this process as there is always a chance of exacerbating any latent efflorescence issues.
Efflorescence occurs where moisture rises through the tile bringing with it salts from underneath the floor as it evaporates on the surface. This can lead to unsightly white marks appearing on the tile. To counteract this potential problem the cleaning was followed by an acid wash using Tile Doctor Acid Gel applied with a 100 then 200-grit pad, before finishing on a 400-grit burnishing pad. The floor was again rinsed with water after the application of each pad to remove the slurry and extracted with a wet vacuum.
Once I was satisfied the floor was as clean as possible, we left site and the area was left to dry over the weekend ready for application of a new sealer.
I returned on the Monday and started by taking a few moisture readings to check the floor was dry. The floor was in an acceptable range, so I applied the first of 4 coats of sealer. For this floor I chose Tile Doctor Seal and Go Extra which is specially formulated product that provides stain resistance with a hard wearing low-sheen finish.
This product is also breathable which is an important feature for old floors, anything that blocks moisture from rising through the tile will cause it to become trapped underneath where it will pool and eventually reach out to the walls and result in rising damp.
Once complete the floor looked brand new and I’m pleased to say with the deep clean and a fresh sealer applied it was impossible to tell the difference between the original and repaired sections of flooring.
For the aftercare of sealed Victorian tiled floors, I recommend Tile Doctor Neutral Cleaner, it’s a mild day to day cleaner with a neutral pH that won’t damage the sealer. Many of the tile cleaning products you find in supermarkets are simply too strong.
Andrew Newstead
North London Tile Doctor

 Five Star Tree Care
Oak trees have been a symbol of strength for a long time. They are also known to live for a very long time, given the right conditions. The reason they became a symbol of strength is because they themselves are very strong and are able to survive some of the harshest storms, when healthy. The wood it produces is undoubtedly very strong as well and is commonly used in the making of furniture, homes, and boats.
Oak trees are not only used for their strong wood, but also for their beauty. There are even certain species that produce distinctive lobed leaves, allowing them to stand out. Then, when fall comes around, they become even more majestic when their leaves turn bright and brilliant colours that add texture and a unique spectacle to the changing environment.
The beauty is so amazing that you might even want one for your own yard. Our team here at Five Star Tree Services is going to go over a few different types of oak trees that might be perfect for your landscape! These are guaranteed to have spectacular fall colours, great shade, and amazing texture.
Different Types of Oaks
You might be interested to know that oaks are one of the oldest trees in the world. Archeologists have been able to date them back to around 65 million years ago. A healthy oak can even live to about 200-300 years old. But do you know where these big trees come from? Little tiny acorns. A single oak tree is able to produce roughly 10 million acorns over the course of its lifetime.
Not only are oak trees beneficial to people but they are also great for animals. They are able to support more than 500 moth and butterfly species, which is more than other native trees can do. Insects also like to find homes in oak trees, which helps to feed the birds. Not to mention that small animals like squirrels also can utilize them for things like food, shade, and shelter. They also help larger animals, such as the white-tailed deer, who eats the acorns during the fall and winter season, which is about 75% of their diets.
Around the world, you can find more than 600 species of oak trees. Let’s go over a small handful of our favourites that are great for providing dazzling colourful displays during the fall months, when the leaves change colours. These are going to range from bronzes, to golds, to reds, and everything in between.
Black Oak
It might be apparent that the name comes from the outward appearance from the almost black bark that you see, along with the deep orange or yellow inner bark of the tree. Being quite a statement tree, you can enjoy the green glossy leaves in the summer and then enjoy them again then they turn orange and red in the fall. This tree has a tendency to look very similar to a red oak, but one of the major differences is that black oaks are a little smaller and are able to tolerate drier soil conditions.
Specifications:
-Growing Zones: 3-9
-Sun Tolerance: Full sun, which can equate to 6 hours of uninterrupted sunlight each day
-Soil: Needs slightly acidic, well-drained, and rich soil
-Growing height: 50-60 feet
White Oak
This oak tree is great for shade and can easily be spotted by the light colour of its bark. During the spring, it comes out with pinkish leaves that later on turn to dark green. The leaves of this tree are 4-9 inches long, have 7-9 lobes, and turn reddish-brown in the fall.
Specifications:
-Growing Zone: 3-9
-Sun Tolerance: Full sun, which can equate to 6 hours of uninterrupted sunlight each day
-Soil: Needs to be planted in well drained and slightly acidic soil
-Growing Height: 80 feet
Red Oak
This oak doesn’t have its name for nothing. It offers the brightest red leaves out of all the oak trees. In the fall, the leaves turn a beautiful deep red. During the summer, it has glossy green leaves and an open canopy. This is a widely adaptable tree and it also grows much faster than other oaks.
Specifications:
-Growing Zone: 3-9
-Sun Tolerance: Full sun, which can equate to 6 hours of uninterrupted sunlight each day
-Soil: Needs to be plated in slightly acidic, moist, but well-drained soil
-Growing Height: 50-75 feet
Bur Oak
One of the defining features of this tree is that it has unique acorns. They are larger than other trees and are fringed. It grows in a round shape that is dense with leaves, offering lovely shade and is able to tolerate heat stress and pollution. In the fall the leaves of this oak tree can turn either yellow/green, muted yellow, or yellow/brown.
Specifications:
-Growing Zones: 3-8
-Sun Tolerance: Full sun, which can equate to 6 hours of uninterrupted sunlight each day
-Soil: Needs neutral to alkaline soil
-Growing Height: 60-80 feet
Pin Oak
Typically found along rivers in eastern and central US, this oak tree’s unique feature is its distinctive branching pattern. It has large leaves that are pointed with sweeping U-shaped spaces between lobes. The leaves in the fall turn a scarlet red and eventually become bronze later in the fall.
Specifications:
-Growing Zone: 4-8
-Sun Tolerance: Full sun, which can equate to 6 hours of uninterrupted sunlight each day
-Soil: Needs slightly acidic soil. Can tolerate wet and heavy clay soils
-Growing Height: 60-70 feet
Live Oak
These are not usually super tall but they do have winding and spiraling branches which have the ability to grow into a massive diameter, larger than other oak trees, and this helps to provide a large area of shade. Another special thing about this particular type of tree is that it is the only evergreen, not a deciduous tree like the rest. This specific oak tree is one of the strongest and was used in colonial times for making ships in the US Navy. The glossy leathery leaves on this tree are 1-3 inches long and are dark green with lighter green underneath, which lasts during the entire winter.
Specifications:
-Growing Zone: 8-11
-Sun Tolerance: Full sun, which can equate to 6 hours of uninterrupted sunlight each day
-Soil: Needs to be planted in slightly acidic soil
-Growing Height: 40-80 feet
How Five Star Tree Services Can Help
Whether you are looking for the best oak tree for your yard or any other tree, our professionals here at Five Star Tree Services can help! With our wide variety of services, we can help you with all your tree care services in Richmond Hill! Give us a call today at (416) 990-3355!
Find the right local pro for your project
 Tile Doctor Ltd
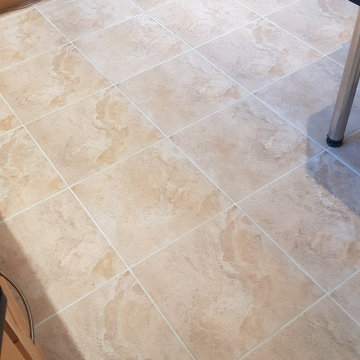
This Ceramic Tiled kitchen floor at a property in Wickersley was proving to be a pain for our clients, whatever they did the grout just looked dark, dirty, and unsightly. No amount of scrubbing would make a difference and eager to find a solution they wasted a lot of money on various products trying to clean the grout lines, but nothing had worked. Ceramic tiles are glazed which makes them very easy to clean, grout however is a different story.
Wickersley is in Rotherham close to the 3 main motorways in South Yorkshire, the M1, M18 and A1. The village took its’ name from the Wickersley family who eventually moved to Sheffield and built the famous Broom Hall, incredibly we restored 100sqm of stone flooring in that very house not too long back. It was a beautiful restoration.
On the first visit we tried a few of our products to clean the grout lines up but sometimes grout just can’t be cleaned, if the staining has penetrated the surface layer and gone right down into the grout it is stained forever. Grinding the grout out and putting in new grout is a big messy expensive job. For this reason, our grout recolouring service is an ideal option and the best thing about it is once it is recoloured the grout is protected and stain resistant.
Tile Doctor have a range of ten grout colours to choose from and in this case our client chose the light grey colour. They were happy to go ahead with our quote and just thankful that we were able to do it relatively inexpensively and without making a huge mess!
Work started by treating the grout lines with an acidic pre-treater that comes with the Grout Colourant kit that Tile Doctor sell, Tile Doctor Grout Colourant Pre-Treat cleaner, this gets rid of any contamination and prepares the grout for the colourant, so you get a superior bond.
Once dry the Light Grey Grout Colourant was applied the grout lines with a small brush. A steady hand is required, and you need to ensure any excess is immediately wiped away before it dries. It is quite a slow job, but very satisfying when you see the difference it makes. Glazed tiles are sealed during manufacture, so we do not need to apply a sealer like we do on most of our jobs.
The customer was over the moon with the transformation, the grubby grout lines had been irradicated and because the grout colourant forms a barrier over the grout, they will remain looking good for a long time to come. For aftercare cleaning I recommended using Tile Doctor Neutral Tile Cleaner which is pH neutral and gentle enough to use on a regular basis, it also has a nice fresh smell.
Matthew Lovett
South Yorkshire TIle Doctor
 Tile Doctor Ltd
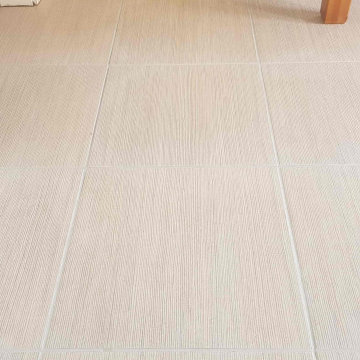
Recently it seems I am getting called out to an increasing number of new builds to sort out patchy grout issues. The reason why there have been so many issues arising is a bit of a mystery, but I put it down to a combination of things like poor quality grout, rushed installations, wet subfloors and the use of different batches.
This recently built house in the village of Darton is a great example and in this case, I suspect two different batches of the same grout had been applied. Darton by the way is a small village in the Borough of Barnsley.
Invariably these problems are picked up by the new owner on their snagging list, with the tiler long gone and the builder keen to get their final payment it is always a tricky situation to resolve. I find the best solution is to apply a Tile Doctor Grout Colourant, it’s a much quicker process than removing the old grout and replacing with new. Most new homeowners would not appreciate us ripping up their brand-new rooms and generating lots of dust in the process! Also, by using the Tile Doctor Grout Colourant it adds a barrier of the grout preventing dirt from discolouring it further down the line.
Even though the house was brand new, the Porcelain Tiled floor was not looking great. The client was happy for me to go ahead and would take up the bill with the housebuilder. I first pre-treated it with Tile Doctors Grout Colourant Pre-Treatment. This removes any contamination from the grout which might affect the adhesion of the colourant and being an acid, it also etches the surface of the grout to ensure a superior bond with the colourant.
The client chose our Light Grey colour which is one of 10 colours we offer. Once the pre-treatment had been applied, scrubbed, rinsed, and vacuumed away the floor was left to dry. Once dry we started applying the colourant, this is done with a small brush (a toothbrush is ideal) carefully scrubbing colourant into each grout joint and wiping off any excess that gets on the tiles before it is able to dry.
Once complete the newly coloured grout lines totally transformed the floor and because the grout colorant is epoxy based the grout lines will stay stain free and never get dirty.
The porcelain tiles were factory sealed so there is no need to apply a seal to the floor.
I recommended the use of Tile Doctor Neutral Tile Cleaner to keep the floor in the best condition. It is pH neutral so is far less harsh on the surface than the everyday household cleaners available. It has a minty fragrance and is mild enough to use daily. They were very happy that the floor now looked as it should have from the start and was the finishing touch to their beautiful new home.
Matthew Lovett
South Yorkshire Tile Doctor
 Tile Doctor Ltd
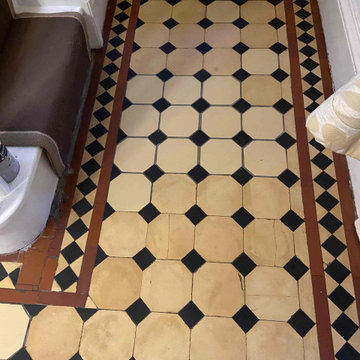
Detailed below is the restoration of a Victorian tiled hallway floor that we started back in June in Preston. Although we started in June there was so much damage to the subfloor and the tiles it took some time to complete, additionally, the client did not like the colour samples of the replacement tiles we had brought along and so decided to source their own which took some time.
Three months later with replacement tiles now sourced we were given the go ahead to start the restoration. The first day’s focus was cleaning the original floor using very coarse 100-grit and 200-grit Diamond pads fitted to a rotary buffer machine and applied to the floor using a strong dilution of Tile Doctor Remove and Go to add extra cleaning power. Tile edges were given special attention using a flex machine fitted with small diamond grit pads.
The floor was rinsed with water to remove the soil generated and this was followed up with an acid rinse using a 1:3 dilution of Tile Doctor Grout Clean Up. This last step in the cleaning process is especially recommend for old floors like this which don’t have a damp proof membrane and can suffer from efflorescence issues.
The next stage focused on repairing the floor and started by carefully knocking out all the broken and chipped tiles. We had previously estimated over 30 tiles needed replacing and so the client had bought two boxes, meaning I had plenty of spares to work with.
Before tiling however, the subfloor had suffered over the years and needed attention first. To deal with this the damaged areas were raked out, cleaned up and then back filled with rapid setting self-levelling screed from Mapie adhesives. Once the sub-base was fixed then we put the new tiles back in, they were not an exact match, about 5mm too short and lighter in tone, but the colour was pretty close.
Tiling an old Victorian floor like this can be a bit like dominoes as you move one out of place 2 decent ones come loose and then they also need refixing. Some of the tiles had hair line cracks in them and once they were loose, they just cracked in half. As such the 20 spare tiles that I thought were spare came into good use and I actually ended up using all of them. I could have done with a few more so it was decided to reset the last four broken tiles and grout them in. Luckily for me the client was very understanding about the nature of tile restoration and had accepted that there would be some imperfections and they were not expecting a new floor.
The Tiles were fixed down using Ultralite Rapid Flex (another product from Mapie) and then grouted using the same adhesive (not a grout, as they did not have grout back in the day, just cement and screed).
The floor was left this to cure overnight, and we came back the next day to finish the clean using a 200-grit diamond pad fitted to a buffing machine and lubricated with water, then one last acid rinse to get the tiles as clean as possible and remove any lingering grout haze. This last clean helps to blend the new tiles in with the original.
Before applying a protective sealer, the floor was left to dry for a couple of days, the tiles need to be thoroughly dry before sealing or you can end up with a patchy appearance.
For this floor with no damp proof membrane, it was important to use a fully breathable sealer that will allow moisture to rise through the tile and evaporate at the surface, so Tile Doctor Colour Grow was chosen. This is a good choice for old floors like this as its fully breathable, head wearing, and it contains a colour enhancer that improves the overall appearance of the tile.
Three coats of Tile Doctor Colour Grow which is a fully breathable, colour enhancing sealer hat works by soaking into the pores of the tile protecting it from within. It has a matt finish, and it works really well with all clay tiles and is ideal for these types of floors.
You can probably spot the lighter coloured tiles in the after photos on this page, however it’s a very subtle difference and I think they have blended in quite well with the original. Certainly, my client was very pleased with the newly restored floor, its completely transformed from when we first visited the client, and the floor has now gained character and history. For aftercare we recommend Tile Doctor Neutral Cleaner, its an effective pH neutral product that is compatible with the new sealer.
Russell Taylor
Lancashire Tile Doctor
 Tile Doctor Ltd
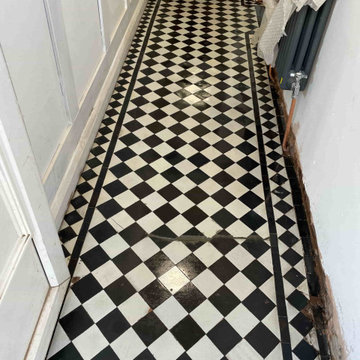
This 1920s single bay house in Earlsdon had been restored by the builder from top to bottom. The hallway floor had been covered in laminate flooring which had been removed, revealing an Edwardian tiled floor beneath. Unfortunately, the plasterer had not covered the floor when working on the walls, so the tiles were now covered in plaster!
The client was keen to keep as many original features as possible and called me in to see if the original 100-year-old floor could be renovated in keeping with the rest of the house. I visited the property to survey the tiles and explained that it certainly could be and having worked on hundreds of these renovations before I was confident of getting a good result. They were happy to go with my quotation and we arranged a time to carry out the work.
The floor tiles themselves were in good condition, but I had to hand carefully scrape the plaster off the tiles before starting on the deep clean. With the plaster removed from the floor I applied Tile Doctor Acid Gel and worked it into the tiles with a coarse 100-grit pad. The floor was then rinsed, and the waste extracted from the floor using a wet vacuum. The process was then repeated with a 200-Grit and then a 400-grit pad until I was happy.
The floor was then speed dried with fans whilst I worked on a repair around the threshold of one of the doors. The repair was relatively straight forward, and I managed to restore the tiling, so the repair was unnoticeable.
The floor was then left overnight to completely dry out. Floors of this age don’t have a damp proof membrane so moisture can build up if they have been covered as in this case. The next stage in the restoration would be to apply a sealer and the floor needs to be dry before you do this otherwise the result can be patchy.
Returning the following day, I first tested the floor with a damp meter to check the moisture levels in different parts of the floor to ensure it was dry enough to seal. The fans had done a good job and I was pleased to find that the floor was dry.
To seal this floor, I used Tile Doctor Seal and Go Extra, it’s a breathable acrylic based sealer that allows for moisture vapour to rise through the tile and evaporate at the surface. This makes it ideal for situations where no damp proof membrane has been installed and there is a low risk of mineral salt deposits being formed (efflorescence).
Once completed the transformation was huge and he Victorian tiles looked well suited to the hallway. Feedback from my client was they were over the moon with the newly restored floor!
For regular cleaning, I recommended Tile Doctor Neutral Tile Cleaner, this is a gentle pH neutral cleaner that will ensure the newly applied seal is retained and not eroded prematurely. This can be the problem with most household cleaning products which contain strong chemicals like bleach which can break down the sealer over time. Without a sealer dirt gets back into the pores of the tile which will mean the homeowner will need to get the floor cleaned and sealed again – a vicious circle!
Mick Gayton
Warwickshire Tile Doctor


 Tile Doctor Ltd
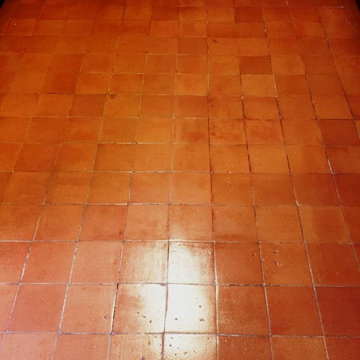
Not too long ago I visited a client who had just moved into a lovely old cottage in Milton, Oxfordshire. She wanted to restore many of the antique features of the building, including a fantastic Quarry tiled floor in the kitchen.
Quarry is typically a robust, hard wearing stone, but in a high traffic area like a kitchen, the tiles will need regular maintenance. These tiles clearly hadn’t seen a thorough clean and fresh seal in a long time, and so I was called in to provide just that.
On the first day of work, I gave the Quarry tiles a deep clean using a strong solution of Tile Doctor Pro-Clean and water. Pro-Clean is a versatile alkaline cleaner that also helps to break down any old and no longer effectual sealer remaining on the tiles.
The solution was applied evenly to the floor and left to dwell for half an hour, allowing time for it to seep into the stone to get underneath and lift out the ingrained dirt. I then removed the dirt by agitating the solution with a scrubbing pad fitted to a rotary floor scrubber. I worked in small sections at first, and gradually finished the entire floor.
After completing the initial clean, I rinsed away the soiled solution and vacuumed up the excess moisture using a wet-vac machine. I then scrubbed the floor an acid wash using a dilution of Tile Doctor Grout Clean-Up to remove grout smears and other mineral type deposits. The resulting solution was then removed in a similar fashion using a wet-vac.
The final step in the cleaning process was to rinse the floor with Tile Doctor pH Neutral Cleaner to remove any trace of product helps to tackle any remaining dirt and reset the pH balance of the tiles before sealing.
After leaving the floor to dry overnight, I returned the next day to the house to seal the floor with Tile Doctor Seal & Go, a water-based topical sealer which gives the floor an aesthetically pleasing sheen and a robust surface seal.
The photos demonstrate the results better than this short account can, needless to say the floor is now transformed.
Barry Woodward
Oxfordshire Tile Doctor

 Truitt and White Window and Door Showroom
Mackey Builders- Located just north of Highway 24, the neighborhood of Hiller Highlands was rebuilt shortly after being ravaged by the 1991 Oakland fires. The client, who is an artist, recently purchased her two-bedroom, 2-1/2 bath townhouse on Treasure Hill intending to completely renovate the interior before moving in. Her goal was to have a home that reflected her eclectic and modern aesthetics; working with Mackey Builders, Inc., she was able to realize her vision.
Updating the kitchen was a top priority for the owner, as she is a gourmet cook. Collaborating with Stacey to create a design that was streamlined and functional, she chose quartz countertops and a natural stone backsplash to replace the ceramic counters and backsplash original to the home. She exchanged contractor-grade appliances for a Miele double oven, cooktop, and dishwasher, and purchased a Sub-Zero refrigerator with a glass door. Open shelving was integrated into the design so that the owner could display her beautiful ceramic collection. When designing the kitchen's custom cabinetry, Stacey chose a horizontal wood grain to balance the room's high ceilings. He also suggested removing a small bar area in order to expand the kitchen.
Amber Flooring was brought in to resurface the hardwood floors and the Mackey Builders team replaced windows and doors, upgraded the lighting, painted all interior walls, and installed more modern trim details. In the master bath, guest bather, and powder room, they installed new quartz countertops, sinks, and custom cabinets. Bathroom walls were hand-plastered in neutral tones that show subtle variations in color.
In the living room, the wood-burning fireplace, mantel, and built-in shelving were removed and replaced with a sleek high efficiency gas fireplace set into a wall of black large format tile. In keeping the owner's eclectic taste, a new stair railing made of custom-milled maple, wire rope, and acid-etched steel was designed and built. Because the owner loves to draw, Stacey came up with the idea of painting a wall in the dining area with blackboard paint and framing it. He then added a ceramic skull and lights; the finished product is a unique and changeable art installation that is also a focal point for the room.
While this project began as an interior remodel, it expanded to include a fence and siding replacement.
About Mackey Builders, Inc.
Mackey Builders, an award-winning contracting firm, has been in business for over 30 years and is proud to have completed hundreds of remodeling projects in the East Bay, San Francisco, and Marin County. An artist by nature, Stacey has an exquisite eye for detail and creates designs that are as beautiful as they are functional. Client satisfaction is paramount; he is always willing to "go the extra mile" to ensure the finished product meets both the client's and his own exacting standards.
 Tile Doctor Ltd
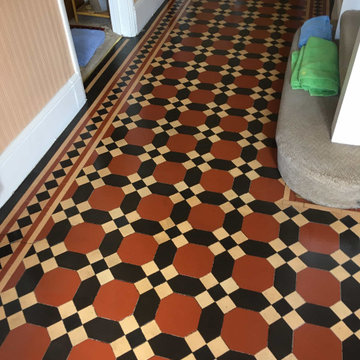
This Victorian floor in Twickenham, Middlesex was in good physical condition for its age but needed a good deep clean. Our customer had informed us that they had never cleaned or sealed the floor in the sixteen years that they had lived there so it was well overdue.
I went over to survey the floor and completed a test clean on a small section of tiling to see which products/techniques would work best. I like to do this as it demonstrates to the client what can be done, and it allows me to come up with an accurate price for doing the work.
As you can see from the pictures, there was quite a difference in the test patch compared to the rest of the floor. Years of foot traffic from the street had taken its’ toll and the floor was very dirty. Luckily, the floor was in very good condition and had not worn too badly.
Once they had seen the test patch, they were confident that it would be worth go ahead with my quote. It would ensure that the period feature was retained for many years to come. The colours on the floor were quite faded so it would be nice to get it restored.
I started the cleaning process by first taping up the surrounding skirting boards and doors to ensure they were protected from potential splashing. Cleaning involved spraying the Victorian tiles with a strong dilution of Tile Doctor Pro-Clean which is a dedicated Tile and Grout cleaning product. This was left to soak in for about ten minutes and then scrubbed in using a black pad fitted to a heavy-duty rotary scrubber.
This gives the floor a good mechanical scrub and works wonders releasing the ground-in dirt and soil from the tiles. The strong dilution of Pro-Clean will also remove any remaining sealers from the tile, however after sixteen years I doubted there would much trace of sealer left. Once done the floor was rinsed with water and all the soils removed with a wet vacuum.
Following the initial clean the colours were already much stronger. Next step however was to improve on that by giving the floor an acid rinse using Tile Doctor Grout Clean-Up. This removes mineral deposits and generally brightens up the appearance of the tile. After another round of scrubbing the floor was rinsed with our high-pressure washer and then vacuumed, extracting all of the dirty water and dirt away in one go. The floor was looking a lot better and was left to dry overnight.
After allowing the floor to dry overnight, we returned the next day to seal the floor. First, checking the floor was dry using the damp meter. Floors of this age can take a little longer to dry as there is no damp-proof membrane so it’s always worth checking as applying a sealer to damp tiles is not a good idea.
Once I was satisfied it was dry eight coats of Tile Doctor Seal and Go sheen finish sealer were applied. This takes a while to do as each coat needs to dry before applying the next. The sealer will protect the Victorian tiles for dirt and stains, it also enhanced the colours in the tile and will make it easier to keep the floor clean going forward.
My client was very pleased with the floor and mentioned that they should have called me in sooner! For aftercare cleaning I recommended Tile Doctor Neutral Clean which is an effective cleaner with a neutral pH, its designed for cleaning tiles without degrading the sealer.
Jonathan Oldham
South Middlesex Tile Doctor

 Goodall Custom Cabinetry
Living room - traditional formal dark wood floor living room idea in Phoenix with beige walls, a standard fireplace and a media wall

 Mercury Mosaics and Tile
Moroccan Fish Scales are a stunning way to add character and beauty to a space in a unique way. This blue-green color has a gorgeous range of variation with just one glaze. Large Moroccan Fish Scales - 1017E Sea Mist
 Tile Doctor Ltd
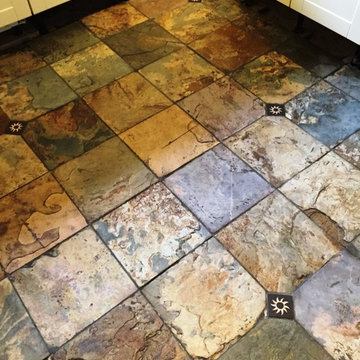
I recently visited a client living in the market town of Woodstock in Oxfordshire to rejuvenate a fantastic multi-coloured Slate floor that had been hidden under several years’ worth of dirt in their kitchen. Slate is a typically hard-wearing tile used for flooring high traffic areas of houses and public buildings but does need sealing to bring out its best features and in this case the sealer had long since worn off and dirt had become ingrained in the stone.
My first task in the cleaning process was to mix a strong solution of Tile Doctor Pro-Clean, which is a strong alkaline cleaner safe to use on Tile and Stone, and NanoTech HBU (Heavy Build-up Remover), which is a particularly powerful product that uses nano-sized particles to tackle muck in areas of the stone where typical cleaners simply can’t reach. I spread this solution across the floor and left it to seep into the stone, to get underneath and lift out the ingrained dirt.
After allowing the solution adequate time to dwell, I scrubbed the floor with a carbon brush to gradually reveal the fantastic natural colours of the Slate hidden beneath. Following this, I rinsed the entire floor several times with clean water, before soaking up the resulting soiled residue with a wet vacuum.
The next part of the cleaning process entailed paying particular attention to the grout lines. I used Tile Doctor Grout Clean-Up to scrub the grout lines and also to treat a small amount of efflorescence. The resulting residue was promptly extracted with the wet vacuum and I finished by giving the whole floor a rinse with Tile Doctor pH Neutral Tile Cleaner. This is a day to day tile cleaning product which is recommended for stone floors, many supermarket tile cleaning products are only suitable for ceramic tiles due to their acidic formula and can damage a floor over years of use so you should always read the label. I then left the floor to dry completely overnight.
On day two, the Slate tiled floor was dry and ready to seal. The floor had to be completely dry, as any excess moisture has the potential to the damage the performance of the sealer. Since my client had specifically requested a matte finish, I opted to use Tile Doctor Colour Grow. Colour Grow is an impregnating sealer that provides durable surface protection from within while also enhancing all of the natural mineral shades.
My client was very pleased with the results, particularly as they hadn’t realised they had such a great looking floor in their house when they had first purchased it!
Barry Woodward
Oxfordshire Tile Doctor



 User
Located just north of Highway 24, the neighborhood of Hiller Highlands was rebuilt shortly after being ravaged by the 1991 Oakland fires. The client, who is an artist, recently purchased her two-bedroom, 2-1/2 bath townhouse on Treasure Hill intending to completely renovate the interior before moving in. Her goal was to have a home that reflected her eclectic and modern aesthetics; working with Mackey Builders, Inc., she was able to realize her vision.
Updating the kitchen was a top priority for the owner, as she is a gourmet cook. Collaborating with Stacey to create a design that was streamlined and functional, she chose quartz countertops and a natural stone backsplash to replace the ceramic counters and backsplash original to the home. She exchanged contractor-grade appliances for a Miele double oven, cooktop, and dishwasher, and purchased a Sub-Zero refrigerator with a glass door. Open shelving was integrated into the design so that the owner could display her beautiful ceramic collection. When designing the kitchen's custom cabinetry, Stacey chose a horizontal wood grain to balance the room's high ceilings. He also suggested removing a small bar area in order to expand the kitchen.
Amber Flooring was brought in to resurface the hardwood floors and the Mackey Builders team replaced windows and doors, upgraded the lighting, painted all interior walls, and installed more modern trim details. In the master bath, guest bather, and powder room, they installed new quartz countertops, sinks, and custom cabinets. Bathroom walls were hand-plastered in neutral tones that show subtle variations in color.
In the living room, the wood-burning fireplace, mantel, and built-in shelving were removed and replaced with a sleek high efficiency gas fireplace set into a wall of black large format tile. In keeping the owner's eclectic taste, a new stair railing made of custom-milled maple, wire rope, and acid-etched steel was designed and built. Because the owner loves to draw, Stacey came up with the idea of painting a wall in the dining area with blackboard paint and framing it. He then added a ceramic skull and lights; the finished product is a unique and changeable art installation that is also a focal point for the room.
While this project began as an interior remodel, it expanded to include a fence and siding replacement.
About Mackey Builders, Inc.
Mackey Builders, an award-winning contracting firm, has been in business for over 30 years and is proud to have completed hundreds of remodeling projects in the East Bay, San Francisco, and Marin County. An artist by nature, Stacey has an exquisite eye for detail and creates designs that are as beautiful as they are functional. Client satisfaction is paramount; he is always willing to "go the extra mile" to ensure the finished product meets both the client's and his own exacting standards.
 Truitt and White Window and Door Showroom
Mackey Builders- Located just north of Highway 24, the neighborhood of Hiller Highlands was rebuilt shortly after being ravaged by the 1991 Oakland fires. The client, who is an artist, recently purchased her two-bedroom, 2-1/2 bath townhouse on Treasure Hill intending to completely renovate the interior before moving in. Her goal was to have a home that reflected her eclectic and modern aesthetics; working with Mackey Builders, Inc., she was able to realize her vision.
Updating the kitchen was a top priority for the owner, as she is a gourmet cook. Collaborating with Stacey to create a design that was streamlined and functional, she chose quartz countertops and a natural stone backsplash to replace the ceramic counters and backsplash original to the home. She exchanged contractor-grade appliances for a Miele double oven, cooktop, and dishwasher, and purchased a Sub-Zero refrigerator with a glass door. Open shelving was integrated into the design so that the owner could display her beautiful ceramic collection. When designing the kitchen's custom cabinetry, Stacey chose a horizontal wood grain to balance the room's high ceilings. He also suggested removing a small bar area in order to expand the kitchen.
Amber Flooring was brought in to resurface the hardwood floors and the Mackey Builders team replaced windows and doors, upgraded the lighting, painted all interior walls, and installed more modern trim details. In the master bath, guest bather, and powder room, they installed new quartz countertops, sinks, and custom cabinets. Bathroom walls were hand-plastered in neutral tones that show subtle variations in color.
In the living room, the wood-burning fireplace, mantel, and built-in shelving were removed and replaced with a sleek high efficiency gas fireplace set into a wall of black large format tile. In keeping the owner's eclectic taste, a new stair railing made of custom-milled maple, wire rope, and acid-etched steel was designed and built. Because the owner loves to draw, Stacey came up with the idea of painting a wall in the dining area with blackboard paint and framing it. He then added a ceramic skull and lights; the finished product is a unique and changeable art installation that is also a focal point for the room.
While this project began as an interior remodel, it expanded to include a fence and siding replacement.
About Mackey Builders, Inc.
Mackey Builders, an award-winning contracting firm, has been in business for over 30 years and is proud to have completed hundreds of remodeling projects in the East Bay, San Francisco, and Marin County. An artist by nature, Stacey has an exquisite eye for detail and creates designs that are as beautiful as they are functional. Client satisfaction is paramount; he is always willing to "go the extra mile" to ensure the finished product meets both the client's and his own exacting standards.
 Truitt and White Window and Door Showroom
Mackey Builders- Located just north of Highway 24, the neighborhood of Hiller Highlands was rebuilt shortly after being ravaged by the 1991 Oakland fires. The client, who is an artist, recently purchased her two-bedroom, 2-1/2 bath townhouse on Treasure Hill intending to completely renovate the interior before moving in. Her goal was to have a home that reflected her eclectic and modern aesthetics; working with Mackey Builders, Inc., she was able to realize her vision.
Updating the kitchen was a top priority for the owner, as she is a gourmet cook. Collaborating with Stacey to create a design that was streamlined and functional, she chose quartz countertops and a natural stone backsplash to replace the ceramic counters and backsplash original to the home. She exchanged contractor-grade appliances for a Miele double oven, cooktop, and dishwasher, and purchased a Sub-Zero refrigerator with a glass door. Open shelving was integrated into the design so that the owner could display her beautiful ceramic collection. When designing the kitchen's custom cabinetry, Stacey chose a horizontal wood grain to balance the room's high ceilings. He also suggested removing a small bar area in order to expand the kitchen.
Amber Flooring was brought in to resurface the hardwood floors and the Mackey Builders team replaced windows and doors, upgraded the lighting, painted all interior walls, and installed more modern trim details. In the master bath, guest bather, and powder room, they installed new quartz countertops, sinks, and custom cabinets. Bathroom walls were hand-plastered in neutral tones that show subtle variations in color.
In the living room, the wood-burning fireplace, mantel, and built-in shelving were removed and replaced with a sleek high efficiency gas fireplace set into a wall of black large format tile. In keeping the owner's eclectic taste, a new stair railing made of custom-milled maple, wire rope, and acid-etched steel was designed and built. Because the owner loves to draw, Stacey came up with the idea of painting a wall in the dining area with blackboard paint and framing it. He then added a ceramic skull and lights; the finished product is a unique and changeable art installation that is also a focal point for the room.
While this project began as an interior remodel, it expanded to include a fence and siding replacement.
About Mackey Builders, Inc.
Mackey Builders, an award-winning contracting firm, has been in business for over 30 years and is proud to have completed hundreds of remodeling projects in the East Bay, San Francisco, and Marin County. An artist by nature, Stacey has an exquisite eye for detail and creates designs that are as beautiful as they are functional. Client satisfaction is paramount; he is always willing to "go the extra mile" to ensure the finished product meets both the client's and his own exacting standards.
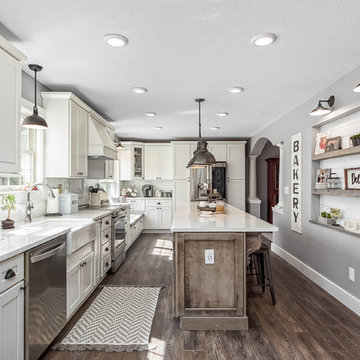
Sponsored
Sunbury, OH

J.Holderby - Renovations
Franklin County's Leading General Contractors - 2X Best of Houzz!
 User
Located just north of Highway 24, the neighborhood of Hiller Highlands was rebuilt shortly after being ravaged by the 1991 Oakland fires. The client, who is an artist, recently purchased her two-bedroom, 2-1/2 bath townhouse on Treasure Hill intending to completely renovate the interior before moving in. Her goal was to have a home that reflected her eclectic and modern aesthetics; working with Mackey Builders, Inc., she was able to realize her vision.
Updating the kitchen was a top priority for the owner, as she is a gourmet cook. Collaborating with Stacey to create a design that was streamlined and functional, she chose quartz countertops and a natural stone backsplash to replace the ceramic counters and backsplash original to the home. She exchanged contractor-grade appliances for a Miele double oven, cooktop, and dishwasher, and purchased a Sub-Zero refrigerator with a glass door. Open shelving was integrated into the design so that the owner could display her beautiful ceramic collection. When designing the kitchen's custom cabinetry, Stacey chose a horizontal wood grain to balance the room's high ceilings. He also suggested removing a small bar area in order to expand the kitchen.
Amber Flooring was brought in to resurface the hardwood floors and the Mackey Builders team replaced windows and doors, upgraded the lighting, painted all interior walls, and installed more modern trim details. In the master bath, guest bather, and powder room, they installed new quartz countertops, sinks, and custom cabinets. Bathroom walls were hand-plastered in neutral tones that show subtle variations in color.
In the living room, the wood-burning fireplace, mantel, and built-in shelving were removed and replaced with a sleek high efficiency gas fireplace set into a wall of black large format tile. In keeping the owner's eclectic taste, a new stair railing made of custom-milled maple, wire rope, and acid-etched steel was designed and built. Because the owner loves to draw, Stacey came up with the idea of painting a wall in the dining area with blackboard paint and framing it. He then added a ceramic skull and lights; the finished product is a unique and changeable art installation that is also a focal point for the room.
While this project began as an interior remodel, it expanded to include a fence and siding replacement.
About Mackey Builders, Inc.
Mackey Builders, an award-winning contracting firm, has been in business for over 30 years and is proud to have completed hundreds of remodeling projects in the East Bay, San Francisco, and Marin County. An artist by nature, Stacey has an exquisite eye for detail and creates designs that are as beautiful as they are functional. Client satisfaction is paramount; he is always willing to "go the extra mile" to ensure the finished product meets both the client's and his own exacting standards.
 User
Located just north of Highway 24, the neighborhood of Hiller Highlands was rebuilt shortly after being ravaged by the 1991 Oakland fires. The client, who is an artist, recently purchased her two-bedroom, 2-1/2 bath townhouse on Treasure Hill intending to completely renovate the interior before moving in. Her goal was to have a home that reflected her eclectic and modern aesthetics; working with Mackey Builders, Inc., she was able to realize her vision.
Updating the kitchen was a top priority for the owner, as she is a gourmet cook. Collaborating with Stacey to create a design that was streamlined and functional, she chose quartz countertops and a natural stone backsplash to replace the ceramic counters and backsplash original to the home. She exchanged contractor-grade appliances for a Miele double oven, cooktop, and dishwasher, and purchased a Sub-Zero refrigerator with a glass door. Open shelving was integrated into the design so that the owner could display her beautiful ceramic collection. When designing the kitchen's custom cabinetry, Stacey chose a horizontal wood grain to balance the room's high ceilings. He also suggested removing a small bar area in order to expand the kitchen.
Amber Flooring was brought in to resurface the hardwood floors and the Mackey Builders team replaced windows and doors, upgraded the lighting, painted all interior walls, and installed more modern trim details. In the master bath, guest bather, and powder room, they installed new quartz countertops, sinks, and custom cabinets. Bathroom walls were hand-plastered in neutral tones that show subtle variations in color.
In the living room, the wood-burning fireplace, mantel, and built-in shelving were removed and replaced with a sleek high efficiency gas fireplace set into a wall of black large format tile. In keeping the owner's eclectic taste, a new stair railing made of custom-milled maple, wire rope, and acid-etched steel was designed and built. Because the owner loves to draw, Stacey came up with the idea of painting a wall in the dining area with blackboard paint and framing it. He then added a ceramic skull and lights; the finished product is a unique and changeable art installation that is also a focal point for the room.
While this project began as an interior remodel, it expanded to include a fence and siding replacement.
About Mackey Builders, Inc.
Mackey Builders, an award-winning contracting firm, has been in business for over 30 years and is proud to have completed hundreds of remodeling projects in the East Bay, San Francisco, and Marin County. An artist by nature, Stacey has an exquisite eye for detail and creates designs that are as beautiful as they are functional. Client satisfaction is paramount; he is always willing to "go the extra mile" to ensure the finished product meets both the client's and his own exacting standards.
 Truitt and White Window and Door Showroom
Mackey Builders: Located just north of Highway 24, the neighborhood of Hiller Highlands was rebuilt shortly after being ravaged by the 1991 Oakland fires. The client, who is an artist, recently purchased her two-bedroom, 2-1/2 bath townhouse on Treasure Hill intending to completely renovate the interior before moving in. Her goal was to have a home that reflected her eclectic and modern aesthetics; working with Mackey Builders, Inc., she was able to realize her vision.
Updating the kitchen was a top priority for the owner, as she is a gourmet cook. Collaborating with Stacey to create a design that was streamlined and functional, she chose quartz countertops and a natural stone backsplash to replace the ceramic counters and backsplash original to the home. She exchanged contractor-grade appliances for a Miele double oven, cooktop, and dishwasher, and purchased a Sub-Zero refrigerator with a glass door. Open shelving was integrated into the design so that the owner could display her beautiful ceramic collection. When designing the kitchen's custom cabinetry, Stacey chose a horizontal wood grain to balance the room's high ceilings. He also suggested removing a small bar area in order to expand the kitchen.
Amber Flooring was brought in to resurface the hardwood floors and the Mackey Builders team replaced windows and doors, upgraded the lighting, painted all interior walls, and installed more modern trim details. In the master bath, guest bather, and powder room, they installed new quartz countertops, sinks, and custom cabinets. Bathroom walls were hand-plastered in neutral tones that show subtle variations in color.
In the living room, the wood-burning fireplace, mantel, and built-in shelving were removed and replaced with a sleek high efficiency gas fireplace set into a wall of black large format tile. In keeping the owner's eclectic taste, a new stair railing made of custom-milled maple, wire rope, and acid-etched steel was designed and built. Because the owner loves to draw, Stacey came up with the idea of painting a wall in the dining area with blackboard paint and framing it. He then added a ceramic skull and lights; the finished product is a unique and changeable art installation that is also a focal point for the room.
While this project began as an interior remodel, it expanded to include a fence and siding replacement.
About Mackey Builders, Inc.
Mackey Builders, an award-winning contracting firm, has been in business for over 30 years and is proud to have completed hundreds of remodeling projects in the East Bay, San Francisco, and Marin County. An artist by nature, Stacey has an exquisite eye for detail and creates designs that are as beautiful as they are functional. Client satisfaction is paramount; he is always willing to "go the extra mile" to ensure the finished product meets both the client's and his own exacting standards.
10