
Search results for "Obtainable" in Home Design Ideas
 Unique Home Solutions Inc.
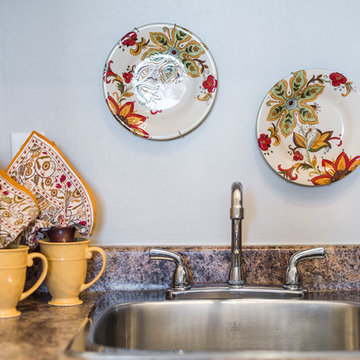
This studio apartment is 380 square feet. Basically one room for the living room, dining room and bedroom. It was challenging as walkways needed to be created and the colours within each living area needed to match to obtain a peaceful feeling as you walked into the unit.
If you are trying to sell or rent out units in your building, give us a call. We can provide furniture within your budget or you can rent it from us. Call Joanne Vroom 514-222-5553.
Unique Home Solutions Inc. has been in business since 2006.
 CG&S Design-Build
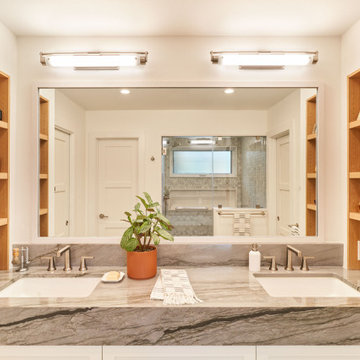
Bathroom - mid-sized contemporary master double-sink bathroom idea in Austin with shaker cabinets, an undermount sink, a hinged shower door, a built-in vanity and a niche
 Think Outside Gardens
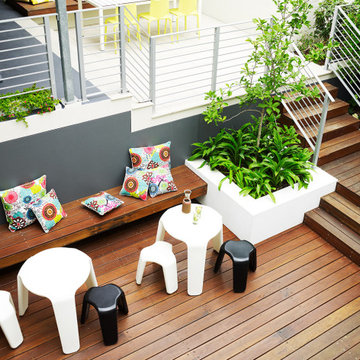
This inner-city garden was designed to meet the needs of a young family who like to entertain but still required solutions for storage and off street parking. Key to the design was connecting the two different areas of the lower courtyard with the upper carstand area. A solution was obtained through constructing an intermediate landing with built in seating and a new gas BBQ. An open style steel balustrade allows for safety between the two areas and visually takes full advantage of the depth of the property. All-weather protection provided by retractable awnings to both upper and lower areas ensures year round enjoyment. Sliding doors in the garage help the generous storage recede into the design.
Spotted gum hardwood timber decking extends the internal areas outside and the wrap around steps further connect the spaces by providing an inviting entry to the BBQ area. A large floating timber bench seat is both practical and breaks up the large retaining wall to the upper carport.
A grey and white colour palette provides a sophisticated look whilst highlighting punctuations of playful colour and contemporary styling to link the children’s play areas with the home.
Find the right local pro for your project

 Talon Construction Inc.
Designing and building a kitchen addition is a complex process that involves multiple steps and considerations. Here is a general outline to help you get started on your kitchen addition project:
Define Your Goals and Budget:
• Determine the purpose of the kitchen addition. Is it for more cooking space, a dining area, or a combination of both?
• Establish a realistic budget for your project. Consider all costs, including construction, permits, materials, and furnishings.
Hire a Design Professional:
• Seek the services of a design build company who specializes in kitchen additions.
• Discuss your vision, needs, and budget with the design professional to create a design concept.
Site Evaluation:
• Assess the existing space and structural condition of your home to ensure it can support the addition.
• Consider factors like zoning regulations, setbacks, and building codes.
Design Development:
• Collaborate with your design professional to refine the concept, including the layout, size, and architectural style.
• Choose materials, finishes, and fixtures that fit your design and budget.
Obtain Permits:
• Consult with your local design build contractor to determine the necessary permits and approvals.
• Prepare and submit all required documents, including architectural drawings and engineering plans.
Create Construction Documents:
• Work with your design build professional to develop detailed construction drawings and specifications.
• These documents will serve as a guide for contractors during construction.
Hire a design build contractor:
• Check references, credentials, and licenses before selecting a contractor.
• Sign a detailed contract that outlines the scope of work, timeline, and payment schedule.
Construction Phase:
• Demolition: If needed, remove any existing structures or walls.
• Foundation: Construct the foundation for the addition.
• Framing: Build the structural framework of the addition.
• Plumbing, Electrical, and HVAC: Install or update utilities as required.
• Insulation: Ensure proper insulation for energy efficiency.
• Drywall and Finish Work: Complete the walls and ceilings.
• Flooring and Cabinetry: Install flooring and kitchen cabinets.
• Appliances and Fixtures: Add appliances, plumbing fixtures, and lighting.
• Paint and Finish: Apply paint and finishes to achieve the desired look.
• Final Inspection: Schedule inspections to ensure compliance with building codes.
Final Inspections and Approvals:
• Arrange for final inspections to ensure the addition meets all safety and code requirements.
• Obtain any necessary certificates of occupancy or compliance.
Move In and Enjoy:
• Once all inspections and approvals are received, you can move into your new kitchen addition and start enjoying it.
Remember that every kitchen addition project is unique, so adapt this outline to your specific needs and circumstances. Consulting with professionals and obtaining the required permits and inspections is crucial to a successful and safe project.
 Talon Construction Inc.
Designing and building a kitchen addition is a complex process that involves multiple steps and considerations. Here is a general outline to help you get started on your kitchen addition project:
Define Your Goals and Budget:
• Determine the purpose of the kitchen addition. Is it for more cooking space, a dining area, or a combination of both?
• Establish a realistic budget for your project. Consider all costs, including construction, permits, materials, and furnishings.
Hire a Design Professional:
• Seek the services of a design build company who specializes in kitchen additions.
• Discuss your vision, needs, and budget with the design professional to create a design concept.
Site Evaluation:
• Assess the existing space and structural condition of your home to ensure it can support the addition.
• Consider factors like zoning regulations, setbacks, and building codes.
Design Development:
• Collaborate with your design professional to refine the concept, including the layout, size, and architectural style.
• Choose materials, finishes, and fixtures that fit your design and budget.
Obtain Permits:
• Consult with your local design build contractor to determine the necessary permits and approvals.
• Prepare and submit all required documents, including architectural drawings and engineering plans.
Create Construction Documents:
• Work with your design build professional to develop detailed construction drawings and specifications.
• These documents will serve as a guide for contractors during construction.
Hire a design build contractor:
• Check references, credentials, and licenses before selecting a contractor.
• Sign a detailed contract that outlines the scope of work, timeline, and payment schedule.
Construction Phase:
• Demolition: If needed, remove any existing structures or walls.
• Foundation: Construct the foundation for the addition.
• Framing: Build the structural framework of the addition.
• Plumbing, Electrical, and HVAC: Install or update utilities as required.
• Insulation: Ensure proper insulation for energy efficiency.
• Drywall and Finish Work: Complete the walls and ceilings.
• Flooring and Cabinetry: Install flooring and kitchen cabinets.
• Appliances and Fixtures: Add appliances, plumbing fixtures, and lighting.
• Paint and Finish: Apply paint and finishes to achieve the desired look.
• Final Inspection: Schedule inspections to ensure compliance with building codes.
Final Inspections and Approvals:
• Arrange for final inspections to ensure the addition meets all safety and code requirements.
• Obtain any necessary certificates of occupancy or compliance.
Move In and Enjoy:
• Once all inspections and approvals are received, you can move into your new kitchen addition and start enjoying it.
Remember that every kitchen addition project is unique, so adapt this outline to your specific needs and circumstances. Consulting with professionals and obtaining the required permits and inspections is crucial to a successful and safe project.
 Ressource USA
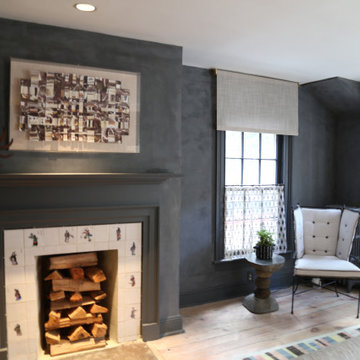
This pre-tinted lime plaster is inspired by the splendid and prestigious Marmorino, originally derived from powders of marble and lime.
Ressource has developed this unique range of Roman plasters and are highly committed to offer exclusive original colors. This palette combines the traditional spectrum of mineral colors, along with contemporary shades inspiration.
The real innovation of this coating lies in the simplicity of implementation : first, a special primer (Rough Primer) applied with a roller, following by one coat of Mineral undercoat and lastly one coat of Roman plaster to obtain this beautiful finish.
This splendid decorative plaster, with a soft, slightly glossy finish, will fit into many different types of interiors. It can be protected with a water-based wax that will delicately accentuate its glazed appearance without excessive shine.
 Nouvel Kitchen and Bath
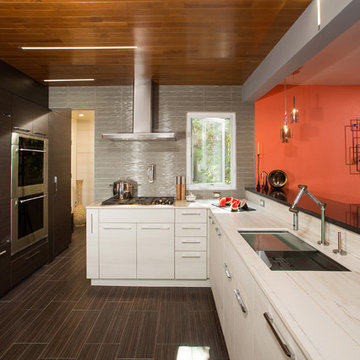
Today’s kitchen is a place that offers not only food for your stomach, but also “food for your eyes”. The owners of this residence, are sensitive to both of these functions.
After the client’s approval to “borrow” a little space (24”D) from their garage was obtained, they received a new Mud Room combined with a “Green lab” for their bonsai-hobby, new entrance to the back yard and a bigger updated kitchen.
The small appliances here work like decorative details. The big ones (i.e. 48” refrigerator) are concealed with panels. The contrast cabinet finishes, tile floor, wood ceiling with flashed LED lights converted this kitchen to an enjoyable entertainment space. Guests can rotate here around a custom designed granite island-bar.
 Alair Homes Orillia
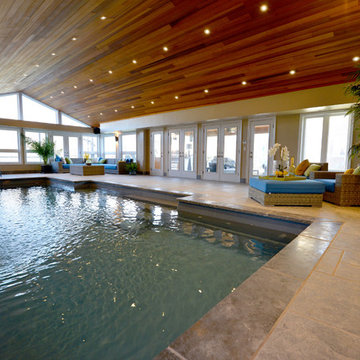
This beautiful pool house was not without its challenges. There were height restrictions and conservation authorities had to approve everything first, as well as obtaining the permits and building the structure without going to the committee of adjustment. It was a very enjoyable project as our clients made a few great changes along the way and we communicated well. The pool and landscaping were executed by Elite Crete Pools.
 User
UserThis is a 7000 sq. ft Residential building for our client. Conceptual Design took almost 2 months. The client wanted modern sleek looking yet geometrically massiveness emanating structures, with prime family space in the middle floor, that had to be transparent, visually.
The top floor is a high-end private bedroom with a very lavish bathroom and walking closet unit with a private Verandah and zen gardens in the bedroom and Bathroom.
Construction has started in July 2016, after obtaining all permit approvals from the government. And the major structural works have been completed as seen in the picture. (November 2017). It will take one more year to fully complete.
Total Project cost NRS 2,29,00,000/- (USD $214,218) as of August 2016.
 Nouvel Kitchen and Bath
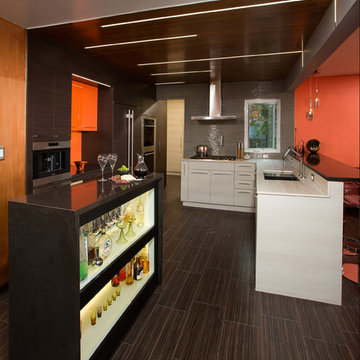
Today’s kitchen is a place that offers not only food for your stomach, but also “food for your eyes”. The owners of this residence, are sensitive to both of these functions.
After the client’s approval to “borrow” a little space (24”D) from their garage was obtained, they received a new Mud Room combined with a “Green lab” for their bonsai-hobby, new entrance to the back yard and a bigger updated kitchen.
The small appliances here work like decorative details. The big ones (i.e. 48” refrigerator) are concealed with panels. The contrast cabinet finishes, tile floor, wood ceiling with flashed LED lights converted this kitchen to an enjoyable entertainment space. Guests can rotate here around a custom designed granite island-bar.
 Talon Construction Inc.
Designing and building a kitchen addition is a complex process that involves multiple steps and considerations. Here is a general outline to help you get started on your kitchen addition project:
Define Your Goals and Budget:
• Determine the purpose of the kitchen addition. Is it for more cooking space, a dining area, or a combination of both?
• Establish a realistic budget for your project. Consider all costs, including construction, permits, materials, and furnishings.
Hire a Design Professional:
• Seek the services of a design build company who specializes in kitchen additions.
• Discuss your vision, needs, and budget with the design professional to create a design concept.
Site Evaluation:
• Assess the existing space and structural condition of your home to ensure it can support the addition.
• Consider factors like zoning regulations, setbacks, and building codes.
Design Development:
• Collaborate with your design professional to refine the concept, including the layout, size, and architectural style.
• Choose materials, finishes, and fixtures that fit your design and budget.
Obtain Permits:
• Consult with your local design build contractor to determine the necessary permits and approvals.
• Prepare and submit all required documents, including architectural drawings and engineering plans.
Create Construction Documents:
• Work with your design build professional to develop detailed construction drawings and specifications.
• These documents will serve as a guide for contractors during construction.
Hire a design build contractor:
• Check references, credentials, and licenses before selecting a contractor.
• Sign a detailed contract that outlines the scope of work, timeline, and payment schedule.
Construction Phase:
• Demolition: If needed, remove any existing structures or walls.
• Foundation: Construct the foundation for the addition.
• Framing: Build the structural framework of the addition.
• Plumbing, Electrical, and HVAC: Install or update utilities as required.
• Insulation: Ensure proper insulation for energy efficiency.
• Drywall and Finish Work: Complete the walls and ceilings.
• Flooring and Cabinetry: Install flooring and kitchen cabinets.
• Appliances and Fixtures: Add appliances, plumbing fixtures, and lighting.
• Paint and Finish: Apply paint and finishes to achieve the desired look.
• Final Inspection: Schedule inspections to ensure compliance with building codes.
Final Inspections and Approvals:
• Arrange for final inspections to ensure the addition meets all safety and code requirements.
• Obtain any necessary certificates of occupancy or compliance.
Move In and Enjoy:
• Once all inspections and approvals are received, you can move into your new kitchen addition and start enjoying it.
Remember that every kitchen addition project is unique, so adapt this outline to your specific needs and circumstances. Consulting with professionals and obtaining the required permits and inspections is crucial to a successful and safe project.
 Talon Construction Inc.
Designing and building a kitchen addition is a complex process that involves multiple steps and considerations. Here is a general outline to help you get started on your kitchen addition project:
Define Your Goals and Budget:
• Determine the purpose of the kitchen addition. Is it for more cooking space, a dining area, or a combination of both?
• Establish a realistic budget for your project. Consider all costs, including construction, permits, materials, and furnishings.
Hire a Design Professional:
• Seek the services of a design build company who specializes in kitchen additions.
• Discuss your vision, needs, and budget with the design professional to create a design concept.
Site Evaluation:
• Assess the existing space and structural condition of your home to ensure it can support the addition.
• Consider factors like zoning regulations, setbacks, and building codes.
Design Development:
• Collaborate with your design professional to refine the concept, including the layout, size, and architectural style.
• Choose materials, finishes, and fixtures that fit your design and budget.
Obtain Permits:
• Consult with your local design build contractor to determine the necessary permits and approvals.
• Prepare and submit all required documents, including architectural drawings and engineering plans.
Create Construction Documents:
• Work with your design build professional to develop detailed construction drawings and specifications.
• These documents will serve as a guide for contractors during construction.
Hire a design build contractor:
• Check references, credentials, and licenses before selecting a contractor.
• Sign a detailed contract that outlines the scope of work, timeline, and payment schedule.
Construction Phase:
• Demolition: If needed, remove any existing structures or walls.
• Foundation: Construct the foundation for the addition.
• Framing: Build the structural framework of the addition.
• Plumbing, Electrical, and HVAC: Install or update utilities as required.
• Insulation: Ensure proper insulation for energy efficiency.
• Drywall and Finish Work: Complete the walls and ceilings.
• Flooring and Cabinetry: Install flooring and kitchen cabinets.
• Appliances and Fixtures: Add appliances, plumbing fixtures, and lighting.
• Paint and Finish: Apply paint and finishes to achieve the desired look.
• Final Inspection: Schedule inspections to ensure compliance with building codes.
Final Inspections and Approvals:
• Arrange for final inspections to ensure the addition meets all safety and code requirements.
• Obtain any necessary certificates of occupancy or compliance.
Move In and Enjoy:
• Once all inspections and approvals are received, you can move into your new kitchen addition and start enjoying it.
Remember that every kitchen addition project is unique, so adapt this outline to your specific needs and circumstances. Consulting with professionals and obtaining the required permits and inspections is crucial to a successful and safe project.
 Masters of Design
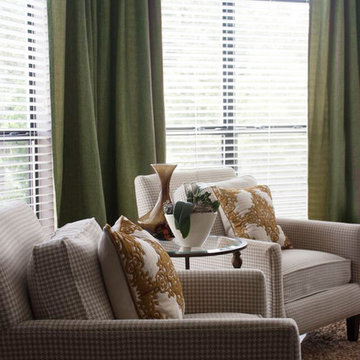
This project was completed for a client who recently moved from a California mansion to a Georgia penthouse in order to be closer to family. It was a huge down size so it was important for our design team to help obtain that same grand appeal that the client was accustomed to, within a significantly smaller home. We created an open space plan that would allow for entertaining many guests at once. With proper scale in consideration, we chose to use large furniture that would make up the living room and dining space to reinforce that grand effect. Lending to this concept we hung drapery higher than the window frames and a bold ceiling fixture in order to compliment the height of the ceiling. Along with these accommodations we utilized the clients existing collection of eclectic wall art to fill the bare walls. In the end we were able to create a space that did not feel foreign to our client, but rather like home.
 Lake State Property
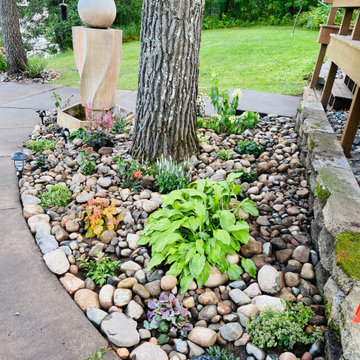
During 2020 many of us were hit hard with Covid-19. This particular family had wedding plans to hold the ceremony at their home. And they had a small budget, instead of spending thousands of dollars on bouquets, they opted to have permanent landscaping put in. The hill slope was of particularly difficulty given the grade, but we were able to obtain the perfect setting to match a modern fountain that they were debating throwing away. We were able to convince them that by removing the grass in the bed around the fountain, we could dress the entire section to become a distinct focal point of their backyard and still keep the design low enough to the ground that the lake view wouldn't be obstructed. The natural colors of the flowers and the selection of rocks suit the lake sunsets beautifully. Unfortunately, they were not able to gather in full, but the family loved the landscaping even though.
 Century Stair Company
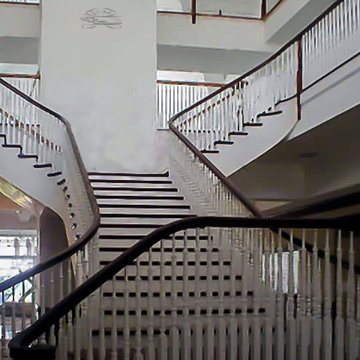
The stairs in this iconic golf property have become the main focal point for many of their indoor venues; classically contoured white balusters maintain a bright look in this great interior space, and complement beautifully the detailed railings and magnificent woodwork throughout the clubhouse. After preliminary shop drawings were submitted for mark up by the supervising Architect and final approval was obtained, we were able to bring to life their fabulous vision. CSC 1976-2020 © Century Stair Company ® All rights reserved.
 Alair Homes Orillia
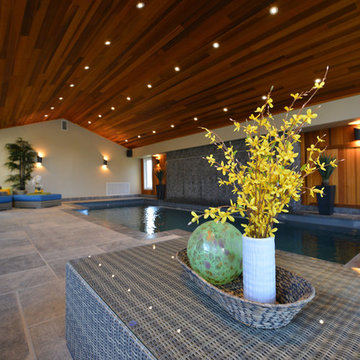
This beautiful pool house was not without its challenges. There were height restrictions and conservation authorities had to approve everything first, as well as obtaining the permits and building the structure without going to the committee of adjustment. It was a very enjoyable project as our clients made a few great changes along the way and we communicated well. The pool and landscaping were executed by Elite Crete Pools.
 Talon Construction Inc.
Designing and building a kitchen addition is a complex process that involves multiple steps and considerations. Here is a general outline to help you get started on your kitchen addition project:
Define Your Goals and Budget:
• Determine the purpose of the kitchen addition. Is it for more cooking space, a dining area, or a combination of both?
• Establish a realistic budget for your project. Consider all costs, including construction, permits, materials, and furnishings.
Hire a Design Professional:
• Seek the services of a design build company who specializes in kitchen additions.
• Discuss your vision, needs, and budget with the design professional to create a design concept.
Site Evaluation:
• Assess the existing space and structural condition of your home to ensure it can support the addition.
• Consider factors like zoning regulations, setbacks, and building codes.
Design Development:
• Collaborate with your design professional to refine the concept, including the layout, size, and architectural style.
• Choose materials, finishes, and fixtures that fit your design and budget.
Obtain Permits:
• Consult with your local design build contractor to determine the necessary permits and approvals.
• Prepare and submit all required documents, including architectural drawings and engineering plans.
Create Construction Documents:
• Work with your design build professional to develop detailed construction drawings and specifications.
• These documents will serve as a guide for contractors during construction.
Hire a design build contractor:
• Check references, credentials, and licenses before selecting a contractor.
• Sign a detailed contract that outlines the scope of work, timeline, and payment schedule.
Construction Phase:
• Demolition: If needed, remove any existing structures or walls.
• Foundation: Construct the foundation for the addition.
• Framing: Build the structural framework of the addition.
• Plumbing, Electrical, and HVAC: Install or update utilities as required.
• Insulation: Ensure proper insulation for energy efficiency.
• Drywall and Finish Work: Complete the walls and ceilings.
• Flooring and Cabinetry: Install flooring and kitchen cabinets.
• Appliances and Fixtures: Add appliances, plumbing fixtures, and lighting.
• Paint and Finish: Apply paint and finishes to achieve the desired look.
• Final Inspection: Schedule inspections to ensure compliance with building codes.
Final Inspections and Approvals:
• Arrange for final inspections to ensure the addition meets all safety and code requirements.
• Obtain any necessary certificates of occupancy or compliance.
Move In and Enjoy:
• Once all inspections and approvals are received, you can move into your new kitchen addition and start enjoying it.
Remember that every kitchen addition project is unique, so adapt this outline to your specific needs and circumstances. Consulting with professionals and obtaining the required permits and inspections is crucial to a successful and safe project.
 Harry Braswell Inc.
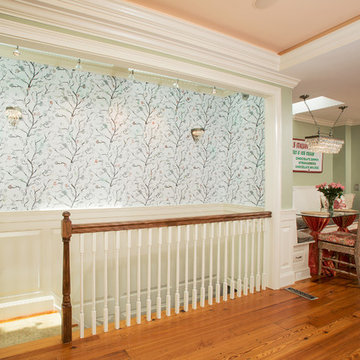
Below the kitchen, the homeowners had a family room that was rarely used because access could only be obtained from the outside of the house by way of a set of super steep cement stairs. Our plans brought the exterior set of stairs inside. New skylights above these stairs drive natural light down to the basement, and the extra space above the now interior stairs gives the kitchen more breathing room.
 VéVé Glass
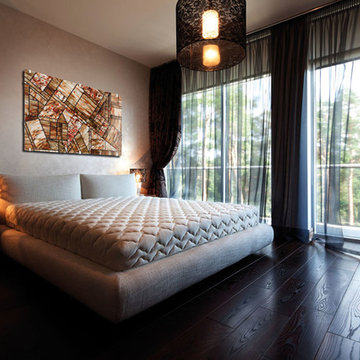
City: the twists of precious aventurine glass with thin pipes that create a sophisticated geometric design.
In this sculpture, the streaked aventurine glass plate is combined with three basic colors: red, brown and black. The colors are artfully blended in order to achieve these irregular streaks and to give a dynamic look to the object.
The streaked aventurine plates are also available in the following colours: sky-blue, blue, green, red, purple, periwinkle. These colours can be obtained with a blending solution or using aventurine glass only.
The following pictures show how the thin black pipe creates a sort of labyrinth.
Each panel has full customization options in terms of dimensions and colors. With this versatility, we can offer modular solutions for indoor decoration such as wall or surface coverings or for backlighting systems.
 3-Dog Designs Kitchens and Baths
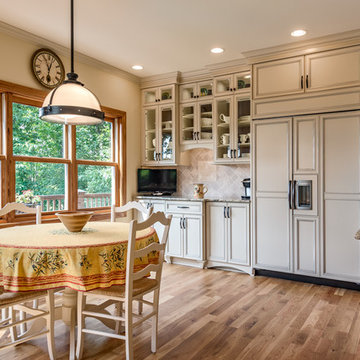
Inspiration for a large timeless galley medium tone wood floor eat-in kitchen remodel in Charlotte with an undermount sink, glass-front cabinets, beige cabinets, granite countertops, beige backsplash, stone tile backsplash, paneled appliances and an island
29