
Search results for "Occurred" in Home Design Ideas
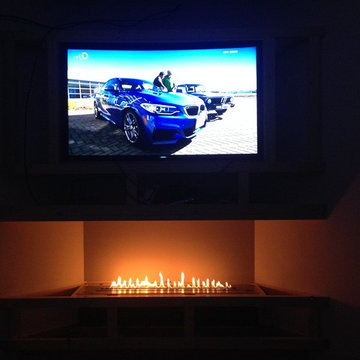
 Art Fireplace Technology Limited
Among the bestin art fireplace design, the AF120 Remote Controlled Electronic Bio Ethanol Fireplace Insert is favored by architects, contractors and high-end designers and offers the discerning client unprecedented quality and safety. In addition to the same vent-free and clean burning flames as manual ethanol fireplace inserts, this art-Fire bio ethanol burner offers much more for both residential and commercial applications:
Remote Control Capability. Due to its electronic operation, powered by a twelve-volt power source, this ethanol fireplace insert may be ignited and extinguished through an on/off switch located on the burner itself, a one-button remote control or through your smart phone by integrating with your Smart Home System.
On-Board Safety Monitoring. The motherboard of this fireplace insert is safety-central. Constantly self-evaluating its operation, this intelligent burner reacts to any condition that appears atypical. Should it sense an excess amount of carbon dioxide emission or heat output, it will automatically cease operation, extinguish the flame and maintain the lock mechanism of the fuel chamber. Additionally, it will self-extinguish should it sense seismic motion or level of tilt making it a shock-proof device. Fuel and battery levels are also constantly evaluated for optimal performance and will give notification through the burner’s LED display, which will indicate operation times and alert you by sound and error message should an event occur.
Sturdy Construction. Constructed of Grade 304 stainless steel, the ethanol burner is corrosion resistant and exhibits excellent resistance to atmospheric, chemical and other exposures. Its top plate measures three millimeters in thickness(3/32 inches). This allows sturdiness, yet promotes a low profile. For added safety, the ethanol fireplace AF120 insert offers insulated double hearth construction.
Separate Fuel Reservoir and Burner Tray. Continuing with the unprecedented safety features of this ethanol burner, excess fuel is housed in a sealed reservoir. This not only prevents fuel evaporation and the aromatic release of the raw ethanol, but lessens the amount of “exposed” fuel at any given time. Through a medical grade fuel pump, the ethanol is delivered into the burner tray. Only allowing the burner tray to manage a few centiliters of ethanol fuel at a given time promotes additional safety and minimizes the risk of fire-related dangers.
 Bloomington Carpet One
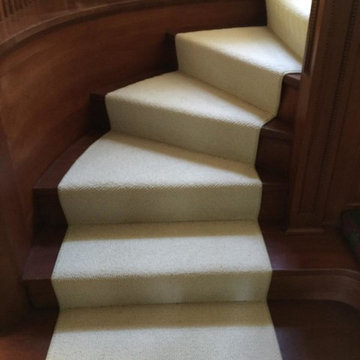
Beautiful custom runner to match the unique measurements of this staircase.
Small wooden curved staircase photo in Minneapolis with wooden risers
Small wooden curved staircase photo in Minneapolis with wooden risers
 Matt Fajkus Architecture
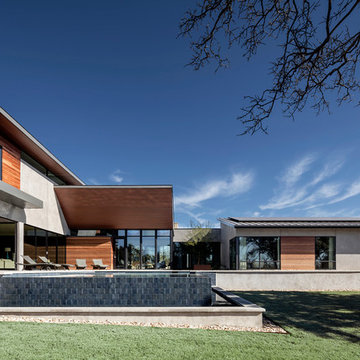
The Control/Shift House is perched on the high side of the site which takes advantage of the view to the southeast. A gradual descending path navigates the change in terrain from the street to the entry of the house. A series of low retaining walls/planter beds gather and release the earth upon the descent resulting in a fairly flat level for the house to sit on the top one third of the site. The entry axis is aligned with the celebrated stair volume and then re-centers on the actual entry axis once you approach the forecourt of the house.
The initial desire was for an “H” scheme house with common entertaining spaces bridging the gap between the more private spaces. After an investigation considering the site, program, and view, a key move was made: unfold the east wing of the “H” scheme to open all rooms to the southeast view resulting in a “T” scheme. The new derivation allows for both a swim pool which is on axis with the entry and main gathering space and a lap pool which occurs on the cross axis extending along the lengthy edge of the master suite, providing direct access for morning exercise and a view of the water throughout the day.
The Control/Shift House was derived from a clever way of following the “rules.” Strict HOA guidelines required very specific exterior massing restrictions which limits the lengths of unbroken elevations and promotes varying sizes of masses. The solution most often used in this neighborhood is one of addition - an aggregation of masses and program randomly attached to the inner core of the house which often results in a parasitic plan. The approach taken with the Control/Shift House was to push and pull program/massing to delineate and define the layout of the house. Massing is intentional and reiterated by the careful selection of materiality that tracks through the house. Voids and relief in the plan are a natural result of this method and allow for light and air to circulate throughout every space of the house, even into the most inner core.
Photography: Charles Davis Smith
Find the right local pro for your project
 Matt Fajkus Architecture
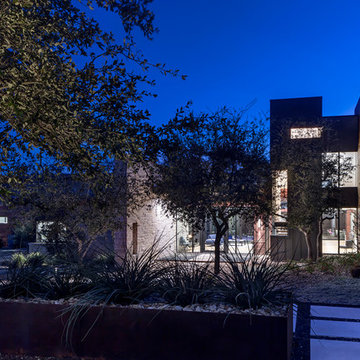
The Control/Shift House is perched on the high side of the site which takes advantage of the view to the southeast. A gradual descending path navigates the change in terrain from the street to the entry of the house. A series of low retaining walls/planter beds gather and release the earth upon the descent resulting in a fairly flat level for the house to sit on the top one third of the site. The entry axis is aligned with the celebrated stair volume and then re-centers on the actual entry axis once you approach the forecourt of the house.
The initial desire was for an “H” scheme house with common entertaining spaces bridging the gap between the more private spaces. After an investigation considering the site, program, and view, a key move was made: unfold the east wing of the “H” scheme to open all rooms to the southeast view resulting in a “T” scheme. The new derivation allows for both a swim pool which is on axis with the entry and main gathering space and a lap pool which occurs on the cross axis extending along the lengthy edge of the master suite, providing direct access for morning exercise and a view of the water throughout the day.
The Control/Shift House was derived from a clever way of following the “rules.” Strict HOA guidelines required very specific exterior massing restrictions which limits the lengths of unbroken elevations and promotes varying sizes of masses. The solution most often used in this neighborhood is one of addition - an aggregation of masses and program randomly attached to the inner core of the house which often results in a parasitic plan. The approach taken with the Control/Shift House was to push and pull program/massing to delineate and define the layout of the house. Massing is intentional and reiterated by the careful selection of materiality that tracks through the house. Voids and relief in the plan are a natural result of this method and allow for light and air to circulate throughout every space of the house, even into the most inner core.
Photography: Charles Davis Smith


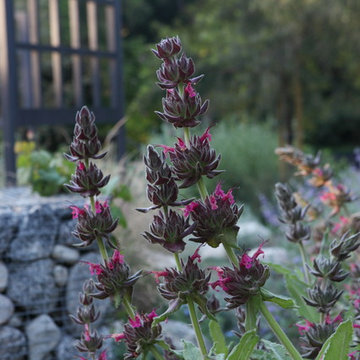
 FormLA Landscaping
A beautiful groundcover year round, the distinctive, wand-like blooms of Hummingbird sage emerge in the spring. As the name suggests, hummingbirds dig them.
Photo: Orly Olivier
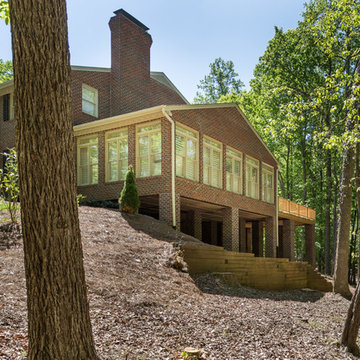
 Paradise Found Construction
Over the years, the deck of this large executive home had been slowly pulling away from the house. Many of the 2 ft. x 2 ft. masonry support piers had begun to sink and lean in various directions. Unfortunately, the problem wasn’t isolated to just the deck support columns. An inspection of the columns supporting the adjacent Sunroom confirmed that the same structural failures were occurring to all of them.
An excavation of one of the piers and its concrete footer revealed that the Sunroom and half of the Deck columns had been built on soil fill, and were slowly sinking and tilting away from the house. The only permanent solution to keep the Deck and Sunroom from collapsing was to replace the piers and the underlying footers.
The Sunroom and a portion of the Deck were jacked up and supported by wooden cribs until new 2 ft. x 2ft. solid masonry columns could be built to replace the failed ones. In order to create enough bearing support under the footers, galvanized steel helical screws were driven under each column footer to an average depth of 26 feet. Concrete footers were poured on top of the screws, and each footer was tied into the adjacent footer and eventually back into the foundation of the home by a series of stabilizing rebar and concrete cross-tie footers.
Once all 14 of the failed columns were rebuilt, the Sunroom was lowered onto the new support piers. A new deck was built to replace the compromised section, and the rest of the original decking and railings were removed and replaced. After the new wood had been acclimated to weather for several months and allowed to dry out and stabilize, the deck and railings were stained and sealed.

 Kathleen Jennison
An Arts & Crafts Bungalow is one of my favorite styles of homes. We have quite a few of them in our Stockton Mid-Town area. And when C&L called us to help them remodel their 1923 American Bungalow, I was beyond thrilled.
As per usual, when we get a new inquiry, we quickly Google the project location while we are talking to you on the phone. My excitement escalated when I saw the Google Earth Image of the sweet Sage Green bungalow in Mid-Town Stockton. "Yes, we would be interested in working with you," I said trying to keep my cool.
But what made it even better was meeting C&L and touring their home, because they are the nicest young couple, eager to make their home period perfect. Unfortunately, it had been slightly molested by some bad house-flippers, and we needed to bring the bathroom back to it "roots."
We knew we had to banish the hideous brown tile and cheap vanity quickly. But C&L complained about the condensation problems and the constant fight with mold. This immediately told me that improper remodeling had occurred and we needed to remedy that right away.
The Before: Frustrations with a Botched Remodel
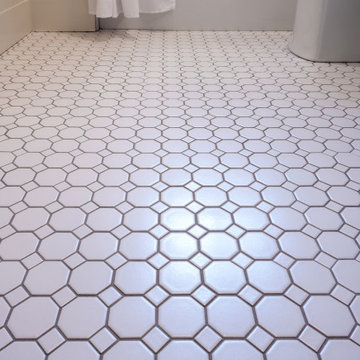
The bathroom needed to be brought back to period appropriate design with all the functionality of a modern bathroom. We thought of things like marble countertop, white mosaic floor tiles, white subway tile, board and batten molding, and of course a fabulous wallpaper.
This small (and only) bathroom on a tight budget required a little bit of design sleuthing to figure out how we could get the proper look and feel. Our goal was to determine where to splurge and where to economize and how to complete the remodel as quickly as possible because C&L would have to move out while construction was going on.
The Process: Hard Work to Remedy Design and Function
During our initial design study, (which included 2 hours in the owners’ home), we noticed framed images of William Morris Arts and Crafts textile patterns and knew this would be our design inspiration. We presented C&L with three options and they quickly selected the Pimpernel Design Concept.
We had originally selected the Black and Olive colors with a black vanity, mirror, and black and white floor tile. C&L liked it but weren’t quite sure about the black, We went back to the drawing board and decided the William & Co Pimpernel Wallpaper in Bayleaf and Manilla color with a softer gray painted vanity and mirror and white floor tile was more to their liking.
After the Design Concept was approved, we went to work securing the building permit, procuring all the elements, and scheduling our trusted tradesmen to perform the work.
We did uncover some shoddy work by the flippers such as live electrical wires hidden behind the wall, plumbing venting cut-off and buried in the walls (hence the constant dampness), the tub barely balancing on two fence boards across the floor joist, and no insulation on the exterior wall.
All of the previous blunders were fixed and the bathroom put back to its previous glory. We could feel the house thanking us for making it pretty again.
The After Reveal: Cohesive Design Decisions
We selected a simple white subway tile for the tub/shower. This is always classic and in keeping with the style of the house.
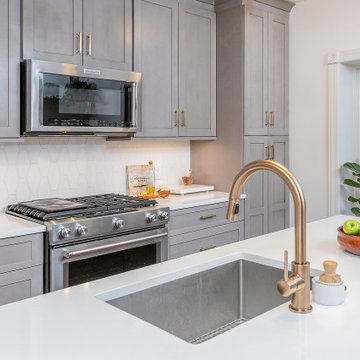
We selected a pre-fab vanity and mirror, but they look rich with the quartz countertop. There is much more storage in this small vanity than you would think.
The Transformation: A Period Perfect Refresh
We began the remodel just as the pandemic reared and stay-in-place orders went into effect. As C&L were already moved out and living with relatives, we got the go-ahead from city officials to get the work done (after all, how can you shelter in place without a bathroom?).
All our tradesmen were scheduled to work so that only one crew was on the job site at a time. We stayed on the original schedule with only a one week delay.
The end result is the sweetest little bathroom I've ever seen (and I can't wait to start work on C&L's kitchen next).
Thank you for joining me in this project transformation. I hope this inspired you to think about being creative with your design projects, determining what works best in keeping with the architecture of your space, and carefully assessing how you can have the best life in your home.
 Gappsi
Gunite Pool Contractor- Company- West Islip-Long Island - NY
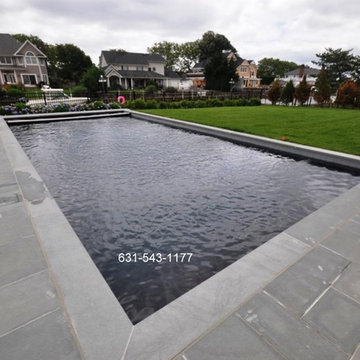
This Gunite pool was built by Gappsi in West Islip NY. The pool size is 18x38 and Pool depth is 6 ft which makes this Gunite swimming pool a non-diving pool. With stadium stairs in the shallow area of the pool and swim out benches on each side of the deep end. This pool also has an automated safety cover which allows the pool area to be open to the rest of the yard. Fencing around the pool is not required thus making the pool patio more accessible and functional. The plumbing for this Gunite pool was done using 2 inches wide 40 schedule PVC pipes; this allows water to flow and filter at a faster rate. The pool plaster finish consists of black envil quartsscape, unlike Marbledust, is a much harder material which makes the finish of this pool last 2 or 3 times longer with the proper maintenance. A 6 inch porcelain tile bend was installed to the top perimeter of the pool wall. The tile line is used to counter water marks that occur on the walls; the tiles are also weather chemicals resistant. The pool water is leveled to the center of the tiles so halt of the tiles will always be exposed to the elements.
The coping and patio was paved using flamed 2 inch bluestone tread and patio using random sized flagging with 1/2 inch cement joint in between. The pool equipment was a combination of Jandy and Hayward pump, filter and heater, to keep the water sanitized. A salt clarion generator and an ozone system were installed and the combination of these two will keep water free of alleges and impurities which makes this pool a maintenance and chemical free Gunite swimming pool.
For more informations about Gunite pools Design and construction in west Islip Ny, contact Gappsi at 631-543-1177 Or visit our website at www.gappsi.com
west islip gunite pool built by Gappsi inc


 Crystal Kitchen + Bath
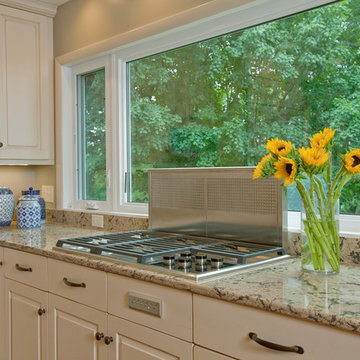
After 11 years on the Gull Lake chain in Nisswa, this couple decided to sell their cabin. Their current home has the lake view, pine trees and “up north” feel right here in Plymouth. The goal of this remodel was to incorporate some of the Nisswa cabin features into an “urban cabin”.
The first step was, large windows were installed to take in the view of the lake. Some features borrowed from the cabin are the interior wood tongue & groove siding, ledge stone fireplace and scraped hickory flooring. Designer, Carol Kornak, reconfigured the appliance locations and reoriented the kitchen by added an island with eating space. And, a subtle but rewarding change occurred in the back hall. Often a bottleneck, the hallway to the garage was a catch-all for coats, boots, mail, etc. With a little design magic (by removing a wall, reducing pantry depth) and adding a boot bench and hooks for coats, the narrow hallway feels more spacious. To keep them organized there is a mail sorting and charging station hidden behind closed doors.
Admittedly, the couple isn’t roughing it with their Wolf/Sub-Zero appliance package including refrigerator, wine cooler, cooktop, steam oven and warming drawer. The new cabinetry from Crystal Cabinet Works in rustic hickory and painted finish pairs beautifully with the two Cambria countertops and completes the transformation into the “Urban Cabin”. The only thing missing is the 2 ½ hour drive and the dock & boat. Luckily, Lake Minnetonka is only a short drive away.
 Adobe Interiors
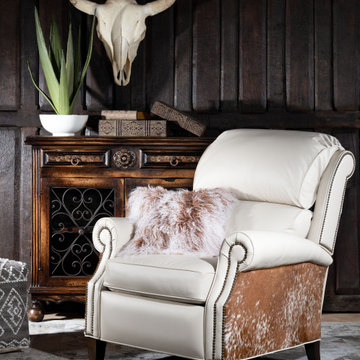
The Calhoun Leather Recliner not only boasts in beauty, but in comfort as well. Made with 100% top grain leather and premium cowhide accents. Our Calhoun Leather Recliner is perfect to brighten up your living space, the neutral and light color tones of the Calhoun Leather Recliner allow you to easily contrast darker furniture and decor pieces. The oversized bustle back provides amble neck, head and lower back support. This fine leather chair is 100% American Made to the highest standards of quality!
Dimensions: 43" H x 38.5" W x 36" D
Seat Depth: 21"
Seat Height: 20"
Arm Height: 24"
Leather Description: A There is no need to compromise beauty over performance. This Ivory colored leather offers a soft supple hand similar to that of an aniline leather. During the dyeing process, this leather is aniline dyed and a pigmented layer is added for color consistency and texture. This pigmented layer also, adds a protective performance coating and durability against daily stains and spills making the leather designed to perform in high traffic areas such as residential family rooms, commercial office spaces and hospitality applications. Ultimately, the leather is fade resistant and is the perfect high performing leather.
*Please note that all cowhides are natural and have unique characteristics. Please talk with one of our designers to hand pick the perfect chair for you.
Frame Construction: Using traditional hand craftsmanship with modern manufacturing methods to produce frames that are among the finest used in the upholstery business. Each frame is precisely cut and hand assembled using kilned dried lumber. Double dowels are utilized in all structural parts to form sturdy, long lasting joints. To complete construction and add stability to the frame, large precisely cut corner blocks are positioned at each corner where the greatest stress occurs using both glues and screws.
 Shorebird Interiors, LLC
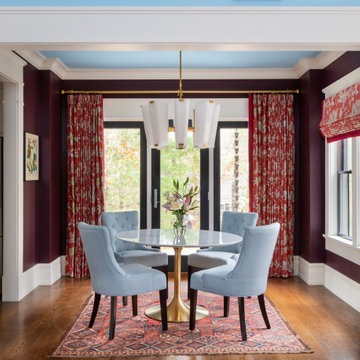
This dining room is an alcove off of the living room but needed to read as a distinct, separate space. We inverted the palette of the living room to achieve this and saturated the walls in a dark eggplant color. We tied the spaced together by treating the ceiling of the dining room in the wall color of the living room.
 Paradise Found Construction
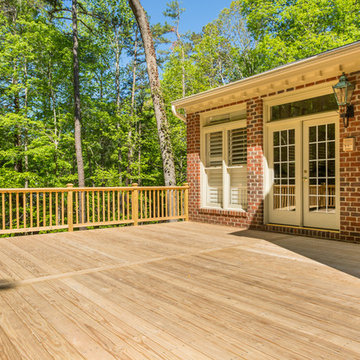
Over the years, the deck of this large executive home had been slowly pulling away from the house. Many of the 2 ft. x 2 ft. masonry support piers had begun to sink and lean in various directions. Unfortunately, the problem wasn’t isolated to just the deck support columns. An inspection of the columns supporting the adjacent Sunroom confirmed that the same structural failures were occurring to all of them.
An excavation of one of the piers and its concrete footer revealed that the Sunroom and half of the Deck columns had been built on soil fill, and were slowly sinking and tilting away from the house. The only permanent solution to keep the Deck and Sunroom from collapsing was to replace the piers and the underlying footers.
The Sunroom and a portion of the Deck were jacked up and supported by wooden cribs until new 2 ft. x 2ft. solid masonry columns could be built to replace the failed ones. In order to create enough bearing support under the footers, galvanized steel helical screws were driven under each column footer to an average depth of 26 feet. Concrete footers were poured on top of the screws, and each footer was tied into the adjacent footer and eventually back into the foundation of the home by a series of stabilizing rebar and concrete cross-tie footers.
Once all 14 of the failed columns were rebuilt, the Sunroom was lowered onto the new support piers. A new deck was built to replace the compromised section, and the rest of the original decking and railings were removed and replaced. After the new wood had been acclimated to weather for several months and allowed to dry out and stabilize, the deck and railings were stained and sealed.
 Pathway Design & Construction
Water leaks can be frustrating and happen often unexpectedly… especially when the water is coming from your upstairs neighbor!
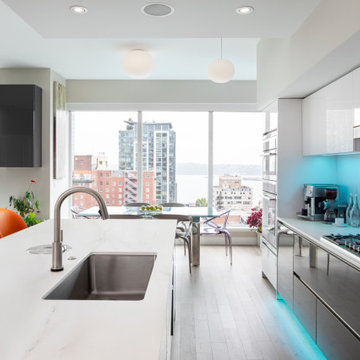
Once the leak occurred, the homeowners decided that it was the perfect opportunity to create their dream kitchen and entryway. The decision was made and the homeowners went shopping to purchase materials for their renovation. One problem; they hadn’t hired a contractor yet. They quickly discovered they would need help building their dream kitchen and entryway which is where we came in.
Scope:
Create a versatile space that reflects the homeowners’ vibrant personalities where they could cook, work, relax and entertain.
Desired features include:
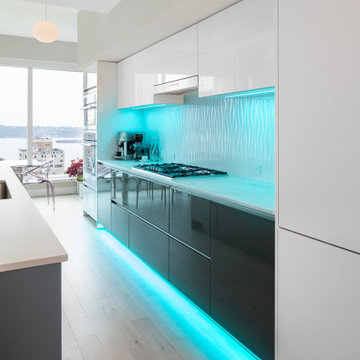
Color changing LED tape lighting was essential to help create ambiance.
Smaller can lights with updated trim to modernize the lighting.
Disguising a “workspace” into the island design.
Installing a compost bin that doubles as a wine chiller for entertaining.
Separate wine bar.
Installing an intricate piece of mirror art and lighting in the entryway.
Installing custom waved back splash tile.
Challenges:
Creating a working set of construction plans from cabinet drawings was a challenge. The process entailed continuous communication with the clients including several walkthroughs before final installation of each aspect throughout the project.
Incorporating high-gloss and muted surfaces into the space without creating glare from the natural light coming in from many existing windows.
Wavy tile became difficult to install with the desired layout of backsplash outlet style and locations.
Solutions:
The core design issues were resolved with exceptional communication between our field team and the homeowners.
Satin finish countertops and matte paint offset the high gloss cabinetry and backsplash.
Because of the size of tiles in the space, the outlets needed to be cut in the center of the tile to look uniform. Time and a steady hand made this possible for the best visual result.
Result:
Thoughtful execution helped to create a versatile dream kitchen and entry way that also provides an at-home workspace. This now versatile space is useful and aesthetically pleasing, exceeding the homeowners’ vision. The small details ranging from accent lighting to the compost bin turned wine chiller make this a luxurious statement piece.
 Paradise Found Construction
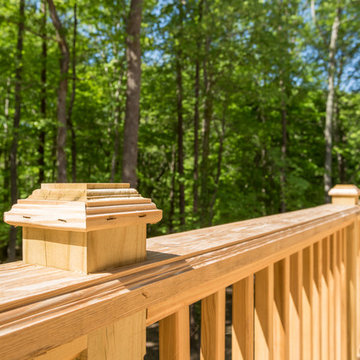
Over the years, the deck of this large executive home had been slowly pulling away from the house. Many of the 2 ft. x 2 ft. masonry support piers had begun to sink and lean in various directions. Unfortunately, the problem wasn’t isolated to just the deck support columns. An inspection of the columns supporting the adjacent Sunroom confirmed that the same structural failures were occurring to all of them.
An excavation of one of the piers and its concrete footer revealed that the Sunroom and half of the Deck columns had been built on soil fill, and were slowly sinking and tilting away from the house. The only permanent solution to keep the Deck and Sunroom from collapsing was to replace the piers and the underlying footers.
The Sunroom and a portion of the Deck were jacked up and supported by wooden cribs until new 2 ft. x 2ft. solid masonry columns could be built to replace the failed ones. In order to create enough bearing support under the footers, galvanized steel helical screws were driven under each column footer to an average depth of 26 feet. Concrete footers were poured on top of the screws, and each footer was tied into the adjacent footer and eventually back into the foundation of the home by a series of stabilizing rebar and concrete cross-tie footers.
Once all 14 of the failed columns were rebuilt, the Sunroom was lowered onto the new support piers. A new deck was built to replace the compromised section, and the rest of the original decking and railings were removed and replaced. After the new wood had been acclimated to weather for several months and allowed to dry out and stabilize, the deck and railings were stained and sealed.
 Pathway Design & Construction
Water leaks can be frustrating and happen often unexpectedly… especially when the water is coming from your upstairs neighbor!
Once the leak occurred, the homeowners decided that it was the perfect opportunity to create their dream kitchen and entryway. The decision was made and the homeowners went shopping to purchase materials for their renovation. One problem; they hadn’t hired a contractor yet. They quickly discovered they would need help building their dream kitchen and entryway which is where we came in.
Scope:
Create a versatile space that reflects the homeowners’ vibrant personalities where they could cook, work, relax and entertain.
Desired features include:
Color changing LED tape lighting was essential to help create ambiance.
Smaller can lights with updated trim to modernize the lighting.
Disguising a “workspace” into the island design.
Installing a compost bin that doubles as a wine chiller for entertaining.
Separate wine bar.
Installing an intricate piece of mirror art and lighting in the entryway.
Installing custom waved back splash tile.
Challenges:
Creating a working set of construction plans from cabinet drawings was a challenge. The process entailed continuous communication with the clients including several walkthroughs before final installation of each aspect throughout the project.
Incorporating high-gloss and muted surfaces into the space without creating glare from the natural light coming in from many existing windows.
Wavy tile became difficult to install with the desired layout of backsplash outlet style and locations.
Solutions:
The core design issues were resolved with exceptional communication between our field team and the homeowners.
Satin finish countertops and matte paint offset the high gloss cabinetry and backsplash.
Because of the size of tiles in the space, the outlets needed to be cut in the center of the tile to look uniform. Time and a steady hand made this possible for the best visual result.
Result:
Thoughtful execution helped to create a versatile dream kitchen and entry way that also provides an at-home workspace. This now versatile space is useful and aesthetically pleasing, exceeding the homeowners’ vision. The small details ranging from accent lighting to the compost bin turned wine chiller make this a luxurious statement piece.
 ma2 architects
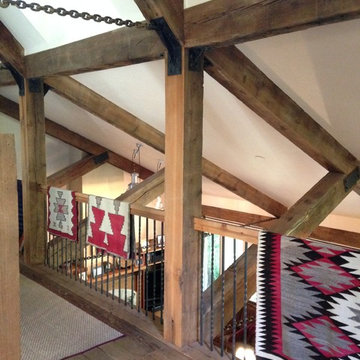
View from the upper level loft. The beams and the chains were reclaimed from a sawmill in Idaho. The flooring is made from 3"x8" wood planks from the same sawmill.
68