
Search results for "Pipes installation" in Home Design Ideas
 Oran Remodeling Inc.
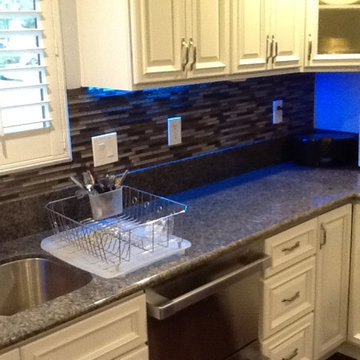
We began this project by having the client meet with our kitchen designer and coming up with the best use of their galley/wall style kitchen and bathroom. We ended on a layout that relocated some of the appliances and installed a new kitchen island and vanity for the bathroom. We also added electrical and gas lines for an oven, cook-top, outlets and hood vent.
In addition we also:
Demo all heater, cap, patch, and repair wall.
Replace 6 cans in small office space- customer to provide cans and lightbulbs.
Install new light fixture in the hall.
Move hall receptacle down.
Remove door, molding hinges between kitchen and front room. (NOT MAIN STUDIO. Enlarge opening/ move light switch and Recep. Remove molding around bath door and main studio door (one side), no patching needed- painters will do.
Demo all tile on walls and in shower in the bathroom, hand bars, soap dispenser, medicine cabinet, mirror, 4 light fixtures, paper towel holder, the cabinet on the wall over toilet, shelf over toilet, toilet paper holder, towel holder on door and walls.
Enlarge opening of the shower,- Ok to demo shower for all glass enclosure- If the cost is the same- as just enlarging opening with new glass door.
Install new tile on walls in bathroom from top to bottom (exclude floor and ceiling).
Create a place in the shower for shower niche and install niche.
Install tile on shower walls and floor.
Install shower door – customer to supply.
Install bath hardware- TP holder, towel rod, bath hooks, tower shelf.
Replace shower head and knobs (like for like).
New hot mop, new wood stud as necessary, replace fan to code install new shower door (customer will supply).
Install new toilet, vanity, mirrored medicine cabinet, replace 2 light fixtures.
Install in the kitchen faucet and sink.
Replace current light with chandelier light (like for like).
Replace kitchen track light with new track light.
Install 9 LED fluorescent lights in loft space (above small office)- customer to supply.
Build and install a 8’x10’ wall, drywall both sides. Reduced size of the wall- Revise Bid (was 12’x12).
Move 2 track lights in the main workspace.
Replace (4) fluorescents lights in the studio.
Install Polycarbonate cover over bath skylight.
Replace dimmer switches and timers (4).
Install vinyl cove base under kitchen cabinets.
Remove black cabinet conversing fire sprinkler pipes- install modify existing bookcase cabinets.
Bury electrical flexible conduit and box (next to back door).
 Gappsi
Mesh covers are the most common way to safeguard your pool during the winter. A winter cover has to be strong and made of good quality material. There are many manufactures of pool liners and mesh safety covers, and mesh covers can be ordered according to the initial pool liner measurements.
Gappsi can supply and install a mesh pool cover, we are authorized dealers and installers for every brand, from Loop-Loc, Merlin, Lathem, Vynall and many other others.
Manufactures make many grades of covers, the better the grade the more expensive to cover is. Tight thin mesh and strong fibers used to manufacture the covers will give your pool cover the quality to last for many years.
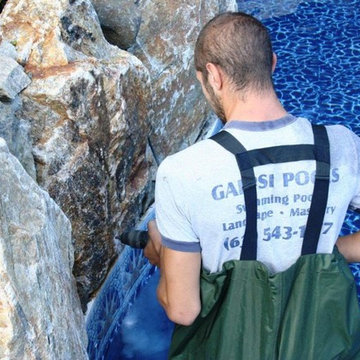
Swimming pool winter covers installed by Gappsi will give you all the protection, security, and safety you need for your family, pets, and neighbors. Winter pool covers are manufactured to let the water from the rain drain through. Also, it allows you to put your pump in the middle of the cover and allow the extra water in the pool to come through and get pumped out. Winter covers are manufactured in all mesh or solid rubber with a 24x24 mesh hole in the center to let water drain into the pool. Anchors are installed in the patio about 36 inches away from the swimming pool. The way they are installed is by drilling a hole in the patio, brass anchors are slid through, and the cover is then attached to the anchors. If the patio is not installed correctly, the cover may become loose and it will not be as safe as it should be.
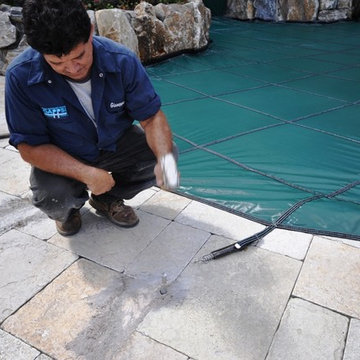
The Gappsi way of installation starts with the proper installation of the patio. Four foot wide slabs with reinforced rebar are always installed around the swimming pool to prevent settling of the patio, then the finished paving material is installed over the concrete base. The Gappsi installation of the safety pool cover is then installed over the patio by drilling holes straight through the finished paving material all the way down into the concrete base. A sleeve is installed into the hole about 6 inches into the patio going through the 4 inches of concrete base and further in the ground, and a brass screw pin is then installed into the pipe. By unscrewing the brass screw pin; it comes up above the patio and allows for the cover ring hooks to attach to the brass screw. After this is all done for every strap of the cover, your Gappsi installed pool cover is safe to walk on with no chance of breaking.
 Post Services Inc
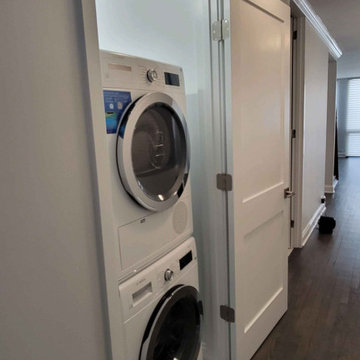
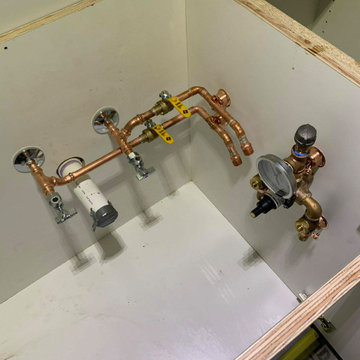
The condo received a new laundry room. The laundry room area that is roughly 3 feet by 3 feet was taken from 1 of the primary bedroom walk in closets. As you will see in the photos the water piping had to be updated per HOA home owners association rules and city of Chicago code. The dryer uses an integral lint and dryer connection due the 240 amp connection. The 2 bathrooms adjacent to the area where the laundry was added required the walls to be opened to allow for water and waste piping to be replaced and added for the new laundry water and waste connections. The laundry requires proper lighting and switches as per code in Chicago. Door and frame install and new laundry cabinet was added in the area that is east of the laundry to allow for the users to have a place for their laundry goods.
Find the right local pro for your project
 BMR BelMax Remodeling
Master Bathroom Remodel by BMR Belmax Remodeling: Project Overview
Initial Condition
Size and Layout: The master bathroom was small, featuring a plastic shower enclosure.
Client’s Request: The client wanted to enlarge the bathroom to create a more spacious and luxurious environment.
Renovation Details
Expansion:
Wall Movement: The wall between the hallway and the master bathroom was moved 2 feet to increase the bathroom’s size.
Plumbing Upgrades:
New Water Pipes: Installed for the new shower, vanity, and toilet.
Drainage: A new shower drain and toilet drain were installed to accommodate the updated layout.
Electrical Enhancements:
Recessed Lighting: Installed 4 new recessed lights to improve illumination.
Heated Floor: Added a new heated floor for enhanced comfort.
Fixtures and Finishes:
Vanity: Installed a beautiful, modern vanity to improve storage and aesthetics.
Medicine Cabinet: Included a new medicine cabinet to provide additional storage and convenience.
Exhaust Fan and HVAC Outlet: Added to improve ventilation and climate control.
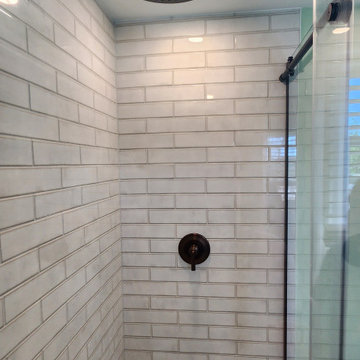
Tiles: Small format tiles were installed in the shower area, and 12×24 tiles were laid on the floor to create a cohesive and stylish look.
Conclusion This comprehensive remodel transformed a small, outdated master bathroom into a spacious, modern, and functional retreat, perfectly tailored to the client’s needs and preferences.

 Gappsi
Mesh covers are the most common way to safeguard your pool during the winter. A winter cover has to be strong and made of good quality material. There are many manufactures of pool liners and mesh safety covers, and mesh covers can be ordered according to the initial pool liner measurements.
Gappsi can supply and install a mesh pool cover, we are authorized dealers and installers for every brand, from Loop-Loc, Merlin, Lathem, Vynall and many other others.
Manufactures make many grades of covers, the better the grade the more expensive to cover is. Tight thin mesh and strong fibers used to manufacture the covers will give your pool cover the quality to last for many years.
Swimming pool winter covers installed by Gappsi will give you all the protection, security, and safety you need for your family, pets, and neighbors. Winter pool covers are manufactured to let the water from the rain drain through. Also, it allows you to put your pump in the middle of the cover and allow the extra water in the pool to come through and get pumped out. Winter covers are manufactured in all mesh or solid rubber with a 24x24 mesh hole in the center to let water drain into the pool. Anchors are installed in the patio about 36 inches away from the swimming pool. The way they are installed is by drilling a hole in the patio, brass anchors are slid through, and the cover is then attached to the anchors. If the patio is not installed correctly, the cover may become loose and it will not be as safe as it should be.
The Gappsi way of installation starts with the proper installation of the patio. Four foot wide slabs with reinforced rebar are always installed around the swimming pool to prevent settling of the patio, then the finished paving material is installed over the concrete base. The Gappsi installation of the safety pool cover is then installed over the patio by drilling holes straight through the finished paving material all the way down into the concrete base. A sleeve is installed into the hole about 6 inches into the patio going through the 4 inches of concrete base and further in the ground, and a brass screw pin is then installed into the pipe. By unscrewing the brass screw pin; it comes up above the patio and allows for the cover ring hooks to attach to the brass screw. After this is all done for every strap of the cover, your Gappsi installed pool cover is safe to walk on with no chance of breaking.
 Lagom architectes
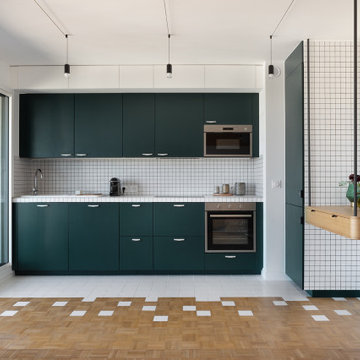
Mid-sized trendy single-wall kitchen photo in Paris with open cabinets, green cabinets, tile countertops, no island and white countertops
 Oran Remodeling Inc.
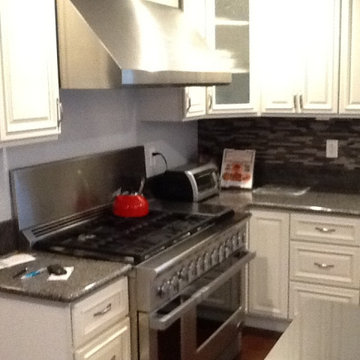
We began this project by having the client meet with our kitchen designer and coming up with the best use of their galley/wall style kitchen and bathroom. We ended on a layout that relocated some of the appliances and installed a new kitchen island and vanity for the bathroom. We also added electrical and gas lines for an oven, cook-top, outlets and hood vent.
In addition we also:
Demo all heater, cap, patch, and repair wall.
Replace 6 cans in small office space- customer to provide cans and lightbulbs.
Install new light fixture in the hall.
Move hall receptacle down.
Remove door, molding hinges between kitchen and front room. (NOT MAIN STUDIO. Enlarge opening/ move light switch and Recep. Remove molding around bath door and main studio door (one side), no patching needed- painters will do.
Demo all tile on walls and in shower in the bathroom, hand bars, soap dispenser, medicine cabinet, mirror, 4 light fixtures, paper towel holder, the cabinet on the wall over toilet, shelf over toilet, toilet paper holder, towel holder on door and walls.
Enlarge opening of the shower,- Ok to demo shower for all glass enclosure- If the cost is the same- as just enlarging opening with new glass door.
Install new tile on walls in bathroom from top to bottom (exclude floor and ceiling).
Create a place in the shower for shower niche and install niche.
Install tile on shower walls and floor.
Install shower door – customer to supply.
Install bath hardware- TP holder, towel rod, bath hooks, tower shelf.
Replace shower head and knobs (like for like).
New hot mop, new wood stud as necessary, replace fan to code install new shower door (customer will supply).
Install new toilet, vanity, mirrored medicine cabinet, replace 2 light fixtures.
Install in the kitchen faucet and sink.
Replace current light with chandelier light (like for like).
Replace kitchen track light with new track light.
Install 9 LED fluorescent lights in loft space (above small office)- customer to supply.
Build and install a 8’x10’ wall, drywall both sides. Reduced size of the wall- Revise Bid (was 12’x12).
Move 2 track lights in the main workspace.
Replace (4) fluorescents lights in the studio.
Install Polycarbonate cover over bath skylight.
Replace dimmer switches and timers (4).
Install vinyl cove base under kitchen cabinets.
Remove black cabinet conversing fire sprinkler pipes- install modify existing bookcase cabinets.
Bury electrical flexible conduit and box (next to back door).
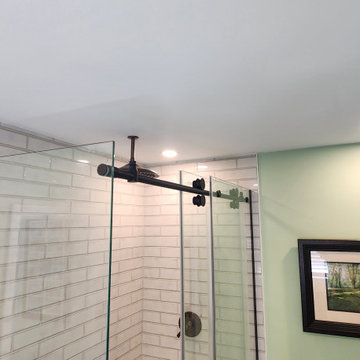 BMR BelMax Remodeling
Master Bathroom Remodel by BMR Belmax Remodeling: Project Overview
Initial Condition
Size and Layout: The master bathroom was small, featuring a plastic shower enclosure.
Client’s Request: The client wanted to enlarge the bathroom to create a more spacious and luxurious environment.
Renovation Details
Expansion:
Wall Movement: The wall between the hallway and the master bathroom was moved 2 feet to increase the bathroom’s size.
Plumbing Upgrades:
New Water Pipes: Installed for the new shower, vanity, and toilet.
Drainage: A new shower drain and toilet drain were installed to accommodate the updated layout.
Electrical Enhancements:
Recessed Lighting: Installed 4 new recessed lights to improve illumination.
Heated Floor: Added a new heated floor for enhanced comfort.
Fixtures and Finishes:
Vanity: Installed a beautiful, modern vanity to improve storage and aesthetics.
Medicine Cabinet: Included a new medicine cabinet to provide additional storage and convenience.
Exhaust Fan and HVAC Outlet: Added to improve ventilation and climate control.
Tiles: Small format tiles were installed in the shower area, and 12×24 tiles were laid on the floor to create a cohesive and stylish look.
Conclusion This comprehensive remodel transformed a small, outdated master bathroom into a spacious, modern, and functional retreat, perfectly tailored to the client’s needs and preferences.
 Post Services Inc
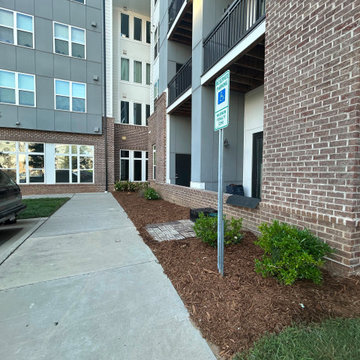
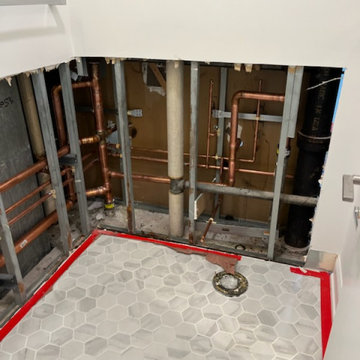
The condo received a new laundry room. The laundry room area that is roughly 3 feet by 3 feet was taken from 1 of the primary bedroom walk in closets. As you will see in the photos the water piping had to be updated per HOA home owners association rules and city of Chicago code. The dryer uses an integral lint and dryer connection due the 240 amp connection. The 2 bathrooms adjacent to the area where the laundry was added required the walls to be opened to allow for water and waste piping to be replaced and added for the new laundry water and waste connections. The laundry requires proper lighting and switches as per code in Chicago. Door and frame install and new laundry cabinet was added in the area that is east of the laundry to allow for the users to have a place for their laundry goods.
 Chimneyz
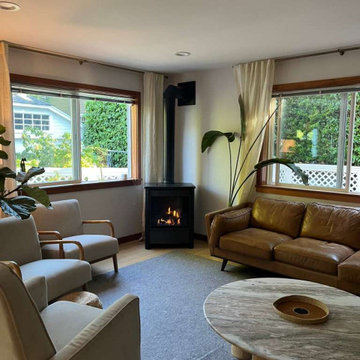
Free-standing direct-vent gas stove installation in a charming Seattle home. The homeowners wanted the warmth and ambiance of a wood stove without the maintenance, smoke, ash, or hassle of cordwood. We installed a high-efficiency direct-vent gas stove in the corner of their open-concept living room, with a code-compliant single-wall vent pipe routed straight up through the ceiling.
The clean black exterior and authentic flame complement the home's mid-century modern aesthetic — leather sofa, light wood floors, natural light, and lush greenery — without overpowering the space.
Scope of work:
- Site assessment and gas line evaluation
- Hearth pad installation and floor protection
- Free-standing direct-vent gas stove installation
- Single-wall vent pipe through ceiling and roof
- Code-compliant clearances and termination
- Gas line connection and leak testing
- Final commissioning and homeowner walkthrough
Installation completed in a single day. Family-owned. Licensed and bonded in Washington State.
 Kate Hansen Photography
Kate Hansen
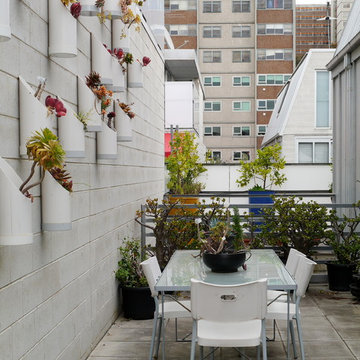
Inspiration for an industrial balcony remodel in Melbourne with no cover
Inspiration for an industrial balcony remodel in Melbourne with no cover

 Granit Architects + Interiors
Photo Credit: Andy Beasley
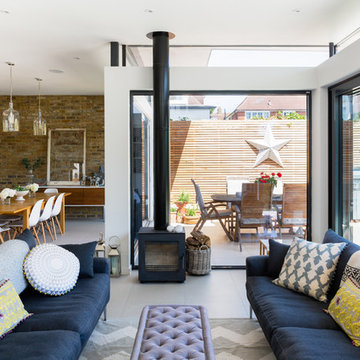
Exposed brick walls, dark joinery and contrasting textures and soft furnishings allows this space to have a lovely homely feel while still being a contemporary family home. A wood burning fire in the sitting area creates a toasty corner, even in an open plan room. A multi use space for entertaining and family life this project is still a hit, and a favourite of ours and the public. The space can be opened up to bring the outside, in. By opening up the huge sliding glazed doors onto the patio you create an even larger space where life can spill out into the garden, and equally lets nature into the home with a breath of fresh air.
The pendant lights above the table from John Lewis – William Bottle Glass Pendants from the Croft collection £130 each. These are such simple lights with a hint of detail and a slightly industrial feel ties in beautifully with the metal star table lamp on the bespoke side table.
 Western Steel Agency
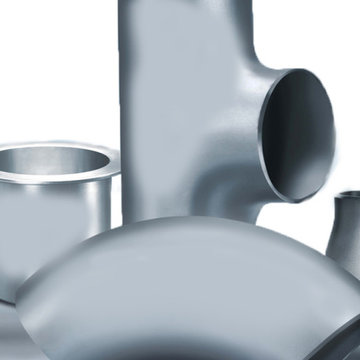
Western Steel Agency is a Prominent Stainless Steel Pipe Fittings Manufacturers in India. We provide a comprehensive range of Stainless Steel Pipe Fittings. Over 250 tons of stainless steel pipe fittings are available in our inventory.
To allow for the flow of fluids or gases, stainless steel pipe fittings are used to join various portions of pipes or tubes. Stainless steel pipe fittings come in a wide variety of forms, each having a special set of functions and applications.We are experts in the trading and provision of premium Stainless Steel Fittings.
We have Stainless Steel Pipe Fittings Manufacturers in various cities and in different industries in India
Stainless Steel Elbow Fitting Manufacturers in India
Stainless Steel Tee Fitting Manufacturers in India
Stainless Steel Stub End Fitting Manufacturers in India
Stainless Steel End Cap Fitting Manufacturers in India
Stainless Steel Cross Fitting Manufacturers in India
Stainless Steel Reducer Fitting Manufacturers in India
Stainless Steel Nipple Fitting Manufacturers in India
.
We have supplied more than 500 tons of SS pipe fitting to India during the past ten years.
For uses such as chemical processing, the dairy industry, oil & gas pipelines, rigs, ship construction, etc., our stainless steel pipe fittings are perfect.Highly corrosive environments are used to install our stainless steel pipe fittings.
Visit: wsaindia.net
Source: Stainless Steel Pipe Fittings Suppliers in India
 Post Services Inc
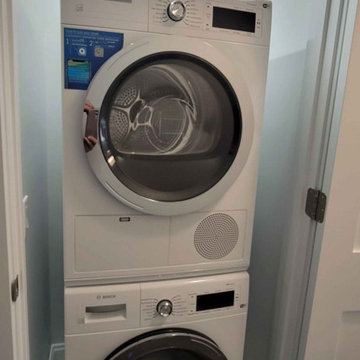
The condo received a new laundry room. The laundry room area that is roughly 3 feet by 3 feet was taken from 1 of the primary bedroom walk in closets. As you will see in the photos the water piping had to be updated per HOA home owners association rules and city of Chicago code. The dryer uses an integral lint and dryer connection due the 240 amp connection. The 2 bathrooms adjacent to the area where the laundry was added required the walls to be opened to allow for water and waste piping to be replaced and added for the new laundry water and waste connections. The laundry requires proper lighting and switches as per code in Chicago. Door and frame install and new laundry cabinet was added in the area that is east of the laundry to allow for the users to have a place for their laundry goods.
 CLIRS
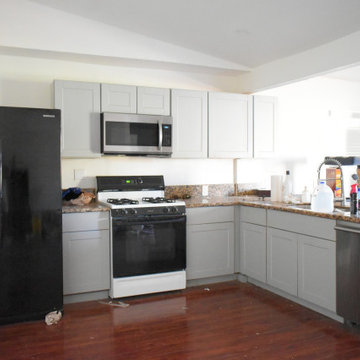
CLIRSFull remodeling house.
-Full paint interior and exterior
-New vinyl flooring
-New kitchen cabinets and painting
-Add 1 more room
-Create new walking shower
-Install new wall tile to bathrooms
-Replace and add lighting to all spaces
-Create enclosure for exterior water heater unit
-Clean yard spaces and landscaping repairs
-Repair drain pipes and install new one for walking shower
-Install carpet on bedrooms
-Replace baseboards
8