
Search results for "Practical tips" in Home Design Ideas
 Dream Coast Builders
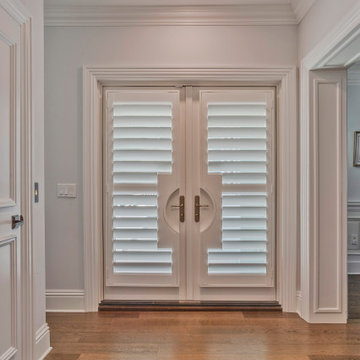
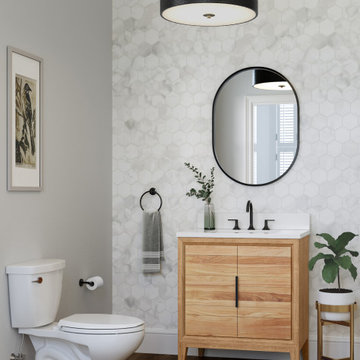
Welcome to Jon Cancellino's Houzz profile! Based in Clearwater, FL, and serving Tampa and the surrounding areas, we specialize in transforming spaces with a touch of modern elegance. Our expertise spans remodeling, custom homes, and home additions. From sleek modern doors and stylish front doors to seamless AC duct installations and eye-catching ceiling lights, we handle every detail with precision.
Explore our portfolio to see how we've enhanced spaces with dark brown wood flooring, white ceilings, and practical window blinds. Our projects often feature thoughtful touches like wall-mounted acrylic photo frames and wall electric switch boards that blend functionality with aesthetics. Whether you’re interested in interior ideas, remodeling tips, or comprehensive general contracting services, we’re here to bring your vision to life. Contact us today to start your next project in Clearwater, Tampa, and beyond!
 Dream Coast Builders
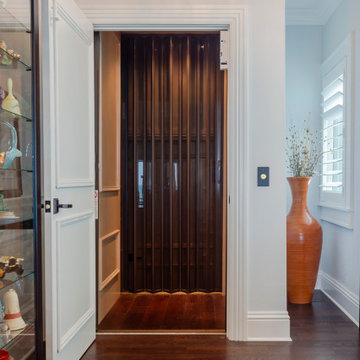
Welcome to Jon Cancellino's Houzz profile! Based in Clearwater, FL, and serving Tampa and the surrounding areas, we specialize in transforming spaces with a touch of modern elegance. Our expertise spans remodeling, custom homes, and home additions. From sleek modern doors and stylish front doors to seamless AC duct installations and eye-catching ceiling lights, we handle every detail with precision.
Explore our portfolio to see how we've enhanced spaces with dark brown wood flooring, white ceilings, and practical window blinds. Our projects often feature thoughtful touches like wall-mounted acrylic photo frames and wall electric switch boards that blend functionality with aesthetics. Whether you’re interested in interior ideas, remodeling tips, or comprehensive general contracting services, we’re here to bring your vision to life. Contact us today to start your next project in Clearwater, Tampa, and beyond!

 safe ZOnea
Maintaining a pest-free home requires attention throughout the year. Seasonal changes affect pest behavior, and understanding these patterns can save homeowners from costly damage and health hazards. In this guide, we will explore practical strategies for spring pest prevention tips, ensuring your property stays protected through every season. From spotting early signs to implementing proactive measures, these steps empower homeowners to take control before infestations occur.
Understanding Seasonal Pest Patterns
Pests adapt to changing weather, and knowing their patterns helps prevent infestations effectively.
Spring: Awakening Pests
Spring signals the end of winter dormancy for many pests. Rodents, ants, and termites start seeking food and warmth. Effective spring pest prevention tips include:
● Cleaning gutters and removing debris
● Sealing cracks and gaps in exterior walls
● Inspecting wood piles and compost areas
● Monitoring early signs of termite activity
Pro Tip: Conduct a termite inspection or a professional evaluation to catch infestations early before they spread.
Summer: Peak Pest Season
Warm temperatures accelerate pest breeding cycles. For a comprehensive summer pest prevention guide:
● Maintain lawns and trim vegetation away from homes
● Check window and door screens for tears
● Store food in sealed containers
● Inspect water sources that attract mosquitoes
Do You Know? Mosquitoes can lay eggs in a teaspoon of water. Eliminating stagnant water is crucial to reducing their population.
Fall: Preparing for Winter
As temperatures drop, pests search for warm indoor spaces. Key actions include:
● Inspecting for winter rodent entry points
● Sealing attic vents, crawl spaces, and foundation gaps
● Cleaning storage areas to minimize hiding spots
● Checking chimney and fireplace openings
Quick Fact: Rodents can enter homes through openings as small as ¼ inch.
Seasonal Pest Checklist for Homeowners
Creating a structured seasonal pest checklist simplifies preventive measures and ensures nothing is overlooked.
Season
Key Actions
Spring
Inspect for termites, seal exterior gaps, clean gutters, and check compost
Summer
Repair screens, trim vegetation, remove standing water, and secure food
Fall
Seal entry points, inspect attic/crawlspace, clear debris, and prepare storage
Winter
Monitor indoor activity, keep firewood away from walls, and maintain traps
Inspection & Maintenance Tips
● Schedule annual pest inspections by professional Virginia pest control consultation to detect hidden problems
● Keep a log of pest sightings and treatment dates
● Regularly replace weather stripping and caulk cracks
Note: Even small preventive steps, when consistently applied, drastically reduce infestations.
Common Pests and Their Seasonal Behaviors
Understanding how different pests behave each season helps homeowners take timely action to protect their property.
● Ants and Termites: Ants emerge in spring seeking food, while termites become active and can damage wood unnoticed. Early detection is critical.
● Rodents and Mice: Fall and winter increase rodent intrusions. Block all entry points and keep food sealed.
● Mosquitoes and Flies: Summer creates the ideal breeding environment for mosquitoes. Eliminate standing water and use physical barriers like nets.
● Spiders and Other Insects: Seasonal shifts cause spiders to move indoors. Regular vacuuming and decluttering reduce hiding spots.
Eco-Friendly Prevention Methods
● Use natural repellents like peppermint oil or diatomaceous earth
● Encourage beneficial insects, such as ladybugs, to reduce pest populations
● Plant pest-deterring plants near home boundaries, like marigolds or lavender
Integrated Pest Management (IPM)
Adopt an IPM approach by combining physical barriers, monitoring, and environmentally safe treatments. This minimizes chemical use while maintaining a pest-free home.
Quote: “Prevention is the most effective form of pest control.” – National Pest Management Association
Seasonal Pest Prevention Tools
● Snap traps and humane rodent traps
● Sticky traps for insects
● Outdoor perimeter sprays (eco-friendly)
● Moisture meters to detect early termite or mold problems
Pro Tip: Keep tools organized and accessible to act quickly when pest activity is noticed.
Planning: Annual Pest Calendar
Month
Recommended Action
March-April
Spring pest prevention tips: Inspect, seal, clean gutters
June-July
Summer pest prevention guide: Screens, standing water, food storage
September
Seasonal pest checklist: Seal entries, declutter, prep storage
November
Winter rodent entry points: Monitor indoors, maintain traps
Key Takeaways
● Seasonal awareness prevents infestations and property damage
● Consistent inspections and maintenance are essential
● Simple eco-friendly measures can significantly reduce pests
● Use a structured checklist and calendar for effective prevention
Conclusion
Homeowners who stay proactive and follow spring pest prevention tips, along with year-round monitoring, ensure their properties remain safe and comfortable. Using a summer pest prevention guide, checking winter rodent entry points, and maintaining a seasonal pest checklist ensure your home remains safe and comfortable. Remember to combine inspections, physical barriers, and environmentally friendly methods for the best results.
FAQs
Q1: How often should I perform a termite inspection?
A1: Conduct inspections annually, especially in spring, to detect early signs of termite activity and prevent extensive damage.
Q2: Can pests enter my home during winter?
A2: Yes, rodents and insects seek warmth and shelter indoors. Sealing entry points and monitoring for activity is crucial.
Q3: What is the most effective eco-friendly method for pest prevention?
A3: Using natural repellents, encouraging beneficial insects, and eliminating water sources effectively reduces pest populations without chemicals.
Ensure your home is ready for every season. Schedule a professional Virginia pest control consultation or a termite inspection in Suffolk, VA, today and stay ahead of potential infestations.
Find the right local pro for your project

 Editor
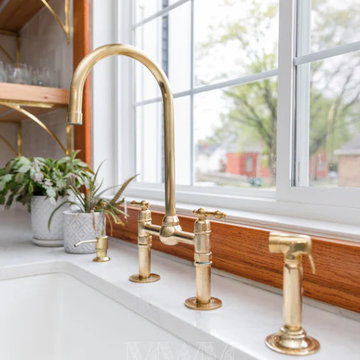
When it comes to selecting fixtures for your kitchen or bathroom, few options offer the blend of elegance, durability, and functionality like brass bridge faucets. These faucets, with their vintage charm and modern efficiency, bring a unique aesthetic and practical benefits to any space. This article explores the appeal of brass bridge faucets, their key features, benefits, and tips on how to choose and maintain them.
The Charm of Brass Bridge Faucets
Classic Aesthetic
Brass bridge faucets are known for their classic, timeless look. The warm, golden hue of brass adds a touch of luxury and sophistication, making these faucets a focal point in any kitchen or bathroom. Their vintage design can seamlessly blend with various décor styles, from rustic to contemporary.
Durability
One of the standout qualities of brass is its durability. Brass is resistant to corrosion and can withstand daily wear and tear, ensuring that your faucet remains in excellent condition for years. This makes brass bridge faucets a long-term investment for your home.
Versatility
Available in various finishes such as polished, brushed, or antique brass, these faucets can complement a wide range of design themes. Whether you want a shiny, reflective finish or a more subdued, matte look, there’s a brass bridge faucet to suit your taste.
Key Features of Brass Bridge Faucets
Elevated Bridge Design
The distinctive feature of bridge faucets is the elevated connecting pipe that links the hot and cold water lines. This bridge not only enhances the faucet's aesthetic appeal but also provides additional clearance, making it easier to clean large pots and pans or to accommodate larger sinks.
Dual Handles
Brass bridge faucets typically feature dual handles, allowing for precise control over water temperature. This functionality ensures a balanced mix of hot and cold water, providing you with the perfect temperature for your needs.
Classic Spout Designs
These faucets often come with high-arc or gooseneck spouts, which are both practical and stylish. The high spout design provides ample space for washing and filling containers, adding to the faucet’s functionality.
Benefits of Brass Bridge Faucets
Visual Appeal
Brass bridge faucets serve as a statement piece in any room. Their elegant design and warm finish add a touch of luxury and can elevate the overall aesthetic of your kitchen or bathroom.
Functionality
Beyond their beauty, brass bridge faucets are highly functional. The dual-handle design allows for precise temperature control, while the elevated bridge offers extra clearance for various tasks. This combination of form and function makes them a practical choice for busy households.
Hygienic Properties
Brass has natural antimicrobial properties, making it a hygienic choice for kitchen and bathroom fixtures. This can be particularly beneficial in spaces where cleanliness is paramount.
Choosing the Right Brass Bridge Faucet
Finish Options
When selecting a brass bridge faucet, consider the finish that best matches your existing décor. Polished brass offers a shiny, reflective surface, while antique brass provides a more vintage, weathered look. Brushed brass has a matte finish that hides fingerprints and water spots.
Coordination with Other Fixtures
Ensure that your brass bridge faucet complements other fixtures in your kitchen or bathroom. Coordinating the faucet with cabinet handles, lighting fixtures, and other hardware can create a cohesive and harmonious look.
Installation Requirements
Check the installation requirements before purchasing a brass bridge faucet. These faucets typically require a three-hole installation, so make sure your sink or countertop is compatible.
Maintenance Tips
Regular Cleaning
To maintain the luster of your brass bridge faucet, clean it regularly with a soft cloth and mild soap. Avoid using abrasive cleaners or scrubbers that can scratch the surface.
Preventing Water Spots
After cleaning, dry the faucet thoroughly to prevent water spots. This is particularly important for polished brass finishes, which are more prone to showing spots and fingerprints.
Addressing Tarnish
Brass can tarnish over time. To address this, use a brass cleaner or a mixture of lemon juice and baking soda to gently polish the surface. Regular polishing can keep your faucet looking its best.
Conclusion
Brass bridge faucets are a beautiful and functional addition to any home. Their timeless design, durability, and practicality make them a worthwhile investment for your kitchen or bathroom. By choosing the right finish and maintaining it properly, you can enjoy the elegance and charm of a brass bridge faucet for years to come. Embrace the classic appeal of brass and elevate the look of your home with this stunning fixture.


Sponsored
Columbus, OH

Hope Restoration & General Contracting
Columbus Design-Build, Kitchen & Bath Remodeling, Historic Renovations
 Design Matters
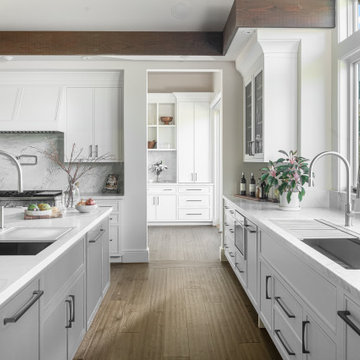
Double Island, Double Galley Workstation: A show stopping space for entertaining, with expansive workspace and functional flow, perfect for culinary enthusiasts. / Signature Custom Cabinetry & Superlative Dolomite Stone. / The Cairn LED Mini Pendant from Hubbardton Forge





 Siobhan's Outdoor Transformations
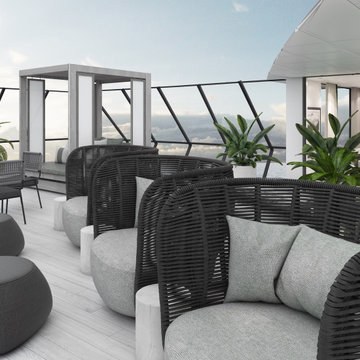
Outdoor living at it's best. The client asked for a flexible deck on the north side of the property. The other part of the brief was to add privacy. Our solution was layered-privacy, including a recycled plastic screen stage backdrop. The line of bamboo behind the screen was added for privacy and also to aid runoff from the street. Bamboo sucks up water very efficiently. Due to climate change we have developed a number of practical solutions to mitigate challenging drainage situations. Most days this space functions as a lovely lounge and on special occasions, it can be converted to a a dance floor. The recycled plastic laser cut decorative screens are made in Australia. Behind the decorative screen is Graceful Bamboo (Bambusa textilis 'Gracilis') one of the tightest clumpers with stems only 1 inch apart. It grows 25 to 30 feet high and carries foliage on the upper two-thirds of the stems, making the first 8 to 10 feet bare. This bamboo is a tight, vertical grower with graceful, cascading foliage and leaf tips that point downward. A neat grower, with the added bonus that it does not drop as much leaf litter as other varieties. The growth habit makes this variety perfect for tight locations where some height is needed, like the 3 story home next door. In the foreground is the azure blue coy pond we designed and found a marine biologist/ pond expert to build. Tucked under the overhang of the house, which give the fish protection from the birds. The pond shimmers day & night– the ultimate focal point, stocked with colorful coy.
Sponsored
Columbus, OH
Hope Restoration & General Contracting
Columbus Design-Build, Kitchen & Bath Remodeling, Historic Renovations

 Lolly & Me
 Taylor Changing Table, Espresso
Gentle curves add a bit of whimsy to this multipurpose changing table a crowd pleaser for all ages. Functional, flush construction puts a playful twist on the traditional sleigh bed slopes. In an espresso finish, it doesn't depart from tradition entirely, though. Made of high-quality materials, it features an inset top shelf to house a standard-size changing pad and two open shelves for easy access to all your diapering needs. The changer includes a safety belt to keep even the most active baby secure. The stains are applied by hand in three steps for extra durability and depth. Rigorously tested to exceed US-safety standards, it comes with foot levelers and anti-tip hardware. When your toddler has outgrown the changer, just remove the changing pad to unveil a practical and stylish nightstand or accent table for any room in your home. Pair it with the Taylor 3-in-1 convertible crib for a complete look. User-friendly instructions eliminate assembly headaches so even the busiest parents can put it together. All our Lolly & Me products are created by two moms, dedicated to dressing up today's nursery with affordable style that's fresh, functional and safe.
- Certifications: JPMA, CPSIA, ASTM; USA-inspected
- Construction: solid New Zealand pine, yellow poplar, 5-ply birch and maple veneers, MDF, formaldehyde-free adhesives
- 3-step finish: hand-applied, high-gloss stain and clear coat
- Inset top shelf in removable changer tray fits standard-size changer pad (32' x 16' x 1')
- Assembled dimensions: 35.2" H x 36" W x 17.4" D
- Care: clean with mild soap and water
- Warranty: one year for all manufacturing defects

 Reyes Creative Concepts LLC.
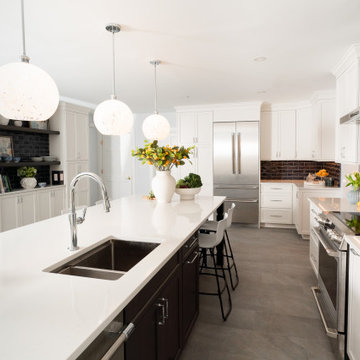
This kitchen isn’t just a pretty face—it’s built to perform!
Think maxed-out storage, a massive island that does it all, bold finishes, and plenty of room to breathe.
Want your kitchen to do more?
Here are ways to get the most out of your space:
Take cabinets all the way up—more storage, less clutter.
Use your island for seating, prep, and storage.
Mix light and dark finishes for a modern, balanced look.
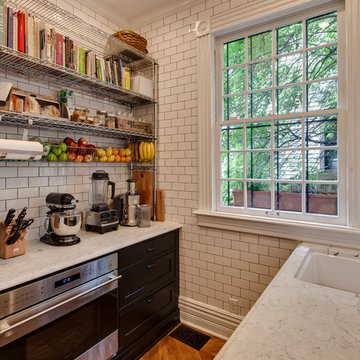
We also added open shelving.
Open shelving isn't just about storage—it’s about creating a stunning focal point that breathes life into your kitchen!
Here, we designed custom floating shelves that seamlessly integrate with the surrounding space, thanks to a striking backsplash tile that continues from the kitchen walls.
The result? A cohesive, elevated aesthetic that balances both beauty and practicality.
Maximize your open shelving with these design tips:
Curate with intention – Display a mix of functional and decorative pieces to create visual interest: cookbooks, plateware, and art.
Stick to a color palette – Keep it cohesive by coordinating dishware, frames, and accessories.
Layer textures – Combine ceramics, glass, and natural elements like wood or greenery for added depth.
Prioritize accessibility – Keep everyday essentials within reach while showcasing special pieces up top.
 Reyes Creative Concepts LLC.
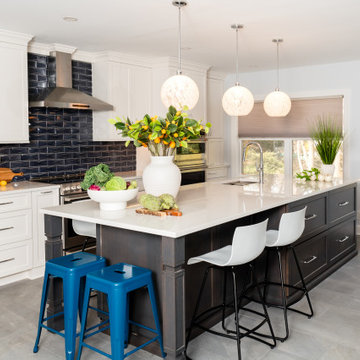
This kitchen isn’t just a pretty face—it’s built to perform!
Think maxed-out storage, a massive island that does it all, bold finishes, and plenty of room to breathe.
Want your kitchen to do more?
Here are ways to get the most out of your space:
Take cabinets all the way up—more storage, less clutter.
Use your island for seating, prep, and storage.
Mix light and dark finishes for a modern, balanced look.
We also added open shelving.
Open shelving isn't just about storage—it’s about creating a stunning focal point that breathes life into your kitchen!
Here, we designed custom floating shelves that seamlessly integrate with the surrounding space, thanks to a striking backsplash tile that continues from the kitchen walls.
The result? A cohesive, elevated aesthetic that balances both beauty and practicality.
Maximize your open shelving with these design tips:
Curate with intention – Display a mix of functional and decorative pieces to create visual interest: cookbooks, plateware, and art.
Stick to a color palette – Keep it cohesive by coordinating dishware, frames, and accessories.
Layer textures – Combine ceramics, glass, and natural elements like wood or greenery for added depth.
Prioritize accessibility – Keep everyday essentials within reach while showcasing special pieces up top.
Sponsored
Delaware, OH

Buckeye Basements, Inc.
Central Ohio's Basement Finishing ExpertsBest Of Houzz '13-'21
 Reyes Creative Concepts LLC.
This kitchen isn’t just a pretty face—it’s built to perform!
Think maxed-out storage, a massive island that does it all, bold finishes, and plenty of room to breathe.
Want your kitchen to do more?
Here are ways to get the most out of your space:
Take cabinets all the way up—more storage, less clutter.
Use your island for seating, prep, and storage.
Mix light and dark finishes for a modern, balanced look.
We also added open shelving.
Open shelving isn't just about storage—it’s about creating a stunning focal point that breathes life into your kitchen!
Here, we designed custom floating shelves that seamlessly integrate with the surrounding space, thanks to a striking backsplash tile that continues from the kitchen walls.
The result? A cohesive, elevated aesthetic that balances both beauty and practicality.
Maximize your open shelving with these design tips:
Curate with intention – Display a mix of functional and decorative pieces to create visual interest: cookbooks, plateware, and art.
Stick to a color palette – Keep it cohesive by coordinating dishware, frames, and accessories.
Layer textures – Combine ceramics, glass, and natural elements like wood or greenery for added depth.
Prioritize accessibility – Keep everyday essentials within reach while showcasing special pieces up top.
 Reyes Creative Concepts LLC.
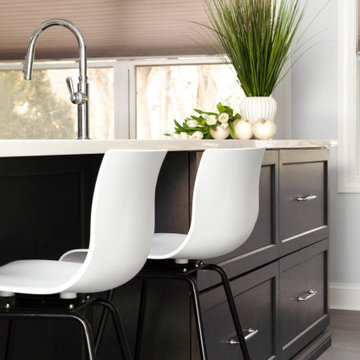
This kitchen isn’t just a pretty face—it’s built to perform!
Think maxed-out storage, a massive island that does it all, bold finishes, and plenty of room to breathe.
Want your kitchen to do more?
Here are ways to get the most out of your space:
Take cabinets all the way up—more storage, less clutter.
Use your island for seating, prep, and storage.
Mix light and dark finishes for a modern, balanced look.
We also added open shelving.
Open shelving isn't just about storage—it’s about creating a stunning focal point that breathes life into your kitchen!
Here, we designed custom floating shelves that seamlessly integrate with the surrounding space, thanks to a striking backsplash tile that continues from the kitchen walls.
The result? A cohesive, elevated aesthetic that balances both beauty and practicality.
Maximize your open shelving with these design tips:
Curate with intention – Display a mix of functional and decorative pieces to create visual interest: cookbooks, plateware, and art.
Stick to a color palette – Keep it cohesive by coordinating dishware, frames, and accessories.
Layer textures – Combine ceramics, glass, and natural elements like wood or greenery for added depth.
Prioritize accessibility – Keep everyday essentials within reach while showcasing special pieces up top.
 Reyes Creative Concepts LLC.
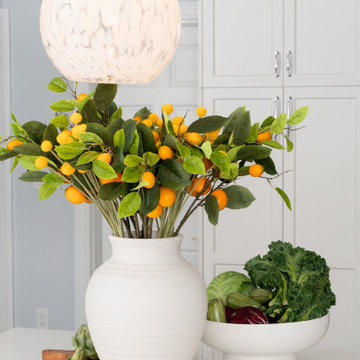
This kitchen isn’t just a pretty face—it’s built to perform!
Think maxed-out storage, a massive island that does it all, bold finishes, and plenty of room to breathe.
Want your kitchen to do more?
Here are ways to get the most out of your space:
Take cabinets all the way up—more storage, less clutter.
Use your island for seating, prep, and storage.
Mix light and dark finishes for a modern, balanced look.
We also added open shelving.
Open shelving isn't just about storage—it’s about creating a stunning focal point that breathes life into your kitchen!
Here, we designed custom floating shelves that seamlessly integrate with the surrounding space, thanks to a striking backsplash tile that continues from the kitchen walls.
The result? A cohesive, elevated aesthetic that balances both beauty and practicality.
Maximize your open shelving with these design tips:
Curate with intention – Display a mix of functional and decorative pieces to create visual interest: cookbooks, plateware, and art.
Stick to a color palette – Keep it cohesive by coordinating dishware, frames, and accessories.
Layer textures – Combine ceramics, glass, and natural elements like wood or greenery for added depth.
Prioritize accessibility – Keep everyday essentials within reach while showcasing special pieces up top.
18