
Search results for "Preventing damage" in Home Design Ideas
 J. Dougherty & Son / JDS Supply
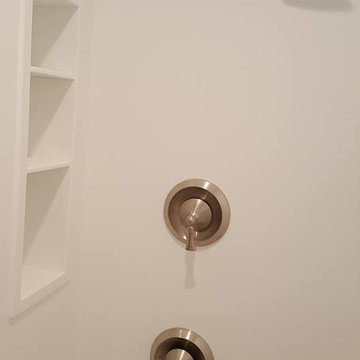
Mid-sized elegant 3/4 ceramic tile alcove shower photo in Philadelphia with white walls
 Choice One Builders
Choice One Builders
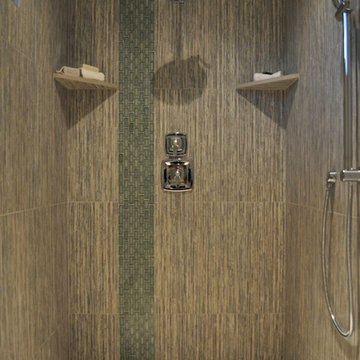
Trendy multicolored tile and porcelain tile bathroom photo with an undermount sink, flat-panel cabinets, medium tone wood cabinets and tile countertops
Trendy multicolored tile and porcelain tile bathroom photo with an undermount sink, flat-panel cabinets, medium tone wood cabinets and tile countertops
 Mi Tile Installation Experts
360° Fireplace Installation — Precision From Every Angle ?
Location: Bethel Island, CA
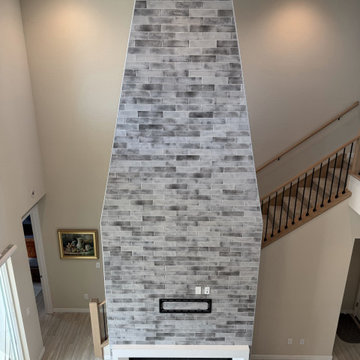
After completing a monumental 20-foot fireplace in this exclusive island community, another homeowner reached out to Mi Tile Installation Experts for an even more ambitious challenge — a four-sided fireplace with perfect symmetry and alignment from every angle.
This project required absolute precision — every corner, joint, and plane had to meet flawlessly across 360 degrees.
✨ Project Highlights:
? Custom geometric design for a striking centerpiece in the living area
? Tiling wrapped seamlessly around all four sides of the fireplace
? Floors fully protected with durable cardboard to prevent damage during setup and ladder work
? Perfect wall leveling before installation — ensuring clean lines and seamless joints
? High-grade stone-look tile for an elegant and timeless finish
The result: a fireplace that became the true focal point of the home — better than the design render itself — and a statement piece that leaves every guest speechless.
? Mikhailbelov37@gmail.com
? https://micatile.info
?️ Free Remodel Audit
Want to avoid hidden issues, costly delays, and budget surprises?
Comment “AUDIT” and we’ll provide a free expert review of your remodel — whether you’re just starting, already in progress, or recently completed.
We’ll help you:
✔️ Plan your project efficiently
✔️ Know what to expect
✔️ Identify common contractor shortcuts
✔️ Protect your investment from day one
? Exclusive Client Benefits
✨ Bonus Program — earn up to 15% back in bonus points to use toward your next project or gift to family/friends.
✨ Referral Program — get 10% cash back from every direct referral project, plus 3% from their referrals.
✨ Returning Client Discount — receive 10% off per sq ft on your second project.
Want full details? Comment BONUS and we’ll send you the complete guide.
#fireplacedesign #customtile #stonelooktile #luxuryremodel #mitileinstallationexperts #miauditmyremodel #bethelisland #oceanviewhome #homerenovation #contractor #precisioncraftsmanship #tiling #interiordesign #modernfireplace #beforeandafter #luxuryhomes #tileinstallation #tileinstallationexperts #tileexperts
Find the right local pro for your project
 Mi Tile Installation Experts
360° Fireplace Installation — Precision From Every Angle ?
Location: Bethel Island, CA
After completing a monumental 20-foot fireplace in this exclusive island community, another homeowner reached out to Mi Tile Installation Experts for an even more ambitious challenge — a four-sided fireplace with perfect symmetry and alignment from every angle.
This project required absolute precision — every corner, joint, and plane had to meet flawlessly across 360 degrees.
✨ Project Highlights:
? Custom geometric design for a striking centerpiece in the living area
? Tiling wrapped seamlessly around all four sides of the fireplace
? Floors fully protected with durable cardboard to prevent damage during setup and ladder work
? Perfect wall leveling before installation — ensuring clean lines and seamless joints
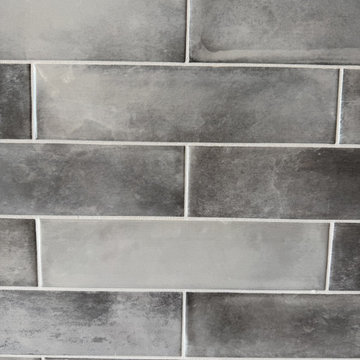
? High-grade stone-look tile for an elegant and timeless finish
The result: a fireplace that became the true focal point of the home — better than the design render itself — and a statement piece that leaves every guest speechless.
? Mikhailbelov37@gmail.com
? https://micatile.info
?️ Free Remodel Audit
Want to avoid hidden issues, costly delays, and budget surprises?
Comment “AUDIT” and we’ll provide a free expert review of your remodel — whether you’re just starting, already in progress, or recently completed.
We’ll help you:
✔️ Plan your project efficiently
✔️ Know what to expect
✔️ Identify common contractor shortcuts
✔️ Protect your investment from day one
? Exclusive Client Benefits
✨ Bonus Program — earn up to 15% back in bonus points to use toward your next project or gift to family/friends.
✨ Referral Program — get 10% cash back from every direct referral project, plus 3% from their referrals.
✨ Returning Client Discount — receive 10% off per sq ft on your second project.
Want full details? Comment BONUS and we’ll send you the complete guide.
#fireplacedesign #customtile #stonelooktile #luxuryremodel #mitileinstallationexperts #miauditmyremodel #bethelisland #oceanviewhome #homerenovation #contractor #precisioncraftsmanship #tiling #interiordesign #modernfireplace #beforeandafter #luxuryhomes #tileinstallation #tileinstallationexperts #tileexperts

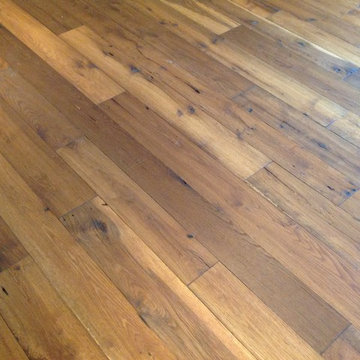
 Green Step Flooring, Inc.
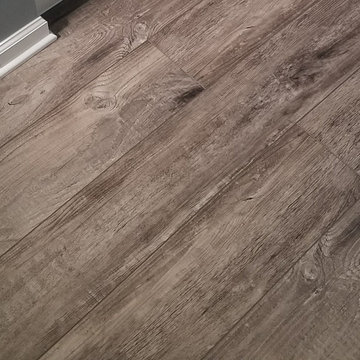
Random width reclaimed oak flooring. Custom free-handed beveling, distressing, hand scraping, wire brushing. Finished with Rubio pure hand rubbed oil by Green Step Flooring, Inc. Home is located in Falls River neighborhood Raleigh, NC
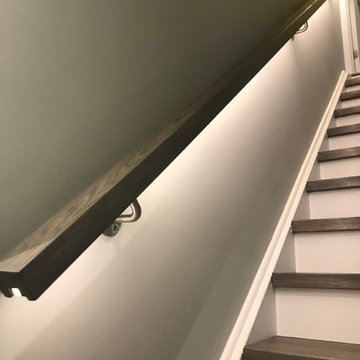
 Grand Project Contracting
This custom railing with the LED lights turned out amazing and gives the basement a great mood light especially at night.
Grand Project Contracting
 EAST SIDE CONSTRUCTION INC
Example of a mid-sized classic master white tile and subway tile ceramic tile alcove shower design in Providence with shaker cabinets, white cabinets, marble countertops, a two-piece toilet, an undermount sink and blue walls
 MRD Woodworking
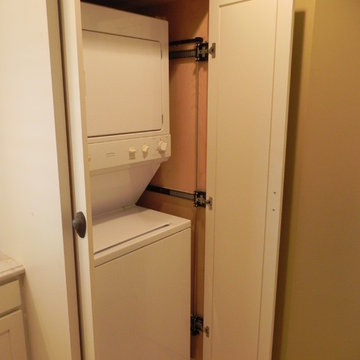
Example of a beach style light wood floor laundry room design in Providence with shaker cabinets, white cabinets and a stacked washer/dryer
 Kwik-Hang Curtain Rod Brackets
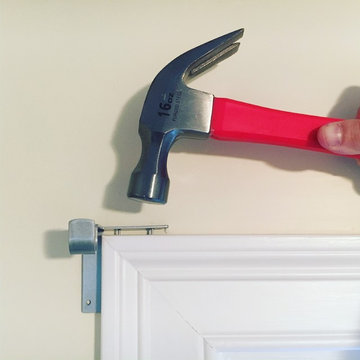
Look how easy it is to install our curtain hardware. Simply tap the bracket into the top of your wood trim then hang your curtains. Hang curtains in seconds while saving your walls and woodwork from damage!
 AdvantageLumber.com
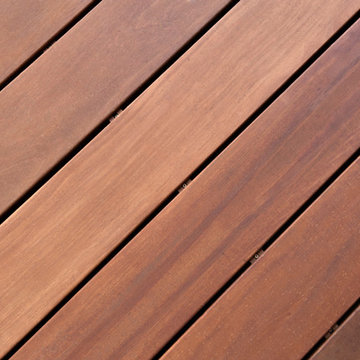
An Ipe Clip system was used in this Garapa deck. It provides the fastener free surface so its easier to walk on, and gives a much better finished look.

 Pauli & Uribe Architects
Richard Mandelkorn
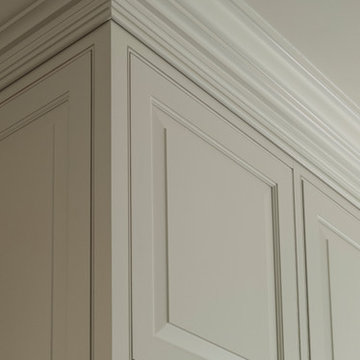
Mid-sized elegant u-shaped medium tone wood floor and brown floor open concept kitchen photo in Boston with a farmhouse sink, raised-panel cabinets, white cabinets, solid surface countertops, gray backsplash, cement tile backsplash, stainless steel appliances and an island
Mid-sized elegant u-shaped medium tone wood floor and brown floor open concept kitchen photo in Boston with a farmhouse sink, raised-panel cabinets, white cabinets, solid surface countertops, gray backsplash, cement tile backsplash, stainless steel appliances and an island
 Vintage Elements LLC
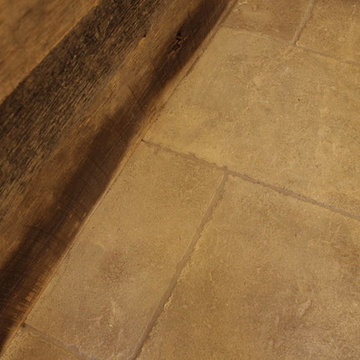
Reclaimed weathered barn siding wall paneling perfectly terminates into the grey limestone floor without the need of baseboards.
Small tuscan 3/4 gray tile and stone tile limestone floor bathroom photo with flat-panel cabinets, black cabinets, marble countertops, a two-piece toilet and white walls
Small tuscan 3/4 gray tile and stone tile limestone floor bathroom photo with flat-panel cabinets, black cabinets, marble countertops, a two-piece toilet and white walls
 Tile Doctor Ltd
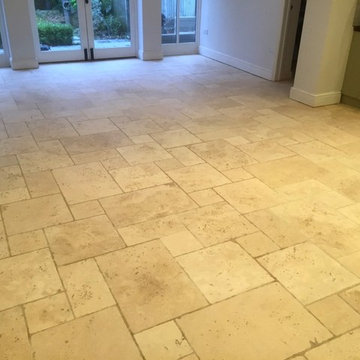
Recently I visited a client in the town of Maidenhead, Berkshire who needed assistance restoring a very dirty pitted Limestone tiled floor which had suffered over the years due to poor maintenance choices. The pressures of a busy family life had, understandably, prevented my client from undertaking regular cleaning and the products and methods used for cleaning were by and large unsuitable for this type of natural stone. In addition, the pits in the tiles had been filled with grout; however, they were not flush to the tile and therefore a large amount of soil had collected in the pockets. The result was a Limestone tiled floor in considerably poor condition that was increasingly difficult to keep clean.
My client had tried and tried to get the floor clean, using methods such as scrubbing with toothbrushes, steam cleaners, and mopping – but they weren’t getting anywhere! I explained to my client that steaming is, in fact, one of the worst cleaning systems to use on natural stone floors. Steam not only damages sealers, it also thins out greasy soils. Some of these soils are absorbed onto the domestic microfiber pads, however a lot of the soil becomes thinner allowing it to penetrate deeper into the pours of the stone and grout. This in itself starts the vicious circle to rapidly soiled and dirty tiles and grout. This happens because the grease soils magnetise dirt!
My first task in the cleaning process was to mix a strong solution of Tile Doctor Pro-Clean, which is a high alkaline cleaner. This solution was applied liberally across the entire Limestone tiled floor and grout. It was allowed to dwell for 30-40 minutes, giving it time to seep into the stone to get underneath and lift the ingrained dirt to the surface. During this time, I scrubbed the grout lines using a specialist stiff grout brush. The Limestone tiles were then scrubbed with heavy mechanical rotary agitation machine.
I then gave the floor a thorough rinse using the latest in cleaning and capture technology, which involves firing hot water at high pressure in a spinning motion across the floor, in effect blasting away the ingrained soils from the grout and pitting in the limestone. The high pressure is delivered from a system mounted inside my van which also contains waste tanks to capture the extracted soiled water.
After being allowed to dry thoroughly for 24 hours, I returned to seal the floor with Tile Doctor Colour Grow which would have brought out the deep colours in the stone, however after discussing the options with the client it became clear that they wanted to keep the floor looking as light as possible so Tile Doctor Ultra Seal was applied. Ultra Seal is a natural look impregnating sealer that soaks into the pores of the stone and protects it from within.
The floor now looks fantastic and the sealer should ensure it remains looking that way for some time to come and before leaving I made sure to provide my client with some professional maintenance advice.
Tim Colenutt
Berkshire Tile Doctor
 Tile Doctor Ltd
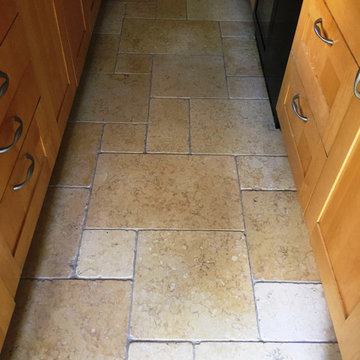
This customer from the south side Shepperton has a galley kitchen installed around twelve years ago with a Limestone floor. Since that time the floor had not been professionally cleaned or the stone re-sealed. The old sealer had long since worn down and was no longer providing any protection to the floor allowing soil and grease from cooking to penetrate the stone and darken the grout. It was now looking permanently dirty and the owner decided it was time to have it renovated.
Shepperton is a suburban village in the borough of Spelthorne, the Thames river is to the south and much of the east. It is set between the towns of Chertsey and Sunbury-on-Thames. The village has a long history and is even mentioned in a document of 959 AD and in the Domesday Book when it was primary farm land, it’s also my base of operation.
To deep clean the stone floor and grout I started with a mixture of Tile Doctor Remove and Go combined 50:50 with Tile Doctor Pro-Clean. This cocktail of sealer remover and cleaning agent was applied to the floor and left to soak in for ten minutes in order to get to work breaking down all the dirt, grease and what was left of the old sealer.
The solution was then worked into the Limestone tiles and grout using a rotary machine fitted with a black scrubbing pad. These pads can struggle to reach into the recesses of the grout lines, so afterwards the grout was scrubbed by hand using a stiff brush along with the more difficult to reach corners that the machine had missed. The floor was then rinsed with water and the products and soil vacuumed off the floor. I repeated the process in a couple of areas where the dirt was a little stubborn. The floor was then clean and after drying out overnight it would be ready for a new seal.
The following day I returned to apply the sealer first checking the floor was dry using a moisture meter. The readings were good, so I set about applying a colour enhancing impregnator sealer Tile Doctor Colour Grow to the Limestone. Tile Doctor Colour Grow works by seeping into the pores of the stone intensifying natural colour, preventing staining and providing a durable protection. Two coats of sealer were applied to the Limestone tile and grout which was all that was needed to return the floor back to its original condition.
The client was very happy with the finished floor and wanted to know how to keep it looking its best going forward. I explained that the best way to keep it looking good is to get maximum longevity from the sealer which will wear down over time but can be prematurely damaged with strong cleaning products. So, for aftercare I recommended the use of Tile Doctor Stone Soap which is designed for everyday cleaning of sealed stone floors.
Jonathan Oldham
South Middlesex Tile Doctor
 Tile Doctor Ltd
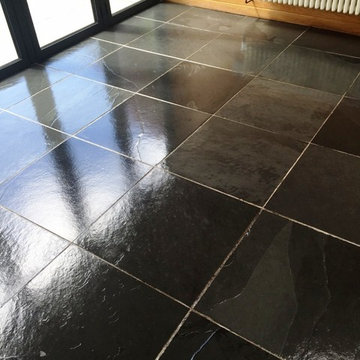
Tenuous link I know but I worked on this semi riven Black Brazilian Slate Tiles in the kitchen and dining room of a house in the seaside town of Thornton-Cleveleys around the time of the Rio Olympics. I love working on Slate as although it’s appearance can degrade without proper maintenance due to a build-up of dirt I knew they would look fantastic by the time I had finished.
The tile itself had lost its rich black colour and the grout lines had become stained, leaving the floor as a whole looking very unattractive. Out of interest honed Slate has a smooth, refined texture whereas the riven Slate has a rougher, more natural texture, and this can make it more difficult to keep clean. Needless to say, the customer was keen to have the tiles restored to looking their best.
To restore the appearance of the Slate, I cleaned the floor and removed what remained of the old sealer off using Tile Doctor Remove and Go. This was scrubbed into the floor using a scrubbing pad fitted to a rotary machine. The floor was then rinsed with water, and the process repeated where necessary to tackle particularly stubborn areas of dirt.
As mentioned previously, the grout lines were in a particularly bad state, and would need special cleaning attention. I cleaned carefully with a strong 5-to-1 dilution of Tile Doctor Pro Clean with water, which is our high alkaline cleaner. The cleaning solution was scrubbed I’m using a stiff handheld grout brush, with the grout lines looking immediately cleaner. When I was satisfied that the grout lines had been restored to the best possible condition, I gave the floor a thorough rinse using the wet pickup function of a wet wax machine to get the floor as dry as possible and then left the whole floor to dry off overnight.
Upon my return to the property I ran some quick damp tests to check that the floor was completely dry. This is important as any excess moisture would have prevented me from sealing the tiles, since it can cloud the sealer and damage it performance.
Previously I discussed sealer options with the customer and they stated that they would prefer a Satin finish, so I applied a sealer called Tile Doctor Seal and Go, our topical sealer which will both protect the Slate from dirt and stains, and also gave it the desired finish. As you can see from the below photographs, the rich, dark shades in the Slate were really enhanced.
The customer was very pleased with the finished result, but was also concerned about keeping the Slate clean in the long-term. For regular cleaning I advised the customer to use a pH neutral cleaner for aftercare called Tile Doctor Neutral Cleaner. As a pH neutral cleaner, it will not erode the sealer compared to acidic cleaners you so often find in supermarkets.
Russell Taylor
Lancashire Tile Doctor


 Pennsylvania Landscape & Nursery Association
Kimicata Brothers, INC http://www.kimicatabrothers.com
Project Entry: Johnson
2014 PLNA Awards for Landscape Excellence Winner
Category: Hardscaping-Residential $30,000-$60,000
Award Level: Honorable Mention
Photo Description:
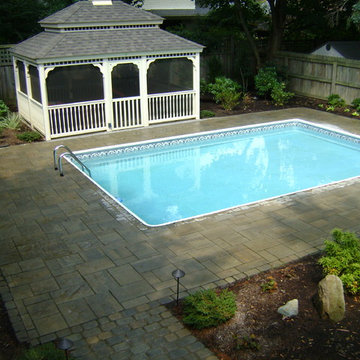
We were contacted by the Johnson’s to update their backyard fenced in pool area in the summer of 2012. Over the years the deck around the pool had deteriorated and the plants had become over grown and made walking around the deck difficult. The old concrete patio was small and only lit by bright 120 volt spot lights. What made this job difficult was the access to the backyard was limited to using a neighbor’s backyard for the project. We had to bring all debris out and materials in from a neighboring street, down the neighbor’s driveway, across the backyard, through an 8’ section that was in the far corner of the neighbor’s yard that corresponded to the entrance to Johnson’s backyard. They had a plan that they wanted to work from. Since access was a problem, we had to secure permission from the neighbor before we could consider bidding the job. After the neighbor’s permission was obtained we discussed materials for the drawing they had. It only included the hardscape and gazebo. Other difficulties included not damaging lighting and plumbing for the pool during excavation and construction. Also the ladders into the pool fit into cups screwed to the deck. These had to be replaced with precisely placed pipes mounted into the base for stability. Care had to be taken to make sure water would not drain from the deck into the pool. So we had to place channel drains between the patio area and pool deck area. A channel drain was placed between the exposed aggregate finished slab for the gazebo and the pool deck. This allowed for proper sloping of the hardscape to provide the drains to move rain away from the pool. We used polymeric sand in the paver joints to prevent breakdown of the installation and avoid wind and water moving sand into the pool. The slab for the gazebo was an exposed aggregate finish that measured 12’ 6” x 16’ 6”. The pagoda style roof for the gazebo and screening make it attractive and functional as a bug free area to entertain in. We discussed adding low voltage lighting, 120 volt plugs and drip irrigation early on so we could place conduits during the construction. After the hardscape installation we installed the low voltage lighting. We installed a transformer with a timer and an optional dusk to dawn photocell. The Johnsons did not like the old 120 volt spot light to light the back, they wanted something softer. We installed 20 path lights to illuminate the hardscape and 3 wall wash lights to add evening depth to the yard. We installed the plantings and Hunter drip irrigation system in the spring of 2013. It was easy to convince them that the drip system was the proper way to irrigate the area. There would be no spray to blow onto patio furniture or into the gazebo. Also drip irrigation uses less water so they are economical to operate. This gave them a low maintenance yard, a nice finished look and something blooming throughout the growing season. The Johnsons have been very happy with the look and the functionality of the pool deck, patio, lights, irrigation and gazebo.
35