
Search results for "Proceed" in Home Design Ideas
 ED Enterprises, Inc.
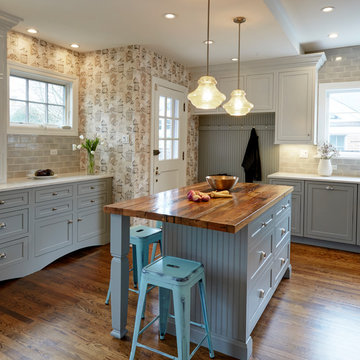
We understood the customer's dream to remove an existing closet and several walls.
We began with the removal of several structural walls and closet. We found that the previous contractor had incorrectly removed structural wood posts. We secured the structural integrity of the building with wood and steel.
We proceeded to expand the opening between
the Kitchen and Butler Pantry, which included relocating waste and water lines from the second floor.
We upgraded the existing electrical and installed a 440-volt electrical system for the entire home.
You can enjoy the illumination of the cabinetry and kitchen, by the pendant lights, recessed lights, under cabinet lights, and curio lights in the glass door cabinets,
Note the brick pattern Subway tile from the counter top to the ceiling, in the kitchen and the Butler Pantry. Take special notice of the decorative tile area above the range.
The chimney style hood was vented to the exterior.
The unique sitting area, near the rear entry, was finished with beadboard paneling and wall cabinets up to the ceiling., trimmed with crown molding.
General Contractor / Remodel: E D Enterprises, Inc.
Michael Alan Kaskel Photography
 United Home Experts
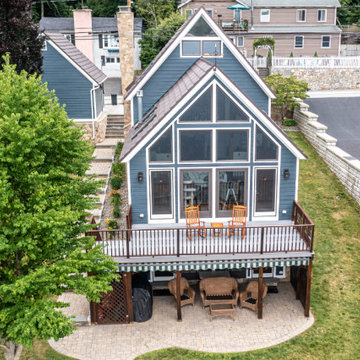
This beautiful, lakeside, colonial located in Hopkinton, MA underwent one of the most beautiful siding transformations of the year using our GorillaPlank™ Siding System.
Built in 1940, this lakeside home in Hopkinton, MA had old scalloped cedar shakes that had become old and worn out. The homeowners considered painting again, but did not want the costly expense of having to paint again, so they decided it was time to renovate and modernize their living space with a low-maintenance siding that closely resembled the appearance of wood.
Everlast Composite Siding was the siding of choice using our GorillaPlank™ Siding System.
Before installing the GorillaPlank™ Siding System, our expert team of installers went to work by stripping down the existing cedar shingles and clapboards down to the sheathing.
After verifying the underlying condition of the sheathing, our team went ahead and set staging to protect the beautiful metal roofs, then proceeded to install the moisture barrier to protect the sheathing, and then installed insulation for added protection and comfort.
Their house is now featuring Everlast Composite Siding in the 7” exposure of one of the newest colors, Blue Spruce!
 Need For Build- Remodeling Experts
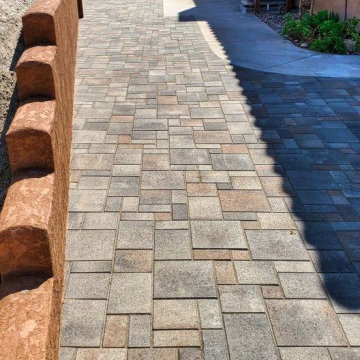
Need For Build did an outstanding job modifying the side yard of our house. The job included clearing large sections of dirt, building a 3' by 50' retaining wall, and installing pavers. The cost estimate came in thousands less than the others I received for the same work. They started on schedule and had a time estimate of 2 to 3 weeks, but they actually finished in only 8 working days. They were very flexible and made changes to the plan at my request as the job proceeded. The work crews were all very polite and helpful; they cleaned up each day and left the final site looking excellent. Another good point is that David was both the salesperson and the project manager so he showed up every day to make sure the progress matched my expectations - I've had other company's sales people disappear once the sale has been made, but not David!
Find the right local pro for your project
 ONE Design
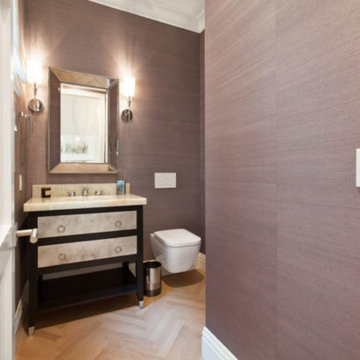
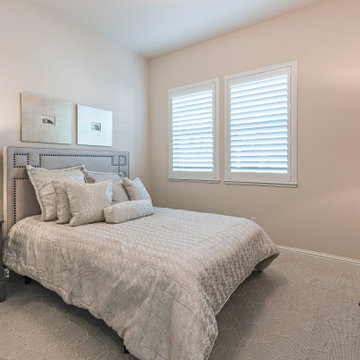
A diamond in the rough was polished to a new brilliance in this remodel. Moving the kitchen to be front and center of everything was the key to this remodel. Carrying the motif of less is more, this remodel emphasized the qualities this Parisian-styled home had with a modern open floor plan. Working through different design studies with the client, we identified the optimum layout and created space for an additional bedroom. Fusing old world details with contemporary living, we ensured the rehabilitation pays homage to its original detailing while expressing a bold narrative, delicately balanced within the original structural framework. Careful detailing of the structural elements ensured the work could proceed without affecting the unit below. Completed in 2014, this home now offers its young family the full urban experience of stylish San Francisco living.
 De Young Properties
With overwhelming support by the community who dug deep and donated, the 2018 Central Valley St. Jude Dream Home Giveaway successfully raised $957,100 for St. Jude Children’s Research Hospital! Since 2007, De Young Properties has been a major donor and builder of 12 St. Jude Dream Homes, helping to raise $11,628,545 to help the kids of St. Jude fight cancer and other life-threatening childhood diseases. One hundred percent of the proceeds will be donated to St. Jude Children’s Research Hospital, which works around the clock to develop cures to save the lives of boys and girls, including children in the San Joaquin Valley.
“We strongly believe in our responsibility to help others, which is why the St. Jude’s Dream Home Giveaway is so important to us and our entire De Young team. We are grateful to our community’s continued support of our business – a community that has given so much to us, which is why we are so passionate about giving back. In fact, we are even more passionate today than we were in 2007 when we first partnered with St. Jude Children’s Research Hospital. We are honored to be a donor and builder of our 12th St. Jude Dream Home in this war against childhood cancer. St. Jude Children’s Research Hospital positively affects the lives of families across the country, in addition to giving us the opportunity to change the life of a local family,” said Paula De Young of De Young Properties. “This amazing pediatric research center, that not only treats life threatening cases in children, also freely gives guidance to doctors around the world and here in the Central Valley. We count ourselves fortunate to be able to help such an important cause”
The 2018 St. Jude Dream Home is one of the most popular De Young floorplans, the Residence 210 with a beautiful Cottage elevation, and will offer three bedrooms, two full bathrooms, a formal dining room, spacious den and an open-air courtyard with a gorgeous stone accented fireplace.
With celebrity designer, Michael Moloney, donating his design talent and resources once again as Design Ambassador for this year’s St. Jude Dream Home, the home boasts a long list of special features, including fashionable quartz and granite counters from Granite Mountain Stone Design, premium designer maple cabinetry and professional closet design from KraftMaid Cabinetry and stainless steel Bosch appliances with a gas range, washer, dryer and built-in refrigerator. In addition, premium-grade wood-look porcelain tile floors by Shaw Floors, spacious 10’ ceilings, professional and water efficient front and back yard landscaping, and Energy Star approved Eagle Brand Cool Roof Tile.
The prime Clovis location of the St. Jude Dream Home is in the De Young Trailside at Loma Vista community which is within walking distance to Reagan Educational Center and located within the greater 3,300-acre Loma Vista master-planned community designed by the City of Clovis. In addition, it is a short drive from Clovis Community Medical Center and a variety of entertainment and dining options including the Sierra Vista Mall, The Square at Campus Pointe, Old Town Clovis and even Wild Water Adventure Park. Easy access to Highway 168 and Herndon Avenue can provide a fast work commute during the week and a family outing to Shaver or Huntington lakes on the weekend and even more.
De Young Properties would like to once again thank everyone in the community who contributed their hard-earned dollars to this worthy cause. They are appreciative of everyone who donated, volunteered or purchased a ticket to win this year’s St. Jude Dream Home, and feel privileged to be able to help such an important cause.
 Southern Scape, LLC
Ca. 1919 Craftsman Style Home, Revisioned by the South’s Leading Designers
Twenty‐two leading interior designers from three different states completely restored this historic home on Franklin’s historic Main Street as part of the O’More Show House, which was opened to the public from May 12‐27, 2016 and presented by leading sponsor, PARKS.
This is the third O’More Show House event in recent years, with participating designers having ties to O’More College of Design in downtown Franklin and proceeds benefiting the College’s School of Interior Design. The 2016 home, a 5,200 square‐foot ca. 1919 brick and stucco Craftsman‐style cottage, is a significant contributing property to the National Register‐listed Hincheyville Historic District. The owners have undertaken a total renovation of the home’s interior while leaving the street‐view exterior intact.
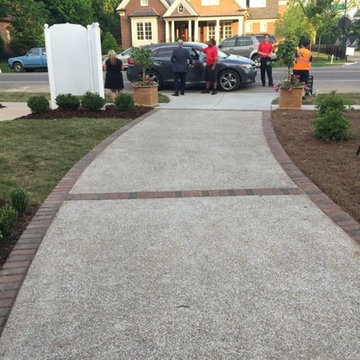
We were recommended to project managers and O'More College for the entire landscape design and installation: landscaping, irrigation, lighting, paver walks and patios, paver-raised porch with steps, paver banding in driveway!
 De Young Properties
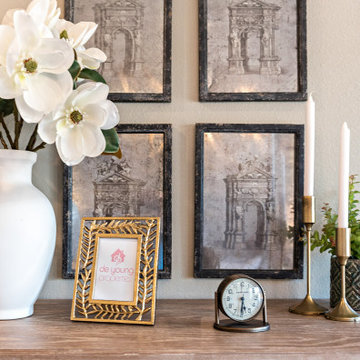
With overwhelming support by the community who dug deep and donated, the 2018 Central Valley St. Jude Dream Home Giveaway successfully raised $957,100 for St. Jude Children’s Research Hospital! Since 2007, De Young Properties has been a major donor and builder of 12 St. Jude Dream Homes, helping to raise $11,628,545 to help the kids of St. Jude fight cancer and other life-threatening childhood diseases. One hundred percent of the proceeds will be donated to St. Jude Children’s Research Hospital, which works around the clock to develop cures to save the lives of boys and girls, including children in the San Joaquin Valley.
“We strongly believe in our responsibility to help others, which is why the St. Jude’s Dream Home Giveaway is so important to us and our entire De Young team. We are grateful to our community’s continued support of our business – a community that has given so much to us, which is why we are so passionate about giving back. In fact, we are even more passionate today than we were in 2007 when we first partnered with St. Jude Children’s Research Hospital. We are honored to be a donor and builder of our 12th St. Jude Dream Home in this war against childhood cancer. St. Jude Children’s Research Hospital positively affects the lives of families across the country, in addition to giving us the opportunity to change the life of a local family,” said Paula De Young of De Young Properties. “This amazing pediatric research center, that not only treats life threatening cases in children, also freely gives guidance to doctors around the world and here in the Central Valley. We count ourselves fortunate to be able to help such an important cause”
The 2018 St. Jude Dream Home is one of the most popular De Young floorplans, the Residence 210 with a beautiful Cottage elevation, and will offer three bedrooms, two full bathrooms, a formal dining room, spacious den and an open-air courtyard with a gorgeous stone accented fireplace.
With celebrity designer, Michael Moloney, donating his design talent and resources once again as Design Ambassador for this year’s St. Jude Dream Home, the home boasts a long list of special features, including fashionable quartz and granite counters from Granite Mountain Stone Design, premium designer maple cabinetry and professional closet design from KraftMaid Cabinetry and stainless steel Bosch appliances with a gas range, washer, dryer and built-in refrigerator. In addition, premium-grade wood-look porcelain tile floors by Shaw Floors, spacious 10’ ceilings, professional and water efficient front and back yard landscaping, and Energy Star approved Eagle Brand Cool Roof Tile.
The prime Clovis location of the St. Jude Dream Home is in the De Young Trailside at Loma Vista community which is within walking distance to Reagan Educational Center and located within the greater 3,300-acre Loma Vista master-planned community designed by the City of Clovis. In addition, it is a short drive from Clovis Community Medical Center and a variety of entertainment and dining options including the Sierra Vista Mall, The Square at Campus Pointe, Old Town Clovis and even Wild Water Adventure Park. Easy access to Highway 168 and Herndon Avenue can provide a fast work commute during the week and a family outing to Shaver or Huntington lakes on the weekend and even more.
De Young Properties would like to once again thank everyone in the community who contributed their hard-earned dollars to this worthy cause. They are appreciative of everyone who donated, volunteered or purchased a ticket to win this year’s St. Jude Dream Home, and feel privileged to be able to help such an important cause.
 Spaces Designed, Interior Design Studio, LLC
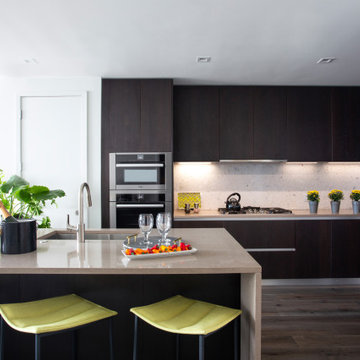
Cozy Chic - While the entire condo is under 1000 sq ft, there's no dearth of chicness. The ultra-modern kitchen has enough room to host an intimate gathering with a large island while it looks sharp with stainless appliances against a backdrop of a darker backsplash. The living room with its vibrant color palette, luxurious rug and comfortable seating continues the theme of intimate conversations in a chic setting.
The artwork in the living room and the bedroom reflects the playful personalities of the owners accompanied by hints of old fashioned charm. The glam bathroom adds a touch of royalty to the entire proceedings with hand-selected mirror, wall paper and sconce lights in the right shades of gold.
The project reflects Spaces Designed's philosophy of designing spaces to not only meet the needs of it's clients but also their personalities and sensibilities. Every space, small or large, has it's own purpose and character - our role is to identify that and meticulously craft the outcome.
 John Rogers Design
Transitional Architectural Theatre Lighting & Interior Design
This Batman themed theater was not part of the original theater plans. I was hired by the owners to do lighting design for their new construction home. In my first preliminary lighting plan presentation the husband expressed his passion for a Batman themed theater and showed me an image of a Batman themed theater he liked. Which he followed up to say it was out of his budget.
I was hired for lighting design. What the owners did not know was that I have an interior design degree. I asked what amount he was willing to spend for a Batman themed theatre. I knew I could design the theatre for a quarter of the cost of the theatre he had shown me. I felt comfortable saying I could design lighting and interiors for the theatre within their budget.
I proceeded with bringing in my team of artists to review the images of his Batman comic magazine collection that had to be in the theater: Batcave, Wayne Manor, Lincoln Penney, Bat phone and the Joker.
As the images indicate, we succeeded in designing and installing the Batman themed theatre to meet the client's criteria.
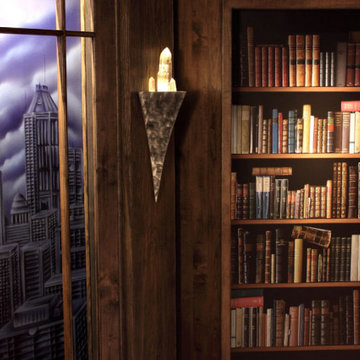
At the owner’s request: Linear LEDs lit the Batcave faux wall murals of stone and Wayne Manor aged wood columns, custom crystal wall sconces, and a library with a life size Batman costume hidden behind a false bookcase. A false wooden window with a Gotham City Mural of the Bat signal were revealed by using ultraviolet black lights.
It was a fun project but could not have been accomplished without a team of excellent artists, building contractors, A.V. control company, millwork fabricators and electricians.
Lighting Designer: John Rogers Design
Interior Design Concept & Millwork Design: John Rogers Design
Faux stone and murals Artist: Robin Tucker
Builder: Richard Harp Homes https://www.richardharphomes.com
A.V. Company:
Electrical:
Photographer: John Watson
Published
AY Magazine
 John Rogers Design
Transitional Architectural Theatre Lighting & Interior Design
This Batman themed theater was not part of the original theater plans. I was hired by the owners to do lighting design for their new construction home. In my first preliminary lighting plan presentation the husband expressed his passion for a Batman themed theater and showed me an image of a Batman themed theater he liked. Which he followed up to say it was out of his budget.
I was hired for lighting design. What the owners did not know was that I have an interior design degree. I asked what amount he was willing to spend for a Batman themed theatre. I knew I could design the theatre for a quarter of the cost of the theatre he had shown me. I felt comfortable saying I could design lighting and interiors for the theatre within their budget.
I proceeded with bringing in my team of artists to review the images of his Batman comic magazine collection that had to be in the theater: Batcave, Wayne Manor, Lincoln Penney, Bat phone and the Joker.
As the images indicate, we succeeded in designing and installing the Batman themed theatre to meet the client's criteria.
At the owner’s request: Linear LEDs lit the Batcave faux wall murals of stone and Wayne Manor aged wood columns, custom crystal wall sconces, and a library with a life size Batman costume hidden behind a false bookcase. A false wooden window with a Gotham City Mural of the Bat signal were revealed by using ultraviolet black lights.
It was a fun project but could not have been accomplished without a team of excellent artists, building contractors, A.V. control company, millwork fabricators and electricians.
Lighting Designer: John Rogers Design
Interior Design Concept & Millwork Design: John Rogers Design
Faux stone and murals Artist: Robin Tucker
Builder: Richard Harp Homes https://www.richardharphomes.com
A.V. Company:
Electrical:
Photographer: John Watson
Published
AY Magazine
 Southern Scape, LLC
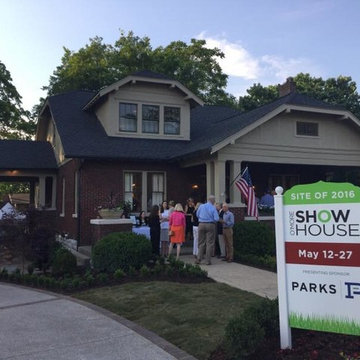
Ca. 1919 Craftsman Style Home, Revisioned by the South’s Leading Designers
Twenty‐two leading interior designers from three different states completely restored this historic home on Franklin’s historic Main Street as part of the O’More Show House, which was opened to the public from May 12‐27, 2016 and presented by leading sponsor, PARKS.
This is the third O’More Show House event in recent years, with participating designers having ties to O’More College of Design in downtown Franklin and proceeds benefiting the College’s School of Interior Design. The 2016 home, a 5,200 square‐foot ca. 1919 brick and stucco Craftsman‐style cottage, is a significant contributing property to the National Register‐listed Hincheyville Historic District. The owners have undertaken a total renovation of the home’s interior while leaving the street‐view exterior intact.
We were recommended to project managers and O'More College for the entire landscape design and installation: landscaping, irrigation, lighting, paver walks and patios, paver-raised porch with steps, paver banding in driveway!
 Envision Web
Stuart Wade, Envision Virtual Tours
Envision Virtual Tours and High Resolution Photography is your best choice to find just what you are looking for in the Ellijay, Ga. area .Ellijay, Georgia, known as the “Apple Capital” of Georgia, is located between the Ellijay and Cartecay Rivers where they join to make the Coosawattee River and is the county seat of Gilmer County, Georgia. The origin of the city’s name is not certain but thought to be the English derivative of an Indian word(s) meaning “many waters”, “place of green things” or “new ground”. Some histories say it may have been named for an Indian chief.
Inhabited for countless years by the Cherokee people indigenous to the North Georgia, the area was first mentioned as a village and trade center before the onslaught of white settlers inhabited the region. During the 1830’s both white settlers and Indians occupied Ellijay. During the original land lottery in 1832, Martin Scalf acquired the 160 acre lot where the town now stands. In 1833, Clemonds Quinland bought 10 acres from Scalf, retained one acre for himself and donated the rest of the purchase to the County. A plan for twenty town lots, streets and a public square was created and the streets were oriented to allow maximum sunlight exposure to the buildings.
Proceeds from lot sales were used to build a jail and courthouse and pay other city expenses. During this same year, Gilmer County was appropriated $800.00 from the State to build a school, and a three-acre lot was donated for the city cemetery. On December 29, l834, Ellijay was incorporated and designated as the County seat of Gilmer County. By 1837, the town had twenty dwellings, three stores and one attorney. Most of these early buildings were of log construction.
Many roads led to Ellijay by 1849. The population had grown to 150 by 1850 and the town at five stores. Some wood-frame buildings were being constructed at this time and in 1854, a new courthouse was built in the center of the square, replacing the earlier building. The County’s first newspaper was the Ellijay Courier, started in 1875, and during this time period, Ellijay was a stop on the stagecoach line. The railroad bridge over the Cartecay River was completed in 1884 and the town now had rail service.
With the arrival of the railroad and subsequent tracks to White Path, Ellijay began to grow much faster. Many hotels were constructed and land was donated for a depot east of town. More industries, such as a cheese factory and the Shippen Brothers Lumber Mill, located in Ellijay. By 1898, the city had expanded its limits in every direction and now included the depot.
By 1900, all the buildings on the town square were brick. This included the recently completed Hyatt Hotel. Most of the other buildings in town were still of log construction, but new wood-frame buildings were being built. The Shippen Brothers Lumber Company production was expanding and exporting their lumber to Europe. Within the next few decades, this company grew to be one of the largest employers in Ellijay, often with five to six million feet of lumber in the yard at one time.
The population of Ellijay grew to 659 by 1910, and began to acquire many new modern conveniences such as electric lights and power, a telephone company and many new businesses.
Then in 1912, a fire ravaged the city, destroying 23 buildings. As a result, many new buildings were constructed under new and stricter fire and safety guidelines. The population, however, decreased slightly at this time to 632 in 1920.
During the 1920’s the town’s population began to grow again and, by this time, apples were being shipped out of the county and new storage facilities were built. Chickens were also shipped to markets outside of Ellijay and Gilmer County.
From the mid 1930’s to 1950, Ellijay received much assistance from the Federal WPA Programs. The old courthouse was removed from the center of town square and the Hyatt Hotel was remodeled to be the new courthouse. A park was created on the site of the old courthouse and the streets around the square were paved. A new street was built at this time entering town from the northeast. Other new roads, bridges, sidewalks and gutters were constructed to improve the city. A school and gymnasium were also built and other structures improved.
This growth began to impact the city’s infrastructure and in the l950’s and l960’s, a period of upgrading water systems, roads, and power supplies began. New low-rent housing appeared in l960 and a new hospital was built in l957. Georgia Highway 5 was widened in l962, new buildings around the square replaced old ones and some were remodeled. In 1974, the hospital was enlarged.
Currently, Ellijay attracts tourists who love the small-town feel and friendly atmosphere. Hotels and restaurants, unique shops, antiques and art galleries lend their charms to those who visit. A new courthouse constructed to resemble the old one, new streetscaping, family-oriented downtown events and the beautification of the square have stepped up the social and economic activity and have made Ellijay a popular destination.
 Tile Doctor Ltd
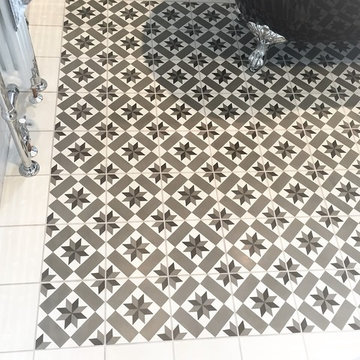
I’m often asked if you should seal a tile before grouting and the answer is a definite yes, and this Encaustic Cement tiled bathroom floor installation in Stockport is a great example as to why. The tiles had not been sealed before grouting and then, once the tiler went to grout the newly installed tiles with a grey grout, the colour ran into the tiles, staining them and leaving them looking grubby and dirty. Had the tiles been sealed it would of made the process of removing the grout from the surface of the tile much easier.
If you haven’t come across them before Encaustic cement tiles are often hand painted and are available in a range of beautifully artistic patterns, so it was a real shame that these tiles were allowed to be spoilt by an avoidable mistake. As you can imagine, the property owner was keen to have the tiles professionally restored, and she contacted me to get the job done. I took some photographs but I’m not sure that they do justice to the problem.
Rather than use a liquid cleaning product, I opted to use diamond encrusted handheld burnishing pads to remove the grout stains. Our burnishing system comprises four pads of varying grits. I started with the Coarse grit burnishing pads applying to the tiles it with a small amount of water as lubricant to grind down the grubby marks. Following this I worked my way through the system, applying Medium, Fine and Very Fine pads to gradually restore the appearance of the floor. Once the burnishing process has been completed I rinsed the tiles and then accelerated the drying process using a heat gun to prepare them to be sealed.
Removing any excess moisture before sealing is essential as even a small amount can cloud the sealer and prevent it from properly protecting the tiles from dirt and stains. Once satisfied that the floor was dry, I proceeded to seal it using Tile Doctor Colour Grow. As an impregnating sealer Colour Grow penetrates deep into the pores of the stone to fill them and thus prevent dirt from becoming ingrained. Colour Grow’s colour intensifying properties also really accentuated the patterns of the Encaustic Cement tiles.
Now that these fantastic tiles have been properly sealed it will be far easier for the customer to keep them clean in future. Needless to say, she was very happy with the result. We recommend topping up your sealer on a regular basis to ensure problems like those which occurred here do not damage the appearance of your tiles.
Steve Keary
Greater Manchester Tile Doctor
 Pennsylvania Landscape & Nursery Association
Realty Landscaping Corp./Real Winter, Inc. http://www.realtylandscaping.com
2014 PLNA Awards for Landscape Excellence Winner
Category: Commercial $75,000 & Over
Award Level: Silver
Project Description:
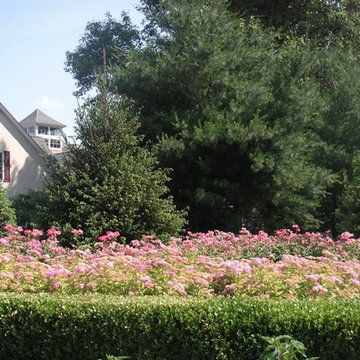
Located in a highly commercialized area of lower Bucks County, the property that was once a declining horse track is now revitalized as Pennsylvania's #1 casino. Parx Casino is owned and operated by Greenwood Gaming & Entertainment, Inc. and includes high stakes
gaming, horse racing, premium entertainment and multiple restaurants and amenities. It's doors are open 24 hours a day. In the midst of an economic downturn, Parx brought in many much needed jobs, stimulating the local economy.
The construction of the Parx Casino project began in 2008. The main portion our landscape installation ran the course of 2009 and into 2010. We originally were contracted to install a landscape that was already designed. The owner however was not totally satisfied with the design that he had commissioned, so we made a few recommendations to them. We took a leap of faith and installed one section of the landscape as a mock-up for a concept that we envisioned. Hoping to stir some interest and excitement and help the client draw in huge numbers of patrons, our concept included a high energy, formal and contemporary layout based upon low hedging and bright panels of color to match the Parx Casino logo. Lines were clean to compliment the building theme and layout. We were given the owners blessing right away and proceeded to redesign the majority of the newly re-developed site.
There were a number of demanding deadlines and site related challenges. The site is very windy and open. Large volumes of vehicular and pedestrian traffic pulse through the site's veins continuously. The scale of the building and property is immense. In order to complete a project of this magnitude, a large labor force was utilized. Overnight and overtime hours were sometimes a necessity. Our veteran supervisory team ensured a good quality product on demand. Great quantities of the highest quality plant materials were needed to soften the huge expanse of asphalt, concrete and building facade. Massive 20 foot evergreen trees were brought in as a wind break, softening the building and obscuring the view to the valet security areas. Views were kept open from the main road to allow visitors a clear view of building entrances and mega-sized digital signage. A hardy mix of evergreen, deciduous and herbaceous plant materials were used to stir seasonal interest year round. Bright colors light the way down the main boulevard, drawing in the masses toward the casino entrances. We installed an automatic overhead and drip irrigation system to help keep the windy site from drying out. To supply the expansive landscape with water, we provided a large pump, which pushed thousands of gallons of water through a 4” main. The two-wire system features a smart controller and pressure regulating heads.
The installation project as a whole was very successful. We took a plan that was given to us, made it our own, and turned our vision into reality. The client so satisfied that they've contracted us to maintain the landscape we implemented ever since. The casino shows no signs of slowing down. Thousands of patrons test their luck daily at Parx. The local economy, strengthened. The Lower Bucks strip is once again the place to be.
Plant Schedule
Trees:
6- X Cupressocyparis leylandii 8-10’ ht.
2- Ilex opaca 18-20’ ht.
37- Picea abies 20-22’ ht.
9- Picea abies 16-18’ ht.
35- Picea abies 12-14’ ht.
4- Pyrus calleryana ‘Aristocrat’ 4-4 ½” cal.
Shrubs:
1,171- Berberis thunbergii var. atropurpurea ‘Cr. Pygmy’ 3 gal.
2,954- Boxwood microphylla ‘Winter Gem’ 18-24” ht.
41- Chaemacyparis obtusa ‘Crippsii’ 3-4’ ht.
104- Chaemacyparis pisifera ‘Filifera Aurea’ 7 gal.
124- Ilex glabra 36-42” ht.
496- Juniperus conferta ‘Blue Pacific’ 3 gal.
223- Prunus cistena 5-6’ ht.
281- Pyracantha coccinea ‘Rutgers’ 3 gal.
463- Rosa ‘Meidrifora’ 3 gal.
143- Rosa ‘Radrazz’ 3 gal.
1,045- Rosa ‘Radcon’ 3 gal.
362- Spiraea japonica ‘Lemon Princess’ 10 gal.
113- Spiraea japonica ‘Lemon Princess’ 3 gal.
217- Spiraea japonica ‘Little Princess’ 10 gal.
369- Spirea japonica ‘Little Princess’ 3 gal.
246- Spiraea x bumulda ‘Goldflame’ 10 gal.
106- Taxus baccata ‘Repandens’ 18-24” ht.
Photo Credit:
Matthew P. Aubel, Realty Landscaping Corp./Real Winter, Inc.
 Linda Edelwich Realtor
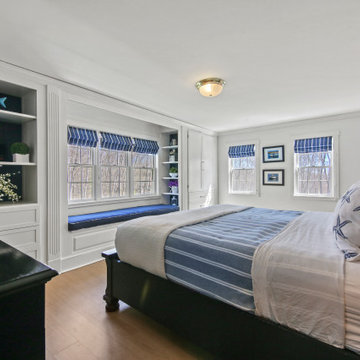
Nestled on 2.57 private acres in a highly sought-after neighborhood adjacent to Glastonbury line, this meticulously maintained custom home welcomes you through gracious double doors into a residence that emanates coastal charm. Richly toned floors contrast beautifully w/crisp neutral walls throughout, while the front-to-back living room serves as a stunning centerpiece w/its elegant gas-fireplace & French doors on either side opening to a screened porch-creating a delightful cross-breeze when open. No popcorn ceilings here! Open floor plan features a versatile home office with built-ins, flowing seamlessly into a gourmet kitchen showcasing a stylish island, custom cabinetry, & stainless-steel appliances adjacent to an expansive dining area w/stylish twin chandeliers. Practical luxury continues with a generous walk-in pantry & custom drop zone with shiplap detailing and shoe cubbies near the three-car garage with soaring ceilings. Upstairs, discover a sumptuous primary suite featuring a stylishly remodeled bathroom w/walk-in shower. Also complemented by a spacious walk-in closet & window flanked by custom built-ins, while two additional bedrooms share another beautifully updated bathroom & convenient 2nd-floor laundry. Additional space w/an unfinished walk-up attic & 880sf of finished extra living space in the walk-out lower level, complete with built in sauna, laminate flooring and ample storage-all crowned by the property's signature wrap-around porch. Roof '17
 Tile Doctor Ltd
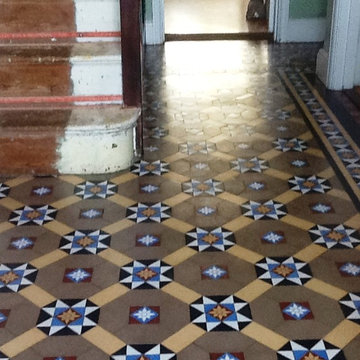
I was recently called down to a client’s house in the market town of Wellingborough, situated approximately 11 miles from Northampton. My client’s situation was an interesting one, as she had an old gas pipe sticking out of her Victorian tiled floor, very close to a doorway. Not only was this a bit of an eyesore, it was also significant trip hazard. The floor had been previously covered by carpet, so it is understandable that my client would have been initially unaware of the obstructive gas pipe.
Rather than risking an accident in the future, she asked me to see what I could do to rectify the issue. At the same time, I was commissioned to give the floor a much needed clean and re-seal.
My first priority was, of course, to deal with the exposed gas pipe. I was unsure whether the pipe was live or not, so I carefully removed the surrounding tiles, allowing a certified engineer access to it. He ensured that the pipe was capped below the tile line, allowing me to safely proceed with my repairs.
I returned a few days later, rescreened the area, and began to refit the tiles, carefully hand painting some of the black tiles to hide the damage and cracks. I also applied new grout to fix all of the replaced tiles into position, and this was left to set overnight.
Returning to the house the next day, I set about treating the floor to a normal strip, clean and re-seal of the entire floor. There was very little old sealer still remaining on the tiles, so I mixed a solution of Tile Doctor Pro Clean and water, before applying this to the floor. Pro Clean is a strong alkaline cleaner which also contains stripping properties, allowing it to both clean and break down any old sealer. The solution was worked into the tiles using a black scrubbing pad, and any excess residue was quickly absorbed using a wet-vac machine.
With older floors you never can tell if a damp proof membrane was installed and it can be troublesome applying a sealant to a damp floor so I left the whole floor to dry for seven days, giving it more than sufficient time to dry completely before the re-seal. To seal the tiles I used five coats of Tile Doctor Seal & Go Extra, which provides both a robust surface seal and the pleasing sheen finish requested by my client; Seal and Go Extra is especially suitable for exterior applications or damp floors due to its increased breathability.
My client was very glad to see the back of the gas pipe and pleased with the overall results of the clean and seal, as it had given this Victorian tiled floor – once hidden under carpet – new life and character. Additionally I’m sure that restoring such an original feature for the property has increased its value.
Phil Vissian
Northamptonshire Tile Doctor
 ONE Design
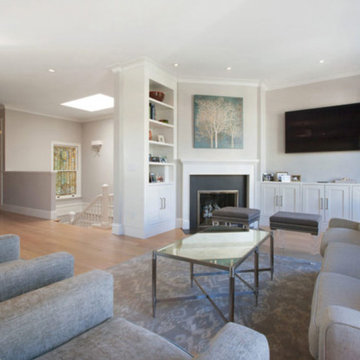
A diamond in the rough was polished to a new brilliance in this remodel. Moving the kitchen to be front and center of everything was the key to this remodel. Carrying the motif of less is more, this remodel emphasized the qualities this Parisian-styled home had with a modern open floor plan. Working through different design studies with the client, we identified the optimum layout and created space for an additional bedroom. Fusing old world details with contemporary living, we ensured the rehabilitation pays homage to its original detailing while expressing a bold narrative, delicately balanced within the original structural framework. Careful detailing of the structural elements ensured the work could proceed without affecting the unit below. Completed in 2014, this home now offers its young family the full urban experience of stylish San Francisco living.
 TKS Design Group
Free ebook, Creating the Ideal Kitchen. DOWNLOAD NOW
One of my very favorite parts of the design process is space planning and considering all the possible floor plan solutions at the beginning stages of the project. What works for one person as a solution may not be the best solution for the next. What you think you want going into the process, may change once all the space planning options are considered. This was exactly the case for this family. They thought they really wanted an island configuration.
Once we figured out the flow of the work triangle and saw how great a large peninsula would work for the family, we proceeded along those lines. The peninsula not only works great for food prep, it also allows more of a traditional table seating versus an island with everyone lined up in a row — not so great for daily dinner conversation.
To the right of that is a counter depth fridge and a speed oven which gives some flexibility with cooking and reheating smaller meals instead of having to heat the entire oven. An induction cooktop with its easy to clean surface keeps the space looking clean and tidy. Induction heats very quickly to high temperatures so is also wonderful to cook on. To the right of cooktop is a long stretch of countertop perfect for prep space.
Storage was very important to the homeowners. We took our time discussing where spice pull outs and tray dividers would be located, how the corner storage would be addressed and the location of the other items such as trash and recycling cans. We worked as many drawers as possible into the space, as I always recommend drawers over doors and/or roll outs as they offer the most flexibility and ease of use. Customizing these details is time well spent as having a place for everything and everything in its place, just like Mom said, really is the key to a functional and professionally designed kitchen.
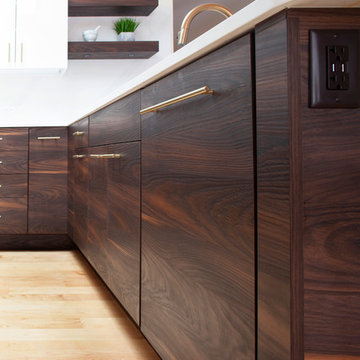
The talls and wall cabinets are white acrylic which combined with the white marble look quartz countertops and full height backsplash keep the room feeling light, bright and airy. The wood toned base cabinets are made of a textured laminate that has the look of wood but is a very easy to maintain product. Brushed gold metal on the hardware, faucet and chandelier add a warm touch and ties into the blond maple flooring. The neighboring breakfast room was also remodeled as part of the project and houses a small coffee station.
Designed by: Susan Klimala, CKBD
Photography by: Kari Firak
For more information on kitchen and bath design ideas go to: www.kitchenstudio-ge.com
 Precision Outdoors
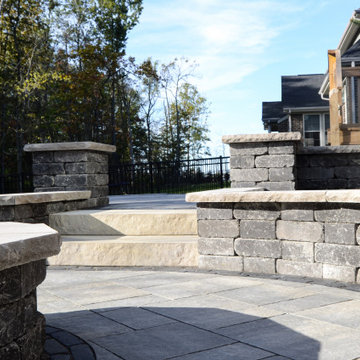
When the homeowners came to us, they had a desire to build out an outdoor space that would compliment their covered patio. Ideally, it would allow them to gather around and roast marshmallows in a cozy setting. When we inspected their property, it was fairly exposed to their neighbors; we proceeded to build out the space so it could have additional room for tables and chairs. Our team then worked to sink the fire pit patio area in, to add privacy with greenery to help create an intimate space to enjoy a fire and embrace family.
 Tile Doctor Ltd
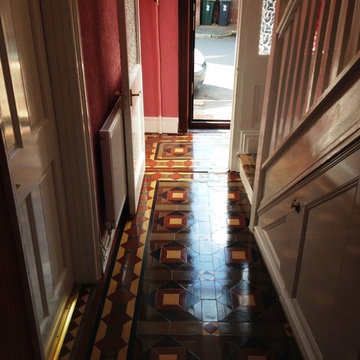
This Victorian tiled hallway at a house in the Forest of Dean had a very interesting pattern, consisting of an array of different colours, including shades of red, yellow and blue. Unfortunately, as you can see from the first photograph below, the tiles had lost all life, with the colours largely masked by months’ – or maybe even years’ – worth of ingrained dirt and muck. The floor as a whole was also suffering from a number of loose tiles that needed to be reset before it could be cleaned.
The property owner was keen to employ some professional assistance to restore the appearance of the floor and prevent it from getting in an even wrote state, and so contacted Tile Doctor who have a lot of experience working with Victorian tiled floors.
As mentioned, the loose tiles had to be repaired before the cleaning process could be started. I removed the tiles and extracted excess grout and old adhesive from the exposed concrete substrate using a vacuum, before putting the original tiles back into place and fixing them back into position carefully using fresh adhesive and matching grout.
Once happy the replaced tiles had set, I started the process of cleaning the entire area of hallway tiles using a combination of Tile Doctor Remove and Go to strip away the old sealer and Tile Doctor NanoTech HBU (formerly Ultra Clean) remover to get the tiles as clean as possible. The latter product contains nano-sized cleaning particles (hence the name) to reach difficult areas of trapped dirt, making it more effective than your run-of-the-mill tile cleaner. These two products were scrubbed into the tiles using a rotary machine fitted with a black scrubbing pad. The floor was then rinsed with water and the soiled residue was extracted with a wet vacuum.
I then paid particular attention to the grout, applying our alkaline-based multi-purpose cleaner Tile Doctor Pro-Clean to the grout lines, before scrubbing them with a narrow grout brush. This quickly had the grout looking clean again: I’d even go as far as to say that it matched it seamlessly with the fresh grout that had just been laid.
With the tile and grout as clean as it was possible to get it, I gave the whole floor a final rinse to neutralise the excess chemicals. I extracted as much water as possible with a wet vacuum and left the floor to dry overnight.
My first task upon returning to the property the next day was to check for any dampness. If you neglect to remove all excess moisture from the surface of the tiles before sealing it is more than likely going to cloud the sealer, rendering it less effective I’m protecting the stone against ingrained dirt and stains.
Once satisfied that the floor was completely dry, I proceeded to seal the tiles using multiple costs of Tile Doctor Seal and Go. Seal and Go is what we would classify as a topical sealer, meaning it rests on the surface of the tiles to act as a durable layer of protection against all kinds of muck. While providing surface protection, Seal and Go also adds a nice subtle sheen to the tiles, as per the customer’s request.
The customer was quite amazed at how quickly the appearance of the tiles had been restored. It was fantastic to see the colours we both knew were hidden in the tiles come to life once again. Another satisfied customer for sure!
Paul Wales
Monmouthshire Tile Doctor
19