
Search results for "Process requests" in Home Design Ideas

 Eades Wallpaper and Fabric
Escape into an enchanted forest with this majestic birch tree design. Soothing tones of beige, grey and cream provide a natural entryway that's both stylish and intriguing by Brewster Wallcovering.



 User
UserDetail of Iridescent Venetian plaster finish on all walls in Living Room by Christianson Lee Studios
Example of a transitional home design design in New York
Example of a transitional home design design in New York
Find the right local pro for your project


 threshold interiors
Location: New York, NY, United States
This Loft was tastefully renovated back in the '90s, but was due for an update and an expansion of the kitchen and dining areas to accommodate the client's cooking skills and entertaining needs. EnlargIing the island and adding cabinetry to delineate the office, bar and dining areas was a priority. The bathroom was updated to feel like a tranquil spa with beautiful new tile, plumbing fixtures and cabinets. Our biggest challenge was coordinating the entire renovation while our client was out of town for the Summer!
Photographed by: James Salomon


 Sans Soucie Art Glass
Glass Front Entry Doors that Make a Statement! Your front entry door is your home's initial focal point and glass front doors by Sans Soucie with frosted, etched glass designs create a unique, custom effect while providing privacy AND light thru exquisite, quality designs! Available any size, all glass front doors are custom made to order and ship worldwide at reasonable prices. Exterior entry door glass will be tempered, dual pane (an equally efficient single 1/2" thick pane is used in our fiberglass doors). Selling both the glass inserts for front doors as well as entry doors with glass, Sans Soucie art glass doors are available in 8 woods and Plastpro fiberglass in both smooth surface or a grain texture, as a slab door or prehung in the jamb - any size. From simple frosted glass effects to our more extravagant 3D sculpture carved, painted and stained glass .. and everything in between, Sans Soucie designs are sandblasted different ways creating not only different effects, but different price levels. The "same design, done different" - with no limit to design, there's something for every decor, any style. The privacy you need is created without sacrificing sunlight! Price will vary by design complexity and type of effect: Specialty Glass and Frosted Glass. Inside our fun, easy to use online Glass and Entry Door Designer, you'll get instant pricing on everything as YOU customize your door and glass! When you're all finished designing, you can place your order online! We're here to answer any questions you have so please call (877) 331-339 to speak to a knowledgeable representative! Doors ship worldwide at reasonable prices from Palm Desert, California with delivery time ranges between 3-8 weeks depending on door material and glass effect selected. (Doug Fir or Fiberglass in Frosted Effects allow 3 weeks, Specialty Woods and Glass [2D, 3D, Leaded] will require approx. 8 weeks).
 Windy City Painters
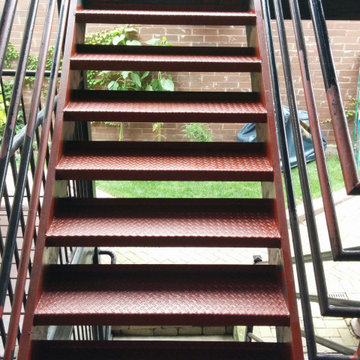
Metal Porch Stairs Painting in Lakeview, Chicago | Windy City Painters
Lakeview is one of Chicago's most architecturally diverse neighborhoods — vintage courtyard buildings, rooftop-deck condos, newly converted three-flats, and classic brick two-flats all line the same block. What they share is this: exposed metal. Back porch stairs, handrails, balconies, and exterior landings define the rear streetscape of nearly every building in the neighborhood. And in Chicago, exposed metal without proper protective coatings doesn't last.
Windy City Painters recently completed a full metal porch stairs painting project in Lakeview that illustrates exactly what professional metal refinishing looks like — and why preparation is everything.
The Problem: Years of Chicago Weather Had Done Their Damage
The client's back porch stairs were structurally sound — the diamond-plate steel treads were solid underfoot and the handrails were stable. However, the original paint system had long since failed. Surface rust had spread across the treads and risers. The old coating was peeling at every seam, edge, and weld point. Meanwhile, the black handrails were chalky and beginning to show rust at the bases.
Notably, this is a pattern Windy City Painters sees constantly in Lakeview. The neighborhood's diverse housing stock — ranging from pre-war courtyard buildings to 1990s condo conversions — often features original metal porch work that has never received a proper professional refinish. Homeowners and property managers patch-paint over rust for years, which ultimately accelerates the problem rather than solving it.
The solution isn't more paint. It's a complete system: mechanical rust removal, chemical treatment, primer, and a durable topcoat engineered for exterior metal.
The Windy City Painters Process for Metal Porch Stairs Painting
Windy City Painters approaches every metal porch stairs painting project with the same disciplined sequence. Consequently, our finishes outlast the competition by years.
Step 1 — Mechanical Preparation Our crew wire-brushes all loose rust, flaking paint, and surface contamination from every tread, riser, stringer, and handrail section. For heavier rust accumulation, we use grinding discs to cut down to clean, bare metal. This step is non-negotiable. Additionally, we pay particular attention to weld seams, bolt plates, and edge returns — the spots where moisture consistently hides and rust reliably starts.
Step 2 — Chemical Rust Treatment After mechanical prep, we apply a rust-converting primer to any remaining rust residue. This chemically neutralizes active rust and converts it into a stable, paintable surface. Moreover, the converter bonds to the metal and creates an additional barrier against future oxidation.
Step 3 — Rust-Inhibiting Primer Windy City Painters then applies a full coat of oil-based, rust-inhibiting primer to all prepared metal surfaces. This primer penetrates bare metal and creates the critical bond layer that everything else depends on. Skipping this step — or substituting a latex primer — is the single biggest reason DIY metal paint jobs fail within one season.
Step 4 — Two Topcoats of Industrial Enamel We apply two full coats of oil-based industrial enamel in the client's chosen color. For this Lakeview project, the stairs received a deep red finish and the handrails received gloss black — a classic combination that reads beautifully against the surrounding brick. Each coat is allowed to cure fully before the next is applied. Furthermore, we back-roll every surface to eliminate lap marks and ensure consistent film build.
Step 5 — Final Inspection and Cleanup Windy City Painters inspects every inch of the completed work before calling a project done. We remove all masking, clean up the work area completely, and walk the client through the finished result. In addition, we advise on a maintenance schedule to maximize the life of the coating system.
Why Metal Porch Stairs Painting Matters for Lakeview Properties
Metal porch stairs are among the most visible exterior features of Chicago residential buildings. Therefore, their condition directly affects curb appeal, property value, and — most importantly — structural safety. Rust that penetrates deeply enough will compromise the structural integrity of stairs and railings. Meanwhile, peeling paint signals to buyers, renters, and neighbors that a property is deferred.
In contrast, freshly refinished metal porch stairs signal exactly the opposite. They say the property is maintained, the owner takes pride in the building, and the structure is safe. For Lakeview landlords and homeowners alike, metal porch stair refinishing delivers an exceptional return on investment.
Professional Advice for Lakeview Homeowners
Before starting a metal porch stairs painting project, Windy City Painters recommends the following:
Don't paint over rust. Any rust left beneath a topcoat will continue to spread and will lift the new paint within months. Mechanical removal is essential.
Choose oil-based products for exterior metal. Latex paints don't adhere to metal as reliably and lack the film hardness needed to withstand foot traffic and freeze-thaw cycles.
Time your project right. Ideal conditions for metal painting are 50°F–90°F with low humidity. Chicago's spring and early fall are perfect windows.
Don't skip the primer. A properly applied rust-inhibiting primer is what separates a seven-year finish from a one-year failure.
Budget for full prep. Preparation typically represents 60–70% of the labor on a metal refinishing project. That's where the money is well spent.
Windy City Painters: Lakeview's Trusted Metal Refinishing Contractor
Windy City Painters has refined the process of exterior metal painting and refinishing across Chicago's North Side and Near West Side. We work in Lakeview regularly — on courtyard buildings, two-flats, coach houses, and commercial properties — and we understand the unique demands that Chicago's climate places on exterior metal. As a result, our coating systems are selected and applied for maximum longevity in this specific environment.
See more of our work and request a free estimate at www.windypainters.com.
Ready to transform your Lakeview home? Contact Windy City Painters for a free estimate — visit www.windypainters.com today. Proudly serving Wicker Park, West Town, Lincoln Park, Roscoe Village, Lakeview, Ukrainian Village, River North, and all of Chicago.
 Windy City Painters
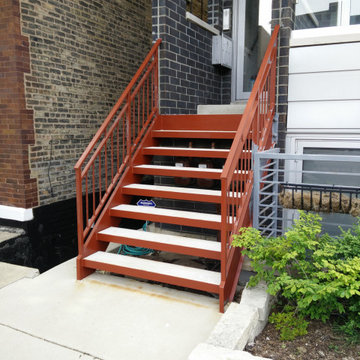
Does your iron fence look like Chicago winters have been winning the battle for years? That slow orange spread across pickets and rails is not just an eyesore - it is active corrosion undermining the structural integrity of metalwork that frames some of Chicago's most architecturally significant residential properties. Windy City Painters addresses iron fence rust at the source, using professional-grade rust conversion chemistry and direct-to-metal coatings engineered for the specific abuse Chicago's climate delivers.
PROJECT OVERVIEW
This project involved a heavily rusted ornamental iron fence on a Chicago North Side residential property. Rust had progressed beyond surface oxidation into moderate pitting on lower rails, a pattern Windy City Painters sees frequently on properties within blocks of treated roadways where salt drift accelerates corrosion. The scope included mechanical descaling, chemical rust conversion, DTM priming, and a durable gloss topcoat matched to the original fence color.
MATERIALS AND PRODUCTS
Ospho Rust Converter: A phosphoric acid-based treatment that chemically reacts with iron oxide, converting it to iron phosphate - a stable, paintable compound. Corroseal Water-Based Rust Converter is an alternative for situations requiring lower VOC handling. Rust-Oleum Professional DTM Primer and Sherwin-Williams DTM Acrylic Coating serve as the primary coating system, formulated for direct metal adhesion with built-in rust inhibitors. For structurally compromised sections, welding is coordinated before any chemical or coating work begins.
THE PROCESS
Step 1 - Mechanical Preparation: Wire wheel grinding on an angle grinder removes loose rust scale, mill scale, and flaking paint. For advanced pitting, Windy City Painters deploys a needle gun descaler, which impacts the metal surface thousands of times per minute to drive scale from deep cavities. This step determines whether the fence can be coated or needs welding first.
Step 2 - Chemical Rust Conversion: Ospho or Corroseal is brushed onto all remaining rust surface. These products do not simply seal rust - they react with it. The conversion process takes 24 hours to fully cure before topcoating. Skipping this step is the single most common reason iron fence paint jobs fail prematurely.
Step 3 - DTM Priming: Sherwin-Williams DTM or Rust-Oleum DTM primer is applied by brush to ensure full penetration around decorative elements, picket tips, and weld joints. Spray application is used on open sections for even film build. DTM formulations bond directly to prepared metal without a separate shop primer.
Step 4 - Finish Coating: A DTM topcoat in gloss or semi-gloss provides the final weather barrier. Gloss is preferred for iron fencing because the harder surface sheds water more effectively and resists dirt adhesion between maintenance cycles. Windy City Painters applies two finish coats for maximum film thickness.
CHICAGO-SPECIFIC CHALLENGES
Chicago's freeze-thaw cycle is the primary enemy of iron fence coatings. Water infiltrates micro-cracks in paint film, freezes, expands, and delaminate coating from beneath. Properties on the North Side and Near West Side also contend with lake-effect humidity that keeps metal surfaces damp for extended periods, slowing cure times and promoting under-film corrosion if preparation is inadequate. Greystones and Victorian brownstones typically feature ornate cast iron or wrought iron fencing with complex geometries that trap moisture and demand hand-brush application to fully coat recesses.
WHAT TO EXPECT LONG-TERM
A properly prepared and coated iron fence in Chicago should hold 5-8 years before requiring recoating. Annual inspection of weld joints, picket tips, and base rails closest to grade will identify early rust return. Addressing small spots with touch-up converter and primer extends service life significantly between full recoats.
PRO TIPS
Tip 1: Never pressure wash a rusted iron fence immediately before painting. Water drives moisture into pits and delays the surface drying needed for chemical converter adhesion. Allow 48 hours of dry weather before prep begins.
Tip 2: Picket tips and rail ends are the first failure points. These end-grain equivalent areas on metal concentrate corrosion. Ask your painter to apply an extra brush coat to every tip and terminus.
Tip 3: Black is the traditional and most durable color choice for iron fencing. Dark pigments absorb UV rather than reflecting it, reducing thermal cycling stress on the paint film at color change boundaries.
FAQ
Q: What does iron fence painting cost in Chicago?
A: Most residential iron fence painting in Chicago ranges from $400 to $1,200 depending on linear footage, rust severity, prep method required, and whether structural welding is needed before Windy City Painters can coat the surface.
Q: How do I know if my fence needs a welder before painting?
A: If you can press a screwdriver through a rail or picket, the metal wall has failed. Windy City Painters inspects all fencing before quoting and identifies weld-required sections so repairs happen before any coating investment.
Q: Is Ospho or Corroseal better for my fence?
A: Both convert rust effectively. Ospho is solvent-based and fast-acting, preferred for heavy rust. Corroseal is water-based with lower odor, preferred in enclosed or residential settings where off-gassing is a concern. Windy City Painters selects based on site conditions.
Q: Can iron fence painting be done in winter in Chicago?
A: Application requires temperatures above 50 degrees Fahrenheit for DTM coatings to cure properly. Most iron fence painting in Chicago runs April through October, with scheduling flexibility based on extended warm stretches.
Q: How do I maintain my fence between professional recoats?
A: Inspect annually in spring. Sand any rust spots to bare metal with 80-grit paper, apply Ospho, let cure 24 hours, then spot-prime with DTM primer and touch up with finish coat. Windy City Painters offers maintenance inspections.
Q: Do you paint courtyard building fences and coach house gates?
A: Yes. Multi-unit courtyard buildings and coach houses are common in the North Side neighborhoods Windy City Painters serves. We coordinate with property managers and HOAs for larger perimeter fence projects.
Q: How long after painting can I touch the fence?
A: DTM coatings are typically dry to touch in 2-4 hours and hard dry in 24 hours. Full cure for maximum hardness takes 7 days. Windy City Painters advises against pressure washing or heavy contact during that cure window.
Visit windypainters.com to request your free iron fence assessment and project quote.

 LM // PM Productions, LLC
Large trendy gender-neutral light wood floor and beige floor playroom photo in New York with gray walls
 LUKAS MACHNIK INTERIOR DESIGN
NBCUniversal, Inc + Lukas Machnik Design
Inspiration for a coastal home design remodel in Los Angeles
Inspiration for a coastal home design remodel in Los Angeles

 ODS Architecture
Inspiration for a contemporary black tile and mosaic tile light wood floor and beige floor powder room remodel in San Francisco with flat-panel cabinets, light wood cabinets, a wall-mount toilet, black walls, an integrated sink, solid surface countertops and white countertops
 Free Lancing
Effective residential construction project management is crucial in today’s fast-moving building industry. It means overseeing every step of building a home, from planning to finishing, to ensure projects are completed time, within budget, and with high quality. Unlike commercial projects, residential projects require special attention to meet homeowners' unique needs and wishes, requiring a customized approach from the beginning to the end.
In 2025, the construction sector will use advanced technologies like AI and integrated project delivery (IPD) to streamline processes and improve stakeholder collaboration. However, project managers face significant challenges, including managing risks, maintaining quality control, and ensuring effective communication among team members.
A WIP Report (Work-in-Progress Report) is a key tool that helps track a project's budget, progress, and resource use. It provides clear insights, making managing costs easier, avoiding delays, and making informed decisions.
By adopting best practices and using modern construction management tools, project managers can overcome these challenges and deliver successful residential construction projects that meet client expectations and contribute to a sustainable future.
This article provides a brief overview of residential construction project management, highlights its importance, and touches on the challenges faced by project managers while incorporating the latest trends and technologies in the field.
Types of Residential Construction Management
Here are the different types of Residential Construction Management:
Single-Family Homes: These are standalone houses built for individual families. Managing these projects involves overseeing construction from planning to completion, ensuring that the home meets the owner's preferences and budget.
Multi-Family Housing: This includes apartments, condominiums, and townhouses. Projects of this type require managing multiple units, often with shared facilities, and ensuring compliance with local building codes.
Custom Home Building: This involves constructing homes tailored to specific client needs. Close collaboration with architects and designers is required to ensure the house reflects the owner's personality and preferences.
Home Renovation and Remodeling: These projects focus on updating or expanding existing homes. They often involve working with subcontractors for specialized tasks like electrical or plumbing work.
Components of Residential Construction Project Management
Managing a residential construction project requires carefully coordinating people, materials, and timelines. A well-structured approach ensures efficiency, cost control, and high-quality results.
Roles and Responsibilities
A project manager plays a vital role in residential construction. They oversee every step from planning to completion and ensure the project stays on schedule, within budget, and meets quality standards.
Project Manager’s Role in Home Construction
The project manager is responsible for organizing tasks, managing resources, and solving problems that arise during construction. They coordinate between different teams, track progress, and ensure safety regulations are followed.
Collaboration with Contractors, Architects, and Stakeholders
Successful residential construction requires teamwork. Project managers work closely with architects to bring designs to new heights, coordinate with contractors to manage labor and materials, and keep stakeholders (such as homeowners and investors) informed about project updates.
Client Communication and Expectations Management
Clear communication with clients is essential. The project manager keeps homeowners updated on timelines, changes, and challenges. Setting realistic expectations and providing regular updates, they help avoid misunderstandings and keep the project running smoothly.
Project Scope & Planning
Practical project planning sets the foundation for a successful residential construction project. It ensures clear goals, minimizes risks, and keeps the project on track.
Defining Project Objectives and Deliverables:
Clearly outlining what needs to be done and what the final result should look like is essential. This involves setting specific, measurable goals that align with the homeowner's vision and budget.
Managing Homeowner Expectations and Scope Creep:
Homeowners often have changing needs or ideas. Effective project managers must manage these expectations to prevent "scope creep," which can delay projects and increase costs. This involves open communication and setting clear boundaries.
Ensuring Compliance with Zoning Laws and Permits:
Before construction begins, it's crucial to ensure that all necessary permits are obtained and that the project complies with local zoning laws. This step avoids costly fines and delays, ensuring the project moves forward smoothly.
Budgeting & Cost Control
Proper budgeting is essential for keeping residential construction projects financially viable. Effective cost management prevents overspending and ensures profitability.
Accurate Cost Estimation for Residential Projects
A precise cost estimate considers labor, materials, permits, and unexpected expenses. Using historical data and Sage 300 CRE for financial management improves accuracy and helps set realistic budgets.
Budget Allocation and Tracking
Allocating funds efficiently ensures that each phase of the project receives the necessary resources. Tracking expenses through Construction & Financial Dashboards allows for real-time monitoring and early detection of budget deviations.
Preventing Budget Overruns
Uncontrolled costs can derail a project. Regular financial reviews, automated alerts for overspending, and contingency planning help keep expenses in check and prevent financial strain.
Scheduling & Timeline Management
Timely project completion is crucial in residential construction. Effective scheduling minimizes delays and ensures a smooth workflow.
Creating Detailed Project Schedules
A structured schedule outlines all tasks, deadlines, and dependencies. Breaking down the project into phases, planning, execution, and finishing, helps maintain order and clarity.
Preventing Delays & Meeting Deadlines
Delays can result from labor shortages, weather conditions, or supply chain issues. To avoid problems, it’s good to check for risks ahead of time, add extra time to schedules, and keep everyone on the same page.
Using Gantt Charts and Critical Path Methods
CPM for Construction helps identify critical activities that directly impact project completion, while Gantt charts provide a visual timeline of tasks. Both tools optimize scheduling and improve efficiency.
Residential Construction Project Management Phases
Managing a residential construction project effectively requires a structured approach through various phases. Each phase plays a critical role in ensuring the project's success, from initial planning to completion.
Pre-Construction Phase
The pre-construction phase sets the foundation for a smooth and efficient building process. Proper planning at this stage helps prevent costly changes and delays later.
Site Analysis & Approvals: A thorough site analysis assesses soil conditions, topography, and environmental factors. Feasibility studies evaluate project viability, including costs and regulatory compliance. Obtaining zoning approvals, permits, and other legal clearances is crucial before breaking ground.
Selecting Materials and Procurement Strategies: Choosing the right materials impacts durability, sustainability, and cost efficiency. A well-planned procurement strategy, including bulk purchasing and reliable supplier partnerships, ensures timely delivery and cost savings. Using Sage 300 CRE for procurement management helps streamline material sourcing and financial planning.
Construction Phase
The construction phase transforms plans into reality. Effective coordination and strict quality control ensure a successful build.
Resource Allocation and Workflow Coordination: Efficiently managing labor, equipment, and materials is key to maintaining progress. Using CPM for Construction, project managers can allocate resources strategically, prevent bottlenecks, and optimize workflows for timely completion.
Project Closeout & Handover
The final phase of residential construction project management is crucial for ensuring a smooth transition from construction to occupancy. Proper closeout procedures guarantee quality, client satisfaction, and long-term project success.
Final Inspections and Quality Assurance: Before finishing the project, a final inspection checks that everything meets safety rules and quality standards. Any problems need to be fixed quickly. Using Procore helps make inspections and tracking issues easier, ensuring a high-quality final product.
Client Walkthrough and Support: A final check helps homeowners see the finished work, ask questions, and make sure it meets their expectations. This is also a chance to explain important home features and maintenance tips. Good communication here builds trust and strengthens relationships.
Warranty Management and Feedback: Efficient warranty management ensures clients get quick help for any issues after construction. A clear process for tracking requests and keeping in touch with homeowners boosts satisfaction. Collecting feedback helps improve future projects. Using S-Curve Forecasting tracks performance trends and refines management strategies.
Software for Residential Construction Project Management
The integration of technology in residential construction project management has revolutionized the way projects are planned, executed, and monitored. Digital tools streamline operations, reduce costs, and improve communication, making them essential for modern construction firms.
Importance of Digital Tools
Investing in digital tools is crucial for construction firms as it transforms the industry by enhancing efficiency, accuracy, and collaboration across the entire project lifecycle. They also improve project management by streamlining processes, automating tasks, and facilitating real-time stakeholder communication.
Top Construction Management Software for Residential Projects
Several software solutions are available for managing residential construction projects:
Procore: Known for its comprehensive project management features, including document management and collaboration tools.
Sage 300 CRE: Offers robust accounting and financial management capabilities, ideal for large-scale construction projects.
Buildertrend: Specializes in residential construction, providing tools for project scheduling, budgeting, and client communication.
CoConstruct: Focuses on custom home building and remodeling, offering features for estimating, scheduling, and project management.
WIP Reports: Useful for tracking work-in-progress and managing project finances effectively.
Features Comparison and Best Use Cases:
Procore: Best for large projects requiring extensive collaboration and document management.
Sage 300 CRE: Ideal for firms needing robust financial management.
Buildertrend: Suitable for residential builders focusing on client communication and project scheduling.
CoConstruct: Perfect for custom home builders who need detailed estimating and scheduling tools.
WIP Reports: Useful for firms needing to track project finances closely.
How Software Improves Project Efficiency
Construction management software significantly enhances project efficiency in several ways:
Automating Accounting and Job Costing: Software like Sage 300 CRE automates financial tasks, reducing manual errors and improving budget tracking.
Streamlining Document Management and Communication: Tools like Procore centralize documents and facilitate real-time communication among team members, reducing misunderstandings and delays.
Mobile-Friendly Solutions for Real-Time Tracking: Mobile apps from platforms like Buildertrend allow for on-site access to project data, enabling real-time tracking and decision-making.
These digital tools and software solutions are essential for modern residential construction project management, offering benefits such as improved efficiency, enhanced collaboration, and better financial control.
Challenges in Residential Construction Project Management
Residential construction projects face a variety of challenges that can impact their success. Here are some of the key issues project managers encounter:
Managing Subcontractors and Labor Shortages
One of the biggest challenges in residential construction is managing subcontractors and dealing with labor shortages. Subcontractors often have their own schedules and priorities, which can lead to delays if not coordinated properly. Additionally, labor shortages can slow down projects and increase costs due to the need for overtime or hiring temporary workers.
Budget Overruns and Unexpected Costs
Budget overruns are common in residential construction due to factors like material price fluctuations, unexpected site conditions, or changes in project scope. Effective budget management involves regularly monitoring expenses and having contingency plans for unexpected costs.
Changing Construction and Eco Rules
Construction and Eco Rules are always changing, so project managers need to keep up with the latest regulations. This involves following guidelines for saving energy, protecting the environment, and ensuring safety. Ignoring these rules can lead to fines, delays, or even stopping the project.
Best Practices
To ensure your residential construction projects run smoothly and successfully, follow these essential best practices:
Setting Clear Project Goals and Milestones
Clearly defining what you want to achieve is the first step to success. Set specific, measurable, achievable, relevant, and time-bound (SMART) goals. This helps everyone involved understand what needs to be done and by when. For example, instead of saying "build a house," say "build a house with three bedrooms and two bathrooms within the next nine months."
Stakeholder Collaboration
Good communication is key to keeping everyone on the same page. Regular meetings with contractors, suppliers, and homeowners help prevent misunderstandings and ensure that everyone knows what's happening and what's next. This open dialogue also helps resolve issues quickly, preventing small problems from becoming big delays.
Using Data-Driven Insights for Decision-Making
Making decisions based on facts rather than guesses is crucial. Use data and analytics to understand project progress, identify potential issues early, and make informed decisions. For instance, if data shows that a particular material is consistently causing delays, you can plan ahead to avoid those delays in the future.
Proactive Risk Management Strategies
Things don't always go as planned, so being prepared is essential. Identify potential risks early and have a plan to manage them. This might include having backup suppliers, planning for weather conditions, or setting aside extra funds for unexpected expenses. Being proactive can prevent small issues from turning into major problems.
Conclusion
Effective residential construction project management requires careful planning, clear communication, and the right digital tools. From single-family homes to multi-family housing and custom projects, managing timelines, budgets, and quality is essential for success.
By following best practices, using project management software, and staying ahead of industry trends, project managers can ensure smooth execution and client satisfaction despite challenges like labor shortages, budget overruns, and regulatory compliance; modern technology and strategic planning help mitigate risks.
Construction firms can improve efficiency, enhance collaboration, and maintain financial control by adopting advanced tools like Procore, Sage 300 CRE, and Buildertrend. A well-managed project delivers a quality home and builds trust and long-term success in the industry.
FAQs
What is residential construction project management?
It involves overseeing all aspects of building residential properties, from initial planning and design to construction and completion, ensuring projects are completed on time, within budget, and to the desired quality standards.
How can I prevent budget overruns in my construction project?
Accurate cost estimation, continuous budget tracking, and having contingency plans for unexpected expenses are key strategies to prevent budget overruns.
What are the main stages of a residential construction project?
The primary stages include design, pre-construction, procurement, and construction.
How does construction management software improve project efficiency?
It streamlines processes like scheduling, budgeting, and communication, providing real-time data access and collaboration among stakeholders, which enhances overall project efficiency.
How can I ensure my project complies with local building codes and regulations?
Engage professionals familiar with local laws, obtain all necessary permits before starting, and conduct regular inspections to ensure adherence to building codes and regulations.

 Angela Todd Studios | Portland, OR
We went all out on the detail in this home. From the large floor-to-ceiling windows in the living room to the powerful statement tiles in the bathroom, we gave this home a seriously stylish punch, keeping the interior contemporary with unconventional accents that our clients love.
For more about Angela Todd Studios, click here: https://www.angelatoddstudios.com/
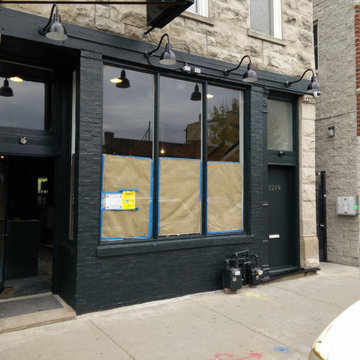 Windy City Painters
Painter Near Me Chicago - Professional Painting Services by Windy City Painters
Finding a skilled painter near me in Chicago is easier when you know what to look for, and Windy City Painters delivers the craftsmanship Chicago homeowners trust for greystones, vintage two-flats, classic bungalows, and modern condos throughout the city.
Project Overview
This project showcases Windy City Painters completing professional interior and exterior painting services for a Chicago-area client. The building's vintage character called for careful color selection and precise application to honor original architectural details while refreshing every surface.
Materials and Products Used
Windy City Painters selects premium paints from trusted manufacturers including Sherwin-Williams and Benjamin Moore, chosen specifically for Chicago's climate demands. Primers, fillers, and caulks are all professional-grade for lasting adhesion and durability.
Our Step-by-Step Process
Step 1 - Prep and Repairs: All surfaces are cleaned, sanded, and patched. Cracks in plaster or drywall are filled and feathered smooth before any painting begins.
Step 2 - Priming: A quality primer is applied to ensure proper adhesion, uniform sheen, and long-term durability across all surfaces.
Step 3 - Paint Application: Multiple coats are applied using the right tools for each surface - brushes, rollers, and sprayers where appropriate.
Step 4 - Final Inspection: Windy City Painters conducts a detailed walkthrough with the homeowner to confirm every detail meets our high standard.
Chicago-Specific Challenges
Older Chicago homes present unique challenges including lead paint layers, aging horsehair plaster, moisture from harsh winters, and intricate vintage millwork. Windy City Painters is trained to handle all of these safely and professionally.
Results
Clients consistently report dramatic improvements in curb appeal, interior atmosphere, and overall home value after working with Windy City Painters.
Pro Tips Before You Start
Always test for lead paint in homes built before 1978. Budget for surface prep - it determines final quality. Choose paints rated for Chicago's freeze-thaw cycles for exterior projects.
See more work and request a free estimate at windypainters.com.
Frequently Asked Questions
Q: How do I find a reliable painter near me in Chicago? / A: Look for licensed, insured contractors with strong local reviews. Windy City Painters is a trusted painter near me in Chicago with a proven track record serving greystones, bungalows, and vintage buildings throughout the city.
Q: What surfaces can a painter near me in Chicago handle? / A: Windy City Painters handles drywall, plaster, wood trim, cabinets, brick, and metal surfaces, making us a comprehensive painter near me in Chicago for any project large or small.
Q: How important is surface preparation? / A: Proper preparation is the foundation of any quality paint job. As your painter near me in Chicago, Windy City Painters dedicates significant time to prep work ensuring flawless, long-lasting results every time.
Q: Do you handle lead paint safely in older Chicago homes? / A: Yes, Windy City Painters follows all safety protocols for lead paint in older homes, making us the responsible painter near me in Chicago for vintage and pre-1978 buildings.
Q: What paint brands does Windy City Painters recommend? / A: As a professional painter near me in Chicago, Windy City Painters recommends Sherwin-Williams and Benjamin Moore for their durability, color accuracy, and performance in Chicago's demanding climate.
Q: Can you paint exterior surfaces in Chicago winters? / A: Exterior painting requires temperatures above 50 degrees Fahrenheit. Windy City Painters, your painter near me in Chicago, schedules exterior projects during appropriate seasonal windows for best results.
Q: How many coats of paint are typically needed? / A: Most projects require two finish coats over primer. Your painter near me in Chicago at Windy City Painters assesses each surface individually to determine the right number of coats.
Q: Do you offer color consultation services? / A: Yes, Windy City Painters provides color guidance as part of our painter near me in Chicago service, helping you select shades that complement your home's architecture and style.
Q: Can Windy City Painters match existing paint colors? / A: Absolutely, as your skilled painter near me in Chicago, Windy City Painters uses professional color-matching technology to seamlessly blend new paint with existing finishes throughout your home.
Q: How do I get a free estimate from a painter near me in Chicago? / A: Simply visit windypainters.com or call us directly. Windy City Painters makes it easy to connect with a professional painter near me in Chicago for a no-obligation estimate.

 Jon Allen Fine Metal Art
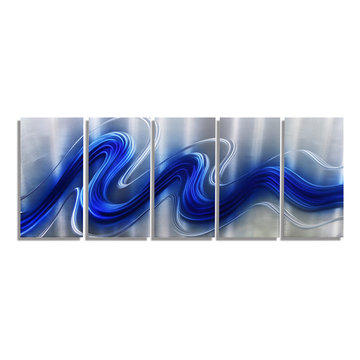
Electric Blue by Jon Allen - a stunning, handmade abstract metal wall painting that spans five panels in cobalt blue and silver. It measures 64" x 24" x 2" (162.56 cm x 60.96 cm x 5.08 cm) including suggested 1" spacing between the panels.
'Electric Blue' is a unique, brightly colored metal painting is the perfect abstract metal accent to add excitement and intrigue to your decor. It's a handmade piece of original artwork that features beautiful blue tones and is a three-dimensional wall sculpture that will be that modern touch every home needs. My hand textured intricacies and carvings into the metal capture and reflect surrounding light sources creating enhanced interaction with dramatic illusions of depth and 3D movement as viewed from different angles. Hang it in your living room, bedroom, kitchen, bathroom, office, or outdoors under covered areas like your patio or pool area. This abstract metal art will delight your guests!
 Windy City Painters
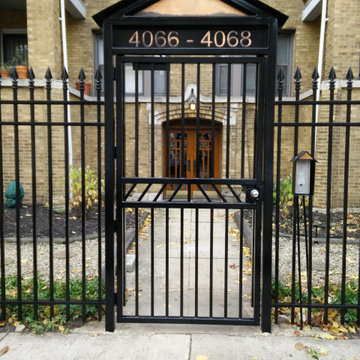
s your ornamental iron fence flaking rust onto the sidewalk every time Chicago wind kicks up? That is not a cosmetic problem - it is a sign that bare metal is exposed to moisture and the corrosion cycle is accelerating. Windy City Painters restores iron fencing on Chicago greystones, two-flats, Victorian brownstones, and courtyard buildings using professional-grade rust conversion and rust-inhibitive systems designed for the Midwest climate.
PROJECT OVERVIEW
Ornamental iron fence painting in Chicago is a multi-stage restoration process, not a simple brush-and-go job. Chicago properties - particularly the dense residential streetscapes of the North Side and Near West Side - feature decorative iron fencing that ranges from simple tubular picket to elaborate spear-top and scroll designs. When paint fails on iron, rust accelerates quickly. Windy City Painters evaluates each fence for structural rust-through, surface rust, and paint adhesion before recommending a scope of work.
MATERIALS AND PRODUCTS
Rust conversion: Ospho (phosphoric acid-based) or Corroseal (latex rust converter) depending on rust severity and surface porosity. Both chemically convert iron oxide into a stable compound that primer bonds to permanently rather than simply coating over active rust.
Primer: Rust-Oleum DTM (Direct to Metal) rust-inhibitive primer or Sherwin-Williams DTM Acrylic Coating primer, both formulated to penetrate weld seams, crevices, and pitted metal surfaces where brush application is essential.
Finish coat: Sherwin-Williams DTM Acrylic in satin or semi-gloss for UV resistance, color retention, and flexibility through freeze-thaw cycles. Two finish coats applied by brush for full coverage on ornamental profiles.
THE PROCESS
Step 1 - Mechanical Preparation: Wire wheel grinding with angle grinders removes loose rust and failing paint across flat rail surfaces. Needle gun descaling reaches weld joints, picket bases, and decorative scroll details where wire wheels cannot access. Windy City Painters inspects for rust-through after mechanical prep and flags any sections needing welding before painting proceeds.
Step 2 - Rust Conversion: Ospho or Corroseal is applied by brush to all remaining rust-affected surfaces. Ospho reacts with iron oxide over 24 hours, converting it to iron phosphate. Corroseal encapsulates and converts simultaneously. Both products create a chemically stable surface that dramatically improves primer adhesion on previously rusted iron fence sections.
Step 3 - Primer Application: Rust-Oleum DTM or Sherwin-Williams DTM rust-inhibitive primer is worked into every joint, crevice, and ornamental detail by brush - never sprayed alone on open ironwork where overspray and thin coverage risk undercutting. Full wet film thickness is verified before drying. Windy City Painters does not rush cure times between coats.
Step 4 - Finish Coats: Two coats of Sherwin-Williams DTM Acrylic topcoat are applied by brush for maximum film build on vertical pickets and horizontal rails. Color is matched to original or updated per homeowner preference. Semi-gloss finish resists dirt accumulation and makes future cleaning easier between repainting cycles.
CHICAGO-SPECIFIC CHALLENGES
Chicago presents iron fence painting conditions that milder climates do not. Road salt spray from city streets migrates onto fence bases through snowplow activity and foot traffic. Freeze-thaw cycling - sometimes occurring 30 or more times per winter - expands and contracts metal faster than paint can flex if film build is inadequate. High summer humidity slows cure times and risks blushing in topcoats applied too early in the morning. Windy City Painters schedules iron fence work during appropriate temperature and humidity windows and never applies coatings when rain is forecast within 24 hours.
WHAT TO EXPECT LONG-TERM
A properly prepped and primed iron fence in Chicago should hold a quality DTM finish for 5-8 years before needing significant maintenance. Annual inspection of base welds and picket bottoms - areas where water pools - catches early rust before it requires full mechanical prep again. Touch-up painting of isolated spots extends coating life significantly.
PRO TIPS
Tip 1: Never let a painter skip straight to topcoat on a rusty fence. Active rust under paint fails within one or two seasons. Ospho or Corroseal conversion is non-negotiable on Chicago iron.
Tip 2: Inspect fence picket bases at ground level every fall. That is where water collects, salt concentrates, and rust begins its worst work. Early touch-up costs far less than full restoration.
Tip 3: Request brush application on ornamental ironwork rather than spray-only. Brush work ensures wet paint is physically worked into every joint and crevice where rust originates.
Ready to restore your iron fence? Visit windypainters.com to schedule a free estimate with Windy City Painters.
Q: What does iron fence painting cost in Chicago? A: Iron fence painting in Chicago typically runs $8-$18 per linear foot. Rust severity, fence height, ornamental detail complexity, and whether welding repairs are needed all affect the final cost for professional iron fence restoration.
Q: How do you treat rust before painting an iron fence? A: Windy City Painters uses Ospho or Corroseal rust converters after mechanical prep. These products chemically neutralize iron oxide, creating a stable surface that rust-inhibitive primer bonds to permanently rather than painting over active corrosion.
Q: What primer is best for painting a rusty iron fence in Chicago? A: Rust-Oleum DTM and Sherwin-Williams DTM rust-inhibitive primers are our go-to products for iron fence painting in Chicago. Both are formulated for direct metal application and resist the moisture and freeze-thaw stress Chicago winters produce.
Q: How long does painted iron fencing last in Chicago? A: A professionally prepped and primed iron fence in Chicago holds a quality DTM finish for 5-8 years. Annual inspection of base welds and low points, with spot touch-up as needed, extends that service life considerably.
Q: Do I need a welder before painting my iron fence? A: If rust has eaten through fence rails or pickets structurally, Windy City Painters will identify those sections during prep and recommend welding before any primer or paint is applied. Painting over structurally failed metal is a waste of money.
Q: Can I paint an iron fence myself? A: DIY iron fence painting without proper rust conversion and DTM primer systems almost always fails within two seasons in Chicago. Professional prep, product selection, and application technique are why Windy City Painters results last 5-8 years.
Q: What neighborhoods does Windy City Painters serve for iron fence work? A: Windy City Painters serves Chicago North Side and Near West Side neighborhoods, working on greystones, two-flats, Victorian brownstones, courtyard buildings, and coach houses throughout the city.
 LU Design Build
Before their move, the family had always lived in subdivisions. “Our previous homes were a great place to raise our kids, and we always loved getting to know our neighbors,” she notes. However, she and her husband began looking for a home with a little extra outdoor space and a more manageable interior that would accommodate them as they grew older.
Though they’d toured many houses and even put contracts on a few, this Westwood ranch-style home spoke to them as soon as they stepped foot through the front door. “The house and the property just had the feeling I was looking for, even though it wasn’t in the best condition yet. It was just so peaceful.”
Peacefulness and a connection to nature were the main focuses for the renovation. The homeowners sought the help of Rochelle McAvin of LU Design Build to make their vision come to life.
“I needed a designer who understood my love for gently-used furniture, which I find more personal and interesting. They also needed to get the look I was going for; Mid-century modern with a twist. I felt that LU Design Build was creating the kind of projects I was looking for.”
Designer Rochelle McAvin has worked in the design build industry for over six years, and she focuses mainly on residential remodeling. For all projects, she believes in letting the clients’ priorities fuel the design. “Form follows function, and we wanted to make this house as efficient and comfortable as possible for the homeowners.”
The goal of the project was to create a personal oasis for the pair they could enjoy for years to come while leaving a minimal environmental footprint. They aimed to make the space feel calm, serene and interesting without making the entire house white.
The home is interesting from the moment you enter. To the right of the front door is a sunken living room that the homeowners lovingly call “The Pit.” Built in 1967, the sunken living room was original to the home, but the previous owners leveled the space in a 1980s remodel. Both the new owners and Rochelle agreed that restoring the sunken floor plan gave the home character, though they made it smaller to increase coziness and intimacy.
Primarily used as a family gathering place and game room, “The Pit” needed ample seating and enough space for visitors to pull up a chair and enjoy each other’s company. The large couch was a find from Stash Home, and the gray swivel chair and roomy coffee table came from Pottery Barn. The homeowner finished off the space with vintage ottomans from an estate sale to act as side tables. Large windows at the front of the room give a perfect view of the pond just outside and let in plenty of natural light during the day. Dimmable light fixtures from West Elm give the room a warm glow once the sun sets.
Because the homeowners don’t always require a lot of seating, they opted for a table in their dining room with many removable leaves, allowing it to shrink down to the size of a desk. A Napoleon electric fireplace adds to the warm ambience at dinners, gently lighting the striking wallpaper.
White oak floors and tongue-and-groove white ceilings lead from the front of the home back into the main living space. The living room has vaulted ceilings and an original brick fireplace. The homeowners wanted to find a perfect balance between bright and cozy; the windows and the added skylights gave the room great natural light, but the team added an oiled plywood wall to warm up the color scheme. The fireplace, painted beige in a previous remodel, received a fresh coat of gray paint to act as the room’s anchor.
The homeowner found the majority of the home’s furniture from Facebook marketplace. Buying furniture second-hand is a great way to recycle interesting pieces and minimize one’s environmental footprint in the remodeling process. “She has such a good eye bringing in earthy, vintage pieces that made every space more personal and cozy,” says Rochelle. “I think she nailed it!”
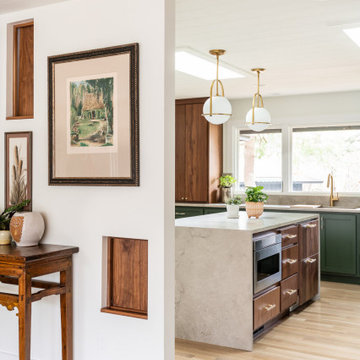
In the kitchen, the homeowner desired a space that “felt like any other room. I didn’t want it to scream ‘kitchen.’” To achieve this look, the team chose natural Missouri limestone from SFI for the island and countertops. The walnut cabinets are custom-made from Hulls Cabinetry; the bottom cabinets are painted evergreen to match the lush trees shown through the large windows. Lucite hardware with brass accents from CB2 add interest and ease. The Facebook marketplace table keeps the space light and fun.
To avoid clutter, the team created a butler’s pantry off the kitchen to house the family’s odds and ends, as well as the wife’s house plant collection. “We created a bright, functional space for her off the main living area for her to stow all her keepsakes," comments Rochelle. "She’s a collector, and we wanted to give all her things a home without affecting the rest of the home’s design.”
Rochelle knew the main bedroom needed a calming, relaxing vibe for both homeowners to enjoy. “I don’t spend much time in my bedroom, but I wanted it to feel like a getaway, almost like our own personal hotel room,” the wife notes. She and Rochelle chose the softest carpet they could find. A Harlequin “Foxley” wallpaper accent wall elevates the suite, complemented by walls painted in a custom gray/taupe. A tree trunk headboard in gray adds a final natural element.
“Our last bathroom was very large, and it was always cold,” the wife says. “We wanted this bathroom to be as warm as possible.” They kept the bathroom’s layout relatively small, but it allowed enough space for all the wife’s requests, including a matte eco-friendly Perlato Vittoria tub in lapis stone, zero-entry shower and Missouri limestone vanity. Heated porcelain floors designed to mimic slate paired with high-gloss, straight stacked tile on the walls keep the bathroom both natural and eye-catching.
“This project was so organic from beginning to end,” says Rochelle. “The homeowner and I made changes to the design as we went along. Our constant collaboration is what made this home so customized for them. It really fits their personality."
“We don’t intend to move again, so with this house, we really went for it,” the wife says. “It’s everything we wanted from the start: easy to live in, peaceful, beautiful. I’m so happy every time I come home because I know this space made for us.”
42