
Search results for "Professional prepare" in Home Design Ideas
 Chamberland Professional Painting
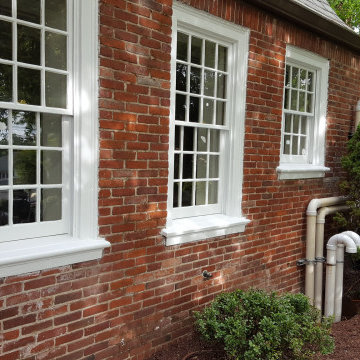
Chamberland Professional Painting | Exterior Painting Experts in West Hartford, Glastonbury & Farmington Valley
Transform your home's exterior with Chamberland Professional Painting, the trusted choice for high-quality exterior painting in West Hartford, Glastonbury, and the Farmington Valley areas. Our skilled painters specialize in residential exterior painting, delivering flawless finishes that enhance curb appeal, protect against harsh New England weather, and increase property value.
We use premium, weather-resistant paints and proven techniques to ensure a durable, long-lasting finish for siding, brick, stucco, wood, decks, fences, and more. Whether you're refreshing your home's look or preparing to sell, our expert team provides personalized color consultations and professional craftsmanship to bring your vision to life.
✅ Local & Licensed Connecticut Painting Contractor
✅ Eco-Friendly, High-Quality Paint Options
✅ Detailed Surface Preparation & Power Washing
✅ Dedicated to Precision, Cleanliness & Customer Satisfaction
? Serving West Hartford, Glastonbury, and Farmington Valley, CT. Contact us today for a free consultation and let’s make your home stand out!
 Maverick City Builders
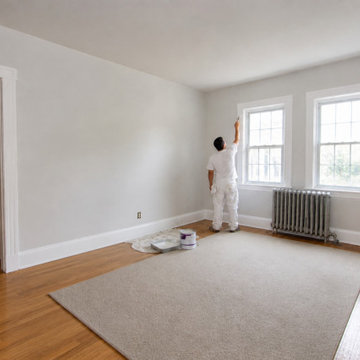
This whole home interior painting and trim upgrade project in Lancaster highlights how a professionally executed finish can completely transform the look, feel, and flow of an entire living space. The project began with a dated interior featuring worn paint, visible wall imperfections, and aging trim that no longer reflected a clean, modern aesthetic. While the home’s structure remained solid, the overall appearance felt dull and lacked the brightness, consistency, and refinement homeowners are looking for today.
Our team began with a comprehensive preparation process across the entire home, which is one of the most critical steps in achieving a high-quality and long-lasting paint finish. Every surface was carefully cleaned, patched, and sanded to create a smooth and uniform base. All floors, fixtures, and furnishings were fully protected using professional-grade coverings, and trim lines throughout the home were precisely taped to ensure sharp, clean edges. This level of preparation not only enhances the final appearance but also ensures durability and consistency from room to room.
As the project progressed, premium-quality paints were applied using a combination of rolling and precision cutting techniques to achieve a smooth, even finish across all wall and ceiling surfaces. The selected color palette focused on modern, neutral tones designed to maximize natural light and create a cohesive, open feel throughout the home. At the same time, all trim, baseboards, and interior details were upgraded with a crisp white finish, adding contrast, depth, and a polished look that ties every space together.
During the final stages, detailed touch-ups and trim refinements were completed in every room to achieve a flawless, professional-grade result. Each edge, corner, and transition was carefully inspected and perfected, ensuring consistency and craftsmanship at every level. The transformation is especially noticeable when comparing the before and after, as the home evolves from a worn, outdated environment into a bright, modern, and refreshed living space.
Once completed, the home was staged to highlight its full potential and demonstrate how a whole home painting upgrade can dramatically improve both aesthetics and functionality. The final result is a clean, cohesive, and welcoming interior that feels updated, spacious, and move-in ready.
Projects like this showcase the value of expert craftsmanship and attention to detail in full-home interior renovations. Whether you are preparing your property for sale or looking to modernize your living space, a whole home interior painting and trim upgrade remains one of the most effective ways to increase both visual appeal and overall property value in Lancaster, MA and surrounding areas.
Our team started with a detailed preparation process, which is one of the most critical steps in achieving a high-quality paint finish. All surfaces were carefully cleaned, patched, and sanded to ensure a smooth and even base. Floors and furniture were fully protected using professional-grade coverings, and trim areas were precisely taped to guarantee clean, sharp lines. This level of preparation ensures that the final result is not only visually appealing but also long-lasting.
As the painting phase progressed, high-quality paints were applied using a combination of rolling and cutting techniques to create a consistent, smooth finish across all wall surfaces. The color selection focused on modern, neutral tones that enhance natural light and create a more open, inviting atmosphere. At the same time, the trim and baseboards were upgraded with a crisp, clean white finish, adding contrast and definition throughout the space.
During the final stages, detailed touch-ups and trim work were completed to achieve a flawless result. Every corner, edge, and transition was carefully inspected and refined, ensuring a professional-grade finish that stands out. The transformation is most noticeable when comparing the before and after stages, where the room evolves from a dated and worn environment into a bright, modern living area.
The completed space was then staged to showcase its full potential, demonstrating how a simple upgrade like interior painting and trim work can dramatically improve both aesthetics and functionality. The result is a clean, polished, and welcoming environment that feels refreshed and ready for everyday living.
Projects like this demonstrate the impact of expert craftsmanship and attention to detail in interior renovations. Whether you are preparing your home for sale or simply looking to update your living space, professional painting and trim upgrades offer one of the most effective ways to enhance your home’s value and appearance.
 Chamberland Professional Painting
At Chamberland Professional Painting, we specialize in premium exterior painting services tailored to Connecticut’s most refined homes. From West Hartford to the surrounding towns, our licensed and fully insured team transforms weather-worn exteriors into stunning, long-lasting finishes using only top-tier paints like Benjamin Moore and Sherwin Williams.
Our meticulous preparation includes wood repair, surface sealing, and detailed trim work—ensuring beauty, protection, and durability that lasts for decades. Whether you’re refreshing curb appeal or safeguarding your home’s exterior against New England’s elements, we deliver craftsmanship without compromise.
We work closely with homeowners, builders, and designers to ensure a smooth, professional experience from consultation through cleanup. If you're ready to elevate your home’s exterior with a team that prioritizes precision and polish, we’d be honored to bring your vision to life.
? Based in West Hartford, proudly serving all of Hartford County and beyond.
Find the right local pro for your project

 Talon Construction Inc.
Designing and building a kitchen addition is a complex process that involves multiple steps and considerations. Here is a general outline to help you get started on your kitchen addition project:
Define Your Goals and Budget:
• Determine the purpose of the kitchen addition. Is it for more cooking space, a dining area, or a combination of both?
• Establish a realistic budget for your project. Consider all costs, including construction, permits, materials, and furnishings.
Hire a Design Professional:
• Seek the services of a design build company who specializes in kitchen additions.
• Discuss your vision, needs, and budget with the design professional to create a design concept.
Site Evaluation:
• Assess the existing space and structural condition of your home to ensure it can support the addition.
• Consider factors like zoning regulations, setbacks, and building codes.
Design Development:
• Collaborate with your design professional to refine the concept, including the layout, size, and architectural style.
• Choose materials, finishes, and fixtures that fit your design and budget.
Obtain Permits:
• Consult with your local design build contractor to determine the necessary permits and approvals.
• Prepare and submit all required documents, including architectural drawings and engineering plans.
Create Construction Documents:
• Work with your design build professional to develop detailed construction drawings and specifications.
• These documents will serve as a guide for contractors during construction.
Hire a design build contractor:
• Check references, credentials, and licenses before selecting a contractor.
• Sign a detailed contract that outlines the scope of work, timeline, and payment schedule.
Construction Phase:
• Demolition: If needed, remove any existing structures or walls.
• Foundation: Construct the foundation for the addition.
• Framing: Build the structural framework of the addition.
• Plumbing, Electrical, and HVAC: Install or update utilities as required.
• Insulation: Ensure proper insulation for energy efficiency.
• Drywall and Finish Work: Complete the walls and ceilings.
• Flooring and Cabinetry: Install flooring and kitchen cabinets.
• Appliances and Fixtures: Add appliances, plumbing fixtures, and lighting.
• Paint and Finish: Apply paint and finishes to achieve the desired look.
• Final Inspection: Schedule inspections to ensure compliance with building codes.
Final Inspections and Approvals:
• Arrange for final inspections to ensure the addition meets all safety and code requirements.
• Obtain any necessary certificates of occupancy or compliance.
Move In and Enjoy:
• Once all inspections and approvals are received, you can move into your new kitchen addition and start enjoying it.
Remember that every kitchen addition project is unique, so adapt this outline to your specific needs and circumstances. Consulting with professionals and obtaining the required permits and inspections is crucial to a successful and safe project.

 safe ZOnea
Staging a home for sale or for a major transition is a strange in-between state. You are still living in the space, but you are also preparing it to impress strangers, support showings, and remain functional until the final move-out day. That tension between “home” and “product” is where storage quietly becomes one of your smartest tools. Used well, storage lets you reduce clutter, protect important items, and create the kind of rooms that photograph beautifully and feel calm when buyers walk through the door.
A staged move is rarely just about shifting boxes from one address to another. It is about managing timing, presentation, and stress at the same time. When storage is built into the plan from day one, the entire process feels less rushed and more strategic. Rooms open up gradually, essentials stay accessible, and you never feel like you are drowning in half-packed chaos. Understanding how to use storage as a staging partner, not just a place to dump excess stuff, is what turns a messy transition into a controlled, professional-looking move.
Why Storage Is the Backbone of Every Staged Move
Visual space is emotional space. When every surface is covered, and every corner is full, buyers feel crowded before they have even evaluated the layout. Storage gives you a way to pull back without making drastic decisions about what to keep or donate. Seasonal décor, bulky furniture, duplicate items, archives, and personal collections can be moved out early, so the home reads cleaner and more open while still feeling lived-in. That balance between warmth and simplicity is exactly what good staging tries to achieve.
In more complex situations, such as live-work properties or home offices, storage becomes even more important. You may need to keep a business running while also presenting a polished environment to viewers. Partnering with local movers in Boston makes it easier to shift equipment, files, and nonessential pieces into storage in phases, so work can continue while the visible areas of the property stay controlled and presentable.
How Staging and Storage Work Together to Control Visual Impact
Staging works best when every object in a room has a clear purpose. A sofa frames a conversation. A table suggests gathering. A lamp softens the mood. Everything else that is not essential to that story competes for attention. Storage supports staging by giving you a clean staging bench off-site, where nonessential items can wait without being constantly shuffled between rooms or piled into overstuffed closets.
The art lies in deciding what stays and what goes. Family photos, extensive collections, excess seating, and rarely used appliances often move into storage first. What remains should be enough to show scale, comfort, and function without revealing the full weight of daily life. Commercial properties go through a similar filtering process. Extra desks, surplus equipment, outdated signage, and inactive files often move out early so the active workspace feels lean, efficient, and future-ready before a relocation supported by commercial movers takes place.
Strategic Timing of Storage before the Actual Move
The worst time to think about storage is when boxes are already stacked in the hallway. In a staged move, storage decisions ideally begin as soon as you know the property will be listed or the space will be transitioned. That might be a month or more before the main moving date. Starting early gives you time to sort, label, and prioritize instead of throwing things together in a panic.
An early storage phase also helps you test how the home feels with less in it. You may discover that removing a few large pieces transforms a cramped room into an open, inviting space. For commercial spaces, early storage lets operations continue with fewer interruptions. Departments can send nonessential items out in waves. When the main relocation comes, much of the excess is already safely stored, and what remains is easier for a commercial movers Boston team to handle with speed and care.
The Emotional Psychology behind Letting Storage Hold Your Belongings
Letting belongings leave the house ahead of you can feel unsettling. There is always a quiet fear that once something is out of sight, it will be forgotten, damaged, or harder to reclaim. That is why some people resist using storage even when they know it would make the staging process easier. Acknowledging that emotion instead of dismissing it helps you plan more honestly and avoids last-minute regret.
The reality is that good storage is not a black hole; it is a temporary pause. When items are packed thoughtfully, labeled clearly, and placed in an environment you trust, they become easier to manage than when they are tucked into random cupboards or stacked in spare rooms. For many people, living with fewer visible possessions during staging actually reduces tension. The home feels lighter and easier to maintain. Businesses notice the same effect when storage removes outdated equipment and clutter from the floor. The workspace looks more focused, and staff can concentrate on current tasks instead of navigating around accumulated history.
Protecting Assets While They Live in Storage
Sending belongings into storage is only a good idea if they come back in the same or better condition. That is where quality control matters. Furniture, textiles, electronics, files, and artwork each have different vulnerabilities. Moisture, temperature swings, dust, and rough handling can all damage them in ways that only become obvious later. Choosing the right type of storage and packing accordingly is central to the genius of using storage as part of a staged move rather than as a desperate overflow container.
Climate-controlled units, padded wrapping, elevated pallets, careful stacking, and clearly marked boxes all reduce risk. The goal is to handle items fewer times, not more. When storage is integrated into the move plan, belongings can travel directly from the home to storage and later from storage to the new address with minimal extra movement. Many owners coordinate those transfers through a well trusted movers in Boston, so the same team that moves items out early also manages their final delivery, preserving continuity and accountability.
How Storage Reduces Risk during Multi-Phase Moves
Few staged moves happen in a single clean step. There are often gaps between listing and selling, between selling and closing, between closing and final move-out. If renovations, inspections, or office reconfigurations are involved, the timeline becomes even more layered. Storage absorbs those gaps, so you are not forced to live among towers of boxes or stack equipment in hallways waiting for the next phase.
By treating storage as a flexible middle ground, you can move things out gradually while still having access when needed. For example, archived files can go first, followed by seasonal décor, then surplus furniture. As each stage ends, fewer items remain to be shifted on the final date. This phased approach reduces the risk of rushed, late-night packing sessions, careless stacking, and damaged items. It also makes it easier for commercial moving crews to work efficiently because they are handling a manageable volume of goods at each phase rather than everything at once.
Using Storage to Maintain Clean Show-Ready Conditions
One of the hardest parts of staging is keeping the property consistently show-ready. Every viewing becomes its own small event. Floors need to be cleared, surfaces wiped, and personal items tucked away. When too many belongings remain in the home, each showing takes a heavy amount of effort. Storage cuts that workload dramatically by taking nonessentials completely off the stage.
With fewer items to move and hide, maintaining a neutral, inviting look becomes much more realistic. You are not scrambling to stuff things into closets or push items under the bed. Instead, the home sits closer to show condition all the time, and the final touches before a viewing are minimal. In commercial environments, using storage helps maintain a professional appearance for clients and staff, even while the space is being prepared for a larger transition. Active tools and furniture stay in play, while inactive pieces quietly support the future from storage.
Storage as a Strategic Tool in Business Relocation Planning
For businesses, storage is more than a convenience; it is part of risk management. Office relocations and staged commercial moves have to juggle lease deadlines, equipment deliveries, IT cutovers, and staffing realities. Trying to shift everything in one move often results in downtime, lost files, and strained teams. Storage turns the move into a series of controlled steps instead of a single disruptive jump.
Unused furniture, archived documents, and non-critical inventory can be moved into storage weeks ahead of the main relocation. As the new space becomes ready, items can move out of storage and directly into position. This reduces double-handling and keeps the old and new locations from filling with half-unpacked material. A business that coordinates these flows with professional commercial movers in Boston usually experiences smoother transitions, because storage is treated as a working part of the operational plan rather than a leftover problem.
The Hidden Cost Benefits of Proper Storage Planning
On paper, storage looks like an extra expense. In reality, poorly managed moves cost far more. When everything is rushed into boxes at the last minute, items are damaged, misplaced, or transported multiple times. Extra labor hours, emergency packing supplies, replacement furniture, and extended timelines quickly outweigh the cost of well-used storage. Staging without storage also tends to keep homes and offices crowded longer, which can hurt impressions and, in the case of a sale, influence offers.
When storage is integrated from the beginning, you minimize waste. You handle items fewer times, you know where things are, and you avoid paying people to shift the same objects repeatedly. Staged homes that look better often sell faster or draw stronger interest, which helps recover investment on the back end. Businesses benefit from less downtime, safer handling of equipment, and predictable work schedules. Those gains are why many clients prefer partnering with a commercial moving company in Boston that understands storage as a cost-control tool, not just a place to park overflow.
Conclusion
The true genius of using storage during a staged home move is that it quietly rewrites the rules of transition. Instead of treating space as something that must absorb every box and belonging until the last possible moment, you treat storage as a flexible extension of the home or office. This shift in thinking opens rooms, clears sightlines, and makes every phase of the move more intentional. Staging becomes easier, maintenance becomes lighter, and the stress of living in a half-moved environment drops noticeably. When storage is chosen carefully, used early, and coordinated with the overall moving plan, it protects both physical assets and emotional energy. Buyers and visitors see a calm, collected space. You experience a less chaotic path from “here” to “there.” Whether you are selling a home, repositioning a business, or managing a complex phased relocation, storage can turn a disruptive event into a managed, almost elegant process.
For people who want that level of control and care during a staged move, Stairhopper movers have built a strong reputation by treating storage, timing, and transport as parts of one connected strategy. Their team is known for listening closely, planning around real-life constraints, and moving both residential and commercial clients through transitions with calm, steady execution. They approach every project as a partnership, aligning storage use, staging needs, and final delivery so that what matters most arrives safely, on schedule, and with as little disruption as possible.
Frequently Asked Questions
Q1. When should I arrange storage for a staged home move?
Ideally, four to six weeks before listing or transition, so clearing, packing, and staging can happen gradually without rushed decisions or last-minute stress.
Q2. Is climate-controlled storage necessary for staged moves?
It is highly recommended for wood furniture, electronics, artwork, and documents, since temperature and humidity swings can quietly damage materials over time.
Q3. How does storage help keep a home show-ready?
By moving nonessential items off-site, daily tidying becomes simpler, and each room can stay closer to a staged condition between viewings or inspections.
Q4. Can storage reduce the length of the final moving day?
Yes. When many items are moved into storage in advance, the final moving day focuses on essentials, which shortens timelines and reduces physical and mental strain.
Q5. Is storage useful for short-term business relocations?
Even in short relocations, storage helps prevent overcrowded offices and allows departments to move in phases without interrupting everyday operations.
Q6. How do I decide what should go into storage first?
Start with rarely used items, seasonal décor, surplus furniture, and archived materials, then work toward pieces that are visually distracting or make rooms feel cramped.
Q7. Will using storage make it harder to find things later?
Not if packing and labeling are done carefully. Clear categories, room-based labels, and simple inventories make stored items easier to locate than when scattered at home.
Q8. Does storage still make sense if my move happens in one day?
Yes, because staging and preparation begin well before that day. Storage keeps the home functional and attractive during the weeks leading up to the final move.
 Windy City Painters
PREPARATION AND PLANNING
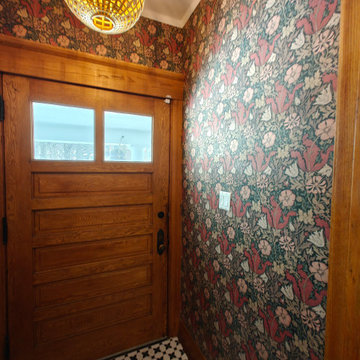
First, we assessed existing wall conditions and repaired minor imperfections. Next, surfaces were thoroughly cleaned and primed for maximum adhesion. Then, precise measurements ensured perfect pattern alignment throughout the space.
INSTALLATION PROCESS
Subsequently, we carefully cut each strip accounting for pattern matching. Moreover, professional installation techniques eliminated bubbles and ensured seamless seams. Finally, detailed finishing work created flawless edges and corners.
CHICAGO-SPECIFIC CHALLENGES
Furthermore, older Chicago buildings present unique challenges including settling walls, vintage plaster surfaces, and lead paint considerations. Therefore, proper preparation becomes crucial for long-lasting results that withstand seasonal temperature fluctuations.
RESULTS AND QUALITY
Consequently, the finished installation showcases perfect pattern alignment and professional craftsmanship. The wallpaper enhances the entry hall's architectural character while providing durability for high-traffic use.
PROFESSION AL TIPS
Homeowners should always hire experienced installers for complex patterns. Additionally, investing in quality primer saves money long-term by ensuring proper adhesion and easier future removal.
See more work and request free estimate at windypainters.com.
Q: How long does wallpaper installation take? / A: Most entry halls require one to two days depending on pattern complexity, surface preparation needs, and room size for professional wallpaper installation.
Q: Can you install over existing wallpaper? / A: We recommend removing old wallpaper first for best adhesion, though some situations allow installation over existing wallpaper after proper preparation and assessment.
Q: What wallpaper works best in Chicago? / A: Vinyl and fabric-backed wallpapers handle Chicago's climate changes best, providing durability against humidity fluctuations and temperature variations throughout seasons.
Q: Do you guarantee installation work? / A: Yes, Windy City Painters provides comprehensive warranties covering wallpaper installation craftsmanship and adhesion for specified warranty periods on all projects.
Q: How do you handle pattern matching? / A: We carefully measure walls, calculate pattern repeats, and plan installation sequence to ensure perfect wallpaper installation pattern alignment throughout the space.
Q: Can wallpaper work in vintage buildings? / A: Absolutely, we specialize in wallpaper installation for older Chicago homes, understanding unique challenges like settling walls and vintage plaster surfaces.
Q: What preparation is required? / A: Proper wallpaper installation requires surface assessment, repairs, thorough cleaning, appropriate priming, and climate control for optimal adhesion and lasting results.
Q: Do you remove old wallpaper? / A: Yes, we provide professional wallpaper removal services using safe techniques that protect underlying wall surfaces during the wallpaper installation preparation process.
Q: How much does installation cost? / A: Wallpaper installation costs vary based on room size, pattern complexity, surface preparation needs, and wallpaper selection - contact for detailed estimates.
Q: What tools do professionals use? / A: Professional wallpaper installation requires specialized smoothing tools, precision cutting equipment, quality brushes, and professional-grade adhesives for optimal results and longevity.
Sponsored
Columbus, OH

Wannemacher Interiors
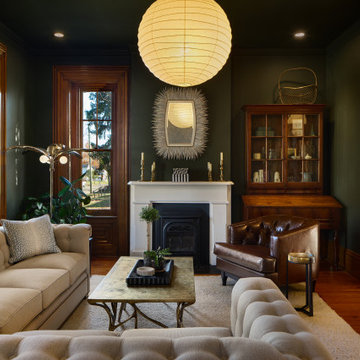
Customized Award-Winning Interior Design Solutions in Franklin Cnty OH
 Talon Construction Inc.
Designing and building a kitchen addition is a complex process that involves multiple steps and considerations. Here is a general outline to help you get started on your kitchen addition project:
Define Your Goals and Budget:
• Determine the purpose of the kitchen addition. Is it for more cooking space, a dining area, or a combination of both?
• Establish a realistic budget for your project. Consider all costs, including construction, permits, materials, and furnishings.
Hire a Design Professional:
• Seek the services of a design build company who specializes in kitchen additions.
• Discuss your vision, needs, and budget with the design professional to create a design concept.
Site Evaluation:
• Assess the existing space and structural condition of your home to ensure it can support the addition.
• Consider factors like zoning regulations, setbacks, and building codes.
Design Development:
• Collaborate with your design professional to refine the concept, including the layout, size, and architectural style.
• Choose materials, finishes, and fixtures that fit your design and budget.
Obtain Permits:
• Consult with your local design build contractor to determine the necessary permits and approvals.
• Prepare and submit all required documents, including architectural drawings and engineering plans.
Create Construction Documents:
• Work with your design build professional to develop detailed construction drawings and specifications.
• These documents will serve as a guide for contractors during construction.
Hire a design build contractor:
• Check references, credentials, and licenses before selecting a contractor.
• Sign a detailed contract that outlines the scope of work, timeline, and payment schedule.
Construction Phase:
• Demolition: If needed, remove any existing structures or walls.
• Foundation: Construct the foundation for the addition.
• Framing: Build the structural framework of the addition.
• Plumbing, Electrical, and HVAC: Install or update utilities as required.
• Insulation: Ensure proper insulation for energy efficiency.
• Drywall and Finish Work: Complete the walls and ceilings.
• Flooring and Cabinetry: Install flooring and kitchen cabinets.
• Appliances and Fixtures: Add appliances, plumbing fixtures, and lighting.
• Paint and Finish: Apply paint and finishes to achieve the desired look.
• Final Inspection: Schedule inspections to ensure compliance with building codes.
Final Inspections and Approvals:
• Arrange for final inspections to ensure the addition meets all safety and code requirements.
• Obtain any necessary certificates of occupancy or compliance.
Move In and Enjoy:
• Once all inspections and approvals are received, you can move into your new kitchen addition and start enjoying it.
Remember that every kitchen addition project is unique, so adapt this outline to your specific needs and circumstances. Consulting with professionals and obtaining the required permits and inspections is crucial to a successful and safe project.
 Talon Construction Inc.
Designing and building a kitchen addition is a complex process that involves multiple steps and considerations. Here is a general outline to help you get started on your kitchen addition project:
Define Your Goals and Budget:
• Determine the purpose of the kitchen addition. Is it for more cooking space, a dining area, or a combination of both?
• Establish a realistic budget for your project. Consider all costs, including construction, permits, materials, and furnishings.
Hire a Design Professional:
• Seek the services of a design build company who specializes in kitchen additions.
• Discuss your vision, needs, and budget with the design professional to create a design concept.
Site Evaluation:
• Assess the existing space and structural condition of your home to ensure it can support the addition.
• Consider factors like zoning regulations, setbacks, and building codes.
Design Development:
• Collaborate with your design professional to refine the concept, including the layout, size, and architectural style.
• Choose materials, finishes, and fixtures that fit your design and budget.
Obtain Permits:
• Consult with your local design build contractor to determine the necessary permits and approvals.
• Prepare and submit all required documents, including architectural drawings and engineering plans.
Create Construction Documents:
• Work with your design build professional to develop detailed construction drawings and specifications.
• These documents will serve as a guide for contractors during construction.
Hire a design build contractor:
• Check references, credentials, and licenses before selecting a contractor.
• Sign a detailed contract that outlines the scope of work, timeline, and payment schedule.
Construction Phase:
• Demolition: If needed, remove any existing structures or walls.
• Foundation: Construct the foundation for the addition.
• Framing: Build the structural framework of the addition.
• Plumbing, Electrical, and HVAC: Install or update utilities as required.
• Insulation: Ensure proper insulation for energy efficiency.
• Drywall and Finish Work: Complete the walls and ceilings.
• Flooring and Cabinetry: Install flooring and kitchen cabinets.
• Appliances and Fixtures: Add appliances, plumbing fixtures, and lighting.
• Paint and Finish: Apply paint and finishes to achieve the desired look.
• Final Inspection: Schedule inspections to ensure compliance with building codes.
Final Inspections and Approvals:
• Arrange for final inspections to ensure the addition meets all safety and code requirements.
• Obtain any necessary certificates of occupancy or compliance.
Move In and Enjoy:
• Once all inspections and approvals are received, you can move into your new kitchen addition and start enjoying it.
Remember that every kitchen addition project is unique, so adapt this outline to your specific needs and circumstances. Consulting with professionals and obtaining the required permits and inspections is crucial to a successful and safe project.
 Certapro Painters Of Loudoun, Reston, & Tysons
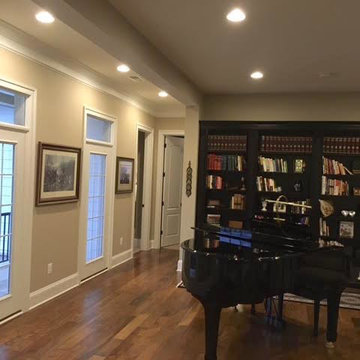
Inspiration for a transitional living room remodel in DC Metro
 Maverick City Builders
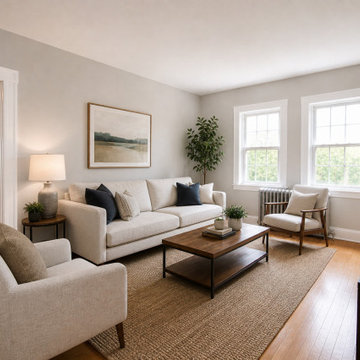
This whole home interior painting and trim upgrade project in Lancaster highlights how a professionally executed finish can completely transform the look, feel, and flow of an entire living space. The project began with a dated interior featuring worn paint, visible wall imperfections, and aging trim that no longer reflected a clean, modern aesthetic. While the home’s structure remained solid, the overall appearance felt dull and lacked the brightness, consistency, and refinement homeowners are looking for today.
Our team began with a comprehensive preparation process across the entire home, which is one of the most critical steps in achieving a high-quality and long-lasting paint finish. Every surface was carefully cleaned, patched, and sanded to create a smooth and uniform base. All floors, fixtures, and furnishings were fully protected using professional-grade coverings, and trim lines throughout the home were precisely taped to ensure sharp, clean edges. This level of preparation not only enhances the final appearance but also ensures durability and consistency from room to room.
As the project progressed, premium-quality paints were applied using a combination of rolling and precision cutting techniques to achieve a smooth, even finish across all wall and ceiling surfaces. The selected color palette focused on modern, neutral tones designed to maximize natural light and create a cohesive, open feel throughout the home. At the same time, all trim, baseboards, and interior details were upgraded with a crisp white finish, adding contrast, depth, and a polished look that ties every space together.
During the final stages, detailed touch-ups and trim refinements were completed in every room to achieve a flawless, professional-grade result. Each edge, corner, and transition was carefully inspected and perfected, ensuring consistency and craftsmanship at every level. The transformation is especially noticeable when comparing the before and after, as the home evolves from a worn, outdated environment into a bright, modern, and refreshed living space.
Once completed, the home was staged to highlight its full potential and demonstrate how a whole home painting upgrade can dramatically improve both aesthetics and functionality. The final result is a clean, cohesive, and welcoming interior that feels updated, spacious, and move-in ready.
Projects like this showcase the value of expert craftsmanship and attention to detail in full-home interior renovations. Whether you are preparing your property for sale or looking to modernize your living space, a whole home interior painting and trim upgrade remains one of the most effective ways to increase both visual appeal and overall property value in Lancaster, MA and surrounding areas.
Our team started with a detailed preparation process, which is one of the most critical steps in achieving a high-quality paint finish. All surfaces were carefully cleaned, patched, and sanded to ensure a smooth and even base. Floors and furniture were fully protected using professional-grade coverings, and trim areas were precisely taped to guarantee clean, sharp lines. This level of preparation ensures that the final result is not only visually appealing but also long-lasting.
As the painting phase progressed, high-quality paints were applied using a combination of rolling and cutting techniques to create a consistent, smooth finish across all wall surfaces. The color selection focused on modern, neutral tones that enhance natural light and create a more open, inviting atmosphere. At the same time, the trim and baseboards were upgraded with a crisp, clean white finish, adding contrast and definition throughout the space.
During the final stages, detailed touch-ups and trim work were completed to achieve a flawless result. Every corner, edge, and transition was carefully inspected and refined, ensuring a professional-grade finish that stands out. The transformation is most noticeable when comparing the before and after stages, where the room evolves from a dated and worn environment into a bright, modern living area.
The completed space was then staged to showcase its full potential, demonstrating how a simple upgrade like interior painting and trim work can dramatically improve both aesthetics and functionality. The result is a clean, polished, and welcoming environment that feels refreshed and ready for everyday living.
Projects like this demonstrate the impact of expert craftsmanship and attention to detail in interior renovations. Whether you are preparing your home for sale or simply looking to update your living space, professional painting and trim upgrades offer one of the most effective ways to enhance your home’s value and appearance.
 Windy City Painters
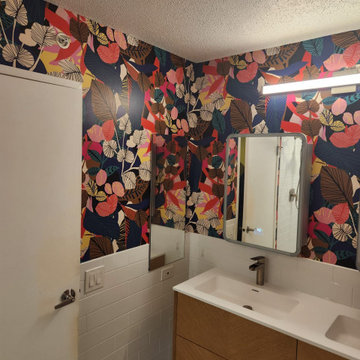
Expert wallpaper installer Lakeview services transform Chicago homes with precision and style. This stunning project showcases our commitment to quality craftsmanship in one of Chicago's most desirable neighborhoods.
Project Overview and Architecture
This beautiful Lakeview greystone required careful wallpaper installation that would complement the home's original architectural details. The vintage building's unique character demanded specialized techniques to ensure perfect results while preserving the historic charm that makes these homes so special.
Materials and Products
We utilized premium wallpaper adhesive, professional smoothing tools, and high-quality materials specifically chosen for Chicago's climate conditions. Our team selected products that work exceptionally well with the plaster walls common in vintage Lakeview homes.
Installation Process
First, we thoroughly prepared surfaces by repairing imperfections and priming walls. Next, we precisely measured and cut each strip, ensuring perfect pattern alignment. Then, we applied adhesive evenly and positioned wallpaper with expert precision. Finally, we eliminated bubbles, trimmed edges, and completed finishing touches.
Chicago Home Challenges
Lakeview's vintage homes present unique challenges including uneven plaster walls, settling issues, and temperature fluctuations. Our wallpaper installer Lakeview expertise addresses these concerns with specialized preparation techniques and climate-appropriate materials that ensure lasting results.
Results and Quality
The finished installation showcases flawless pattern matching, smooth surfaces, and crisp edges that enhance the room's architectural features. This wallpaper installer Lakeview project demonstrates our commitment to excellence and attention to detail.
Professional Tips
Homeowners should always hire experienced professionals for wallpaper installation. Proper surface preparation is crucial for longevity. Additionally, choosing quality materials appropriate for Chicago's climate ensures your investment lasts for years.
See more work and request free estimate at windypainters.com.
Q: Why choose professional wallpaper installer Lakeview services over DIY? / A: Professional installation prevents costly mistakes, ensures proper adhesion, and guarantees beautiful results that enhance your home's value and appearance.
Q: How do you handle vintage Lakeview home challenges? / A: Our wallpaper installer Lakeview team addresses plaster walls, settling issues, and architectural details with specialized techniques and appropriate materials.
Q: What preparation is required before wallpaper installation? / A: We repair wall imperfections, apply primer, ensure smooth surfaces, and address any moisture issues for optimal wallpaper installer Lakeview results.
Q: How long does professional wallpaper installation take? / A: Most rooms require 1-2 days depending on complexity, though our wallpaper installer Lakeview team works efficiently while maintaining quality standards.
Q: Can you work with designer or specialty wallpapers? / A: Absolutely, our wallpaper installer Lakeview experts handle luxury papers, grasscloth, murals, and specialty materials with appropriate techniques and care.
Q: Do you remove existing wallpaper before installation? / A: Yes, we provide complete removal services using safe methods that protect your walls and prepare surfaces for new wallpaper installer Lakeview projects.
Q: How do you ensure pattern alignment and matching? / A: Our wallpaper installer Lakeview professionals use precise measuring, professional tools, and years of experience to achieve perfect pattern continuity.
Q: What types of walls can accommodate wallpaper? / A: We install wallpaper on various surfaces including drywall, plaster, and painted walls after proper preparation for wallpaper installer Lakeview projects.
Q: How do you handle corners and trim work? / A: Our wallpaper installer Lakeview team uses specialized techniques for inside corners, outside corners, and detailed trim work ensuring professional results.
Q: What warranty do you provide on installation? / A: Windy City Painters guarantees our wallpaper installer Lakeview work with comprehensive warranty coverage protecting your investment and ensuring satisfaction.

 Jersey Landscaping
Professional outdoor lighting can provide the security solutions you need. Enhance the beauty and character of your home by working with an outdoor lighting designer. Find out about our money-saving, environmentally-friendly, low voltage outdoor lighting for NJ homes, which enhances your new or existing landscape design. Landscape lighting installation can be a complicated process. Which lights will work best? What spaces should be lit? An outdoor lighting designer from Jersey Landscaping is prepared to answer your questions, and make recommendations based on the size of your space — and the size of your budget. Learn more about our wide variety of outdoor lighting for NJ homeowners.
www.jerseylandscaping.com

 Talon Construction Inc.
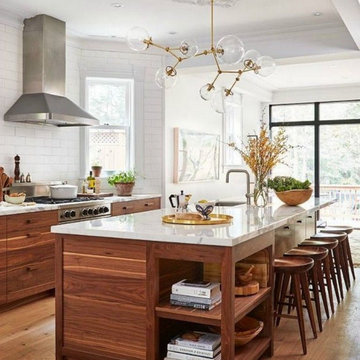
Designing and building a kitchen addition is a complex process that involves multiple steps and considerations. Here is a general outline to help you get started on your kitchen addition project:
Define Your Goals and Budget:
• Determine the purpose of the kitchen addition. Is it for more cooking space, a dining area, or a combination of both?
• Establish a realistic budget for your project. Consider all costs, including construction, permits, materials, and furnishings.
Hire a Design Professional:
• Seek the services of a design build company who specializes in kitchen additions.
• Discuss your vision, needs, and budget with the design professional to create a design concept.
Site Evaluation:
• Assess the existing space and structural condition of your home to ensure it can support the addition.
• Consider factors like zoning regulations, setbacks, and building codes.
Design Development:
• Collaborate with your design professional to refine the concept, including the layout, size, and architectural style.
• Choose materials, finishes, and fixtures that fit your design and budget.
Obtain Permits:
• Consult with your local design build contractor to determine the necessary permits and approvals.
• Prepare and submit all required documents, including architectural drawings and engineering plans.
Create Construction Documents:
• Work with your design build professional to develop detailed construction drawings and specifications.
• These documents will serve as a guide for contractors during construction.
Hire a design build contractor:
• Check references, credentials, and licenses before selecting a contractor.
• Sign a detailed contract that outlines the scope of work, timeline, and payment schedule.
Construction Phase:
• Demolition: If needed, remove any existing structures or walls.
• Foundation: Construct the foundation for the addition.
• Framing: Build the structural framework of the addition.
• Plumbing, Electrical, and HVAC: Install or update utilities as required.
• Insulation: Ensure proper insulation for energy efficiency.
• Drywall and Finish Work: Complete the walls and ceilings.
• Flooring and Cabinetry: Install flooring and kitchen cabinets.
• Appliances and Fixtures: Add appliances, plumbing fixtures, and lighting.
• Paint and Finish: Apply paint and finishes to achieve the desired look.
• Final Inspection: Schedule inspections to ensure compliance with building codes.
Final Inspections and Approvals:
• Arrange for final inspections to ensure the addition meets all safety and code requirements.
• Obtain any necessary certificates of occupancy or compliance.
Move In and Enjoy:
• Once all inspections and approvals are received, you can move into your new kitchen addition and start enjoying it.
Remember that every kitchen addition project is unique, so adapt this outline to your specific needs and circumstances. Consulting with professionals and obtaining the required permits and inspections is crucial to a successful and safe project.
 Decor Innovation Designs - Home Staging
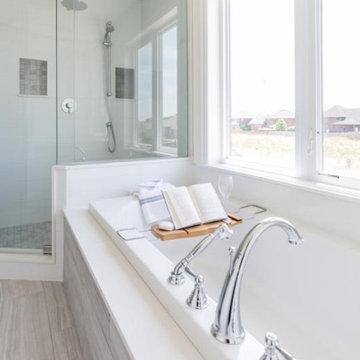
Example of a large trendy master multicolored tile and ceramic tile ceramic tile and multicolored floor bathroom design in Other with shaker cabinets, white cabinets, a one-piece toilet, white walls, an undermount sink, quartzite countertops, a hinged shower door and white countertops
 Maverick City Builders
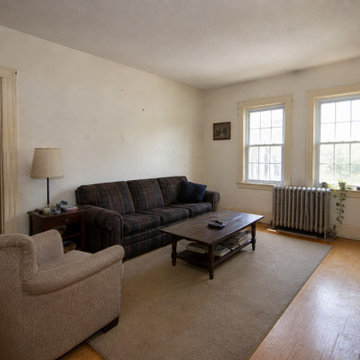
This whole home interior painting and trim upgrade project in Lancaster highlights how a professionally executed finish can completely transform the look, feel, and flow of an entire living space. The project began with a dated interior featuring worn paint, visible wall imperfections, and aging trim that no longer reflected a clean, modern aesthetic. While the home’s structure remained solid, the overall appearance felt dull and lacked the brightness, consistency, and refinement homeowners are looking for today.
Our team began with a comprehensive preparation process across the entire home, which is one of the most critical steps in achieving a high-quality and long-lasting paint finish. Every surface was carefully cleaned, patched, and sanded to create a smooth and uniform base. All floors, fixtures, and furnishings were fully protected using professional-grade coverings, and trim lines throughout the home were precisely taped to ensure sharp, clean edges. This level of preparation not only enhances the final appearance but also ensures durability and consistency from room to room.
As the project progressed, premium-quality paints were applied using a combination of rolling and precision cutting techniques to achieve a smooth, even finish across all wall and ceiling surfaces. The selected color palette focused on modern, neutral tones designed to maximize natural light and create a cohesive, open feel throughout the home. At the same time, all trim, baseboards, and interior details were upgraded with a crisp white finish, adding contrast, depth, and a polished look that ties every space together.
During the final stages, detailed touch-ups and trim refinements were completed in every room to achieve a flawless, professional-grade result. Each edge, corner, and transition was carefully inspected and perfected, ensuring consistency and craftsmanship at every level. The transformation is especially noticeable when comparing the before and after, as the home evolves from a worn, outdated environment into a bright, modern, and refreshed living space.
Once completed, the home was staged to highlight its full potential and demonstrate how a whole home painting upgrade can dramatically improve both aesthetics and functionality. The final result is a clean, cohesive, and welcoming interior that feels updated, spacious, and move-in ready.
Projects like this showcase the value of expert craftsmanship and attention to detail in full-home interior renovations. Whether you are preparing your property for sale or looking to modernize your living space, a whole home interior painting and trim upgrade remains one of the most effective ways to increase both visual appeal and overall property value in Lancaster, MA and surrounding areas.
Our team started with a detailed preparation process, which is one of the most critical steps in achieving a high-quality paint finish. All surfaces were carefully cleaned, patched, and sanded to ensure a smooth and even base. Floors and furniture were fully protected using professional-grade coverings, and trim areas were precisely taped to guarantee clean, sharp lines. This level of preparation ensures that the final result is not only visually appealing but also long-lasting.
As the painting phase progressed, high-quality paints were applied using a combination of rolling and cutting techniques to create a consistent, smooth finish across all wall surfaces. The color selection focused on modern, neutral tones that enhance natural light and create a more open, inviting atmosphere. At the same time, the trim and baseboards were upgraded with a crisp, clean white finish, adding contrast and definition throughout the space.
During the final stages, detailed touch-ups and trim work were completed to achieve a flawless result. Every corner, edge, and transition was carefully inspected and refined, ensuring a professional-grade finish that stands out. The transformation is most noticeable when comparing the before and after stages, where the room evolves from a dated and worn environment into a bright, modern living area.
The completed space was then staged to showcase its full potential, demonstrating how a simple upgrade like interior painting and trim work can dramatically improve both aesthetics and functionality. The result is a clean, polished, and welcoming environment that feels refreshed and ready for everyday living.
Projects like this demonstrate the impact of expert craftsmanship and attention to detail in interior renovations. Whether you are preparing your home for sale or simply looking to update your living space, professional painting and trim upgrades offer one of the most effective ways to enhance your home’s value and appearance.
 safe ZOnea
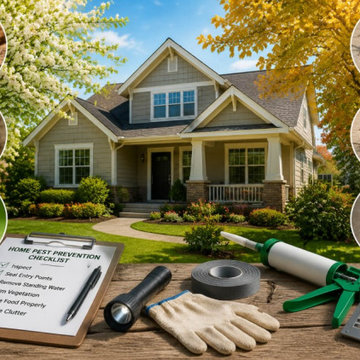
Maintaining a pest-free home requires attention throughout the year. Seasonal changes affect pest behavior, and understanding these patterns can save homeowners from costly damage and health hazards. In this guide, we will explore practical strategies for spring pest prevention tips, ensuring your property stays protected through every season. From spotting early signs to implementing proactive measures, these steps empower homeowners to take control before infestations occur.
Understanding Seasonal Pest Patterns
Pests adapt to changing weather, and knowing their patterns helps prevent infestations effectively.
Spring: Awakening Pests
Spring signals the end of winter dormancy for many pests. Rodents, ants, and termites start seeking food and warmth. Effective spring pest prevention tips include:
● Cleaning gutters and removing debris
● Sealing cracks and gaps in exterior walls
● Inspecting wood piles and compost areas
● Monitoring early signs of termite activity
Pro Tip: Conduct a termite inspection or a professional evaluation to catch infestations early before they spread.
Summer: Peak Pest Season
Warm temperatures accelerate pest breeding cycles. For a comprehensive summer pest prevention guide:
● Maintain lawns and trim vegetation away from homes
● Check window and door screens for tears
● Store food in sealed containers
● Inspect water sources that attract mosquitoes
Do You Know? Mosquitoes can lay eggs in a teaspoon of water. Eliminating stagnant water is crucial to reducing their population.
Fall: Preparing for Winter
As temperatures drop, pests search for warm indoor spaces. Key actions include:
● Inspecting for winter rodent entry points
● Sealing attic vents, crawl spaces, and foundation gaps
● Cleaning storage areas to minimize hiding spots
● Checking chimney and fireplace openings
Quick Fact: Rodents can enter homes through openings as small as ¼ inch.
Seasonal Pest Checklist for Homeowners
Creating a structured seasonal pest checklist simplifies preventive measures and ensures nothing is overlooked.
Season
Key Actions
Spring
Inspect for termites, seal exterior gaps, clean gutters, and check compost
Summer
Repair screens, trim vegetation, remove standing water, and secure food
Fall
Seal entry points, inspect attic/crawlspace, clear debris, and prepare storage
Winter
Monitor indoor activity, keep firewood away from walls, and maintain traps
Inspection & Maintenance Tips
● Schedule annual pest inspections by professional Virginia pest control consultation to detect hidden problems
● Keep a log of pest sightings and treatment dates
● Regularly replace weather stripping and caulk cracks
Note: Even small preventive steps, when consistently applied, drastically reduce infestations.
Common Pests and Their Seasonal Behaviors
Understanding how different pests behave each season helps homeowners take timely action to protect their property.
● Ants and Termites: Ants emerge in spring seeking food, while termites become active and can damage wood unnoticed. Early detection is critical.
● Rodents and Mice: Fall and winter increase rodent intrusions. Block all entry points and keep food sealed.
● Mosquitoes and Flies: Summer creates the ideal breeding environment for mosquitoes. Eliminate standing water and use physical barriers like nets.
● Spiders and Other Insects: Seasonal shifts cause spiders to move indoors. Regular vacuuming and decluttering reduce hiding spots.
Eco-Friendly Prevention Methods
● Use natural repellents like peppermint oil or diatomaceous earth
● Encourage beneficial insects, such as ladybugs, to reduce pest populations
● Plant pest-deterring plants near home boundaries, like marigolds or lavender
Integrated Pest Management (IPM)
Adopt an IPM approach by combining physical barriers, monitoring, and environmentally safe treatments. This minimizes chemical use while maintaining a pest-free home.
Quote: “Prevention is the most effective form of pest control.” – National Pest Management Association
Seasonal Pest Prevention Tools
● Snap traps and humane rodent traps
● Sticky traps for insects
● Outdoor perimeter sprays (eco-friendly)
● Moisture meters to detect early termite or mold problems
Pro Tip: Keep tools organized and accessible to act quickly when pest activity is noticed.
Planning: Annual Pest Calendar
Month
Recommended Action
March-April
Spring pest prevention tips: Inspect, seal, clean gutters
June-July
Summer pest prevention guide: Screens, standing water, food storage
September
Seasonal pest checklist: Seal entries, declutter, prep storage
November
Winter rodent entry points: Monitor indoors, maintain traps
Key Takeaways
● Seasonal awareness prevents infestations and property damage
● Consistent inspections and maintenance are essential
● Simple eco-friendly measures can significantly reduce pests
● Use a structured checklist and calendar for effective prevention
Conclusion
Homeowners who stay proactive and follow spring pest prevention tips, along with year-round monitoring, ensure their properties remain safe and comfortable. Using a summer pest prevention guide, checking winter rodent entry points, and maintaining a seasonal pest checklist ensure your home remains safe and comfortable. Remember to combine inspections, physical barriers, and environmentally friendly methods for the best results.
FAQs
Q1: How often should I perform a termite inspection?
A1: Conduct inspections annually, especially in spring, to detect early signs of termite activity and prevent extensive damage.
Q2: Can pests enter my home during winter?
A2: Yes, rodents and insects seek warmth and shelter indoors. Sealing entry points and monitoring for activity is crucial.
Q3: What is the most effective eco-friendly method for pest prevention?
A3: Using natural repellents, encouraging beneficial insects, and eliminating water sources effectively reduces pest populations without chemicals.
Ensure your home is ready for every season. Schedule a professional Virginia pest control consultation or a termite inspection in Suffolk, VA, today and stay ahead of potential infestations.
 Enhanced Home Services, LLC
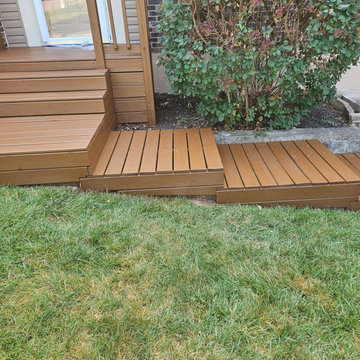
This front entry deck was transformed with a rich, warm semi-transparent stain that enhances the natural beauty of the wood while providing long-lasting protection against the elements. The refreshed finish highlights the grain, creates a clean, uniform appearance, and adds instant curb appeal.
Every surface—including the stairs, railings, landings, and connecting walkway—was carefully prepared and professionally stained to ensure even coverage and a durable finish. Proper preparation and premium products help extend the life of the wood while giving this entryway a fresh, welcoming look.
Whether your deck needs a complete restoration or simply a new protective coat, a professionally applied stain can dramatically improve both appearance and longevity.
 Windy City Painters
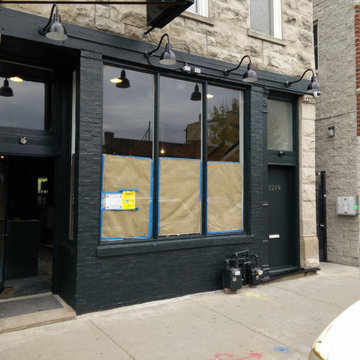
Painter Near Me Chicago - Professional Painting Services by Windy City Painters
Finding a skilled painter near me in Chicago is easier when you know what to look for, and Windy City Painters delivers the craftsmanship Chicago homeowners trust for greystones, vintage two-flats, classic bungalows, and modern condos throughout the city.
Project Overview
This project showcases Windy City Painters completing professional interior and exterior painting services for a Chicago-area client. The building's vintage character called for careful color selection and precise application to honor original architectural details while refreshing every surface.
Materials and Products Used
Windy City Painters selects premium paints from trusted manufacturers including Sherwin-Williams and Benjamin Moore, chosen specifically for Chicago's climate demands. Primers, fillers, and caulks are all professional-grade for lasting adhesion and durability.
Our Step-by-Step Process
Step 1 - Prep and Repairs: All surfaces are cleaned, sanded, and patched. Cracks in plaster or drywall are filled and feathered smooth before any painting begins.
Step 2 - Priming: A quality primer is applied to ensure proper adhesion, uniform sheen, and long-term durability across all surfaces.
Step 3 - Paint Application: Multiple coats are applied using the right tools for each surface - brushes, rollers, and sprayers where appropriate.
Step 4 - Final Inspection: Windy City Painters conducts a detailed walkthrough with the homeowner to confirm every detail meets our high standard.
Chicago-Specific Challenges
Older Chicago homes present unique challenges including lead paint layers, aging horsehair plaster, moisture from harsh winters, and intricate vintage millwork. Windy City Painters is trained to handle all of these safely and professionally.
Results
Clients consistently report dramatic improvements in curb appeal, interior atmosphere, and overall home value after working with Windy City Painters.
Pro Tips Before You Start
Always test for lead paint in homes built before 1978. Budget for surface prep - it determines final quality. Choose paints rated for Chicago's freeze-thaw cycles for exterior projects.
See more work and request a free estimate at windypainters.com.
Frequently Asked Questions
Q: How do I find a reliable painter near me in Chicago? / A: Look for licensed, insured contractors with strong local reviews. Windy City Painters is a trusted painter near me in Chicago with a proven track record serving greystones, bungalows, and vintage buildings throughout the city.
Q: What surfaces can a painter near me in Chicago handle? / A: Windy City Painters handles drywall, plaster, wood trim, cabinets, brick, and metal surfaces, making us a comprehensive painter near me in Chicago for any project large or small.
Q: How important is surface preparation? / A: Proper preparation is the foundation of any quality paint job. As your painter near me in Chicago, Windy City Painters dedicates significant time to prep work ensuring flawless, long-lasting results every time.
Q: Do you handle lead paint safely in older Chicago homes? / A: Yes, Windy City Painters follows all safety protocols for lead paint in older homes, making us the responsible painter near me in Chicago for vintage and pre-1978 buildings.
Q: What paint brands does Windy City Painters recommend? / A: As a professional painter near me in Chicago, Windy City Painters recommends Sherwin-Williams and Benjamin Moore for their durability, color accuracy, and performance in Chicago's demanding climate.
Q: Can you paint exterior surfaces in Chicago winters? / A: Exterior painting requires temperatures above 50 degrees Fahrenheit. Windy City Painters, your painter near me in Chicago, schedules exterior projects during appropriate seasonal windows for best results.
Q: How many coats of paint are typically needed? / A: Most projects require two finish coats over primer. Your painter near me in Chicago at Windy City Painters assesses each surface individually to determine the right number of coats.
Q: Do you offer color consultation services? / A: Yes, Windy City Painters provides color guidance as part of our painter near me in Chicago service, helping you select shades that complement your home's architecture and style.
Q: Can Windy City Painters match existing paint colors? / A: Absolutely, as your skilled painter near me in Chicago, Windy City Painters uses professional color-matching technology to seamlessly blend new paint with existing finishes throughout your home.
Q: How do I get a free estimate from a painter near me in Chicago? / A: Simply visit windypainters.com or call us directly. Windy City Painters makes it easy to connect with a professional painter near me in Chicago for a no-obligation estimate.
 Windy City Painters
Modern Sophistication in River North | Interior Transformation
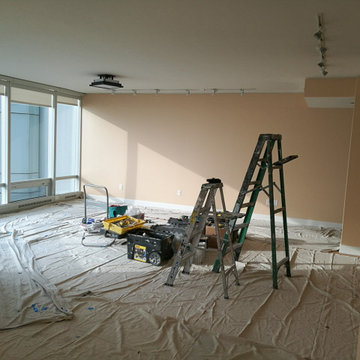
Refining a home in River North requires a balance of high-end aesthetics and logistical precision. This recent mid-rise project highlights our team’s ability to transform modern urban spaces into polished, gallery-quality homes. Whether it’s a sleek condo or a spacious loft, we specialize in the crisp lines and durable finishes that downtown Chicago living demands.
Project Overview & Premium Materials
For this River North residence, we selected Benjamin Moore Advance for its furniture-like finish and incredible durability. In a high-traffic urban environment, the paint needs to do more than just look good—it needs to withstand daily life. We paired this with high-performance primers specifically chosen for the smooth drywall and metal trim often found in newer Chicago developments.
Our Meticulous Process
Logistics & Protection: We coordinate directly with building management to handle COIs and freight elevator schedules. Once inside, we utilize heavy-duty floor protection and dust-containment systems.
Preparation: Modern lighting is unforgiving. We perform extensive drywall patching and sanding to ensure walls are perfectly plumb and smooth.
Application: Using a combination of professional airless spraying for a factory-smooth finish on doors and precision brush-and-roller work for walls.
Detail & Delivery: A final walkthrough ensures every transition—from baseboard to ceiling—is flawless before a comprehensive cleanup.
The Urban Challenge: Mid-Rise Logistics
Painting in River North isn't just about the walls; it’s about the environment. Working within mid-rise buildings requires strict adherence to work hours, noise ordinances, and specialized venting for low-VOC materials. Our team is seasoned in navigating these requirements so the homeowner doesn't have to.
Results That Elevate
The final result is a bright, cohesive space that maximizes the natural light from the building's large windows. By updating dated finishes with a sophisticated, modern palette, we’ve added significant aesthetic and resale value to this downtown property.
Project Insights & FAQ
How do I choose a painter for a River North condo?
Look for contractors who are familiar with high-rise requirements. You need a team that carries the specific insurance limits required by downtown HOAs and understands the "in-and-out" logistics of River North buildings.
What is the typical timeline for a downtown project?
Most mid-rise interiors are completed within 2 to 4 days. We focus on high-efficiency workflows to ensure you can enjoy your refreshed home as quickly as possible.
Can you work during the winter?
Absolutely. Interior painting in Chicago is a year-round service. In fact, winter is an ideal time to refresh your condo's interior while you're spending more time indoors.
Why choose Windy City Painters for your urban home?
We combine local expertise with a commitment to premium materials and clean, professional execution. From handling building management paperwork to the final brushstroke, we provide a turnkey experience for the busy professional.
Ready to start your River North transformation?
View more of our portfolio and request your free estimate at windypainters.com.
Pro Tip for Houzz Users:
When updating a modern condo, consider a "Matte" or "Ulti-Matte" finish for your walls. It hides minor drywall imperfections and looks stunning under the recessed LED lighting common in River North units.
8