
Search results for "Professional prepare" in Home Design Ideas
![Modern Cabinet Refinishing [Kitchen & Bathroom] - New Smyrna Beach FL](https://st.hzcdn.com/fimgs/d2d178480a10cd34_6037-w360-h360-b0-p0--.jpg)
 ZerOne Contracting
Behind the scenes of our meticulous kitchen cabinet refinishing process. To achieve a true factory-grade finish, we dismantle the doors and drawers, bringing them to our controlled setup for professional spraying. Every single piece is thoroughly cleaned, sanded, masked, and suspended to ensure an ultra-smooth, durable coating without a single brush mark or drip. Preparation is 90% of our work, and we treat your home like a showroom.
 The Art of Preparation
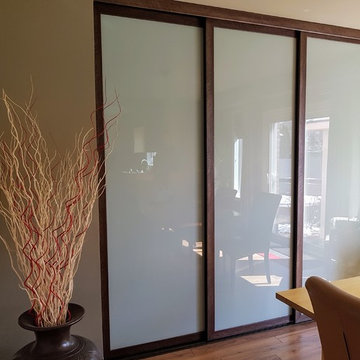
Extra Storage was required. We used sliding doors with mounted metal shelving and used the entire height. There is even a mini fridge included!
Mid-sized trendy home design photo in Toronto
Mid-sized trendy home design photo in Toronto
 Maverick City Builders
This whole home interior painting and trim upgrade project in Lancaster highlights how a professionally executed finish can completely transform the look, feel, and flow of an entire living space. The project began with a dated interior featuring worn paint, visible wall imperfections, and aging trim that no longer reflected a clean, modern aesthetic. While the home’s structure remained solid, the overall appearance felt dull and lacked the brightness, consistency, and refinement homeowners are looking for today.
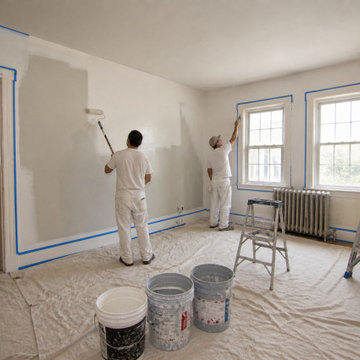
Our team began with a comprehensive preparation process across the entire home, which is one of the most critical steps in achieving a high-quality and long-lasting paint finish. Every surface was carefully cleaned, patched, and sanded to create a smooth and uniform base. All floors, fixtures, and furnishings were fully protected using professional-grade coverings, and trim lines throughout the home were precisely taped to ensure sharp, clean edges. This level of preparation not only enhances the final appearance but also ensures durability and consistency from room to room.
As the project progressed, premium-quality paints were applied using a combination of rolling and precision cutting techniques to achieve a smooth, even finish across all wall and ceiling surfaces. The selected color palette focused on modern, neutral tones designed to maximize natural light and create a cohesive, open feel throughout the home. At the same time, all trim, baseboards, and interior details were upgraded with a crisp white finish, adding contrast, depth, and a polished look that ties every space together.
During the final stages, detailed touch-ups and trim refinements were completed in every room to achieve a flawless, professional-grade result. Each edge, corner, and transition was carefully inspected and perfected, ensuring consistency and craftsmanship at every level. The transformation is especially noticeable when comparing the before and after, as the home evolves from a worn, outdated environment into a bright, modern, and refreshed living space.
Once completed, the home was staged to highlight its full potential and demonstrate how a whole home painting upgrade can dramatically improve both aesthetics and functionality. The final result is a clean, cohesive, and welcoming interior that feels updated, spacious, and move-in ready.
Projects like this showcase the value of expert craftsmanship and attention to detail in full-home interior renovations. Whether you are preparing your property for sale or looking to modernize your living space, a whole home interior painting and trim upgrade remains one of the most effective ways to increase both visual appeal and overall property value in Lancaster, MA and surrounding areas.
Our team started with a detailed preparation process, which is one of the most critical steps in achieving a high-quality paint finish. All surfaces were carefully cleaned, patched, and sanded to ensure a smooth and even base. Floors and furniture were fully protected using professional-grade coverings, and trim areas were precisely taped to guarantee clean, sharp lines. This level of preparation ensures that the final result is not only visually appealing but also long-lasting.
As the painting phase progressed, high-quality paints were applied using a combination of rolling and cutting techniques to create a consistent, smooth finish across all wall surfaces. The color selection focused on modern, neutral tones that enhance natural light and create a more open, inviting atmosphere. At the same time, the trim and baseboards were upgraded with a crisp, clean white finish, adding contrast and definition throughout the space.
During the final stages, detailed touch-ups and trim work were completed to achieve a flawless result. Every corner, edge, and transition was carefully inspected and refined, ensuring a professional-grade finish that stands out. The transformation is most noticeable when comparing the before and after stages, where the room evolves from a dated and worn environment into a bright, modern living area.
The completed space was then staged to showcase its full potential, demonstrating how a simple upgrade like interior painting and trim work can dramatically improve both aesthetics and functionality. The result is a clean, polished, and welcoming environment that feels refreshed and ready for everyday living.
Projects like this demonstrate the impact of expert craftsmanship and attention to detail in interior renovations. Whether you are preparing your home for sale or simply looking to update your living space, professional painting and trim upgrades offer one of the most effective ways to enhance your home’s value and appearance.
Find the right local pro for your project
 Louis Duncan-He Designs
interior design calgary basement renovation
Basement - coastal basement idea in Calgary
Basement - coastal basement idea in Calgary
 Haven & Co.
D&M Images
Example of an urban gender-neutral laminate floor and brown floor walk-in closet design in Other with flat-panel cabinets and medium tone wood cabinets
Example of an urban gender-neutral laminate floor and brown floor walk-in closet design in Other with flat-panel cabinets and medium tone wood cabinets
 Wanda Ely Architect Inc.
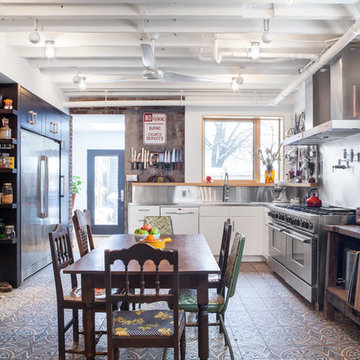
A modern plan combines the kitchen and dining areas into a large common room that is meant for cooking, entertaining and gathering. Double stoves with a stainless steel backsplash, the exposed joist ceiling, and open pegboard for storing cookware and utensils gives the kitchen an honest, utilitarian feel inspired by industrial kitchens.
Photo by Scott Norsworthy
 Meredith Heron Design
Donna Griffith for House and Home Magazine
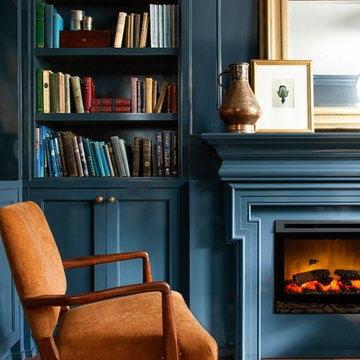
Example of a small transitional enclosed dark wood floor living room design in Toronto with black walls
Example of a small transitional enclosed dark wood floor living room design in Toronto with black walls
Sponsored
Columbus, OH

Wannemacher Interiors
Customized Award-Winning Interior Design Solutions in Franklin Cnty OH

 Wilson Home Remodeling
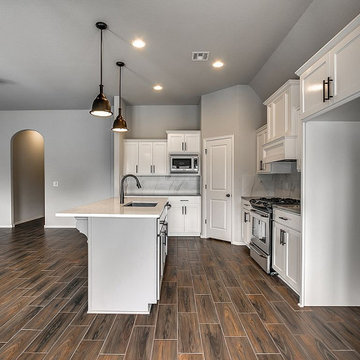
Our professional general contractors in Fremont believe your kitchen is arguably the most important part of your home. You spend the most amount of time there, preparing enticing delicacies, gathering around with family preparing meals, and sometimes that visit for that late-night snack. You simply can’t afford to leave your kitchen in a bad shape, especially if you’re particular about what goes into your stomach. The WILSON TEAM of professionals are here to help you turn your dream kitchen into reality, thanks to our kitchen remodel services in Fremont!
General Contractors, Kitchen Renovation in Fremont - https://www.wilsonhomeremodeling.com/
 Homeowner Services of Michigan LLC
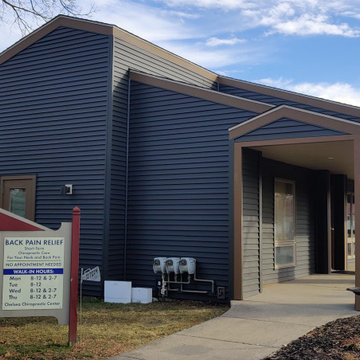
Homeowner Services of Michigan recently completed a comprehensive exterior restoration project for a professional building owned by a commercial property client. The client selected us for our ability to meet their specific needs and adhere to their timeline. A key requirement was to complete the project without disrupting the tenants of the complex.
We began by carefully removing the old, outdated siding. Our team ensured minimal disturbance to the tenants by scheduling work during off-peak hours and utilizing sound-dampening techniques. Once the old siding was removed, we prepared the building’s inner sheath and applied advanced weather-sealing techniques to protect against moisture and improve insulation.
Next, we installed high-quality HardieBoard cement composite siding in a deep slate blue color. This choice provided a modern and professional appearance. Our team ensured precise alignment and secure fastening for maximum durability.
To complete the look, we installed contrasting regal gold trim, gutters, and downspouts. The regal gold trim highlighted the building’s architectural features, while the matching gutters and downspouts ensured efficient water drainage and added to the building's aesthetic appeal.
The project was completed on time and within budget, with no disruption to the building’s tenants. The new exterior not only enhanced the building's curb appeal but also provided improved weather resistance and energy efficiency. The combination of deep slate blue HardieBoard siding and regal gold trim created a striking, professional look that perfectly aligned with the client’s vision.
 Simply Home Decorating
This beautiful North Vancouver home belongs to a nature-loving and health-conscious couple, Emma and Vince (names changed), their two young children, and their dog, Jasper. When they contacted us about renovating and furnishing their kitchen and family room, we walked in and saw a world of potential waiting to be uncovered.
Before: Larkhall Crescent Home:
Like many original North Vancouver homes, the interior was definitely dated. We encountered late ‘80s finishes in powder pink and teal green, old carpet, and a kitchen that wasn’t maximized to suit this family’s modern-day lifestyle. However, the size of the rooms offered us a ton of space with which to get creative.
Knowing our clients’ love of cooking, need for work spaces (Emma and Vince both work remotely), and growing family, we developed a design concept that would increase usable space, optimize storage, and create intimacy in this large area. As for the style, we were inspired by their European roots, inventing a new and modern take on “Belgian Farmhouse” style. Now, the home is truly one-of-a-kind.
After: Warm & Cozy Family Room:
Fresh, bright, and comfortable, this living area has been transformed! We started with the fireplace as a focal point, selecting aged brick tiles for added texture and a crisp wood mantle. The taupe-coloured sectional infuses the room with visual warmth and serves the added purpose of separating the family room from the kitchen.
Emma and Vince were also keen on using non-toxic materials in their home, and we were happy to oblige. To meet their needs, we sourced natural wood elements and sought out Canadian-made products - that adhere to high health standards - whenever possible.
Look closer at the elements of this space, and you will find this stunning, honeycomb-patterned rug in earthy gold, beige, and charcoal tones. It’s plush to the touch and full of visual texture that brings this room’s colour palette together. We sourced these two-tone chairs with caning, petrified wood side table, black sconces, and botanical prints in greyscale from local artist, Heather Johnston.
We topped off the space with this dark wood and rattan console that offers storage facing the kitchen and presents an opportunity to display cherished items. The result is a cozy lounging space brimming with comfort and functionality. It’s perfect for enjoying quality family time, or Emma can simply slide the coffee table away to make room for her morning yoga practice.
Now, let’s turn around and give some attention to the kitchen. Do you remember what the original kitchen looked like? If not, scroll back up, because the transformation is shocking…
Moody & Welcoming Kitchen for Healthy Living:
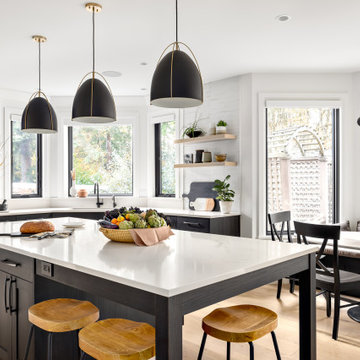
This kitchen looks very different from how it started, right? Though we didn’t touch any walls, the kitchen has almost doubled in usable space! We created a long, extended island with storage, an outlet for small appliances, and seating for comfortable prep, after-school snacking, or mingling among friends.
On the other side of the island, the family has even more storage and an integrated dishwasher within easy reach of the sink, perfect for quick clean-up. From this angle, you can also see the expansive custom Shaker cabinetry in white and the integrated double ovens. These facilitate their cooking experience and gave us the opportunity to add an additional surprise…
A coffee garage station and more hidden storage! Keeping these items located along the perimeter allows them to be accessed by the family or their guests without someone getting under the cook’s feet. These are the little details that make everyday life easier and more enjoyable.
Moving deeper into the kitchen, the seamless induction cooktop topped with a freestanding concealed hood fan commands attention in a soft yet prominent way. The natural wood accent mirrors the fireplace mantle, and the choice of off-black wood-grain cabinets not only continues our black-and-white colour palette but adds a sense of depth and contrast. The corner sink is located to the right and perfectly positioned with a view of their thriving backyard.
To invite more of this family’s character into the space, we mixed metals for interest — matte black, dark pewter, and warm brass — and created open shelves in white oak for their plants and decor. You can also glimpse the tumbled edge of the backsplash tile, which echoes the rustic brick of the fireplace. It adds that farmhouse charm while still feeling timeless and sophisticated.
Last but not least, we designed this dining banquette in the bay window (with integrated bench storage, of course), where the family can share a meal together, the kids can do homework, or Emma and Vince can work and enjoy a change of scenery from their offices. Like the other spaces in the home, it was designed to be beautiful, multi-functional, and long-lasting.
Praise from Our Clients:
It is clear that we love this home, but what did our clients have to say?
“Lori is a visionary and masters execution to the finest detail all at the same time. When she first met us to know more about who we are and how we live, she could right away envision how we could use the space in our kitchen and living room…The results exceeded our expectations.
Lori and her team were also a delight to work with — coordination with all the trades, fast problem-solving, regular updates, professional and friendly attitude of her entire team — made it the dream team. Thank you SHD for making our space so beautiful!”
In turn, we are so grateful for this family’s trust, their open communication, and for being wonderful people with whom to work. (So, thank you!)
 Chamberland Professional Painting
Chamberland Professional Painting | Exterior Painting Experts in West Hartford, Glastonbury & Farmington Valley
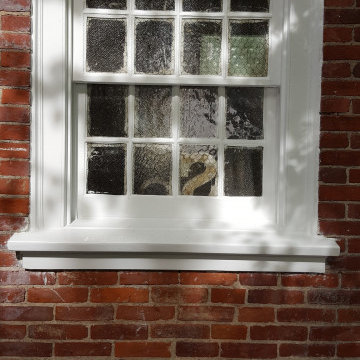
Transform your home's exterior with Chamberland Professional Painting, the trusted choice for high-quality exterior painting in West Hartford, Glastonbury, and the Farmington Valley areas. Our skilled painters specialize in residential exterior painting, delivering flawless finishes that enhance curb appeal, protect against harsh New England weather, and increase property value.
We use premium, weather-resistant paints and proven techniques to ensure a durable, long-lasting finish for siding, brick, stucco, wood, decks, fences, and more. Whether you're refreshing your home's look or preparing to sell, our expert team provides personalized color consultations and professional craftsmanship to bring your vision to life.
✅ Local & Licensed Connecticut Painting Contractor
✅ Eco-Friendly, High-Quality Paint Options
✅ Detailed Surface Preparation & Power Washing
✅ Dedicated to Precision, Cleanliness & Customer Satisfaction
? Serving West Hartford, Glastonbury, and Farmington Valley, CT. Contact us today for a free consultation and let’s make your home stand out!

 Talon Construction Inc.
Designing and building a kitchen addition is a complex process that involves multiple steps and considerations. Here is a general outline to help you get started on your kitchen addition project:
Define Your Goals and Budget:
• Determine the purpose of the kitchen addition. Is it for more cooking space, a dining area, or a combination of both?
• Establish a realistic budget for your project. Consider all costs, including construction, permits, materials, and furnishings.
Hire a Design Professional:
• Seek the services of a design build company who specializes in kitchen additions.
• Discuss your vision, needs, and budget with the design professional to create a design concept.
Site Evaluation:
• Assess the existing space and structural condition of your home to ensure it can support the addition.
• Consider factors like zoning regulations, setbacks, and building codes.
Design Development:
• Collaborate with your design professional to refine the concept, including the layout, size, and architectural style.
• Choose materials, finishes, and fixtures that fit your design and budget.
Obtain Permits:
• Consult with your local design build contractor to determine the necessary permits and approvals.
• Prepare and submit all required documents, including architectural drawings and engineering plans.
Create Construction Documents:
• Work with your design build professional to develop detailed construction drawings and specifications.
• These documents will serve as a guide for contractors during construction.
Hire a design build contractor:
• Check references, credentials, and licenses before selecting a contractor.
• Sign a detailed contract that outlines the scope of work, timeline, and payment schedule.
Construction Phase:
• Demolition: If needed, remove any existing structures or walls.
• Foundation: Construct the foundation for the addition.
• Framing: Build the structural framework of the addition.
• Plumbing, Electrical, and HVAC: Install or update utilities as required.
• Insulation: Ensure proper insulation for energy efficiency.
• Drywall and Finish Work: Complete the walls and ceilings.
• Flooring and Cabinetry: Install flooring and kitchen cabinets.
• Appliances and Fixtures: Add appliances, plumbing fixtures, and lighting.
• Paint and Finish: Apply paint and finishes to achieve the desired look.
• Final Inspection: Schedule inspections to ensure compliance with building codes.
Final Inspections and Approvals:
• Arrange for final inspections to ensure the addition meets all safety and code requirements.
• Obtain any necessary certificates of occupancy or compliance.
Move In and Enjoy:
• Once all inspections and approvals are received, you can move into your new kitchen addition and start enjoying it.
Remember that every kitchen addition project is unique, so adapt this outline to your specific needs and circumstances. Consulting with professionals and obtaining the required permits and inspections is crucial to a successful and safe project.

 Rockwell Solutions
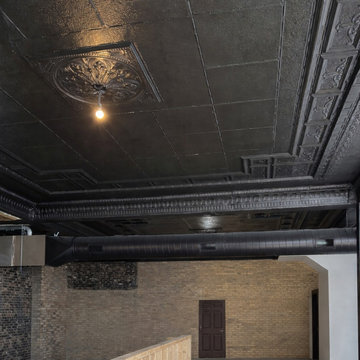
This project focused on restoring and transforming a historic pressed tin ceiling that had accumulated significant wear over time. Years of modifications had left the ceiling with nail holes, damaged areas, missing ornamental details, and inconsistent finishes that hid much of the original craftsmanship.
Our team carefully repaired the damaged sections and rebuilt missing ornamental elements to restore the integrity of the original design. Once the repairs were complete, the entire ceiling was professionally prepared and refinished.
The ceiling and exposed HVAC ductwork were finished in Sherwin-Williams “Caviar,” a deep, rich tone that highlights the intricate patterns and architectural details of the pressed tin panels. The darker finish adds contrast and depth to the space, allowing the historic texture and decorative elements to stand out rather than blend into the background.
The result is a dramatic transformation that brings new life to the historic ceiling while preserving its character. What was once a worn and inconsistent surface is now a striking architectural feature that anchors the room and celebrates the craftsmanship of the original tin work.
 Novell Design Build & Novella Outdoors
Janis Nicolay
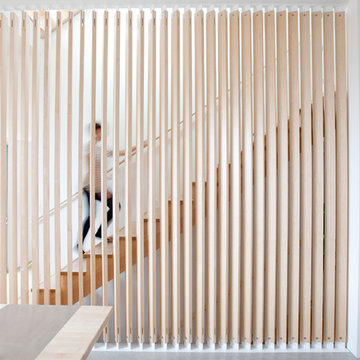
Example of a trendy wooden straight staircase design in Vancouver with wooden risers
Example of a trendy wooden straight staircase design in Vancouver with wooden risers
 Wilson Home Remodeling
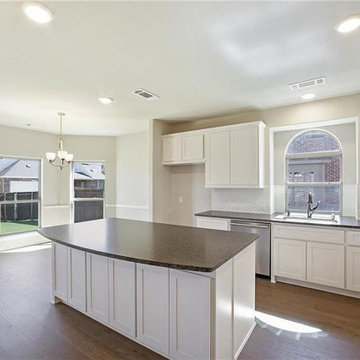
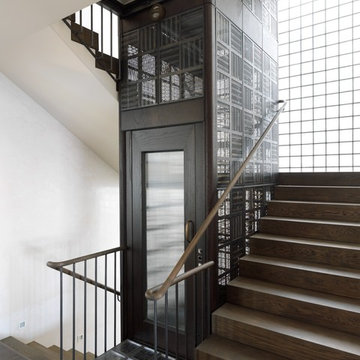
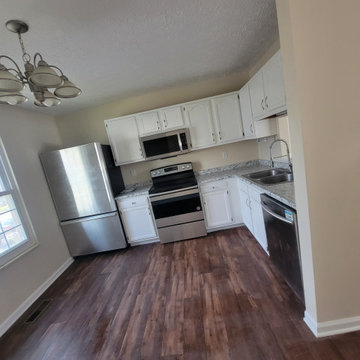
Our professional general contractors in Fremont believe your kitchen is arguably the most important part of your home. You spend the most amount of time there, preparing enticing delicacies, gathering around with family preparing meals, and sometimes that visit for that late-night snack. You simply can’t afford to leave your kitchen in a bad shape, especially if you’re particular about what goes into your stomach. The WILSON TEAM of professionals are here to help you turn your dream kitchen into reality, thanks to our kitchen remodel services in Fremont!
General Contractors, Kitchen Renovation in Fremont - https://www.wilsonhomeremodeling.com/

 Talon Construction Inc.
Designing and building a kitchen addition is a complex process that involves multiple steps and considerations. Here is a general outline to help you get started on your kitchen addition project:
Define Your Goals and Budget:
• Determine the purpose of the kitchen addition. Is it for more cooking space, a dining area, or a combination of both?
• Establish a realistic budget for your project. Consider all costs, including construction, permits, materials, and furnishings.
Hire a Design Professional:
• Seek the services of a design build company who specializes in kitchen additions.
• Discuss your vision, needs, and budget with the design professional to create a design concept.
Site Evaluation:
• Assess the existing space and structural condition of your home to ensure it can support the addition.
• Consider factors like zoning regulations, setbacks, and building codes.
Design Development:
• Collaborate with your design professional to refine the concept, including the layout, size, and architectural style.
• Choose materials, finishes, and fixtures that fit your design and budget.
Obtain Permits:
• Consult with your local design build contractor to determine the necessary permits and approvals.
• Prepare and submit all required documents, including architectural drawings and engineering plans.
Create Construction Documents:
• Work with your design build professional to develop detailed construction drawings and specifications.
• These documents will serve as a guide for contractors during construction.
Hire a design build contractor:
• Check references, credentials, and licenses before selecting a contractor.
• Sign a detailed contract that outlines the scope of work, timeline, and payment schedule.
Construction Phase:
• Demolition: If needed, remove any existing structures or walls.
• Foundation: Construct the foundation for the addition.
• Framing: Build the structural framework of the addition.
• Plumbing, Electrical, and HVAC: Install or update utilities as required.
• Insulation: Ensure proper insulation for energy efficiency.
• Drywall and Finish Work: Complete the walls and ceilings.
• Flooring and Cabinetry: Install flooring and kitchen cabinets.
• Appliances and Fixtures: Add appliances, plumbing fixtures, and lighting.
• Paint and Finish: Apply paint and finishes to achieve the desired look.
• Final Inspection: Schedule inspections to ensure compliance with building codes.
Final Inspections and Approvals:
• Arrange for final inspections to ensure the addition meets all safety and code requirements.
• Obtain any necessary certificates of occupancy or compliance.
Move In and Enjoy:
• Once all inspections and approvals are received, you can move into your new kitchen addition and start enjoying it.
Remember that every kitchen addition project is unique, so adapt this outline to your specific needs and circumstances. Consulting with professionals and obtaining the required permits and inspections is crucial to a successful and safe project.
 Windy City Painters
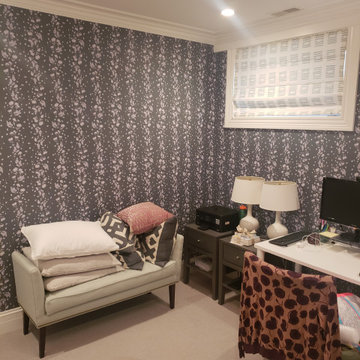
First, we conducted thorough surface preparation including wall conditioning and primer application. Second, we precisely measured and calculated pattern repeats for perfect alignment. Third, we applied premium adhesive using professional techniques for long-lasting adhesion. Finally, we completed meticulous finishing work including seam treatment and detail trimming.
**Chicago-Specific Challenges**
River North high-rises present unique installation challenges including building access restrictions, climate-controlled environments, and coordination with building management. Furthermore, these luxury spaces demand the highest quality standards and minimal disruption to residents.
**Exceptional Results**
The completed wallpaper installation transformed this River North condo into a designer showcase, perfectly complementing the urban sophistication and architectural elegance of downtown Chicago living.
**Professional Tips**
Always choose experienced installers familiar with luxury building requirements. Additionally, select wallpaper designed for Chicago's climate variations and ensure proper surface preparation for lasting results.
See more work and request free estimate at windypainters.com.
**Frequently Asked Questions**
Q: Why choose wallpaper installation River North specialists? A: We understand luxury condo requirements and building management protocols essential for downtown projects.
Q: How do you handle pattern matching? A: Our experts use precision measuring and mathematical calculations for perfect wallpaper installation River North pattern alignment.
Q: Can you work in occupied condos? A: Yes, we coordinate schedules and minimize disruption during wallpaper installation River North residential projects.
Q: Do you remove existing wallpaper? A: Absolutely, we provide complete removal and surface preparation for new wallpaper installation River North applications.
Q: What about building restrictions? A: We coordinate with management and follow all protocols for wallpaper installation River North high-rise requirements.
Q: How long does installation take? A: Most wallpaper installation River North projects complete within one to two days depending on scope.
Q: Do you warranty your work? A: Yes, all wallpaper installation River North projects include comprehensive warranties for materials and workmanship.
Q: Can you install designer wallpaper? A: We specialize in premium materials and complex patterns for luxury wallpaper installation River North projects.
Q: Do you offer consultations? A: Yes, we provide design guidance and material selection for wallpaper installation River North residential spaces.
Q: What makes you different? A: Our wallpaper installation River North expertise combines luxury experience with downtown building management coordination skills.
 Windy City Painters
## Professional Wallpaper Installation Lincoln Park Project
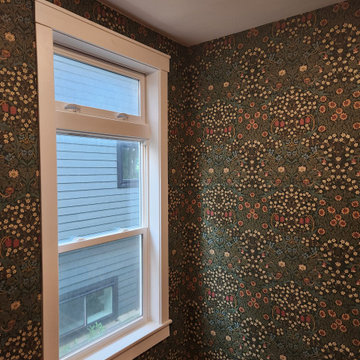
Wallpaper installation Lincoln Park requires expert techniques for this stunning greystone renovation. Lincoln Park's architectural heritage includes beautiful greystones, vintage condos, and historic buildings that demand specialized installation approaches respecting original craftsmanship.
## Materials and Products Used
We utilized premium vinyl wallpaper with fabric backing for durability. Additionally, commercial-grade adhesives from Benjamin Moore ensure long-lasting application. Furthermore, we applied specialized primers designed for vintage plaster surfaces common in Lincoln Park homes.
## Four-Step Installation Process
First, complete removal of existing wallpaper and surface preparation. Second, repair any wall imperfections and apply appropriate primer. Third, precise measurement and cutting with careful pattern matching. Finally, professional installation with seamless application and detailed finishing.
## Chicago Home Challenges
Chicago's harsh winters create expansion and contraction issues requiring flexible adhesives. Moreover, older Lincoln Park buildings often have uneven plaster walls needing extensive preparation. Additionally, potential lead paint concerns in vintage homes require certified safe work practices.
## Results and Quality Standards
Perfect pattern alignment across all seams creates seamless appearance throughout the space. Furthermore, moisture-resistant materials ensure longevity against Chicago's humidity fluctuations. The finished installation enhances the home's architectural character while providing modern durability.
## Professional Tips
Always test adhesive compatibility on small areas first. Moreover, control room temperature and humidity during installation for optimal results. Additionally, choose wallpaper appropriate for Chicago's climate conditions.
See more work and request free estimate at windypainters.com.
## Frequently Asked Questions
Q: How long does wallpaper installation Lincoln Park typically take for one room?
A: Most single rooms completed within one to two days including preparation, removal, and professional wallpaper installation Lincoln Park application.
Q: What wallpaper types work best in Chicago's climate conditions?
A: Vinyl and fabric-backed wallpapers offer superior durability against humidity and temperature changes affecting wallpaper installation Lincoln Park projects.
Q: Can you install wallpaper over existing painted walls in older homes?
A: Yes, with proper surface preparation and primer application, wallpaper installation Lincoln Park works excellently over previously painted surfaces.
Q: Do you handle complete wallpaper removal before new installation?
A: Absolutely, comprehensive wallpaper removal and surface preparation included in all wallpaper installation Lincoln Park project estimates and services.
Q: What preparation is required for vintage Lincoln Park home wallpaper installation?
A: Surface cleaning, repairs, lead paint testing if applicable, and proper primer application essential for successful wallpaper installation Lincoln Park.
Q: How do you ensure perfect pattern matching across large walls?
A: Expert measuring, cutting, and installation techniques guarantee seamless pattern alignment throughout every wallpaper installation Lincoln Park project we complete.
Q: What warranty coverage do you provide for wallpaper installation work?
A: All wallpaper installation Lincoln Park projects include comprehensive warranty coverage protecting your investment and ensuring long-lasting beautiful results.
Q: Can wallpaper installation work in Lincoln Park condos and smaller spaces?
A: Yes, we specialize in all housing types including condos, requiring precise wallpaper installation Lincoln Park techniques for optimal results.
Q: How do Chicago weather conditions affect wallpaper installation timing and materials?
A: We schedule wallpaper installation Lincoln Park during optimal conditions and recommend climate-appropriate materials for Chicago's challenging weather patterns.
Q: What makes Windy City Painters different for wallpaper installation Lincoln Park projects?
A: Local Chicago expertise, understanding of neighborhood architecture, and proven wallpaper installation Lincoln Park experience delivering exceptional quality results.
9