
Search results for "Proper selection" in Home Design Ideas

 Kathleen Jennison
An Arts & Crafts Bungalow is one of my favorite styles of homes. We have quite a few of them in our Stockton Mid-Town area. And when C&L called us to help them remodel their 1923 American Bungalow, I was beyond thrilled.
As per usual, when we get a new inquiry, we quickly Google the project location while we are talking to you on the phone. My excitement escalated when I saw the Google Earth Image of the sweet Sage Green bungalow in Mid-Town Stockton. "Yes, we would be interested in working with you," I said trying to keep my cool.
But what made it even better was meeting C&L and touring their home, because they are the nicest young couple, eager to make their home period perfect. Unfortunately, it had been slightly molested by some bad house-flippers, and we needed to bring the bathroom back to it "roots."
We knew we had to banish the hideous brown tile and cheap vanity quickly. But C&L complained about the condensation problems and the constant fight with mold. This immediately told me that improper remodeling had occurred and we needed to remedy that right away.
The Before: Frustrations with a Botched Remodel
The bathroom needed to be brought back to period appropriate design with all the functionality of a modern bathroom. We thought of things like marble countertop, white mosaic floor tiles, white subway tile, board and batten molding, and of course a fabulous wallpaper.
This small (and only) bathroom on a tight budget required a little bit of design sleuthing to figure out how we could get the proper look and feel. Our goal was to determine where to splurge and where to economize and how to complete the remodel as quickly as possible because C&L would have to move out while construction was going on.
The Process: Hard Work to Remedy Design and Function
During our initial design study, (which included 2 hours in the owners’ home), we noticed framed images of William Morris Arts and Crafts textile patterns and knew this would be our design inspiration. We presented C&L with three options and they quickly selected the Pimpernel Design Concept.
We had originally selected the Black and Olive colors with a black vanity, mirror, and black and white floor tile. C&L liked it but weren’t quite sure about the black, We went back to the drawing board and decided the William & Co Pimpernel Wallpaper in Bayleaf and Manilla color with a softer gray painted vanity and mirror and white floor tile was more to their liking.
After the Design Concept was approved, we went to work securing the building permit, procuring all the elements, and scheduling our trusted tradesmen to perform the work.
We did uncover some shoddy work by the flippers such as live electrical wires hidden behind the wall, plumbing venting cut-off and buried in the walls (hence the constant dampness), the tub barely balancing on two fence boards across the floor joist, and no insulation on the exterior wall.
All of the previous blunders were fixed and the bathroom put back to its previous glory. We could feel the house thanking us for making it pretty again.
The After Reveal: Cohesive Design Decisions
We selected a simple white subway tile for the tub/shower. This is always classic and in keeping with the style of the house.
We selected a pre-fab vanity and mirror, but they look rich with the quartz countertop. There is much more storage in this small vanity than you would think.
The Transformation: A Period Perfect Refresh
We began the remodel just as the pandemic reared and stay-in-place orders went into effect. As C&L were already moved out and living with relatives, we got the go-ahead from city officials to get the work done (after all, how can you shelter in place without a bathroom?).
All our tradesmen were scheduled to work so that only one crew was on the job site at a time. We stayed on the original schedule with only a one week delay.
The end result is the sweetest little bathroom I've ever seen (and I can't wait to start work on C&L's kitchen next).
Thank you for joining me in this project transformation. I hope this inspired you to think about being creative with your design projects, determining what works best in keeping with the architecture of your space, and carefully assessing how you can have the best life in your home.

 Barn Pros
View from inside the barn looking at a Barn Pros drop-down style horse stall. These stall fronts and packages are available in several styles, including several European designs. Stall walls are filled with our hand-selected 2'x6" Douglas Fir tongue and groove lumber - which has the proper flex for use in horse stalls.
Learn more on our website: www.barnpros.com/store

 TOC design & construction inc.
DESIGNED BY TOC design
CONSTRUCTION BY TOC design & Construction inc.
PHOTOS BY : Tania Scardellato
I was fortunate to have a young family approach me in desperate need to renovate there only 3 piece bathroom. This space was In dire need of a remodel, with old brown wall to wall tiles and a dated bulky yellow brown single sink vanity.
Storage was a must, lighting a necessity, and proper accessibility to the shower bath area.
We had a tight budget to respect, but a full gut of this bathroom was required. And a good thing too, once we started doing the demolition we noticed that mildew and rotting floors and walls had accumulated throughout the years. Doing it right the first time is no joke when dealing with water and electrical issues.
We discarded all reminisce of old and built from scratch, new walls, new plumbing, new electrical ,new insulation and a new window, a new fan that actually exhausted outside ( I say this laughing as you would be amazed at how many fans are installed but don’t exhaust outside, and you the client would never know unless you go inside the attic space.
Once all the hard stuff was done, the rest is just a matter of smart design. If you have a small bathroom here are some tips to guide you.
10 tips for making a small bathroom feel larger
Is your tiny bathroom cramping your functionality and style, leaving you longing for the enormous bathrooms gracing the pages of design magazines? Even if your bathroom is a fraction of the size, all it takes is some design savvy to make the most of the space you have. Consider these 10 smart tips that will help your bathroom look, feel and function like those larger contenders.
1-Get creative with corners
Space is at a premium in small bathrooms, so it's important to maximize every inch. Corners, for example, provide extra space for shelving, storage units and even hooks. Get creative and install unique design solutions that are not only functional, but also eye-catching. If you love the airiness of floating cabinets, add baskets or decorative boxes under for extra storage. If you are installing floating cabinets insure that they are installed securely to studs or plywood at wall.
2- Let solid colors shine
Busy patterns have a shrinking effect and make small bathrooms seem even smaller. Conversely, light natural hues make a space feel more open. If you're itching to get creative with design, experiment with textures but keep overpowering patterns to a minimum. Tone on tone is the best to achieve this.
3 - Maximize your bathtub
A bathtub takes up a significant portion of the room, but modern, compact options with curved basins, can make the tub feel larger when in use, all while conserving space.
4 - Select a smaller faucet
A faucet is jewelry for the bathroom. And just as accessories can overpower an outfit, a big bulky faucet isn't flattering in a small bath. Single-handle designs conserve counter space, while a wall-mount installation frees it up all together and can create quite the wow-factor, if the budget can accommodate the required changes to plumbing behind the wall.
5 - Make vanity storage simple
If you're in a storage war with your small bathroom, you're not alone in the battle. Toiletries and personal supplies without a place to call home only add clutter and chaos. Store smart with a space-saving vanity, the dual sink vanity shown here, looks quite simple, but in reality it has 4 sets of full extension drawers, and the vanity tower adds extra storage without overpowering the use of space.
6 - Show off the shower
Shower curtains may be pretty, but they interrupt the visual flow of a bathing space and make it feel significantly smaller. In bathrooms with small footprints, opt for a clear glass sliding shower door that doesn't require the clearance of one with a hinged design. Or as shown in this design and for fraction less expensive a half hinged panel installed on a fixed tempered glass panel. If you're embarking on a big remodel, create the illusion of more space by using same tile in the shower that's used throughout; instead of seeing them as two separate zones, the eye will read them as one.
7 - Discover the treasure of hidden storage
Work with a contractor, and you just might find some serious storage potential hidden behind your walls. Whether it's utilizing space between the studs for shallow shelving or a creating a small linen closet by annexing space from an adjacent room, even small additions can make a big difference.
8 - Focal Point
Tile is a beautiful, durable addition to any bathroom. For dainty spaces, consider installing tile at a diagonal to accentuate the focal point or as in this bathroom I used an oversized textured pattern to bring depth to the space at the window wall.
9 - Choose the right lights
Strategically install light to reflect and brighten a small bathroom to make it appear larger. Recessed lighting is an affordable solution for tiny rooms, offering ample light while taking up little space. Wall sconces alongside a mirror also reflect off the walls and make a room feel bright and airy. I always recommend going with LED lighting at 2800 to 3000K.
10 – Accessorize
This is your time to shine in your decorating skills, have fun with your towels, you can change the color scheme daily just by adding pops of color in your accessories, make sure to get items that serve a dual purpose, like baskets, boxes they can always be used as hampers, storing of towels and even a nice display for your guest.
Find the right local pro for your project

 S Squared Design, LLC
This 1950's home was in the need of an overhaul. Family of 4, they needed functional storage, easy to clean materials, and a proper master closet and bathroom. Timeless design drove the material selections and period appropriate fixtures made this house feel updated yet still fitting to the homes age. White custom cabinetry, classic tiles, mirrors and light fixtures were a perfect fit for this family. A large walk in shower, with a bench, in the new reconfigured master bathroom was an amazing transformation. All the bedrooms were outfitted with more useful storage. The master closet even got a full desk workspace with all the natural light you could ask for.

 AB design studio inc.
classic + modern style | large estate property
ocean & mountain view home above the pacific coast.
Trendy brown floor wine cellar photo in Santa Barbara with beige walls and storage racks
Trendy brown floor wine cellar photo in Santa Barbara with beige walls and storage racks
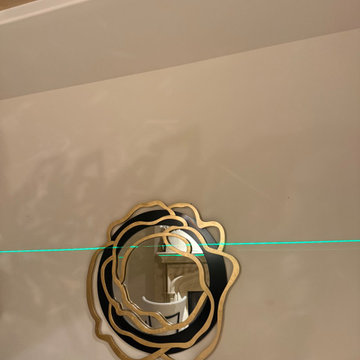
 Zephyr & Zinnia Furniture and Home Decor
We offer curated mirror selection and professional installation to enhance the style, balance, and functionality of your space. We carefully source mirrors that complement your interior design vision, then handle precise measurements, proper wall anchoring, and expert installation to ensure a seamless, refined result. Whether for a bathroom, living area, entryway, or commercial space, our mirror design and installation service delivers both aesthetic impact and lasting quality. By managing the entire process from selection to placement we eliminate guesswork, protect your walls, and ensure every detail aligns with the overall design of your space.
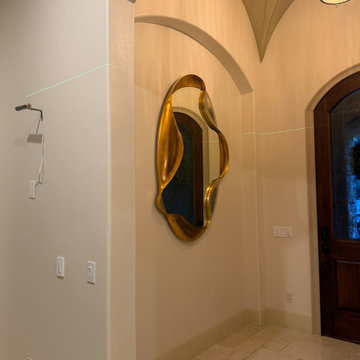 Zephyr & Zinnia Furniture and Home Decor
We offer curated mirror selection and professional installation to enhance the style, balance, and functionality of your space. We carefully source mirrors that complement your interior design vision, then handle precise measurements, proper wall anchoring, and expert installation to ensure a seamless, refined result. Whether for a bathroom, living area, entryway, or commercial space, our mirror design and installation service delivers both aesthetic impact and lasting quality. By managing the entire process from selection to placement we eliminate guesswork, protect your walls, and ensure every detail aligns with the overall design of your space.


 S Squared Design, LLC
This 1950's home was in the need of an overhaul. Family of 4, they needed functional storage, easy to clean materials, and a proper master closet and bathroom. Timeless design drove the material selections and period appropriate fixtures made this house feel updated yet still fitting to the homes age. White custom cabinetry, classic tiles, mirrors and light fixtures were a perfect fit for this family. A large walk in shower, with a bench, in the new reconfigured master bathroom was an amazing transformation. All the bedrooms were outfitted with more useful storage. The master closet even got a full desk workspace with all the natural light you could ask for.

 CRES Builders Corp.
The stoop had pulled away from their house by about 2 inches and the driveway, which was completely cracked throughout, showed signs of sinking about 6 inches and caused water to run across their walkway in the rain; however, many of their neighbors also noted that they were having similar problems with their stoops and driveways.
: Since re-pouring the concrete presented us with the best opportunity for success, we began by re-grading the dirt so that it would have the proper pitch away from the garage and installed 2 inches of compacted crushed run material, before tying the rebar into the existing garage footer. From there, we built a 4-foot by 4-foot rebar grid throughout the driveway, and completed the process with properly-cured 4000 psi concrete.
The stoop also required a complete replacement, so after removing the original stoop and discovering that it was not properly tied to the home, we built a new foundation with concrete blocks before drilling rebar into the house and concrete slab. From there, we filled the block cells with concrete before pouring a 2-inch concrete cap on top. To finish the project, we installed a selection of beautiful field stone and created a sturdy footer for the perimeter stone to sit on.
To finish, since water control was also a problem due to the fact that the actual home sits lower than the curb, we decided to install a 12-inch by 12-inch landscape drain box at the corner of the walkway to divert all of the water from the driveway into this box. From there, in an effort to make sure the ground water would not compromise the integrity of the driveway, walkway, and stoop, we also connected the down spout into the underground drain system.

 Sacksteder's Interiors
Residential And Home Decorating
Many homes have unique spaces that create a decorating challenge. We can help you make the most of your rooms by giving you expert advice on furniture selection and placement. You will find we can help you make the most of your space in both style and function.
Our professional interior designers can help you visualize your space and create balance with the proper scale, heights and colors.
 CRES Builders Corp.
The stoop required a complete replacement, so after removing the original stoop and discovering that it was not properly tied to the home, we built a new foundation with concrete blocks before drilling rebar into the house and concrete slab. From there, we filled the block cells with concrete before pouring a 2-inch concrete cap on top. To finish the project, we installed a selection of beautiful field stone and created a sturdy footer for the perimeter stone to sit on.
To finish, since water control was also a problem due to the fact that the actual home sits lower than the curb, we decided to install a 12-inch by 12-inch landscape drain box at the corner of the walkway to divert all of the water from the driveway into this box. From there, in an effort to make sure the ground water would not compromise the integrity of the driveway, walkway, and stoop, we also connected the down spout into the underground drain system.

 Ecoscape Environmental Design
The lively color pallet of this front garden bed borders a geometrically designed pathway near the street in this quiet Boulder, Colorado neighborhood.
 CRES Builders Corp.
The stoop had pulled away from their house by about 2 inches and the driveway, which was completely cracked throughout, showed signs of sinking about 6 inches and caused water to run across their walkway in the rain; however, many of their neighbors also noted that they were having similar problems with their stoops and driveways.
: Since re-pouring the concrete presented us with the best opportunity for success, we began by re-grading the dirt so that it would have the proper pitch away from the garage and installed 2 inches of compacted crushed run material, before tying the rebar into the existing garage footer. From there, we built a 4-foot by 4-foot rebar grid throughout the driveway, and completed the process with properly-cured 4000 psi concrete.
The stoop also required a complete replacement, so after removing the original stoop and discovering that it was not properly tied to the home, we built a new foundation with concrete blocks before drilling rebar into the house and concrete slab. From there, we filled the block cells with concrete before pouring a 2-inch concrete cap on top. To finish the project, we installed a selection of beautiful field stone and created a sturdy footer for the perimeter stone to sit on.
To finish, since water control was also a problem due to the fact that the actual home sits lower than the curb, we decided to install a 12-inch by 12-inch landscape drain box at the corner of the walkway to divert all of the water from the driveway into this box. From there, in an effort to make sure the ground water would not compromise the integrity of the driveway, walkway, and stoop, we also connected the down spout into the underground drain system.
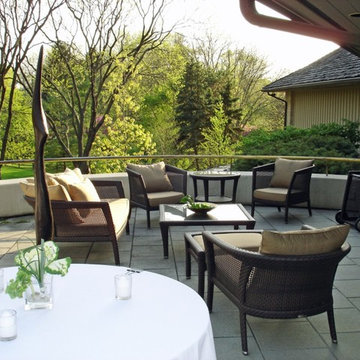


 Texas Sun & Shade
Block the sun and maintain your view!
Our large selection of interior solar screens is the ideal solution to your indoor natural lighting needs. Allow the proper amount of sunlight in while creating the perfect environment in your home. Utilize the interior solar screens to reduce the sun’s glare while saving money by blocking the heat from entering the room. Choose from a variety of fabrics that can blend with their surroundings or feature them as a design aspect in the room. Our interior solar screens are best for windows, glass doors, and sunrooms. Maintain your view while blocking harmful UV rays.
 Barn Pros
View from inside the barn looking at a Barn Pros drop-down style horse stall. These stall fronts and packages are available in several styles, including several European designs. Stall walls are filled with our hand-selected 2'x6" Douglas Fir tongue and groove lumber - which has the proper flex for use in horse stalls.
Learn more on our website: www.barnpros.com/store
 Kathleen Jennison
An Arts & Crafts Bungalow is one of my favorite styles of homes. We have quite a few of them in our Stockton Mid-Town area. And when C&L called us to help them remodel their 1923 American Bungalow, I was beyond thrilled.
As per usual, when we get a new inquiry, we quickly Google the project location while we are talking to you on the phone. My excitement escalated when I saw the Google Earth Image of the sweet Sage Green bungalow in Mid-Town Stockton. "Yes, we would be interested in working with you," I said trying to keep my cool.
But what made it even better was meeting C&L and touring their home, because they are the nicest young couple, eager to make their home period perfect. Unfortunately, it had been slightly molested by some bad house-flippers, and we needed to bring the bathroom back to it "roots."
We knew we had to banish the hideous brown tile and cheap vanity quickly. But C&L complained about the condensation problems and the constant fight with mold. This immediately told me that improper remodeling had occurred and we needed to remedy that right away.
The Before: Frustrations with a Botched Remodel
The bathroom needed to be brought back to period appropriate design with all the functionality of a modern bathroom. We thought of things like marble countertop, white mosaic floor tiles, white subway tile, board and batten molding, and of course a fabulous wallpaper.
This small (and only) bathroom on a tight budget required a little bit of design sleuthing to figure out how we could get the proper look and feel. Our goal was to determine where to splurge and where to economize and how to complete the remodel as quickly as possible because C&L would have to move out while construction was going on.
The Process: Hard Work to Remedy Design and Function
During our initial design study, (which included 2 hours in the owners’ home), we noticed framed images of William Morris Arts and Crafts textile patterns and knew this would be our design inspiration. We presented C&L with three options and they quickly selected the Pimpernel Design Concept.
We had originally selected the Black and Olive colors with a black vanity, mirror, and black and white floor tile. C&L liked it but weren’t quite sure about the black, We went back to the drawing board and decided the William & Co Pimpernel Wallpaper in Bayleaf and Manilla color with a softer gray painted vanity and mirror and white floor tile was more to their liking.
After the Design Concept was approved, we went to work securing the building permit, procuring all the elements, and scheduling our trusted tradesmen to perform the work.
We did uncover some shoddy work by the flippers such as live electrical wires hidden behind the wall, plumbing venting cut-off and buried in the walls (hence the constant dampness), the tub barely balancing on two fence boards across the floor joist, and no insulation on the exterior wall.
All of the previous blunders were fixed and the bathroom put back to its previous glory. We could feel the house thanking us for making it pretty again.
The After Reveal: Cohesive Design Decisions
We selected a simple white subway tile for the tub/shower. This is always classic and in keeping with the style of the house.
We selected a pre-fab vanity and mirror, but they look rich with the quartz countertop. There is much more storage in this small vanity than you would think.
The Transformation: A Period Perfect Refresh
We began the remodel just as the pandemic reared and stay-in-place orders went into effect. As C&L were already moved out and living with relatives, we got the go-ahead from city officials to get the work done (after all, how can you shelter in place without a bathroom?).
All our tradesmen were scheduled to work so that only one crew was on the job site at a time. We stayed on the original schedule with only a one week delay.
The end result is the sweetest little bathroom I've ever seen (and I can't wait to start work on C&L's kitchen next).
Thank you for joining me in this project transformation. I hope this inspired you to think about being creative with your design projects, determining what works best in keeping with the architecture of your space, and carefully assessing how you can have the best life in your home.
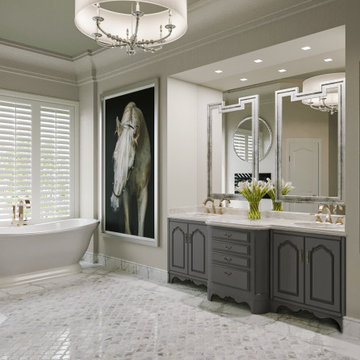
 Pierre Jean-Baptiste Interiors
This Master Bathroom design includes a recessed shelf built into the shower space to be covered by tile, as well as a mirrored medicine cabinet adding cosmetic storage space in addition to the vanity. The new exhaust fan will help keep the room properly ventilated for maximum enjoyment of long hot showers with no worry of steam. The marble tile selections chosen features various marbles and pearl options. In addition to the beautiful texture of the marbling, the tile designs chosen add interest and texture with the filigree and scalloped patterns. The combinations of crystal and metals in the chandeliers along with the mirrors are not only beautiful pieces to add to the space, but bounce light bringing a sparkle and brightness into this updated design.

 Mosby Building Arts
A kitchen that remained unchanged since the house was built in 1967 receives a fresh and lively update. The homeowner spent a lot of time imagining her new kitchen, even selecting the vibrant green paint color in advance. When she called Mosby to begin the remodel, the selection process went quickly as we brought her day dreams to life.
The project includes a custom-made kitchen table made from the same Showplace cabinets and Formica countertops used in the kitchen proper, and a matching laundry room next to the new in-wall pantry with pull-out shelving.
Make special note of the flooring – it’s a vinyl plank flooring that you assume is actual wood until the homeowner tells you otherwise. And it’s a joy to have her demonstrate all the special storage features, including a two-tiered Lazy Susan filling up the blind spot in the corner cabinets.
Photo by Toby Weiss for Mosby Building Arts
 TOC design & construction inc.
DESIGNED BY TOC design
CONSTRUCTION BY TOC design & Construction inc.
PHOTOS BY : Tania Scardellato
I was fortunate to have a young family approach me in desperate need to renovate there only 3 piece bathroom. This space was In dire need of a remodel, with old brown wall to wall tiles and a dated bulky yellow brown single sink vanity.
Storage was a must, lighting a necessity, and proper accessibility to the shower bath area.
We had a tight budget to respect, but a full gut of this bathroom was required. And a good thing too, once we started doing the demolition we noticed that mildew and rotting floors and walls had accumulated throughout the years. Doing it right the first time is no joke when dealing with water and electrical issues.
We discarded all reminisce of old and built from scratch, new walls, new plumbing, new electrical ,new insulation and a new window, a new fan that actually exhausted outside ( I say this laughing as you would be amazed at how many fans are installed but don’t exhaust outside, and you the client would never know unless you go inside the attic space.
Once all the hard stuff was done, the rest is just a matter of smart design. If you have a small bathroom here are some tips to guide you.
10 tips for making a small bathroom feel larger
Is your tiny bathroom cramping your functionality and style, leaving you longing for the enormous bathrooms gracing the pages of design magazines? Even if your bathroom is a fraction of the size, all it takes is some design savvy to make the most of the space you have. Consider these 10 smart tips that will help your bathroom look, feel and function like those larger contenders.
1-Get creative with corners
Space is at a premium in small bathrooms, so it's important to maximize every inch. Corners, for example, provide extra space for shelving, storage units and even hooks. Get creative and install unique design solutions that are not only functional, but also eye-catching. If you love the airiness of floating cabinets, add baskets or decorative boxes under for extra storage. If you are installing floating cabinets insure that they are installed securely to studs or plywood at wall.
2- Let solid colors shine
Busy patterns have a shrinking effect and make small bathrooms seem even smaller. Conversely, light natural hues make a space feel more open. If you're itching to get creative with design, experiment with textures but keep overpowering patterns to a minimum. Tone on tone is the best to achieve this.
3 - Maximize your bathtub
A bathtub takes up a significant portion of the room, but modern, compact options with curved basins, can make the tub feel larger when in use, all while conserving space.
4 - Select a smaller faucet
A faucet is jewelry for the bathroom. And just as accessories can overpower an outfit, a big bulky faucet isn't flattering in a small bath. Single-handle designs conserve counter space, while a wall-mount installation frees it up all together and can create quite the wow-factor, if the budget can accommodate the required changes to plumbing behind the wall.
5 - Make vanity storage simple
If you're in a storage war with your small bathroom, you're not alone in the battle. Toiletries and personal supplies without a place to call home only add clutter and chaos. Store smart with a space-saving vanity, the dual sink vanity shown here, looks quite simple, but in reality it has 4 sets of full extension drawers, and the vanity tower adds extra storage without overpowering the use of space.
6 - Show off the shower
Shower curtains may be pretty, but they interrupt the visual flow of a bathing space and make it feel significantly smaller. In bathrooms with small footprints, opt for a clear glass sliding shower door that doesn't require the clearance of one with a hinged design. Or as shown in this design and for fraction less expensive a half hinged panel installed on a fixed tempered glass panel. If you're embarking on a big remodel, create the illusion of more space by using same tile in the shower that's used throughout; instead of seeing them as two separate zones, the eye will read them as one.
7 - Discover the treasure of hidden storage
Work with a contractor, and you just might find some serious storage potential hidden behind your walls. Whether it's utilizing space between the studs for shallow shelving or a creating a small linen closet by annexing space from an adjacent room, even small additions can make a big difference.
8 - Focal Point
Tile is a beautiful, durable addition to any bathroom. For dainty spaces, consider installing tile at a diagonal to accentuate the focal point or as in this bathroom I used an oversized textured pattern to bring depth to the space at the window wall.
9 - Choose the right lights
Strategically install light to reflect and brighten a small bathroom to make it appear larger. Recessed lighting is an affordable solution for tiny rooms, offering ample light while taking up little space. Wall sconces alongside a mirror also reflect off the walls and make a room feel bright and airy. I always recommend going with LED lighting at 2800 to 3000K.
10 – Accessorize
This is your time to shine in your decorating skills, have fun with your towels, you can change the color scheme daily just by adding pops of color in your accessories, make sure to get items that serve a dual purpose, like baskets, boxes they can always be used as hampers, storing of towels and even a nice display for your guest.
 Simply Home Decorating
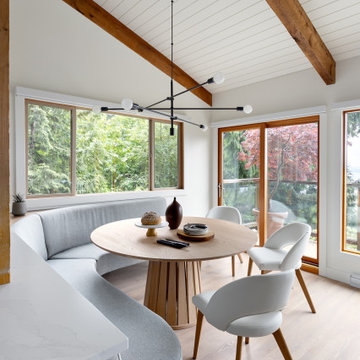
The new owners of this 1974 Post and Beam home originally contacted us for help furnishing their main floor living spaces. But it wasn’t long before these delightfully open minded clients agreed to a much larger project, including a full kitchen renovation. They were looking to personalize their “forever home,” a place where they looked forward to spending time together entertaining friends and family.
In a bold move, we proposed teal cabinetry that tied in beautifully with their ocean and mountain views and suggested covering the original cedar plank ceilings with white shiplap to allow for improved lighting in the ceilings. We also added a full height panelled wall creating a proper front entrance and closing off part of the kitchen while still keeping the space open for entertaining. Finally, we curated a selection of custom designed wood and upholstered furniture for their open concept living spaces and moody home theatre room beyond.
This project is a Top 5 Finalist for Western Living Magazine's 2021 Home of the Year.
12