
Search results for "Protected method" in Home Design Ideas
 Tile Doctor Ltd
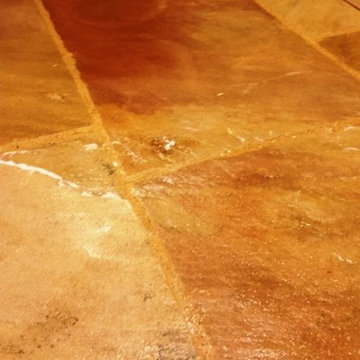
Sandstone is a particularly popular choice for kitchen and hallway floors amongst home owners in the UK. It not only possesses beautiful natural shades and features, but it is also typically hard wearing, making it an ideal stone for tiled flooring in high traffic areas of a house and can often be found laid as large riven flagstones in pubs and other commercial premises.
Naturally, just like any other type of tiled floor, Sandstone needs to be maintained using appropriate products and methods. A lack of adequate surface sealer in particular leaves Sandstone susceptible to ingrained dirt, and can leave distinct, unsightly patches such as those in the photograph below.
In this instance, I visited a client in the old Essex town of Thaxted, who believed that her four square meter Sandstone tiled floor might be suffering from damp issues after lifting up the mats covering the area.
However, when I arrived at the property and ran damp tests, I found the issue to be superficial. The Sandstone floor however did require attention in the form of a deep clean and a fresh seal to tackle the white patches and prevent further discolouration.
To begin the cleaning process I spread Tile Doctor Remove & Go evenly across the floor. It was left to dwell for approximately 15 minutes, during which time it worked to break down the old sealer remaining on the tiles. I then agitated the area twice over with both a black scrubbing pad fitted to a rotation machine lift away any dirt.
The resultant slurry was removed using a wet vacuum and the floor was then rinsed with water and then mixed a strong solution of one part Tile Doctor Pro Clean to three parts water which was used to give the floor a final clean and scrub the grout clean before using the wet vacuum again and giving the floor a final rinse with water.
After completing the cleaning process I left the floor to dry over the weekend. Upon my return to the house I proceeded to seal the tiles with three coats of Tile Doctor Colour Grow which is an impregnating sealer that soaks into the pores of the stone and provide durable surface protection going forward. Colour Grow is also specially designed to let the floor breathe and enhance the natural colours in the stone and, in this case, really helped to intensify the natural sand-coloured shades in the tiles.
The difference made to these Sandstone tiles was really noticeable, with the white patches completely removed and the surface more generally back to looking like new, needless to say, my client was very happy with the results.
Nick Murphy
South Essex Tile Doctor
 Delta Floor Solutions
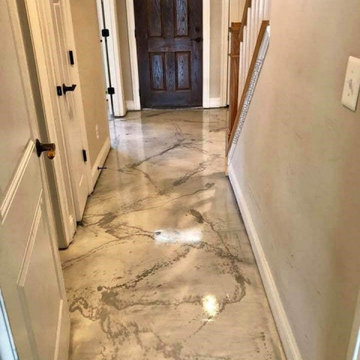
Are you looking to update the flooring in your home or business? If so, then you need to contact Delta Floor Solutions today. We provide high-quality flooring and service you can count on. There is a wide variety of flooring solutions to choose from such as decorative concrete overlays which consist of concrete staining that is stamped and resurfaced to mimic the look of the top of the line flooring. If Epoxy coatings are what you desire, then rest assured, we have you covered. Whether it's metallic or color flake epoxy finish, your floor is going to have the texture you want. Want that smooth, shiny look? Our heavy-duty machines will slowly grind down the surface leaving you with the desired polished concrete look you're after. Do you have concrete that is old, cracked, and worn down? Our grind and seal method can take care of that easily by grinding down and smoothing out the top layer of concrete to create a new layer which will then allow us to put a protective seal overlay on it making the flooring look brand new again. Whatever your flooring needs may be, contact us today for a free on-site consultation.
 EasyHeat
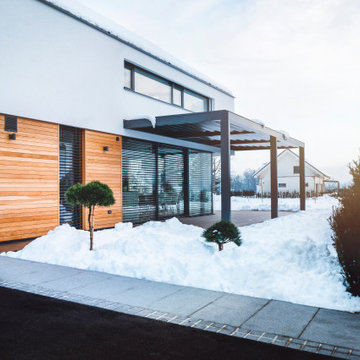
In concrete, asphalt or under paving stone, you can count on EasyHeat™ snow melting systems to clear the way. Highly efficient and more economical than most other snow and ice removal methods, our snow melting systems automatically eliminate snow and freezing rain on contact, helping to keep the surface clear and maintenance free, 24 hours a day, 7 days a week.
Find the right local pro for your project
 EasyHeat
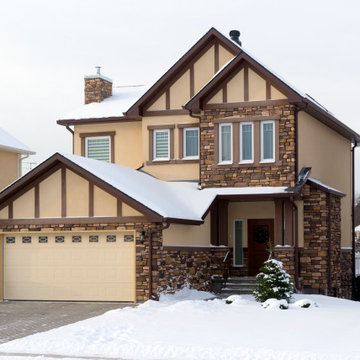
In concrete, asphalt or under paving stone, you can count on EasyHeat™ snow melting systems to clear the way. Highly efficient and more economical than most other snow and ice removal methods, our snow melting systems automatically eliminate snow and freezing rain on contact, helping to keep the surface clear and maintenance free, 24 hours a day, 7 days a week.

 authenTEAK Outdoor Living
Castelle Dumont Deep Seating Collection - Castelle Cast Aluminum Outdoor Furniture, manufactured by Pride Family Brands in Costa Rica, is constructed of rust-free, lightweight, durable aircraft grade aluminum and uses full-circumference welding to eliminate gaps and stress points on the frames. Castelle is an industry leader and is known for producing high-quality outdoor furniture that blends all-weather durability with indoor styling. http://www.authenteak.com/castelle.html
 EasyHeat
In concrete, asphalt or under paving stone, you can count on EasyHeat™ snow melting systems to clear the way. Highly efficient and more economical than most other snow and ice removal methods, our snow melting systems automatically eliminate snow and freezing rain on contact, helping to keep the surface clear and maintenance free, 24 hours a day, 7 days a week.
 Get My Rugs LLC
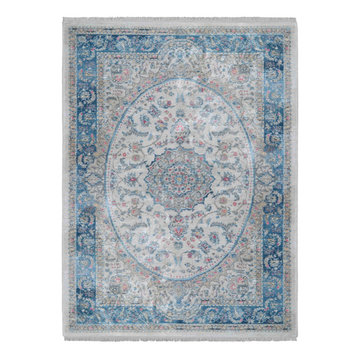
"This machine woven crossweave polyester rug will take your breath away for a while. Its major points of attraction include fine fabric, great texture, dazzling look, high durability, best price and much more. The rug admirers will surely pick such art piece for their home d�cor. It requires a little cleaning and maintenance to retain its shine and elegance.
Specifications
*Material : Polyester
*Color : Multicolor
*Pattern : Oriental
*Pile : 0.27 Inch
*Shape : Rectangle
*Size : 8'x10'
*Origin of Manufacturing : India
Product Key Features :-
*Machine Woven by sophisticated technology enhancing detailed design and product durability
*Oriental designed and weaved by machine woven cross weave technique in Turkey
*Soft polyester yarn with flat pile height of 0.27 inches for underfoot comfort.
*Designer area rugs perfect for Living Room, Bedroom, Study Room, Dinning Room, Foyer.
*Free shipping and quick order dispatch. With quality product we deliver quality services to customers
Material Description : Polyester, an artificial fabric, have gained much popularity as rug weaving material. The polyester material rugs are highly sturdy and have gain acceptance due to its qualities like shine, wear & fade resistance, comfort, non-allergenic, moisture resistance, ease of cleaning, moth-proof, etc.
FloorProtection : To save the flooring from any scratch or damage, you need to make use of rug pads that can simply be put on the lower surface of the rug.
CleaningMethods : Use vacuum cleaner to make the inner and outer surface dust free. In case of any stain, we recommend our customers to go for professional dry-cleaning. You can also shake or beat the rugs to get rid off loose dust or particles."
Sponsored
Sunbury, OH

J.Holderby - Renovations
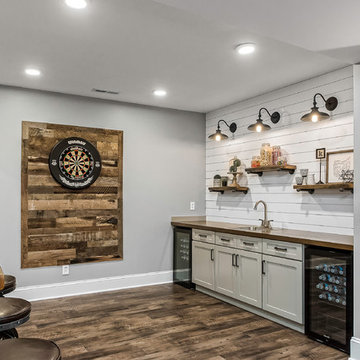
Franklin County's Leading General Contractors - 2X Best of Houzz!
 EasyHeat
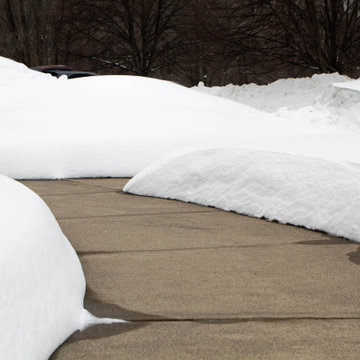
In concrete, asphalt or under paving stone, you can count on EasyHeat™ snow melting systems to clear the way. Highly efficient and more economical than most other snow and ice removal methods, our snow melting systems automatically eliminate snow and freezing rain on contact, helping to keep the surface clear and maintenance free, 24 hours a day, 7 days a week.
 Ravenscourt Landscaping and Design LLC
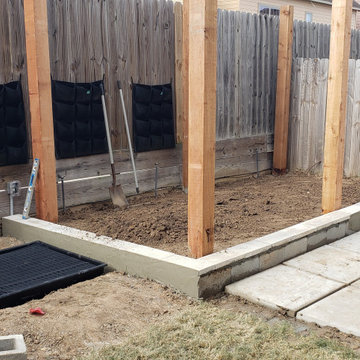
We used a new technique to seal the cedar pergola.
Yakisugi (焼杉) is a traditional Japanese method of wood preservation. Yaki means to heat with fire, and sugi is cypress.[1][2] It is referred to in the West as burnt timber cladding and also known as shou sugi ban (焼杉板) which uses the same kanji characters but an incorrect pronunciation. The ban character means "plank". By slightly charring the surface of the wood without combusting the whole piece, the wood becomes water-proof through the carbonisation and is thus more durable.[3][4] It also protects against insects, as well as making the wood fire retardant.[5] - Wikipedia

 Eco Star Painting
Step #1 Apply BM CLEAN
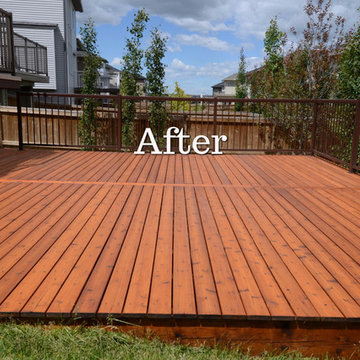
As you can see in the 'Before' picture above, this cedar deck was extremly dirty. This required an extra step in comparison to the typical deck stripping process. My paint rep at Benjamin Moore recommended a product called CLEAN. It comes in one gallon plastic containers and can be applied out of a plastic pail or with a garden sprayer. We used a Garden sprayer and chose a flat tip for application. The three gallon garden sprayer was filled with 2 gallons of water and one gallon of the CLEAN solution. This is a strong mixture and can be reduced to up to 6 parts water and one part of the Benjamin Moore CLEAN.
This approximately 22x20 deck had a board running perpindicular to the rest of the floor boards which divided it into 2 equal parts. Our method was to apply the solution to 3-4 of these 10' boards at a time. Allow it to set up for a few minutes and then scrub away with the deck brush. The agitation loosens up the dirt and grime and is then removed with a pressure washer a board a time. The flat tip on the pressure washer was almost the same width as the floor board. It is important to clean the sides of the board too because any remaining dirt or stain will be visible.
Benjamin Moore Deck Restoration products named Clean,Restore,brighten
Step #2 Apply BM RESTORE
The second step is exactly the same as the first step but with a different solution called Benjamin Moore RESTORE. The deck was dry before we started the 2nd step becuase it was baking hot outside. You use the same 2/1 mixture of water to chemical. This chemical will remove the stain still present in the deck floor. Make sure to rinse the garden sprayer clean before adding the restore solution. Unlike the BM CLEAN, the BM RESTORE has an orange-ish color in appearance. It did a fine job of removing most of the stain, but not 100% of it. There were a few areas that required a 3rd coat of restore but the process was quicker.
Step #3 Apply BM BRIGHTEN
The third step is exactly the same as the first two step but the chemical solution used was Benjamin Moore 'BRIGHTEN'. Again, the garden sprayer was cleaned and filled with 2 parts water and one part Brighten. The brightener not only lightens the wood but it also neutralizes the previous stripper solution. As stated before the Restore adds a bit of color and the Brighten will remove any traces of it. you still have to agitate the brightener with a scrub brush and either pressure wash it off or use a garden hose. We used the pressure washer for faster results. After it dries the wood look a lot brighter but we still found some spots of stain that had not come off.
Apply Sikkens Stain
As stated above the stain we used is called "Sikkens Proluxe" which is basically just a slight re-branding of the classic Sikkens Stain. The formula is exactly the same. In fact, the secondary name is still called 'Cetol' SRD RE. The color chosen was "CEDAR".
The weather was quite hot for a typical Calgary Spring day so we stained a 10' section of floor board at a time. The deck has a metal railing so the supporting feet had to be brushed in with a 2.5" natural bristle paint brush. for the rest of the job a 6" Wooster natural bristle deck brush was used. The handle was remove and a broom handle was inserted. The stain was stirred frequently and poured into a plastic Simms brand roller pan. Semi transparent Oil based stain has the consistency of water so you need to be careful not to spill any of it. When applying to a board you hit the sides first with the brush and then fillin the rest. Ten feet of floor board can be stain in a short period of time. it's important not to leave any streaks so it is adviseable to back-brush the entie length before moving on to the next board. The staining only took about 2.5 hours to complete. One coat is the manufacturers recommendation.
One last thing about Sikkens Stain. To maintain this beautiful look the deck should be re- coated once a year, preferably every spring. It's like applying sunscreen yearly to protect the wood against further damage. Two gallons was enough to cover this 450 sq foot deck.
 EasyHeat
In concrete, asphalt or under paving stone, you can count on EasyHeat™ snow melting systems to clear the way. Highly efficient and more economical than most other snow and ice removal methods, our snow melting systems automatically eliminate snow and freezing rain on contact, helping to keep the surface clear and maintenance free, 24 hours a day, 7 days a week.
 EasyHeat
In concrete, asphalt or under paving stone, you can count on EasyHeat™ snow melting systems to clear the way. Highly efficient and more economical than most other snow and ice removal methods, our snow melting systems automatically eliminate snow and freezing rain on contact, helping to keep the surface clear and maintenance free, 24 hours a day, 7 days a week.
Sponsored
Sunbury, OH
J.Holderby - Renovations
Franklin County's Leading General Contractors - 2X Best of Houzz!
 Adobe Interiors
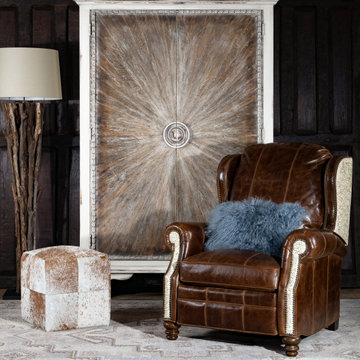
Our Cowboy Chaps Recliner simply oozes refined western elegance. This simple, stately leather recliner offers all the comfort and convenience of a high-quality recliner with the body and frame of a high-end chair. This luxurious Western piece of furniture is made from the finest possible top-grain Italian leather, stretched over high-density cushioning and a hardwood frame. Our Cowboy Chaps Recliner features a stately design reminiscent of the porticos of Southern estates. Bronze nail head accents serve to perfectly complement the deep, dulcet tones of the rich leather upholstery accented with a contrasting embossed leather. The Cowboy Chaps Recliner is a subtle, elegant addition to virtually any home or living area. This unique piece of furniture is a surefire way to show off your sense of style and classical tastes. Thanks to its clean, elegant appearance, this piece pairs well with virtually any collection of furniture and any décor theme, instantly becoming a standout piece that you’ll be proud to show off.
Overall Dimensions: 45" H x 39" W x 40" D
Arm Height: 27"
Seat Dimensions: 20" H x 23" W x 20" D
Semi-Attached Back
Overall Layout: 70"
Leather Description: Crafted from full grain, buffalo hides tanned by a third generation, family-run tannery in India. This Leather features a striking pull-up effect and authentically aged aesthetic that immediately draws you in. Another standout quality of this leather is its rich and surprisingly soft hand achieved through an extensive milling process and innovative wax treatment.
True 100% full grain cowhide leather is characterized by variations in shade, texture, color and grain. Healed marks and scars are to be expected and enhance the natural beauty of the hides. These variations are normal and unique features of true genuine 100% full grain cowhide leather.
Embossed Leather Description: A leather used to accent many of today's home interiors. The leather hide is first embossed with a large crocodile grain and then colored by applying two base color coats of micro pigments. The leather is then wiped-off to give it a contrast of colors utilizing the base color combination. This color contrast is further accented by two additional top coat colors that are wiped-on by hand to give the leather a beautiful antique look. The last step is to slightly protect the hand work of the leather hide with a lacquer topcoat that provides great depth and warmth to the finished product.
Frame Construction: Using traditional hand craftsmanship with modern manufacturing methods to produce frames that are among the finest used in the upholstery business. Each frame is precisely cut and hand assembled using kilned dried lumber. Double dowels are utilized in all structural parts to form sturdy, long lasting joints. To complete construction and add stability to the frame, large precisely cut corner blocks are positioned at each corner where the greatest stress occurs using both glues and screws. Limited Lifetime Warranty
Seat Cushions: Marshall Springs encased in 1.8 density foam, wrapped in 2 ounce fiber and encased in a sewn ticking. Limited Lifetime Warranty
 NORDIC BUILDERS - MODERN TIMBERFRAME DESIGN BUILD
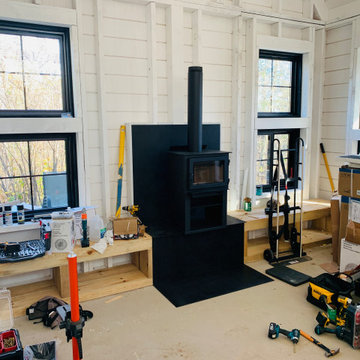
Believe it or not, this was one of the cleanest the job was in a long time. The cabin was pretty tiny so not much room left when it was stocked with all of our materaisl that needed cover. But underneath it all, you can see the minimalistic pine bench. I loved how our 2 step finish made all of the grain and color pop without being shiny. Price of steel skyrocketed just before this but still wasn't too bad, especially compared to the stone I had planned before.
Installed the steel plate hearth for the wood stove. Took some hunting but found a minimalistic modern wood stove. Was a little worried when client insisted on wood stove because most are so traditional and dated looking. Love the square edges, straight lines. Wood stove disappears into the black background. Originally I had planned a massive stone gas fireplace and surround and was disappointed when client wanted woodstove. But after redeisign was pretty happy how it turned out. Got that minimal streamlined rustic farmhouse look I was going for.
The cubby holes are for firewood storage. 2 step finish method. 1st coat makes grain and color pop (you should have seen how bland it looked before) and final coat for protection.
 EasyHeat
In concrete, asphalt or under paving stone, you can count on EasyHeat™ snow melting systems to clear the way. Highly efficient and more economical than most other snow and ice removal methods, our snow melting systems automatically eliminate snow and freezing rain on contact, helping to keep the surface clear and maintenance free, 24 hours a day, 7 days a week.

 EasyHeat
In concrete, asphalt or under paving stone, you can count on EasyHeat™ snow melting systems to clear the way. Highly efficient and more economical than most other snow and ice removal methods, our snow melting systems automatically eliminate snow and freezing rain on contact, helping to keep the surface clear and maintenance free, 24 hours a day, 7 days a week.
 Tile Doctor Ltd
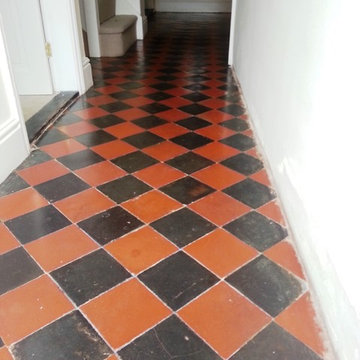
Details below of a restorative clean and seal that I recently completed on a Quarry tiled hallway at a house in the small village of Riseley, North Bedfordshire.
The floor was a mix of fantastic black and red tiles; however, it had lost its character after a long period without professional maintenance. My client commissioned me to strip off the old sealer from the floor and replace it, but not before providing a thorough clean, including tackling some adhesive staining and inherent grout haze.
The first task involved mixing our high alkaline cleaner, known as Tile Doctor Pro-Clean, with water to form a strong solution. The solution was applied to the tiled floor and left to dwell for a short period. This dwelling time allows for the Pro-Clean to seep into the stone to get underneath the ingrained dirt and lift it out. Pro-Clean also contains stripping properties, and thus helped to break down the old (and now ineffectual) sealer.
After completing this initial clean I rinsed the floor using a standard mop and bucket method. With the old sealer removed, it became evident that there was also plaster residue marking the tiles, as well as inherent grout haze on the surface of the tile probably from the original installation. To tack these problems I used Tile Doctor Grout Clean-Up, which is an acid-based cleaner that dissolves the adhesive and the grout. Being an acid you have to be careful and ensure the floor is rinsed thoroughly after use and if you’re considering using this product yourself read the label and make sure you use the right protective equipment.
After the floor was thoroughly rinsed with water it was dried as much as possible using a wet vacuum which literally sucks the water off the floor. The floor was then left to dry for four days, with the help of several air movers. By the time I returned to the house, the floor was completely dry and ready to take the seal.
I opted to use a combination of sealers, including one coat of our colour enhancing, impregnating sealer, known as Colour Grow, followed by three coats of Tile Doctor Seal & Go to provide a truly robust and aesthetically pleasing surface seal.
The photographs demonstrate the finished results better than words can and I think you will agree the floor is quite transformed.
Andrew Evans
Bedfordshire Tile Doctor
 Tile Doctor Ltd
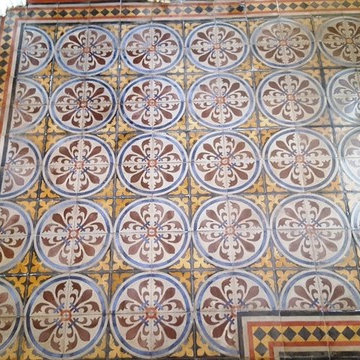
This very old Encaustic tiled flooring was uncovered at a property in Chester when the present owners started to undertake renovation. They removed the carpets and vinyl tiles from the hallway, revealing the Encaustic tiles to find that they were in truly horrific condition. This included being covered by heavy dirt, dust and, in some parts, by a sticky black bitumen.
Encaustic tiles are made out of compressed cement, and were commonly used in properties built during the Edwardian and Victorian period. This gives us a good idea of just how old these tiles are – but the owners were keen to see what Tile Doctor could do to restore their condition.
The black bitumen was my main concern when it came to cleaning the tiles. To remove this, along with all the other dirt and dust, our powerful cleaner for heavy soil buildup, known as Tile Doctor Remove and Go, was applied.
The product, which is also effective for removing adhesive and paint stains, was worked into the tiles then left to dwell for thirty minutes, before being scrubbed with a black pad fitted to a rotary machine. The resulting cleaning residue was soaked up with a wet vac machine. This cleaning process was repeated once more over to get the tiles as clean as possible, before leaving them to dry overnight.
The next day, damp readings were taken to make sure the floor was dry enough to seal. It’s essential to take damp readings before sealing – especially with old tiled floors that may not have a damp proof membrane installed – as even the slightest amount of excess moisture can damage the performance of the sealer.
Two types of sealer were used in this situation. First to be applied was a single coat of Tile Doctor Colour Grow, an impregnating, colour intensifying sealer which enhances the best shades in the tiles. Following this, four coats of Tile Doctor Seal and Go were applied. This is a topical sealer, which means it builds a layer of protection on the surface of the floor, while also providing an aesthetically pleasing low-sheen finish.
The customer was over the moon at the end result. At first the floor looked to be with a lost cause, but with the right cleaning methods and products it has been a restored to a standard where it almost appears new. Another satisfied customer!
Alastair Robb
West Cheshire Tile Doctor
11